前言
小前提:
- java:springboot框架,maven版本管理。
- 阿里云:有账号,已经进行实名认证。
java对接阿里云短信服务详解(验证码,推广短信,通知短信)
- 前言
- 1. 登录阿里云进入控制台
- 2. 创建用户和用户组
- 3. 开通阿里云短信服务
- 4. 代码整合阿里云SMS短信服务
- 4.1 pom.xml 中引入SDK依赖
- 4.2 测试官方提供的实例Demo
- 4.3 继承到springboot项目当中
- 4.3.1 配置文件
- 4.3.2 controller
- 4.3.3 service
- 4 启动项目测试发送
1. 登录阿里云进入控制台
阿里云登录地址:https://account.aliyun.com/login/login.htm

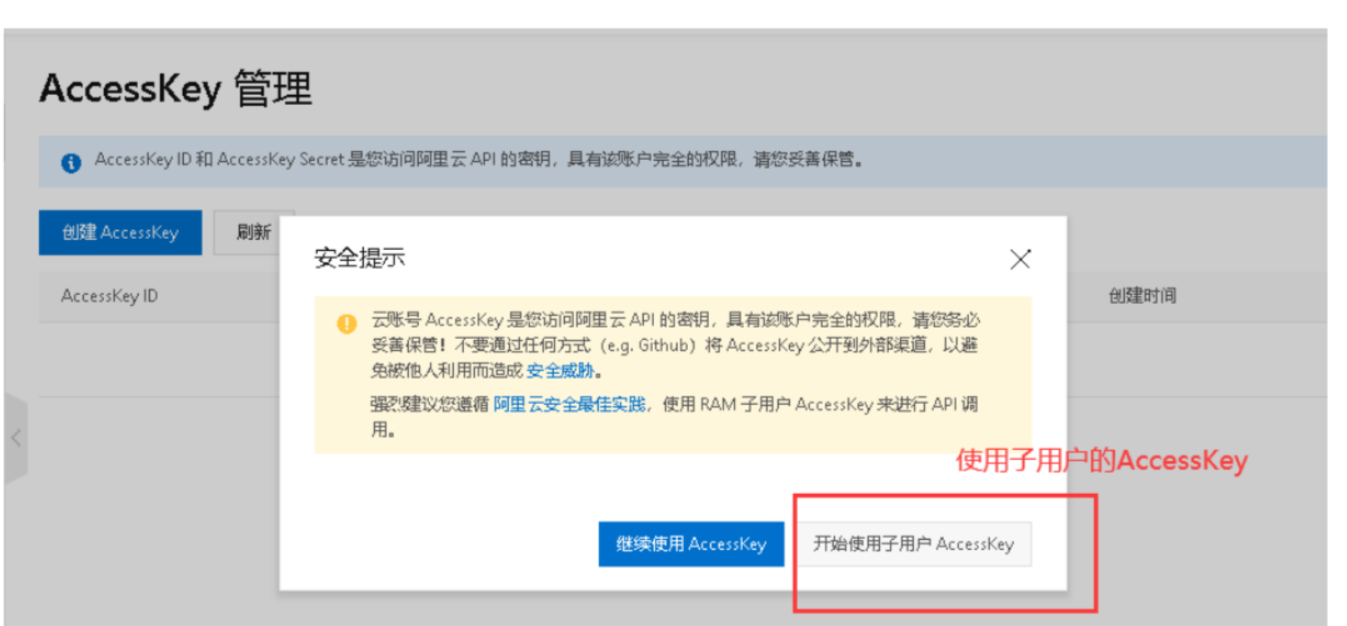
2. 创建用户和用户组
创建用户组
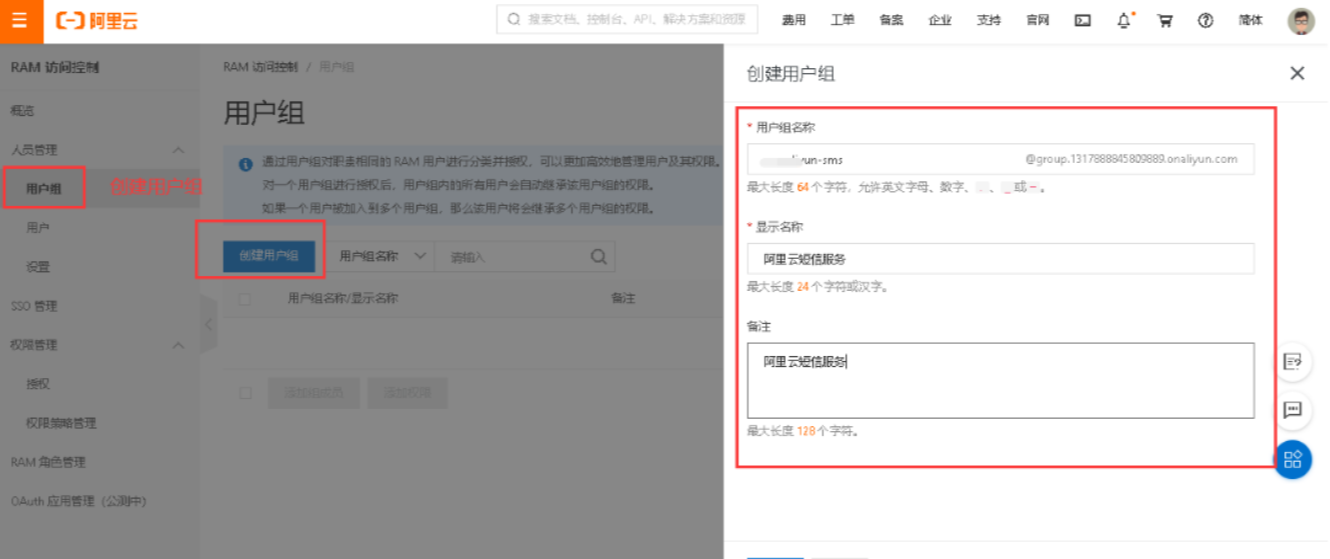
添加完成后进入用户组,并为其添加权限:
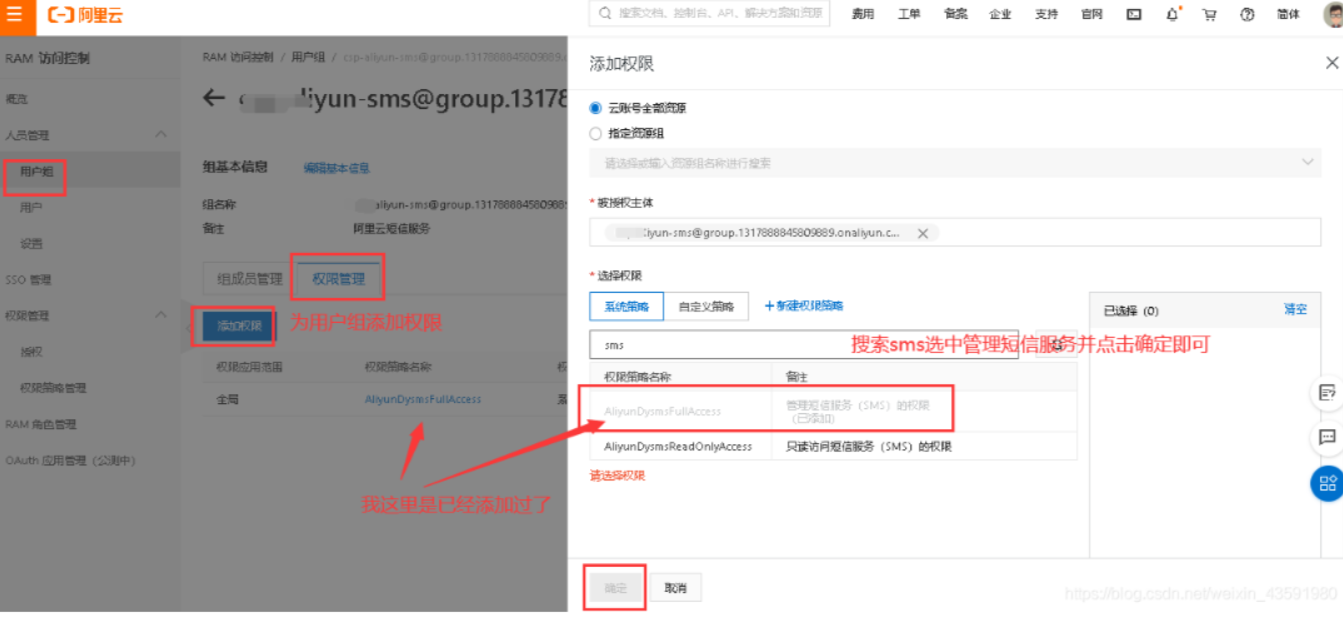
创建用户
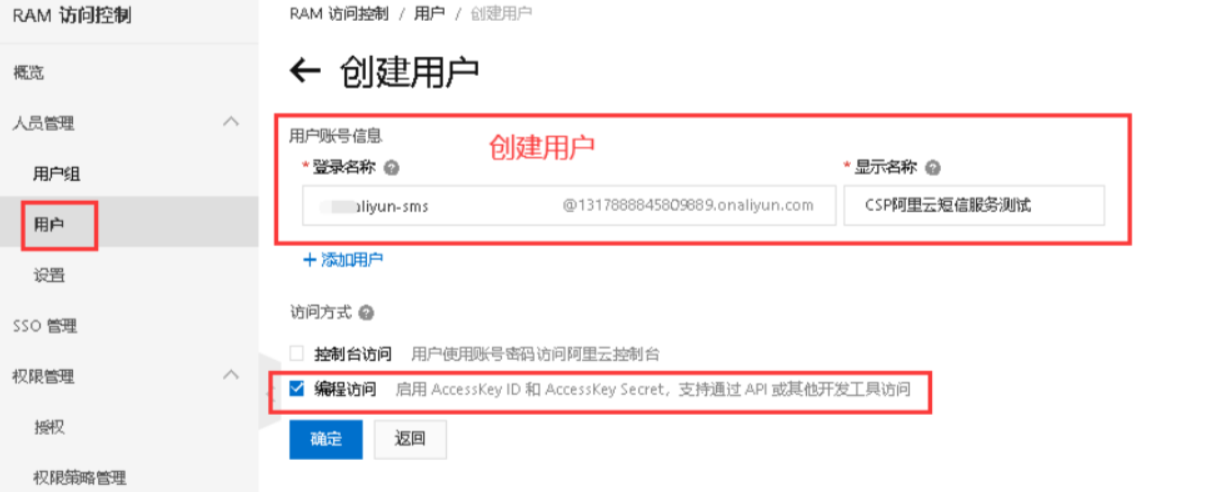


3. 开通阿里云短信服务
阿里云短信服务地址:https://dysms.console.aliyun.com/dysms.htm
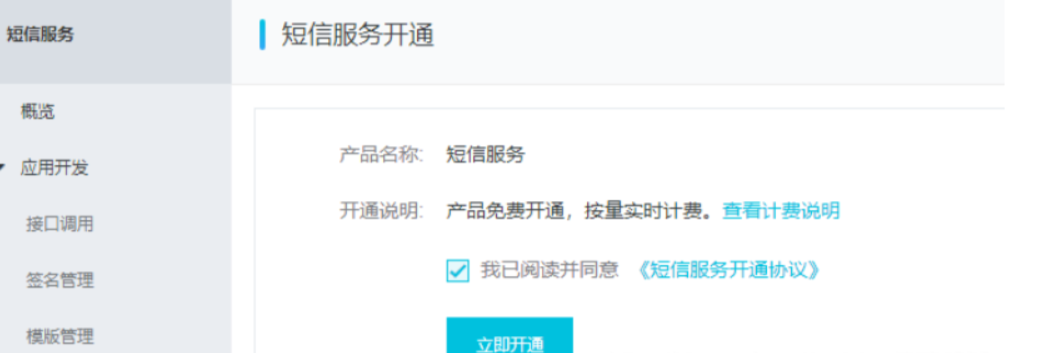
在概览中直接点击立即开通短信服务!接下来点击快速学习:
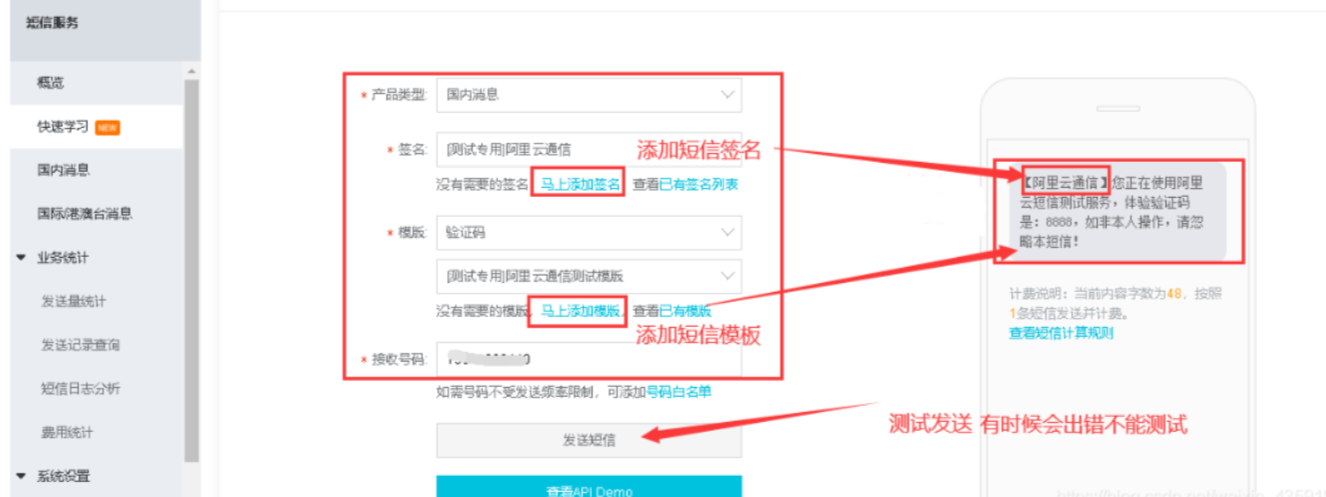
点击添加签名,添加模板,去向阿里云申请自己定义的签名和短信模板!
打个时间戳 2023-1-13 ,我在写这篇文章的时候正在申请,现在的要求已经相当严格了,我被驳回好几次,所以填写相关信息的时候还是要认真一些哦
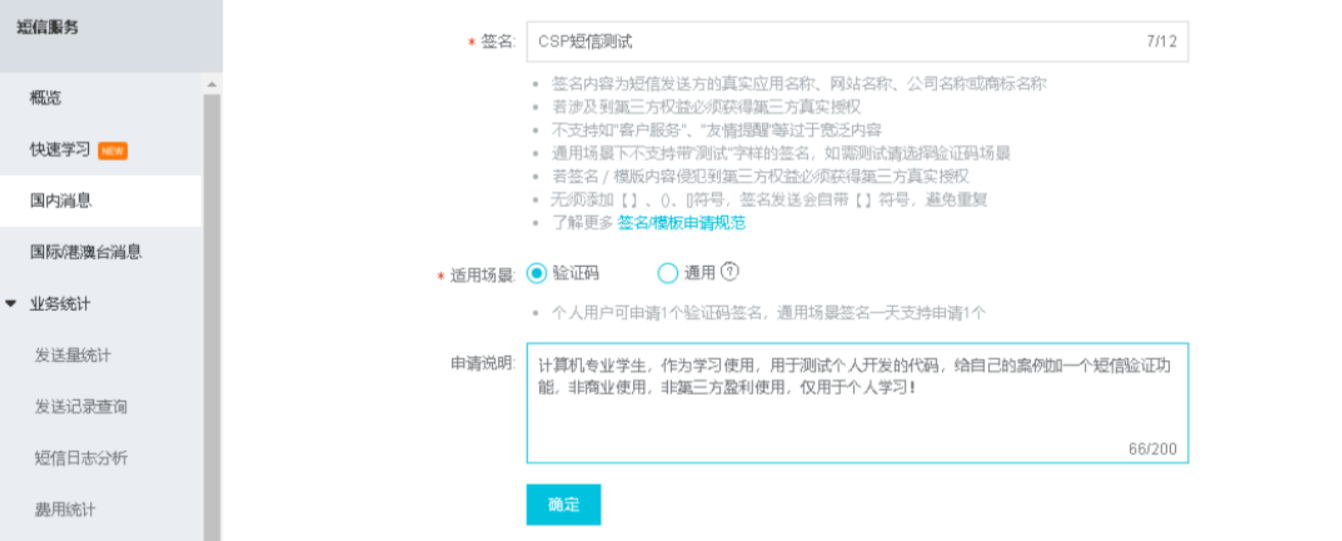
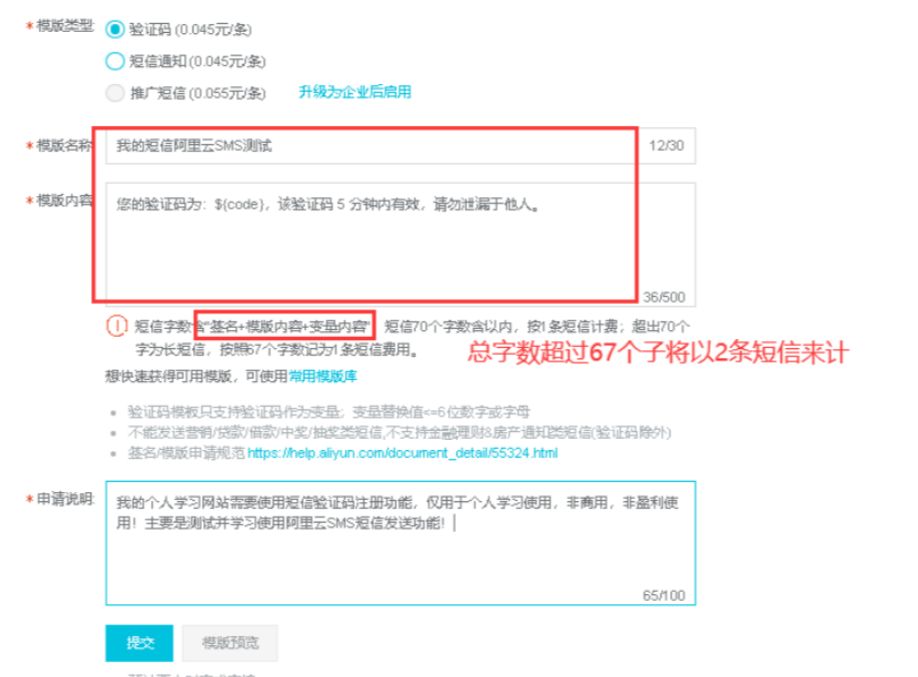
模板和签名申请提交后等待申请结果通过即可!
(可能是快过年了,审核超级慢,一般三个小时还没好,好了又驳回,
一次是官网没有体现出哪里需要用短信验证,
一次是应用商店没有搜索到app
祝大家申请的时候最好写好一遍过吧)
呃 写这边文章的时候又失败一次。

我签名是选的测试或学习,
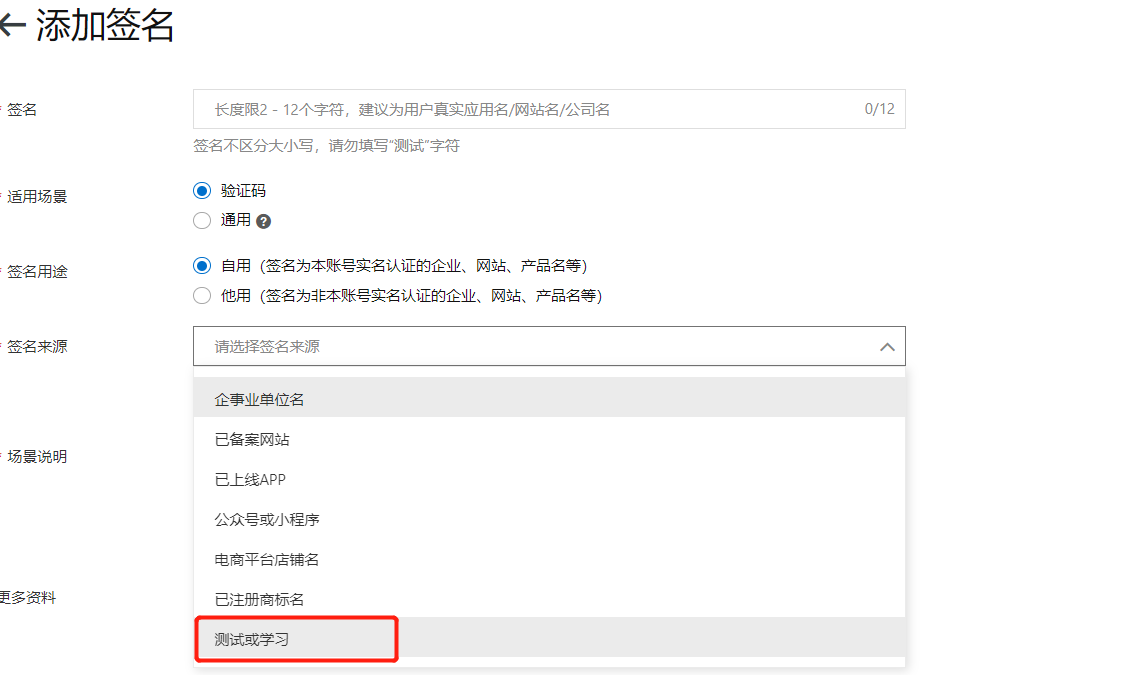

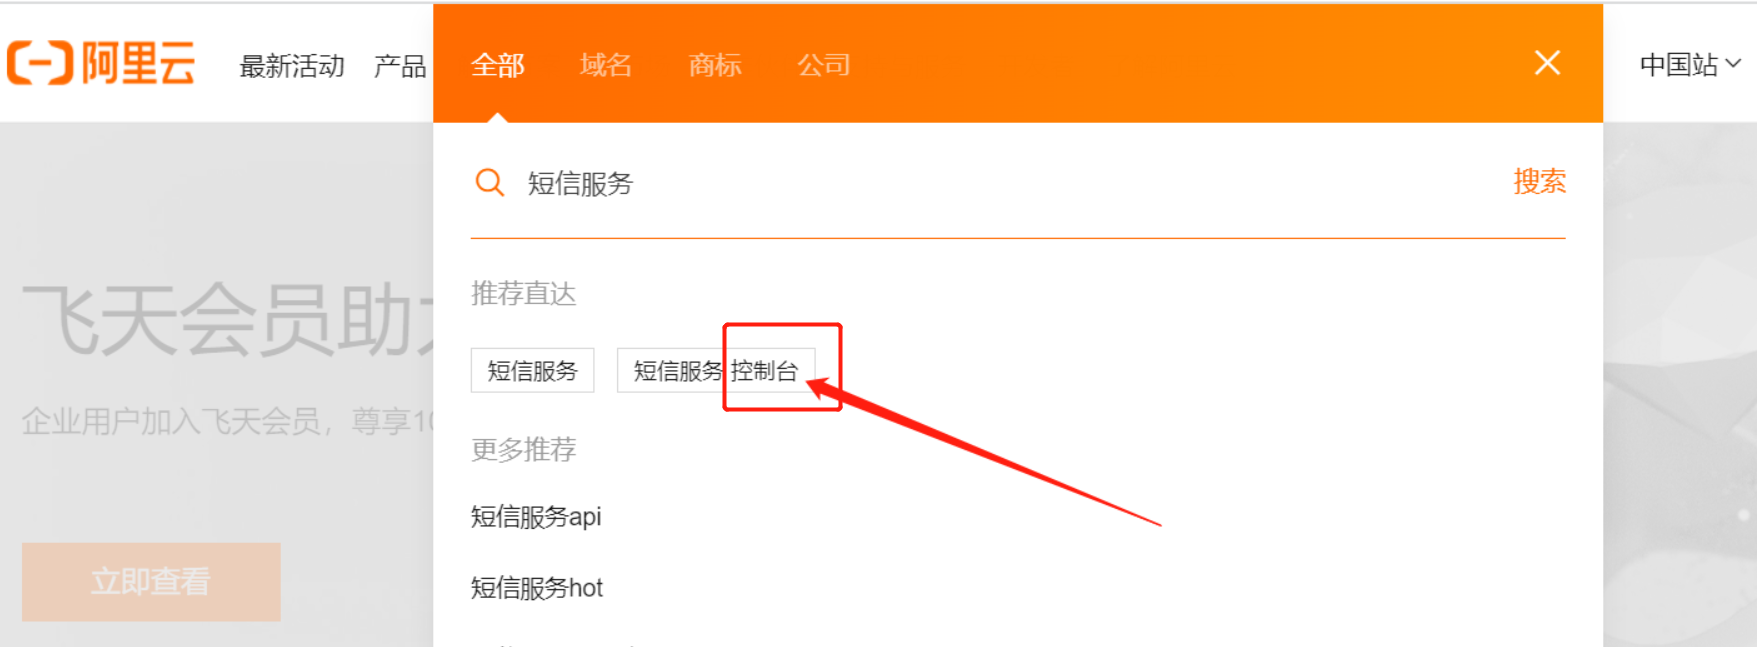
点击 短信服务 控制台
点击 国内消息 我们需要添加一个签名和模板
签名和模板需要审核,一般两小时内审核。
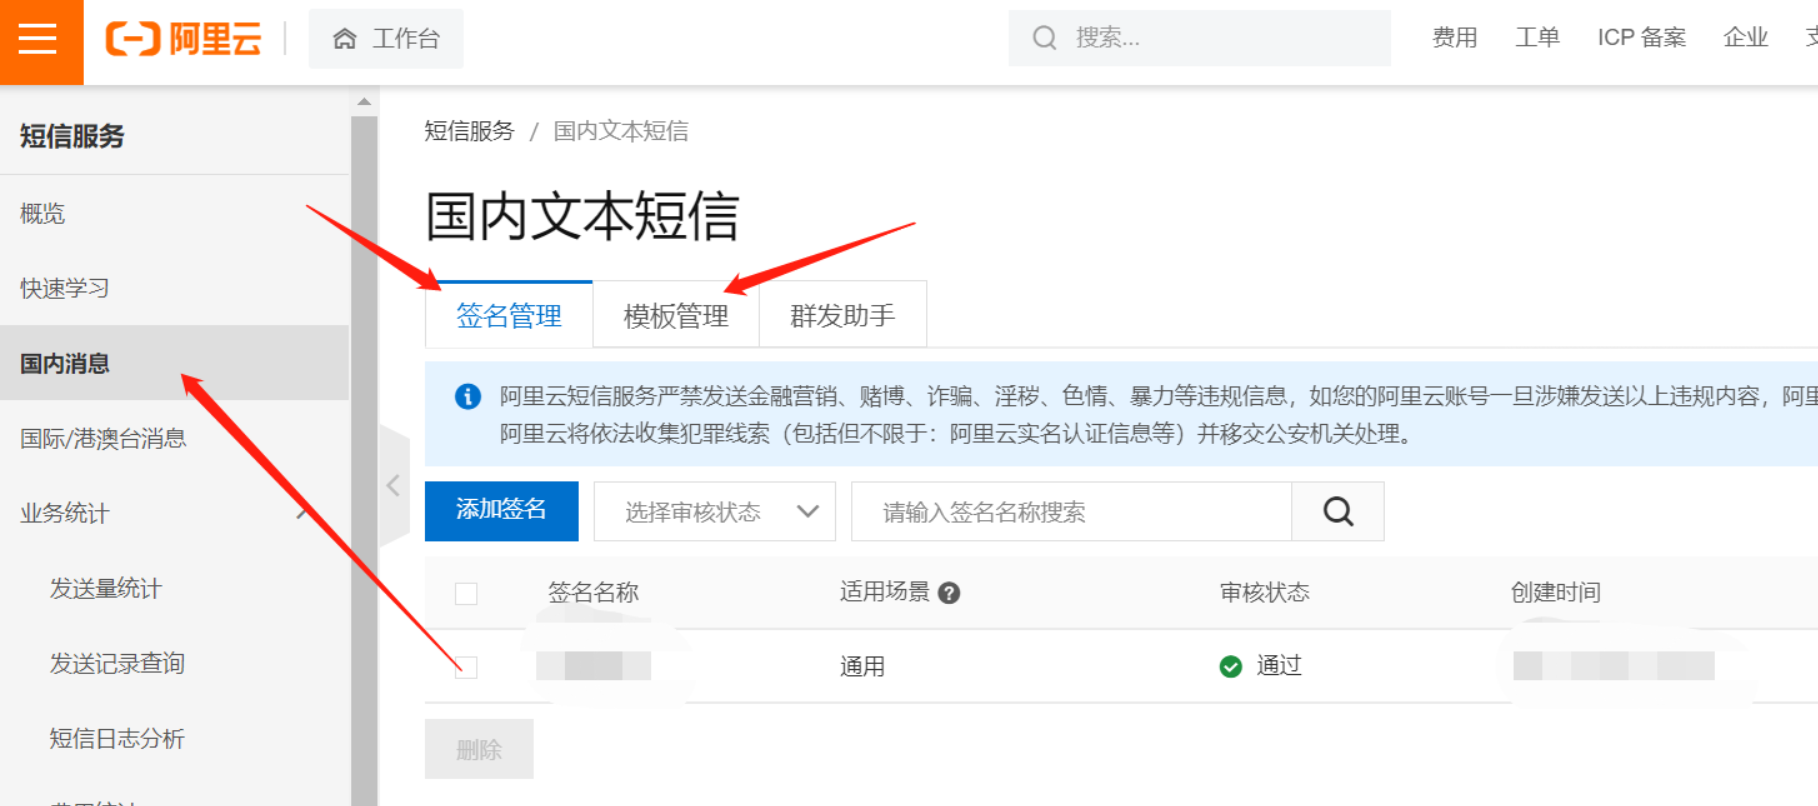
ok 这里先审核。小编审核的时候特别慢,而且被打回好几次,所以大家填写资料的时候尽量详细吧。
这里审核这 我们去配置一下项目。
4. 代码整合阿里云SMS短信服务
4.1 pom.xml 中引入SDK依赖
Spring Boot版本我使用的是2.3.x:
<!-- aliyun sms SDK -->
<dependency>
    <groupId>com.aliyun</groupId>
    <artifactId>aliyun-java-sdk-core</artifactId>
    <version>4.5.3</version>
</dependency>
<!-- fastjson -->
<dependency>
    <groupId>com.alibaba</groupId>
    <artifactId>fastjson</artifactId>
    <version>1.2.68</version>
</dependency>
<!-- redis -->
<dependency>
    <groupId>org.springframework.boot</groupId>
    <artifactId>spring-boot-starter-data-redis</artifactId>
</dependency>
4.2 测试官方提供的实例Demo
@SpringBootTest
class AliyunSmsDemoApplicationTests {

    @Test
    void contextLoads() {

        /**
         * 连接阿里云:
         *
         * 三个参数:
         * regionId 不要动,默认使用官方的
         * accessKeyId 自己的用户accessKeyId
         * accessSecret 自己的用户accessSecret
         */
        DefaultProfile profile = DefaultProfile.getProfile(
                "cn-hu", "LTAI4GKDZfBV8V9B", "1bc8phOIbSWFt2AlLctBMMCI");
        IAcsClient client = new DefaultAcsClient(profile);

        // 构建请求:
        CommonRequest request = new CommonRequest();
        request.setSysMethod(MethodType.POST);
        request.setSysDomain("dysmsapi.aliyuncs.com");
        request.setSysVersion("2019-05-25");
        request.setSysAction("SendSms");

        // 自定义参数:
        request.putQueryParameter("PhoneNumbers", "xxxxx0441");// 接收短信的手机号
        request.putQueryParameter("SignName", "C上商城");// 短信签名
        request.putQueryParameter("TemplateCode", "SMS_20xxxxx74");// 短信模版CODE

        // 构建短信验证码
        Map<String,Object> map = new HashMap<>();
        map.put("code",1234);// 这里仅用于测试,所以验证码写死
        request.putQueryParameter("TemplateParam", JSONObject.toJSONString(map));

        try {
            CommonResponse response = client.getCommonResponse(request);
            System.out.println(response.getData());
        } catch (ServerException e) {
            e.printStackTrace();
        } catch (ClientException e) {
            e.printStackTrace();
        }
    }
}
4.3 继承到springboot项目当中
4.3.1 配置文件
application.yml和application.properties是同一个作用的文件,有些小白可能不太理解,这里看一下项目里使用的是那个后缀的配置文件,将内容复制进去即可。
application.yml
server:
  port: 8080

# spring相关配置
spring:
  redis:
    # Redis数据库索引(默认为0)
    database: 0
    # Redis服务器地址
    host: 8.xxx.xx.xx6
    # Redis服务器连接端口
    port: 6379
    # Redis服务器连接密码(默认为空)
    password: cspxxxxxxx
    jedis:
      pool:
        # 连接池最大连接数(使用负值表示没有限制)
        max-active: 8
        # 连接池最大阻塞等待时间(使用负值表示没有限制)
        max-wait: -1
        # 连接池中的最大空闲连接
        max-idle: 8
        # 连接池中的最小空闲连接
        min-idle: 0
    # 连接超时时间(毫秒)
    timeout: 8000
application.properties
# accessKeyId
aliyun.sms.accessKeyId=LTAI4xxxxxxxxxxV9B
# accessKeySecret
aliyun.sms.accessKeySecret=LTAI4xxxxxxxxxxV8V9B
# 短信模板Code
aliyun.sms.templateCode=SMS_xxxxx74
4.3.2 controller
@RestController
public class AliyunSmsApiController {

    @Autowired
    private AliyunSendSmsService aliyunSendSmsService;

    @Autowired
    private RedisTemplate<String, String> redisTemplate;

    @Value("${aliyun.sms.templateCode}")
    private String templateCode;

    /**
     * 短信发送
     *
     * @param phone
     * @return
     */
    @GetMapping("/send/{phone}")
    public String sendCode(@PathVariable("phone") String phone) {

        // 根据手机号从redis中拿验证码
        String code = redisTemplate.opsForValue().get(phone);
        if (!StringUtils.isEmpty(code)) {
            return phone + " : " + code + "已经存在,还没有过期!";
        }

        // 如果redis 中根据手机号拿不到验证码,则生成4位随机验证码
        code = UUID.randomUUID().toString().substring(0, 4);

        // 验证码存入codeMap
        Map<String, Object> codeMap = new HashMap<>();
        codeMap.put("code", code);

        // 调用aliyunSendSmsService发送短信
        Boolean bool = aliyunSendSmsService.sendMessage(phone, templateCode, codeMap);

        if (bool) {
            // 如果发送成功,则将生成的4位随机验证码存入redis缓存,5分钟后过期
            redisTemplate.opsForValue().set(phone, code, 5, TimeUnit.MINUTES);
            return phone + " : " + code + "发送成功!";
        } else {
            return phone + " : " + code + "发送失败!";
        }
    }
}
4.3.3 service
@Service
public class AliyunSendSmsService {

    @Value("${aliyun.sms.accessKeyId}")
    private String accessKeyId;

    @Value("${aliyun.sms.accessKeySecret}")
    private String accessKeySecret;

    /**
     * 发送短信验证码
     *
     * @param phone        接收短信的手机号
     * @param templateCode 短信模板CODE
     * @param codeMap      验证码map 集合
     * @return
     */
    public Boolean sendMessage(String phone, String templateCode, Map<String, Object> codeMap) {

        /**
         * 连接阿里云:
         *
         * 三个参数:
         * regionId 不要动,默认使用官方的
         * accessKeyId 自己的用户accessKeyId
         * accessSecret 自己的用户accessSecret
         */
        DefaultProfile profile = DefaultProfile.getProfile(
                "cn-hangzhou", accessKeyId, accessKeySecret);
        IAcsClient client = new DefaultAcsClient(profile);

        // 构建请求:
        CommonRequest request = new CommonRequest();
        request.setSysMethod(MethodType.POST);
        request.setSysDomain("dysmsapi.aliyuncs.com");
        request.setSysVersion("2017-05-25");
        request.setSysAction("SendSms");

        // 自定义参数:
        request.putQueryParameter("PhoneNumbers", phone);// 手机号
        request.putQueryParameter("SignName", "CSP网上商城");// 短信签名
        request.putQueryParameter("TemplateCode", templateCode);// 短信模版CODE

        // 构建短信验证码
        request.putQueryParameter("TemplateParam", JSONObject.toJSONString(codeMap));

        try {
            CommonResponse response = client.getCommonResponse(request);
            System.out.println(response.getData());
            return response.getHttpResponse().isSuccess();
        } catch (ServerException e) {
            e.printStackTrace();
        } catch (ClientException e) {
            e.printStackTrace();
        }
        return false;
    }
}
4 启动项目测试发送

手机收到短信验证码!


