2024.4.15 -2024.4.16 完结
0.准备&&补充知识点
yolo检测算法可以实现目标检测、分割和分类任务。
项目仓库地址:https://github.com/ultralytics/yolov5
跟练视频:目标检测 YOLOv5 开源代码项目调试与讲解实战
lux下载视频神器:https://github.com/iawia002/lux
参考链接:Github 上lux下载神器的安装及使用教程
(之前人家叫annie,现在叫lux…)
(1).pt文件和.pth文件有什么区别?
.pt文件是保存整个PyTorch模型的,而.pth文件只保存模型的参数。
- .pt文件:.pt文件是PyTorch的早期版本所使用的模型文件格式,通常是通过调用torch.save()函数保存的模型。
- .pth文件:.pth文件是PyTorch的后续版本引入的模型文件格式,也是当前推荐使用的格式。只保留权重,文件相对较小
1.配置环境
Python=3.9:
conda install pytorch==1.13.0 torchvision==0.14.0 torchaudio==0.13.0 pytorch-cuda=11.7 -c pytorch -c nvidia
检查:
>>> import torch
>>> print(torch.__version__)
1.13.0
>>> print(torch.cuda.is_available())
True
>>> print(torch.cuda.get_device_name(0))
NVIDIA GeForce GTX 1060
根据requirements.txt安装依赖库:
pip install -r .\requirements.txt
2.预测
2.1 调试
选择了跟视频一样的yolov5-5.0版本,但是现在已经更新到v7.0版本了。最新版本问题会少很多,因为关于模型权重的下载是按照github tags里面最新内容下载的。
出现问题:
Can’t get attribute ‘SPPF’ on <module ‘models.common’ from’D:\code\yolov5-5.0\models\common.py’>
找到models/common.py文件,添加SPPF类,前面引入warrings库
import warrings
class SPPF(nn.Module):
    # Spatial Pyramid Pooling - Fast (SPPF) layer for YOLOv5 by Glenn Jocher
    def __init__(self, c1, c2, k=5):  # equivalent to SPP(k=(5, 9, 13))
        super().__init__()
        c_ = c1 // 2  # hidden channels
        self.cv1 = Conv(c1, c_, 1, 1)
        self.cv2 = Conv(c_ * 4, c2, 1, 1)
        self.m = nn.MaxPool2d(kernel_size=k, stride=1, padding=k // 2)

    def forward(self, x):
        x = self.cv1(x)
        with warnings.catch_warnings():
            warnings.simplefilter('ignore')  # suppress torch 1.9.0 max_pool2d() warning
            y1 = self.m(x)
            y2 = self.m(y1)
            return self.cv2(torch.cat([x, y1, y2, self.m(y2)], 1))
出现新问题:
‘Upsample’ object has no attribute ‘recompute_scale_factor’
找到报错文件upsampling.py,将源代码报错位置改为:
return F.interpolate(input, self.size, self.scale_factor, self.mode, self.align_corners)
删掉刚才下载的pt文件,手动下载权重文件将其替换。
继续出现问题:
504: UserWarning: torch.meshgrid: in an upcoming release, it will be required to pass the indexing argument. (Triggered internally at C:\cb\pytorch_1000000000000\work\aten\src\ATen\native\TensorShape.cpp:3191.) return _VF.meshgrid(tensors, **kwargs) # type: ignore[attr-defined]
找到文件位置:
 # return _VF.meshgrid(tensors, **kwargs)  # type: ignore[attr-defined]
 # 添加  **indexing = 'ij'**
 return _VF.meshgrid(tensors, **kwargs,indexing = 'ij')  # type: ignore[attr-defined]
成功:

在exp中找到结果:
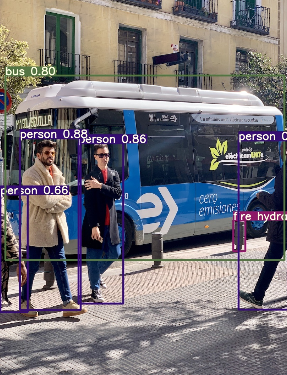
用lux下载视频,可以对视频进行预测。同样在参数–source中进行修改。
2.2 参数分析
parser.add_argument('--weights', nargs='+', type=str, default='yolov5s.pt', help='model.pt path(s)')

在–weight模型的选择上,尽管分辨率上不同(640和1280),但实际上输入和输出是保持不变的,可以得出在预测过程中图片有放缩。
parser.add_argument('--img-size', type=int, default=640, help='inference size (pixels)')
控制输入图像的大小,进行裁剪方便统一输入。
parser.add_argument('--conf-thres', type=float, default=0.25, help='object confidence threshold')
显示阈值,默认值0.25是作者根据经验设置比较合理的参数阈值。设置过高,一些置信度比较低的预测不会被显示。
parser.add_argument('--iou-thres', type=float, default=0.45, help='IOU threshold for NMS')
Non-Maximum Suppression:非极大值抑制(Non-Maximum Suppression,NMS)是计算机视觉和目标检测任务中常用的一种技术,用于消除冗余或重叠的边界框预测。
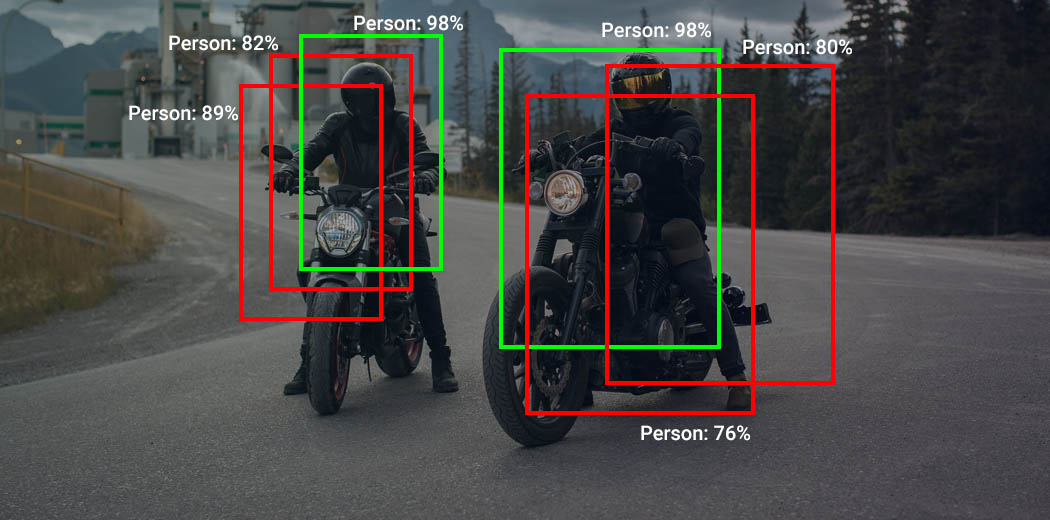
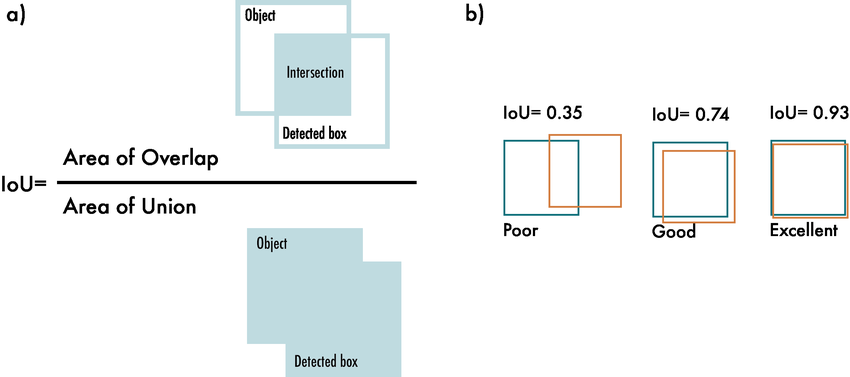
IOU = 两块区域的交集/两块区域的并集
所以参数设置为1,框和框之间的重合部分很大;设置为0,不会有重合部分(重合的被舍弃)。
parser.add_argument('--view-img', action='store_true', help='display results')
parser.add_argument('--save-txt', action='store_true', help='save results to *.txt')
action=‘store_true’,当命令行中指定了该参数时,存储的值为 True;否则,存储的值为 False。
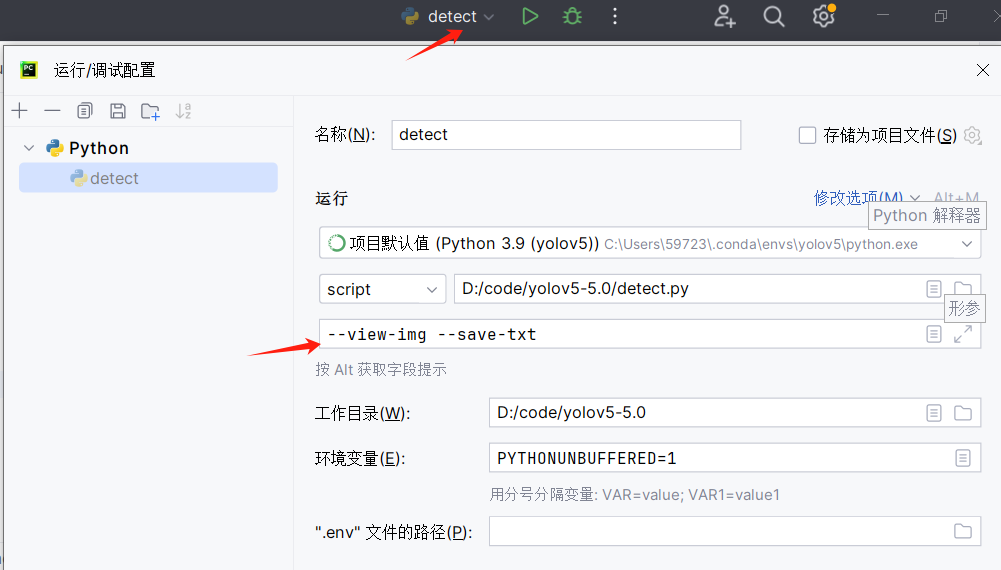
小技巧: 为了在ide中方便点击运行,可以提前设置参数配置。
可以实现实时显示和保存参数。
parser.add_argument('--classes', nargs='+', type=int, help='filter by class: --class 0, or --class 0 2 3')
指定显示某个类别: - - class 0,只显示person
其余参数很多,需要自查即可。
3.训练
直接点击运行问题很多,总结一下是numpy版本的问题,根据错误提示修改np.int改为int。
还有一个loss.py的问题:解决yolov5训练模型时result type Float can‘t be cast to the desired output type __int64
网络不好手动下载coco128,放在指定位置。
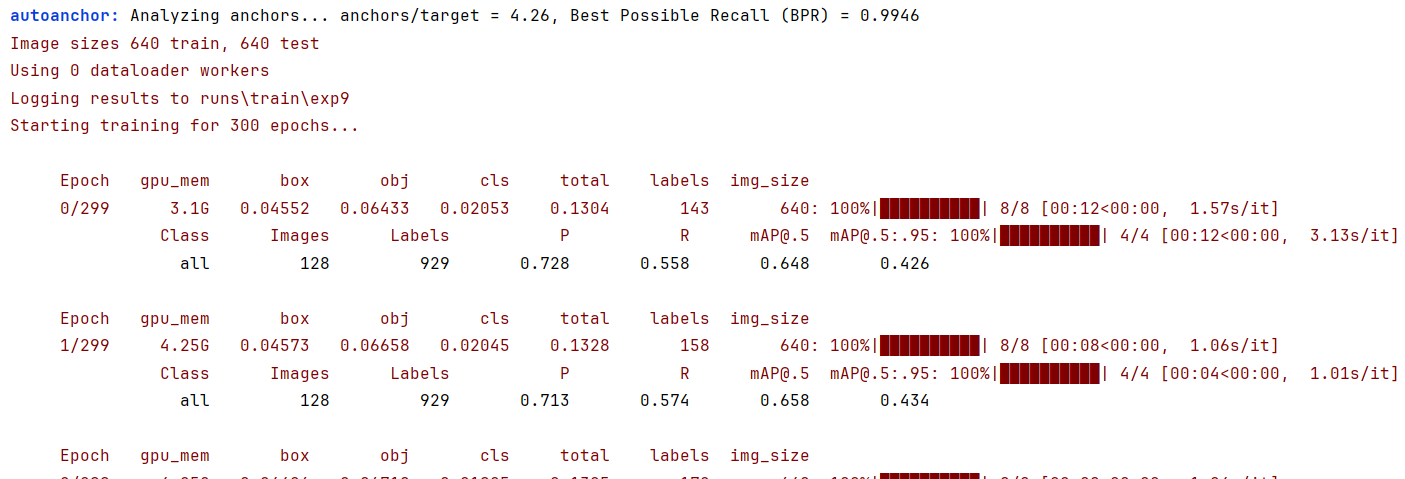
修改后即可开始299轮的训练。
parser.add_argument('--hyp', type=str, default='data/hyp.scratch.yaml', help='hyperparameters path')
指定超参数文件,超参数文件是在训练模型之前指定的相关参数,包括了:学习率lr,批量大小batch_size,正则化参数等。
通常情况下,需要对超参数进行优化,给学习机选择一组最优超参数,以提高学习的性能和效果。
parser.add_argument('--rect', action='store_true', help='rectangular training')
设置为矩形输入:
如果分辨率不是n*n,则对图像进行填充处理。

parser.add_argument('--noautoanchor', action='store_true', help='disable autoanchor check')
锚点和锚框:
锚框:目标检测之锚点与锚框
Pytorch机器学习(九)—— YOLO中对于锚框,预测框,产生候选区域及对候选区域进行标注详解
锚框是通过超参数设置,进行一个预设,算法会在图像上生成一系列位置固定的锚框,并对这些锚框进行预测,判断是否包含目标物体,以及预测框相对于锚框位置需要调整的幅度。
4.训练自己的数据集
训练自定义数据
找图片,利用在线网站半人工标注label。
修改yaml文件,开始训练!
训练后的结果保留在最后一次的weights/best.pt模型中。
