- Incorporating a new topology in Booksim
- 1. 新拓扑结构
- 2. 需要添加的文件
- 3. 修改步骤
- 3.1 添加testnet.hpp
- 3.2 添加testnet.cpp
- 3.3 将testnet集成到network.cpp中
- 3.4 创建配置文件testnetconfig
- 3.5 在main.cpp和global.hpp中加入gP_testnet和gA_testnet变量
- 3.6 make进行编译
- 4. 仿真模拟结果
Incorporating a new topology in Booksim
1. 新拓扑结构
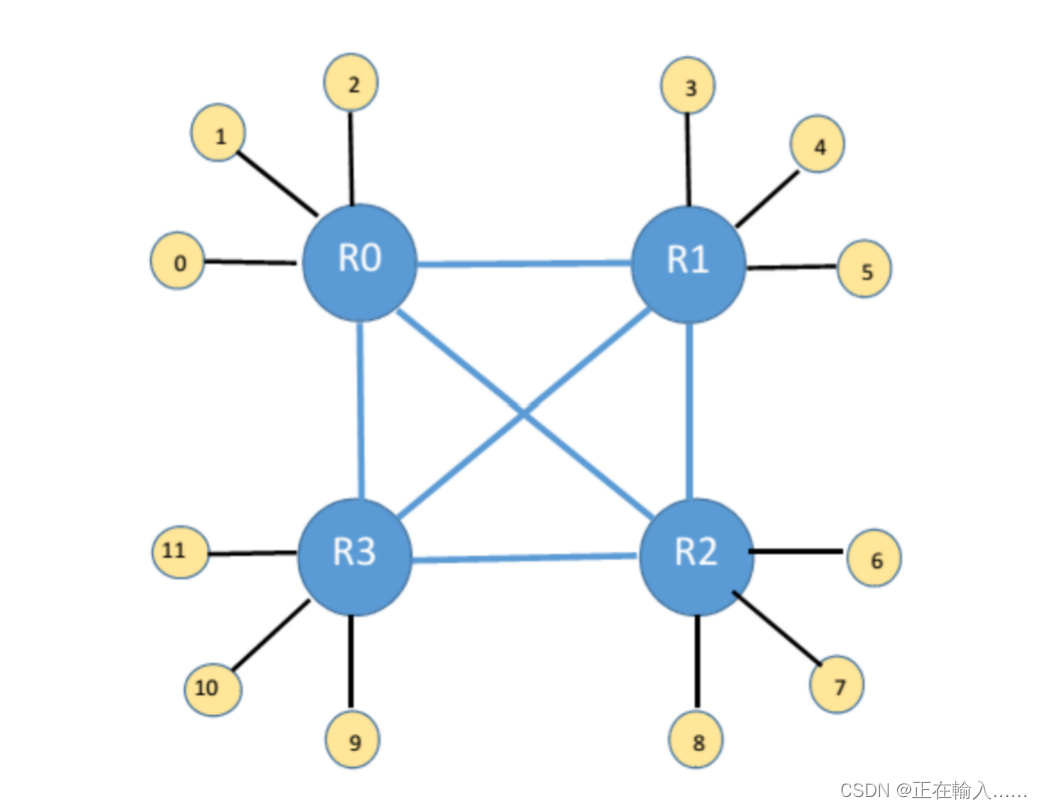
如图1所示,拟集成一种上述的拓扑。
2. 需要添加的文件
在Booksim中集成新的拓扑,我们需要添加如下文件:
- 拓扑文件
- testnet.cpp
- testnet.cpp
- 配置文件
- Testnetconfig
- 修改文件
- network.cpp
3. 修改步骤
3.1 添加testnet.hpp
 #ifndef _TestNet_HPP_
 #define _TestNet_HPP_

 #include "network.hpp"
 #include "routefunc.hpp"

 class TestNet : public Network {
 public:
 TestNet( const Configuration &config, const string & name );
 static void RegisterRoutingFunctions() ;

 private:

 int _a;// 路由器总数
 int _p;// 每个路由器管理的处理节点
 int _k;// 每个路由器的端口数

 void _ComputeSize( const Configuration &config );// 计算拓扑大小
 void _BuildNet( const Configuration& config );// 构建网络
 };

 int testnet_port(int rID, int src, int dest);

 //
 // Routing Functions
 //
 void min_testnet( const Router *r, const Flit *f, int in_channel, OutputSet *outputs, bool inject ) ;

 #endif
3.2 添加testnet.cpp
- 构造函数
TestNet::TestNet( const Configuration& config, const string & name )
: Network(config, name)
{
cout<< "testnet constructor starts..."<<endl;
_ComputeSize(config);
_Alloc();
_BuildNet(config);
cout<< "testnet constructor ends..."<<endl;

}
- _ComputeSize()
void TestNet::_ComputeSize( const Configuration &config ) {

cout<< "_ComputeSize starts..."<<endl;

// _a _p _k 均为硬编码,但可以使用GetInt()从配置文件中获取
_a = 4;// 路由器总数
_p = 3;// 每个路由器管理的处理节点

_k = (_a-1) + _p;// 每个路由器的端口数

// 以下三个参数为network中需要使用的
_nodes    = _a * _p; // Number of nodes in network 总节点数(除却路由器)
_size     = _a + _a * _p;      // Number of routers in network 包括路由器和处理节点
_channels = _a * (_a-1);     // 路由器之间的uni-directional link,不包括处理节点

// 全局变量,路由函数需要
gP_testnet = _p;
gA_testnet = _a;

cout<< "_ComputeSize ends..."<<endl;
}
-
_Alloc()
_Alloc()定义在network.cpp,用于分配注入弹出通道和路由器link。 -
_BuildNet()
_BuildNet()初始化路由器,添加所有的通道。如下图所示:

void TestNet::_BuildNet( const Configuration& config ) {
// for every router
    // build the router object
    // add the links to the processing nodes
    // add the links to the other routers

ostringstream router_name;
int node;
int c, cnt;
int port_to_routers = _a - 1;

for (node = 0; node < _a; ++node) {
    // create router
    router_name<< "router";
    router_name<< "_"<< node;
    // k是输入输出端口数
    _routers[node] = Router::NewRouter(config, this, router_name.str(), node, _k, _k);
    _timed_modules.push_back(_routers[node]);
    router_name.str("");

    // add input and output channels to processing nodes
    for(cnt = 0; cnt < _p; cnt++){
    c = _p * node + cnt; // for router 0, c is 0,1,2; router 1, c is 3,4,5 and so on.
    _routers[node]->AddInputChannel(_inject[c], _inject_cred[c]);
    }

    for(cnt = 0; cnt < _p; cnt++){
    c = _p * node + cnt; // for router 0, c is 0,1,2; router 1, c is 3,4,5 and so on.
    _routers[node]->AddOutputChannel(_eject[c], _eject_cred[c]);
    }

    // add output and input channels to other routers
    // add output channels
    for(cnt = 0; cnt < _a - 1; cnt++){
    c = port_to_routers * node + cnt; // for router 0, c is 0,1,2; router 1, c is 3,4,5 and so on.
    _routers[node]->AddOutputChannel(_chan[c], _chan_cred[c]);
    }

    // add input channels
    for(cnt = 0; cnt < _a; cnt++)
    {
    if(cnt == node)
    {
        continue;// do nothing
    }
    else if(cnt < node)
    {
        c = cnt * port_to_routers - 1 + node;
    }
    else if(cnt > node)
    {
        c = cnt * port_to_routers + node;
    }
    _routers[node]->AddInputChannel(_chan[c], _chan_cred[c]);
    }
}
}
- RegisterRoutingFunctions()
该函数注册拓扑的路由算法,而gRoutingFunctionMap定义在routefunc.cpp
void TestNet::RegisterRoutingFunctions() {
    gRoutingFunctionMap["min_testnet"] = &min_testnet;
}
对于一组特定的router, flit和input channel, 需要提供一个output port和output VC用于路由。
6. testnet_port(int rID, int src, int dest)选择正确的输出端口
int testnet_port(int rID, int src, int dest)// find the right port
{
    int dst_router;
    int out_port;

    dst_router = dest / gP_testnet;

    if(rID == dst_router)// 目标node是在当前路由器管理之下
    {
        out_port = dest % gP_testnet;
    }
    else// 如果是在其他router下管理
    {
        if(dst_router < rID)
        {
        out_port = gP_testnet + dst_router;
        }
        else{
        out_port = gP_testnet + dst_router - 1;
        }
    }

    return out_port;
}
- min_testnet()进行路由
void min_testnet( const Router *r, const Flit *f, int in_channel, OutputSet *outputs, bool inject )
{
  int debug = f->watch;
  outputs->Clear();

  if(inject)
  {
      int inject_vc = RandomInt(gNumVCs-1);
      outputs->AddRange(-1, inject_vc, inject_vc);
      return;
  }

  int rID = r->GetID();

  int out_port = -1;
  int out_vc = 0;

  if(in_channel < gP_testnet)// source node assign to vc0
  {
      out_vc = 0;
  }
  else// dest node assign it to vc1
  {
      out_vc = 1;
  }

  out_port = testnet_port(rID, f->src, f->dest);

  outputs->AddRange(out_port, out_vc, out_vc);

  if(debug)
  {
      *gWatchOut << GetSimTime()<<" | "<<r->FullName()<<" | "
          <<" through output port : "<< out_port
          <<" out vc: "<< out_vc << endl;
  }
}
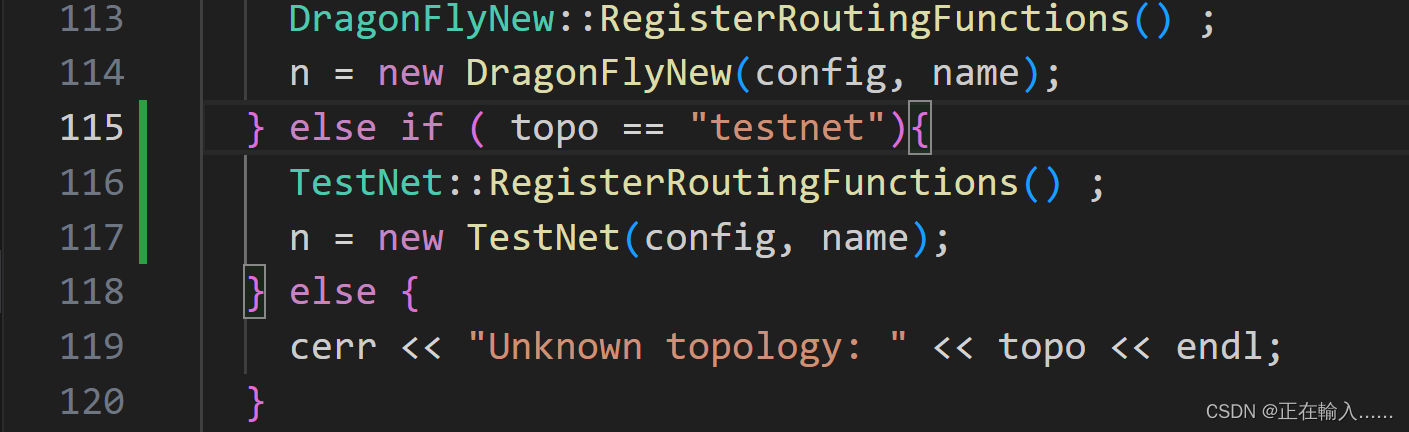
3.3 将testnet集成到network.cpp中
- 添加testnet.hpp

- 加入testnet拓扑
3.4 创建配置文件testnetconfig
```
// Topology
topology = testnet;

//a = 4;
//p = 3;

//Routing
routing_function = min;

// Flow control
num_vcs = 2;

// Traffic
traffic = uniform;
injection_rate = 0.25;
```
3.5 在main.cpp和global.hpp中加入gP_testnet和gA_testnet变量
3.6 make进行编译
4. 仿真模拟结果
- a = 4, p = 3时运行booksim得到如下结果:
====== Overall Traffic Statistics ======
====== Traffic class 0 ======
Packet latency average = 14.392 (1 samples)
        minimum = 7 (1 samples)
        maximum = 78 (1 samples)
Network latency average = 14.3911 (1 samples)
        minimum = 7 (1 samples)
        maximum = 78 (1 samples)
Flit latency average = 14.4049 (1 samples)
        minimum = 7 (1 samples)
        maximum = 78 (1 samples)
Fragmentation average = 0 (1 samples)
        minimum = 0 (1 samples)
        maximum = 0 (1 samples)
Injected packet rate average = 0.250979 (1 samples)
        minimum = 0.24025 (1 samples)
        maximum = 0.26 (1 samples)
Accepted packet rate average = 0.251208 (1 samples)
        minimum = 0.23125 (1 samples)
        maximum = 0.27025 (1 samples)
Injected flit rate average = 0.250979 (1 samples)
        minimum = 0.24025 (1 samples)
        maximum = 0.26 (1 samples)
Accepted flit rate average = 0.251208 (1 samples)
        minimum = 0.23125 (1 samples)
        maximum = 0.27025 (1 samples)
Injected packet size average = 1 (1 samples)
Accepted packet size average = 1 (1 samples)
Hops average = 1.74948 (1 samples)
Total run time 0.0592558
- a = 8, p = 4时运行booksim得到如下结果:
====== Overall Traffic Statistics ======
====== Traffic class 0 ======
Packet latency average = 14.1645 (1 samples)
        minimum = 7 (1 samples)
        maximum = 40 (1 samples)
Network latency average = 14.1645 (1 samples)
        minimum = 7 (1 samples)
        maximum = 40 (1 samples)
Flit latency average = 14.1681 (1 samples)
        minimum = 7 (1 samples)
        maximum = 40 (1 samples)
Fragmentation average = 0 (1 samples)
        minimum = 0 (1 samples)
        maximum = 0 (1 samples)
Injected packet rate average = 0.248344 (1 samples)
        minimum = 0.236 (1 samples)
        maximum = 0.261667 (1 samples)
Accepted packet rate average = 0.248417 (1 samples)
        minimum = 0.223667 (1 samples)
        maximum = 0.273667 (1 samples)
Injected flit rate average = 0.248344 (1 samples)
        minimum = 0.236 (1 samples)
        maximum = 0.261667 (1 samples)
Accepted flit rate average = 0.248417 (1 samples)
        minimum = 0.223667 (1 samples)
        maximum = 0.273667 (1 samples)
Injected packet size average = 1 (1 samples)
Accepted packet size average = 1 (1 samples)
Hops average = 1.87333 (1 samples)
Total run time 0.14817