#include "opencv2/imgproc.hpp"  // 包含OpenCV图像处理头文件
#include "opencv2/highgui.hpp"  // 包含OpenCV高层GUI(图形用户界面)头文件
#include "opencv2/ml.hpp"       // 包含OpenCV机器学习模块头文件
#include "opencv2/objdetect.hpp"// 包含OpenCV目标检测模块头文件
#include "opencv2/videoio.hpp"  // 包含OpenCV视频I/O模块头文件
#include <iostream>             // 包含输入输出流头文件
#include <time.h>               // 包含C标准库时间操作头文件


using namespace cv;             // 使用cv命名空间
using namespace cv::ml;         // 使用cv::ml命名空间
using namespace std;            // 使用std命名空间


// 函数声明区
vector< float > get_svm_detector( const Ptr< SVM >& svm );  // 获取SVM检测器的函数声明
void convert_to_ml( const vector< Mat > & train_samples, Mat& trainData );  // 将训练样本转换为机器学习算法格式的函数声明
void load_images( const String & dirname, vector< Mat > & img_lst, bool showImages );  // 加载图片的函数声明
void sample_neg( const vector< Mat > & full_neg_lst, vector< Mat > & neg_lst, const Size & size );  // 获取负样本的函数声明
void computeHOGs( const Size wsize, const vector< Mat > & img_lst, vector< Mat > & gradient_lst, bool use_flip );  // 计算HOG特征的函数声明
void test_trained_detector( String obj_det_filename, String test_dir, String videofilename );  // 测试训练好的检测器的函数声明


// 获取SVM支持向量机的检测器
vector< float > get_svm_detector( const Ptr< SVM >& svm )
{
    // 获取支持向量
    Mat sv = svm->getSupportVectors();
    const int sv_total = sv.rows;
    // 获取决策函数
    Mat alpha, svidx;
    double rho = svm->getDecisionFunction( 0, alpha, svidx );


    // 检查维度和数据类型是否一致
    CV_Assert( alpha.total() == 1 && svidx.total() == 1 && sv_total == 1 );
    CV_Assert( (alpha.type() == CV_64F && alpha.at<double>(0) == 1.) ||
               (alpha.type() == CV_32F && alpha.at<float>(0) == 1.f) );
    CV_Assert( sv.type() == CV_32F );


    // 预备HOG检测器向量
    vector< float > hog_detector( sv.cols + 1 );
    memcpy( &hog_detector[0], sv.ptr(), sv.cols*sizeof( hog_detector[0] ) );
    hog_detector[sv.cols] = (float)-rho; // 最后一个元素是偏移量rho
    return hog_detector; // 返回HOG检测器
}


/*
* 将训练/测试集转换为OpenCV机器学习算法可以使用的格式。
* TrainData是一个矩阵,大小为(#samples x max(#cols,#rows) per sample),数据类型为32FC1。
* 如果需要,会进行样本的转置。
*/
void convert_to_ml( const vector< Mat > & train_samples, Mat& trainData )
{
    // 转换数据
    const int rows = (int)train_samples.size();
    const int cols = (int)max( train_samples[0].cols, train_samples[0].rows );
    Mat tmp( 1, cols, CV_32FC1 ); // 用于必要时的转置
    trainData = Mat( rows, cols, CV_32FC1 );


    // 遍历训练样本并将它们转换为一维特征向量
    for( size_t i = 0 ; i < train_samples.size(); ++i )
    {
        // 确保每个训练样本是一维的
        CV_Assert( train_samples[i].cols == 1 || train_samples[i].rows == 1 );

        // 如果样本是列向量,需要进行转置
        if( train_samples[i].cols == 1 )
        {
            transpose( train_samples[i], tmp );
            tmp.copyTo( trainData.row( (int)i ) );
        }
        // 如果样本已经是行向量,直接复制
        else if( train_samples[i].rows == 1 )
        {
            train_samples[i].copyTo( trainData.row( (int)i ) );
        }
    }
}


// 加载图片的函数实现
void load_images( const String & dirname, vector< Mat > & img_lst, bool showImages = false )
{
    vector< String > files; // 文件名的字符串数组
    glob( dirname, files ); // 读取目录下的所有文件名


    // 遍历文件名,加载每张图片
    for ( size_t i = 0; i < files.size(); ++i )
    {
        Mat img = imread( files[i] ); // 读取图片
        // 若图片为空,则输出无效并继续
        if ( img.empty() )
        {
            cout << files[i] << " is invalid!" << endl; // 如果图片无效,则输出错误信息
            continue;
        }
        // 如果需要显示图片,则显示每一张载入的图片
        if ( showImages )
        {
            imshow( "image", img ); // 显示图片
            waitKey( 1 ); // 等待1ms以刷新窗口
        }
        // 将读入的图片添加到img_lst列表中
        img_lst.push_back( img );
    }
}


// 从提供的负图片列表中采样出指定尺寸的图片
void sample_neg( const vector< Mat > & full_neg_lst, vector< Mat > & neg_lst, const Size & size )
{
    Rect box; // 用于裁剪的矩形区域
    box.width = size.width;
    box.height = size.height;


    srand( (unsigned int)time( NULL ) ); // 设置随机种子


    // 遍历全体负样本列表
    for ( size_t i = 0; i < full_neg_lst.size(); i++ )
        // 仅对尺寸大于指定大小的图片进行裁剪
        if ( full_neg_lst[i].cols > box.width && full_neg_lst[i].rows > box.height )
        {
            box.x = rand() % ( full_neg_lst[i].cols - box.width ); // 随机生成矩形左上角x坐标
            box.y = rand() % ( full_neg_lst[i].rows - box.height ); // 随机生成矩形左上角y坐标
            Mat roi = full_neg_lst[i]( box ); // 从源图像中裁剪出roi区域
            neg_lst.push_back( roi.clone() ); // 将裁剪出的图片克隆并加入到负样本列表中
        }
}


// 计算图片列表中每一幅图片的HOG特征
void computeHOGs( const Size wsize, const vector< Mat > & img_lst, vector< Mat > & gradient_lst, bool use_flip )
{
    HOGDescriptor hog; // 创建HOG描述符对象
    hog.winSize = wsize; // 设置HOG检测窗口大小
    Mat gray; // 存放转换为灰度的图片
    vector< float > descriptors; // 存放计算的HOG特征向量


    // 遍历图片列表,计算每一张图片的HOG特征向量
    for( size_t i = 0 ; i < img_lst.size(); i++ )
    {
        // 仅对尺寸大于等于窗口大小的图片进行操作
        if ( img_lst[i].cols >= wsize.width && img_lst[i].rows >= wsize.height )
        {
            // 定义感兴趣区域,在图片中间裁剪出指定大小的区域
            Rect r = Rect(( img_lst[i].cols - wsize.width ) / 2,
                          ( img_lst[i].rows - wsize.height ) / 2,
                          wsize.width,
                          wsize.height);
            cvtColor( img_lst[i](r), gray, COLOR_BGR2GRAY ); // 将裁剪区域转换为灰度图
            hog.compute( gray, descriptors, Size( 8, 8 ), Size( 0, 0 ) ); // 计算HOG特征向量
            gradient_lst.push_back( Mat( descriptors ).clone() ); // 将计算结果复制到gradient_lst列表中
            if ( use_flip )
            {
                flip( gray, gray, 1 ); // 如果需要,对灰度图进行水平翻转
                hog.compute( gray, descriptors, Size( 8, 8 ), Size( 0, 0 ) ); // 再次计算翻转后的HOG特征向量
                gradient_lst.push_back( Mat( descriptors ).clone() ); // 将翻转后的特征向量也加入到列表中
            }
        }
    }
}


// 测试训练好的检测器
void test_trained_detector( String obj_det_filename, String test_dir, String videofilename )
{
    cout << "Testing trained detector..." << endl; // 输出提示信息
    HOGDescriptor hog; // 创建HOG描述符对象
    hog.load( obj_det_filename ); // 加载训练好的HOG检测器


    vector< String > files; // 用于存放测试图片路径的字符串数组
    glob( test_dir, files ); // 获取所有测试图片路径


    int delay = 0; // 延迟变量,控制视频显示速度
    VideoCapture cap; // 创建视频捕捉对象


    // 如果提供了视频文件名,则根据文件名打开视频流
    if ( videofilename != "" )
    {
        // 如果是单个数字,则按摄像头编号处理,否则按视频文件路径处理
        if ( videofilename.size() == 1 && isdigit( videofilename[0] ) )
            cap.open( videofilename[0] - '0' );
        else
            cap.open( videofilename );
    }


    obj_det_filename = "testing " + obj_det_filename; // 编辑窗口标题
    namedWindow( obj_det_filename, WINDOW_NORMAL ); // 创建显示结果的窗口


    for( size_t i=0;; i++ )
    {
        Mat img; // 存放每一帧图片或视频帧


        // 如果视频流已打开,则从中抓取下一帧
        if ( cap.isOpened() )
        {
            cap >> img;
            delay = 1; // 视频流时延迟为1ms
        }
        // 否则,如果i小于测试文件数,就读取下一张测试图片
        else if( i < files.size() )
        {
            img = imread( files[i] );
        }


        // 如果图片为空则退出测试
        if ( img.empty() )
        {
            return;
        }


        vector< Rect > detections; // 存放检测到的目标矩形框
        vector< double > foundWeights; // 存放检测到的权重


        // 使用训练好的HOG检测器对图片进行多尺度检测
        hog.detectMultiScale( img, detections, foundWeights );
        for ( size_t j = 0; j < detections.size(); j++ )
        {
            Scalar color = Scalar( 0, foundWeights[j] * foundWeights[j] * 200, 0 ); // 根据权重确定矩形框颜色
            // 在检测到的目标上画出矩形框
            rectangle( img, detections[j], color, img.cols / 400 + 1 );
        }


        imshow( obj_det_filename, img ); // 在窗口中显示结果


        // 如果按下ESC键,则退出测试
        if( waitKey( delay ) == 27 )
        {
            return;
        }
    }
}


// 程序的入口函数
int main( int argc, char** argv )
{
    // 定义命令行参数
    const char* keys =
    {
        "{help h|     | show help message}" // 显示帮助信息
        "{pd    |     | path of directory contains positive images}" // 包含正样本图像的目录路径
        "{nd    |     | path of directory contains negative images}" // 包含负样本图像的目录路径
        "{td    |     | path of directory contains test images}" // 包含测试图像的目录路径
        "{tv    |     | test video file name}" // 测试视频文件名
        "{dw    |     | width of the detector}" // 检测器的宽度
        "{dh    |     | height of the detector}" // 检测器的高度
        "{f     |false| indicates if the program will generate and use mirrored samples or not}" // 指示程序是否生成并使用镜像样本
        "{d     |false| train twice}" // 是否进行两次训练
        "{t     |false| test a trained detector}" // 测试训练好的检测器
        "{v     |false| visualize training steps}" // 可视化训练步骤
        "{fn    |my_detector.yml| file name of trained SVM}" // 训练好的SVM的文件名
    };


    // 解析命令行参数
    CommandLineParser parser( argc, argv, keys );


    // 如果有请求帮助的命令,打印帮助信息后退出程序
    if ( parser.has( "help" ) )
    {
        parser.printMessage();
        exit( 0 );
    }


    // 从命令行参数中获取各种路径和配置信息
    String pos_dir = parser.get< String >( "pd" );
    String neg_dir = parser.get< String >( "nd" );
    String test_dir = parser.get< String >( "td" );
    String obj_det_filename = parser.get< String >( "fn" );
    String videofilename = parser.get< String >( "tv" );
    int detector_width = parser.get< int >( "dw" );
    int detector_height = parser.get< int >( "dh" );
    bool test_detector = parser.get< bool >( "t" );
    bool train_twice = parser.get< bool >( "d" );
    bool visualization = parser.get< bool >( "v" );
    bool flip_samples = parser.get< bool >( "f" );


    // 如果是测试训练好的检测器,则执行测试并退出程序
    if ( test_detector )
    {
        test_trained_detector( obj_det_filename, test_dir, videofilename );
        exit( 0 );
    }


    // 如果没有提供正样本或负样本的路径,则打印错误信息并退出程序
    if( pos_dir.empty() || neg_dir.empty() )
    {
        parser.printMessage();
        cout << "Wrong number of parameters.\n\n"
             << "Example command line:\n" << argv[0] << " -dw=64 -dh=128 -pd=/INRIAPerson/96X160H96/Train/pos -nd=/INRIAPerson/neg -td=/INRIAPerson/Test/pos -fn=HOGpedestrian64x128.xml -d\n"
             << "\nExample command line for testing trained detector:\n" << argv[0] << " -t -fn=HOGpedestrian64x128.xml -td=/INRIAPerson/Test/pos";
        exit( 1 );
    }


    // 初始化用于存储图像的向量
    vector< Mat > pos_lst, full_neg_lst, neg_lst, gradient_lst;
    vector< int > labels;


    // 加载正样本图像并可视化
    clog << "Positive images are being loaded..." ;
    load_images( pos_dir, pos_lst, visualization );
    if ( pos_lst.size() > 0 )
    {
        clog << "...[done] " << pos_lst.size() << " files." << endl;
    }
    else
    {
        clog << "no image in " << pos_dir <<endl;
        return 1;
    }


    // 获取正样本图像的大小,并根据配置对其进行适当的调整
    Size pos_image_size = pos_lst[0].size();
    if ( detector_width && detector_height )
    {
        pos_image_size = Size( detector_width, detector_height );
    }
    else
    {
        for ( size_t i = 0; i < pos_lst.size(); ++i )
        {
            if( pos_lst[i].size() != pos_image_size )
            {
                cout << "All positive images should be same size!" << endl;
                exit( 1 );
            }
        }
        pos_image_size = pos_image_size / 8 * 8;
    }


    // 加载负样本图像并可视化
    clog << "Negative images are being loaded...";
    load_images( neg_dir, full_neg_lst, visualization );
    clog << "...[done] " << full_neg_lst.size() << " files." << endl;


    // 从负样本中采样获取负样本数据列表
    clog << "Negative images are being processed...";
    sample_neg( full_neg_lst, neg_lst, pos_image_size );
    clog << "...[done] " << neg_lst.size() << " files." << endl;


    // 计算正样本的HOG(图像梯度直方图)特征
    clog << "Histogram of Gradients are being calculated for positive images...";
    computeHOGs( pos_image_size, pos_lst, gradient_lst, flip_samples );
    size_t positive_count = gradient_lst.size();
    labels.assign( positive_count, +1 );
    clog << "...[done] ( positive images count : " << positive_count << " )" << endl;


    // 计算负样本的HOG特征
    clog << "Histogram of Gradients are being calculated for negative images...";
    computeHOGs( pos_image_size, neg_lst, gradient_lst, flip_samples );
    size_t negative_count = gradient_lst.size() - positive_count;
    labels.insert( labels.end(), negative_count, -1 );
    CV_Assert( positive_count < labels.size() );
    clog << "...[done] ( negative images count : " << negative_count << " )" << endl;

    // 创建一个Mat对象来存储训练数据
    Mat train_data;
    // 将梯度列表转换为训练数据的格式
    convert_to_ml( gradient_lst, train_data );


    // 开始训练支持向量机(SVM)
    clog << "Training SVM...";
    Ptr< SVM > svm = SVM::create(); // 创建SVM对象
    /* 设置SVM训练的默认参数 */
    svm->setCoef0( 0.0 ); // 设置训练中的参数Coef0为0.0
    svm->setDegree( 3 ); // 设置多项式核函数的参数degree为3
    svm->setTermCriteria( TermCriteria(TermCriteria::MAX_ITER + TermCriteria::EPS, 1000, 1e-3 ) ); // 设置终止条件
    svm->setGamma( 0 ); // 设置核函数的参数gamma为0
    svm->setKernel( SVM::LINEAR ); // 设置使用线性核函数
    svm->setNu( 0.5 ); // 设置训练中的参数nu为0.5
    svm->setP( 0.1 ); // 设置EPS_SVR中损失函数的epsilon参数为0.1
    svm->setC( 0.01 ); // 设置错误项的惩罚系数C为0.01,软分类
    svm->setType( SVM::EPS_SVR ); // 设置SVM的类型为EPS_SVR(epsilon支持向量回归),也可以是C_SVC或者NU_SVR
    // 使用训练数据和标签训练SVM
    svm->train( train_data, ROW_SAMPLE, labels );
    clog << "...[done]" << endl;


    // 如果设置了训练两次的参数
    if ( train_twice )
    {
        // 使用训练好的检测器对负样本图像进行检测,这可能需要一些时间
        clog << "Testing trained detector on negative images. This might take a few minutes...";
        HOGDescriptor my_hog; // 创建一个HOG描述器
        my_hog.winSize = pos_image_size; // 设置HOG描述器的窗口大小为正样本图像的大小


        // 将训练好的SVM设置到HOG描述器中
        my_hog.setSVMDetector( get_svm_detector( svm ) );


        vector< Rect > detections; // 存储检测到的目标的矩形框
        vector< double > foundWeights; // 存储找到的权重


        // 在每张负样本图像中进行多尺度检测
        for ( size_t i = 0; i < full_neg_lst.size(); i++ )
        {
            if ( full_neg_lst[i].cols >= pos_image_size.width && full_neg_lst[i].rows >= pos_image_size.height )
                my_hog.detectMultiScale( full_neg_lst[i], detections, foundWeights );
            else // 如果图像尺寸不够,清空检测结果
                detections.clear();


            // 对每个检测结果进行处理,转换成训练的大小,并添加到负样本列表中
            for ( size_t j = 0; j < detections.size(); j++ )
            {
                Mat detection = full_neg_lst[i]( detections[j] ).clone();
                resize( detection, detection, pos_image_size, 0, 0, INTER_LINEAR_EXACT);
                neg_lst.push_back( detection );
            }


            // 如果设置了可视化,则展示检测结果
            if ( visualization )
            {
                for ( size_t j = 0; j < detections.size(); j++ )
                {
                    rectangle( full_neg_lst[i], detections[j], Scalar( 0, 255, 0 ), 2 );
                }
                imshow( "testing trained detector on negative images", full_neg_lst[i] );
                waitKey( 5 );
            }
        }
        clog << "...[done]" << endl;


        // 清空梯度的列表,为再次训练做准备
        gradient_lst.clear();
        // 重新计算正样本的HOG特征
        clog << "Histogram of Gradients are being calculated for positive images...";
        computeHOGs( pos_image_size, pos_lst, gradient_lst, flip_samples );
        positive_count = gradient_lst.size(); // 更新正样本计数
        clog << "...[done] ( positive count : " << positive_count << " )" << endl;


        // 重新计算负样本的HOG特征
        clog << "Histogram of Gradients are being calculated for negative images...";
        computeHOGs( pos_image_size, neg_lst, gradient_lst, flip_samples );
        negative_count = gradient_lst.size() - positive_count; // 更新负样本计数
        clog << "...[done] ( negative count : " << negative_count << " )" << endl;


        // 清空标签列表,并重新分配正负样本标签
        labels.clear();
        labels.assign(positive_count, +1);
        labels.insert(labels.end(), negative_count, -1);


        // 再次训练SVM
        clog << "Training SVM again...";
        convert_to_ml( gradient_lst, train_data );
        svm->train( train_data, ROW_SAMPLE, labels );
        clog << "...[done]" << endl;
    }


    // 初始化一个HOG描述器
    HOGDescriptor hog;
    hog.winSize = pos_image_size; // 设置HOG描述器的窗口大小


    // 将训练好的SVM模型设置到HOG描述器中
    hog.setSVMDetector( get_svm_detector( svm ) );
    // 保存训练好的检测器到文件中
    hog.save( obj_det_filename );


    // 测试训练好的检测器
    test_trained_detector( obj_det_filename, test_dir, videofilename );


    // 程序正常退出
    return 0;
}
glob( test_dir, files );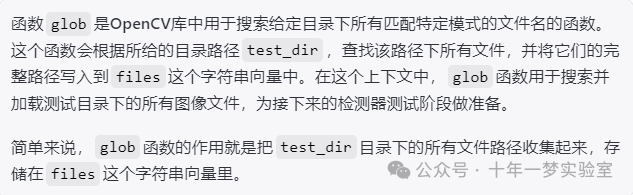
hog.detectMultiScale( img, detections, foundWeights );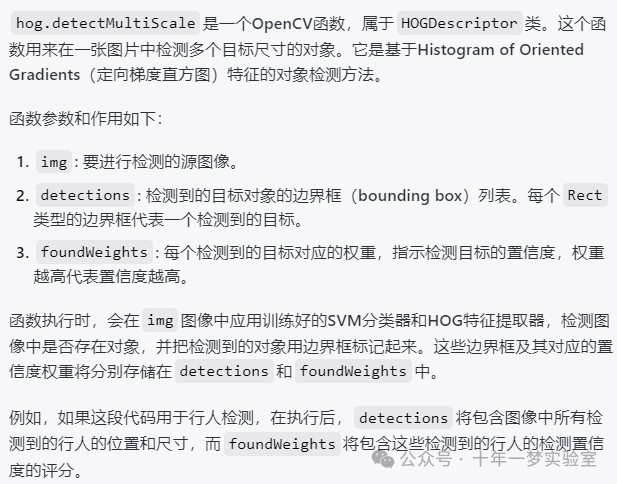
computeHOGs( pos_image_size, pos_lst, gradient_lst, flip_samples );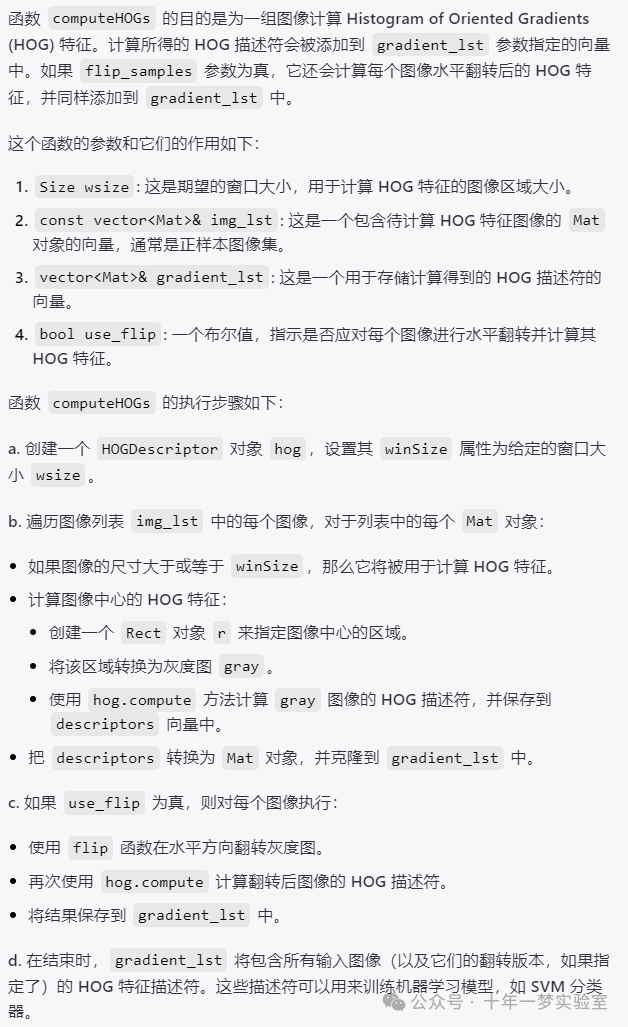
pos_image_size = pos_image_size / 8 * 8;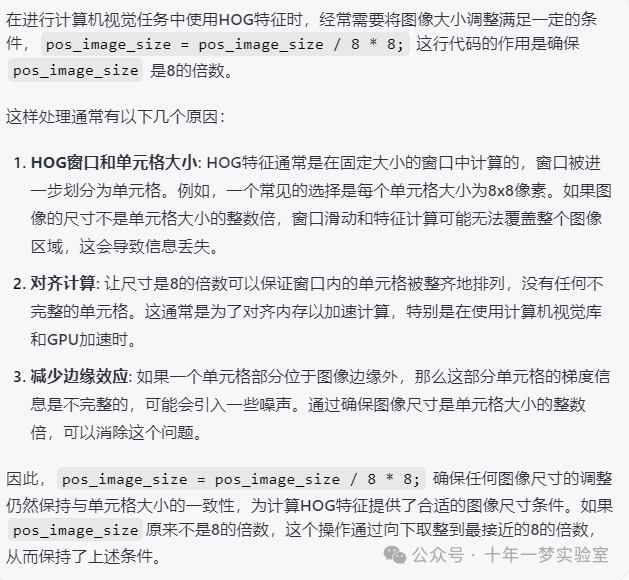
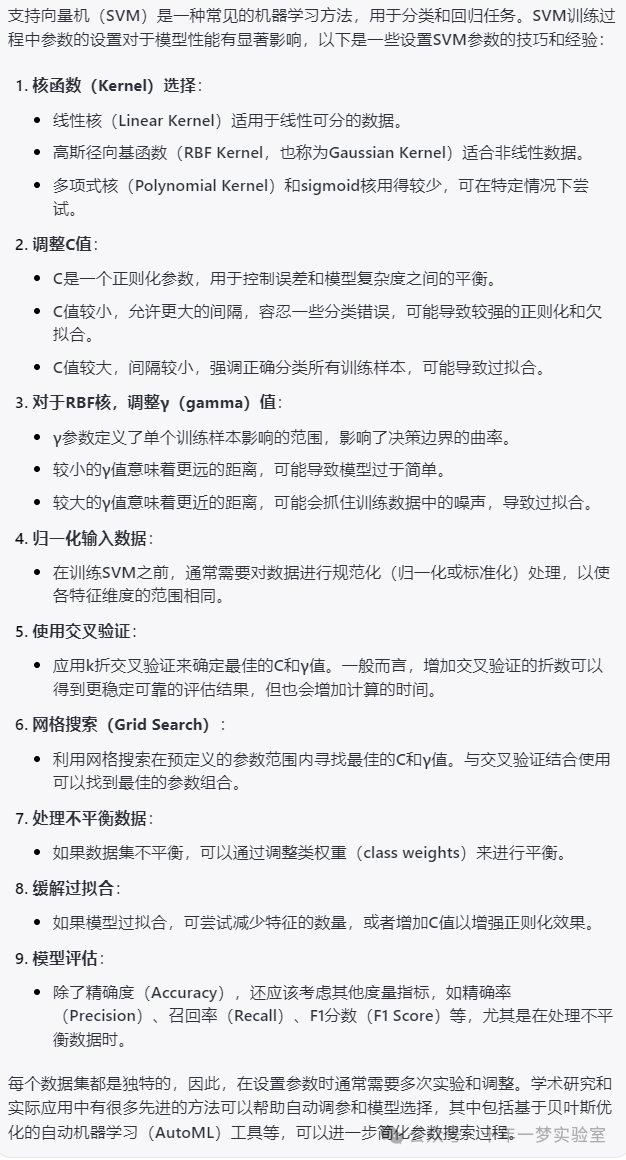
SVM训练的参数设置有哪些技巧或经验
my_hog.detectMultiScale( full_neg_lst[i], detections, foundWeights );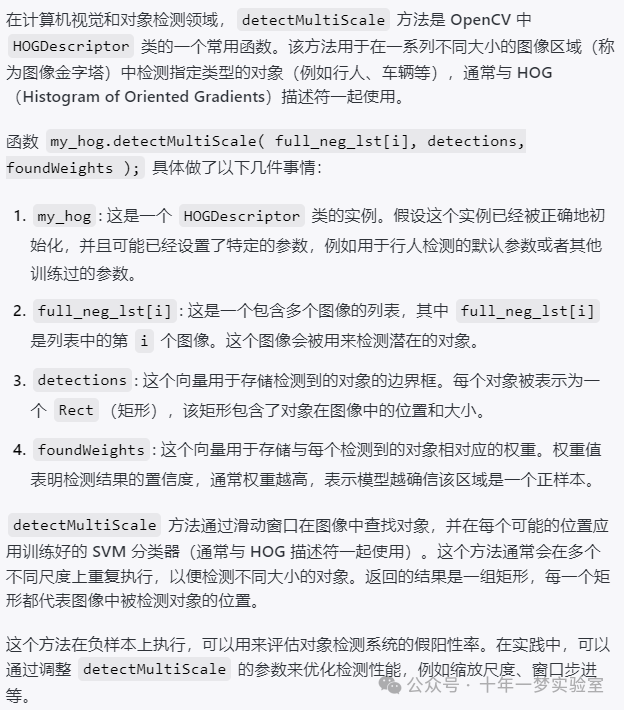
hog.compute( gray, descriptors, Size( 8, 8 ), Size( 0, 0 ) );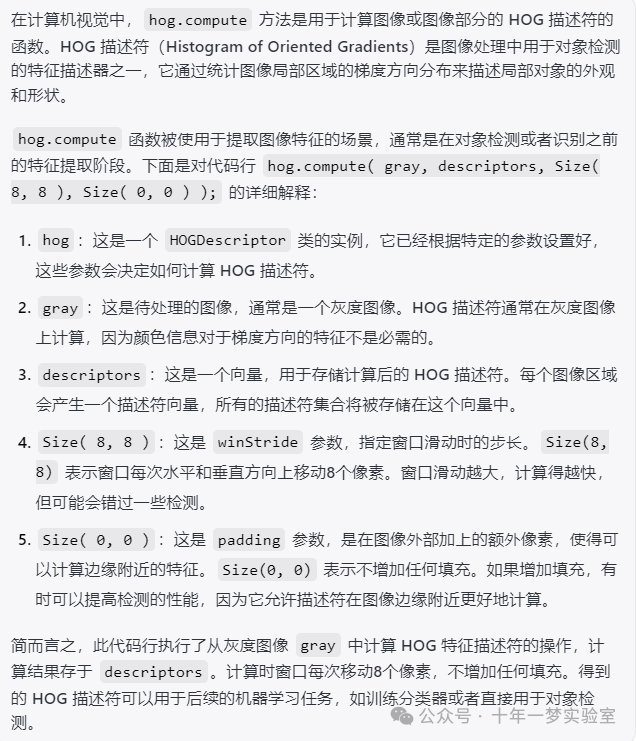
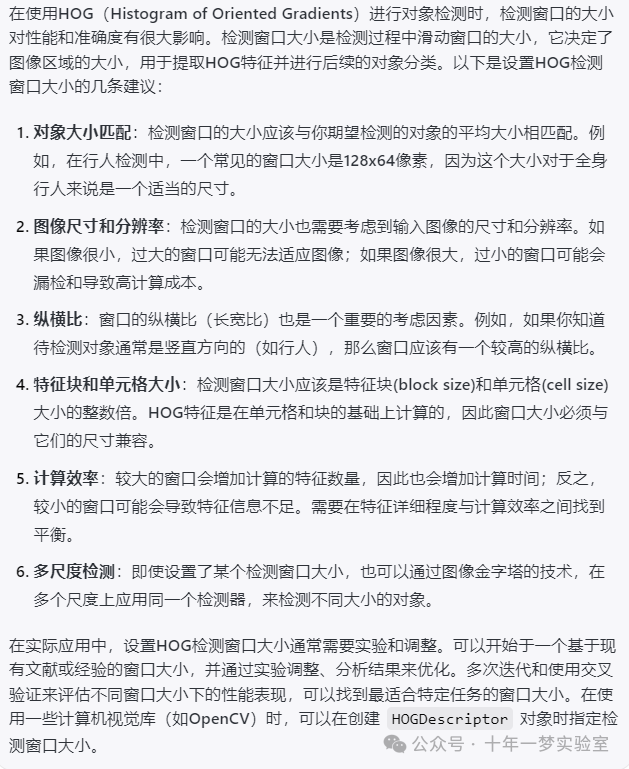
HOG检测窗口大小如何设置