yolov9训练自己的数据
- 1 conda环境
- 安装指定版本torch
- 2 预训练模型测试
- 3 训练自己的数据集
- 3.1 制作数据
- 3.2 创建模型配置文件
- 3.3 创建数据加载配置文件
- 3.4 使用ClearML跟踪训练日志
- 3.5 训练
- 3.6 模型测试
- 3.7 转换成TensorRT模型
- 4 参考文档
1 conda环境
下载yolov9代码,并执行以下命令
$ git clone https://github.com/WongKinYiu/yolov9.git
$ cd yolov9
$ conda create --name yolov9 python=3.8
$ pip install -r requirement.txt
安装指定版本torch
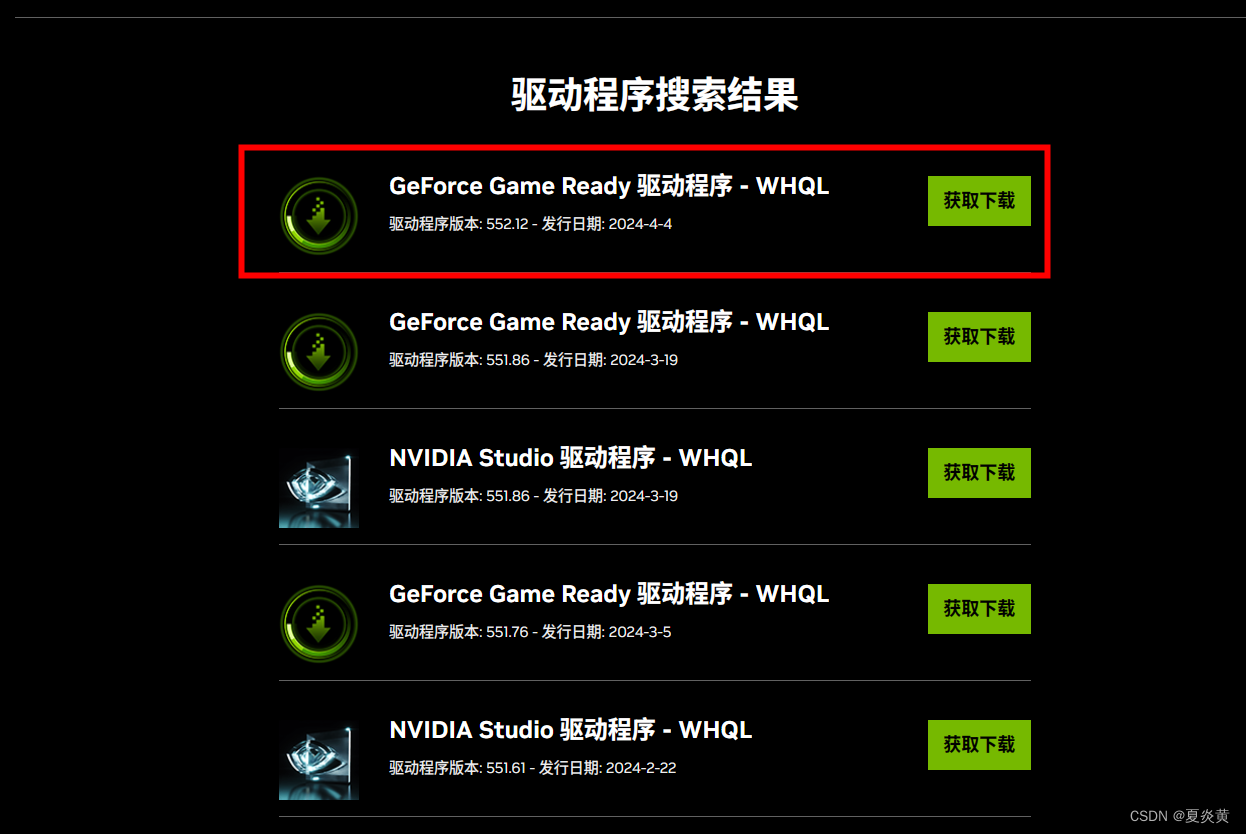
到pytorch官网下载安装。

pip install torch==2.0.0 torchvision==0.15.1 -index-url https://download.pytorch.org/whl/cu118
torch安装失败,到上面地址手动下载v2.0.0,再安装。

 $ pip install torch-2.0.0+cu118-cp38-cp38-linux_x86_64.whl
 $ pip install torchvision-0.15.1+cu118-cp38-cp38-linux_x86_64.whl
2 预训练模型测试
# inference converted yolov9 models
$ python detect.py --source ./data/images/horses.jpg --img 640 --device 0 --weights ./weights/yolov9-c-converted.pt --conf 0.1

# inference yolov9 models
# python detect_dual.py --source ./data/images/horses.jpg --img 640 --device 0 --weights ./weights/yolov9-c.pt

# inference gelan models
# python detect.py --source ./data/images/horses.jpg --img 640 --device 0 --weights ./weights/gelan-c.pt
detect: weights=['./weights/yolov9-c-converted.pt'], source=./data/images/horses.jpg, data=data/coco128.yaml, imgsz=[640, 640], conf_thres=0.25, iou_thres=0.4e, save_txt=False, save_conf=False, save_crop=False, nosave=False, classes=None, agnostic_nms=False, augment=False, visualize=False, update=False, project=run_thickness=3, hide_labels=False, hide_conf=False, half=False, dnn=False, vid_stride=1
YOLOv5 🚀 v0.1-35-g9660d12 Python-3.8.18 torch-2.0.0+cu118 CUDA:0 (NVIDIA GeForce RTX 3090, 24260MiB)

Fusing layers...
gelan-c summary: 387 layers, 25288768 parameters, 64944 gradients, 102.1 GFLOPs
image 1/1 /home/hard_disk/waf/projects-test/yolov9/data/images/horses.jpg: 448x640 5 horses, 89.3ms
Speed: 0.2ms pre-process, 89.3ms inference, 40.3ms NMS per image at shape (1, 3, 640, 640)
Results saved to runs/detect/exp

3 训练自己的数据集
3.1 制作数据
标注好的数据划分成train和val,调整成以下目录结构。images内放图片,labels放对应标签,图片名和标签名要一致。
vehicle/
├── train
│   ├── images
│   │   ├── 000000000064.jpg
│   ├── labels
│   │   ├── 000000000064.txt
├── val
│   ├── images
│   │   ├── 00000000724.jpg
│   ├── labels
│   │   ├── 000000000724.txt
├── train.txt
├── val.txt
train.txt内容为图像完整路径。
/home/hard_disk/waf/data/vehicle/train/images/000000000064.jpg
/home/hard_disk/waf/data/vehicle/train/images/000000000071.jpg
...
3.2 创建模型配置文件
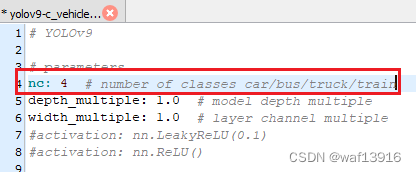
在yolov9/models/detect/目录下创建yolov9-c_vehicle.yaml,拷贝yolov9-c.yaml内容,并修改nc值为待训练的类别数。
3.3 创建数据加载配置文件
在yolov9/data/目录下创建vehicle.yaml,内容为
path: /home/hard_disk/waf/data/vehicle/  # dataset root dir
train: train.txt  # train images (relative to 'path') 20960 images,19335+1625(uav)
val: val.txt  # val images (relative to 'path') 100 images
test:

# Classes
names:
  0: car
  1: bus
  2: truck
  3: train
3.4 使用ClearML跟踪训练日志
(1)ClearML官网注册账号。
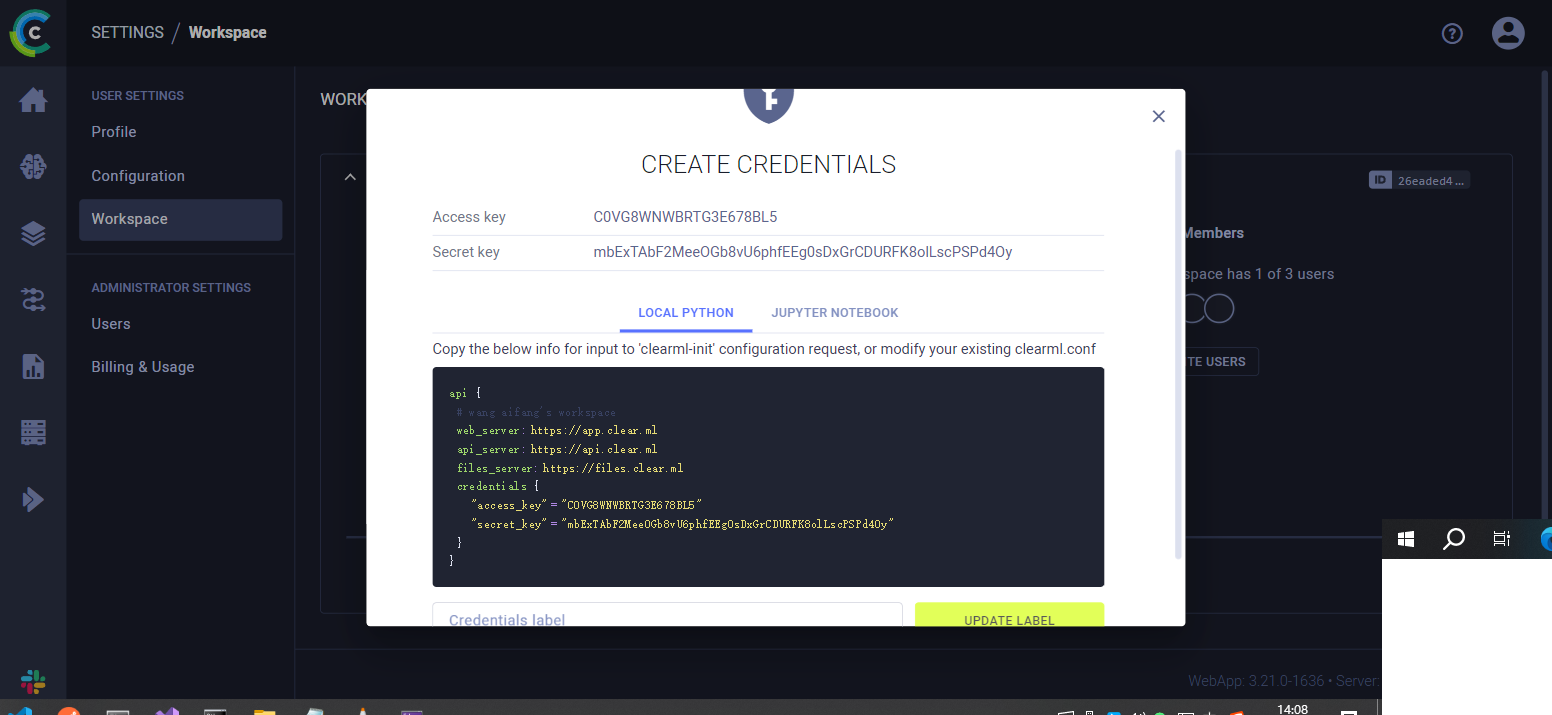
(2)右上角进入个人主页,依次点“Setting”–“Workspace”–“+Creat new credentials”,复制这段api:
(3)终端安装clearml
pip install clearml -i https://pypi.tuna.tsinghua.edu.cn/simple/
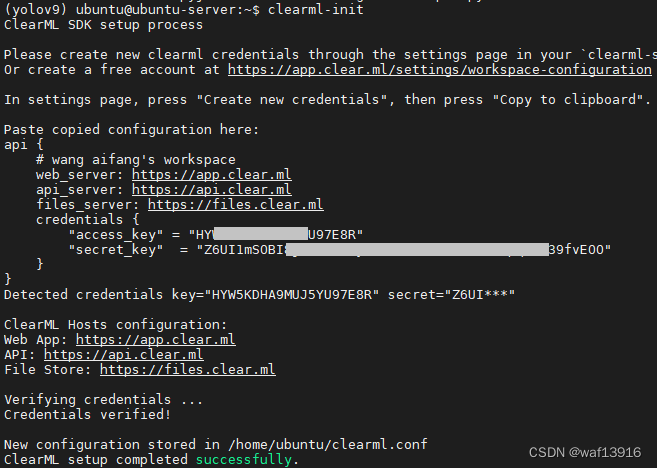
运行 clearml-init 连接ClearML 服务器,按照提示粘贴之前复制的api。
3.5 训练
#gpu单卡训练
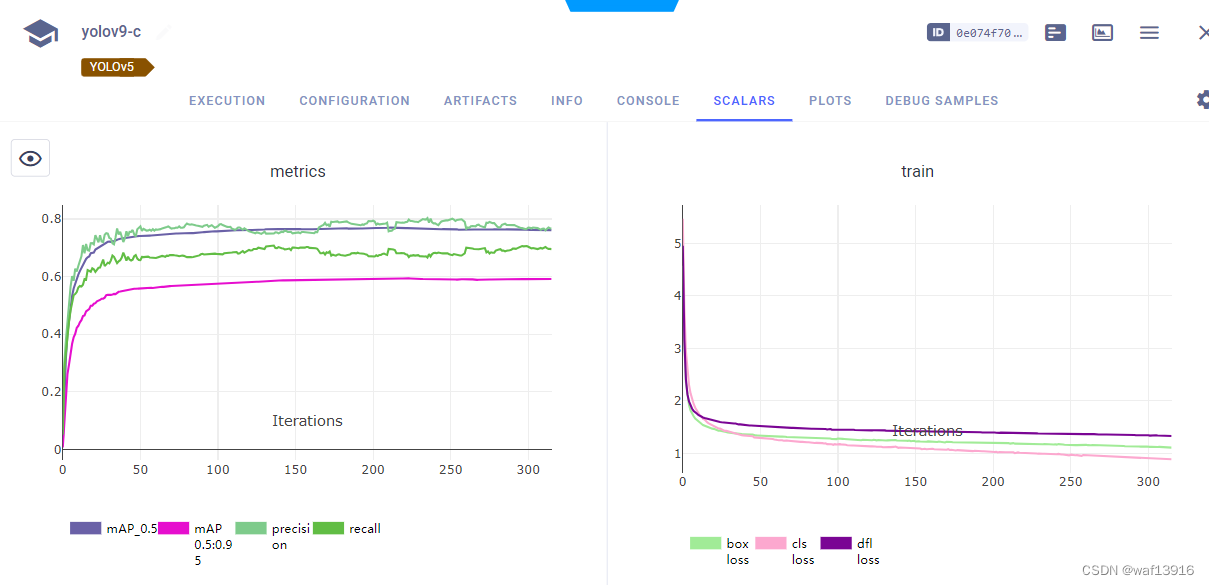
$ python train_dual.py --workers 8 --device 0 --batch 16 --data data/vehicle.yaml --img 640 --cfg models/detect/yolov9-c_vehicle.yaml --weights '' --name yolov9-c --hyp data/hyps/hyp.scratch-high.yaml --min-items 0 --epochs 500 --close-mosaic 15 --cache
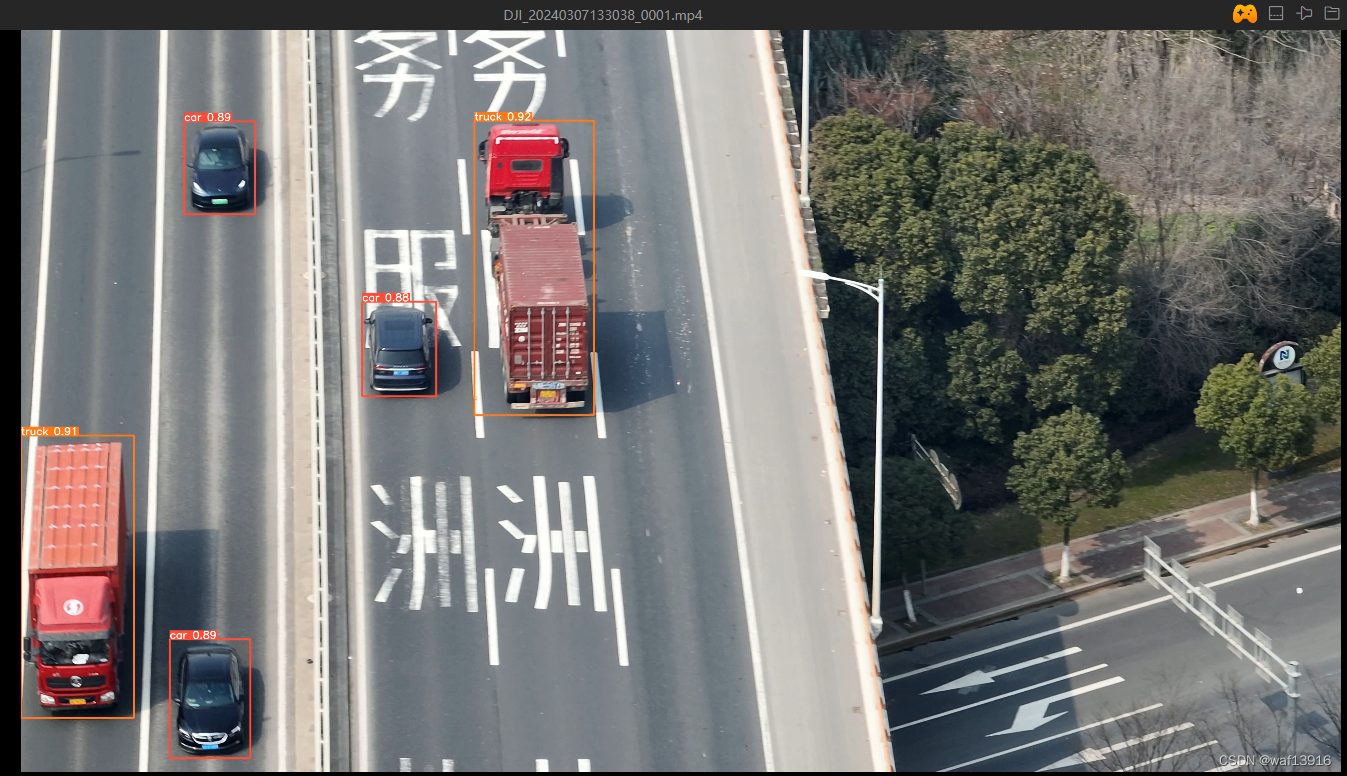
3.6 模型测试
python detect.py --source E:\DJI_20240307133038_0001.MP4 --img 640 --device 0 --weights weights\yolov9-c_vehicle.pt
3.7 转换成TensorRT模型
(1)Re-parameterization,将 reparameterize.py放到yolov9目录下,perform re-parameterization:
python reparameterize.py weights\yolov9-c_vehicle.pt weights\yolov9-c_vehicle_converted_cuda.pt
reparameterize.py代码如下,nc修改为训练的类别数,device也可以设置为cpu
import argparse
import torch
from models.yolo import Model

def main(input_model_path, output_model_path):
    device = torch.device("cuda")
    cfg = "./models/detect/gelan-c.yaml"
    model = Model(cfg, ch=3, nc=4, anchors=3)
    #model = model.half()
    model = model.to(device)
    _ = model.eval()
    ckpt = torch.load(input_model_path, map_location='cuda')
    model.names = ckpt['model'].names
    model.nc = ckpt['model'].nc


    idx = 0
    for k, v in model.state_dict().items():
        if "model.{}.".format(idx) in k:
            if idx < 22:
                kr = k.replace("model.{}.".format(idx), "model.{}.".format(idx+1))
                model.state_dict()[k] -= model.state_dict()[k]
                model.state_dict()[k] += ckpt['model'].state_dict()[kr]
            elif "model.{}.cv2.".format(idx) in k:
                kr = k.replace("model.{}.cv2.".format(idx), "model.{}.cv4.".format(idx+16))
                model.state_dict()[k] -= model.state_dict()[k]
                model.state_dict()[k] += ckpt['model'].state_dict()[kr]
            elif "model.{}.cv3.".format(idx) in k:
                kr = k.replace("model.{}.cv3.".format(idx), "model.{}.cv5.".format(idx+16))
                model.state_dict()[k] -= model.state_dict()[k]
                model.state_dict()[k] += ckpt['model'].state_dict()[kr]
            elif "model.{}.dfl.".format(idx) in k:
                kr = k.replace("model.{}.dfl.".format(idx), "model.{}.dfl2.".format(idx+16))
                model.state_dict()[k] -= model.state_dict()[k]
                model.state_dict()[k] += ckpt['model'].state_dict()[kr]
        else:
            while True:
                idx += 1
                if "model.{}.".format(idx) in k:
                    break
            if idx < 22:
                kr = k.replace("model.{}.".format(idx), "model.{}.".format(idx+1))
                model.state_dict()[k] -= model.state_dict()[k]
                model.state_dict()[k] += ckpt['model'].state_dict()[kr]
            elif "model.{}.cv2.".format(idx) in k:
                kr = k.replace("model.{}.cv2.".format(idx), "model.{}.cv4.".format(idx+16))
                model.state_dict()[k] -= model.state_dict()[k]
                model.state_dict()[k] += ckpt['model'].state_dict()[kr]
            elif "model.{}.cv3.".format(idx) in k:
                kr = k.replace("model.{}.cv3.".format(idx), "model.{}.cv5.".format(idx+16))
                model.state_dict()[k] -= model.state_dict()[k]
                model.state_dict()[k] += ckpt['model'].state_dict()[kr]
            elif "model.{}.dfl.".format(idx) in k:
                kr = k.replace("model.{}.dfl.".format(idx), "model.{}.dfl2.".format(idx+16))
                model.state_dict()[k] -= model.state_dict()[k]
                model.state_dict()[k] += ckpt['model'].state_dict()[kr]
    _ = model.eval()


    m_ckpt = {'model': model.half(),
              'optimizer': None,
              'best_fitness': None,
              'ema': None,
              'updates': None,
              'opt': None,
              'git': None,
              'date': None,
              'epoch': -1}
    torch.save(m_ckpt, output_model_path)

if __name__ == "__main__":
    parser = argparse.ArgumentParser(description="Script to convert YOLO model")
    parser.add_argument("input_model_path", type=str, help="Path to the input YOLO model")
    parser.add_argument("output_model_path", type=str, help="Path to save the converted YOLO model")
    args = parser.parse_args()
    main(args.input_model_path, args.output_model_path)
(2)导出onnx模型,在yolov9目录下执行以下命令,生成yolov9-c_vehicle_converted_cuda.onnx
python export.py --weights weights\yolov9-c_vehicle_converted_cuda.pt --include onnx
(3)Build a TensorRT engine:
trtexec.exe --onnx=yolov9-c_vehicle_converted_cuda.onnx --explicitBatch --saveEngine=yolov9-c_vehicle_converted_cuda.engine --fp16
4 参考文档
(1) yolov9 训练自己数据集<日志>
(2) How to Train YOLOv9 on a Custom Dataset
(3) Convert YOLOv9-C
(4) spacewalk01/TensorRT-YOLOv9
(5) yolov5/tutorials/train_custom_data
(6) RuntimeError: The size of tensor a (3) must match the size of tensor b(64) at non-singleton dimension 1
