简介
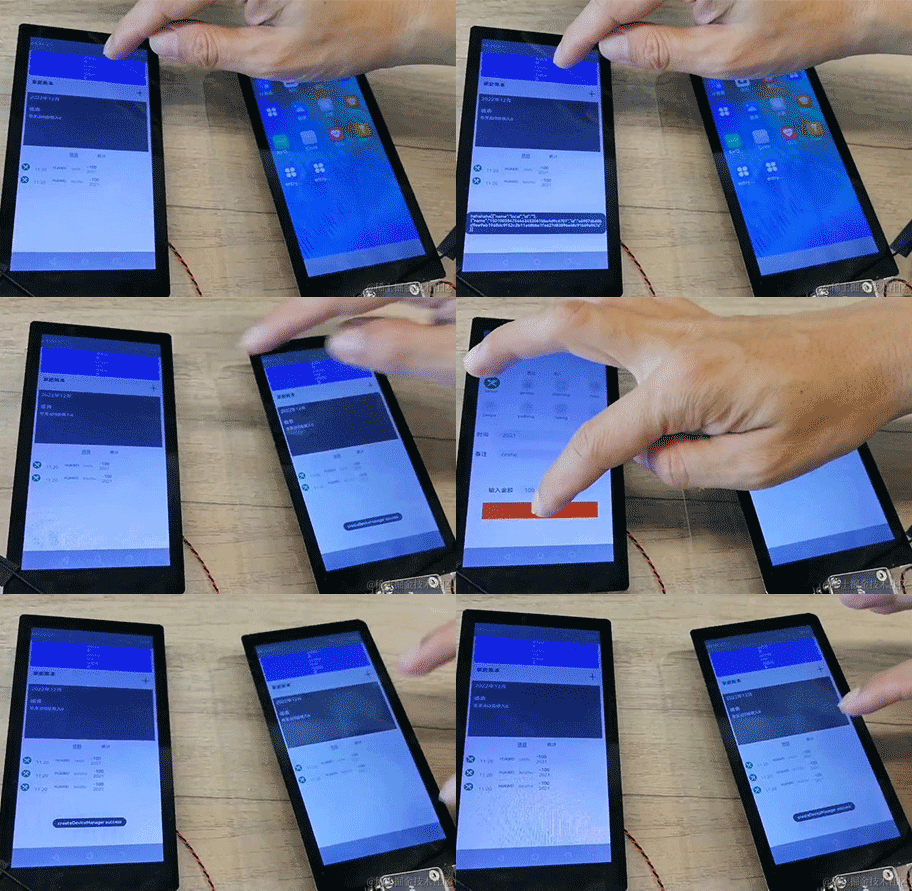
Demo基于Open Harmony系统使用ETS语言进行编写,本Demo主要通过设备认证、分布式拉起、分布式数据管理等功能来实现。
应用效果
-
设备认证,获取同一个局域网内的设备ID,并拉起应用

-
添加数据并在另一台设备显示该数据
开发步骤
开发文档:gitee.com/li-shizhen-skin/harmony-os/blob/master/README.md【复制地址前往】
1.新建Openharmony ETS工程
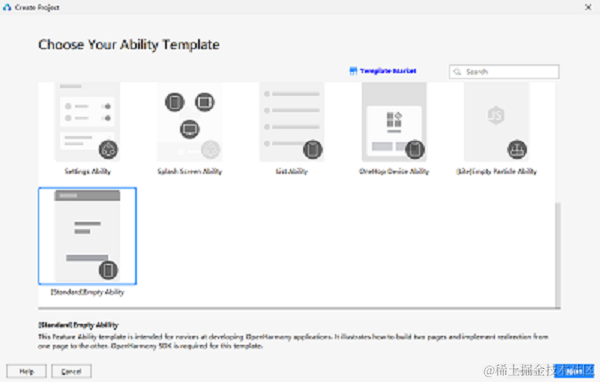
更多鸿蒙开发知识文档+mau123789是v直接领。在DevEco Studio中点击File -> New Project ->[Standard]Empty Ability->Next,Language 选择ETS语言,最后点击Finish即创建成功。
2.界面代码编写
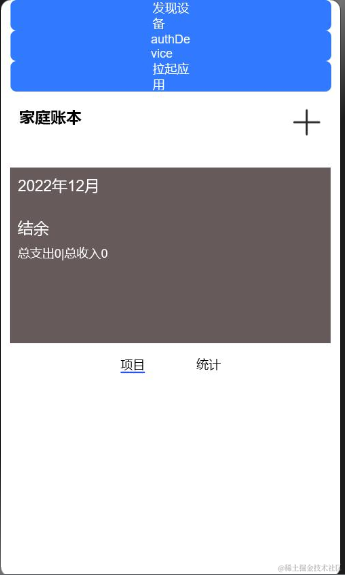
1) 首页界面
build() {
    Flex({ direction: FlexDirection.Column}) {
      //发现设备
      Button('发现设备', { type: ButtonType.Normal, stateEffect: true })
        .borderRadius(8)
        .backgroundColor(0x317aff).width(90)
        .onClick(() =>{
          this.fun()
        })
      //设备认证
      Button('authDevice', { type: ButtonType.Normal, stateEffect: true })
        .borderRadius(8)
        .backgroundColor(0x317aff).width(90)
        .onClick(() =>{
          this.authDevice()
        })

    // 拉起应用
      Button('拉起应用', { type: ButtonType.Normal, stateEffect: true })
        .borderRadius(8)
        .backgroundColor(0x317aff).width(90)
        .onClick(() =>{
                    this.startAb()
        })

      Stack({
        alignContent:Alignment.TopEnd
      }){
        Text('家庭账本')
          .fontSize(20)
          .fontWeight(FontWeight.Bold)
          .width('100%')
          .margin({left:12})
           .onClick(() =>{
             //          routePage()
             this.fun()
           })
        Image("/picture/add.png")
          .width(40)
          .height(40)
          .align(Alignment.Start)
          .margin({
            right:12
          }).onClick(() =>{
          routePage()
        })

      }
      .width(350)
      .height(60)
      .margin({
        top:10,
        bottom:10
      })
      Flex({
        direction: FlexDirection.Column, alignItems:ItemAlign.Start,
      }){

        Text("2022年12月")
          .fontSize(20)
          .fontColor(Color.White)

        Text("结余")
          .fontSize(20)
          .fontColor(Color.White)
          .margin({
            top:30
          }).align(Alignment.Start)

        Text("总支出0|总收入0")
          .fontSize(16)
          .fontColor(Color.White)
          .margin({
            top:10
          }).align(Alignment.Start)
      }
      .backgroundColor("#665A5A")
      .height(230)
      .layoutWeight(1)
      .padding(10)
      .onClick(() =>{
        routePage()
      })

      Tabs() {
        TabContent() {
          ProjectList()
        }
        .tabBar("项目")

        TabContent() {
          Statistics()
        }
        .tabBar("统计")
      }
    }
    .width('100%')
    .height('100%')
    .padding({
      left:12,right:12
    })

  }
底部TabContent 统计模块
@Component
struct ProjectList {
  remoteDataManager = new RemoteDataManager()
  @State ProjectData: Array<any> = []
  TestData:any[] =  []
  TestKvData: Array<any> = []
  kvManager = null
  kvStore = null
  STORE_ID = 'store_accountbook'
  aboutToAppear(){
    try {
      const config = {
        userInfo: {
          userId: '0',
          userType: 0
        },
        bundleName: 'com.example.accountbookets'
      }
      factory.createKVManager(config).then((manager) => {
        this.kvManager = manager
        let options =
          {
            createIfMissing: true,
            encrypt: false,
            backup: false,
            autoSync: true,
            kvStoreType: 1,
            securityLevel: 3
          }
        this.kvManager.getKVStore(this.STORE_ID, options).then((store) => {
          this.kvStore = store
          this.kvStore.get("key2").then((data) => {
            this.ProjectData = JSON.parse(data)
          })

        }).catch((err) => {
        })

      }).catch((err) => {
      })
    } catch (e) {
    }
  }

  @Builder ProjectItem(image, name, des,time,money) {
    Flex({ direction: FlexDirection.Row,alignItems: ItemAlign.Center }){
      Image($r("app.media.icon1"))
        .width(30)
        .height(30)

      Column() {
        Text(name)
          .fontSize(16)
          .fontColor(Color.Black)
        Text('11:20')
          .fontSize(16)
          .fontColor(Color.Gray)
      }
      .alignItems(HorizontalAlign.Start)
      .margin({left:15})

      Text('HUAWEI')
        .fontSize(12)
        .fontColor(Color.Black)
        .margin({left:20})

      Text(des)
        .fontSize(14)
        .fontColor(Color.Gray)
        .margin({left:15})

      Column() {
        Text('-100')
          .fontSize(16)
          .fontColor(Color.Black)
        Text(time)
          .fontSize(16)
          .fontColor(Color.Gray)
      }
      .alignItems(HorizontalAlign.Start)
      .margin({left:20})
    }
    .width(400)
    .height(50)
    .margin({top:10})

  }

  build() {
    List() {
      ForEach(this.ProjectData, (item) => {
        ListItem() {
          this.ProjectItem(item.image, item.name, item.des,item.time,item.money)
        }
        .onClick(() => {
        })

      }, (item) => JSON.stringify(item)) {

      }


    }
  }
}
统计模块里面的TabContent
@Component
struct Statistics{
  build(){
    Flex({ direction: FlexDirection.Row}){

      Tabs() {
        TabContent() {
          PayList()
        }
        .tabBar("支出分类")

        TabContent() {

        }
        .tabBar("成员分类")
      }
    }
  }
}
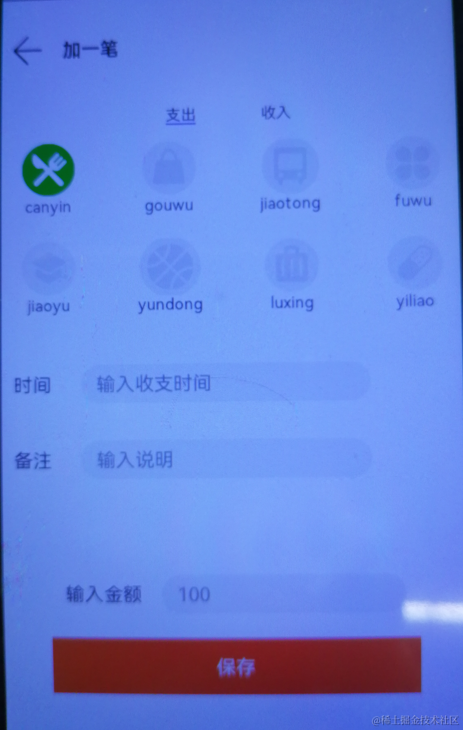
2) add.ets页面
@Component
struct PayList {

  private PayData: PayBean[] = initializeOnStartup()
  @Builder PayItem(previewUrl, title, describe) {
    Flex({ direction: FlexDirection.Row,alignItems: ItemAlign.Center }){
      Image(previewUrl)
        .width(30)
        .height(30)


      Text(title)
        .fontSize(16)
        .fontColor(Color.Black)
        .margin({left:8})

      Text('100%')
        .fontSize(12)
        .fontColor(Color.Black)
        .margin({left:8})

      Progress({ value: 20, total: 150, style: ProgressStyle.Linear }).color(Color.Red).value(150).width(200)

      Text('-100')
        .fontSize(14)
        .fontColor(Color.Gray)
        .margin({left:8})
    }
    .width(400)
    .height(50)
    .margin({top:10})

  }

  build() {
    List() {
      ForEach(this.PayData, (item) => {
        ListItem() {
          this.PayItem(item.image, item.name, item.des)
        }
        .onClick(() => {
          console.info("点击我")
          router.push({
            uri: "pages/VideoPlayer",

          })
        })
      }, (item) => JSON.stringify(item)) {

      }
    }
  }
}
add页面支出模块
@Component
struct pay{
  @Link payTime:string
  @Link payRemark:string
  @Link payType:string
  @State private index:number = 0
  @State strType:string = "canyin"
  @State AccountData: Array<any> = [
    { previewUrl: "/picture/icon1.png", title: "canyin" ,number:0},
    { previewUrl: "/picture/icon2_2.png", title: "gouwu" ,number:1},
    { previewUrl: "/picture/icon3_3.png", title: "jiaotong" ,number:2},
    { previewUrl: "/picture/icon4_4.png", title: "fuwu" ,number:3},
    { previewUrl: "/picture/icon5_5.png", title: "jiaoyu" ,number:4},
    { previewUrl: "/picture/icon6_6.png", title: "yundong" ,number:5},
    { previewUrl: "/picture/icon7_7.png", title: "luxing" ,number:6},
    { previewUrl: "/picture/icon8_8.png", title: "yiliao" ,number:7},
//    { previewUrl: "/picture/icon9_9.png", title: "生活" ,number:9},
//    { previewUrl: "/picture/icon10_10.png", title: "宠物" ,number:10},
  ]

  @Builder ProItem(previewUrl, title,number) {
    Stack() {
      Flex({
        direction: FlexDirection.Column
      }) {
        if (this.index == number) {
          if (number == 0) {
            Image("/picture/icon1.png")
              .width(60)
              .height(60)
          }else if (number == 1) {
            Image("/picture/icon2.png")
              .width(60)
              .height(60)

          }else if (number == 2) {
            Image("/picture/icon3.png")
              .width(60)
              .height(60)

          }else if (number == 3) {
            Image("/picture/icon4.png")
              .width(60)
              .height(60)
          }else if (number == 4) {
            Image("/picture/icon5.png")
              .width(60)
              .height(60)

          }else if (number == 5) {
            Image("/picture/icon6.png")
              .width(60)
              .height(60)

          }else if (number == 6) {
            Image("/picture/icon7.png")
              .width(60)
              .height(60)
          }else if (number == 7) {
            Image("/picture/icon8.png")
              .width(60)
              .height(60)
          }else if (number == 8) {
            Image("/picture/icon9.png")
              .width(60)
              .height(60)
          }else if (number == 9) {
            Image("/picture/icon10.png")
              .width(60)
              .height(60)
          }
        }else{
          if (number == 0) {
            Image("/picture/icon1_1.png")
              .width(60)
              .height(60)
          }else{
            Image(previewUrl)
              .width(60)
              .height(60)
          }

        }
        Column() {
          Text(title)
            .fontSize(16)
            .fontColor(Color.Black)
        }
        .alignItems(HorizontalAlign.Center)
      }

    }
    .height(100)
    .width(100)
    .margin({
      bottom: 16
    })

  }
  build(){
    Flex({direction: FlexDirection.Column}){

      Grid(){
        ForEach(this.AccountData, (item) => {
          GridItem() {
            this.ProItem(item.previewUrl, item.title,item.number)
          }
          .onClick(() => {
            console.info("点击我")
            this.index = item.number
            this.payType = this.AccountData[this.index].title
          })
        }, (item) => JSON.stringify(item)) {

        }
      }
      .rowsTemplate('1fr 1fr')
      .columnsTemplate('1fr 1fr 1fr 1fr')
      .columnsGap(8)
      .rowsGap(8)
      .height(200)
//      Time()
//      Remark()
      // ******************时间**********************
      Flex({
        direction: FlexDirection.Row,alignItems: ItemAlign.Center
      }){
        Text("时间")
          .fontColor(Color.Black)
          .fontSize(20)
          .margin({
            right:15
          })
          .width(70)

        TextInput({ placeholder: '输入收支时间', text: this.payTime })
          .type(InputType.Normal)
          .placeholderColor(Color.Gray)
          .placeholderFont({ size: 20, weight: 2})
          .enterKeyType(EnterKeyType.Search)
          .caretColor(Color.Green)
          .width(300)
          .height(40)
          .borderRadius('20px')
          .backgroundColor(Color.White)
          .onChange((value: string) => {
            this.payTime = value
          })

      }
      .margin({
        top:20,left:15
      })
      .width(200)
      //*******************备注********************
      Flex({
        direction: FlexDirection.Row,alignItems: ItemAlign.Center
      }){
        Text("备注")
          .fontColor(Color.Black)
          .fontSize(20)
          .margin({
            right:15
          })
          .width(70)

        TextInput({ placeholder: '输入说明', text: this.payRemark })
          .type(InputType.Normal)
          .placeholderColor(Color.Gray)
          .placeholderFont({ size: 20, weight: 2})
          .enterKeyType(EnterKeyType.Search)
          .caretColor(Color.Green)
        //        .layoutWeight(8)
          .height(40)
          .width(300)
          .borderRadius('20px')
          .backgroundColor(Color.White)
          .onChange((value: string) => {
            this.payRemark = value
          })
      }
      .margin({
        top:20,left:15
      })
      .width(50)
      .height(50)
    }
    .height('100%')
    .layoutWeight(1)

  }
}
收入模块代码
@Component
struct Income{

  build(){
    Flex({direction: FlexDirection.Column}){
      Time()
      Remark()

    }
  }
}
时间模块
@Component
struct Time{
  @State inputTime:string = ''
  build(){
    Flex({
      direction: FlexDirection.Row,alignItems: ItemAlign.Center
    }){
      Text("时间")
        .fontColor(Color.Black)
        .fontSize(20)
        .margin({
          right:15
        })
      .width(70)

      TextInput({ placeholder: '2021', text: this.inputTime })
        .type(InputType.Normal)
        .placeholderColor(Color.Gray)
        .placeholderFont({ size: 20, weight: 2})
        .enterKeyType(EnterKeyType.Search)
        .caretColor(Color.Green)
        .width(300)
        .height(40)
        .borderRadius('20px')
        .backgroundColor(Color.White)
    }
    .margin({
      top:20,left:15
    })
    .width(200)
  }
}
备注模块
@Component
struct Remark{
  @State inputRemark:string = ''
  build(){
    Flex({
      direction: FlexDirection.Row,alignItems: ItemAlign.Center
    }){
      Text("备注")
        .fontColor(Color.Black)
        .fontSize(20)
        .margin({
          right:15
        })
      .width(70)

      TextInput({ placeholder: 'ceshe', text: this.inputRemark })
        .type(InputType.Normal)
        .placeholderColor(Color.Gray)
        .placeholderFont({ size: 20, weight: 2})
        .enterKeyType(EnterKeyType.Search)
        .caretColor(Color.Green)
//        .layoutWeight(8)
        .height(40)
        .width(300)
        .borderRadius('20px')
        .backgroundColor(Color.White)

    }
    .margin({
      top:20,left:15
    })
    .width(50)
    .height(50)

  }
}
3.设备认证
设备认证是依赖[DeviceManager]组件来实现的,详细代码参考源码RemoteDeviceModel.ets
1.创建DeviceManager实例
registerDeviceListCallback(callback) {
    if (typeof (this.#deviceManager) === 'undefined') {
      deviceManager.createDeviceManager('com.example.tictactoegame', (error, value) => {
        if (error) return
        this.#deviceManager = value;
        this.registerDeviceListCallback_(callback);
      });
    } else {
      this.registerDeviceListCallback_(callback);
    }
  }
2.查询可信设备列表
 var list = this.#deviceManager.getTrustedDeviceListSync();
    if (typeof (list) != 'undefined' && typeof (list.length) != 'undefined') {
      this.deviceList = list;
    }
3.注册设备上下线监听
this.#deviceManager.on('deviceStateChange', (data) => {
      switch (data.action) {
        case 0:
          this.deviceList[this.deviceList.length] = data.device;
          this.callback();
          if (this.authCallback != null) {
            this.authCallback();
            this.authCallback = null;
          }
          break;
        case 2:
          if (this.deviceList.length > 0) {
            for (var i = 0; i < this.deviceList.length; i++) {
              if (this.deviceList[i].deviceId === data.device.deviceId) {
                this.deviceList[i] = data.device;
                break;
              }
            }
          }
          this.callback();
          break;
        case 1:
          if (this.deviceList.length > 0) {
            var list = [];
            for (var i = 0; i < this.deviceList.length; i++) {
              if (this.deviceList[i].deviceId != data.device.deviceId) {
                list[i] = data.device;
              }
            }
            this.deviceList = list;
          }
          this.callback();
          break;
        default:
          break;
      }
    });
4.设备发现
this.#deviceManager.on('deviceFound', (data) => {
      for (let i = 0; i < this.discoverList.length; i++) {
        if (that.discoverList[i].deviceId === data.device.deviceId) {
          return;
        }
      }
      this.discoverList[this.discoverList.length] = data.device;
      this.callback();
    });
5.设备认证
authDevice(deviceInfo, callback){
    let extraInfo = {
      "targetPkgName": 'com.example.tictactoegame',
      "appName": 'com.example.tictactoegame',
      "appDescription": 'com.example.tictactoegame',
      "business": '0'
    };
    let authParam = {
      "authType": 1,
      "appIcon": '',
      "appThumbnail": '',
      "extraInfo": extraInfo
    };
    this.#deviceManager.authenticateDevice(deviceInfo, authParam, (err, data) => {
      if (err) {
        this.authCallback = null;
      } else {
        this.authCallback = callback;
      }
    });
  }
4.数据管理
[分布式数据管理]依赖@ohos.data.distributedData模块实现,详细参考源码RemoteDataManager.ets
1.导入该模块
import factory from '@ohos.data.distributedData';2.创建KVManager实例,用于管理数据库对象
 registerDataListCallback(callback) {
    let that = this
    if (this.kvManager == null) {
      try {
        const config = {
          userInfo: {
            userId: '0',
            userType: 0
          },
          bundleName: 'com.example.tictactoegame'
        }
        factory.createKVManager(config).then((manager) => {
          that.kvManager = manager
          that.registerDataListCallback_(callback)
        }).catch((err) => {
        })
      } catch (e) {
      }
    } else {
      this.registerDataListCallback_(callback)
    }
  }
3.创建并获取KVStore数据库
registerDataListCallback_(callback) {
    let that = this
    if (that.kvManager == null) {
      callback()
      return
    }
    if (that.kvStore == null) {
      try {
        let options =
          {
            createIfMissing: true,
            encrypt: false,
            backup: false,
            autoSync: true,
            kvStoreType: 1,
            securityLevel: 3
          }
        this.kvManager.getKVStore(this.STORE_ID, options).then((store) => {
          that.kvStore = store
          that._registerDataListCallback_(callback)
        }).catch((err) => {
        })
      } catch (e) {
      }
    } else {
      this._registerDataListCallback_(callback)
    }
  }
4.订阅指定类型的数据变更通知
 _registerDataListCallback_(callback) {
    let that = this
    if (that.kvManager == null) {
      callback()
      return
    }
    this.kvStore.on('dataChange', 1, function(data) {
      if (data) {
         that.arr = data.updateEntries
        callback()
      }
    })
  }
5.添加指定类型键值对到数据库
  dataChange(key, value) {
    let that = this
      try {
        that.kvStore.put(JSON.stringify(key), JSON.stringify(value)).then((data) => {
        }).catch((err) => {
          prompt.showToast({message:'put err:'+JSON.stringify(value)})
        })

      } catch (e) {
      }
  }
5.远程拉起设备app
使用[FeatureAbility]模块的startAbility接口拉起远程设备app
 startAbilityContinuation(deviceId) {
    let wantValue = {
      bundleName: 'com.example.tictactoegame',
      abilityName: 'com.example.tictactoegame.MainAbility',
      deviceId: deviceId,
      parameters: {
        uri: 'pages/Fight'
      }
    };
    featureAbility.startAbility({ want: wantValue }).then(() => {
      router.replace({ uri: 'pages/Fight' })
    });
  }
6.添加数据
新建一个账单数据 添加到分布式数据
this.remoteDataManager.dataChange("key2", JSON.stringify(this.TestKvData))在另一台设备监听并获取显示该条数据
 private onPageShow() {

    this.remoteDataManager.registerDataListCallback(() => {
      let arr = this.remoteDataManager.arr[0]
      this.strTest = arr.value.value
      this.ProjectData = JSON.parse(this.strTest)

  }
最后呢,很多开发朋友不知道需要学习那些鸿蒙技术?鸿蒙开发岗位需要掌握那些核心技术点?为此鸿蒙的开发学习必须要系统性的进行。
而网上有关鸿蒙的开发资料非常的少,假如你想学好鸿蒙的应用开发与系统底层开发。你可以参考这份资料,少走很多弯路,节省没必要的麻烦。由两位前阿里高级研发工程师联合打造的《鸿蒙NEXT星河版OpenHarmony开发文档》里面内容包含了(ArkTS、ArkUI开发组件、Stage模型、多端部署、分布式应用开发、音频、视频、WebGL、OpenHarmony多媒体技术、Napi组件、OpenHarmony内核、Harmony南向开发、鸿蒙项目实战等等)鸿蒙(Harmony NEXT)技术知识点
如果你是一名Android、Java、前端等等开发人员,想要转入鸿蒙方向发展。可以直接领取这份资料辅助你的学习。下面是鸿蒙开发的学习路线图。
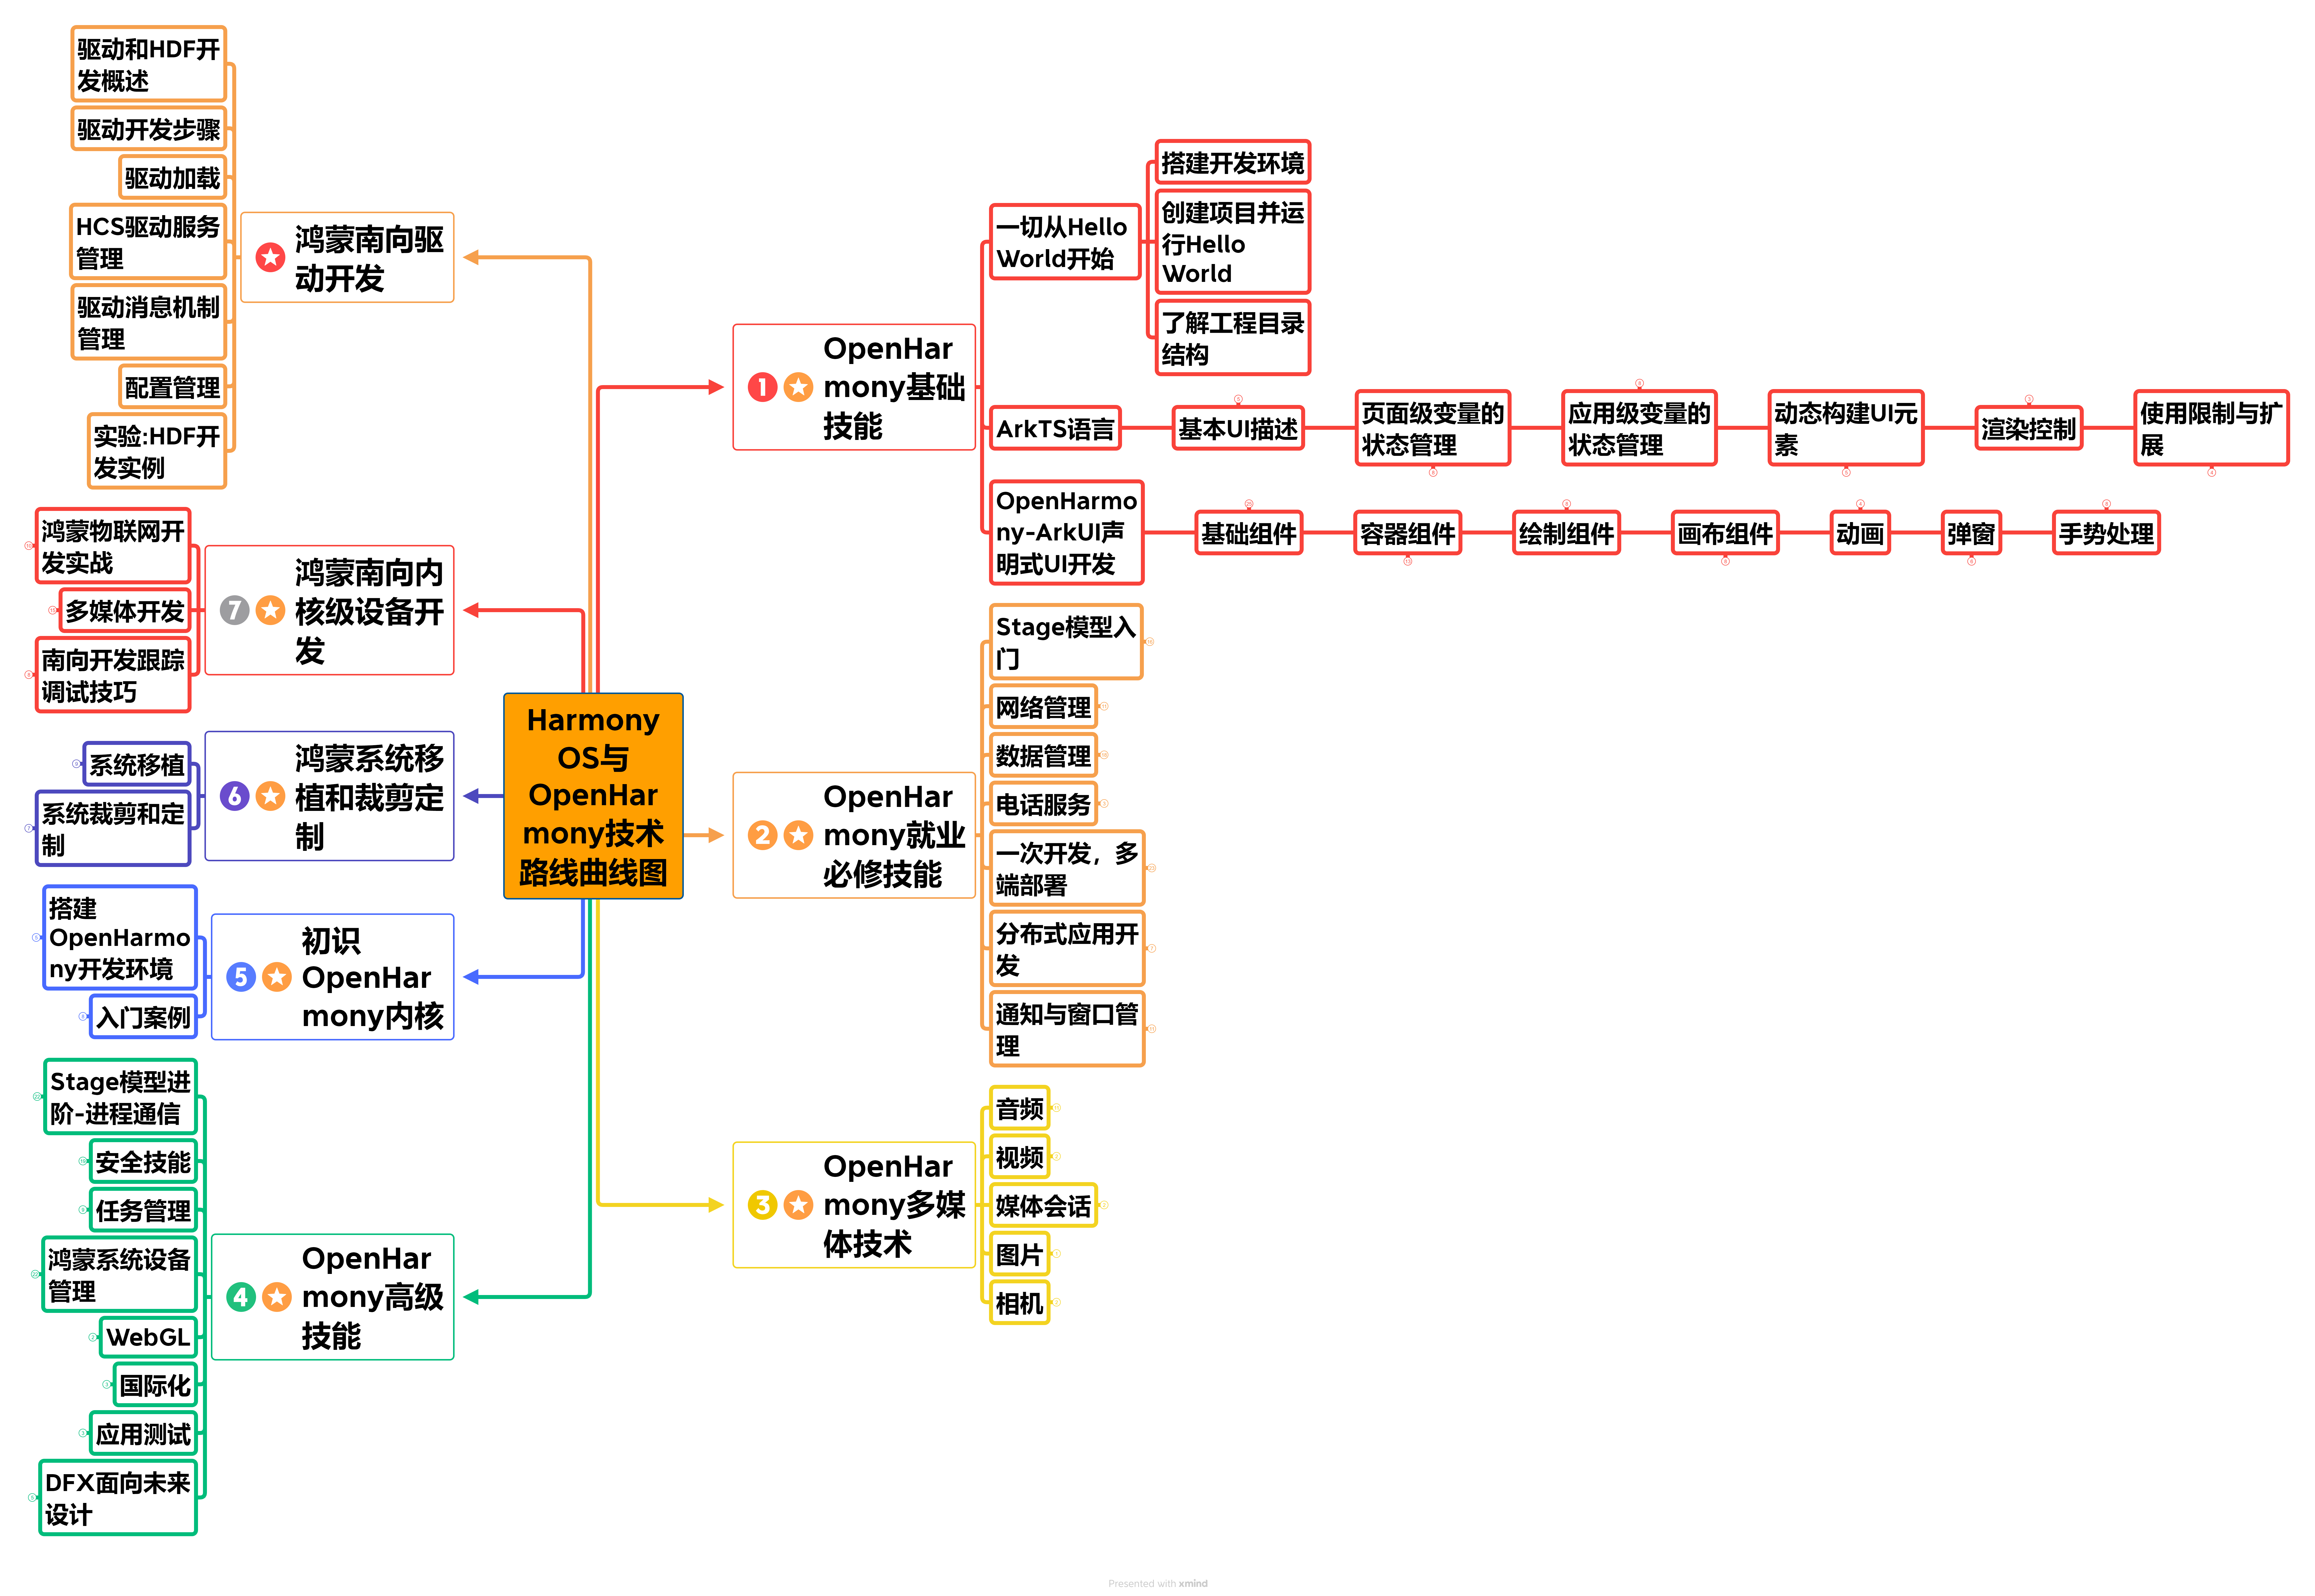
高清完整版请点击→《鸿蒙NEXT星河版开发学习文档》
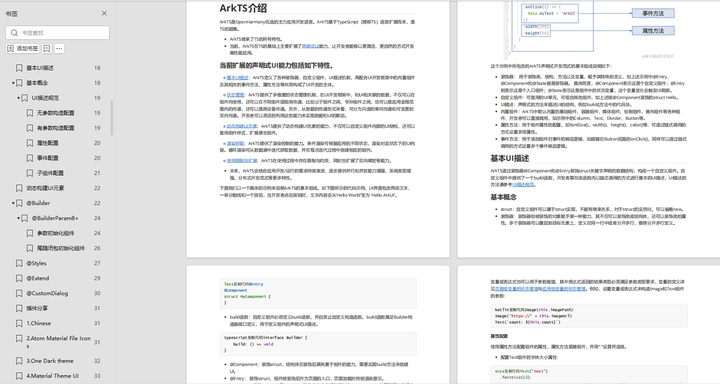
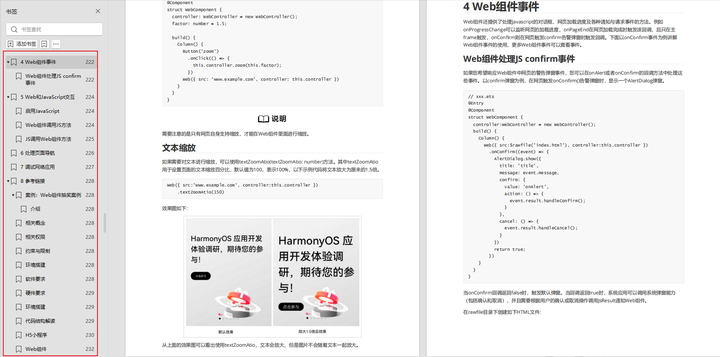
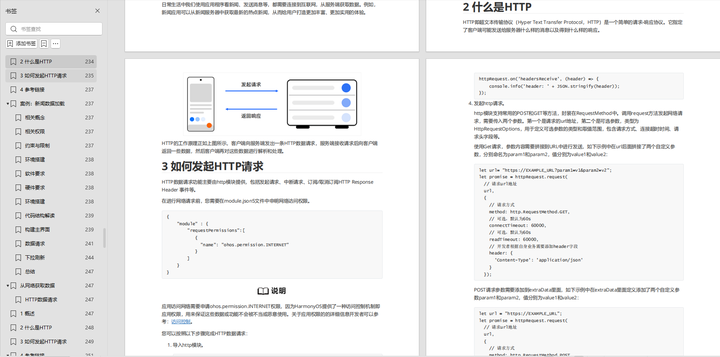
针对鸿蒙成长路线打造的鸿蒙学习文档。话不多说,我们直接看详细资料鸿蒙(OpenHarmony )学习手册(共计1236页)与鸿蒙(OpenHarmony )开发入门教学视频,帮助大家在技术的道路上更进一步。
《鸿蒙 (OpenHarmony)开发学习视频》

《鸿蒙生态应用开发V2.0白皮书》
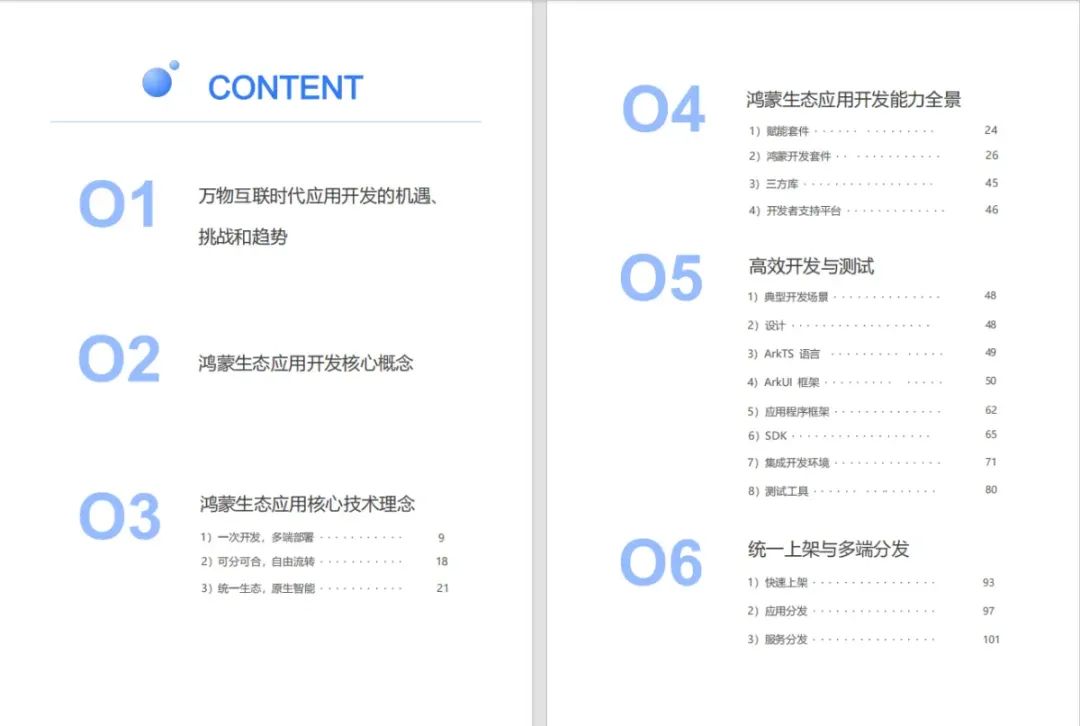
《鸿蒙 (OpenHarmony)开发基础到实战手册》
获取这份鸿蒙星河版学习资料,请点击→《鸿蒙NEXT星河版开发学习文档》
OpenHarmony北向、南向开发环境搭建
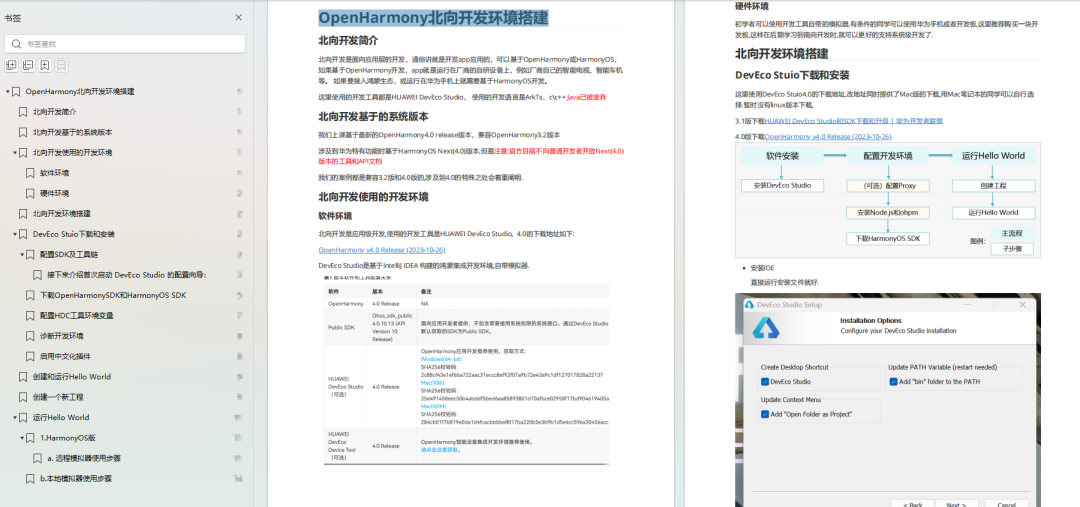
《鸿蒙开发基础》
-
ArkTS语言
-
安装DevEco Studio
-
运用你的第一个ArkTS应用
-
ArkUI声明式UI开发
-
.……
《鸿蒙开发进阶》
-
Stage模型入门
-
网络管理
-
数据管理
-
电话服务
-
分布式应用开发
-
通知与窗口管理
-
多媒体技术
-
安全技能
-
任务管理
-
WebGL
-
国际化开发
-
应用测试
-
DFX面向未来设计
-
鸿蒙系统移植和裁剪定制
-
……
《鸿蒙开发实战》
-
ArkTS实践
-
UIAbility应用
-
网络案例
-
……
获取这份鸿蒙星河版学习资料,请点击→《鸿蒙NEXT星河版开发学习文档》
总结
鸿蒙—作为国家主力推送的国产操作系统。部分的高校已经取消了安卓课程,从而开设鸿蒙课程;企业纷纷跟进启动了鸿蒙研发。
并且鸿蒙是完全具备无与伦比的机遇和潜力的;预计到年底将有 5,000 款的应用完成原生鸿蒙开发,未来将会支持 50 万款的应用。那么这么多的应用需要开发,也就意味着需要有更多的鸿蒙人才。鸿蒙开发工程师也将会迎来爆发式的增长,学习鸿蒙势在必行!

