- 有任何环境问题,可以参考我的文章 Appium自动化测试<一>, Appium自动化测试<二>
- 有任何定位问题、触屏操作、等待问题、Toast 信息操作问题、手机操作问题及H5页面的操作请参考我的文章:Appium自动化测试<三>
- 补充遇到的问题请参照我的 Appium自动化测试<四>补充
pyAppium 项目介绍
pyAppium是python语言,基于PO模式的pytest、Appium二次封装的Android自动化框架,多进程方式在多台手机上同时执行测试,自动获取已连接设备信息,自动启动多个appium服务,同一套测试用例在不同手机上执行,用例执行失败自动截图、收集报错信息,pytest-testreport 插件生成测试报告。
pyAppium 实现功能介绍:
- 自动启动appium server和杀掉appium server
- 自动获取电脑连接设备信息,如设备版本、设备udid
- 自动检测端口是否可用、释放占用端口
- 自动获取测试APP应用相关信息,如:appPackage、launchable_activity
- 自动安装APP和卸载APP
- 测试用例无需配置,自动获取用例执行,测试人员只需编写相关case
- 用例执行失败自动截图、收集错误日志信息,自动加到测试报告对应case下面
- 启动一次APP,执行所有测试用例,缩短测试用例执行间隔,提高测试执行效率
- 多进程方式在多台手机上同时执行测试,大幅提高测试效率
- 自动查找定位类型,进行定位,降低测试人员要求,减轻工作量,提高写用例的效率
测试环境
win10 64 pycharm2022.1
python 3.7.0 及以上
appium sever & nodejs & 手机或者模拟器 & Appium-Python-Client=2.7.1 & JDK 请参照我的环境安装文章:
Appium自动化测试<一>
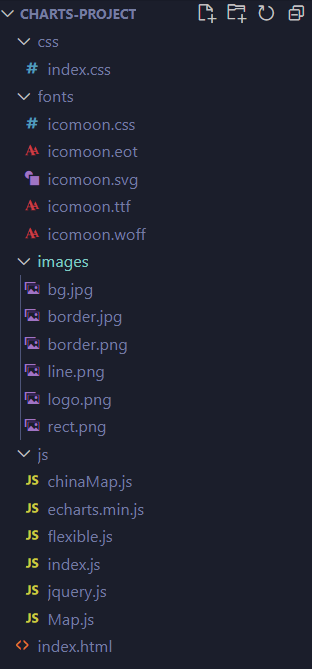
项目结构说明:
- app:存放测试包(微信).apk
- common:一些公共的方法
- all_path:存放文件路径
- app_driver:存放driver
- app_info:app的一些卸载,安装,获取包名等方法
- appium_auto_server:存放cmd命令操作app方法
- Base:基本的driver操作
- data_util:存放yaml方法
- config:存放yaml配置文件
caps.yml:存放配置文件 - outputs:生成输出路径
- appium_log:生成 appium 服务路径
- logs:输出 log 路径
- pageobjects:存放单元测试用例文件
- unit_page:测试用例
- reports:生成html报告
- testcase:运行pytest路径
- conftest :pytest配置文件
- test_case:pytest 测试用例路径
- main:运行pytest
- pytest.ini:pytest 执行配置逻辑
- requirements.txt:安装项目依赖包:pip install -r requirements.txt
使用说明
启动项目正常运行前提:
-
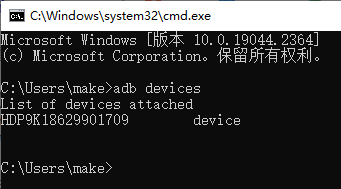
.有手机正常已经连接电脑:CMD 输入 adb devices 并且有返回 pid
-
-
本demo基于微信测试:请先登录上微信,把微信最新版本的APP.apk包,放到项目目录app下。
-
启动项目:直接运行main.py文件即可。
-
有任何环境问题,可以参考我的文章 Appium自动化测试<一>, Appium自动化测试<二>
-
有任何定位问题、触屏操作、等待问题、Toast 信息操作问题、手机操作问题及H5页面的操作请参考我的文章:Appium自动化测试<三>
关键代码说明
启动入口说明 main.py
from multiprocessing import Pool
import pytest
from common.app_info import get_device_infos


def main(device_info):
    command_line = ["--cmdopt={}".format(device_info)]
    pytest.main(command_line)


if __name__ == '__main__':
    device_info = get_device_infos() # 获取连接设备信息
    print("++++++++++++++++++++++++++++++++", device_info)
    with Pool(len(device_info)) as pool: # 查找多台设备,顺序执行用例
        pool.map(main, device_info)
        pool.close()
        pool.join()
- common:一些公共的方法
- all_path:存放文件路径
- app_driver:存放driver
- app_info:app的一些卸载,安装,获取包名等方法
- appium_auto_server:存放cmd命令操作app方法
- Base:基本的driver操作
- data_util:存放yaml方法
all_path.py 文件
import os

base_path = os.path.dirname(os.path.dirname(__file__))

appPath = os.path.join(base_path, 'app')
appium_server_logPath = os.path.join(base_path, 'outputs', 'appium_log')
configPath = os.path.join(base_path, 'config')
logPath = os.path.join(base_path, 'outputs', 'logs')
picturePath = os.path.join(base_path, 'outputs', 'picture')
reportsPath = os.path.join(base_path, 'outputs', 'reports')
app_driver.py 文件
import time
from common.all_path import configPath
from common.app_info import *
from common.data_util import read_yaml
from common.appium_auto_server import open_appium, check_port, close_appium
from common.app_info import get_app_name, get_app_launchable_activity, get_app_package_name
from appium import webdriver
import logging


class AppDriver:

    def __init__(self, device_info):
        self.device_info = eval(device_info)

    def driver(self):
        app_path = os.path.join(appPath, get_app_name(appPath))
        desired_caps = read_yaml(os.path.join(configPath, "caps.yml"))['desired_caps']
        desired_caps['platformVersion'] = self.device_info['platform_version']  # 版本信息
        desired_caps['deviceName'] = self.device_info['device']
        desired_caps['appPackage'] = get_app_package_name().replace("'", '')
        desired_caps['appActivity'] = get_app_launchable_activity().replace("'", '')
        desired_caps['app'] = app_path
        desired_caps["udid"] = self.device_info['device']
        desired_caps["systemPort"] = self.device_info["system_port"]  # 系统端口号
        driver = webdriver.Remote(f"http://127.0.0.1:{self.device_info['server_port']}/wd/hub", desired_caps)
        return driver

    def switch_appium(self):
        cmd = "appium -a 127.0.0.1 -p {0} -U {1} --no-reset".format(self.device_info["server_port"],self.device_info["device"])
        if check_port(self.device_info["server_port"]) == 0:
            # logging.info('检查并开启appium服务')
            open_appium(cmd, self.device_info["server_port"])
        else:
            close_appium()
            logging.info('定位到已经存在appium服务, 关闭再开启appium服务')
            time.sleep(3)
            open_appium(cmd, self.device_info["server_port"])
app_info.py 文件
import subprocess
import logging
import os
from common.all_path import appPath


def exec_cmd(cmd) -> str:
    result = os.popen(cmd).read()
    return result


def get_app_name(file_dir) -> str:
    for root, dirs, files in os.walk(file_dir):
        files = [file for file in files if file.endswith(".apk")]
        if len(files) == 1:
            return files[0]
        else:
            raise FileNotFoundError("{}目录下没有测试包或者存在多个测试包 ".format(file_dir))


def get_app_package_name() -> str:
    cmd = "aapt dump badging {} | findstr package".format(os.path.join(appPath, get_app_name(appPath)))
    result = exec_cmd(cmd)
    if "package" in result:
        package_name = result.strip().split(" ")[1].split('=')[1]
        return package_name
    else:
        raise NameError("未获取到package name")


def get_app_launchable_activity() -> str:
    cmd = "aapt dump badging {} | findstr launchable".format(os.path.join(appPath, get_app_name(appPath)))
    result = exec_cmd(cmd)
    if "launchable" in result:
        launchable_activity = result.strip().split(" ")[1].split('=')[1].replace("label", '')
        return launchable_activity
    else:
        raise NameError("未获取到launchable activity")


def get_devices_version(device: str) -> str:
    if not isinstance(device, str):
        raise Exception("device type is should str..")
    result = exec_cmd("adb -s {} shell getprop ro.build.version.release".format(device))
    result = result.strip()
    if "error" not in result:
        return result
    else:
        raise Exception("获取设备系统版本失败,无法进行正常测试")


def get_all_devices() -> list:
    result = exec_cmd('adb devices')
    result = result.strip().split(" ")[3].replace("\n", '').replace("\t", ''). \
        replace("attached", '').split('device')
    result.remove('')
    if len(result) == 0:
        raise Exception("电脑未连接设备信息,无法进行正常测试")
    return result


def get_device_infos():
    """ [{'platform_version': '8.1.0', 'server_port': 4723, 'system_port': 8200, 'device': 'HDP9K18629901709'}] """
    device_infos = []
    devices = get_all_devices()
    for i in range(len(devices)):
        device_dict = {"platform_version": get_devices_version(devices[i]), "server_port": 4723 + i * 2,
                       "system_port": 8200 + i * 1, "device": devices[i]}
        device_infos.append(device_dict)

    if len(device_infos) < 1:
        raise Exception("当前电脑未连接设备信息。。。")

    return device_infos


def uninstall_app(device_list: list) -> None:
    """ 卸载 app 命令:adb -s 127.0.0.1:HDP9K18629901709 uninstall "com.xkw.client """
    if not isinstance(device_list, list):
        raise Exception("device_list is should list!")

    for device_info in device_list:
        cmd = 'adb -s {} uninstall "{}"'.format(device_info.get("device").split(':')[-1],
                                                          str(get_app_package_name())).replace("'", '')
        logging.info("开始卸载设备上应用:{}".format(cmd))
        exec_cmd(cmd)


def install_app():
    """ 下载app """
    subprocess.Popen('chcp 65001', shell=True)
    cmd = 'adb install {}'.format(os.path.join(appPath, get_app_name(appPath)))
    logging.info("开始下载设备上应用:{}".format(cmd))
    subprocess.Popen(cmd, shell=True, stderr=subprocess.PIPE)


def check_kill_appium(port):
    """ 备选方案 杀掉appium 在端口只有1个的时候作用 """
    cmd = 'netstat -o -n -a | findstr {}'.format(port['server_port'])
    result = exec_cmd(cmd)
    if "LISTENING" in result:
        package_name = result.strip().split(" ")[-1]
        cmds = 'taskkill /f /pid {}'.format(package_name)
        result = exec_cmd(cmds)
        if 'PID' in result:
            logging.info('释放端口: {} 成功'.format(result))
            return result
        else:
            raise NameError("未成功: 终止 PID 为 {}  的进程".format(result))
    else:
        raise NameError("appium服务未开启")


def kill_app():
    """ 备选方案 杀掉appium 在端口只有1个的时候作用  """
    device_dict = get_device_infos()[-1]
    cmd = 'netstat -o -n -a | findstr {}'.format(device_dict['server_port'])
    result = exec_cmd(cmd)
    if "LISTENING" in result:
        cmds = 'taskkill /f /t /im node.exe'
        result = exec_cmd(cmds)
        if 'PID' in result:
            return result
        else:
            raise NameError("未成功: 终止 PID 为 {}  的进程".format(result))
    else:
        raise NameError("appium服务未开启")
appium_auto_server.py 文件
import subprocess
import socket, os, datetime
from common.all_path import logPath, appium_server_logPath
from common.app_info import exec_cmd


def open_appium(cmd, port):
    """
    function : 命令启动 appium server
    :param cmd: appium server 启动命令
    :param port: appium server 启动端口
    :return: None
    """
    subprocess.Popen('chcp 65001', shell=True)
    if not os.path.exists(appium_server_logPath):
        os.makedirs(appium_server_logPath)
    now = datetime.datetime.now().strftime('%Y_%m_%d_%H_%M_%S')

    release_port(port)
    subprocess.Popen(cmd, shell=True, stdout=open(appium_server_logPath+"/"+now+'--'+str(port)+'.log', "a"),
                     stderr=subprocess.STDOUT)


def close_appium():
    """
    function: 关闭appium 服务器
    :return: None
    """
    # os.system('chcp 65001')
    # os.system('taskkill /f /im node.exe')STDOUT
    subprocess.Popen('chcp 65001', shell=True)
    cmd = "taskkill /f /im node.exe"
    subprocess.Popen(cmd, shell=True,stderr=subprocess.PIPE)


def check_port(port):
    """
    function: 检测端口是否被占用,如果sk.connect连接成功, 表示端口已经被占用,如果连接失败,则表示端口未被占用
    :param host: 主机地址:'127.0.0.1'
    :param port: 端口: 4723
    :return:
    """
    subprocess.Popen('chcp 65001', shell=True)
    sk = socket.socket(socket.AF_INET, socket.SOCK_STREAM)
    try:
        sk.connect(('127.0.0.1', port))
        sk.shutdown(2)
    except Exception as msg:
        return 0
    else:
        return 1


def release_port(port):
    """
    :param port: 需要释放的端口
    :return: 返回True netstat -ano| findstr 4723
    """
    cmd = "netstat -ano| findstr {}".format(port)
    result = exec_cmd(cmd)
    if "LISTENING" and str(port) in result:
        pid = result.strip().split(" ")[-1]
        cmd = "taskkill /f /pid {}".format(pid)
        # exec_cmd(cmd)
        subprocess.Popen(cmd, shell=True)
        return True
    else:
        return False


def close_appium_server(port) -> None:
    # windows
    # 获取appium pid
    plist = subprocess.getstatusoutput("netstat -ano|findstr %s" % port)[1].split("\n")
    r = []
    for pinfo in plist:
        r.append(pinfo.split()[-1])
    pid = max(r)
    # 杀appium进程
    while 1:
        print(f"扫描appium进程ID {pid}...")
        if pid:
            print(f"扫描到appium进程ID: {pid}, 执行命令 taskkill /PID {pid} /F 杀掉进程!")
            subprocess.Popen("taskkill /PID %s /F" % pid, shell=True)
            break
    print("----t1脚本执行结束----")
Base.py 文件
import os
from appium.webdriver.common.mobileby import MobileBy
import logging
from selenium.webdriver.common.keys import Keys
from appium.webdriver.common.touch_action import TouchAction
from selenium.webdriver.support import expected_conditions as EC
from selenium.webdriver.support.wait import WebDriverWait
import datetime
from common.all_path import picturePath
from selenium.common.exceptions import NoSuchElementException  # 找不到元素引发


class BasePage:

    def __init__(self, driver):
        self.driver = driver

    def get_screenshot(self, doc):
        """ 截图 """
        logging.info("开始进行截图..")
        if not os.path.exists(picturePath):
            os.makedirs(picturePath)
        now = datetime.datetime.now().strftime('%Y_%m_%d_%H_%M_%S')
        file = "{}".format(doc) + '_' + now + '.png'
        pic_name = os.path.join(picturePath, file)
        self.driver.get_screenshot_as_file(pic_name)
        logging.info("截图成功!图片路径为:{}".format(pic_name))

    def result_assert(self, res, expected, doc=''):
        try:
            assert res == expected
        except AssertionError:
            self.get_screenshot(doc)
            raise

    def find_loc_by_type(self, search_type, value):
        try:
            loc = (search_type, value)
            WebDriverWait(self.driver, 5).until(EC.visibility_of_element_located(loc))
            return loc
        except Exception as e:
            # logging.info(e)
            return None

    def find_visibility(self, value):
        try:
            logging.info("页面开始查找元素 {} ".format(value))
            loc = None
            loc = loc if loc is not None else self.find_loc_by_type(MobileBy.ID, value)
            loc = loc if loc is not None else self.find_loc_by_type(MobileBy.NAME, value)
            loc = loc if loc is not None else self.find_loc_by_type(MobileBy.ANDROID_UIAUTOMATOR, value)
            loc = loc if loc is not None else self.find_loc_by_type(MobileBy.ACCESSIBILITY_ID, value)
            loc = loc if loc is not None else self.find_loc_by_type(MobileBy.CLASS_NAME, value)
            loc = loc if loc is not None else self.find_loc_by_type(MobileBy.XPATH, value)
            if loc is None:
                raise Exception(logging.warning("NotFound:" + value))
            logging.info("页面查找元素 {} 成功!".format(value))
            return loc
        except Exception as e:
            logging.info('定位元素 {} 出现未知错误! 错误为:{}'.format(value, e))
            return None

    def find_element_by_type(self, search_type, value):
        try:
            ele = self.driver.find_element(search_type, value)
            return ele
        except Exception as e:
            logging.info(e)
            return None

    def find_ele(self, value):
        loc = self.find_visibility(value)
        try:
            ele = None
            ele = ele if ele is not None else self.find_element_by_type(*loc)
            return ele
        except Exception as e:
            # return None
            raise Exception(logging.info("%f" % e))

    def ele_clear(self, ele):
        try:
            self.find_ele(ele).send_keys(Keys.CONTROL, 'a')
            self.find_ele(ele).send_keys(Keys.BACK_SPACE)
            return 0
        except Exception as e:
            logging.info(e)
            return 1

    # 输入
    def ele_input(self, ele, value, doc=''):
        try:
            logging.info("{} 页面输入框输入{}".format(doc, value))
            self.ele_clear(self.find_ele(ele))
            self.find_ele(ele).send_keys(value)
            logging.info("{} 页面输入框输入{}成功!".format(doc, value))
            return 0
        except Exception as e:
            logging.error('{} 定位元素 {}出现未知错误! 错误为:{}'.format(ele, doc, e))
            return 1

    # 点击
    def ele_click(self, ele, doc=''):
        try:
            self.find_ele(ele).click()
            logging.info('点击屏幕 {}'.format(doc))
            return 0
        except Exception as e:
            logging.info("%f" % e)
            return 1

    # 触屏轻按
    def ele_perform(self, ele, doc):
        try:
            TouchAction(self.driver).tap(self.find_ele(ele)).wait(200).perform()
            logging.info('轻按屏幕 {} 成功'.format(doc))
            return 0
        except Exception as e:
            logging.error("轻按屏幕失败! 错误为:{}".format(e))
            self.get_screenshot(doc)
            return 1

    def ele_xy_perform(self, x, y):
        try:
            TouchAction(self.driver).tap(x=x, y=y).wait(200).perform()
            logging.info('坐标轻按屏幕成功')
            return 0
        except Exception as e:
            logging.error("坐标轻按屏幕失败! 错误为:{}".format(e))
            return 1
data_util.py 文件
import yaml


def read_yaml(path):
    with open(path,'r+',encoding='utf-8') as file:
        dict_data = yaml.load(stream=file, Loader=yaml.FullLoader)
        return dict_data
- config:存放yaml配置文件
caps.yml:存放配置文件
caps.yml 文件
desired_caps:
  platformName: Android
  platformVersion: 8.1
  deviceName: ye_shen_Android
  appPackage: com.tencent.mm
  appActivity: com.tencent.mm.ui.LauncherUI
  noReset: True
  autoAcceptAlerts: True
  newCommandTimeout: 240
- pageobjects:存放单元测试用例文件
- unit_page:测试用例
unit_page.py 文件
from common.Base import BasePage


class PublicPage(BasePage):
    # 特有的属性
    # 点击我的
    el_loc = 'new UiSelector().resourceId("com.tencent.mm:id/j5t")'
    loc = 'new UiSelector().text("我").resourceId("com.tencent.mm:id/f2s")'
    # 点击服务
    el_loc1 = 'new UiSelector().text("服务")'

    def login(self):
        # el = self.find_ele(self.loc)
        self.ele_perform(self.loc, '点击我的')
        # self.ele_xy_perform(540, 1255)

        # ele = self.find_ele(self.el_loc1)
        self.ele_perform(self.el_loc1, '点击服务')
- testcase:运行pytest路径
- conftest :pytest配置文件
- test_case:pytest 测试用例路径
conftest.py 文件
from common.app_driver import AppDriver
import pytest, os, time, datetime
from common.all_path import logPath
from common.appium_auto_server import close_appium


base_driver = None


def pytest_addoption(parser):
    parser.addoption("--cmdopt", action="store", default="device_info", help=None)


@pytest.fixture(scope="session")
def cmd_opt(request):
    return request.config.getoption("--cmdopt")


#  log输出文件目录
def pytest_configure(config):
    now = datetime.datetime.now().strftime('%Y_%m_%d_%H_%M_%S')
    logfile_name = f'{now}.log'
    config.option.log_file = os.path.join(config.rootdir, logPath, logfile_name)


@pytest.fixture(scope='session')
def common_driver(cmd_opt):
    global base_driver
    base_driver = AppDriver(cmd_opt)
    base_driver.switch_appium()  # 控制打开appium开关
    driver = base_driver.driver()
    yield driver
    time.sleep(5)
    driver.close_app()  # 退出App
    driver.quit()  # 退出驱动
    close_appium()
test_case.py 文件
from pageobjects.unit_page import PublicPage
from common.Base import BasePage


class TestCase:

    def test_login(self, common_driver):
        driver = common_driver
        base = BasePage(driver)
        login_page = PublicPage(driver)
        login_page.login()
- main :运行pytest
- pytest.ini:pytest 执行配置逻辑
- requirements.txt:安装项目依赖包:pip install -r requirements.txt
main.py 文件
from multiprocessing import Pool
import pytest
from common.app_info import get_device_infos


def main(device_info):
    command_line = ["--cmdopt={}".format(device_info)]
    pytest.main(command_line)


if __name__ == '__main__':
    device_info = get_device_infos()
    print("++++++++++++++++++++++++++++++++",device_info)
    with Pool(len(device_info)) as pool:
        pool.map(main, device_info)
        pool.close()
        pool.join()
pytest.ini 文件
[pytest]

filterwarnings =
    # Appium team is aware of deprecation warning - https://github.com/appium/python-client/issues/680
    ignore::DeprecationWarning

# addopts = -s -v --html=./outputs/reports/report.html --self-contained-html --alluredir=allure_files
addopts = -vs --report=_report.html --template=2 --title=Appium_test_report --tester=QA --desc=WeChatTest

testpaths = testcase/

python_functions = test_* check_*
python_files = test_* *_test check_*
python_classes = *Test Test* *Suite

markers =
    smoke:smoke case
    high:high level case

log_cli=1
log_cli_level=ERROR
log_cli_date_format=%Y-%m-%d-%H-%M-%S
log_cli_format=%(asctime)s-%(filename)s-%(module)s-%(funcName)s-%(lineno)d-%(levelname)s-%(message)s


log_file_level=INFO
log_file_date_format=%Y-%m-%d %H:%M:%S
log_file_format=%(asctime)s %(filename)s %(module)s %(funcName)s %(lineno)d %(levelname)s: %(message)s
requirements.txt 文件
allure-pytest==2.8.10
Appium-Python-Client==2.7.1
pytest==6.2.5
PyYAML==5.3
requests==2.22.0
selenium==4.7.2
pytest-testreport==1.1.6
执行日志
- outputs/logs/
2023-01-11 21:19:01 Base.py Base find_visibility 51 INFO: 页面开始查找元素 new UiSelector().text("我").resourceId("com.tencent.mm:id/f2s")
2023-01-11 21:19:29 Base.py Base find_visibility 61 INFO: 页面查找元素 new UiSelector().text("我").resourceId("com.tencent.mm:id/f2s") 成功!
2023-01-11 21:19:31 Base.py Base ele_perform 120 INFO: 轻按屏幕 点击我的 成功
2023-01-11 21:19:31 Base.py Base find_visibility 51 INFO: 页面开始查找元素 new UiSelector().text("服务")
2023-01-11 21:19:39 Base.py Base find_visibility 61 INFO: 页面查找元素 new UiSelector().text("服务") 成功!
2023-01-11 21:19:41 Base.py Base ele_perform 120 INFO: 轻按屏幕 点击服务 成功
- outputs/appium_log/
[35m[Appium][39m Welcome to Appium v1.22.3
[35m[Appium][39m Non-default server args:
[35m[Appium][39m   address: 127.0.0.1
[35m[Appium][39m   udid: HDP9K18629901709
[35m[Appium][39m   noReset: true
[35m[Appium][39m Deprecated server args:
[35m[Appium][39m   [31m-U[39m => --default-capabilities
[35m[Appium][39m   [31m--no-reset[39m => --default-capabilities
[35m[Appium][39m Default capabilities, which will be added to each request unless overridden by desired capabilities:
[35m[Appium][39m   udid: HDP9K18629901709
[35m[Appium][39m   noReset: true
[35m[Appium][39m Appium REST http interface listener started on 127.0.0.1:4723
[debug] [35m[HTTP][39m Request idempotency key: 3eb0c171-38f6-4e40-9c92-c0f73d8959b1
[35m[HTTP][39m [37m-->[39m [37mPOST[39m [37m/wd/hub/session[39m
[35m[HTTP][39m [90m{"capabilities":{"firstMatch":[{}],"alwaysMatch":{"platformName":"Android","appium:platformVersion":"8.1.0","appium:deviceName":"HDP9K18629901709","appium:appPackage":"com.tencent.mm","appium:appActivity":"com.tencent.mm.ui.LauncherUI","appium:noReset":true,"appium:autoAcceptAlerts":true,"appium:newCommandTimeout":240,"appium:app":"E:\\joinkwang\\Documents\\demo\\demo_appium_Ui\\app\\weixin.apk","appium:udid":"HDP9K18629901709","appium:systemPort":8200}}}[39m
[debug] [35m[W3C][39m Calling AppiumDriver.createSession() with args: [null,null,{"firstMatch":[{}],"alwaysMatch":{"platformName":"Android","appium:platformVersion":"8.1.0","appium:deviceName":"HDP9K18629901709","appium:appPackage":"com.tencent.mm","appium:appActivity":"com.tencent.mm.ui.LauncherUI","appium:noReset":true,"appium:autoAcceptAlerts":true,"appium:newCommandTimeout":240,"appium:app":"E:\\joinkwang\\Documents\\demo\\demo_appium_Ui\\app\\weixin.apk","appium:udid":"HDP9K18629901709","appium:systemPort":8200}}]
[debug] [35m[BaseDriver][39m Event 'newSessionRequested' logged at 1673443115793 (21:18:35 GMT+0800 (中国标准时间))
[35m[Appium][39m
.................................................................
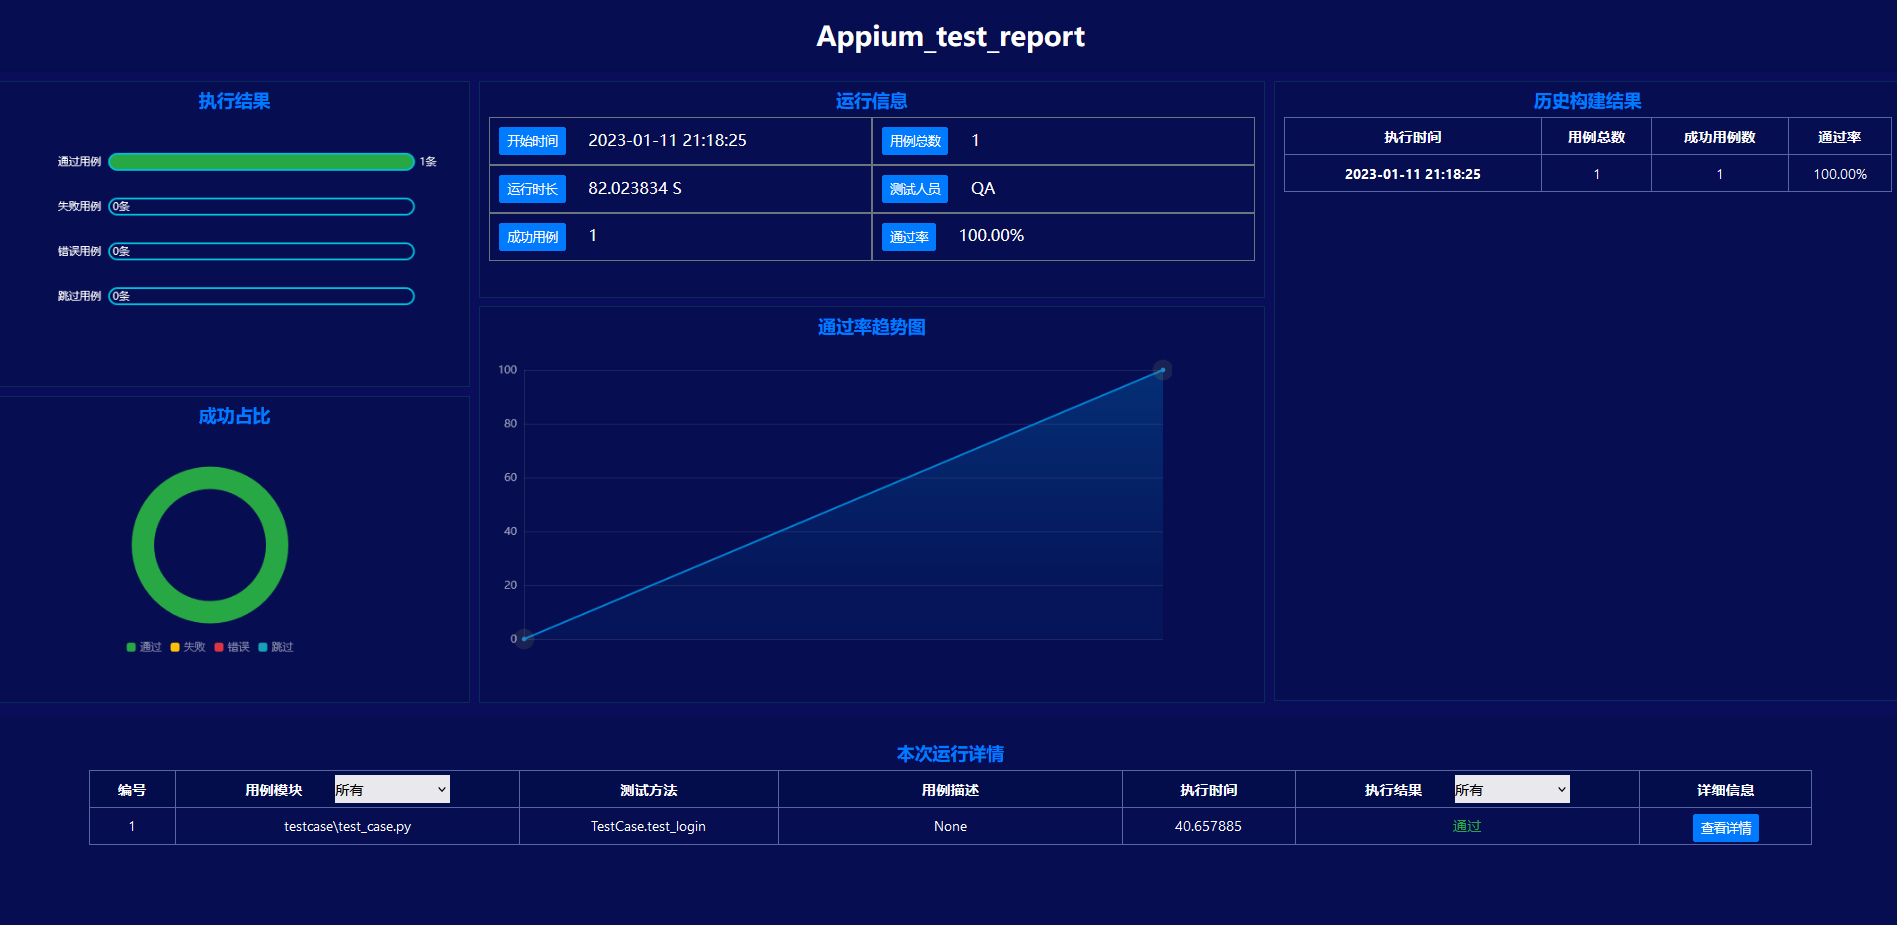
测试报告
以上为内容纯属个人理解,如有不足,欢迎各位大神指正,转载请注明出处!









![[LeetCode算法->双指针]](https://img-blog.csdnimg.cn/img_convert/74e34e0780f0455c84af82854701d3a4.png)
