核心逻辑
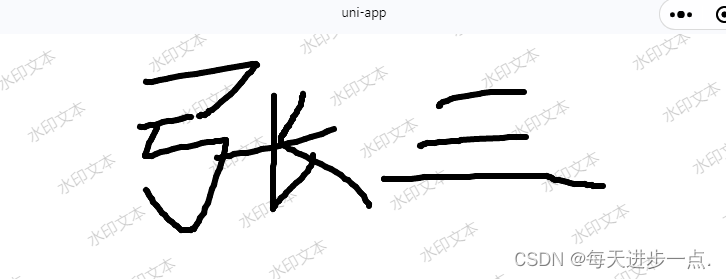
先将坐标系中心点通过ctx.translate(canvasw / 2, canvash / 2) 平移到canvas 中心,再旋转设置水印
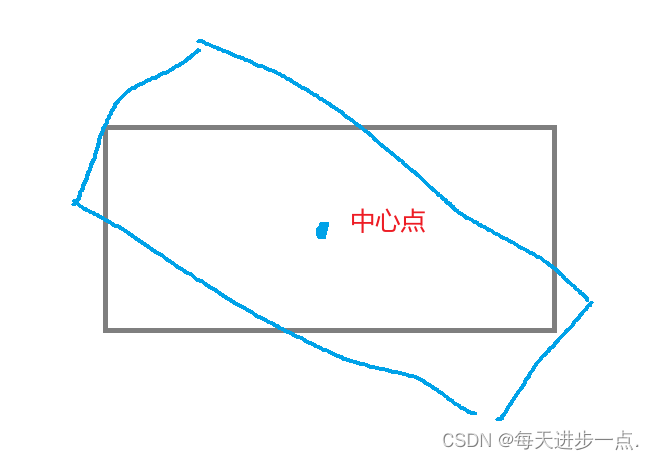
假如不 translate 直接旋转,则此时的旋转中心为左上角原点,此时旋转示意如图所示

当translate到中心点之后再旋转,此时则会变成这样
当 ctx.translate(x, y) 之后,实际上是将
坐标系横移
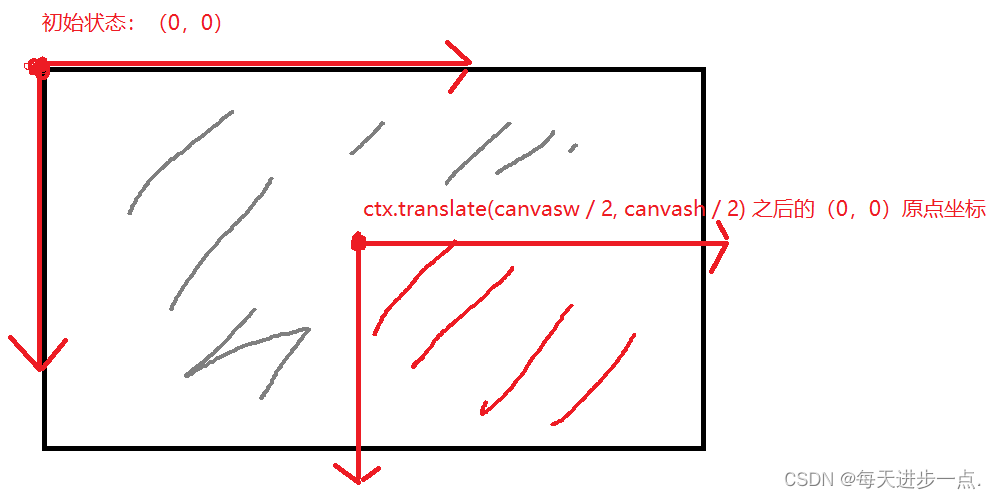
此时ctx.fillText('水印文本', 0, 0) 的位置如图显示

我们循环从 -5 开始循环,此时得到的坐标点则为四个象限内均有
for (var i = -5; i < 5; i++) {
 for (var j = -5; j < 5; j++) {
   const x = i * 140
   const y = j * 60
   this.canvasCtx.fillText('水印文本', x, y)
 }
}
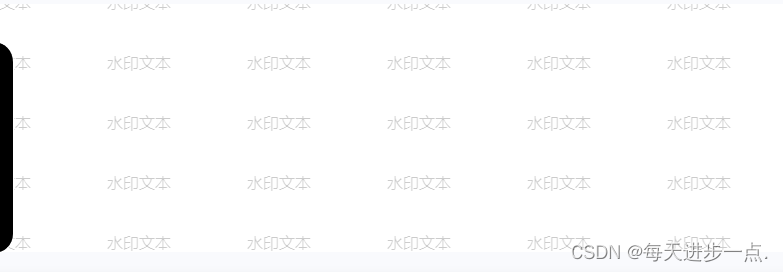
此时,我们再进行旋转,ctx.rotate((-30 * Math.PI) / 180),注意,此时是 -30 度

其他:设置水印前需要存储一下状态 ctx.save(),水印设置完成后 ctx.restore()
水印完整代码
// 设置水印文字
handleWaterMark: function (canvasw, canvash, text = '水印文本') {
  // 设置白色背景
  this.canvasCtx.fillStyle = '#fff'
  this.canvasCtx.fillRect(0, 0, canvasw, canvash)
  // 设置水印文字
  // 存储状态
  this.canvasCtx.save()
  this.canvasCtx.font = '16px sans-serif'
  this.canvasCtx.fillStyle = 'rgba(0, 0, 0, 0.2)'
  this.canvasCtx.translate(canvasw / 2, canvash / 2)
  this.canvasCtx.rotate((-30 * Math.PI) / 180)
  // 绘制水印
  for (var i = -5; i < 5; i++) {
    for (var j = -5; j < 5; j++) {
      const x = i * 140
      const y = j * 60
      this.canvasCtx.fillText(text, x, y)
    }
  }
  this.canvasCtx.draw(true)
  // 回退状态
  this.canvasCtx.restore()
},




![[Qt] QString::fromLocal8Bit 的使用误区](https://img-blog.csdnimg.cn/direct/62600f6b003a467495d5f47db140b1b2.png)


