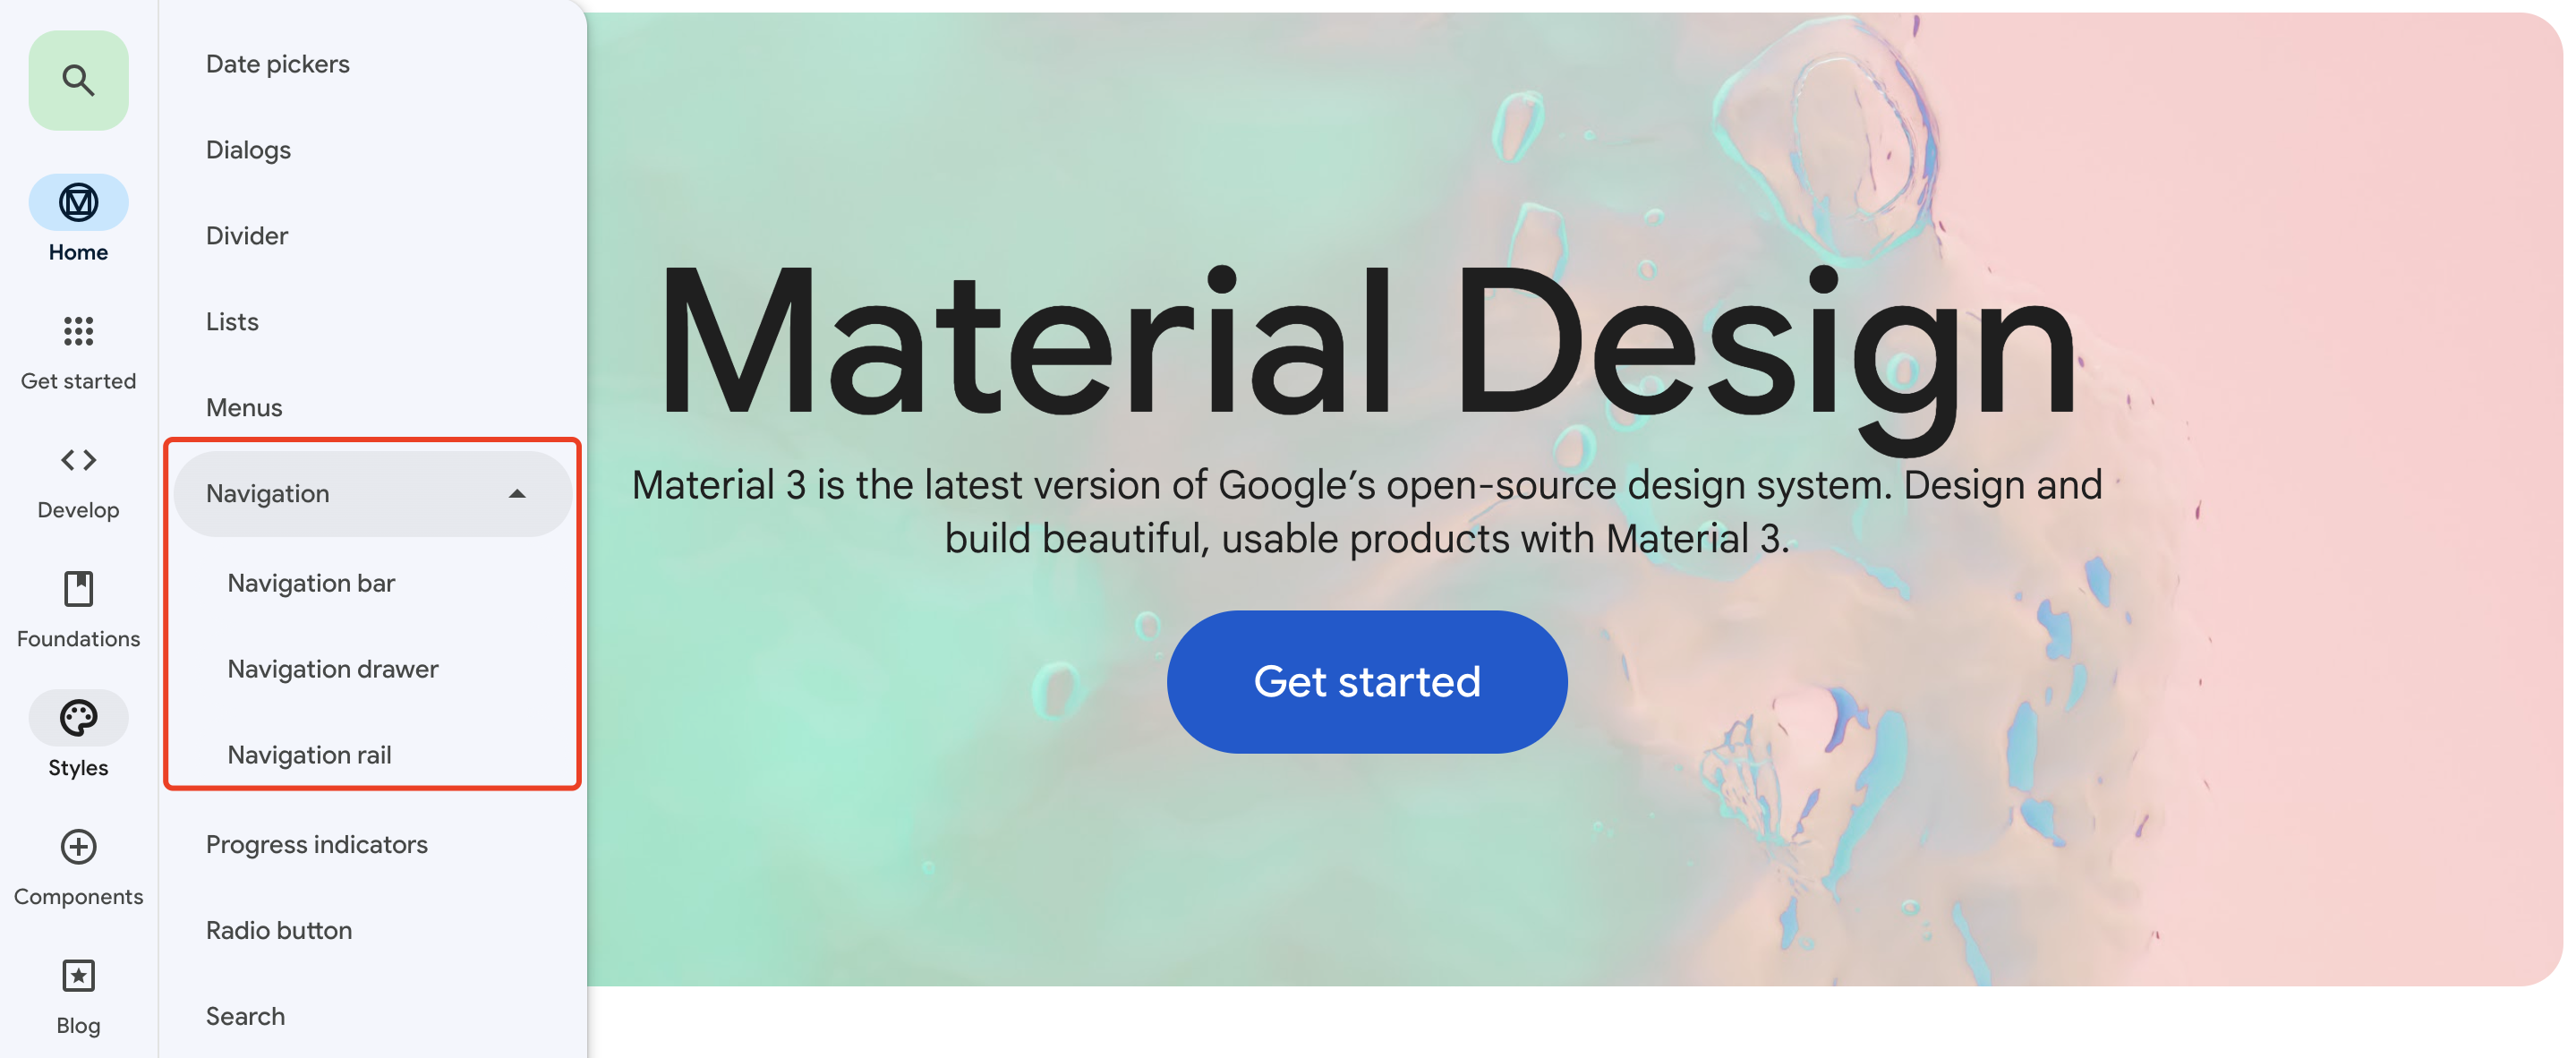
 Material Design 3 定义了三种导航模式,其用法和对应的 Flutter 组件如下所示:
| MD3 导航 | Flutter 组件 | 用途 |
|---|---|---|
| Navigation bar | BottomNavigationBar | 小型屏(宽度小于640) |
| Navigation drawer | Drawer | 大型屏(宽度大于960) |
| Navigation rail | NavigationRail | 中型屏(宽度介于640和960之间) |
这篇博文要介绍的是 NavigationRail 的用法,它主要用于宽度介于640到960之间的中型屏,展现形式如下(最左侧的竖长条):
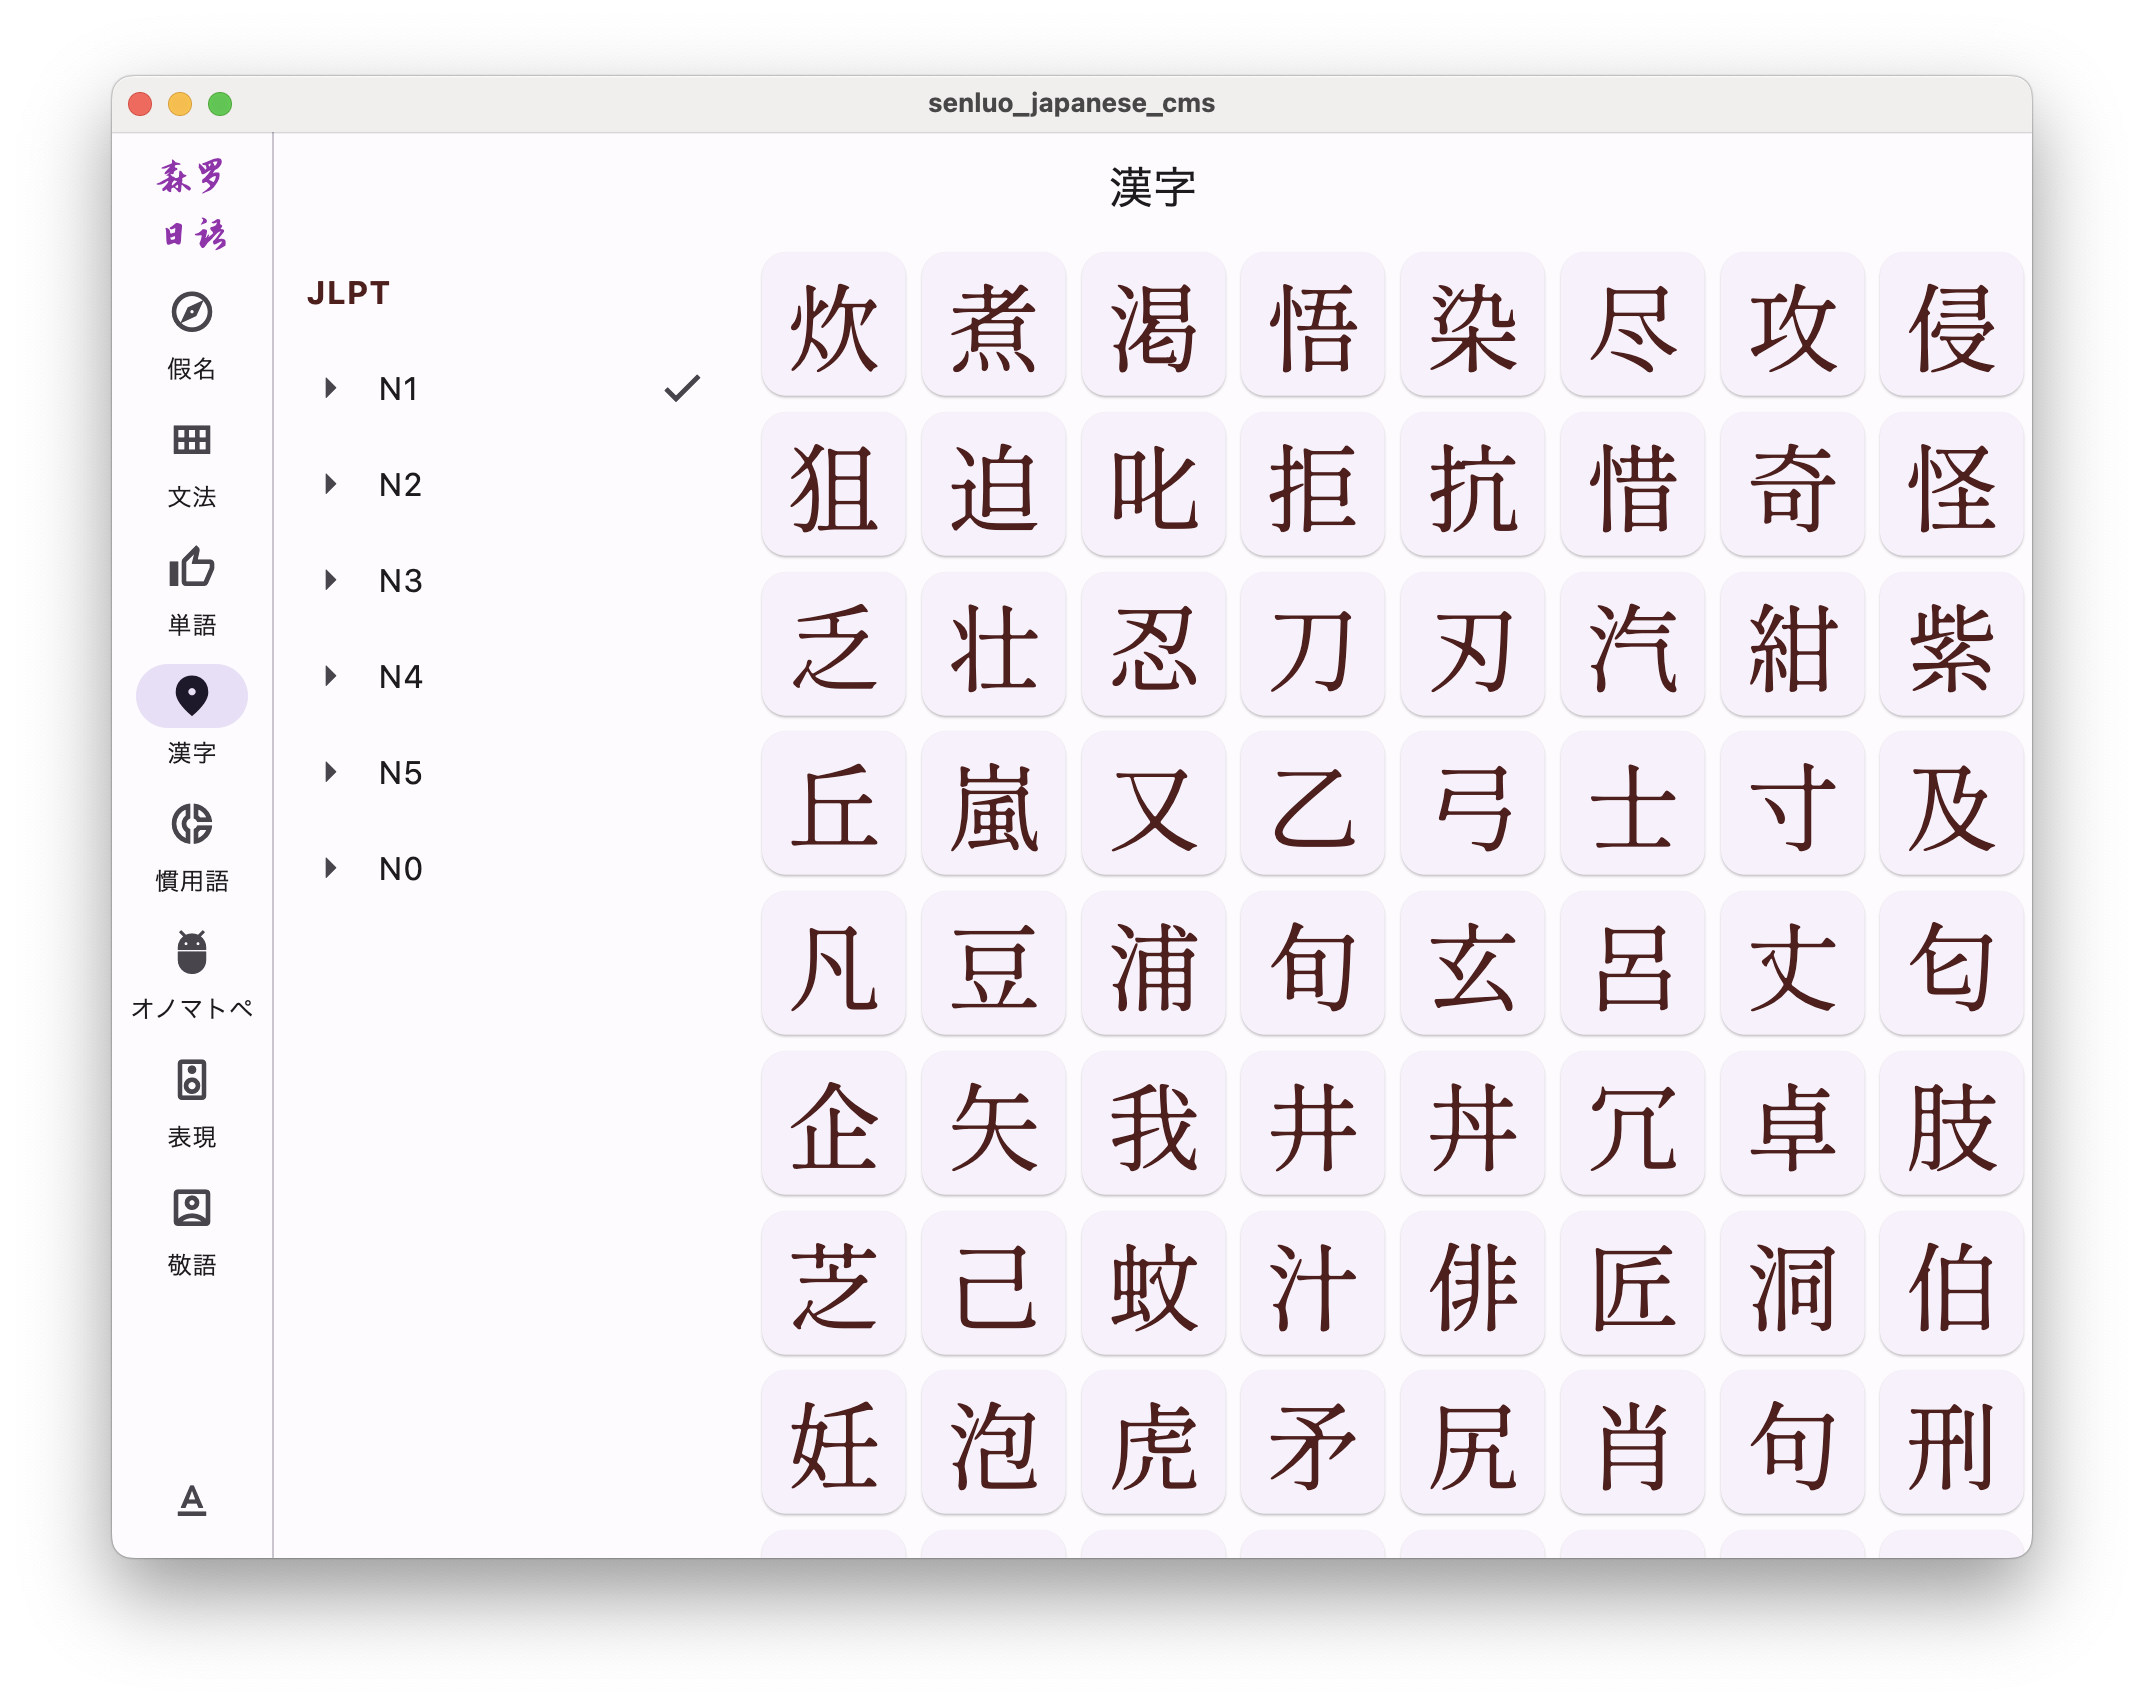
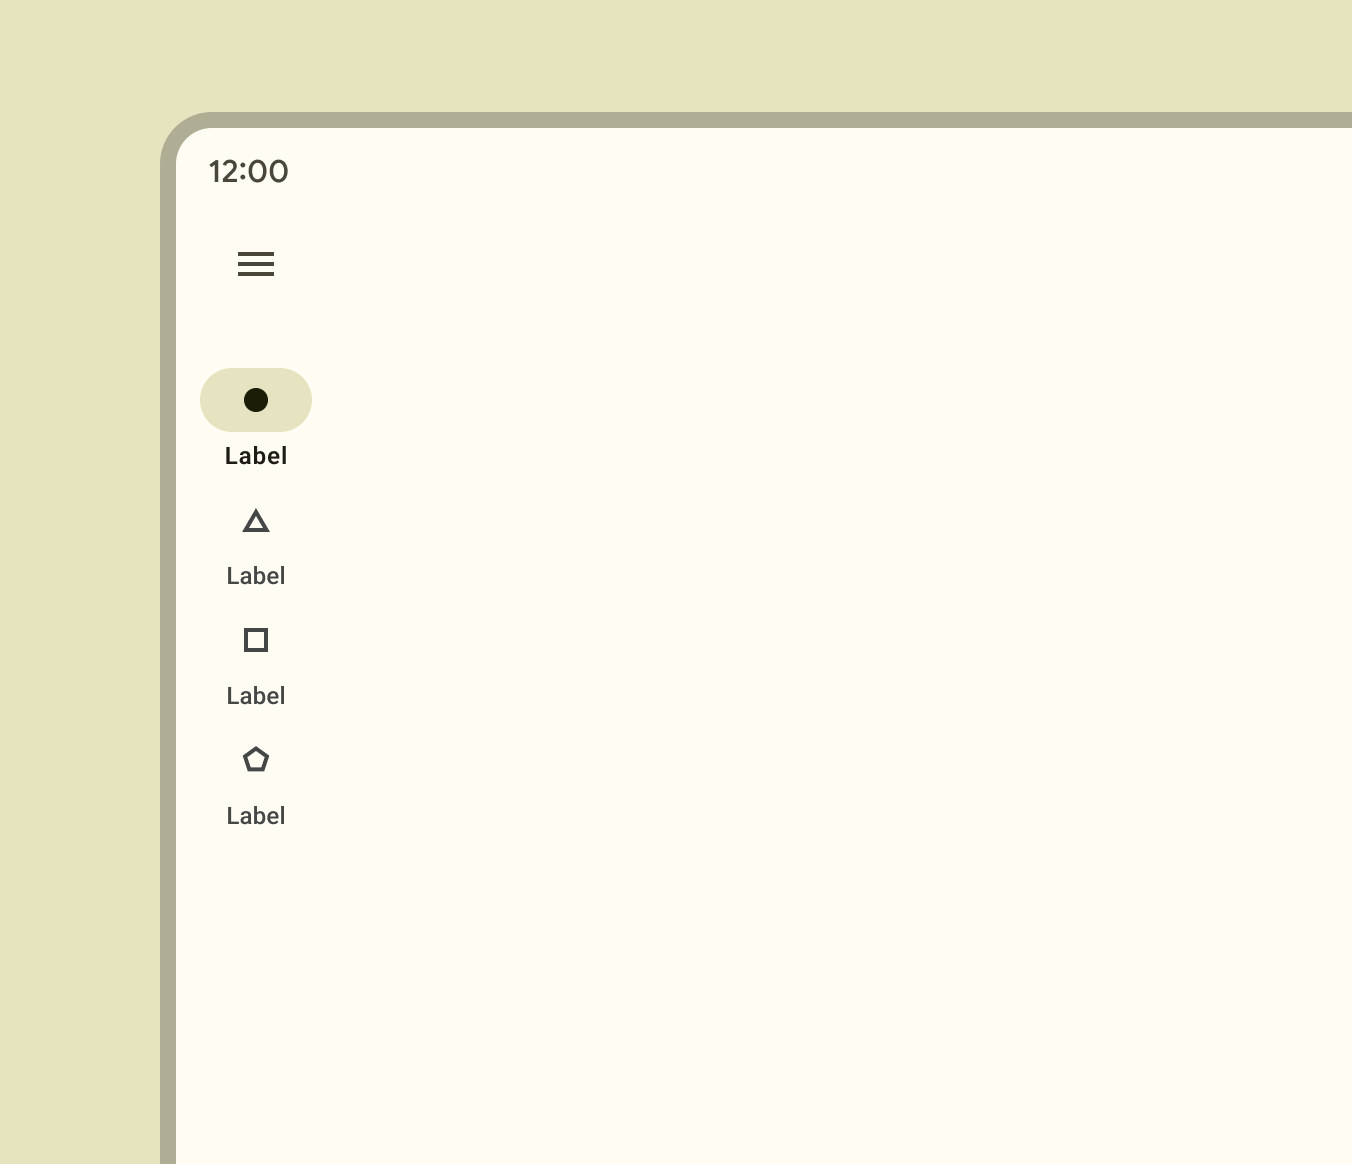
从设计规范的角度来讲,导航数量最好控制在 3 到 7 个。
如果超出最大数量,可以在顶部放一个菜单按钮,点击后弹出用模态对话框展示的二级导航。
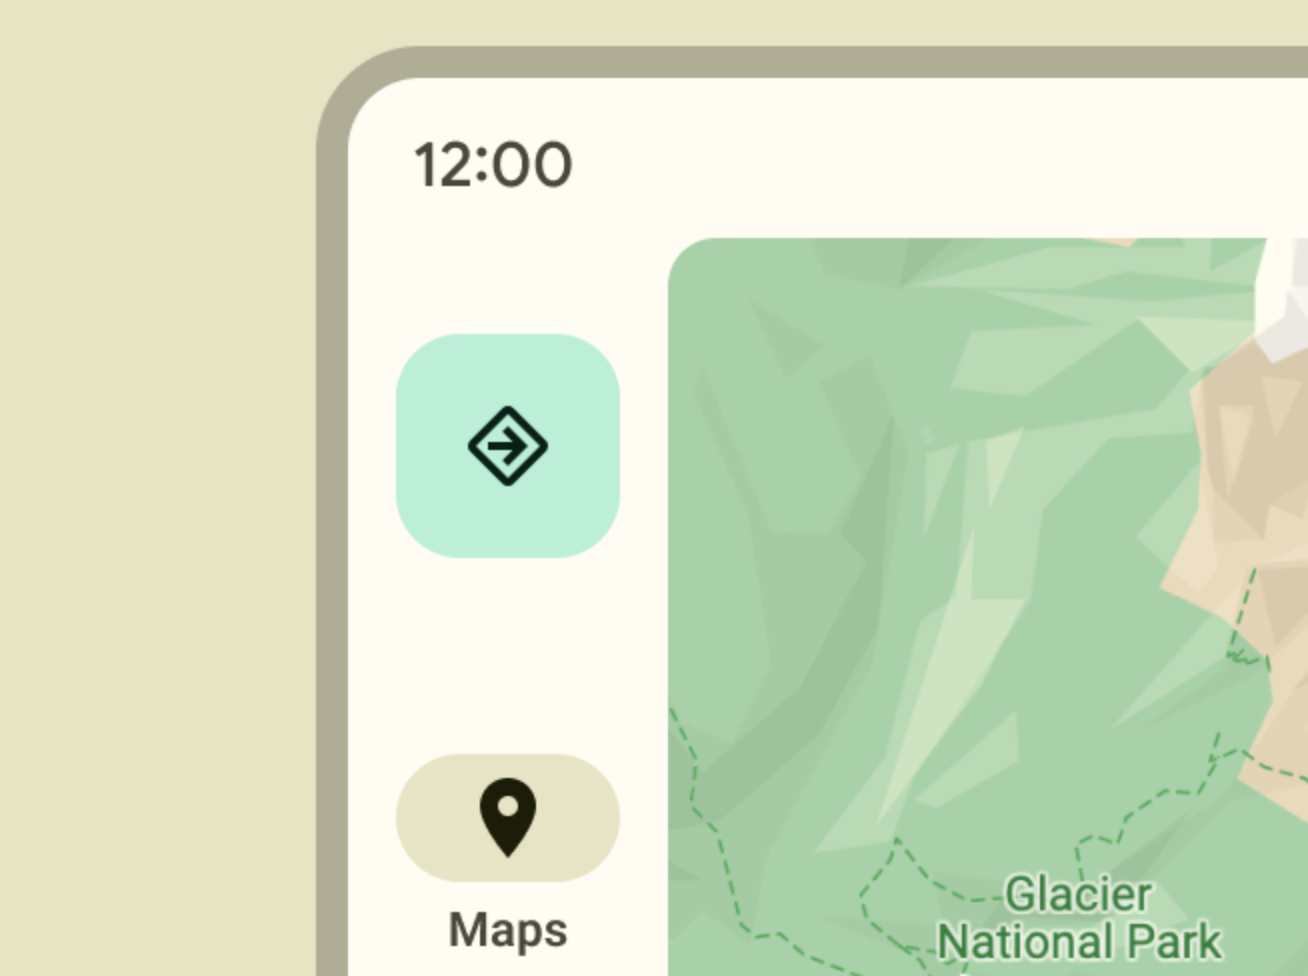
另外,Navigation rail 顶部也可以放置 FAB,用于凸显产品最核心的导航目的地:
顶部还可以放置 Logo,但做设计时一定要注意,不要给用户造成「这是个按钮」的错觉。
以上是我们从设计层面做出的解读,下面我们从代码层面看一下它的具体用法。
我们知道,Flutter 针对不同屏幕大小内置了三种导航组件:
- NavigationRail => 中型屏(宽度介于 640 ~ 960 之间)
- BottomNavigationBar => 小型屏(宽度小于 640)
- Drawer => 大型屏(宽度大于 960)
这三种组件一般会配合 Scaffold 一起使用,为了让导航组件能够根据屏幕尺寸进行动态调整,我们来实现一个「自适应」的 Scaffold。
步骤1:新建一个 dart 源文件,命名为 adaptive_scaffold.dart。
步骤2:定义两个查询屏幕类型的小函数:
bool _isLargeScreen(BuildContext context) {
  return MediaQuery.of(context).size.width > 960.0;
}

bool _isMediumScreen(BuildContext context) {
  return MediaQuery.of(context).size.width > 640.0;
}
步骤3:定义一个表示导航目的地的结构体 AdaptiveScaffoldDestination
class AdaptiveScaffoldDestination {
  // 标题
  final String title;

  // 图标
  final IconData icon;

  const AdaptiveScaffoldDestination({
    required this.title,
    required this.icon,
  });
}
步骤4:定义 AdaptiveScaffold。
class AdaptiveScaffold extends StatefulWidget {
  final Widget? title;
  final List<Widget> actions;
  final Widget? body;
  final int currentIndex;
  final List<AdaptiveScaffoldDestination> destinations;
  final ValueChanged<int>? onNavigationIndexChange;
  final FloatingActionButton? floatingActionButton;

  // ...
}
每个字段含义如下表所示:
| 字段 | 含义 |
|---|---|
title | 页面标题,可展示于 Drawer 或 AppBar |
actions | 传递给 AppBar 的 actions |
body | 传递给 Scaffold 的 body |
currentIndex | 当前导航目的地序号 |
destinations | 导航目的地列表 |
onNavigationIndexChange | 导航发生改变时的回调 |
floatingActionButton | FAB |
当显示设备为大型屏时,也就是 _isLargeScreen(context) == true 时,页面布局如下图所示:
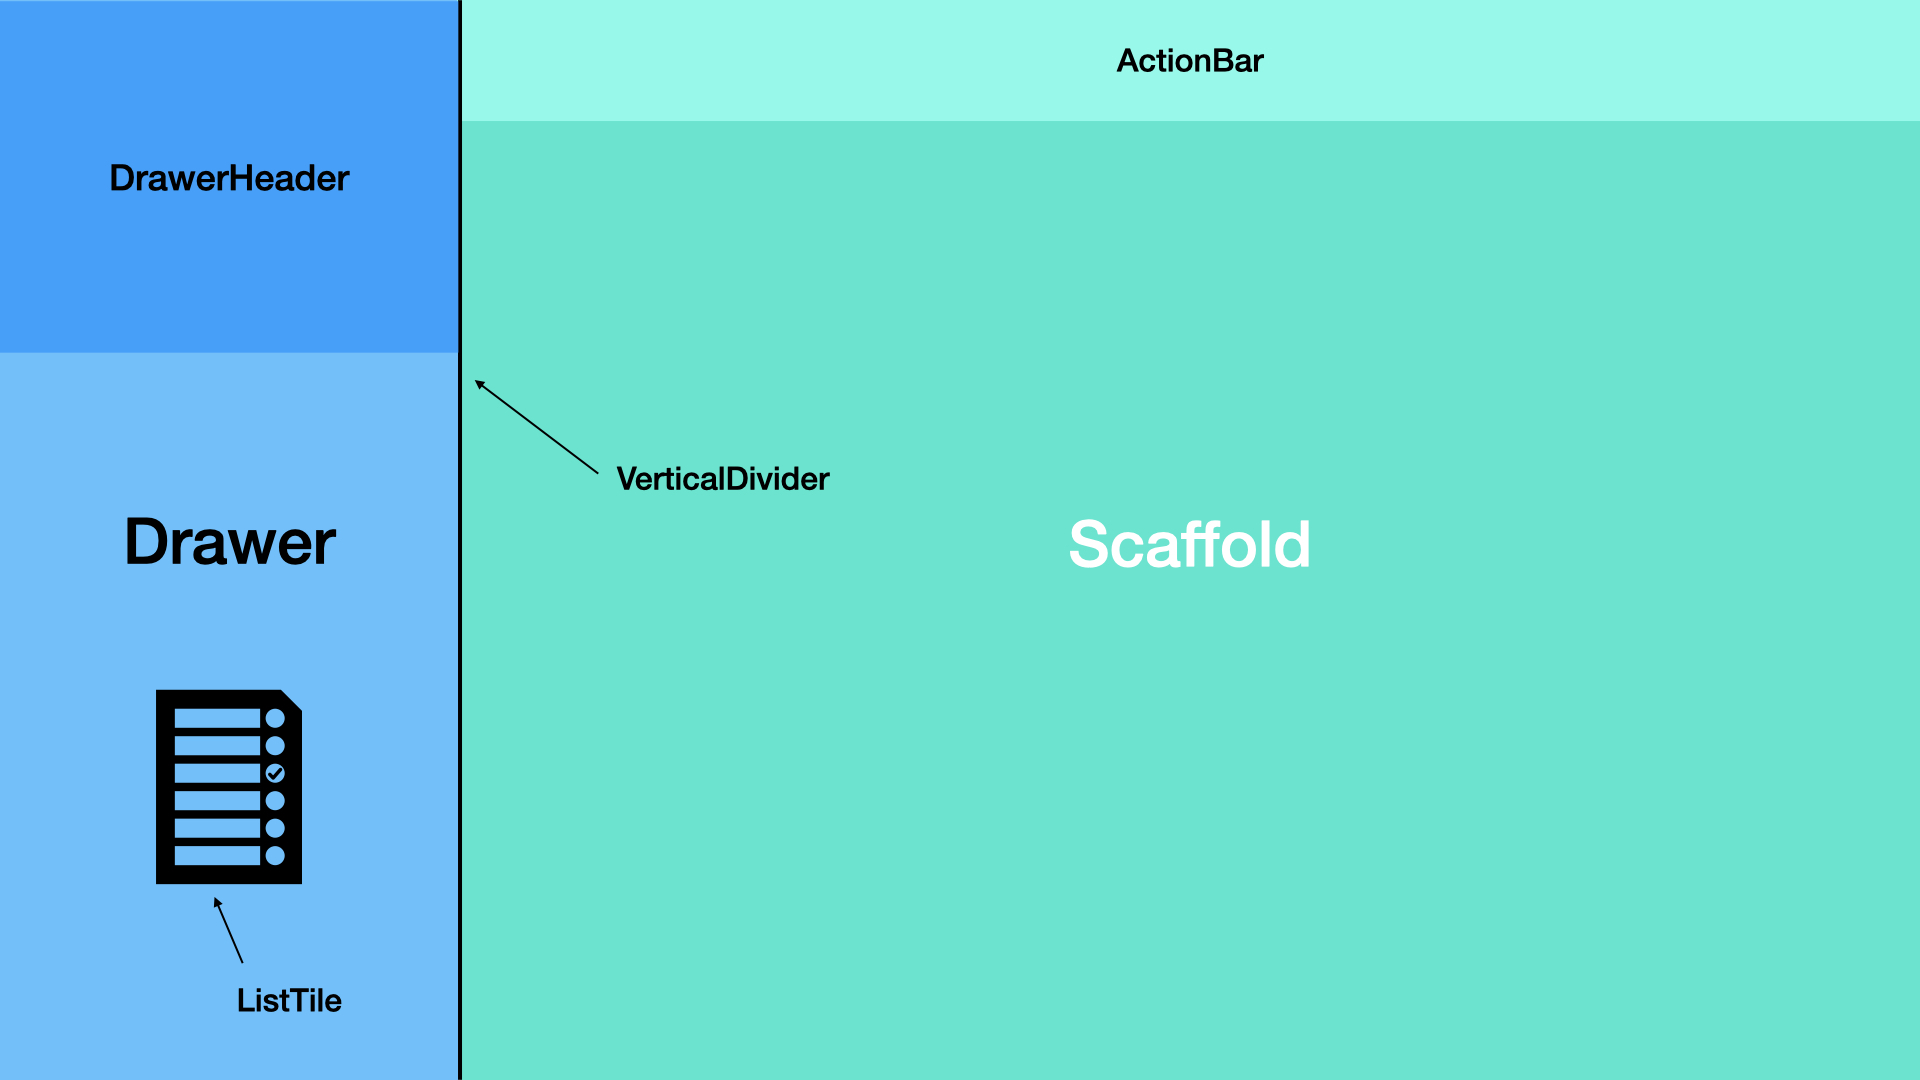
整体布局是一个 Row,其子节点从左到右依次为:Drawer、VerticalDivider 和 Expanded。
Row(
  children: [
    Drawer(),
    VerticalDivider(),
    Expanded(),
  ],
);
其中,Drawer 的子节点是一个 Column:
Column(
  children: [
    // 展示页面标题
    DrawerHeader(
      child: Center(
        child: widget.title,
      ),
    ),
    // 列表展示导航条目
    for (var d in widget.destinations)
      ListTile(
        leading: Icon(d.icon),
        title: Text(d.title),
        selected:
            widget.destinations.indexOf(d) == widget.currentIndex,
        onTap: () => _destinationTapped(d),
      ),
  ],
),
竖分割线:
VerticalDivider(
  width: 1,
  thickness: 1,
  color: Colors.grey[300],
),
最后包裹在 Expanded 内的 Scaffold 用于展示页面的主要内容。
Expanded(
  child: Scaffold(
    appBar: AppBar(
      actions: widget.actions,
    ),
    body: widget.body,
    floatingActionButton: widget.floatingActionButton,
  ),
),
以上是大型屏的展示效果。
当显示设备为中型屏时,也就是 _isMediumScreen(context) == true 时,页面布局如下图所示:

整体布局是一个 Scaffold:
Scaffold(
  appBar: AppBar(
    title: widget.title,
    actions: widget.actions,
  ),
  body: Row(
    children: [
      // 导航
      NavigationRail(
        leading: widget.floatingActionButton,
        destinations: [
          ...widget.destinations.map(
            (d) => NavigationRailDestination(
              icon: Icon(d.icon),
              label: Text(d.title),
            ),
          ),
        ],
        selectedIndex: widget.currentIndex,
        onDestinationSelected: widget.onNavigationIndexChange ?? (_) {},
      ),
      VerticalDivider(
        width: 1,
        thickness: 1,
        color: Colors.grey[300],
      ),
      Expanded(
        child: widget.body!,
      ),
    ],
  ),
);
当显示设备为小屏幕时,页面布局如下:
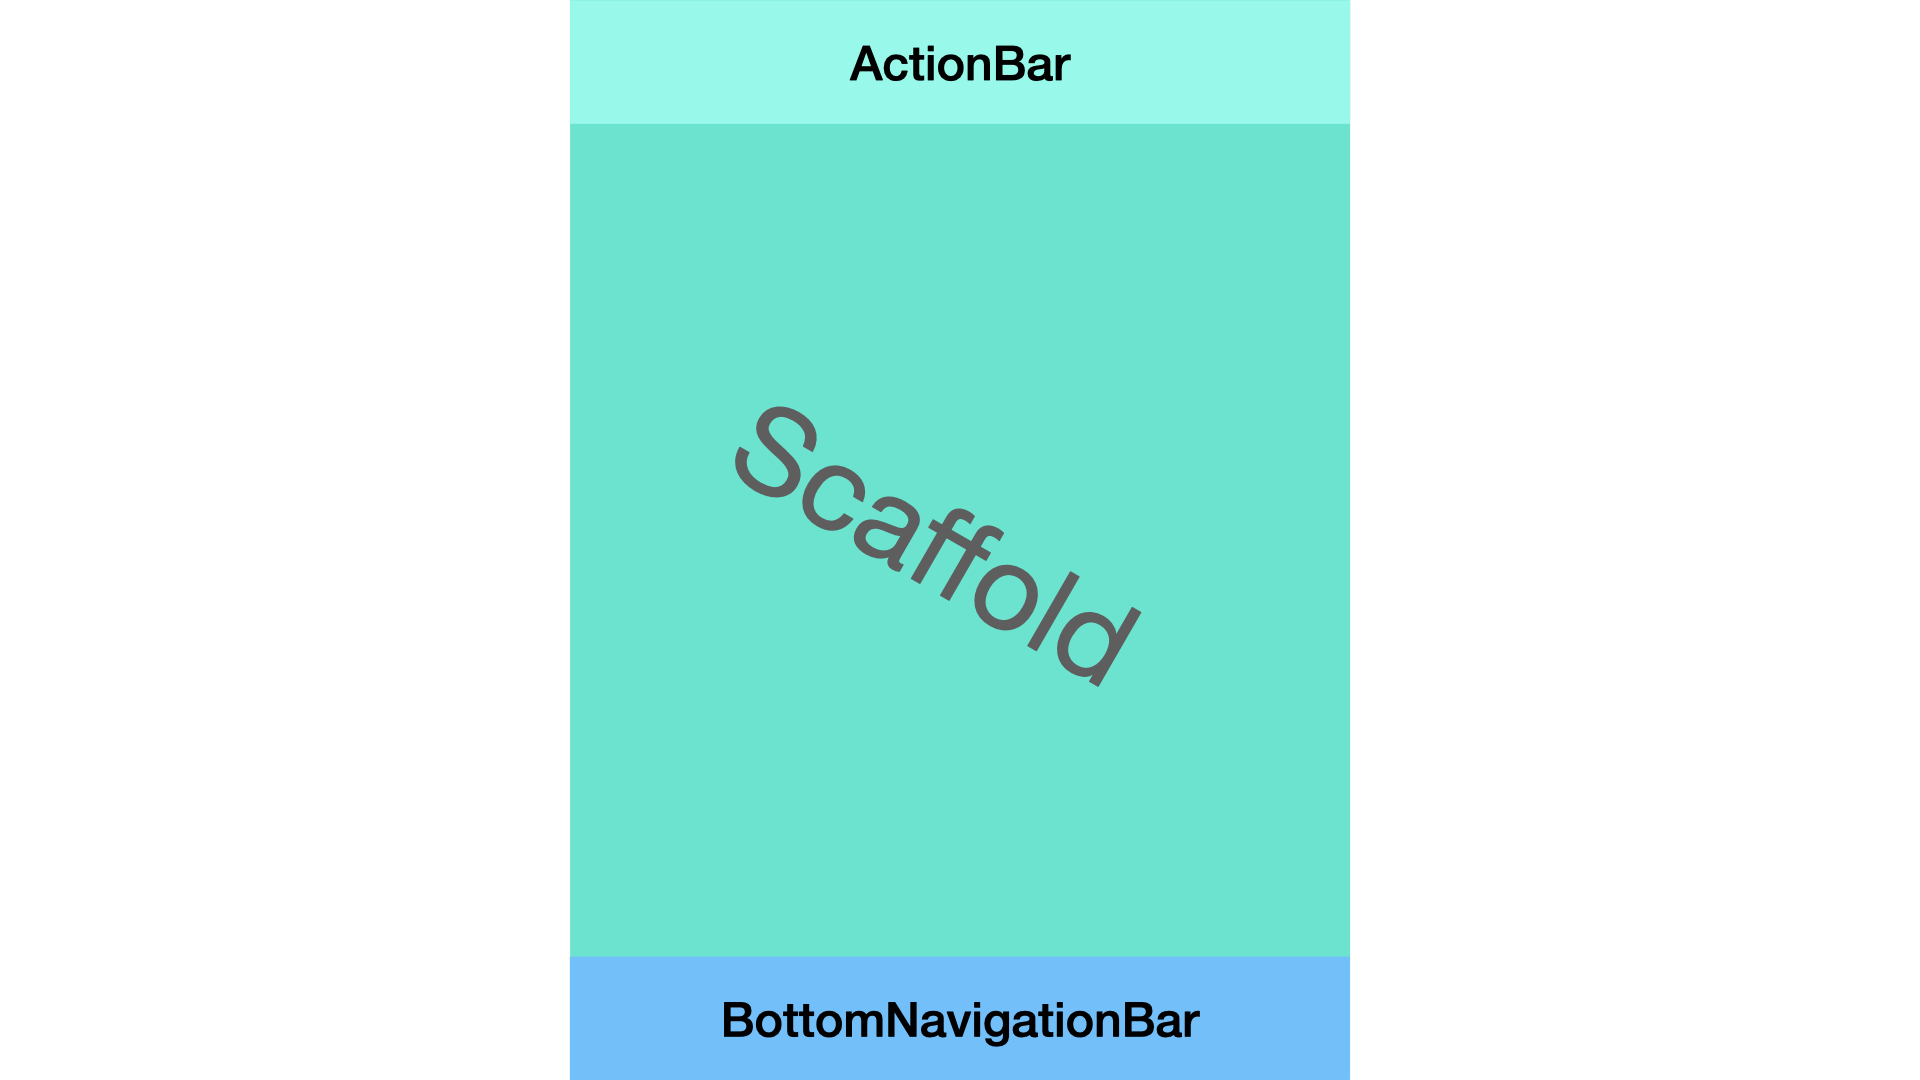
对应的代码:
Scaffold(
  body: widget.body,
  appBar: AppBar(
    title: widget.title,
    actions: widget.actions,
  ),
  bottomNavigationBar: BottomNavigationBar(
    items: [
      ...widget.destinations.map(
        (d) => BottomNavigationBarItem(
          icon: Icon(d.icon),
          label: d.title,
        ),
      ),
    ],
    currentIndex: widget.currentIndex,
    onTap: widget.onNavigationIndexChange,
  ),
  floatingActionButton: widget.floatingActionButton,
);
以上就是可动态适配屏幕大小的 Scaffold 实现方案,完整代码可移步至 Flutter 官方示例代码 adaptive_scaffold.dart。
