文章目录
- 一、向量和矩阵的基本运算
- 二、几何基元和变换
- 1、几何基元(Geometric Primitives)
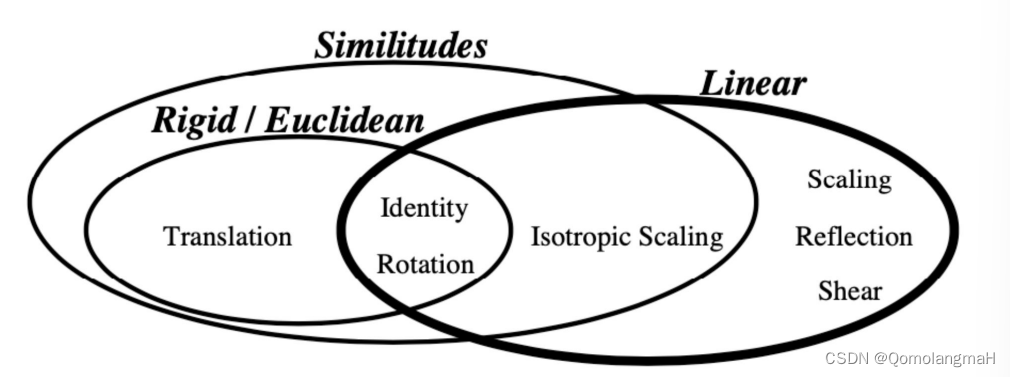
- 2、几何变换(Geometric Transformations)
- 2D变换编辑器
- 0. 项目结构
- 1. Package: gui
- button.py
- window.py
- 1. `__init__(self, width, height, title)`
- 2. `add_buttons(self)`
- 3. `clear(self)`
- 4. `draw(self, original_img)`
- 5. `handle_events(self, event)`
- 6. `save_image(self)`
- 7. 代码整合
- 2. Package: transformations
- image_generators.py
- image_transformers.py
- 3. main.py
- 4. 效果展示
- 选择图像
- 图像操作
- 保存图像
一、向量和矩阵的基本运算
【计算机视觉】二、图像形成:1、向量和矩阵的基本运算:线性变换与齐次坐标
二、几何基元和变换
1、几何基元(Geometric Primitives)
几何基元是计算机图形学中最基本的图形对象,它们是构建更复杂图形的基础单元。常见的几何基元包括:
- 点(Point): 由一对或一组坐标值表示的零维对象。
- 线段(Line Segment): 由两个端点确定的一维对象。
- 多边形(Polygon): 由一系列顶点连接而成的闭合平面图形,是二维对象。
- 曲线(Curve): 由一系列控制点和方程确定的平滑曲线,如贝塞尔曲线、样条曲线等。
- 圆(Circle): 由一个圆心和半径确定的二维闭合曲线。
- 球体(Sphere): 由一个球心和半径确定的三维闭合曲面。
这些基本的几何基元可以通过组合、变换等操作构建出更加复杂的图形对象,如三维模型、场景等。
2、几何变换(Geometric Transformations)
【计算机视觉】二、图像形成:2、几何基元和几何变换:2D变换
2D变换编辑器
【计算机视觉】二、图像形成——实验:2D变换编辑器(Pygame)
0. 项目结构
image_transformations/
├── main.py
├── gui/
│   ├── __init__.py
│   ├── button.py
│   └── window.py
├── transformations/
│   ├── __init__.py
│   ├── image_generators.py
│   └── image_transformers.py
├── utils/
│   ├── __init__.py
│   └── file_utils.py
1. Package: gui
button.py
import pygame


# 按钮类
class Button:
    def __init__(self, x, y, width, height, text, color):
        self.rect = pygame.Rect(x, y, width, height)
        self.text = text
        self.color = color
        self.darker_color = (max(color[0] - 50, 0), max(color[1] - 50, 0), max(color[2] - 50, 0))  # 计算一个较暗的颜色

    def draw(self, surface):
        pygame.draw.rect(surface, self.color, self.rect)
        font = pygame.font.Font(None, 24)
        text = font.render(self.text, True, (255, 255, 255))
        text_rect = text.get_rect(center=self.rect.center)
        surface.blit(text, text_rect)

    def is_clicked(self, pos):
        return self.rect.collidepoint(pos)
window.py
Window 类负责管理整个窗口及其界面,只需要创建一个 Window 对象,并在主循环中调用 clear()、draw()、handle_events() 方法即可。这样可以使代码更加模块化和易于维护。
1. __init__(self, width, height, title)
- 初始化窗口对象。
- 设置窗口的宽度、高度和标题。
- 创建一个空列表
self.buttons来存储所有按钮对象。 - 初始化当前层级
self.current_layer为 1。 - 初始化其他变量,如选择的变换操作
self.selected_transform、变换后的图像self.transformed_img、原始图像self.original_img、鼠标拖拽相关变量等。 - 调用
self.add_buttons()方法添加按钮。
    def __init__(self, width, height, title):
        self.width = width
        self.height = height
        self.window = pygame.display.set_mode((width, height))
        pygame.display.set_caption(title)

        self.buttons = []
        self.current_layer = 1
        self.selected_transform = None
        self.transformed_img = None
        self.original_img = None
        self.mouse_dragging = False
        self.drag_start_pos = (0, 0)
        self.drag_offset = (0, 0)
        self.translation_offset = (0, 0)

        self.add_buttons()
        # pygame.display.set_icon(pygame.image.load("icon.png"))  # 加载图标文件
        self.pygame_to_numpy_map = {}
2. add_buttons(self)
- 创建第一层界面的三个按钮对象。
- 创建第二层界面的八个按钮对象。
- 将所有按钮对象添加到
self.buttons列表中。
   def add_buttons(self):
        # 添加第一层界面按钮
        self.buttons.append(Button(50, 50, 200, 50, "Select Image", (255, 0, 0)))
        self.buttons.append(Button(350, 50, 200, 50, "Generate Square", (0, 255, 0)))
        self.buttons.append(Button(650, 50, 200, 50, "Generate Circle", (0, 0, 255)))

        # 添加第二层界面按钮
        # - "Translate"按钮颜色为红色
        # - "Rotate"按钮颜色为橙色 `(2
        # - "Isotropic Scale"按钮
        # - "Scale"按钮颜色为青色 `(0,
        # - "Mirror"按钮颜色为蓝色 `(0
        # - "Shear"按钮颜色为紫色 `(12
        # 问:为什么没有黄色
        # 答:黄色太耀眼了………
        self.buttons.append(Button(50, 50, 150, 50, "Translate", (255, 0, 0)))
        self.buttons.append(Button(250, 50, 150, 50, "Rotate", (255, 165, 0)))
        self.buttons.append(Button(450, 50, 150, 50, "Isotropic Scale", (0, 255, 0)))
        self.buttons.append(Button(650, 50, 150, 50, "Scale", (0, 255, 255)))
        self.buttons.append(Button(50, 150, 150, 50, "Mirror", (0, 0, 255)))
        self.buttons.append(Button(250, 150, 150, 50, "Shear", (128, 0, 128)))
        self.buttons.append(Button(450, 150, 150, 50, "Back to Selection", (128, 128, 128)))
        # 新增"保存图片"功能
        self.buttons.append(Button(650, 150, 150, 50, "Save Image", (0, 128, 0)))
3. clear(self)
- 使用灰色色 (220, 220, 220) 填充窗口~ui界面背景。
	 def clear(self):
	        self.window.fill((220, 220, 220))
4. draw(self, original_img)
- 根据当前层级绘制相应的界面。
- 在第一层界面中,绘制前三个按钮。
- 在第二层界面中,绘制原始图像和后七个按钮。
- 在第三层界面中,绘制原始图像、变换后的图像、后七个按钮和选择的变换操作文本。
    def draw(self, original_img):
        # # 绘制标题栏
        # pygame.draw.rect(self.window, (100, 100, 100), (0, 0, self.width, 50))  # 绘制矩形背景
        # font = pygame.font.Font(None, 36)
        # text = font.render("Image Transformations", True, (255, 255, 255))  # 绘制白色文本
        # self.window.blit(text, (10, 10))
        if self.current_layer == 1:
            # 绘制第一层界面
            for button in self.buttons[:3]:
                button.draw(self.window)

        elif self.current_layer == 2:
            # 绘制第二层界面
            if original_img is not None:
                self.window.blit(original_img, (50, 250))
            for button in self.buttons[3:]:
                button.draw(self.window)

        elif self.current_layer == 3:
            # 绘制第三层界面
            if self.original_img is not None:
                self.window.blit(self.original_img, (50, 250))
            if self.transformed_img is not None:
                self.window.blit(self.transformed_img, (350, 250))
            for button in self.buttons[3:]:  # 在第三层界面上方显示操作按钮
                button.draw(self.window)
            if self.selected_transform is not None:
                font = pygame.font.Font(None, 36)
                text = font.render(f"Selected Transform: {self.selected_transform}", True, (255, 255, 255))
                text_rect = text.get_rect(center=(self.width // 2, 222))
                self.window.blit(text, text_rect)
5. handle_events(self, event)
- 处理各种事件。
- 如果事件类型是
pygame.MOUSEBUTTONDOWN,则处理鼠标按下事件:- 在第一层界面中,点击相应按钮加载图像或生成图形。
- 在第二层和第三层界面中,点击相应按钮选择变换操作。
- 如果点击左键,开始鼠标拖拽操作。
- 如果事件类型是
pygame.MOUSEBUTTONUP,则处理鼠标释放事件,结束鼠标拖拽操作。 - 如果事件类型是
pygame.MOUSEMOTION,则处理鼠标移动事件:- 如果处于第三层界面并正在拖拽,则根据选择的变换操作和鼠标移动量执行相应的变换,并更新变换后的图像。
6. save_image(self)
    def save_image(self):
        if self.transformed_img is not None:
            root = Tk()
            root.withdraw()
            file_path = filedialog.asksaveasfilename(defaultextension=".png")
            if file_path:
                pygame.image.save(self.transformed_img, file_path)
7. 代码整合
import numpy as np
import pygame
from gui.button import Button
from transformations.image_generators import *
from transformations.image_transformers import *
from tkinter import filedialog
from tkinter import Tk


class Window:
    def __init__(self, width, height, title):
        self.width = width
        self.height = height
        self.window = pygame.display.set_mode((width, height))
        pygame.display.set_caption(title)

        self.buttons = []
        self.current_layer = 1
        self.selected_transform = None
        self.transformed_img = None
        self.original_img = None
        self.mouse_dragging = False
        self.drag_start_pos = (0, 0)
        self.drag_offset = (0, 0)
        self.translation_offset = (0, 0)

        self.add_buttons()
        # pygame.display.set_icon(pygame.image.load("icon.png"))  # 加载图标文件
        self.pygame_to_numpy_map = {}

	    # def pygame_to_numpy(self, surface):
	    #     if surface in self.pygame_to_numpy_map:
	    #         return self.pygame_to_numpy_map[surface]
	    #     else:
	    #         numpy_array = np.transpose(np.array(pygame.surfarray.pixels3d(surface)), (1, 0, 2))
	    #         self.pygame_to_numpy_map[surface] = numpy_array
	    #         return numpy_array
	    #
	    # def numpy_to_pygame(self, numpy_array):
	    #     surface = pygame.Surface(numpy_array.shape[:2][::-1], pygame.SRCALPHA)
	    #     pygame.surfarray.blit_array(surface, np.transpose(numpy_array, (1, 0, 2)))
	    #     return surface

    def add_buttons(self):
        # 添加第一层界面按钮
        self.buttons.append(Button(50, 50, 200, 50, "Select Image", (255, 0, 0)))
        self.buttons.append(Button(350, 50, 200, 50, "Generate Square", (0, 255, 0)))
        self.buttons.append(Button(650, 50, 200, 50, "Generate Circle", (0, 0, 255)))

        # 添加第二层界面按钮
        # - "Translate"按钮颜色为红色
        # - "Rotate"按钮颜色为橙色 `(2
        # - "Isotropic Scale"按钮
        # - "Scale"按钮颜色为青色 `(0,
        # - "Mirror"按钮颜色为蓝色 `(0
        # - "Shear"按钮颜色为紫色 `(12
        # 问:为什么没有黄色
        # 答:黄色太耀眼了………
        self.buttons.append(Button(50, 50, 150, 50, "Translate", (255, 0, 0)))
        self.buttons.append(Button(250, 50, 150, 50, "Rotate", (255, 165, 0)))
        self.buttons.append(Button(450, 50, 150, 50, "Isotropic Scale", (0, 255, 0)))
        self.buttons.append(Button(650, 50, 150, 50, "Scale", (0, 255, 255)))
        self.buttons.append(Button(50, 150, 150, 50, "Mirror", (0, 0, 255)))
        self.buttons.append(Button(250, 150, 150, 50, "Shear", (128, 0, 128)))
        self.buttons.append(Button(450, 150, 150, 50, "Back to Selection", (128, 128, 128)))
        # 新增"保存图片"功能
        self.buttons.append(Button(650, 150, 150, 50, "Save Image", (0, 128, 0)))

    def clear(self):
        self.window.fill((220, 220, 220))  # ui界面灰色背景

    def draw(self, original_img):
        # # 绘制标题栏
        # pygame.draw.rect(self.window, (100, 100, 100), (0, 0, self.width, 50))  # 绘制矩形背景
        # font = pygame.font.Font(None, 36)
        # text = font.render("Image Transformations", True, (255, 255, 255))  # 绘制白色文本
        # self.window.blit(text, (10, 10))
        if self.current_layer == 1:
            # 绘制第一层界面
            for button in self.buttons[:3]:
                button.draw(self.window)

        elif self.current_layer == 2:
            # 绘制第二层界面
            if original_img is not None:
                self.window.blit(original_img, (50, 250))
            for button in self.buttons[3:]:
                button.draw(self.window)

        elif self.current_layer == 3:
            # 绘制第三层界面
            if self.original_img is not None:
                self.window.blit(self.original_img, (50, 250))
            if self.transformed_img is not None:
                self.window.blit(self.transformed_img, (350, 250))
            for button in self.buttons[3:]:  # 在第三层界面上方显示操作按钮
                button.draw(self.window)
            if self.selected_transform is not None:
                font = pygame.font.Font(None, 36)
                text = font.render(f"Selected Transform: {self.selected_transform}", True, (255, 255, 255))
                text_rect = text.get_rect(center=(self.width // 2, 222))
                self.window.blit(text, text_rect)

    def handle_events(self, event):
        if event.type == pygame.MOUSEBUTTONDOWN:
            mouse_pos = pygame.mouse.get_pos()
            if self.current_layer == 1:  # 第一层界面
                for button in self.buttons[:3]:
                    if button.is_clicked(mouse_pos):
                        if button.text == "Select Image":
                            root = Tk()
                            root.withdraw()
                            self.file_path = filedialog.askopenfilename(title="Select Image")
                            if self.file_path:
                                self.original_img = pygame.image.load(self.file_path)
                                self.original_img = pygame.transform.scale(self.original_img, (256, 256))
                                self.current_layer = 2
                        elif button.text == "Generate Square":
                            self.original_img = generate_square(256, (255, 255, 255))
                            self.current_layer = 2
                        elif button.text == "Generate Circle":
                            self.original_img = generate_circle(128, (255, 255, 255))
                            self.current_layer = 2
            elif self.current_layer == 2 or self.current_layer == 3:  # 第二层和第三层界面
                for button in self.buttons[3:]:
                    if button.is_clicked(mouse_pos):
                        if button.text == "Save Image":
                            self.save_image()
                        elif button.text == "Back to Selection":  # 返回选择界面
                            self.original_img = None
                            self.selected_transform = None
                            self.transformed_img = None
                            self.current_layer = 1
                        else:
                            self.selected_transform = button.text
                            self.transformed_img = self.original_img.copy()
                            if self.current_layer == 2:
                                self.current_layer = 3

            if event.button == 1:  # 鼠标左键
                self.mouse_dragging = True
                self.drag_start_pos = mouse_pos

        elif event.type == pygame.MOUSEBUTTONUP:
            if event.button == 1:  # 鼠标左键
                self.mouse_dragging = False

        elif event.type == pygame.MOUSEMOTION:
            if self.mouse_dragging and self.current_layer == 3:
                pygame.mouse.set_cursor(pygame.SYSTEM_CURSOR_HAND)
                mouse_pos = pygame.mouse.get_pos()
                self.drag_offset = (mouse_pos[0] - self.drag_start_pos[0], mouse_pos[1] - self.drag_start_pos[1])
                if self.selected_transform == "Translate":
                    self.translation_offset = self.drag_offset  # 更新平移偏移量
                    self.transformed_img = translate(self.original_img, self.translation_offset[0],
                                                     self.translation_offset[1])
                elif self.selected_transform == "Rotate":
                    angle = self.drag_offset[0]
                    self.transformed_img = rotate(self.original_img, angle)
                elif self.selected_transform == "Isotropic Scale":
                    scale_factor = max(0.1, 1 + self.drag_offset[0] / 100)  # 限制缩放比例在0.1到无穷大之间
                    self.transformed_img = isotropic_scale(self.original_img, scale_factor)
                elif self.selected_transform == "Scale":
                    scale_x = max(0.1, 1 + self.drag_offset[0] / 100)  # 限制x方向缩放比例在0.1到无穷大之间
                    scale_y = max(0.1, 1 + self.drag_offset[1] / 100)  # 限制y方向缩放比例在0.1到无穷大之间
                    self.transformed_img = scale(self.original_img, scale_x, scale_y)
                elif self.selected_transform == "Mirror":
                    if self.drag_offset[0] > 0:
                        mirror_type = 'horizontal'
                    else:
                        mirror_type = 'vertical'
                    self.transformed_img = mirror(self.original_img, mirror_type)
                elif self.selected_transform == "Shear":
                    shear_x = self.drag_offset[0] / 100
                    shear_y = self.drag_offset[1] / 100
                    self.transformed_img = shear(self.original_img, shear_x, shear_y)
            else:
                pygame.mouse.set_cursor(pygame.SYSTEM_CURSOR_ARROW)
                # 在鼠标拖拽时将鼠标指针设置为手型, 否则设置为默认箭头形状。

    def save_image(self):
        if self.transformed_img is not None:
            root = Tk()
            root.withdraw()
            file_path = filedialog.asksaveasfilename(defaultextension=".png")
            if file_path:
                pygame.image.save(self.transformed_img, file_path)
2. Package: transformations
image_generators.py
import pygame


# 生成正方形图像
def generate_square(size, color):
    img = pygame.Surface((size, size))
    img.fill(color)
    return img


# 生成圆形图像
def generate_circle(radius, color):
    img = pygame.Surface((radius * 2, radius * 2))
    img.fill((0, 0, 0))
    img.set_colorkey((0, 0, 0))
    pygame.draw.circle(img, color, (radius, radius), radius)
    return img
image_transformers.py
import pygame

window_width, window_height = 888, 888


# 平移变换
def translate(img, x, y):
    width, height = img.get_size()
    translated_img = pygame.Surface((window_width, window_height), pygame.SRCALPHA)
    translated_img.blit(img, (x, y))
    return translated_img


# 旋转变换
def rotate(img, angle):
    rotated_img = pygame.transform.rotate(img, angle)
    return rotated_img


# 等比缩放变换
def isotropic_scale(img, scale_factor):
    width, height = img.get_size()
    new_size = (int(width * scale_factor), int(height * scale_factor))
    scaled_img = pygame.transform.scale(img, new_size)
    return scaled_img


# 缩放变换
def scale(img, scale_x, scale_y):
    width, height = img.get_size()
    new_width = int(width * scale_x)
    new_height = int(height * scale_y)
    scaled_img = pygame.transform.scale(img, (new_width, new_height))
    return scaled_img


# 镜像变换
def mirror(img, mirror_type):
    if mirror_type == 'horizontal':
        mirrored_img = pygame.transform.flip(img, True, False)
    elif mirror_type == 'vertical':
        mirrored_img = pygame.transform.flip(img, False, True)
    else:
        return img
    return mirrored_img


# 剪切变换
def shear(img, shear_x, shear_y):
    width, height = img.get_size()
    sheared_img = pygame.Surface((width + abs(shear_x * height), height + abs(shear_y * width)))
    sheared_img.set_colorkey((0, 0, 0))
    for x in range(width):
        for y in range(height):
            sheared_img.blit(img, (x + shear_x * y, y + shear_y * x), (x, y, 1, 1))
    return sheared_img
3. main.py
import pygame
from gui.window import Window

pygame.init()

window_width, window_height = 888, 888
window = Window(window_width, window_height, "2D Transformations")

running = True
while running:
    # 设置窗口大小
    for event in pygame.event.get():
        if event.type == pygame.QUIT:
            running = False

        window.handle_events(event)

    window.clear()
    window.draw(window.original_img)
    pygame.display.flip()

pygame.quit()
4. 效果展示
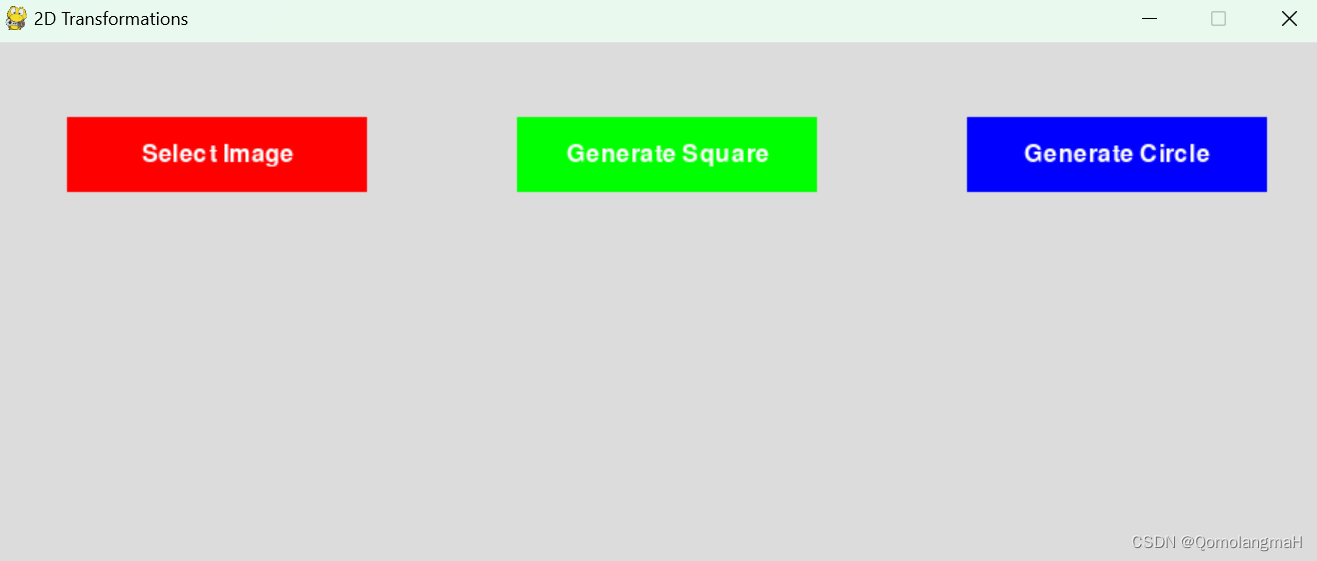
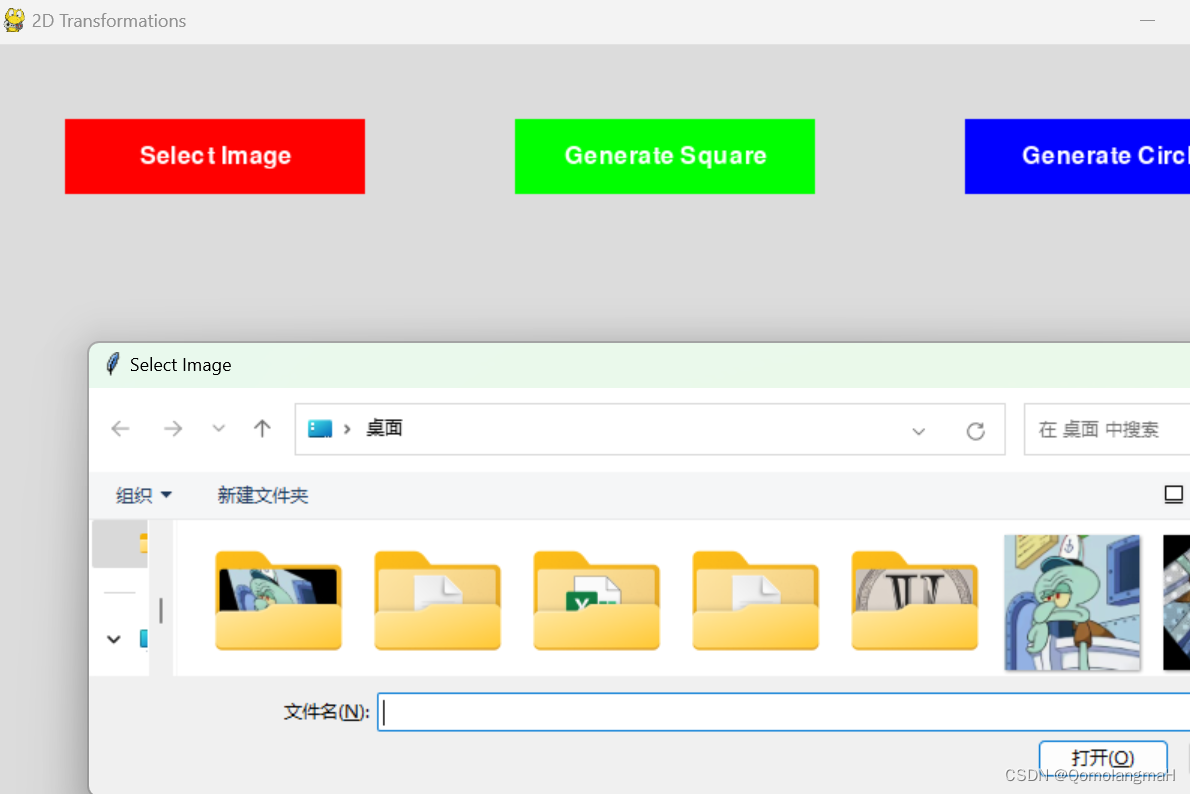
选择图像
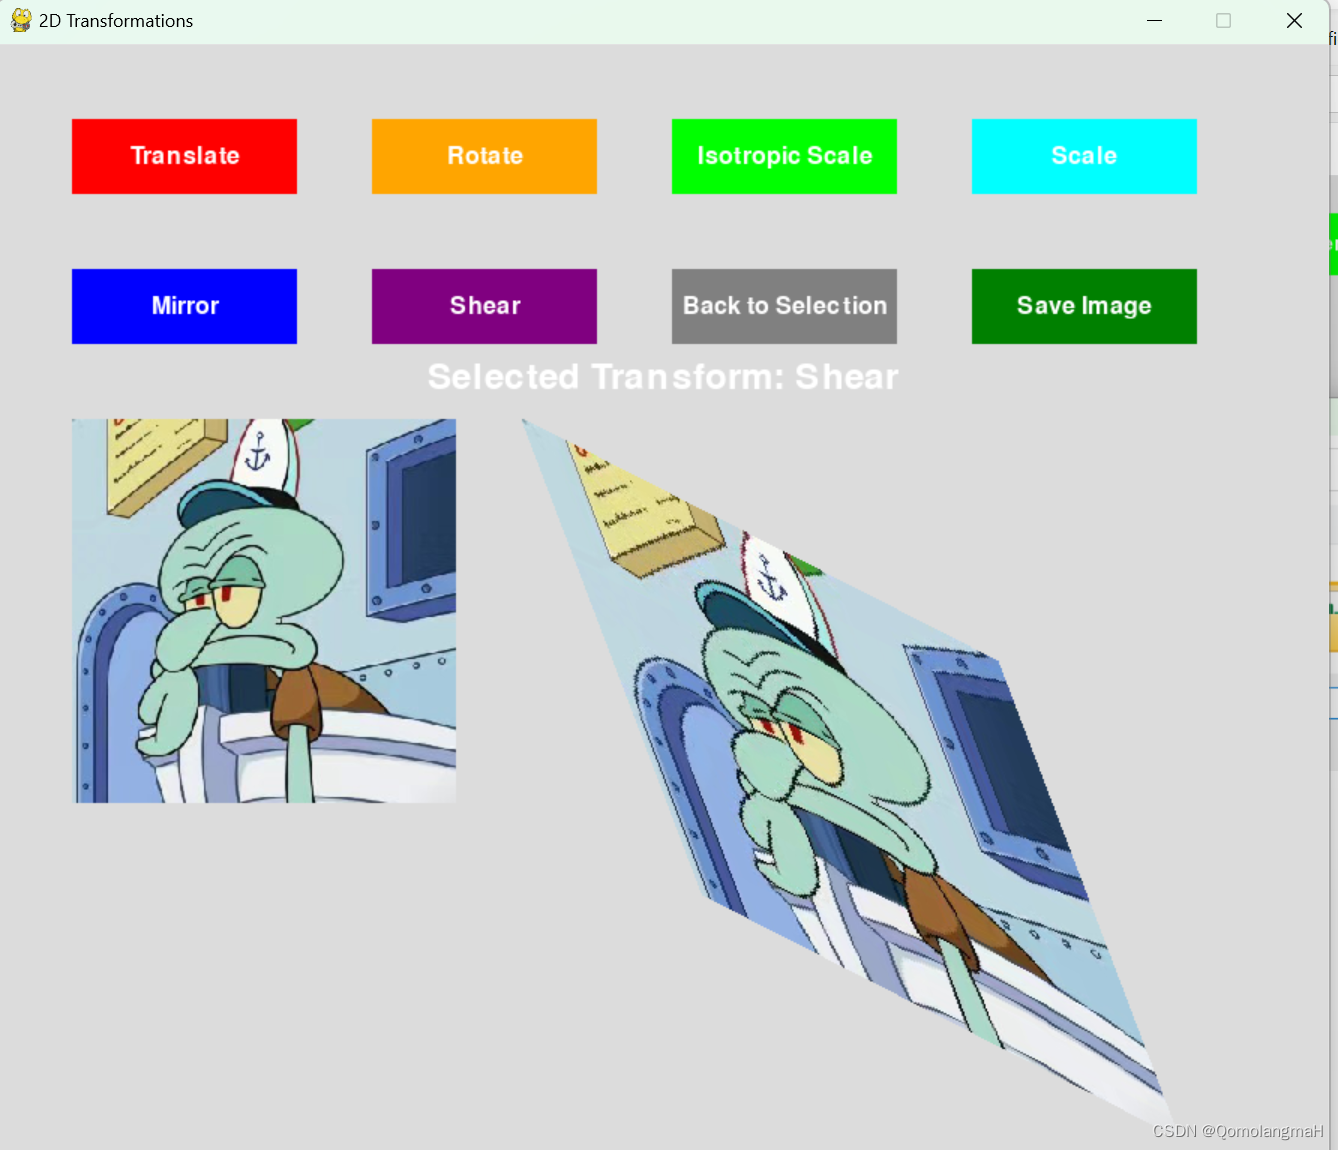
图像操作
保存图像