vue+springboot登录与注册功能的实现
注:对于JWT的学习,首先要完成注册和登录的功能,本篇博客是基于上述博客的进阶学习,代码页也是在原有的基础上进行扩展
①在pom.xml添加依赖
<!-- JWT -->
<dependency>
  <groupId>com.auth0</groupId>
  <artifactId>java-jwt</artifactId>
  <version>4.3.0</version>
</dependency>
②在common文件夹下定义一个JwtInterceptor拦截器java文件
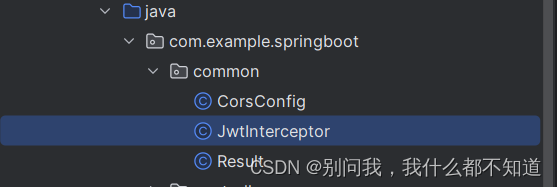
Jwtlnterceptor:
package com.example.springboot.common;

import cn.hutool.core.util.StrUtil;
import com.auth0.jwt.JWT;
import com.auth0.jwt.JWTVerifier;
import com.auth0.jwt.algorithms.Algorithm;
import com.auth0.jwt.exceptions.JWTDecodeException;
import com.auth0.jwt.exceptions.JWTVerificationException;
import com.example.springboot.entity.User;
import com.example.springboot.exception.ServiceException;
import org.springframework.web.method.HandlerMethod;
import org.springframework.web.servlet.HandlerInterceptor;
import com.example.springboot.mapper.UserMapper;
import javax.annotation.Resource;
import javax.servlet.http.HttpServletRequest;
import javax.servlet.http.HttpServletResponse;

public class JwtInterceptor implements HandlerInterceptor {

    @Resource
    private UserMapper userMapper;

    @Override
    public boolean preHandle(HttpServletRequest request, HttpServletResponse response, Object handler) {
        String token = request.getHeader("token");
        if (StrUtil.isBlank(token)) {
            token = request.getParameter("token");
        }
        // 如果不是映射到方法直接通过
//        if (handler instanceof HandlerMethod) {
//            AuthAccess annotation = ((HandlerMethod) handler).getMethodAnnotation(AuthAccess.class);
//            if (annotation != null) {
//                return true;
//            }
//        }
        // 执行认证
        if (StrUtil.isBlank(token)) {
            throw new ServiceException("401", "请登录");
        }
        // 获取 token 中的 user id
        String userId;
        try {
            userId = JWT.decode(token).getAudience().get(0);
        } catch (JWTDecodeException j) {
            throw new ServiceException("401", "请登录");
        }
        // 根据token中的userid查询数据库
        User user = userMapper.selectbyid(Integer.valueOf(userId));
        if (user == null) {
            throw new ServiceException("401", "请登录");
        }
        // 用户密码加签验证 token
        JWTVerifier jwtVerifier = JWT.require(Algorithm.HMAC256(user.getPassword())).build();
        try {
            jwtVerifier.verify(token); // 验证token
        } catch (JWTVerificationException e) {
            throw new ServiceException("401", "请登录");
        }
        return true;
    }
}
③修改自定义异常
GlobalExeception:
package com.example.springboot.exception;

import com.example.springboot.common.Result;
import org.springframework.web.bind.annotation.ControllerAdvice;
import org.springframework.web.bind.annotation.ExceptionHandler;
import org.springframework.web.bind.annotation.ResponseBody;

@ControllerAdvice
public class GlobalExeception {

    @ExceptionHandler(ServiceException.class)
    @ResponseBody
    public Result serviceException(ServiceException e){
        return Result.error(e.getCode(),e.getMessage());
    }
}
ServiceException:
package com.example.springboot.exception;

import lombok.Getter;

@Getter
public class ServiceException extends RuntimeException{
    private final String code;
    public ServiceException(String msg){
        super(msg);
        this.code="500";
    }
    public ServiceException(String code,String msg){
        super(msg);
        this.code=code;
    }
}
④配置拦截器 InterceptorConfig

InterceptorConfig:
package com.example.springboot.common;

import org.springframework.context.annotation.Bean;
import org.springframework.context.annotation.Configuration;
import org.springframework.web.servlet.config.annotation.InterceptorRegistry;
import org.springframework.web.servlet.config.annotation.ResourceHandlerRegistry;
import org.springframework.web.servlet.config.annotation.WebMvcConfigurationSupport;

@Configuration
public class InterceptorConfig extends WebMvcConfigurationSupport {

    @Override
    protected void addInterceptors(InterceptorRegistry registry) {
        registry.addInterceptor(jwtInterceptor())
                .addPathPatterns("/**").excludePathPatterns("/login");
        super.addInterceptors(registry);
    }

    @Bean
    public JwtInterceptor jwtInterceptor() {
        return new JwtInterceptor();
    }

}
⑤新建一个工具类TokenUtils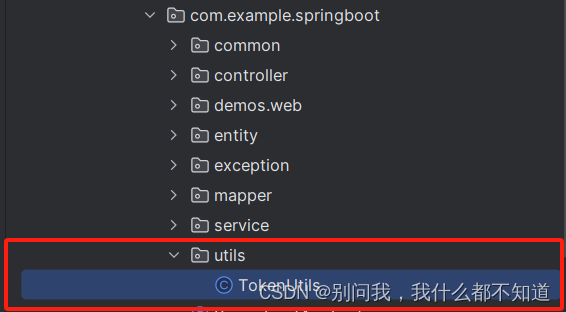
TokenUtils:
package com.example.springboot.utils;

import cn.hutool.core.date.DateUtil;
import cn.hutool.core.util.StrUtil;
import com.auth0.jwt.JWT;
import com.auth0.jwt.algorithms.Algorithm;
import com.example.springboot.entity.User;
import org.springframework.stereotype.Component;
import org.springframework.web.context.request.RequestContextHolder;
import org.springframework.web.context.request.ServletRequestAttributes;
import com.example.springboot.mapper.UserMapper;
import javax.annotation.PostConstruct;
import javax.annotation.Resource;
import javax.servlet.http.HttpServletRequest;
import java.util.Date;

@Component
public class TokenUtils {

    private static UserMapper staticUserMapper;

    @Resource
    UserMapper userMapper;

    @PostConstruct
    public void setUserService() {
        staticUserMapper = userMapper;
    }

    /**
     * 生成token
     *
     * @return
     */
    public static String createToken(String userId, String sign) {
        return JWT.create().withAudience(userId) // 将 user id 保存到 token 里面,作为载荷
                .withExpiresAt(DateUtil.offsetHour(new Date(), 2)) // 2小时后token过期
                .sign(Algorithm.HMAC256(sign)); // 以 password 作为 token 的密钥
    }

    /**
     * 获取当前登录的用户信息
     *
     * @return user对象
     */
    public static User getCurrentUser() {
        try {
            HttpServletRequest request = ((ServletRequestAttributes) RequestContextHolder.getRequestAttributes()).getRequest();
            String token = request.getHeader("token");
            if (StrUtil.isNotBlank(token)) {
                String userId = JWT.decode(token).getAudience().get(0);
                return staticUserMapper.selectbyid(Integer.valueOf(userId));
            }
        } catch (Exception e) {
            return null;
        }
        return null;
    }
}
修改UserService和User:
UserService:
package com.example.springboot.service;

import com.example.springboot.entity.User;
import com.example.springboot.exception.ServiceException;
import com.example.springboot.mapper.UserMapper;
import com.example.springboot.utils.TokenUtils;
import jdk.nashorn.internal.parser.Token;
import org.springframework.beans.factory.annotation.Autowired;
import org.springframework.stereotype.Service;
import org.springframework.web.bind.annotation.RequestBody;

import java.util.List;

@Service
public class UserService {
    @Autowired
    UserMapper userMapper;
    public void insertUser(User user){
        userMapper.insert(user);
    }

    public void updateUser(User user) {
        userMapper.updateUser(user);
    }

    public void deleteUser(Integer id) {
        userMapper.deleteUser(id);
    }

    public void batchdeleteUser(List<Integer> ids) {
        for(Integer id : ids){
            userMapper.deleteUser(id);
        }
    }


    public List<User> selectall() {
        return userMapper.selectall();
    }

    public User selectbyid(Integer id) {
        return userMapper.selectbyid(id);
    }

    public List<User> selectbyname(String name) {
        return userMapper.selectbyname(name);
    }

    public List<User> selectbymore(String username, String name) {
        return userMapper.selectbymore(username,name);
    }

    public List<User> selectbymo(String username, String name) {
        return userMapper.selectbymo(username,name);
    }

    public User login(User user) {
        User dbuser=userMapper.selectbyUsername(user.getUsername());
        if(dbuser == null){
            throw new ServiceException("账号不存在");
        }
        if(!user.getPassword().equals(dbuser.getPassword())){
            throw new ServiceException("账号或者密码错误");
        }
        String token=TokenUtils.createToken(dbuser.getId().toString(),dbuser.getPassword());
        dbuser.setToken(token);
        return dbuser;
    }

    public User register(User user) {
        User dbuser=userMapper.selectbyUsername(user.getUsername());
        if(dbuser != null){
            throw new ServiceException("用户名已存在");
        }
        userMapper.insert(user);
        return user;
    }
}
User:
package com.example.springboot.entity;

import lombok.AllArgsConstructor;
import lombok.Data;

@Data
public class User {
    private Integer id;
    private String username;
    private String password;
    private String name;
    private String phone;
    private String email;
    private String address;
    private String avatar;
    private String token;
}
登录试下,在预览发现token:
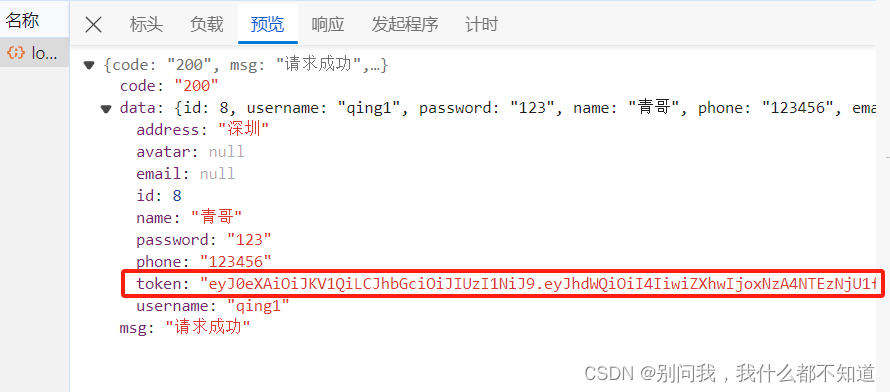
请求的数据会存在应用程序的本地存储中:
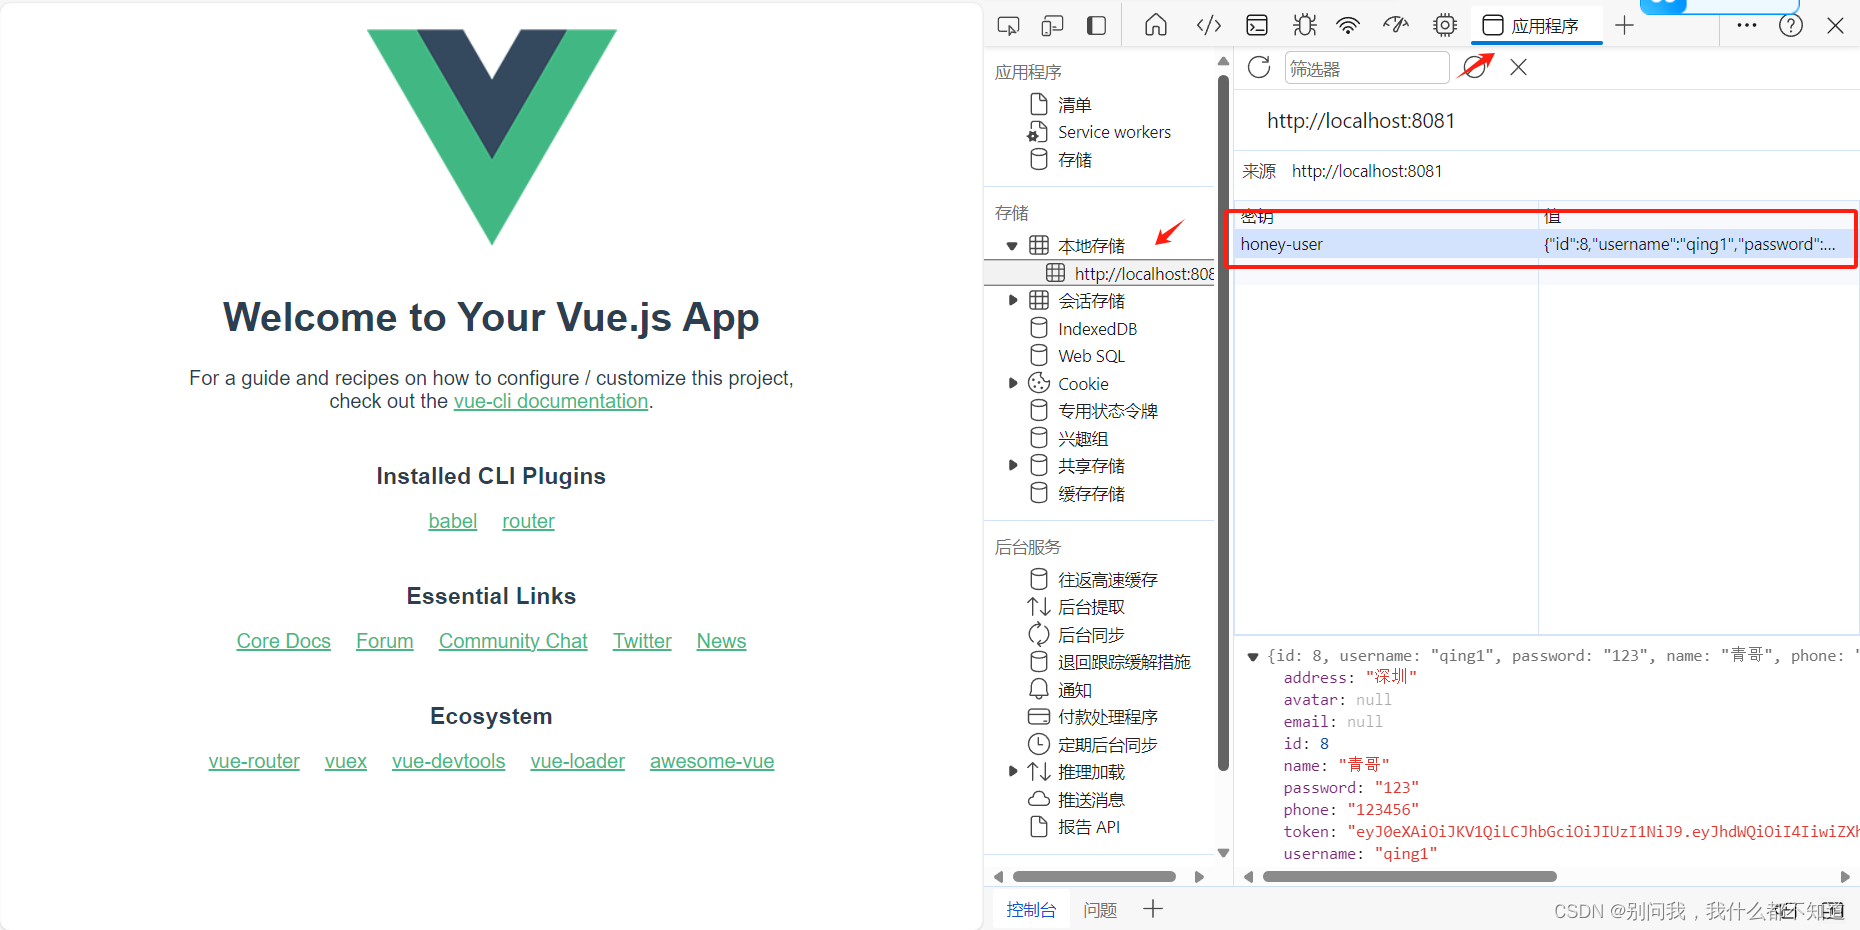
⑥在vue中修改request.js
import axios from 'axios'
import router from "@/router";

// 创建可一个新的axios对象
const request = axios.create({
    baseURL: 'http://localhost:9090',   // 后端的接口地址  ip:port
    timeout: 30000
})

// request 拦截器
// 可以自请求发送前对请求做一些处理
// 比如统一加token,对请求参数统一加密
request.interceptors.request.use(config => {
    config.headers['Content-Type'] = 'application/json;charset=utf-8';
    let user=JSON.parse(localStorage.getItem("honey-user")||'{}')
    // let user = localStorage.getItem("user") ? JSON.parse(localStorage.getItem("user")) : null
    config.headers['token'] = user.token  // 设置请求头

    return config
}, error => {
    console.error('request error: ' + error) // for debug
    return Promise.reject(error)
});

// response 拦截器
// 可以在接口响应后统一处理结果
request.interceptors.response.use(
    response => {
        let res = response.data;

        // 兼容服务端返回的字符串数据
        if (typeof res === 'string') {
            res = res ? JSON.parse(res) : res
        }
        if(res.code === '401'){
            router.push('/login')
        }
        return res;
    },
    error => {
        console.error('response error: ' + error) // for debug
        return Promise.reject(error)
    }
)


export default request
管理系统代码要做如下修改:退出登录的时候要清除数据
<template>
  <div>
    <el-container>
      <!--    侧边栏  -->
      <el-aside :width="asideWidth" style="min-height: 100vh; background-color: #001529">
        <div style="height: 60px; color: white; display: flex; align-items: center; justify-content: center">
          <img src="@/assets/logo1.png" alt="" style="width: 40px; height: 40px">
          <span class="logo-title" v-show="!isCollapse">honey2024</span>
        </div>

        <el-menu :collapse="isCollapse" :collapse-transition="false" router background-color="#001529" text-color="rgba(255, 255, 255, 0.65)" active-text-color="#fff" style="border: none" :default-active="$route.path">
          <el-menu-item index="/">
            <i class="el-icon-menu"></i>
            <span slot="title">系统首页</span>
          </el-menu-item>
          <el-menu-item index="/1">
            <i class="el-icon-house"></i>
            <span slot="title">系统首页</span>
          </el-menu-item>
          <el-menu-item index="/2">
            <i class="el-icon-house"></i>
            <span slot="title">系统首页</span>
          </el-menu-item>
          <el-submenu index="3">
            <template slot="title">
              <i class="el-icon-menu"></i>
              <span>信息管理</span>
            </template>
            <el-menu-item>用户信息</el-menu-item>
            <el-menu-item>管理员信息</el-menu-item>
            <el-menu-item index="/">系统首页</el-menu-item>
          </el-submenu>
        </el-menu>

      </el-aside>

      <el-container>
        <!--        头部区域-->
        <el-header>

          <i :class="collapseIcon" style="font-size: 26px" @click="handleCollapse"></i>
          <el-breadcrumb separator-class="el-icon-arrow-right" style="margin-left: 20px">
            <el-breadcrumb-item :to="{ path: '/' }">首页</el-breadcrumb-item>
            <el-breadcrumb-item :to="{ path: '/user' }">用户管理</el-breadcrumb-item>
          </el-breadcrumb>

          <div style="flex: 1; width: 0; display: flex; align-items: center; justify-content: flex-end">
            <i class="el-icon-quanping" style="font-size: 26px" @click="handleFull"></i>
            <el-dropdown placement="bottom">
              <div style="display: flex; align-items: center; cursor: default">
                <img src="@/assets/logo1.png" alt="" style="width: 40px; height: 40px; margin: 0 5px">
                <span>管理员</span>
              </div>
              <el-dropdown-menu slot="dropdown">
                <el-dropdown-item>个人信息</el-dropdown-item>
                <el-dropdown-item>修改密码</el-dropdown-item>
                <el-dropdown-item @click.native="logout">退出登录</el-dropdown-item>
              </el-dropdown-menu>
            </el-dropdown>
          </div>

        </el-header>

        <!--        主体区域-->
        <el-main>
          <div style="box-shadow: 0 0 10px rgba(0,0,0,.1); padding: 10px 20px; border-radius: 5px; margin-bottom: 10px">
            早安,骚年,祝你开心每一天!
          </div>
          <div style="display: flex;">
            <el-card style="width: 50%;margin-right: 10px;">
              <div slot="header" class="clearfix">
                <span>青哥哥带你做毕设2024</span>
              </div>
              <div>
                2024毕设正式开始了!青哥哥带你手把手敲出来!
                <div style="margin-top: 20px">
                  <div style="margin: 10px 0"><strong>主题色</strong></div>
                  <el-button type="primary">按钮</el-button>
                  <el-button type="success">按钮</el-button>
                  <el-button type="warning">按钮</el-button>
                  <el-button type="danger">按钮</el-button>
                  <el-button type="info">按钮</el-button>
                </div>
              </div>
            </el-card>
            <el-card style="width: 50%;">
              <div slot="header" class="clearfix">
                <span>渲染用户的数据</span>
              </div>
              <div>
                <el-table :data="users">
                  <el-table-column label="ID" prop="id"/>
                  <el-table-column label="用户名" prop="username"/>
                  <el-table-column label="姓名" prop="name"/>
                  <el-table-column label="地址" prop="address"/>
                </el-table>
              </div>
            </el-card>
          </div>

        </el-main>

      </el-container>


    </el-container>
  </div>
</template>

<script>
import axios from "axios";
import request from '@/utils/request'

export default {
  name: 'HomeView',
  data() {
    return {
      isCollapse: false,  // 不收缩
      asideWidth: '200px',
      collapseIcon: 'el-icon-s-fold',
      users: []
    }
  },
  mounted() {
    // axios.get('http://localhost:9090/user/selectall').then(res=>{
    //   console.log(res.data);
    //   this.users=res.data.data
    // })
    request.get('/user/selectall').then(res => {
      this.users = res.data
    })
  },
  methods: {
    logout() {
      localStorage.removeItem("honey-user")
      this.$router.push('/login')
    },
    handleFull() {
      document.documentElement.requestFullscreen()
    },
    handleCollapse() {
      this.isCollapse = !this.isCollapse
      this.asideWidth = this.isCollapse ? '64px' : '200px'
      this.collapseIcon = this.isCollapse ? 'el-icon-s-unfold' : 'el-icon-s-fold'
    }
  }
}
</script>

<style>
.el-menu--inline {
  background-color: #000c17 !important;
}

.el-menu--inline .el-menu-item {
  background-color: #000c17 !important;
  padding-left: 49px !important;
}

.el-menu-item:hover, .el-submenu__title:hover {
  color: #fff !important;
}

.el-submenu__title:hover i {
  color: #fff !important;
}

.el-menu-item:hover i {
  color: #fff !important;
}

.el-menu-item.is-active {
  background-color: #1890ff !important;
  border-radius: 5px !important;
  width: calc(100% - 8px);
  margin-left: 4px;
}

.el-menu-item.is-active i, .el-menu-item.is-active .el-tooltip {
  margin-left: -4px;
}

.el-menu-item {
  height: 40px !important;
  line-height: 40px !important;
}

.el-submenu__title {
  height: 40px !important;
  line-height: 40px !important;
}

.el-submenu .el-menu-item {
  min-width: 0 !important;
}

.el-menu--inline .el-menu-item.is-active {
  padding-left: 45px !important;
}

/*.el-submenu__icon-arrow {*/
/*  margin-top: -5px;*/
/*}*/

.el-aside {
  transition: width .3s;
  box-shadow: 2px 0 6px rgba(0, 21, 41, .35);
}

.logo-title {
  margin-left: 5px;
  font-size: 20px;
  transition: all .3s; /* 0.3s */
}

.el-header {
  box-shadow: 2px 0 6px rgba(0, 21, 41, .35);
  display: flex;
  align-items: center;
}
</style>
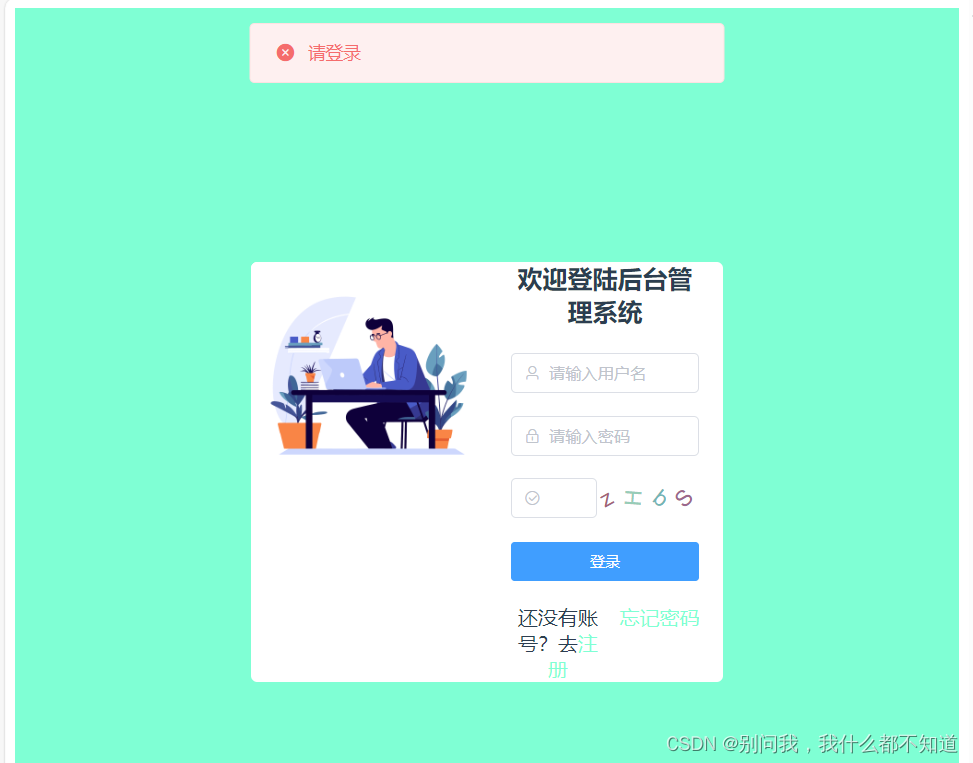
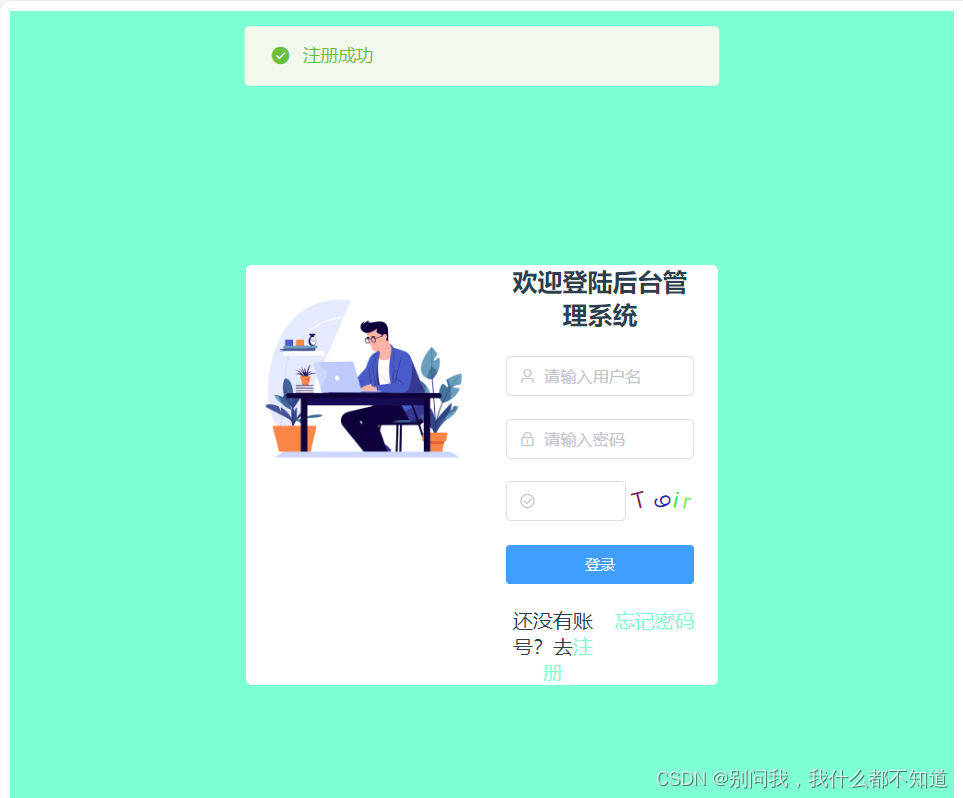
此时还有个小问题:在注册页注册的时候,会显示登录失败
⑦新建自定义注解(作用:在拦截器需要放行的地方放行)

AuthAuccess:
import java.lang.annotation.*;

@Target(ElementType.METHOD)
@Retention(RetentionPolicy.RUNTIME)
@Documented
public @interface AuthAccess {
}
Jwtlnterceptor:
package com.example.springboot.common;
import org.springframework.web.method.HandlerMethod;
import cn.hutool.core.util.StrUtil;
import com.auth0.jwt.JWT;
import com.auth0.jwt.JWTVerifier;
import com.auth0.jwt.algorithms.Algorithm;
import com.auth0.jwt.exceptions.JWTDecodeException;
import com.auth0.jwt.exceptions.JWTVerificationException;
import com.example.springboot.entity.User;
import com.example.springboot.exception.ServiceException;
import org.springframework.web.servlet.HandlerInterceptor;
import com.example.springboot.mapper.UserMapper;
import javax.annotation.Resource;
import javax.servlet.http.HttpServletRequest;
import javax.servlet.http.HttpServletResponse;

public class JwtInterceptor implements HandlerInterceptor {

    @Resource
    private UserMapper userMapper;

    @Override
    public boolean preHandle(HttpServletRequest request, HttpServletResponse response, Object handler) {
        String token = request.getHeader("token");
        if (StrUtil.isBlank(token)) {
            token = request.getParameter("token");
        }
        // 如果不是映射到方法直接通过
        if (handler instanceof HandlerMethod) {
            AuthAccess annotation = ((HandlerMethod) handler).getMethodAnnotation(AuthAccess.class);
            if (annotation != null) {
                return true;
            }
        }
        // 执行认证
        if (StrUtil.isBlank(token)) {
            throw new ServiceException("401", "请登录");
        }
        // 获取 token 中的 user id
        String userId;
        try {
            userId = JWT.decode(token).getAudience().get(0);
        } catch (JWTDecodeException j) {
            throw new ServiceException("401", "请登录");
        }
        // 根据token中的userid查询数据库
        User user = userMapper.selectbyid(Integer.valueOf(userId));
        if (user == null) {
            throw new ServiceException("401", "请登录");
        }
        // 用户密码加签验证 token
        JWTVerifier jwtVerifier = JWT.require(Algorithm.HMAC256(user.getPassword())).build();
        try {
            jwtVerifier.verify(token); // 验证token
        } catch (JWTVerificationException e) {
            throw new ServiceException("401", "请登录");
        }
        return true;
    }
}
WebController:引用自定义注解地方就表示放行
package com.example.springboot.controller;

import cn.hutool.core.util.StrUtil;
import com.example.springboot.common.AuthAccess;
import com.example.springboot.common.Result;
import com.example.springboot.entity.User;
import com.example.springboot.exception.ServiceException;
import com.example.springboot.service.UserService;
import org.springframework.web.bind.annotation.*;

import javax.annotation.Resource;

@RestController
public class WebController {
    @Resource
    UserService userService;

    @AuthAccess
    @GetMapping("/")
    public Result hello(){
        return Result.success("success");
    }

    @PostMapping("/login")
    public Result login(@RequestBody User user){
        if(StrUtil.isBlank(user.getUsername())||StrUtil.isBlank(user.getPassword())){
            return Result.error("数据输入错误");
        }
        user=userService.login(user);
        return Result.success(user);
    }

    @AuthAccess
    @PostMapping("/register")
    public Result register(@RequestBody User user){
        if(StrUtil.isBlank(user.getUsername())||StrUtil.isBlank(user.getPassword())){
            throw new ServiceException("输入不合法");
        }
        if(user.getUsername().length()>10||user.getPassword().length()>20){
            throw new ServiceException("长度过长");
        }
        user=userService.register(user);
        return Result.success(user);
    }
}
如果不使用自定义注解的方法,也可以直接修改InterceptorConfig:
package com.example.springboot.common;

import org.springframework.context.annotation.Bean;
import org.springframework.context.annotation.Configuration;
import org.springframework.web.servlet.config.annotation.InterceptorRegistry;
import org.springframework.web.servlet.config.annotation.ResourceHandlerRegistry;
import org.springframework.web.servlet.config.annotation.WebMvcConfigurationSupport;

@Configuration
public class InterceptorConfig extends WebMvcConfigurationSupport {

    @Override
    protected void addInterceptors(InterceptorRegistry registry) {
        registry.addInterceptor(jwtInterceptor())
                .addPathPatterns("/**").excludePathPatterns("/login","/register");
        super.addInterceptors(registry);
    }

    @Bean
    public JwtInterceptor jwtInterceptor() {
        return new JwtInterceptor();
    }

}




![306_C++_QT_创建多个tag页面,使用QMdiArea容器控件,每个页面都是一个新的表格[或者其他]页面](https://img-blog.csdnimg.cn/direct/c240cfeb26144541893de61c2f797eff.png)




![[AIGC] JVM内存结构](https://img-blog.csdnimg.cn/img_convert/248cecbc862acba6ade2cd008631cde4.png)