一、商品详情页面

代码模版
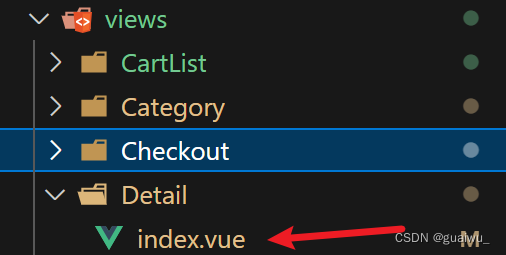
创建Detail文件夹, 然后创建index.vue文件
<script setup>
import { getDetail } from "@/api/goods/index";
import { ref, onMounted } from "vue";
import { useRoute } from "vue-router";
import { useCartStore } from '@/store/cartStore';

const cartStore = useCartStore()
const route = useRoute();
const goods = ref({});
const category = ref({});
const seller = ref({});
const imageList = [
  require(`@/assets/img/hot/hotgoods1.jpg`),
  require(`@/assets/img/hot/hotgoods2.jpg`),
  require(`@/assets/img/hot/hotgoods3.jpg`),
  require(`@/assets/img/hot/hotgoods4.jpg`),
];
// const imageList = []

const getGoods = async () => {
  const res = await getDetail(route.params.id);
  goods.value = res.data.good;
  category.value = res.data.category;
  seller.value = res.data.seller;
  console.log(res.data.pictureList)
  imageList.value = res.data.pictureList
};
//count
const count = ref(1)
const countChange = (count) => {
    console.log(count);
}
//添加购物车
const addCart = () => {
    //console.log(goods)

        cartStore.addCart({
            id: goods.value.id,
            name: goods.value.goodsName,
            picture: goods.value.picture1,
            price: goods.value.price,
            count: count.value,
            // attrsText: skuObj.specsText,
            selected: true
        })
    }


onMounted(() => {
  getGoods();
});
console.log(imageList);
// console.log(data);
</script>


<template>
  <div class="lyg-goods-page">
    <div class="container">
      <div class="bread-container">
        <el-breadcrumb separator=">">
          <el-breadcrumb-item :to="{ path: '/' }">首页</el-breadcrumb-item>
          <el-breadcrumb-item :to="{ path: `/category/sub/${category.id}` }"
            >{{ category.categoryName }}
          </el-breadcrumb-item>
          <el-breadcrumb-item :to="{ path: '/' }"
            >{{ goods.goodsName }}
          </el-breadcrumb-item>
        </el-breadcrumb>
      </div>
      <!-- 商品信息 -->
      <div class="info-container">
        <div>
          <div class="goods-info">
            <div class="media">
              <!-- 图片预览区 -->
              <!--                 :src="require(`@/assets/img/${goods.picture1}.jpg`)" -->
              <!-- <img class="goods-img" :alt="goods.alt" /> -->
              <LygImageView :image-list="imageList"/>
            </div>
            <div class="spec">
              <!-- 商品信息区 -->
              <p class="g-desc">{{ goods.goodsName }}</p>
              <p class="g-name">{{ goods.goodsDetail }}</p>
              <p class="g-price">
                <span>{{ goods.price }}</span>
                <span> {{ goods.originalPrice }}</span>
              </p>
              <div class="g-service">
                <!-- <dl>
                                    <dt>促销</dt>
                                    <dd>12月好物放送,App领券购买直降120元</dd>
                                </dl> -->
                <dl>
                  <dt>服务</dt>
                  <dd>
                    <span>无忧退货</span>
                    <span>快速退款</span>
                    <span>免费包邮</span>
                    <a href="javascript:;">了解详情</a>
                  </dd>
                </dl>
              </div>
              <!-- 统计数量 -->
              <ul class="goods-sales">
                <li>
                  <p>商品数量</p>
                  <p>{{ goods.goodsNumber }}</p>
                  <p><i class="iconfont icon-comment-filling"></i>查看</p>
                </li>
                <li>
                  <p>人气数值</p>
                  <p>{{ goods.heat }}</p>
                  <p><i class="iconfont icon-task-filling"></i>销量人气</p>
                </li>
                <li>
                  <p>卖家信誉</p>
                  <p>{{ seller.reputation }}</p>
                  <p><i class="iconfont icon-dynamic-filling"></i>卖家主页</p>
                </li>

              </ul>

              <!-- 数据组件 -->
              <el-input-number :min="1" v-model="count" @change="countChange" />
              <!-- 按钮组件 -->
              <div>
                <el-button size="large" class="btn" @click="addCart"> 加入购物车 </el-button>
              </div>
              <!--  -->
            </div>
          </div>

        </div>
      </div>
    </div>
  </div>
</template>


<style scoped lang='scss'>
.lyg-goods-page {
  border-bottom: solid 0.5px #666;
  .goods-info {
    min-height: 600px;
    background: #fff;
    display: flex;

    .media {
      width: 580px;
      height: 600px;
      padding: 30px 100px;

    }

    .spec {
      flex: 1;
      padding: 30px 160px 30px 0;
    }
  }

  .goods-footer {
    display: flex;
    margin-top: 20px;

    .goods-article {
      width: 940px;
      margin-right: 20px;
    }

    .goods-aside {
      width: 280px;
      min-height: 1000px;
    }
  }

  .goods-tabs {
    min-height: 600px;
    background: #fff;
  }

  .goods-warn {
    min-height: 600px;
    background: #fff;
    margin-top: 20px;
  }

  .number-box {
    display: flex;
    align-items: center;

    .label {
      width: 60px;
      color: #999;
      padding-left: 10px;
    }
  }

  .g-name {
    width: 520px;
    font-size: 22px;
    text-align: left;
  }

  .g-desc {
    color: #000000;
    font-size: 25px;
    margin-bottom: 10px;
    margin-top: 10px;
  }

  .g-price {
    margin-top: 10px;

    span {
      &::before {
        content: "¥";
        font-size: 14px;
      }

      &:first-child {
        color: $priceColor;
        margin-right: 10px;
        font-size: 22px;
      }

      &:last-child {
        color: #999;
        text-decoration: line-through;
        font-size: 16px;
      }
    }
  }

  .g-service {
    background: #f5f5f5;
    width: 500px;
    padding: 20px 10px 0 10px;
    margin-top: 10px;

    dl {
      padding-bottom: 20px;
      display: flex;
      align-items: center;

      dt {
        width: 50px;
        color: #999;
      }

      dd {
        color: #666;

        &:last-child {
          span {
            margin-right: 10px;

            &::before {
              content: "•";
              color: $lygColor;
              margin-right: 2px;
            }
          }

          a {
            color: $lygColor;
          }
        }
      }
    }
  }

  .goods-sales {
    display: flex;
    width: 400px;
    align-items: center;
    text-align: center;
    height: 140px;

    li {
      flex: 1;
      position: relative;

      ~ li::after {
        position: absolute;
        top: 10px;
        left: 0;
        height: 60px;
        border-left: 1px solid #e4e4e4;
        content: "";
      }

      p {
        &:first-child {
          color: #999;
        }

        &:nth-child(2) {
          color: $priceColor;
          margin-top: 10px;
        }

        &:last-child {
          color: #666;
          margin-top: 10px;

          i {
            color: $lygColor;
            font-size: 14px;
            margin-right: 2px;
          }

          &:hover {
            color: $lygColor;
            cursor: pointer;
          }
        }
      }
    }
  }
}

.goods-tabs {
  min-height: 600px;
  background: #fff;

  nav {
    height: 70px;
    line-height: 70px;
    display: flex;
    border-bottom: 1px solid #f5f5f5;

    a {
      padding: 0 40px;
      font-size: 18px;
      position: relative;

      > span {
        color: $priceColor;
        font-size: 16px;
        margin-left: 10px;
      }
    }
  }
}

.goods-detail {
  padding: 40px;

  .attrs {
    display: flex;
    flex-wrap: wrap;
    margin-bottom: 30px;

    li {
      display: flex;
      margin-bottom: 10px;
      width: 50%;

      .dt {
        width: 100px;
        color: #999;
      }

      .dd {
        flex: 1;
        color: #666;
      }
    }
  }

  > img {
    width: 100%;
  }
}

.btn {
  margin-top: 20px;
}

.bread-container {
  padding: 25px 0;
}
</style>
封装接口
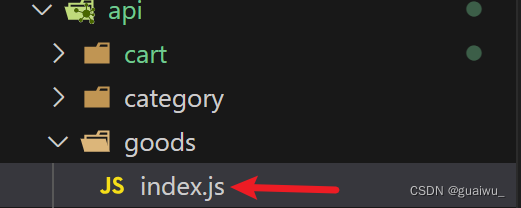
创建文件
import http from "@/utils/http"

//获取商品信息
export function getDetail (id) {
  return http({
    url: '/goods',
      method: 'get',
      params: {
        id
      }
  })
}
配置路由
商品详情页面也是二级页面
{
        path: "/category/new",
        component: () => import("@/views/Category/New.vue"),
      },
      {
        path: "category/sub/:id",
        component: SubCategory,
      },
      {
        path: "/detail/:id",
        component: Detail,
      },
}
链接跳转
将之前页面商品的跳转链接修改
<RouterLink :to="`/detail/${item.id}`">

</RouterLink>
二、详情页面图片显示组件
创建文件
index.js在 components 文件夹下, index.vue 在ImgView文件夹下

代码模版
index.vue
<script setup>
import { ref, watch } from "vue";
import { useMouseInElement } from "@vueuse/core";

//const imageList = [
  // require(`@/assets/img/hot/hotgoods1.jpg`),
  // require(`@/assets/img/hot/hotgoods2.jpg`),
  // require(`@/assets/img/hot/hotgoods3.jpg`),
  // require(`@/assets/img/hot/hotgoods4.jpg`),
//];
const image1List = [
  require(`@/assets/img/hot/hotgoods1.jpg`),
  require(`@/assets/img/hot/hotgoods2.jpg`),
  require(`@/assets/img/hot/hotgoods3.jpg`),
  require(`@/assets/img/hot/hotgoods4.jpg`),
];
// 图片列表
// const imageList = []
const props = defineProps({
    imageList: {
        type: Array,
        default: () => []
    }
})
// const props = defineProps({
//   imageList: Array,
// });
const imgList = props.imageList

//记录激活下标
const activeIndex = ref(0);
//鼠标划过事件
const enterhandler = (i) => {
  activeIndex.value = i;
};

console.log(imgList);
console.log(image1List);
</script>
<!--

 -->
<template>
  <div class="goods-image">
    <!-- 左侧大图-->
    <div class="middle" ref="target">
      <img class="middle-img" :src="imgList[activeIndex]" alt="" />

    </div>
    <!-- 小图列表 -->
    <ul class="small">
      <li
        v-for="(img, i) in imgList"
        :key="i"
        @mouseenter="enterhandler(i)"
        :class="{ active: i === activeIndex }"
      >
        <img :src="img" alt="" />
      </li>
    </ul>


  </div>
</template>

<style scoped lang="scss">
.goods-image {
  width: 480px;
  height: 400px;
  position: relative;
  display: flex;

  .middle {
    width: 400px;
    height: 400px;
    background: #f5f5f5;
    border: solid 1px #f6f6f6;
    .middle-img {
      width: 400px;
      height: 400px;
    }
  }


  .small {
    width: 80px;

    li {
      width: 68px;
      height: 68px;
      margin-left: 12px;
      margin-bottom: 15px;
      border: solid 1px #dad6d6;
      cursor: pointer;
      img {
        width: 68px;
        height: 68px;
      }

      &:hover,
      &.active {
        border: 2px solid $lygColor;
      }
    }
  }
}
</style>
index.js
// 通过插件的方式把components中的所有组件都进行全局化注册
import ImageView from './ImageView/index.vue'
export const componentPlugin ={
    install(app){
        // app.component('组件名字',组件配置对象)
        app.component('LygImageView',ImageView)
    }
}
三、登录页面

代码模版
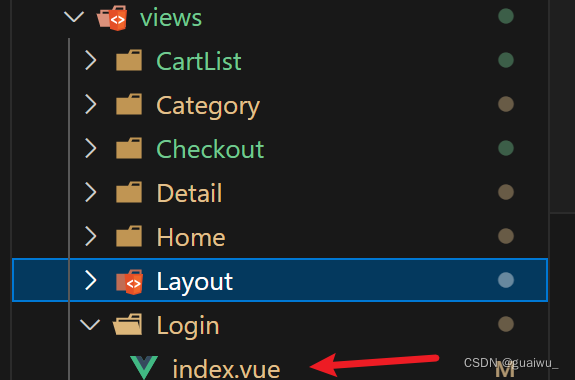
创建文件
<script setup>
import {useUserStore} from '@/store/user'
import { ref } from "vue";
import { useRouter } from 'vue-router';
// 1.准备表单对象
const form = ref({
username: "",
password: "",
agree: true,
});
// 2. 校验规则对象
const rules = {
username: [{ required: true, message: "用户名不能为空", trigger: "blur" }],
password: [
{ required: true, message: "密码不能为空", trigger: "blur" },
{ min: 6, max: 24, message: "密码长度要求6-14个字符", trigger: "blur" },
],
agree: [
{
validator: (rule, value, callBack) => {
console.log(value);
//自定义校验逻辑
// 勾选协议通过,不勾选不通过
if (value) {
callBack();
} else {
callBack(new Error("请勾选协议"));
}
},
},
],
};
// 3.获取 form 实例做统一校验
const router = useRouter()
const formRef = ref(null)
const userStore = useUserStore()
const doLogin = () => {
const { username, password } = form.value
// 调用实例方法
formRef.value.validate(async (valid) => {
// valid: 所有表单都通过校验 才为true
console.log(valid)
console.log(username,password)
// 以valid做为判断条件 如果通过校验才执行登录逻辑
if (valid) {
// TODO LOGIN
await userStore.getUserInfo({ username, password })
// 1. 提示用户
ElMessage({ type: 'success', message: '登录成功' })
// 2. 跳转首页
router.replace({ path: '/' })
}
})
}
// TODO LOGIN
</script>
<template>
<div class="wrap">
<header class="login-header">
<div class="container m-top-20">
<h1 class="logo">
<a href="/">乐易购</a>
</h1>
<RouterLink class="entry" to="/">
进入网站首页
<i class="iconfont icon-angle-right"></i>
<i class="iconfont icon-angle-right"></i>
</RouterLink>
</div>
</header>
<section class="login-section">
<div class="wrapper">
<nav>
<a href="javascript:;">账户登录</a>
</nav>
<div class="username-box">
<div class="form">
<el-form ref="formRef" label-position="right" :model="form"
:rules="rules"
label-width="60px" status-icon>
<el-form-item prop="username" label="账户">
<el-input v-model="form.username" />
</el-form-item>
<el-form-item prop="password" label="密码">
<el-input v-model="form.password" />
</el-form-item>
<el-form-item prop="agree" label-width="22px">
<el-checkbox size="large" v-model="form.agree">
我已同意隐私条款和服务条款
</el-checkbox>
</el-form-item>
<el-button size="large" class="subBtn" @click="doLogin">点击登录</el-button>
</el-form>
</div>
</div>
</div>
</section>
<footer class="login-footer">
<div class="container">
<p>
<a href="javascript:;">关于我们</a>
<a href="javascript:;">帮助中心</a>
<a href="javascript:;">售后服务</a>
<a href="javascript:;">配送与验收</a>
<a href="javascript:;">商务合作</a>
<a href="javascript:;">搜索推荐</a>
<a href="javascript:;">友情链接</a>
</p>
<p>CopyRight © 乐易购</p>
</div>
</footer>
</div>
</template>
<style scoped lang='scss'>
.login-header {
background: #fff;
border-bottom: 1px solid #e4e4e4;
.container {
display: flex;
align-items: flex-end;
justify-content: space-between;
}
.logo {
width: 300px;
height: 132px;
text-align: right;
line-height: 132px;
text-shadow: 5px 5px 2px #251818;
font-size: 45px;
letter-spacing: 0.2em;
font-family: Microsoft YaHei;
a {
height: 132px;
width: 100%;
text-indent: -9999px;
color: $lygColor;
}
}
.sub {
flex: 1;
font-size: 24px;
font-weight: normal;
margin-bottom: 38px;
margin-left: 20px;
color: #666;
}
.entry {
color: #000;
width: 120px;
margin-bottom: 38px;
font-size: 16px;
i {
font-size: 14px;
color: $warnColor;
letter-spacing: -5px;
}
}
}
.login-section {
background: url('@/assets/login.png') no-repeat center / cover;
height: 488px;
position: relative;
.wrapper {
width: 380px;
background: #fff;
position: absolute;
left: 50%;
top: 54px;
transform: translate3d(100px, 0, 0);
box-shadow: 0 0 10px rgba(0, 0, 0, 0.15);
nav {
font-size: 14px;
height: 55px;
margin-bottom: 20px;
border-bottom: 1px solid #f5f5f5;
display: flex;
padding: 0 40px;
text-align: right;
align-items: center;
a {
color: #000;
flex: 1;
line-height: 1;
display: inline-block;
font-size: 18px;
position: relative;
text-align: center;
}
}
}
}
.login-footer {
padding: 30px 0 50px;
background: #fff;
p {
text-align: center;
color: #999;
padding-top: 20px;
a {
line-height: 1;
padding: 0 10px;
color: #999;
display: inline-block;
~ a {
border-left: 1px solid #ccc;
}
}
}
}
.username-box {
.toggle {
padding: 15px 40px;
text-align: right;
a {
color: $lygColor;
i {
font-size: 14px;
}
}
}
.form {
padding: 0 20px 20px 20px;
&-item {
margin-bottom: 28px;
.input {
position: relative;
height: 36px;
> i {
width: 34px;
height: 34px;
background: #cfcdcd;
color: #fff;
position: absolute;
left: 1px;
top: 1px;
text-align: center;
line-height: 34px;
font-size: 18px;
}
input {
padding-left: 44px;
border: 1px solid #cfcdcd;
height: 36px;
line-height: 36px;
width: 100%;
&.error {
border-color: $priceColor;
}
&.active,
&:focus {
border-color: $lygColor;
}
}
.code {
position: absolute;
right: 1px;
top: 1px;
text-align: center;
line-height: 34px;
font-size: 14px;
background: #f5f5f5;
color: #666;
width: 90px;
height: 34px;
cursor: pointer;
}
}
> .error {
position: absolute;
font-size: 12px;
line-height: 28px;
color: $priceColor;
i {
font-size: 14px;
margin-right: 2px;
}
}
}
.agree {
a {
color: #069;
}
}
.btn {
display: block;
width: 100%;
height: 40px;
color: #fff;
text-align: center;
line-height: 40px;
background: $lygColor;
&.disabled {
background: #cfcdcd;
}
}
}
.action {
padding: 20px 40px;
display: flex;
justify-content: space-between;
align-items: center;
.url {
a {
color: #999;
margin-left: 10px;
}
}
}
}
.subBtn {
background: $lygColor;
width: 100%;
color: #fff;
}
</style>
封装接口
创建文件

编写代码("username" , "password" 要和你数据库的属性对应上)
import http from '@/utils/http'

export function loginAPI ({ username,password}) {
  return http({
    url: '/login',
    method: 'POST',
    data:{
      "username": username,
      "password": password
    },
  })
}
配置路由
登录页面是一级页面
const routes = [
  {
    // Home 页面是首页下的二级页面,所以要配置在首页路径下
    path: "/",
    component: Layout,
    children: [
      ...//省略
  },
  {
    path: "/login",
    component: Login,
  },
];
用户数据持久化
要先安装pinia
安装pinia持久化插件 pinia-plugin-persistedstate
npm i pinia-plugin-persistedstate
在main.js中注册插件
import { createPinia } from 'pinia'
import piniaPersist from 'pinia-plugin-persistedstate'

const pinia = createPinia()
pinia.use(piniaPersist)
const app = createApp(App)

app.use(pinia)
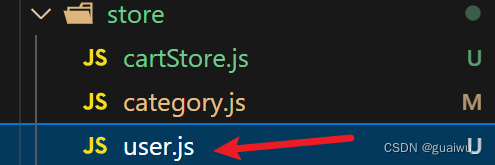
创建文件
// 管理用户数据相关
import { defineStore } from "pinia";
import { ref } from "vue";
import { loginAPI } from "@/api/login/index";
import { useCartStore } from "./cartStore";

export const useUserStore = defineStore(
  "user",
  () => {
    const cartStore = useCartStore();
    // 1. 定义管理用户数据的state
    const userInfo = ref({});
    // 2. 定义获取接口数据的action函数
    const getUserInfo = async ({ username, password }) => {
      const res = await loginAPI({ username, password });
      //console.log(res.data.code)
      // console.log(res.data.token)
      userInfo.value = res.data;

      //window.sessionStorage.setItem('token', res.data.token);

      //获取最新的购物车列表
      cartStore.updateNewList();
    };
    // 退出时清除用户信息
    const clearUserInfo = () => {
      userInfo.value = {};
      //window.sessionStorage.clear;
      //执行清除购物车的action
      cartStore.clearCart;
    };
    // 3. 以对象的格式把state和action return
    return {
      userInfo,
      getUserInfo,
      clearUserInfo,
    };
  },
  {
    persist: true,
  }
);
修改LayoutNav.vue


获取pinia中的用户数据
import { useUserStore } from '@/store/user'

const userStore = useUserStore()
根据是否登录状态来显示
<template v-if="userStore.userInfo.token">
                    <li><a href="javascript:;" @click="$router.push('/my')"><i class=" iconfont icon-user"></i>{{ userStore.userInfo.user.username }}</a></li>
                    <li>
                        <el-popconfirm @confirm="confirm" title="确认退出吗?"  cancel-button-text="取消" confirm-button-text="确认">
                            <template #reference>
                                <a href="javascript:;">退出登录</a>
                            </template>
                        </el-popconfirm>
                    </li>
                    <li><a href="javascript:;">我的订单</a></li>
                </template>
                <template v-else>
                  <li><a href="javascript:;" @click="router.push('/login')">请先登录</a></li>
                    <li><a href="javascript:;">帮助中心</a></li>
                    <li><a href="javascript:;">关于我们</a></li>
                </template>
整体代码
<script setup>
import { useUserStore } from '@/store/user'
import { useRouter } from 'vue-router'

const userStore = useUserStore()
const router = useRouter()
const confirm = () => {
  console.log('用户要退出登录了')
  // 退出登录业务逻辑实现
  // 1.清除用户信息 触发action
  userStore.clearUserInfo()
  // 2.跳转到登录页
  router.push('/login')
}
console.log(userStore)
</script>


<template>
    <nav class="app-topnav">
        <div class="container">
            <ul>
              <template v-if="userStore.userInfo.token">
                    <li><a href="javascript:;" @click="$router.push('/my')"><i class=" iconfont icon-user"></i>{{ userStore.userInfo.user.username }}</a></li>
                    <li>
                        <el-popconfirm @confirm="confirm" title="确认退出吗?"  cancel-button-text="取消" confirm-button-text="确认">
                            <template #reference>
                                <a href="javascript:;">退出登录</a>
                            </template>
                        </el-popconfirm>
                    </li>
                    <li><a href="javascript:;">我的订单</a></li>
                </template>
                <template v-else>
                  <li><a href="javascript:;" @click="router.push('/login')">请先登录</a></li>
                    <li><a href="javascript:;">帮助中心</a></li>
                    <li><a href="javascript:;">关于我们</a></li>
                </template>
            </ul>
        </div>
    </nav>
</template>


<style scoped lang="scss">
.app-topnav {
    background: #333;

    ul {
        display: flex;
        height: 53px;
        justify-content: flex-end;
        align-items: center;

        li {
            a {
                padding: 0 15px;
                color: #cdcdcd;
                line-height: 1;
                display: inline-block;

                i {
                    font-size: 14px;
                    margin-right: 2px;
                }

                &:hover {
                    color: $lygColor;
                }
            }

            ~li {
                a {
                    border-left: 2px solid #666;
                }
            }
        }
    }
}
</style>


