提示:这是SpringBoot3以上的新特性。
远程访问@HttpExchange
- 一、webClient
- 二、Http 服务接口的方法定义
- 三、声明式 HTTP 远程服务
- 1.组合使用注解
- 2.使用单个注解
- 3.定制 HTTP 请求服务
- 四、总结
- 1.部分方法过时
- 2.过时的方法详解
- 远程访问是开发的常用技术,一个应用能够访问其他应用的功能。Spring Boot 提供了多种远程访问技术。基于 HTTP 协议的远程访问是支持最广泛的。Spring Boot3 提供了新的 HTTP 访问能力,通过接口简化 HTTP 远程访问,类似 Feign 功能。Spring 包装了底层 HTTP 客户的访问细节。
- Spring Boot 中定义接口提供 HTTP 服务。生成的代理对象实现此接口,代理对象实现 HTTP 的远程访问。
一、webClient
- 我们想要调用其他系统提供的 HTTP 服务,通常可以使用 Spring 提供的 RestTemplate 来访问,RestTemplate 是 Spring3 中引入的同步阻塞式 HTTP 客户端,因此存在一定性能瓶颈。Spring 官方在 Spring5 中引入了 WebClient 作为异步非阻塞式 HTTP 客户端。有如下的特点:
- 非阻塞,异步请求
- 它的响应式编程是基于 Reactor
- 高并发,硬件资源少
- 支持 Java8 lambdas 函数函数式编程
- 什么是同步和异步
- 异步和同步针对调用者,调用者发送请求,如果等待对方回应之后才去做其他事情,就是同步,如果发送请求之后不等待对方回应就去做其他事情就是异步。
- 什么是阻塞和非阻塞
- 阻塞和非阻塞针对被调度者,被调度者收到请求后,做完请求任务之后才给出反馈就是阻塞,收到请求之后马上给出反馈然后去做其他事情,就是非阻塞。
二、Http 服务接口的方法定义
- @HttpExchange 注解用于声明接口作为 HTTP 远程服务。在方法、类级别使用。通过注解属性以及方法的参数设置 HTTP 请求的细节。
- @GetExchange 用于 HTTP GET 请求。一般用于获取数据。
- @PostExchange 用于 HTTP POST 请求。一般用于提交数据。
- @PutExchange 用于 HTTP PUT 请求。一般用于修改数据。
- @PatchExchange 用于 HTTP PATCH 请求。
- @DelectExchange 用于 HTTP DELETE 请求。一般用于删除数据。
- 作为 HTTP 服务接口中的方法允许使用的参数
参数 说明 URI 设置请求的url,覆盖注解的url属性 HttpMethod 请求方式,覆盖注解的method属性 @RequestHeader 添加到请求中header。 参数类型可以为Map, MultiValueMap,单个值 或者 Collection @PathVariable url中的占位符,参数可为单个值或Map @RequestBody 请求体,参数是对象 @RequestParam 请求参数,单个值或Map, MultiValueMap,Collection @RequestPart 发送文件时使用 @CookieValue 向请求中添加cookie - 接口中方法返回值
返回值类型 说明 void 执行请求,无需解析应答 HttpHeaders 存储 response 应答的 header 信息 对象 解析应答结果,转为声明的类型对象 ResponseEntity<void>、ResonseEntity<T> 解析应答内容,得到 ResponseEntity,从 ResponseEntity 可以获取 http 应答码、header、body等内容
三、声明式 HTTP 远程服务
- 使用一个免费的、24小时在线的 Rest Http 服务。===> https://jsonplaceholder.typicode.com/,其提供的 comments 服务。基于 RESTful 风格,添加新的 comments,修改 comments,查询某个具体的 comments。
1.组合使用注解
- @HttpExchange,@HttpExchange等注解可以组合使用。
- 类级别的 url 和方法级别的 url 组合在一起就是最后请求的 url 地址。
- ① 引入依赖
<dependency> <groupId>org.springframework.boot</groupId> <artifactId>spring-boot-starter-webflux</artifactId> </dependency> - ② 编写 comment 数据类
public class Comment { private Integer postId; private Integer id; private String name; private String email; private String body; //构造方法、setter和getter方法、toString方法 } - ③ 声明服务接口
//其中的一个方法就是一个远程服务调用 @HttpExchange(url = "https://jsonplaceholder.typicode.com") public interface CommonService { @GetExchange("/comments/{id}") //设置请求的URI Comment getCommentById(@PathVariable("id") Integer id); } - ④ 创建 HTTP 服务代理对象
@Configuration(proxyBeanMethods = false) public class HttpConfiguration { @Bean public CommonService requestService(){ WebClient webClient =WebClient.builder().build(); return HttpServiceProxyFactory.builderFor(WebClientAdapter.create(webClient)).build().createClient(CommonService.class); } } - ⑤ 编写测试代码
@SpringBootTest class HttpExchangeApplicationTests { @Autowired private CommonService commonService; @Test public void test(){ Comment comment = commonService.getCommentById(1); System.out.println(comment); } } - ⑥ 结果展示

2.使用单个注解
-
① 引入依赖
-
② 编写 comment 数据类
-
③ 声明服务接口
//其中的一个方法就是一个远程服务调用 public interface CommonService { @PutExchange("/comments/{id}") ResponseEntity<Comment> modifyCommentById(@PathVariable("id") Integer modifyId, @RequestBody Comment comment); } -
④ 创建 HTTP 服务代理对象
@Configuration(proxyBeanMethods = false) public class HttpConfiguration { @Bean public CommonService requestService(){ WebClient webClient = WebClient.create("https://jsonplaceholder.typicode.com"); //WebClient webClient = WebClient.builder().baseUrl("https://jsonplaceholder.typicode.com").build(); //也可以使用这种方式 HttpServiceProxyFactory proxyFactory = HttpServiceProxyFactory.builderFor(WebClientAdapter.create(webClient)).build(); return proxyFactory.createClient(CommonService.class); } } -
⑤ 编写测试代码
@SpringBootTest class HttpExchangeApplicationTests { @Autowired private CommonService commonService; @Test public void test(){ Comment comment = new Comment(123, 1, "gdb", "aaaaa", "bbbbbb"); ResponseEntity<Comment> result = commonService.modifyCommentById(1, comment); System.out.println(result.getStatusCode()); System.out.println(result.getHeaders()); System.out.println(result.getBody()); } } -
⑥ 结果展示

3.定制 HTTP 请求服务
四、总结
1.部分方法过时
- 动力节点王鹤Spring Boot3中代码的写法如下

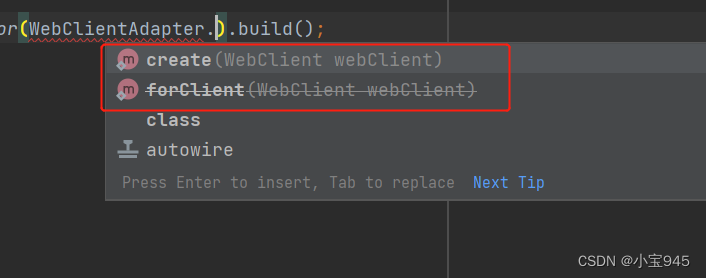
- 由于新版的更新原来的方法已经过时了,大家可以按照如下的方式写

2.过时的方法详解
- Builder builder(HttpClientAdapter clientAdapter) ===> Builder builderFor(HttpExchangeAdapter)


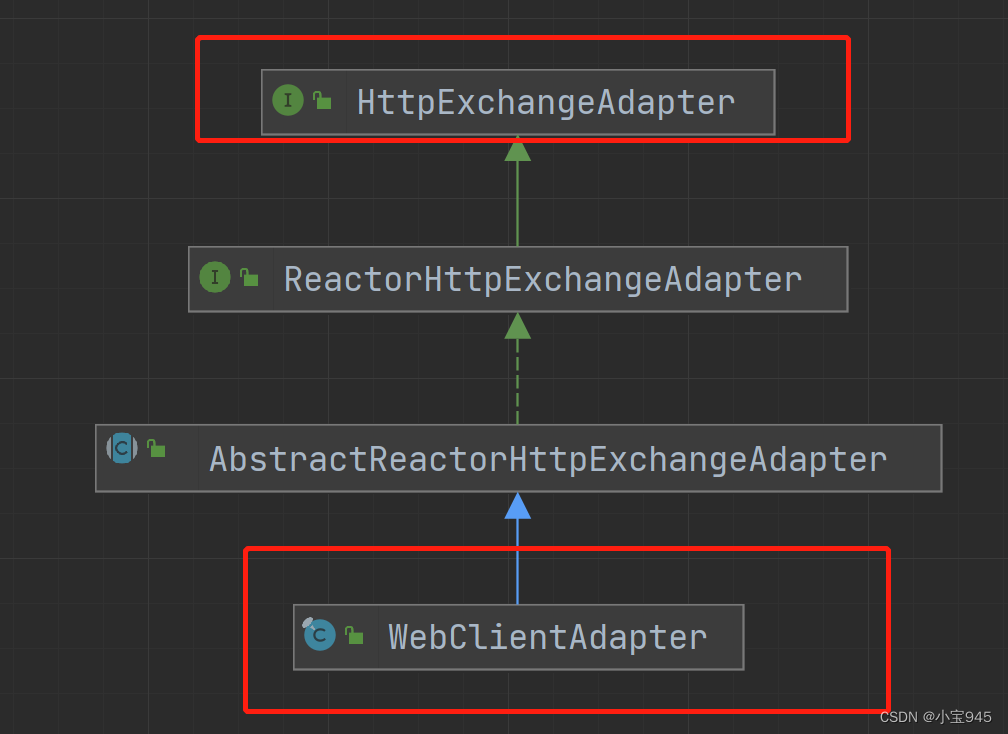
- forCreate(WebClient webClient) ===> create(WebClient webClient)
