ubuntu22.04@laptop安装&配置VNC服务端
- 1. 源由
- 2. 系统安装
- 3. VNC安装
- 3.1 系统更新
- 3.2 lightdm安装
- 3.3 x11vnc安装
- 3.4 x11vnc配置
- 3.5 x11vnc自启动
- 3.6 x11vnc状态查询
- 4. 演示视频
1. 源由
最近系统搞TensorFlow, OpenCV, Python,折腾各种环境,把系统搞得一团糟。
导致整个编译环境各种异常,险情频出。其实这就是不熟悉的东西导致的问题。
因为现在高大上的AI怎么来说入门也是视频起步,对于命令行的服务器、嵌入式来说似乎有那么点距离。
好吧,那我们就需要一个界面,没有这么多显示器,那就上VNC吧。以前很轻松就能搞定的vncserver,这次在ubuntu22.04LTS上,各种折腾,倒腾一天都没能搞定。
好吧,谁叫咱们技术出生,搞定了,希望永远别来折腾了,记录下来。
2. 系统安装
这个不多说,去ubuntu官网去下载ubuntu22.04 LTS镜像文件,然后找个U盘来启动电脑,重新安装。
- Step1: 系统镜像制作,详见:Raspbian镜像无头烧录
- Step2:桌面系统安装,详见:install-ubuntu-desktop
3. VNC安装
VNC指的主要是服务端。
$ lsb_release -a
No LSB modules are available.
Distributor ID: Ubuntu
Description:    Ubuntu 22.04.3 LTS
Release:        22.04
Codename:       jammy
3.1 系统更新
$ sudo apt update
$ sudo apt ugrade
$ sudo reboot
3.2 lightdm安装
注意:请选择lightdm选项。
$ sudo apt install lightdm
$ sudo reboot
3.3 x11vnc安装
$ sudo apt install x11vnc
3.4 x11vnc配置
注意:mypassword请根据自己的需要进行修改,这只是VNC连接的密码,并非系统登录用户密码。
$ sudo nano /lib/systemd/system/x11vnc.service
$ sudo cat /lib/systemd/system/x11vnc.service
[Unit]
Description=x11vnc service
After=display-manager.service network.target syslog.target

[Service]
Type=simple
ExecStart=/usr/bin/x11vnc -forever -display :0 -auth guess -passwd mypassword
ExecStop=/usr/bin/killall x11vnc
Restart=on-failure

[Install]
WantedBy=multi-user.target
3.5 x11vnc自启动
$ systemctl daemon-reload
$ systemctl enable x11vnc.service
$ systemctl start x11vnc.service
3.6 x11vnc状态查询
daniel@daniel-ThinkPad-SL410:~$ systemctl status x11vnc.service
● x11vnc.service - x11vnc service
     Loaded: loaded (/lib/systemd/system/x11vnc.service; enabled; vendor preset: enabled)
     Active: active (running) since Sun 2024-01-28 17:00:19 CST; 1min 3s ago
   Main PID: 721 (x11vnc)
      Tasks: 1 (limit: 4557)
     Memory: 11.0M
        CPU: 392ms
     CGroup: /system.slice/x11vnc.service
             └─721 /usr/bin/x11vnc -forever -display :0 -auth guess "" "" "" "" "" "" "" "" "" "" "" "" "" "" "" "" ""

1月 28 17:00:33 daniel-ThinkPad-SL410 x11vnc[721]: Have you tried the x11vnc '-ncache' VNC client-side pixel caching feature yet?
1月 28 17:00:33 daniel-ThinkPad-SL410 x11vnc[721]: The scheme stores pixel data offscreen on the VNC viewer side for faster
1月 28 17:00:33 daniel-ThinkPad-SL410 x11vnc[721]: retrieval.  It should work with any VNC viewer.  Try it by running:
1月 28 17:00:33 daniel-ThinkPad-SL410 x11vnc[721]:     x11vnc -ncache 10 ...
1月 28 17:00:33 daniel-ThinkPad-SL410 x11vnc[721]: One can also add -ncache_cr for smooth 'copyrect' window motion.
1月 28 17:00:33 daniel-ThinkPad-SL410 x11vnc[721]: More info: http://www.karlrunge.com/x11vnc/faq.html#faq-client-caching
1月 28 17:00:54 daniel-ThinkPad-SL410 x11vnc[721]: 28/01/2024 17:00:54 check_xrandr_event():
1月 28 17:00:54 daniel-ThinkPad-SL410 x11vnc[721]: 28/01/2024 17:00:54 Detected XRANDR event at location 'check_xevents':
1月 28 17:00:54 daniel-ThinkPad-SL410 x11vnc[721]: 28/01/2024 17:00:54 check_xrandr_event: no change detected.
1月 28 17:00:54 daniel-ThinkPad-SL410 x11vnc[721]: 28/01/2024 17:00:54 check_xrandr_event: enabling full XRANDR trapping anyway.
4. 演示视频
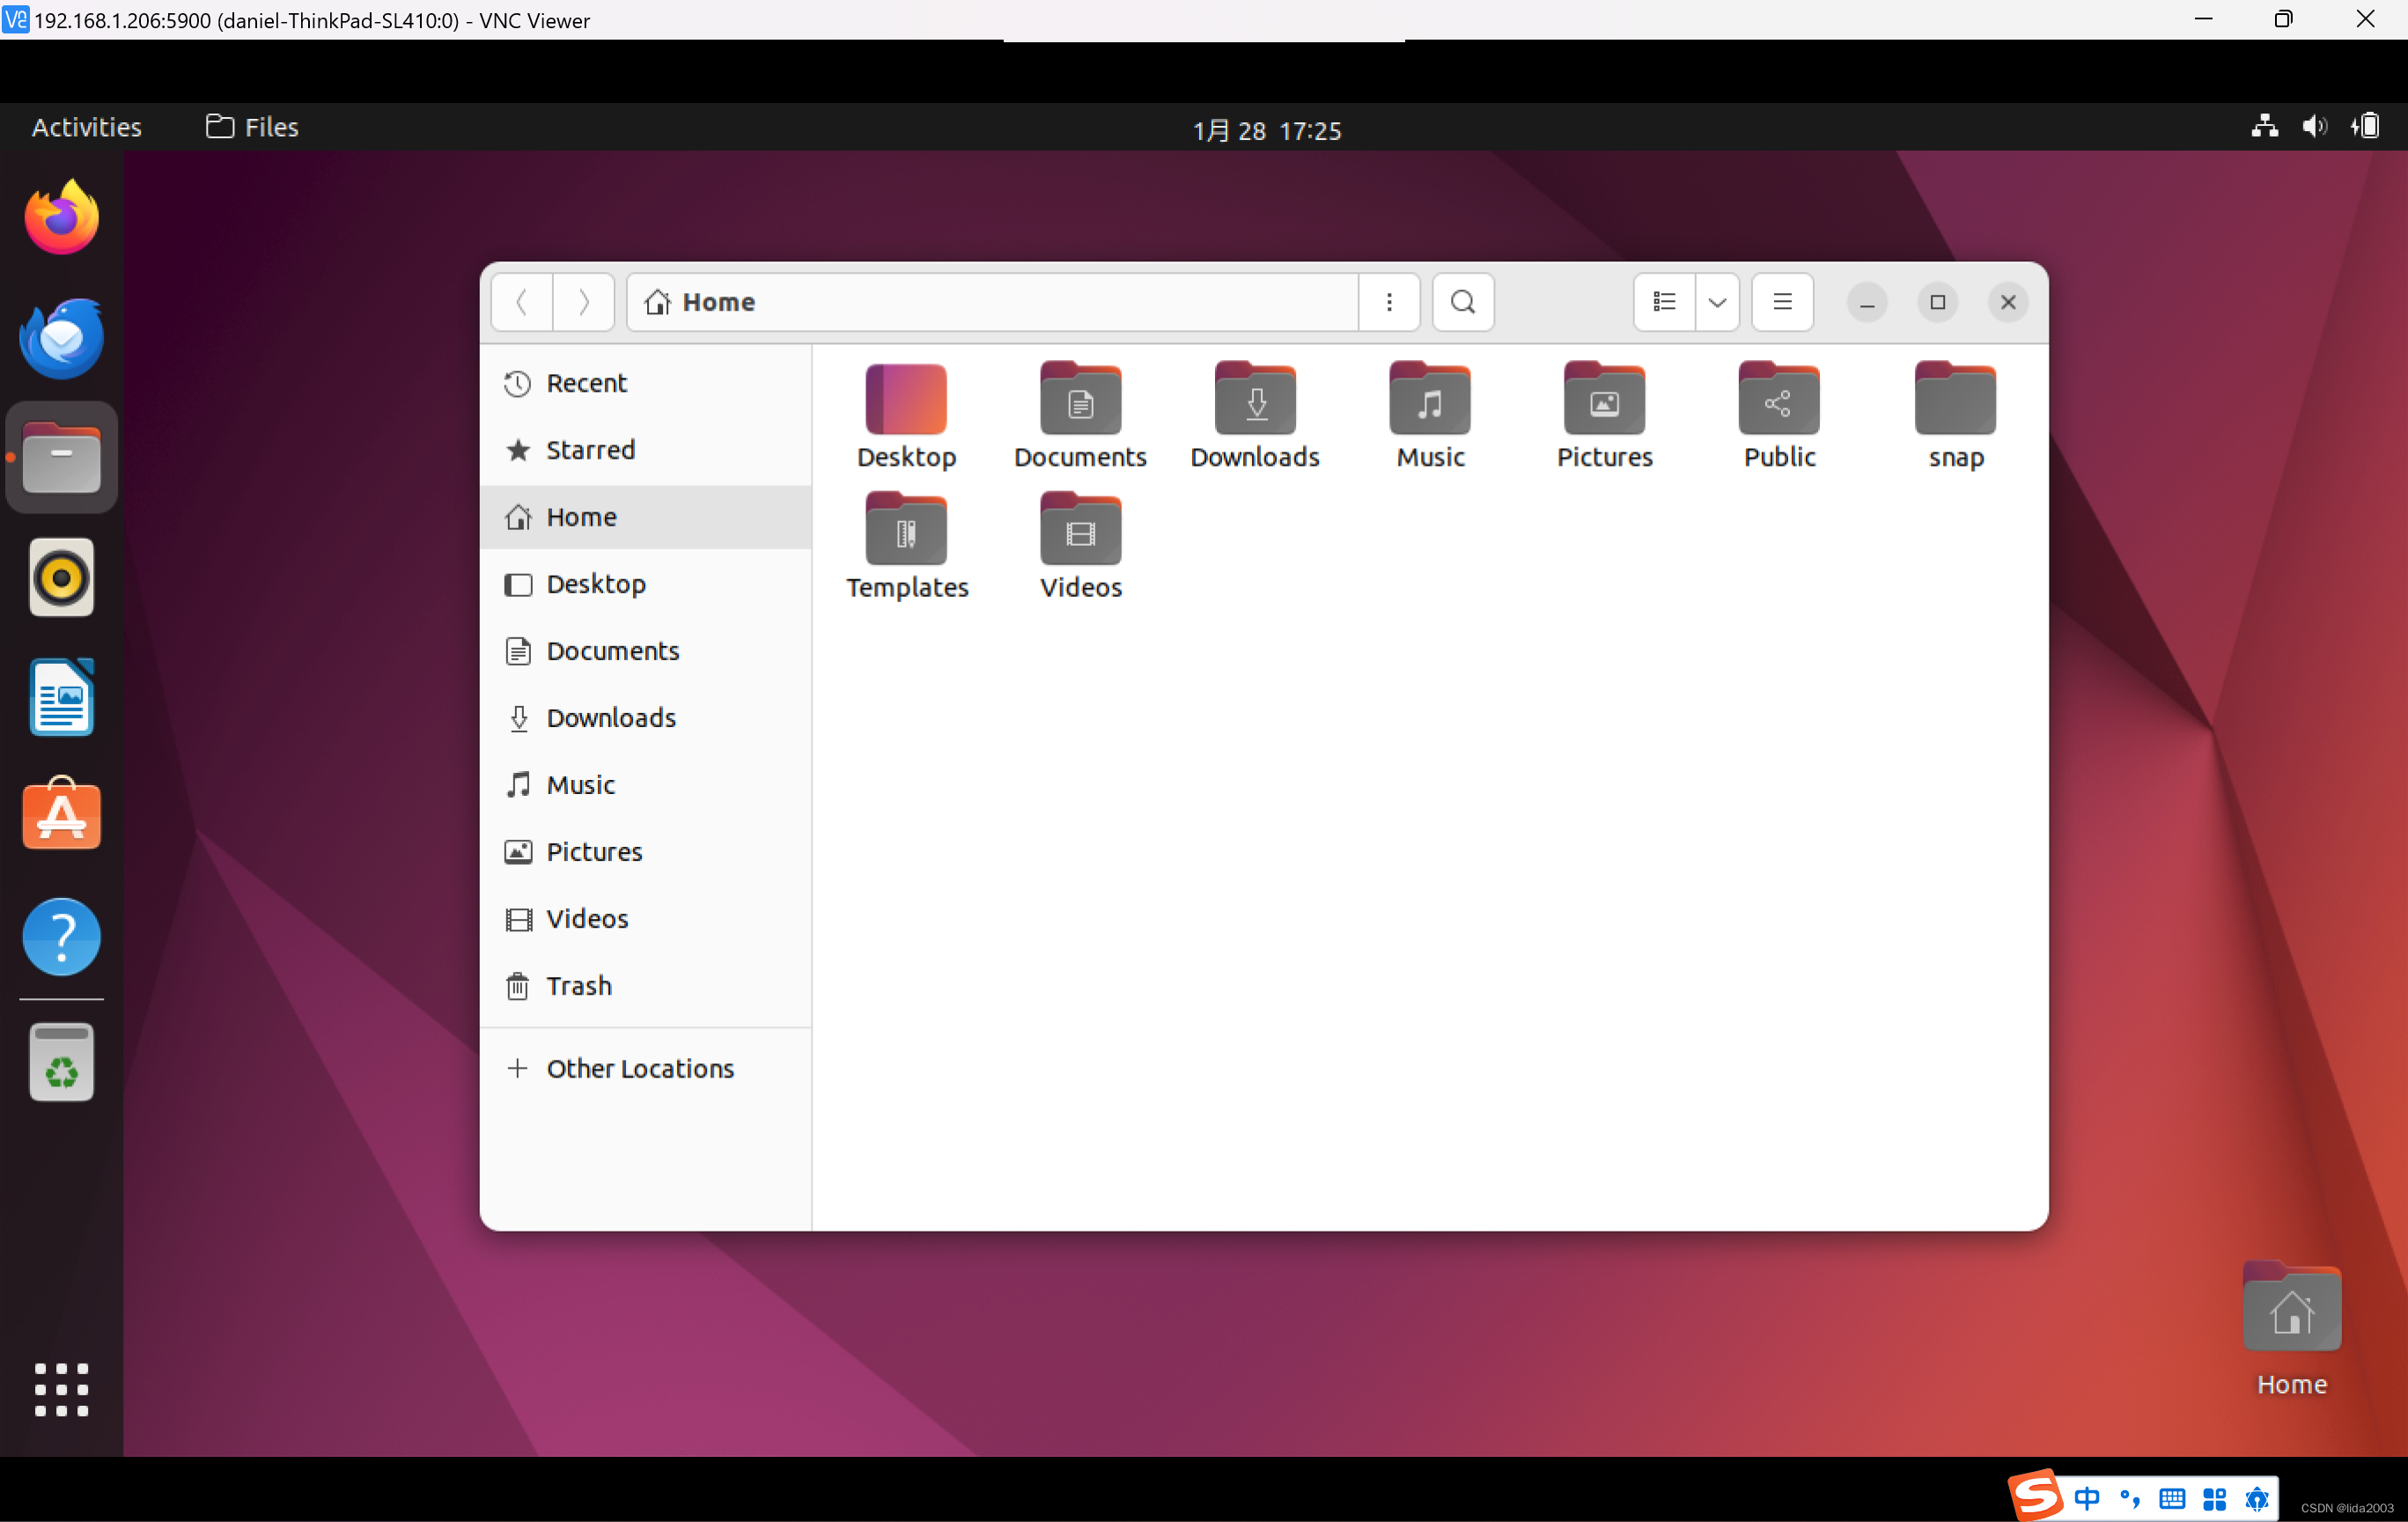
网上有各种链接,各种介绍,这份我认为是最好的。
Ubuntu VNC Server


