修改ImGui层架构:
创建:
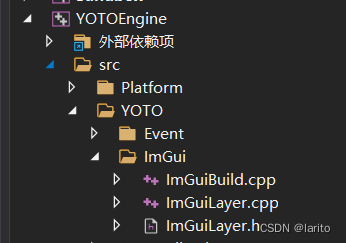
ImGuiBuild.cpp:引入ImGui
#include"ytpch.h"
#define IMGUI_IMPL_OPENGL_LOADER_GLAD//opengl的头文件需要的定义,说明使用的是gald
#include "backends/imgui_impl_opengl3.cpp"
#include "backends/imgui_impl_glfw.cpp"
Layer.h:加入GuiRender方法,每次渲染Gui都会调用
#pragma once
#include"YOTO/Core.h"
#include"YOTO/Event/Event.h"
namespace YOTO {
	class YOTO_API Layer
	{
	public:
		Layer(const std::string& name = "Layer");
		virtual ~Layer();
		virtual void OnAttach(){}
		virtual void OnDetach() {}
		virtual void OnUpdate() {}
		virtual void OnImGuiRender() {}// 每层都可以拥有自己的UI窗口
		virtual void OnEvent(Event& event) {}
		inline const std::string& GetName() const { return m_DebugName; }
	protected:
		std::string m_DebugName;
	};

}
ImGuiLayer.h:删除冗余部分,仅留下加入,删除,和Render方法,添加Begine和End,用于每次刷新UI的配置和删除UI。
#pragma once
#include"YOTO/Layer.h"
#include"YOTO/Event/KeyEvent.h"
#include"YOTO/Event/MouseEvent.h"
#include"YOTO/Event/ApplicationEvent.h"
namespace YOTO {

	class YOTO_API ImGuiLayer:public Layer
	{
	public:
		ImGuiLayer();
		~ImGuiLayer();
		virtual void OnAttach()override;
		virtual void OnDetach()override;
		virtual void OnImGuiRender()override;
		void Begin();
		void End();
	private:
		float m_Time = 0.0f;
	};
}
ImGuiLayer.cpp:删除原来的Update,把配置、绘制UI的代码、渲染分离
#include"ytpch.h"
#include"ImGuiLayer.h"

#include"YOTO/Application.h"

#include<GLFW/glfw3.h>
#include<glad/glad.h>

#define IMGUI_IMPL_API
#include "backends/imgui_impl_glfw.h"
#include "backends/imgui_impl_opengl3.h"
namespace YOTO {
	ImGuiLayer::ImGuiLayer()
	:Layer("ImGuiLayer") {

	}
	ImGuiLayer::~ImGuiLayer() {

	}
	void ImGuiLayer::OnAttach()
	{
		// 不需要手动写ImGui的键值对应GLFW的键值、ImGui接收GLFW窗口事件,ImGui自动完成
	   // 设置Gui配置
		IMGUI_CHECKVERSION();
		ImGui::CreateContext();
		ImGuiIO& io = ImGui::GetIO(); (void)io;
		io.ConfigFlags |= ImGuiConfigFlags_NavEnableKeyboard;       // 启用键盘控制
		//io.ConfigFlags |= ImGuiConfigFlags_NavEnableGamepad;      //启用手柄控制
		io.ConfigFlags |= ImGuiConfigFlags_DockingEnable;           // 启用自动布局
		io.ConfigFlags |= ImGuiConfigFlags_ViewportsEnable;         //启用多视窗/平台视窗(也就是能走出Opengl绘制的框子)
		//io.ConfigFlags |= ImGuiConfigFlags_ViewportsNoTaskBarIcons;
		//io.ConfigFlags |= ImGuiConfigFlags_ViewportsNoMerge;

		// 设置Gui配置样式
		ImGui::StyleColorsDark();
		//ImGui::StyleColorsClassic();
		// 当viewport被启用时,我们调整windowwround /WindowBg,使平台窗口看起来与常规窗口相同。
		ImGuiStyle& style = ImGui::GetStyle();
		if (io.ConfigFlags & ImGuiConfigFlags_ViewportsEnable)
		{
			style.WindowRounding = 0.0f;
			style.Colors[ImGuiCol_WindowBg].w = 1.0f;
		}

		Application& app = Application::Get();
		GLFWwindow* window = static_cast<GLFWwindow*>(app.GetWindow().GetNativeWindow());

		//设置平台/渲染器绑定
		ImGui_ImplGlfw_InitForOpenGL(window, true);
		ImGui_ImplOpenGL3_Init("#version 410");


	}
	void ImGuiLayer::OnDetach()
	{
		ImGui_ImplOpenGL3_Shutdown();
		ImGui_ImplGlfw_Shutdown();
		ImGui::DestroyContext();
	}
	void ImGuiLayer::OnImGuiRender()
	{
		static bool show = true;
		ImGui::ShowDemoWindow(&show);// 当前OnImGuiRender层显示DemoUI窗口
	}

	void ImGuiLayer::Begin()
	{
		ImGui_ImplOpenGL3_NewFrame();
		ImGui_ImplGlfw_NewFrame();
		ImGui::NewFrame();
	}

	void ImGuiLayer::End()
	{
		ImGuiIO& io = ImGui::GetIO();
		Application& app = Application::Get();
		io.DisplaySize = ImVec2(app.GetWindow().GetWidth(), app.GetWindow().GetHeight());
		// Rendering
		ImGui::Render();
		ImGui_ImplOpenGL3_RenderDrawData(ImGui::GetDrawData());
		//如果启动启用多视窗/平台视窗
		if (io.ConfigFlags & ImGuiConfigFlags_ViewportsEnable)
		{
			GLFWwindow* backup_current_context = glfwGetCurrentContext();
			ImGui::UpdatePlatformWindows();
			ImGui::RenderPlatformWindowsDefault();
			glfwMakeContextCurrent(backup_current_context);
		}
	}


}
LayerStack.h:修改m_LayerInsertIndex:
#pragma once
#include"Layer.h"

namespace YOTO {
	class  YOTO_API LayerStack
	{
	public:
		LayerStack();
		~LayerStack();

		void PushLayer(Layer* layer);
		void PushOverlay(Layer* layer);
		void PopLayer(Layer* layer);
		void PopOverlay(Layer* layer);

		std::vector<Layer*>::iterator begin() { return m_Layers.begin(); }
		std::vector<Layer*>::iterator end() { return m_Layers.end(); }

	private:
		std::vector<Layer*>m_Layers;
		unsigned int m_LayerInsertIndex=0;
	};

}
LayerStack.cpp: 修改PushLayer:
#include "ytpch.h"
#include "LayerStack.h"
namespace YOTO {
	LayerStack::LayerStack() {
	}
	LayerStack::~LayerStack() {
		for (Layer* layer : m_Layers)
			delete layer;
	}
	//普通push在队列最左(查找时候性能更优)
	void LayerStack::PushLayer(Layer* layer) {
		// emplace在vector容器指定位置之前插入一个新的元素。返回插入元素的位置
		// 插入 1 2 3,vector是 3 2 1
		 m_Layers.emplace(m_Layers.begin()+ m_LayerInsertIndex, layer);
		 m_LayerInsertIndex++;
	}
	//在最右插入
	void LayerStack::PushOverlay(Layer* overlay) {
		//m_LayerInsert = m_Layers.begin();//如果报错,则把这个注释取消
		m_Layers.emplace_back(overlay);
	}
	//查找
	void LayerStack::PopLayer(Layer* layer) {
		auto it = std::find(m_Layers.begin(), m_Layers.end(), layer);
		if (it != m_Layers.end()) {
			m_Layers.erase(it);
			m_LayerInsertIndex--;	// 指向Begin
		}
	}
	void LayerStack::PopOverlay(Layer* overlay) {
		auto it = std::find(m_Layers.begin(), m_Layers.end(), overlay);
		if (it != m_Layers.end())
			m_Layers.erase(it);
	}
}
Application.h:在APP中添加Gui层,无需在Sandbox中手动添加:
#pragma once
#include"Core.h"
#include"Event/Event.h"
#include"Event/ApplicationEvent.h"
#include "YOTO/Window.h"
#include"YOTO/LayerStack.h"
#include"YOTO/ImGui/ImGuiLayer.h"
namespace YOTO {
	class YOTO_API Application
	{
	public:
		Application();
		virtual ~Application();
		void Run();
		void OnEvent(Event &e);
		void PushLayer(Layer* layer);
		void PushOverlay(Layer* layer);

		inline static Application& Get() {return * s_Instance;}
		inline Window& GetWindow() { return *m_Window; }
	private:
		bool  OnWindowClosed(WindowCloseEvent& e);
		std::unique_ptr<Window>  m_Window;
		ImGuiLayer *  m_ImGuiLayer;
		bool m_Running = true;
		LayerStack m_LayerStack;

		static Application* s_Instance;
	};
	//在客户端定义
	Application* CreateApplication();
}
Application.cpp:在构造函数中newImGuiLayer然后Push到最后
#include"ytpch.h"
#include "Application.h"

#include"Log.h"
#include<glad/glad.h>
#include"Input.h"


namespace YOTO {
#define BIND_EVENT_FN(x) std::bind(&x, this, std::placeholders::_1)

	 Application* Application::s_Instance = nullptr;

	Application::Application() {

		YT_CORE_ASSERT(!s_Instance, "Application需要为空!")
		s_Instance = this;
		//智能指针
		m_Window = std::unique_ptr<Window>(Window::Creat());
		//设置回调函数
		m_Window->SetEventCallback(BIND_EVENT_FN(Application::OnEvent));
		//new一个Layer,放在最后层进行渲染
		m_ImGuiLayer = new ImGuiLayer();
		PushOverlay(m_ImGuiLayer);
		//unsigned int id;
		//glGenBuffers(1, &id);
	}
	Application::~Application() {

	}
	/// <summary>
	/// 所有的Window事件都会在这触发,作为参数e
	/// </summary>
	/// <param name="e"></param>
	void Application::OnEvent(Event& e) {
		//根据事件类型绑定对应事件
		EventDispatcher dispatcher(e);
		dispatcher.Dispatch<WindowCloseEvent>(BIND_EVENT_FN(Application::OnWindowClosed));
		//输出事件信息
		YT_CORE_INFO("Application:{0}",e);
		for (auto it = m_LayerStack.end(); it != m_LayerStack.begin();) {
			(*--it)->OnEvent(e);
			if (e.m_Handled)
				break;
		}
	}

	bool Application::OnWindowClosed(WindowCloseEvent& e) {
		m_Running = false;
		return true;
	}
	void Application::Run() {
		WindowResizeEvent e(1280, 720);
		if (e.IsInCategory(EventCategoryApplication)) {
			YT_CORE_TRACE(e);
		}
		if (e.IsInCategory(EventCategoryInput)) {
			YT_CORE_ERROR(e);
		}

		while (m_Running)
		{
			glClearColor(1,0,1,1);
			glClear(GL_COLOR_BUFFER_BIT);

			for (Layer* layer : m_LayerStack) {
				layer->OnUpdate();
			}
			//将ImGui的刷新放到APP中,与Update分开
			m_ImGuiLayer->Begin();

			for (Layer* layer : m_LayerStack) {
				layer->OnImGuiRender();
			}
			m_ImGuiLayer->End();
			m_Window->OnUpdate();
		}
	}
	void Application::PushLayer(Layer* layer) {
		m_LayerStack.PushLayer(layer);
		layer->OnAttach();
	}
	void Application::PushOverlay(Layer* layer) {
		m_LayerStack.PushOverlay(layer);
		layer->OnAttach();
	}
}
SandboxApp.cpp:把PushImgGui的哪行代码删掉:
#include<YOTO.h>
#include "imgui/imgui.h"
#include<stdio.h>
//#include <glm/vec3.hpp> // glm::vec3
//#include <glm/vec4.hpp> // glm::vec4
//#include <glm/mat4x4.hpp> // glm::mat4
//#include <glm/gtc/matrix_transform.hpp> // glm::translate, glm::rotate, glm::scale, glm::perspective
//glm::mat4 camera(float Translate, glm::vec2 const& Rotate)
//{
//	glm::mat4 Projection = glm::perspective(glm::radians(45.0f), 4.0f / 3.0f, 0.1f, 100.f);
//	glm::mat4 View = glm::translate(glm::mat4(1.0f), glm::vec3(0.0f, 0.0f, -Translate));
//	View = glm::rotate(View, Rotate.y, glm::vec3(-1.0f, 0.0f, 0.0f));
//	View = glm::rotate(View, Rotate.x, glm::vec3(0.0f, 1.0f, 0.0f));
//	glm::mat4 Model = glm::scale(glm::mat4(1.0f), glm::vec3(0.5f));
//	return Projection * View * Model;
//}

class ExampleLayer:public YOTO::Layer
{
public:
	ExampleLayer()
	:Layer("Example") {
		//auto cam=camera(5.0f,{0.5f,0.5f});

	}
	void OnImGuiRender() override {
		ImGui::Begin("Test");
		ImGui::Text("Test");
		ImGui::End();
	}
	void OnUpdate()override {
		//YT_CLIENT_INFO("测试update");
		if (YOTO::Input::IsKeyPressed(YT_KEY_TAB)) {
			YT_CLIENT_INFO("ExampleLayerOnUpdate:TAB按下了");
		}
	}
	void OnEvent(YOTO::Event& event)override {
		if (event.GetEventType() == YOTO::EventType::KeyPressed) {
		YOTO:: KeyPressedEvent& e = (YOTO::KeyPressedEvent&)event;
		YT_CLIENT_TRACE("ExampleLayer:{0}",(char)e.GetKeyCode());
		if (e.GetKeyCode()==YT_KEY_TAB) {
			YT_CLIENT_INFO("ExampleLayerOnEvent:TAB按下了");
		}
		}
		//YT_CLIENT_TRACE("SandBoxApp:测试event{0}", event);
	}

private:

};


class Sandbox:public YOTO::Application
{
public:
	Sandbox() {
		PushLayer(new ExampleLayer());
		//PushLayer(new YOTO::ImGuiLayer());
	}
	~Sandbox() {

	}

private:

};

YOTO::Application* YOTO::CreateApplication() {
	printf("helloworld");
	return new Sandbox();
}
作业:
src下的premake5.lua:修改sandbox的includedirs加入"YOTOEngine/vendor"
workspace "YOTOEngine"		-- sln文件名
	architecture "x64"
	configurations{
		"Debug",
		"Release",
		"Dist"
	}
startproject "Sandbox"
-- https://github.com/premake/premake-core/wiki/Tokens#value-tokens
-- 组成输出目录:Debug-windows-x86_64
outputdir = "%{cfg.buildcfg}-%{cfg.system}-%{cfg.architecture}"
-- 包含相对解决方案的目录
IncludeDir={}
IncludeDir["GLFW"]="YOTOEngine/vendor/GLFW/include"
IncludeDir["Glad"]="YOTOEngine/vendor/Glad/include"
IncludeDir["ImGui"] ="YOTOEngine/vendor/imgui"
IncludeDir["glm"] ="YOTOEngine/vendor/glm"
--项目中包含某包
include "YOTOEngine/vendor/GLFW"
include "YOTOEngine/vendor/Glad"
include "YOTOEngine/vendor/imgui"

project "YOTOEngine"		--YOTOEngine项目
	location "YOTOEngine"--在sln所属文件夹下的YOTOEngine文件夹
	kind "SharedLib"--dll动态库
	language "C++"
	targetdir ("bin/" .. outputdir .. "/%{prj.name}") -- 输出目录
	objdir ("bin-int/" .. outputdir .. "/%{prj.name}")-- 中间目录

	staticruntime "Off"

	pchheader "ytpch.h"
	pchsource "YOTOEngine/src/ytpch.cpp"
	-- 包含的所有h和cpp文件
	files{
		"%{prj.name}/src/**.h",
		"%{prj.name}/src/**.cpp",
		"%{prj.name}/vendor/glm/glm/**.hpp",
		"%{prj.name}/vendor/glm/glm/**.inl"
	}
	-- 包含目录
	includedirs{
		"%{prj.name}/src",
		"%{prj.name}/vendor/spdlog-1.x/include",
		"%{IncludeDir.GLFW}",
		"%{IncludeDir.Glad}",
		"%{IncludeDir.ImGui}",
		"%{IncludeDir.glm}"
	}
	links{
		"GLFW",-- GLFW.lib库链接到YOTOEngine项目中
		"Glad",-- Glad.lib库链接到YOTOEngine项目中
		"ImGui",-- ImGui.lib库链接到YOTOEngine项目中
		"opengl32.lib"
	}
	-- 如果是window系统
	filter "system:windows"
		cppdialect "C++17"
		-- On:代码生成的运行库选项是MTD,静态链接MSVCRT.lib库;
		-- Off:代码生成的运行库选项是MDD,动态链接MSVCRT.dll库;打包后的exe放到另一台电脑上若无这个dll会报错
		systemversion "latest"	-- windowSDK版本
		-- 预处理器定义
		defines{
			"YT_PLATFORM_WINDOWS",
			"YT_BUILD_DLL",
			-- "YT_ENABLE_ASSERTS",
			"GLFW_INCLUDE_NONE"-- 让GLFW不包含OpenGL
		}
		-- 编译好后移动Hazel.dll文件到Sandbox文件夹下
		postbuildcommands{
			("{COPY} %{cfg.buildtarget.relpath} ../bin/" .. outputdir .. "/Sandbox")
		}
	-- 不同配置下的预定义不同
	filter "configurations:Debug"
		defines "YT_DEBUG"
		runtime "Debug"
		symbols "On"

	filter "configurations:Release"
		defines "YT_RELEASE"
		runtime "Release"
		optimize "On"

	filter "configurations:Dist"
		defines "YT_DIST"
		runtime "Release"
		optimize "On"

project "Sandbox"
	location "Sandbox"
	kind "ConsoleApp"
	language "C++"
	staticruntime "Off"
	targetdir ("bin/" .. outputdir .. "/%{prj.name}")
	objdir ("bin-int/" .. outputdir .. "/%{prj.name}")

	files{
		"%{prj.name}/src/**.h",
		"%{prj.name}/src/**.cpp"
	}
	-- 同样包含spdlog头文件
	includedirs{
		"YOTOEngine/vendor/spdlog-1.x/include",
		"YOTOEngine/src",
		"YOTOEngine/vendor",
		"%{IncludeDir.glm}"
	}
	-- 引用YOTOEngine
	links{
		"YOTOEngine",
		"GLFW",
		"opengl32.lib"
	}

	filter "system:windows"
		cppdialect "C++17"
		systemversion "latest"

		defines{
			"YT_PLATFORM_WINDOWS"
		}

	filter "configurations:Debug"
		defines "YT_DEBUG"
		runtime "Debug"
		symbols "On"

	filter "configurations:Release"
		defines "YT_RELEASE"
		runtime "Release"
		optimize "On"

	filter "configurations:Dist"
		defines "YT_DIST"
		runtime "Release"
		optimize "On"
vendor/ImGui的premake5.la添加 defines { "IMGUI_API=__declspec(dllexport)" }
project "ImGui"
	kind "StaticLib"
	language "C++"
    staticruntime "off"

	targetdir ("bin/" .. outputdir .. "/%{prj.name}")
	objdir ("bin-int/" .. outputdir .. "/%{prj.name}")
	defines { "IMGUI_API=__declspec(dllexport)" }
	files
	{
		"imconfig.h",
		"imgui.h",
		"imgui.cpp",
		"imgui_draw.cpp",
		"imgui_internal.h",
		"imgui_tables.cpp",
		"imgui_widgets.cpp",
		"imstb_rectpack.h",
		"imstb_textedit.h",
		"imstb_truetype.h",
		"imgui_demo.cpp"
	}

	filter "system:windows"
		systemversion "latest"
		cppdialect "C++17"

	filter "system:linux"
		pic "On"
		systemversion "latest"
		cppdialect "C++17"

	filter "configurations:Debug"
		runtime "Debug"
		symbols "on"

	filter "configurations:Release"
		runtime "Release"
		optimize "on"

    filter "configurations:Dist"
		runtime "Release"
		optimize "on"
        symbols "off"
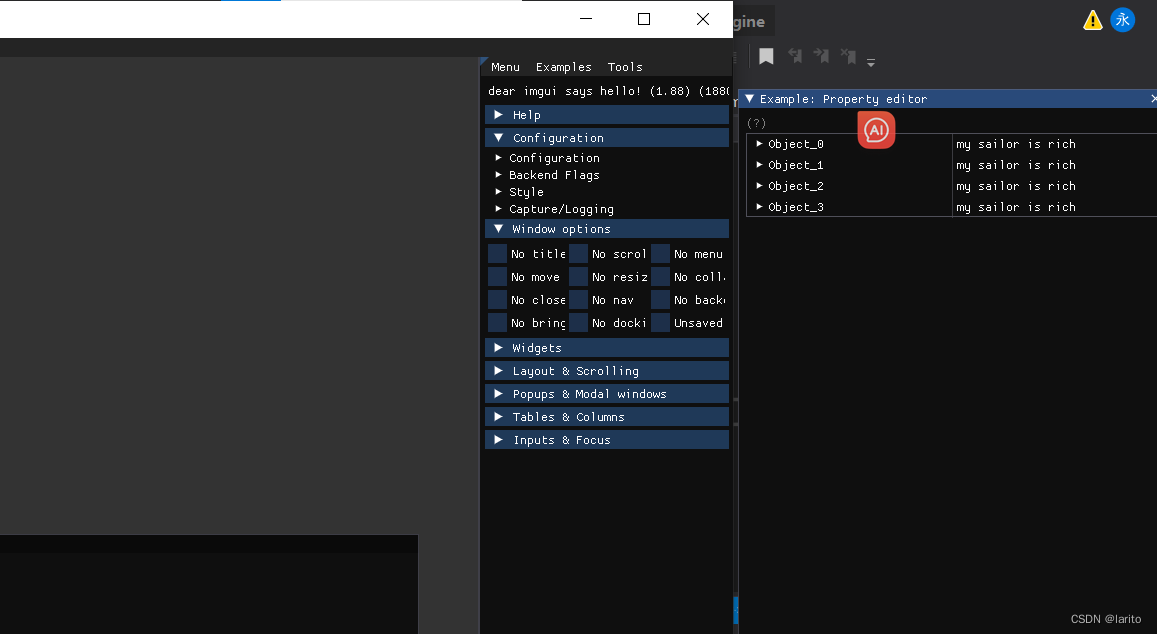
测试:
点dockspace

点出来几个窗口随便摆摆:

能拖出去: