在环信即时通讯云IM 官网下载Demo,本地运行只有手机+验证码的方式登录?怎么更改为自己项目的Appkey和用户去进行登录呢?
👇👇👇本文以Web端为例,教大家如何更改代码来实现
1、 VUE2 Demo
vue2 demo源码下载
vue2 demo线上体验
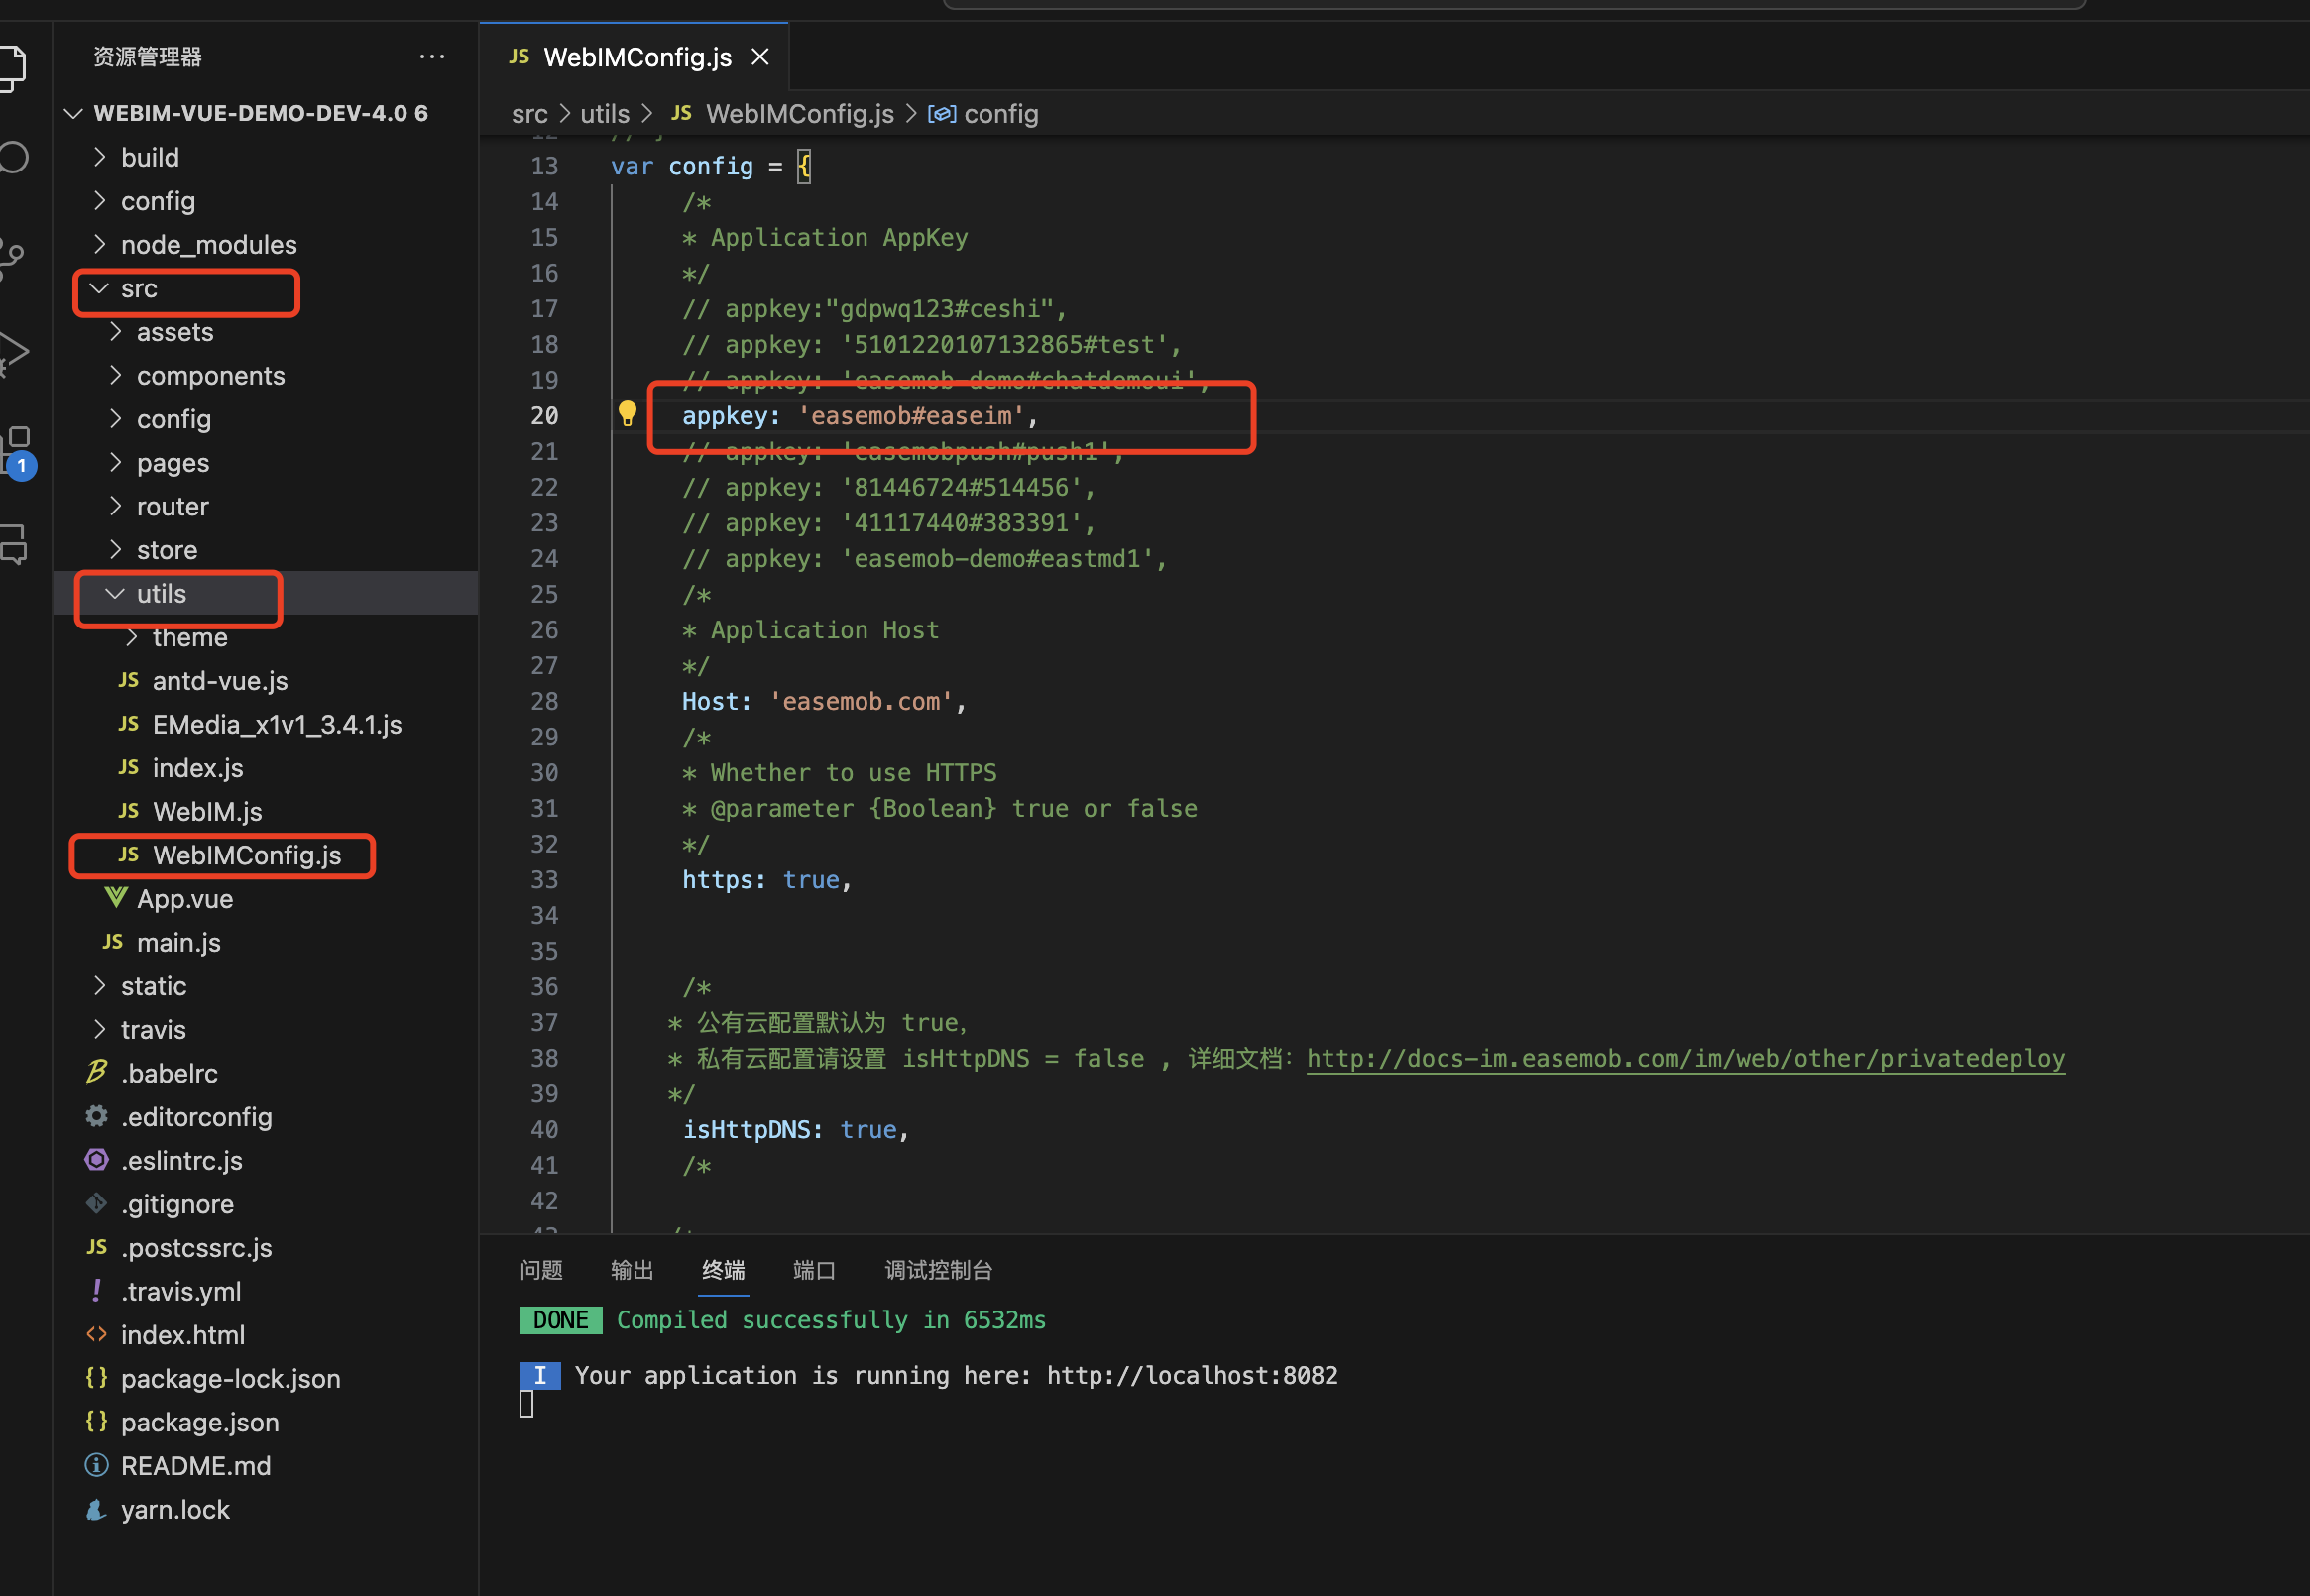
第一步:更改appkey
webim-vue-demo===>src===>utils===>WebIMConfig.js
第二步:更改代码
webim-vue-demo===>src===>pages===>login===>index.vue
<template>
  <a-layout>
		<div class="login">
			<div class="login-panel">
				<div class="logo">Web IM</div>
				<a-input v-model="username" :maxLength="64" placeholder="用户名" />
				<a-input v-model="password" :maxLength="64" v-on:keyup.13="toLogin" type="password" placeholder="密码" />
				<a-input v-model="nickname" :maxLength="64" placeholder="昵称" v-show="isRegister == true" />

				<a-button type="primary" @click="toRegister" v-if="isRegister == true">注册</a-button>
				<a-button type="primary" @click="toLogin" v-else>登录</a-button>
			</div>
			<p class="tip" v-if="isRegister == true">
				已有账号?
				<span class="green" v-on:click="changeType">去登录</span>
			</p>
			<p class="tip" v-else>
				没有账号?
				<span class="green" v-on:click="changeType">注册</span>
			</p>

			<!-- <div class="login-panel">
			<div class="logo">Web IM</div>
			<a-form :form="form" >
			    <a-form-item has-feedback>
			      <a-input
			      	placeholder="手机号码"
			        v-decorator="[
			          'phone',
			          {
			            rules: [{ required: true, message: 'Please input your phone number!' }],
			          },
			        ]"
			        style="width: 100%"
			      >
			        <a-select
			          initialValue="86"
			          slot="addonBefore"
			          v-decorator="['prefix', { initialValue: '86' }]"
			          style="width: 70px"
			        >
			          <a-select-option value="86">
			            +86
			          </a-select-option>
			        </a-select>
			      </a-input>
			    </a-form-item>

			    <a-form-item>
			      <a-row :gutter="8">
			        <a-col :span="14">
			          <a-input
			          	placeholder="短信验证码"
			            v-decorator="[
			              'captcha',
			              { rules: [{ required: true, message: 'Please input the captcha you got!' }] },
			            ]"
			          />
			        </a-col>
			        <a-col :span="10">
			          <a-button v-on:click="getSmsCode" class="getSmsCodeBtn">{{btnTxt}}</a-button>
			        </a-col>
			      </a-row>
			    </a-form-item>
				<a-button style="width: 100%" type="primary" @click="toLogin" class="login-rigester-btn">登录</a-button>

			</a-form> -->
			<!-- </div> -->
		</div>
  </a-layout>
</template>

<script>
import './index.less';
import { mapState, mapActions } from 'vuex';
import axios from 'axios'
import { Message } from 'ant-design-vue';
const domain = window.location.protocol+'//a1.easemob.com'
const userInfo = localStorage.getItem('userInfo') && JSON.parse(localStorage.getItem('userInfo'));
let times = 60;
let timer
export default{
	data(){
		return {
			username: userInfo && userInfo.userId || '',
			password: userInfo && userInfo.password || '',
			nickname: '',
			btnTxt: '获取验证码'
		};
	},
	beforeCreate() {
	    this.form = this.$form.createForm(this, { name: 'register' });
	},
	mounted: function(){
		const path = this.isRegister ? '/register' : '/login';

		if(path !== location.pathname){
			this.$router.push(path);
		}
		if(this.isRegister){
			this.getImageVerification()
		}
	},
	watch: {
		isRegister(result){
			if(result){
				this.getImageVerification()
			}
		}
	},
	components: {},
	computed: {
		isRegister(){
			return  this.$store.state.login.isRegister;
		},
		imageUrl(){
			return this.$store.state.login.imageUrl
		},
		imageId(){
			return this.$store.state.login.imageId
		}
	},
	methods: {
		...mapActions(['onLogin', 'setRegisterFlag', 'onRegister', 'getImageVerification', 'registerUser', 'loginWithToken']),
		toLogin(){
			this.onLogin({
				username: this.username.toLowerCase(),
				password: this.password
			});
			// const form = this.form;
		    // form.validateFields(['phone', 'captcha'], { force: true }, (err, value) => {
		    // 	if(!err){
		    // 		const {phone, captcha} = value
		    // 		this.loginWithToken({phone, captcha})
		    // 	}
		    // });
		},
		toReset(){
			this.$router.push('/resetpassword')
		},
		toRegister(e){
			e.preventDefault(e);
		    // this.form.validateFieldsAndScroll((err, values) => {
		    //     if (!err) {
		    //     	this.registerUser({
		    //     		userId: values.username,
		    //             userPassword: values.password,
		    //             phoneNumber: values.phone,
		    //             smsCode: values.captcha,
		    //     	})
		    //     }
		    // });

			this.onRegister({
				username: this.username.toLowerCase(),
				password: this.password,
				nickname: this.nickname.toLowerCase(),
			});
		},
		changeType(){
			this.setRegisterFlag(!this.isRegister);
		},
		getSmsCode(){
			if(this.$data.btnTxt != '获取验证码') return
			const form = this.form;
		    form.validateFields(['phone'], { force: true }, (err, value) => {
		    	if(!err){
		    		const {phone, imageCode} = value
		    		this.getCaptcha({phoneNumber: phone, imageCode})
		    	}
		    });
		},
		getCaptcha(payload){
			const self = this
			const imageId = this.imageId
			axios.post(domain+`/inside/app/sms/send/${payload.phoneNumber}`, {
                phoneNumber: payload.phoneNumber,
            })
            .then(function (response) {
                Message.success('短信已发送')
                self.countDown()
            })
            .catch(function (error) {
                if(error.response && error.response.status == 400){
                	if(error.response.data.errorInfo == 'Image verification code error.'){
                		self.getImageVerification()
                	}
                	if(error.response.data.errorInfo == 'phone number illegal'){
						Message.error('请输入正确的手机号!')
					}else if(error.response.data.errorInfo == 'Please wait a moment while trying to send.'){
						Message.error('你的操作过于频繁,请稍后再试!')
					}else if(error.response.data.errorInfo.includes('exceed the limit')){
						Message.error('获取已达上限!')
					}else{
						Message.error(error.response.data.errorInfo)
					}
                }
            });
		},
		countDown(){
			this.$data.btnTxt = times
			timer = setTimeout(() => {
				this.$data.btnTxt--
				times--
				if(this.$data.btnTxt === 0){
					times = 60
					this.$data.btnTxt = '获取验证码'
					return clearTimeout(timer)
				}
				this.countDown()
			}, 1000)
		}
	}
};
</script>
webim-vue-demo===>src===>store===>login.js
只用更改actions下的onLogin,其余不用动
onLogin: function(context, payload){
			context.commit('setUserName', payload.username);
			let options = {
				user: payload.username,
				pwd: payload.password,
				appKey: WebIM.config.appkey,
				apiUrl: 'https://a1.easecdn.com'
			};
			WebIM.conn.open(options).then((res)=>{
				localStorage.setItem('userInfo', JSON.stringify({ userId: payload.username, password: payload.password,accessToken:res.accessToken}));
			});

		},
2、VUE3 DEMO:
vue3 demo源码下载
vue3 demo线上体验
第一步:更改appkey
webim-vue-demo===>src===>IM===>config===>index.js

第二步:更改代码
webim-vue-demo===>src===>views===>Login===>components===>LoginInput===>index.vue
<script setup>
import { ref, reactive, watch, computed } from 'vue'
import { ElMessage } from 'element-plus'
import { EaseChatClient } from '@/IM/initwebsdk'
import { handleSDKErrorNotifi } from '@/utils/handleSomeData'
import { fetchUserLoginSmsCode, fetchUserLoginToken } from '@/api/login'
import { useStore } from 'vuex'
import { usePlayRing } from '@/hooks'
const store = useStore()
const loginValue = reactive({
    phoneNumber: '',
    smsCode: ''
})
const buttonLoading = ref(false)
//根据登陆初始化一部分状态
const loginState = computed(() => store.state.loginState)
watch(loginState, (newVal) => {
    if (newVal) {
        buttonLoading.value = false
        loginValue.phoneNumber = ''
        loginValue.smsCode = ''
    }
})
const rules = reactive({
    phoneNumber: [
        { required: true, message: '请输入手机号', trigger: 'blur' },
        {
            pattern: /^1[3-9]\d{9}$/,
            message: '请输入正确的手机号',
            trigger: ['blur', 'change']
        }
    ],
    smsCode: [
        {
            required: true,
            message: '请输入短信验证码',
            trigger: ['blur', 'change']
        }
    ]
})
//登陆接口调用
const loginIM = async () => {
    const { clickRing } = usePlayRing()
    clickRing()
    buttonLoading.value = true
    /* SDK 登陆的方式 */
    try {
      let { accessToken } = await EaseChatClient.open({
        user: loginValue.phoneNumber.toLowerCase(),
        pwd: loginValue.smsCode.toLowerCase(),
      });
      window.localStorage.setItem(`EASEIM_loginUser`, JSON.stringify({ user: loginValue.phoneNumber, accessToken: accessToken }))
    } catch (error) {
      console.log('>>>>登陆失败', error);
      const { data: { extraInfo } } = error
      handleSDKErrorNotifi(error.type, extraInfo.errDesc);
      loginValue.phoneNumber = '';
      loginValue.smsCode = '';
    }
    finally {
      buttonLoading.value = false;
    }
    /*  !环信后台接口登陆(仅供环信线上demo使用!) */
    // const params = {
    //     phoneNumber: loginValue.phoneNumber.toString(),
    //     smsCode: loginValue.smsCode.toString()
    // }
    // try {
    //     const res = await fetchUserLoginToken(params)
    //     if (res?.code === 200) {
    //         console.log('>>>>>>登陆token获取成功', res.token)
    //         EaseChatClient.open({
    //             user: res.chatUserName.toLowerCase(),
    //             accessToken: res.token
    //         })
    //         window.localStorage.setItem(
    //             'EASEIM_loginUser',
    //             JSON.stringify({
    //                 user: res.chatUserName.toLowerCase(),
    //                 accessToken: res.token
    //             })
    //         )
    //     }
    // } catch (error) {
    //     console.log('>>>>登陆失败', error)
    //     if (error.response?.data) {
    //         const { code, errorInfo } = error.response.data
    //         if (errorInfo.includes('does not exist.')) {
    //             ElMessage({
    //                 center: true,
    //                 message: `用户${loginValue.username}不存在!`,
    //                 type: 'error'
    //             })
    //         } else {
    //             handleSDKErrorNotifi(code, errorInfo)
    //         }
    //     }
    // } finally {
    //     buttonLoading.value = false
    // }
}
/* 短信验证码相关 */
const isSenedAuthCode = ref(false)
const authCodeNextCansendTime = ref(60)
const sendMessageAuthCode = async () => {
    const phoneNumber = loginValue.phoneNumber
    try {
        await fetchUserLoginSmsCode(phoneNumber)
        ElMessage({
            type: 'success',
            message: '验证码获取成功!',
            center: true
        })
        startCountDown()
    } catch (error) {
        ElMessage({ type: 'error', message: '验证码获取失败!', center: true })
    }
}
const startCountDown = () => {
    isSenedAuthCode.value = true
    let timer = null
    timer = setInterval(() => {
        if (
            authCodeNextCansendTime.value <= 60 &&
            authCodeNextCansendTime.value > 0
        ) {
            authCodeNextCansendTime.value--
        } else {
            clearInterval(timer)
            timer = null
            authCodeNextCansendTime.value = 60
            isSenedAuthCode.value = false
        }
    }, 1000)
}
</script>

<template>
    <el-form :model="loginValue" :rules="rules">
        <el-form-item prop="phoneNumber">
            <el-input
                class="login_input_style"
                v-model="loginValue.phoneNumber"
                placeholder="手机号"
                clearable
            />
        </el-form-item>
        <el-form-item prop="smsCode">
            <el-input
                class="login_input_style"
                v-model="loginValue.smsCode"
                placeholder="请输入短信验证码"
            >
                <template #append>
                    <el-button
                        type="primary"
                        :disabled="loginValue.phoneNumber && isSenedAuthCode"
                        @click="sendMessageAuthCode"
                        v-text="
                            isSenedAuthCode
                                ? `${authCodeNextCansendTime}S`
                                : '获取验证码'
                        "
                    ></el-button>
                </template>
            </el-input>
        </el-form-item>
        <el-form-item>
            <div class="function_button_box">
                <el-button
                    v-if="loginValue.phoneNumber && loginValue.smsCode"
                    class="haveValueBtn"
                    :loading="buttonLoading"
                    @click="loginIM"
                    >登录</el-button
                >
                <el-button v-else class="notValueBtn">登录</el-button>
            </div>
        </el-form-item>
    </el-form>
</template>

<style lang="scss" scoped>
.login_input_style {
    margin: 10px 0;
    width: 400px;
    height: 50px;
    padding: 0 16px;
}

::v-deep .el-input__inner {
    padding: 0 20px;
    font-style: normal;
    font-weight: 400;
    font-size: 14px;
    line-height: 20px;
    letter-spacing: 1.75px;
    color: #3a3a3a;

    &::placeholder {
        font-family: 'PingFang SC';
        font-style: normal;
        font-weight: 400;
        font-size: 14px;
        line-height: 20px;
        /* identical to box height */
        letter-spacing: 1.75px;
        color: #cccccc;
    }
}

::v-deep .el-input__suffix-inner {
    font-size: 20px;
    margin-right: 15px;
}

::v-deep .el-form-item__error {
    margin-left: 16px;
}

::v-deep .el-input-group__append {
    background: linear-gradient(90deg, #04aef0 0%, #5a5dd0 100%);
    width: 60px;
    color: #fff;
    border: none;
    font-weight: 400;

    button {
        font-weight: 300;
    }
}

.login_text {
    font-family: 'PingFang SC';
    font-style: normal;
    font-weight: 400;
    font-size: 12px;
    line-height: 17px;
    text-align: right;

    .login_text_isuserid {
        display: inline-block;
        // width: 100px;
        color: #f9f9f9;
    }

    .login_text_tologin {
        margin-right: 20px;
        width: 80px;
        color: #05b5f1;
        cursor: pointer;

        &:hover {
            text-decoration: underline;
        }
    }
}

.function_button_box {
    margin-top: 10px;
    width: 400px;

    button {
        margin: 10px;
        width: 380px;
        height: 50px;
        border-radius: 57px;
    }

    .haveValueBtn {
        background: linear-gradient(90deg, #04aef0 0%, #5a5dd0 100%);
        border: none;
        font-weight: 300;
        font-size: 17px;
        color: #f4f4f4;

        &:active {
            background: linear-gradient(90deg, #0b83b2 0%, #363df4 100%);
        }
    }

    .notValueBtn {
        border: none;
        font-weight: 300;
        font-size: 17px;
        background: #000000;
        mix-blend-mode: normal;
        opacity: 0.3;
        color: #ffffff;
        cursor: not-allowed;
    }
}
</style>
3、React DEMO:
React Demo源码下载
React Demo线上体验
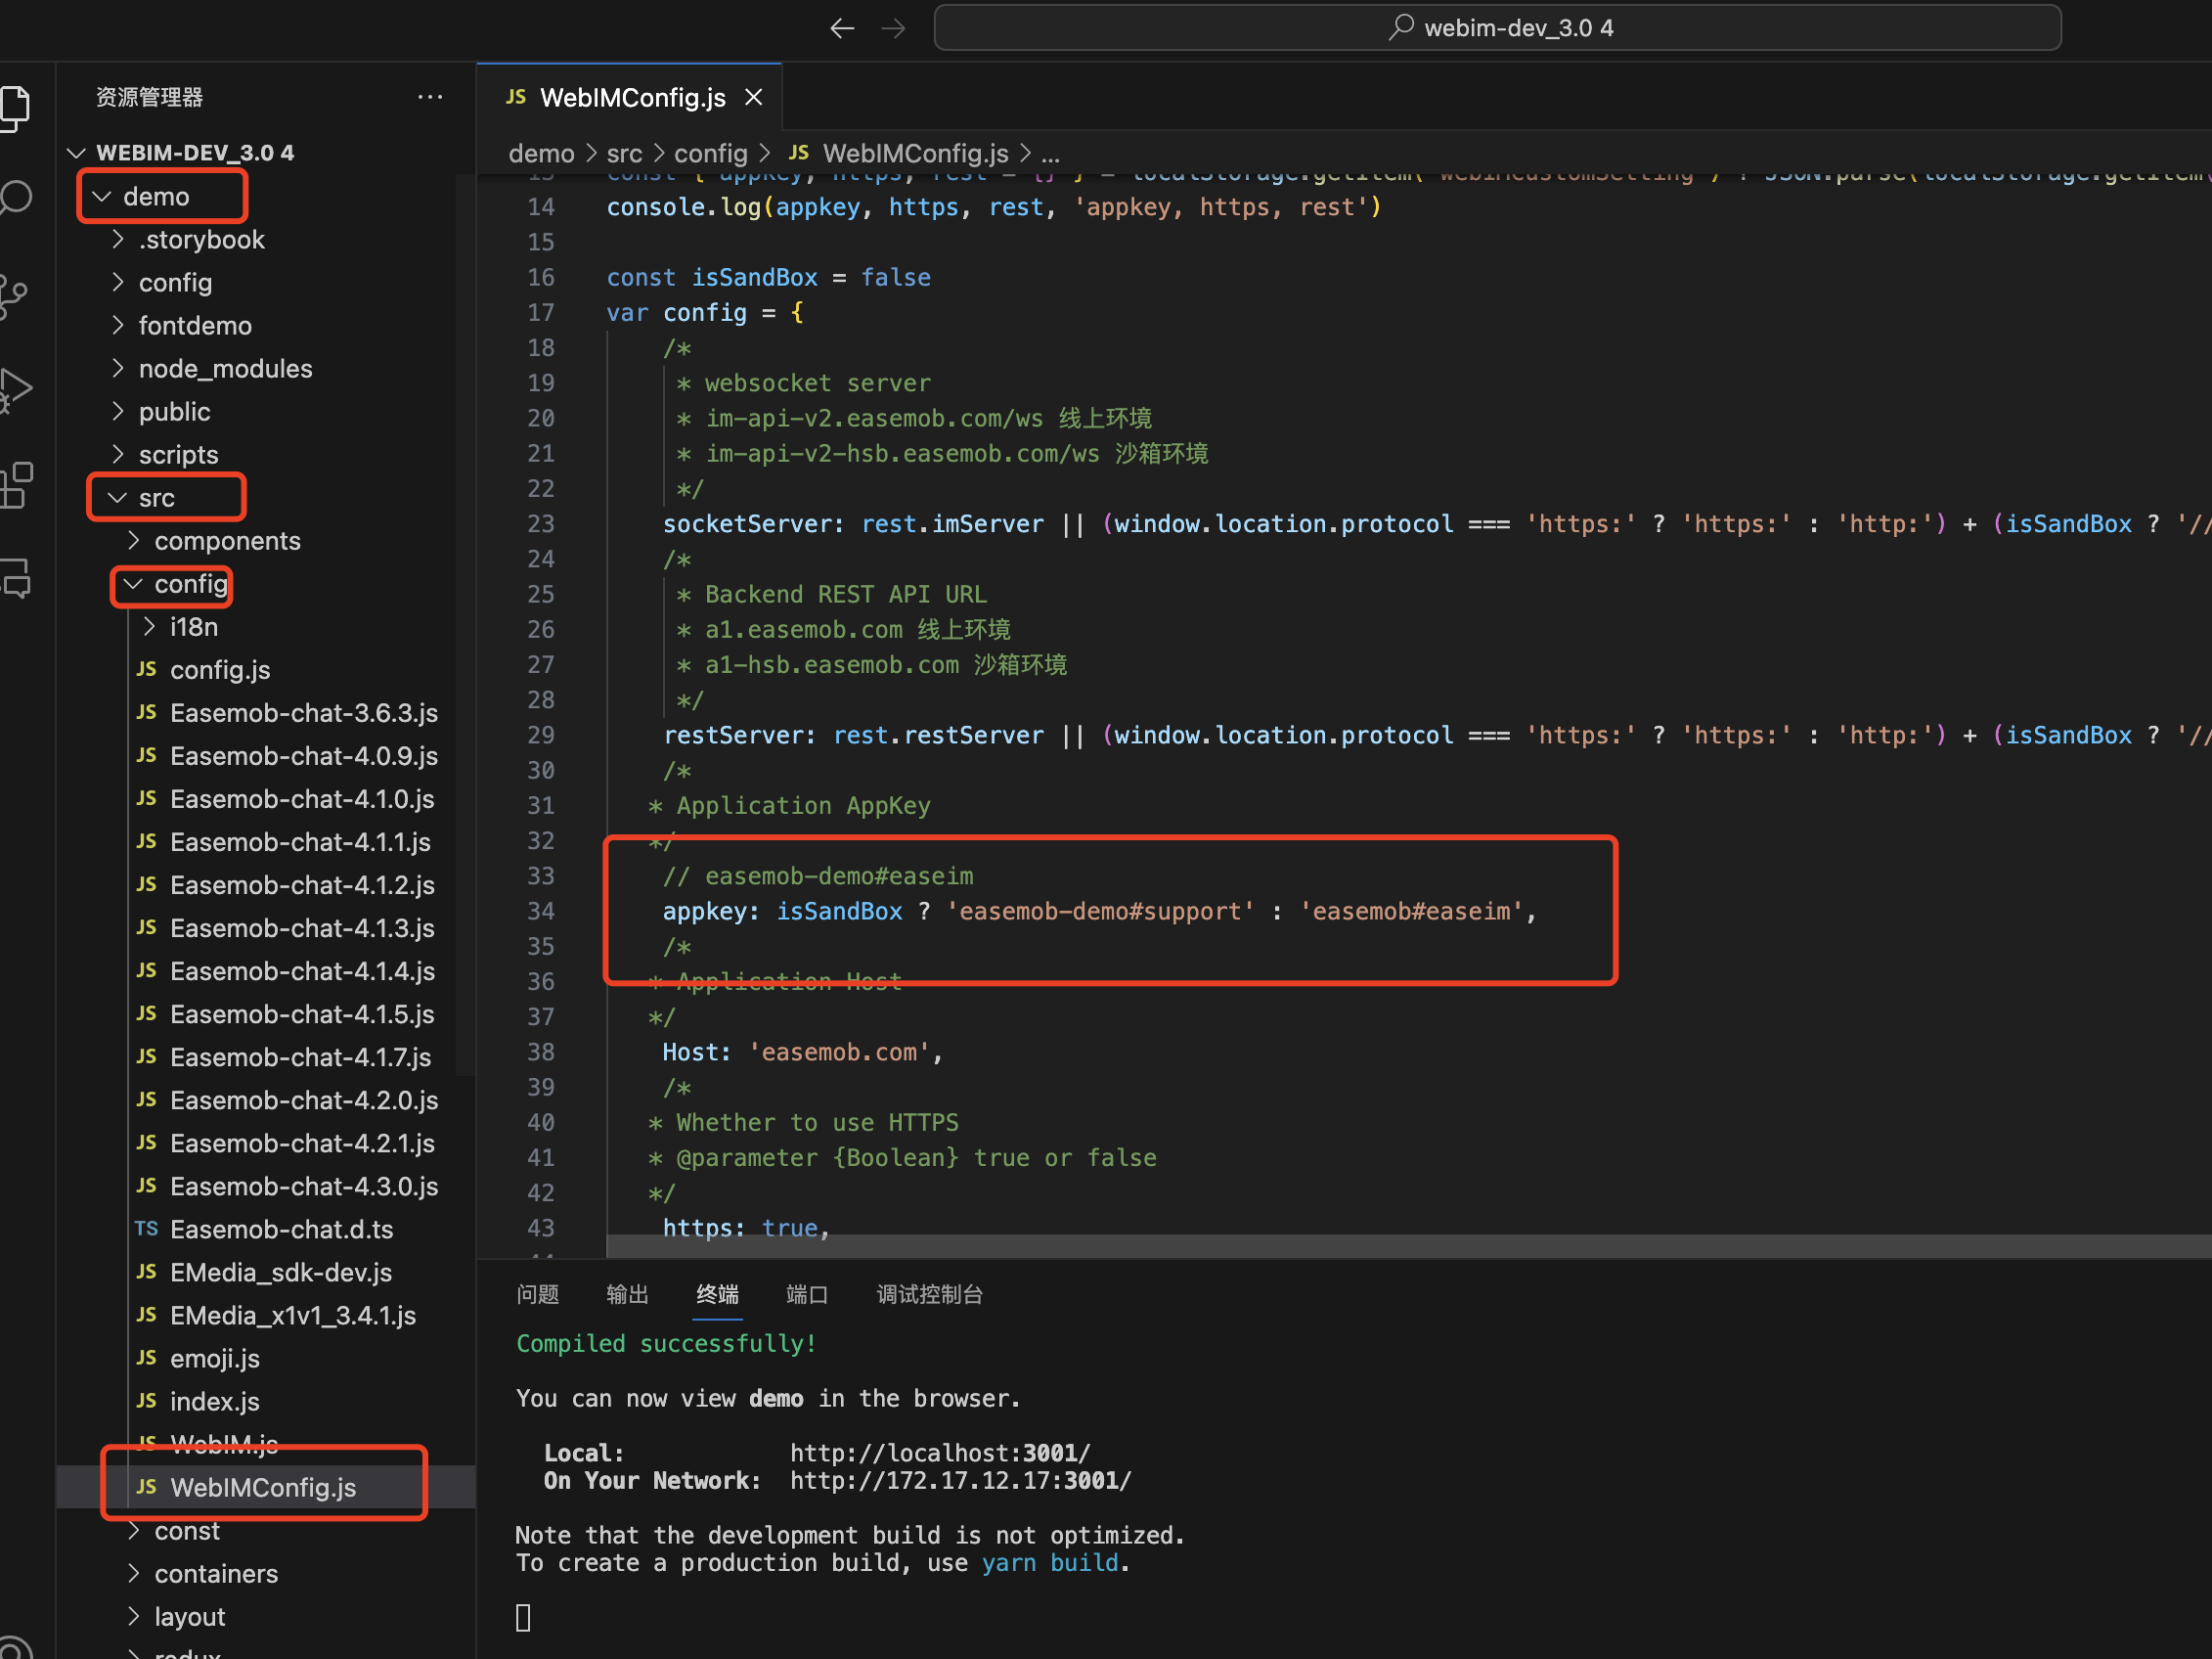
第一步:更改appkey
webim-dev===>demo===>src===>config===>WebIMConfig.js
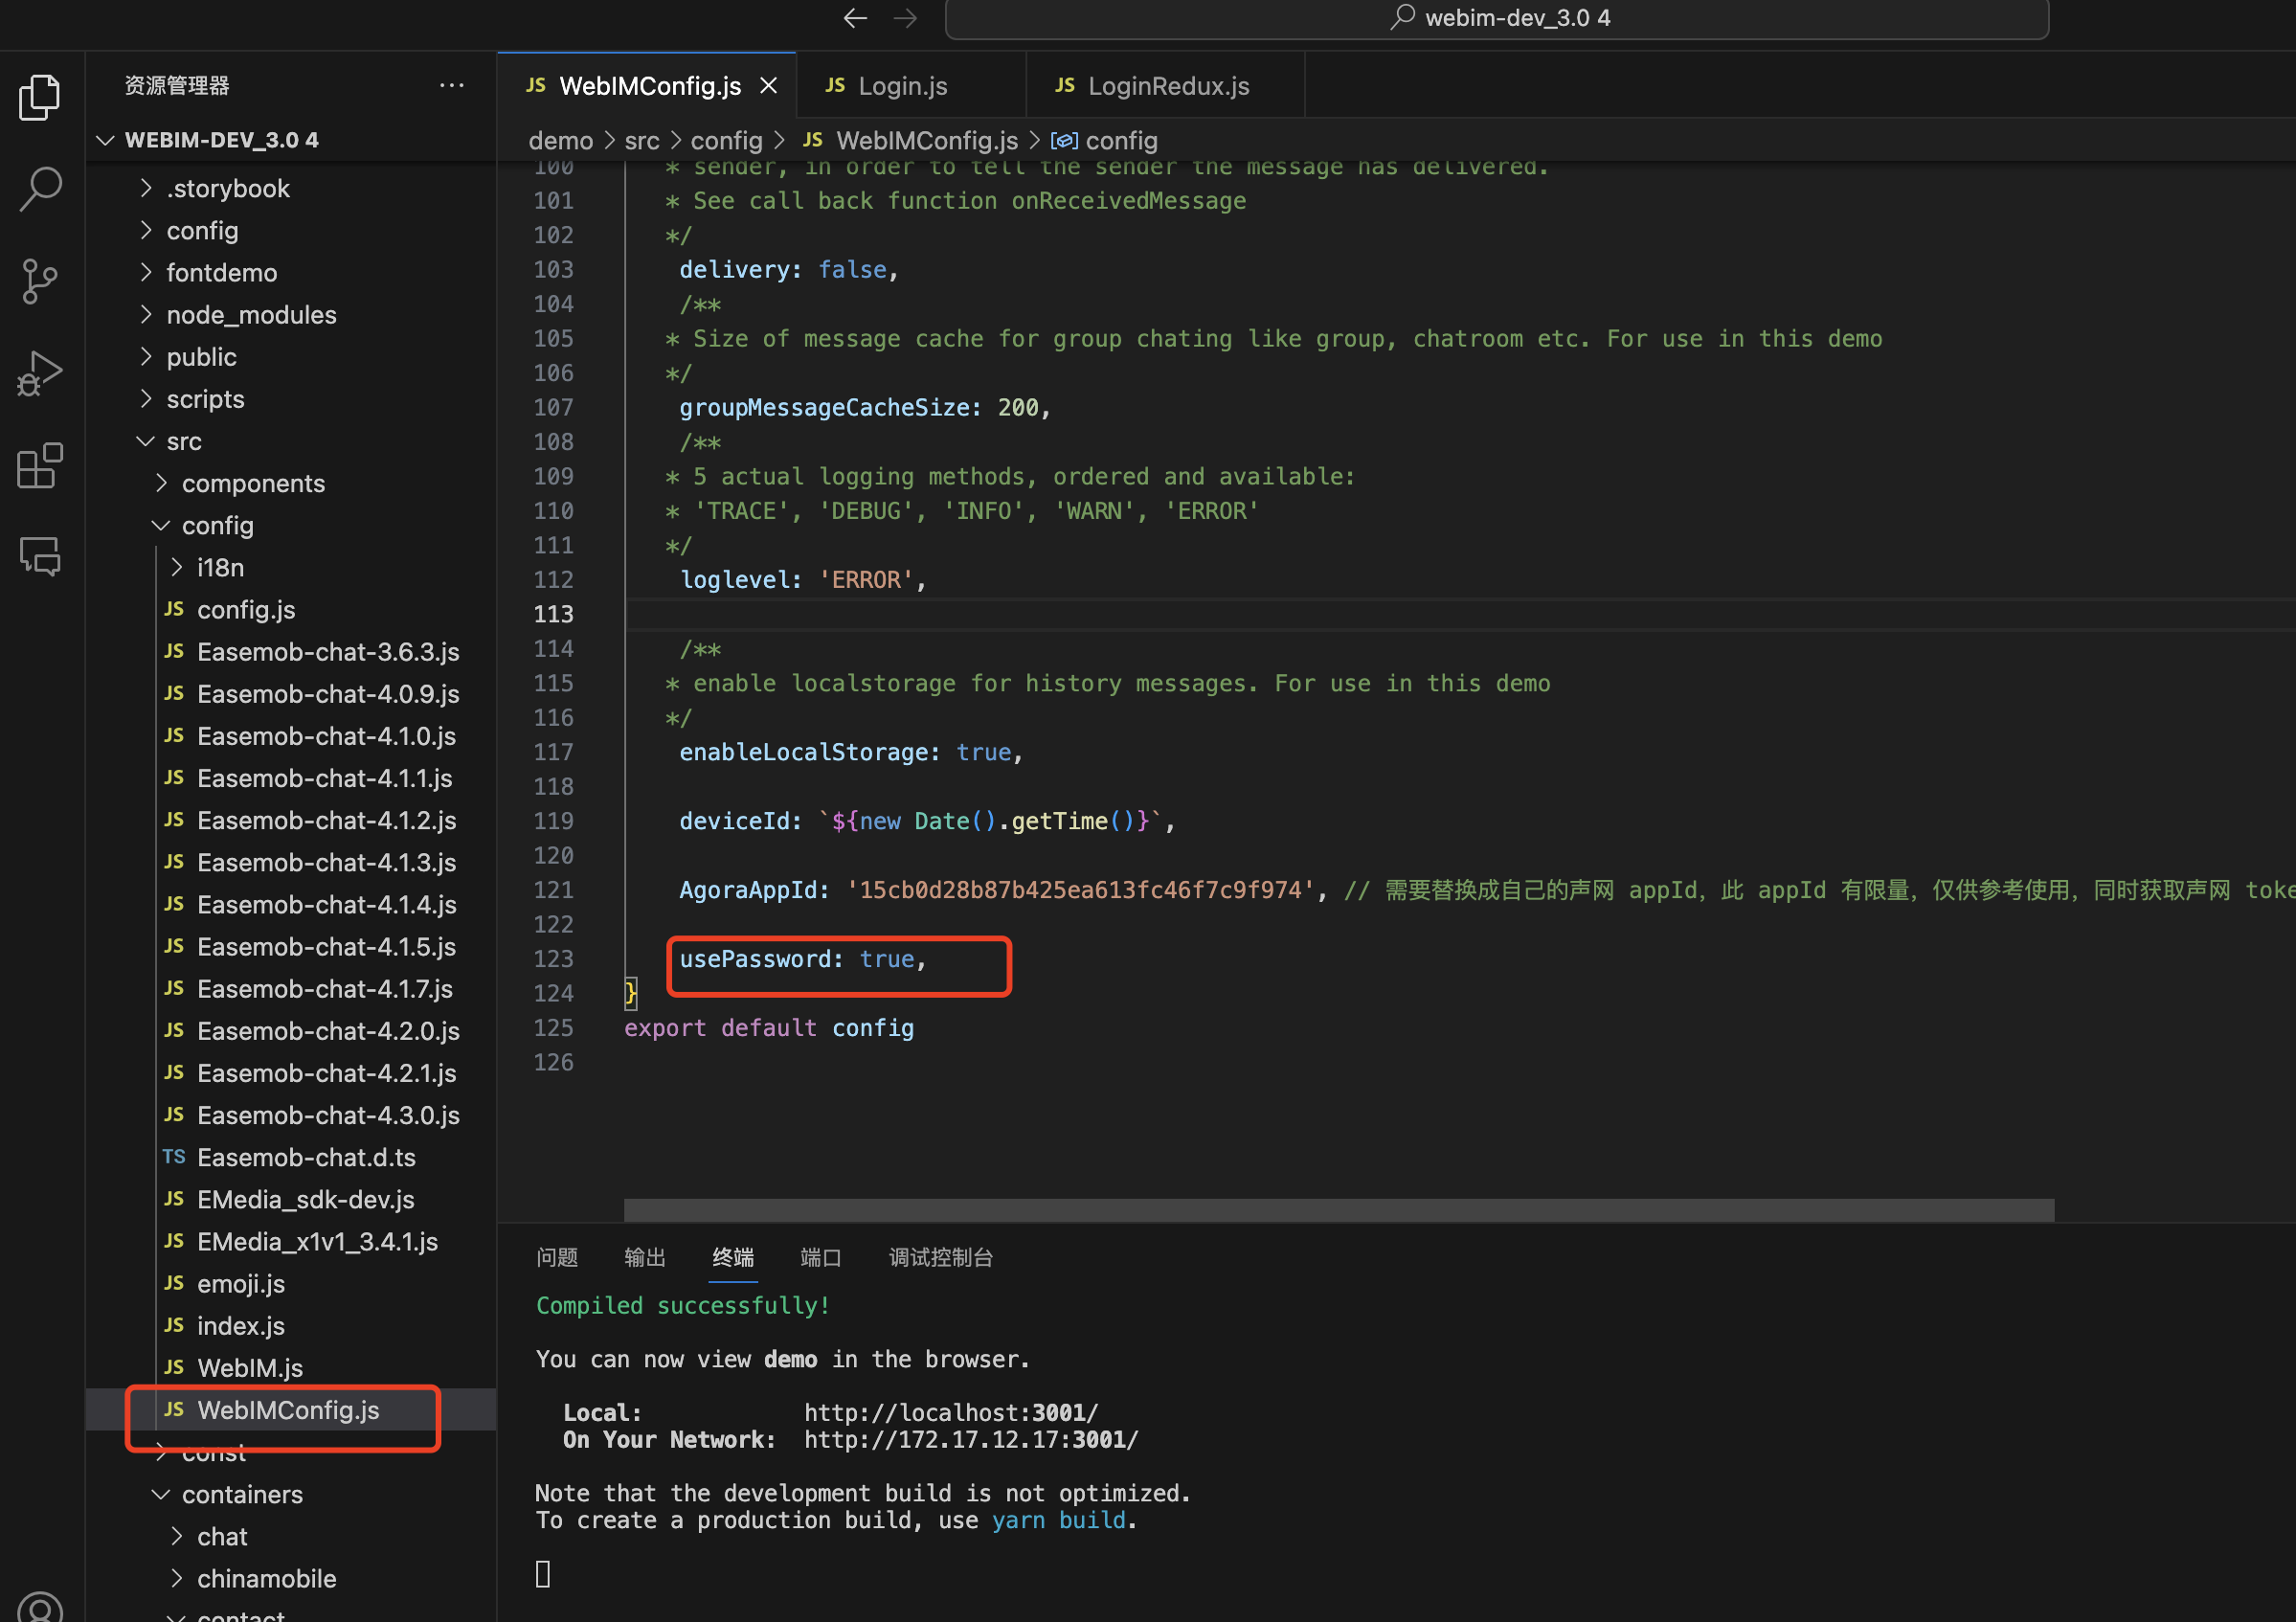
第二步:更改代码
webim-dev===>demo===>src===>config===>WebIMConfig.js
将usePassword改为true
4、Uniapp Demo:
uniapp vue2 demo源码下载
uniapp vue3 demo源码下载
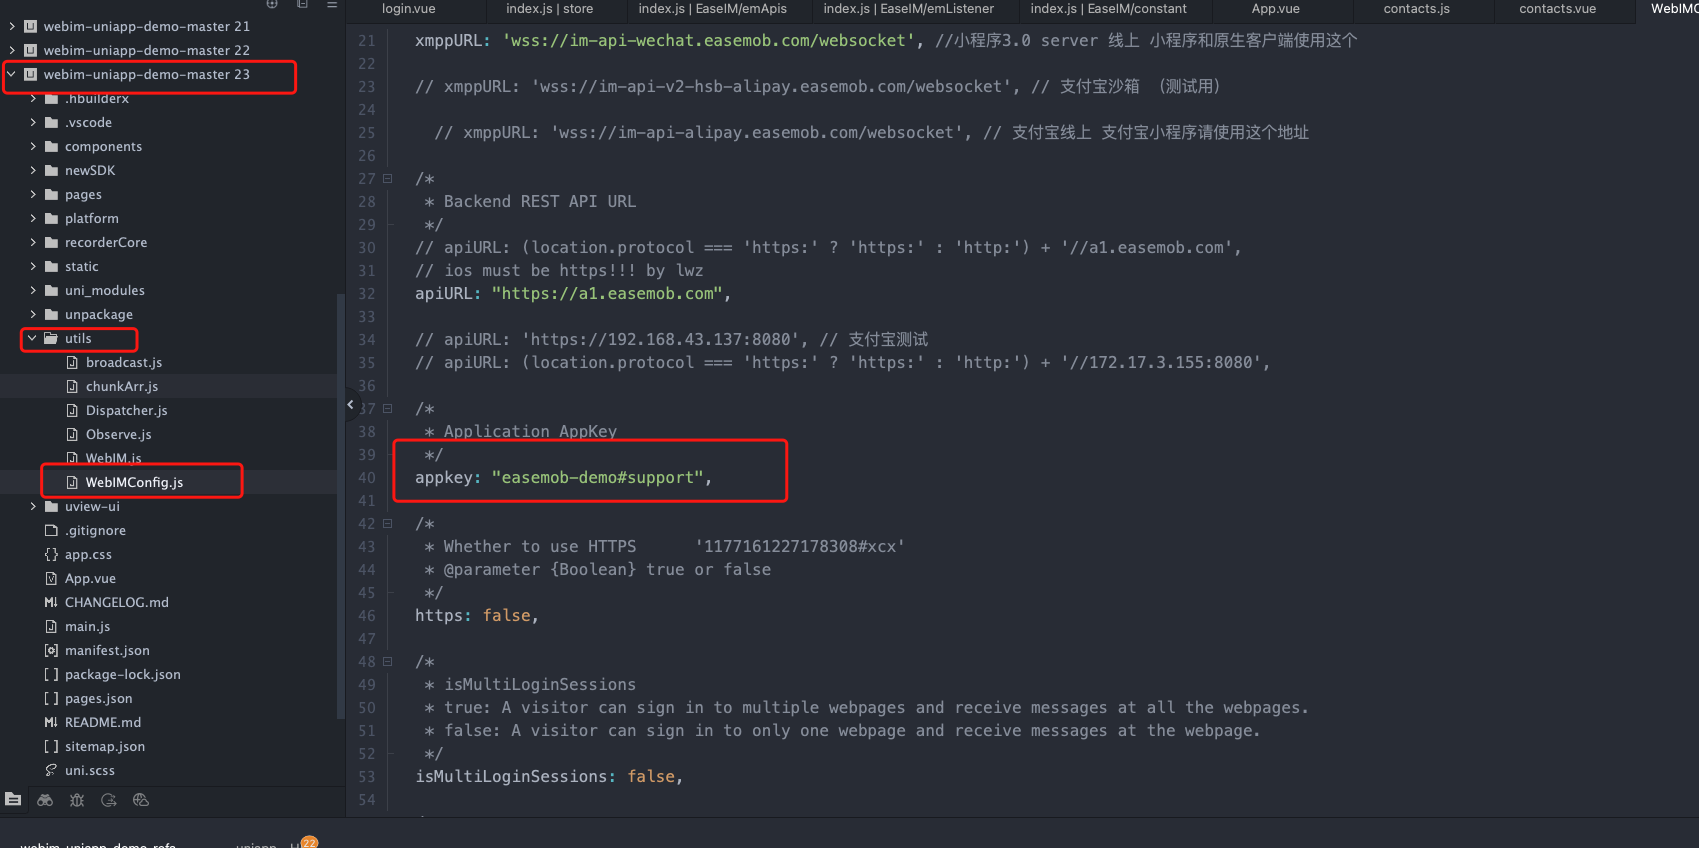
第一步:更改appkey
uniapp vue2 demo
webim-uniapp-demo===>utils===>WebIMConfig.js
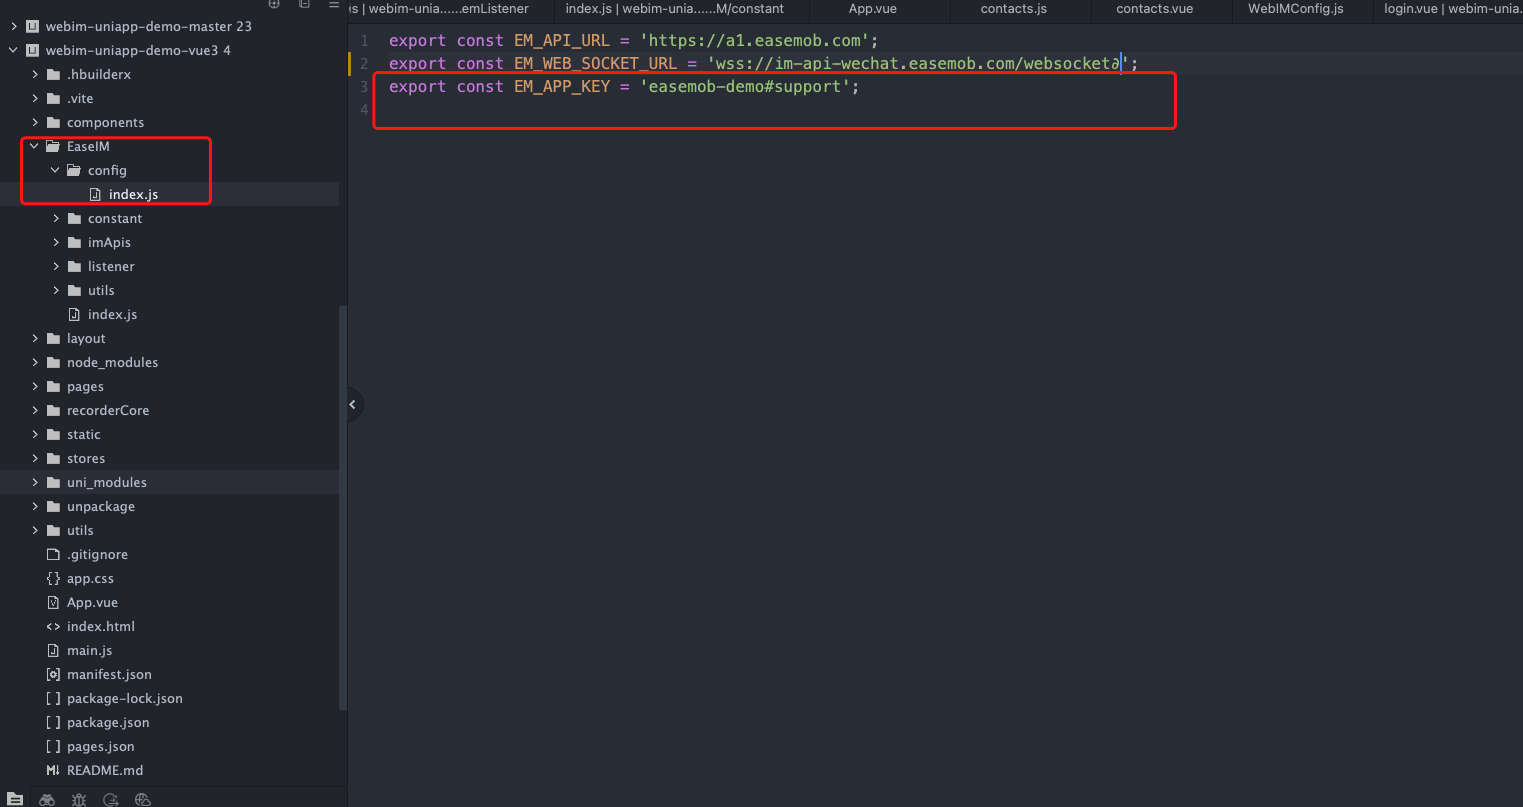
uniapp vue3 demo
webim-uniapp-demo===>EaseIM===>config===>index.js
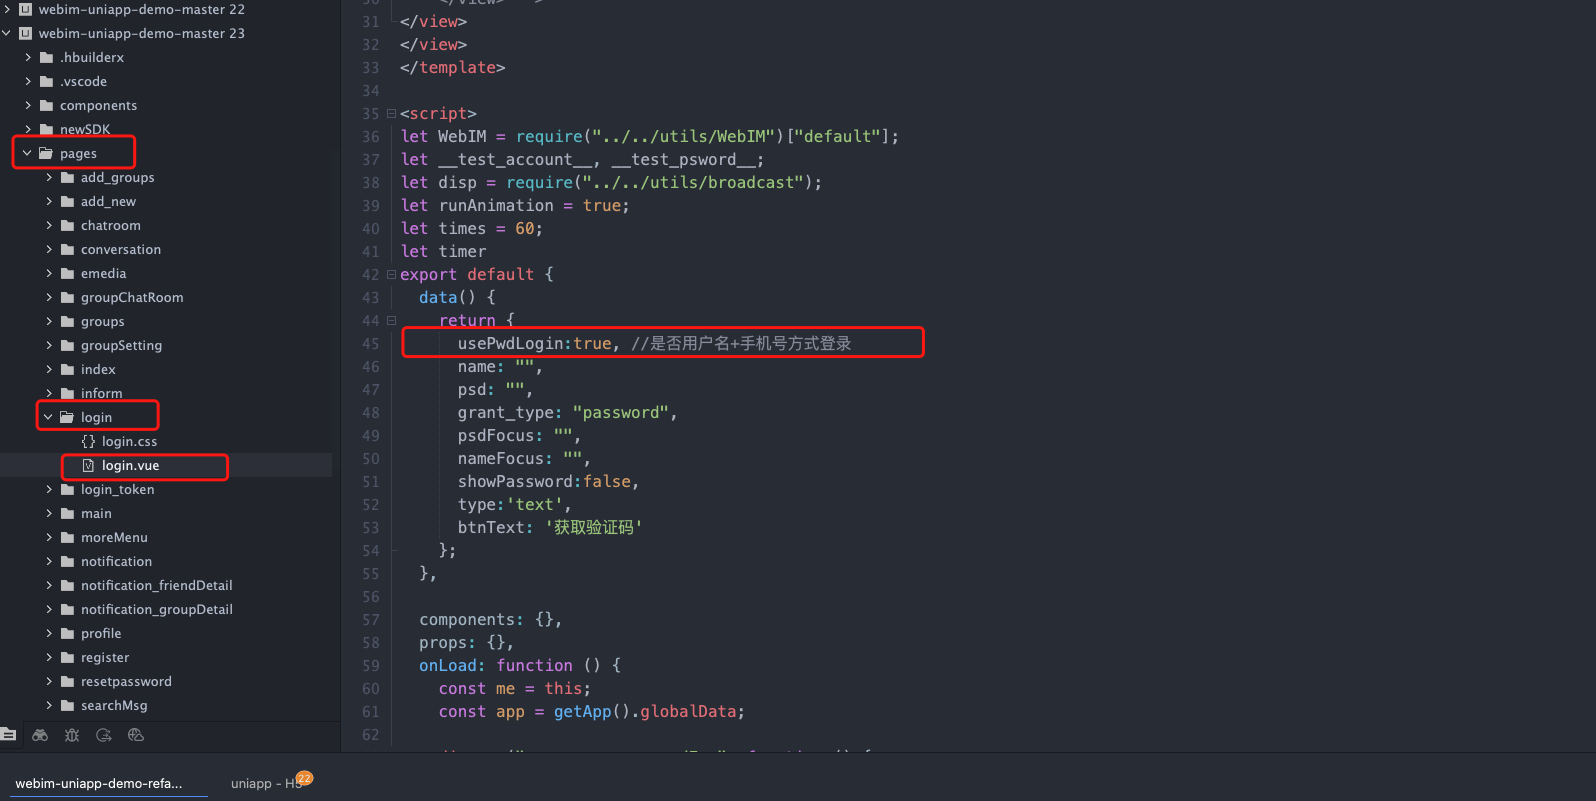
第二步:更改代码
webim-uniapp-demo===>pages===>login===>login.vue
5、微信小程序 Demo:
微信小程序源码下载
第一步:更改appkey
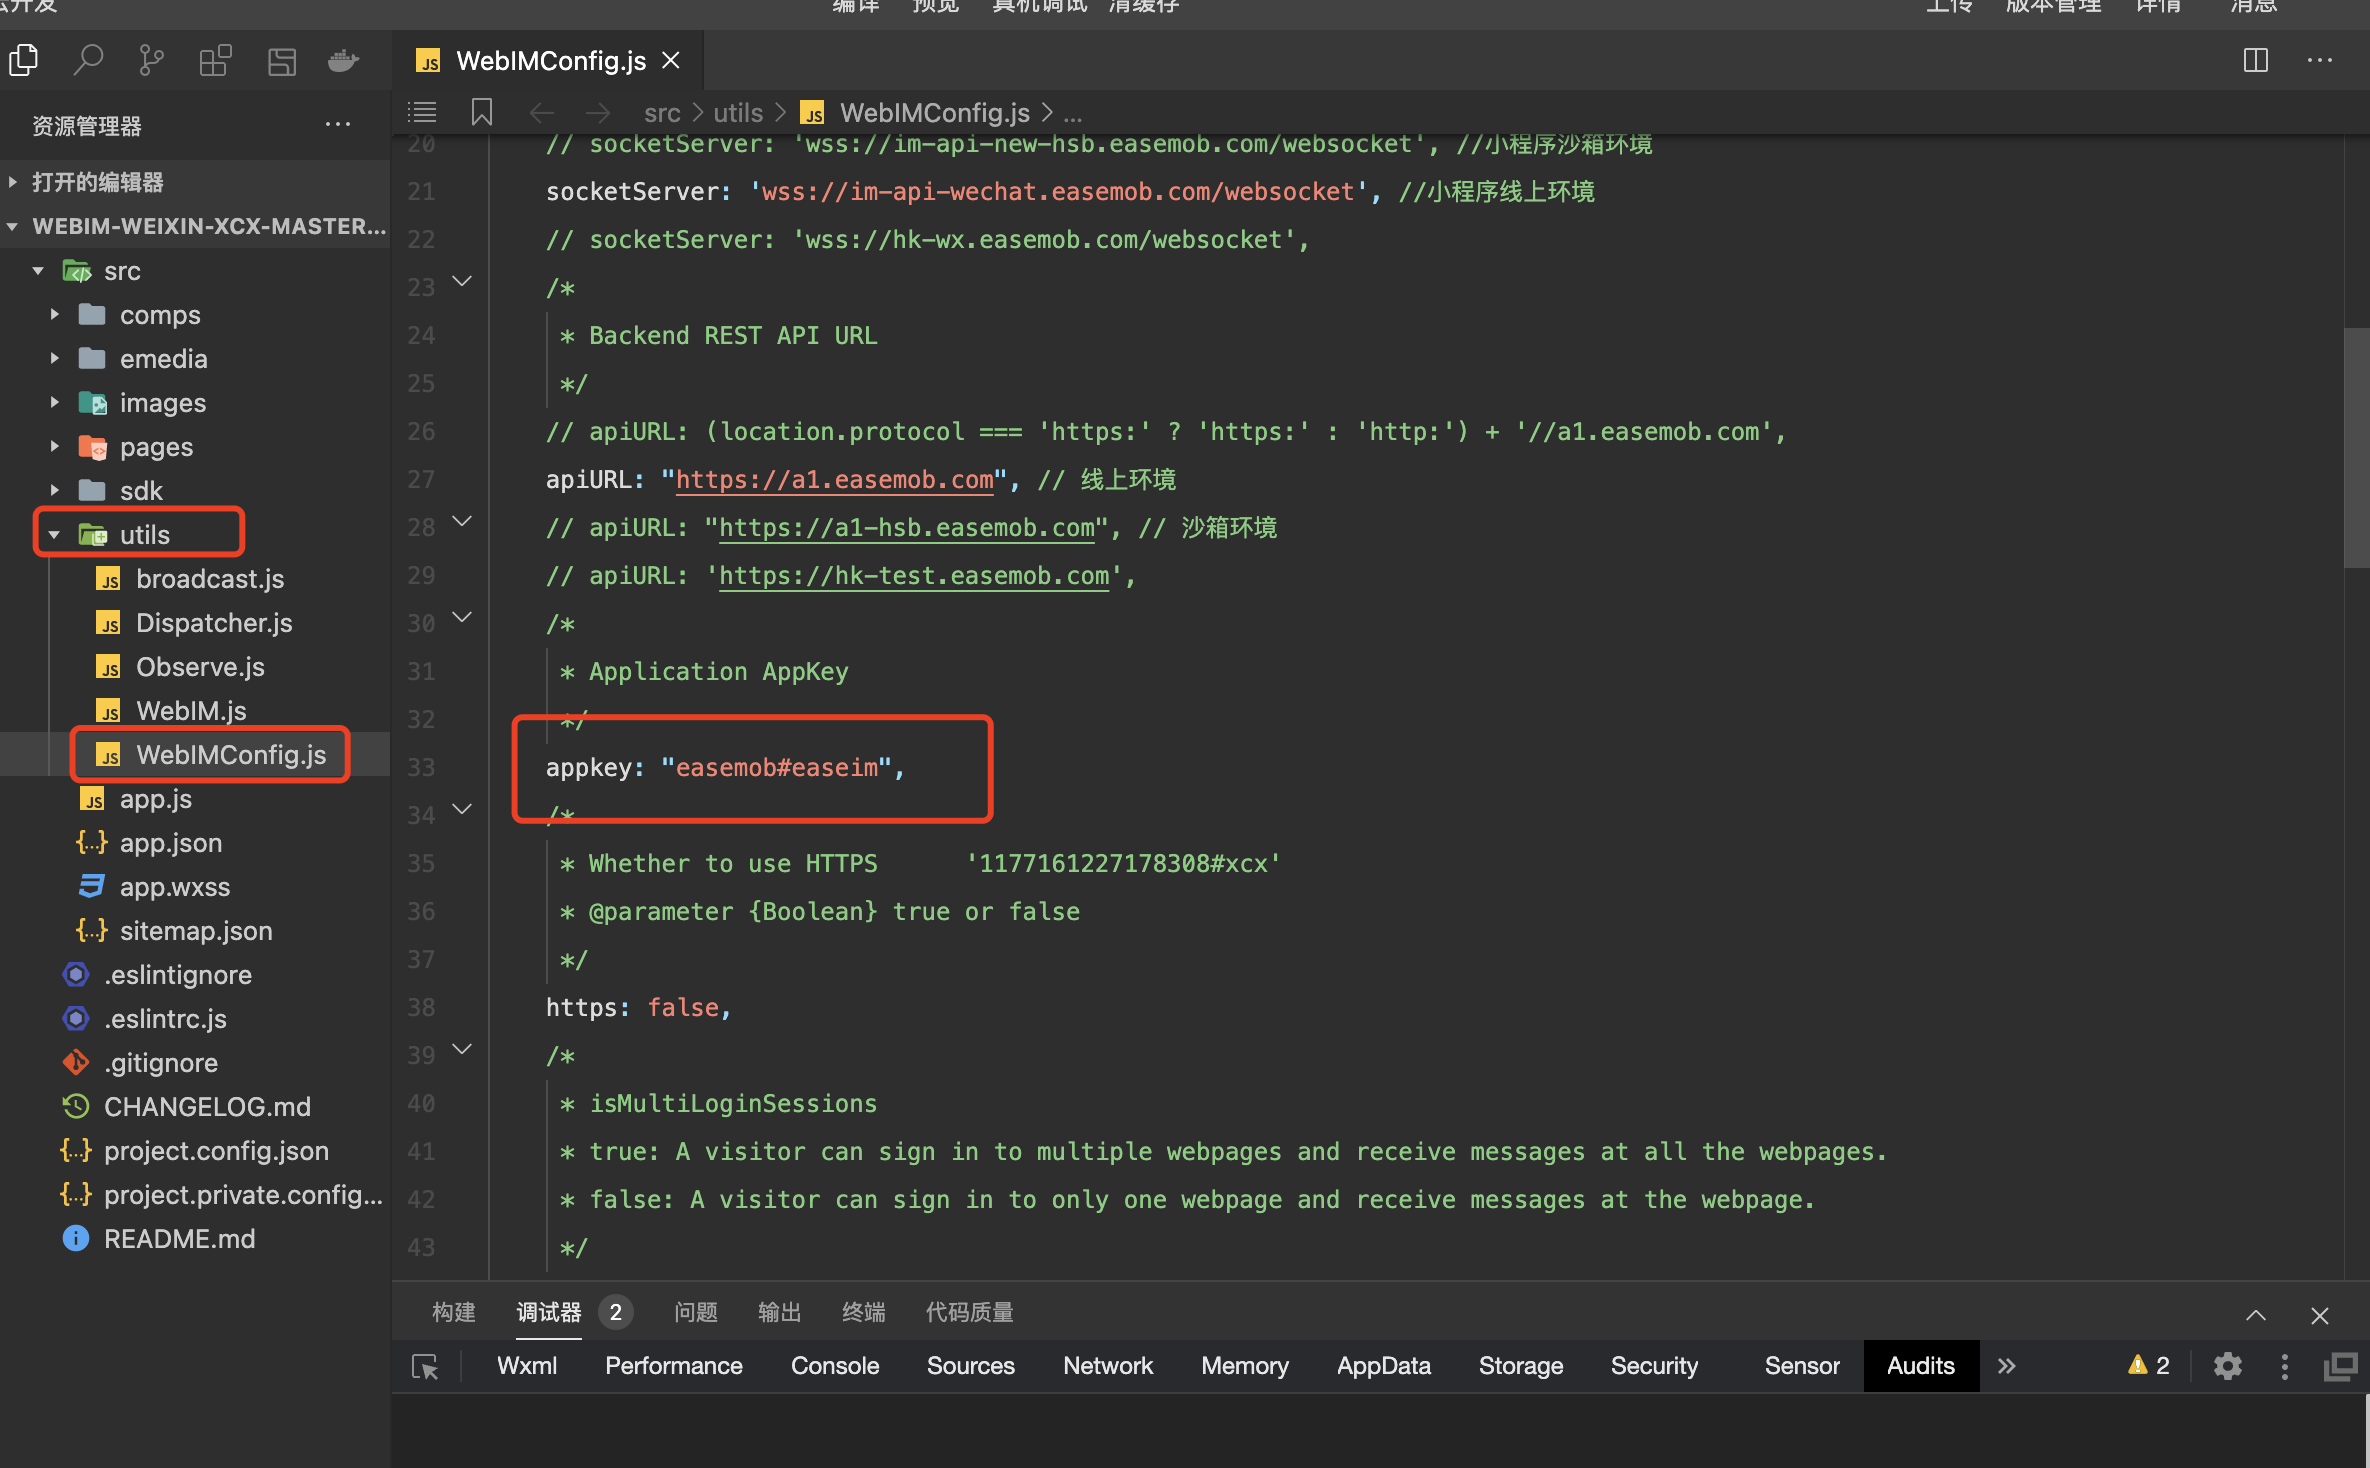
webim-weixin-demo===>src===>utils===>WebIMConfig.js
第二步:更改代码
webim-weixin-demo===>src===>pages===>login===>login.wxml
<import src="../../comps/toast/toast.wxml" />
<view class="login">
<view class="login_title">
<text bindlongpress="longpress">登录</text>
</view>

<!-- 测试用 请忽略 -->
<view class="config" wx:if="{{ show_config }}">
<view>
<text>使用沙箱环境</text>
<switch class="config_swich" checked="{{isSandBox? true: false}}" color="#0873DE" bindchange="changeConfig" />
</view>
</view>

<view class="login_user {{nameFocus}}">
<input type="text" placeholder="请输入用户名" placeholder-style="color:rgb(173,185,193)" bindinput="bindUsername" bindfocus="onFocusName" bindblur="onBlurName" />
</view>
<view class="login_pwd {{psdFocus}}">
<input type="text" password placeholder="用户密码" placeholder-style="color:rgb(173,185,193)" bindinput="bindPassword" bindfocus="onFocusPsd" bindblur="onBlurPsd"/>
</view>
<view class="login_btn">
<button hover-class="btn_hover" bind:tap="login">登录</button>
</view>
<template is="toast" data="{{ ..._toast_ }}"></template>
</view>
webim-weixin-demo===>src===>pages===>login===>login.js
let WebIM = require("../../utils/WebIM")["default"];
let __test_account__, __test_psword__;
let disp = require("../../utils/broadcast");

let runAnimation = true
Page({
data: {
name: "",
psd: "",
grant_type: "password",
rtcUrl: '',
show_config: false,
isSandBox: false
},

statechange(e) {
console.log('live-player code:', e.detail.code)
},

error(e) {
console.error('live-player error:', e.detail.errMsg)
},

onLoad: function(option){
const me = this;
const app = getApp();
new app.ToastPannel.ToastPannel();

disp.on("em.xmpp.error.passwordErr", function(){
me.toastFilled('用户名或密码错误');
});
disp.on("em.xmpp.error.activatedErr", function(){
me.toastFilled('用户被封禁');
});

wx.getStorage({
key: 'isSandBox',
success (res) {
console.log(res.data)
me.setData({
isSandBox: !!res.data
})
}
})

if (option.username && option.password != '') {
this.setData({
name: option.username,
psd: option.password
})
}
},

bindUsername: function(e){
this.setData({
name: e.detail.value
});
},

bindPassword: function(e){
this.setData({
psd: e.detail.value
});
},
onFocusPsd: function(){
this.setData({
psdFocus: 'psdFocus'
})
},
onBlurPsd: function(){
this.setData({
psdFocus: ''
})
},
onFocusName: function(){
this.setData({
nameFocus: 'nameFocus'
})
},
onBlurName: function(){
this.setData({
nameFocus: ''
})
},

login: function(){
runAnimation = !runAnimation
if(!__test_account__ && this.data.name == ""){
this.toastFilled('请输入用户名!')
return;
}
else if(!__test_account__ && this.data.psd == ""){
this.toastFilled('请输入密码!')
return;
}
wx.setStorage({
key: "myUsername",
data: __test_account__ || this.data.name.toLowerCase()
});

getApp().conn.open({
user: __test_account__ || this.data.name.toLowerCase(),
pwd: __test_psword__ || this.data.psd,
grant_type: this.data.grant_type,
appKey: WebIM.config.appkey
});
},

longpress: function(){
console.log('长按')
this.setData({
show_config: !this.data.show_config
})
},

changeConfig: function(){
this.setData({
isSandBox: !this.data.isSandBox
}, ()=>{
wx.setStorage({
key: "isSandBox",
data: this.data.isSandBox
});
})

}

});
相关文档:
注册环信:https://console.easemob.com/user/register
集成文档:https://docs-im-beta.easemob.com/document/ios/quickstart.html
社区支持:https://www.imgeek.net/