【vue/uniapp】使用 uni.chooseImage 和 uni.uploadFile 实现图片上传(包含样式,可以解决手机上无法上传的问题)

news2024/9/22 4:13:37

引入:
之前写过一篇关于 uview 1.x 版本上传照片 的文章,但是发现如果是在微信小程序的项目中嵌入 h5 的模块,这个 h5 的项目使用 u-upload 的话,图片上传功能在电脑上正常,但是在手机的小程序上测试就不会生效,点击上传加号按钮毫无反应。
解决方法:
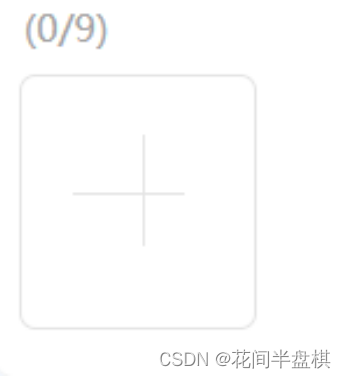
现在最终的解决方法是,使用 uniapp 的 uni.chooseImage 来选择照片,使用 uni.uploadFile 来上传图片,其他所有的样式和逻辑都自己来实现,最终的效果长这样:

代码与解析:
单独写一个组件,先实现样式:

<template>
    <view class="meeting-image">
        <view class="title">
            <text></text>
            <!-- 展示图片张数 -->
            <text style="color: #a1a1a1;">({{ list.length }}/9)</text>
        </view>
        <view class="img_wrap flex-row flex-justify-between">
            <view class="img_box" v-for="(item, index) in list" :key="index">
                <!-- 展示上传之后的图片 -->
                <image :src="item.imgUrl" class="pic" mode="aspectFill" @click="previewImage(index)" />
                <!-- 删除图标 -->
                <!-- 这里的删除图标叉叉是用的在线网址,$public 是挂载在原型上的,可以自定义 -->
                <image 
                    :src="`${$public()}/project-meeting/icon_20_close.png`" 
                    class="close"
                    @click.stop="handleDeleteImg(index, item)" />
            </view>
            <!-- 上传的方框 -->
            <view 
                class="upload-box" 
                @click="chooseImg" 
                v-if="list.length !== 9 && isSponsorUserFlag == 1"
            ></view>
        </view>
        <u-toast ref="uToast" />
    </view>
</template>
.meeting-image {
    .title {
        font-size: 32rpx;
        line-height: 40 rpx;

        text:nth-of-type(1) {
            color: #ff3f30;
            padding-right: 4rpx;
        }

        text:nth-of-type(3) {
            padding-left: 12rpx;
            color: #cccccc;
        }
    }

    .img_wrap {
        flex-wrap: wrap;

        &::after {
            width: calc((100% - 40rpx) / 3);
            display: block;
            content: '';
        }

        .img_box {
            margin-top: 20rpx;
            position: relative;
            width: calc((100% - 40rpx) / 3);
            height: 220rpx;

            .pic {
                width: 100%;
                height: 100%;
                object-fit: cover;
                border-radius: 14rpx;
            }

            .close {
                position: absolute;
                top: -8rpx;
                right: -8rpx;
                width: 40rpx;
                height: 40rpx;
            }
        }

        .upload-box {
            position: relative;
            width: calc((100% - 40rpx) / 3);
            height: 220rpx;
            border: 1px solid #e5e5e5;
            box-sizing: border-box;
            position: relative;
            border-radius: 14rpx;
            margin-top: 20rpx;

            &::after {
                display: block;
                content: '';
                width: 1px;
                height: 96rpx;
                background-color: #e5e5e5;
                position: absolute;
                left: 105rpx;
                top: 50rpx;
            }

            &::before {
                display: block;
                content: '';
                width: 96rpx;
                height: 1px;
                background-color: #e5e5e5;
                position: absolute;
                right: 60rpx;
                top: 100rpx;
            }
        }
    }
}

js 逻辑部分,我这里后端提供的 api 有上传(查询文件地址),即代码中的 previewUrl ,删除的实现方法是在本地进行的,是对数组进行 splice 之后,再将最新的图片数组保存进大数组一次,最后再进行上传,注释写的很详细,方便以后回顾查看。

简单解释:

chooseImg 是最先执行的函数,即点击上传按钮时执行,进来判断是不是数量超过了 9 张,没超过就往下走;
使用 uni.chooseImage 进行图片选择功能,配置相应参数和值,选择成功,走到 then 的成功回调里,回显照片,此时调接口 previewUrl 来上传获取图片id;
然后将图片保存进数组中

<script>
import { BASE_URL } from '@/pages/workTable/utils/constant'
import { previewUrl } from '@/pages/workTable/utils/api.js'

export default {
    name: 'meeting-image',
    // 接收参数
    props: {
        fileList: {
            type: Array,
            default: []
        },
        // 用于该页面有很多项,而每一项都需要传一组图片的页面
        subItem: {

        },
        // 用于只传一组图片的页面
        picListArr: {

        },
        picList: {

        }
    },
    data() {
        return {
            list: [],
            count: 9,
        }
    },

    computed: {},
    methods: {
        // 预览功能暂时有问题
        previewImage(index) {
            console.log('预览', this.list.map(el => el.imgUrl));
            uni.previewImage({
                current: index,
                urls: this.list.map(el => el.imgUrl)
            })
        },
        // 点击上传按钮触发
        chooseImg() {
            // 如果大于 9 张就不触发底下的 uni.chooseImage
            if (this.count == 0) {
                this.$refs.uToast.show({
                    title: '最多能上传9张照片',
                    duration: 2000
                })
                return
            }
            uni.chooseImage({
                // 最多可以选择的图片张数,默认9
                count: this.count,
                // original 原图,compressed 压缩图,默认二者都有
                sizeType: ['original', 'compressed'],
                // album 从相册选图,camera 使用相机,默认二者都有
                sourceType: ['album', 'camera'],
                success: res => {
                    // console.log('res',res);
                    uni.showLoading({
                        title: '上传中'
                    })
                    Promise.all(
                        res.tempFilePaths.map(item => {
                            return this.uploadFile({
                                filePath: item
                            })
                        })
                    )
                        .then(re => {
                            uni.hideLoading()
                            // let fileList = []
                            re.map((el, index) => {
                                let data = JSON.parse(el.data)
                                // 用于上传成功后照片回显
                                // console.log('data',data.data);
                                previewUrl(data.data).then(res => {
                                    console.log('我要预览图片', res); this.list.push({ fileUrl: data.data, imgUrl: res.data })
                                    setTimeout(() => {
                                        console.log('this.list', this.list);
                                        this.saveFile(this.list)
                                    }, 800)
                                })
                            })
                        })
                        .catch(err => {
                            console.log('err', err);
                            this.$refs.uToast.show({
                                title: '上传失败',
                                duration: 2000
                            })
                            uni.hideLoading()
                        })
                },
                fail: () => { }
            })
        },
        // 上传图片
        uploadFile({ filePath }) {
            return new Promise((resolve, reject) => {
                uni.uploadFile({
                    url: `${BASE_URL}/mobilemanage/api/common/upload?typeEnum=IMAGE`,
                    filePath: filePath,
                    name: 'file',
                    header: {
                        'site3-f-ue': uni.getStorageSync('site3-f-ue')
                    },
                    formData: {
                        typeEnum: "IMAGE",
                    },
                    success: res => {
                        console.log('调用上传接口的结果', res);
                        resolve(res)
                    },
                    fail: error => {
                        reject(error)
                    }
                })
            })
        },
        // 将图片保存进数组
        saveFile(list) {
            console.log('aaaaaaaaaa', list);
            // 子组件拿接到的父组件传过来的值,subItem 是每一项的数据,里面有 picList 和 picListArr
            console.log('父组件传过来的subItem', this.subItem);
            // 每一项都需要上传照片这种情况才需要用到 subItem
            if (this.subItem) {
                console.log('有 subItem 的情况');
                let subItem = this.subItem
                subItem.picList = []
                subItem.picListArr = []

                list.map(async item => {
                    console.log('bbbbbbbb', item);
                    subItem.picList.push({
                        fileUrl: item.fileUrl
                    })
                    console.log('subItem.picList', subItem.picList);
                })
                console.log('subItem.picList', subItem.picList);
                subItem.picList.map(item => {
                    subItem.picListArr.push(item.fileUrl)
                })
                console.log('subItem.picListArr', subItem.picListArr);
            } else {
                console.log('没有subItem的情况', list);
                // 只需要上传一组图片
                let picList = this.picList
                let picListArr = this.picListArr

                picList = []
                picListArr = []
                // console.log('list',list);
                list.map(async item => {
                    console.log('qqqqqqqqqqqq', item);
                    picList.push({
                        fileUrl: item.fileUrl
                    })
                })
                this.$emit('getPicList', picList)
                console.log('照片列表', picList);
            }
        },
        // 删除图片
        handleDeleteImg(index, item) {
            this.list.splice(index, 1)
            this.saveFile(this.list)
            this.$refs.uToast.show({
                title: '删除成功',
                duration: 2000
            })
        }
    },
    watch: {
        // 监视当前图片数组长度,增减张数显示
        fileList: {
            handler: function (value) {
                this.list = value
                this.count = 9 - this.list.length
            },
            deep: true,
            immediate: true
        }
    }
}
</script>

使用的时候,父组件进行调用传值:

import uploadImage from '../components/upload-image'
components: {
    uploadImage
},
<upload-image 
    :fileList="subItem.picList" 
    :subItem="subItem" 
    :projectMeetingId="1"
    :isSponsorUserFlag="1"
></upload-image>

本文来自互联网用户投稿,该文观点仅代表作者本人,不代表本站立场。本站仅提供信息存储空间服务,不拥有所有权,不承担相关法律责任。如若转载,请注明出处:http://www.coloradmin.cn/o/1354056.html

如若内容造成侵权/违法违规/事实不符,请联系多彩编程网进行投诉反馈,一经查实,立即删除!

相关文章

C# windows服务程序开机自启动exe程序

我们使用传统的Process.Start(".exe")启动进程会遇到无法打开UI界面的问题&#xff0c;尤其是我们需要进行开启自启动程序设置时出现诸多问题&#xff0c;于是我们就想到采用windows服务开机自启动来创建启动一个新的exe程序&#xff0c;并且是显式运行。 首先是打开…

19、BLIP-2

简介 github 通过利用预训练的视觉模型和语言模型来提升多模态效果和降低训练成本&#xff0c;预训练的视觉模型能够提供高质量的视觉表征&#xff0c;预训练的语言模型则提供了强大的语言生成能力。 实现过程 为了弥合模态差距&#xff0c;提出了一个分两个阶段预训练的 Qu…

华为端口隔离高级用法经典案例

最终效果&#xff1a; pc4不能ping通pc5&#xff0c;pc5能ping通pc4 pc1不能和pc2、pc3通&#xff0c;但pc2和pc3能互通 vlan batch 2 interface Vlanif1 ip address 10.0.0.254 255.255.255.0 interface Vlanif2 ip address 192.168.2.1 255.255.255.0 interface MEth0/0/1 i…

神经网络:经典模型热门模型

在这里插入代码片【一】目标检测中IOU的相关概念与计算 IoU&#xff08;Intersection over Union&#xff09;即交并比&#xff0c;是目标检测任务中一个重要的模块&#xff0c;其是GT bbox与pred bbox交集的面积 / 二者并集的面积。 下面我们用坐标&#xff08;top&#xff0…

Windows定时重启Tomcat

项目场景&#xff1a; 系统&#xff1a;Windows 7 Tomcat&#xff1a;apache-tomcat-8.0.5 JDK&#xff1a;1.8 问题描述 最近项目的Tomcat隔一段时间就假死&#xff0c;最后想到的解决方式就是&#xff1a;每天凌晨1点重启tomact。 解决方案&#xff1a; 使用Windows系统…

基于SpringBoot的旅游网站

目录 前言 开发环境以及工具 项目功能介绍 用户端&#xff1a; 管理端&#xff1a; 详细设计 用户端首页 登录页面 管理端页面 源码获取 前言 本项目是一个基于IDEA和Java语言开发基于SpringBoot的旅游网站。应用包含管理端和用户端等多个功能模块。 改革开放以来&am…

MatrixOne 1.1.0 Release

我们非常高兴地宣布&#xff1a; MatrixOne内核1.1.0版本 正式发布啦&#xff01; 项目文档网站 https://docs.matrixorigin.cn MatrixOne是一款分布式超融合异构数据库&#xff0c;MatrixOne旨在提供一个云原生、高性能、高弹性、高度兼容MySQL的HSTAP数据库&#xff0c;让…

【数据挖掘】基于 LightGBM 的系统访问风险识别(附源码)

基于 LightGBM 的系统访问风险识别 文章目录 基于 LightGBM 的系统访问风险识别一、课题来源二、任务描述三、课题背景四、数据获取分析及说明&#xff08;1&#xff09;登录https://www.datafountain.cn并获取相关数据&#xff08;2&#xff09;数据集文件说明&#xff08;3&a…

Cytoscape 3.10安装包下载及安装教程

Cytoscape3.10下载链接&#xff1a;https://docs.qq.com/doc/DUkpuR0RVU0JVWkFP 1、选中下载好的安装包&#xff0c;右键选择解压到“Cytoscape 3.10”文件夹 2、双击打开“Cytoscape_3_10_0_windows_64bit.exe” 3.点击“Download”&#xff0c;请耐心等待“Java”完成 4、点击…

使用FFmpeg4.3.1的SDK官方开发包编译ffmpeg.c

文章目录 前言一、前期准备1、所需文件2、编译环境 二、创建工程三、解决编译报错四、测试 ffmpeg.c 前言 本文使用官方发布的 SDK 开发包来亲手编译 ffmpeg.c 文件&#xff0c;编译成功后可以对其内部的源码按照我们的需求进行修改&#xff0c;为后面的转码器的开发做个铺垫。…

MySQL四大引擎,数据库管理,数据表管理,数据库账号管理

MySQL四大引擎 InnoDB InnoDB引擎是MySQL默认的存储引擎。它支持事务和行级锁定&#xff0c;并具有高并发性和数据完整性保护的特性。InnoDB适用于具有复杂查询和高并发读写操作的应用程序。MyISAM InnoDB引擎特点和优势 事务支持&#xff1a;InnoDB支持ACID&#xff08;原子…

搭建宠物寄养小程序流程

近日&#xff0c;一地宠物寄养需求旺盛&#xff0c;元旦满房&#xff0c;春节几近饱和&#xff0c;一窝难求。随着市场需求的增长&#xff0c;对于很多宠物行业的商家&#xff0c;可以考虑开展宠物寄养服务&#xff0c;尤其是节假日的宠物寄养需求会更高。因此&#xff0c;商家…

IoTDB 集群部署——windows

本文的测试环境为window server2016&#xff0c;版本包为1.1.0&#xff0c;jdk版本为1.8 首先下载IoTDB版本包&#xff0c;链接地址如下 https://archive.apache.org/dist/iotdb/1.1.0/apache-iotdb-1.1.0-all-bin.zip 本次部署将使用1个ConfigNode 和3个DataNode模式&#…

计算机网络—网络搭建NAT内外网映射

使用Windows Server 2003 网络拓扑 Router 外网&#xff1a;NAT IP 网段 192.168.17.0/24内网&#xff1a;仅主机模式 IP 172.16.29.4 Client1&#xff1a;仅主机模式 IP 172.16.29.2 网关 172.16.29.1 Client2&#xff1a;仅主机模式 IP 172.16.29.3 网关 172.16.29.1…

Python武器库开发-武器库篇之代理池配置(四十)

武器库篇之代理池配置(四十) 我们在渗透的过程中&#xff0c;是必须要挂代理的&#xff0c;相信为何要挂代理的原因&#xff0c;各位也是非常的明白的&#xff0c;这里就不多讲了。关于如何挂代理和购买代理大家可以去看内网隧道代理技术&#xff08;十&#xff09;之公网资产…

【Java】实验三 抽象类与接口

实验名称 实验三 抽象类与接口 实验目的 1. 深刻理解抽象类、接口的意义。 2. 熟练掌握抽象类和接口的定义、继承抽象类以及实现接口的方法。 3. 理解和掌握多态。 实验内容 &#xff08;一&#xff09;抽象类实验&#xff1a;项目源码中新建一个ahpu.shape的包&a…

pytest-yaml 测试平台-4.生成allure报告,报告反馈企业微信、钉钉、飞书通知

前言 定时任务执行完成后生成可视化allure报告&#xff0c;并把结果发到企业微信&#xff0c;钉钉&#xff0c;飞书通知群里。 生成allure报告 添加定时任务 执行完成后生成allure报告 查看报告详情 报告会显示详细的request 和 response 详细信息 也可以查看log日志 …

计算机基础面试题 |08.精选计算机基础面试题

&#x1f90d; 前端开发工程师&#xff08;主业&#xff09;、技术博主&#xff08;副业&#xff09;、已过CET6 &#x1f368; 阿珊和她的猫_CSDN个人主页 &#x1f560; 牛客高级专题作者、在牛客打造高质量专栏《前端面试必备》 &#x1f35a; 蓝桥云课签约作者、已在蓝桥云…

图像清晰度评估指标

图像清晰度评估涉及多个指标&#xff0c;这些指标可用于定量测量图像的清晰度和质量。 以下是一些常见的图像清晰度评估指标&#xff1a; 均方根误差&#xff08;Root Mean Square Error&#xff0c;RMSE&#xff09;&#xff1a; 通过计算原始图像和处理后图像之间的像素差异的…

kbdnecnt.DLL文件缺失,软件或游戏无法启动运行,怎样快速修复?

不少人都在问“kbdnecnt.DLL文件”是什么&#xff1f;为什么电脑总是报错提示说“kbdnecnt.DLL文件缺失&#xff0c;软件无法启动”&#xff1f; 首先&#xff0c;先来了解“kbdnecnt.DLL文件”是什么&#xff1f; kbdnecnt.DLL是Windows操作系统中的一个动态链接库文件&#…