作用描述
<router-view>标签是用来渲染路由对应的组件的位置;
默认情况下,一个路由是只对应一个组件的。
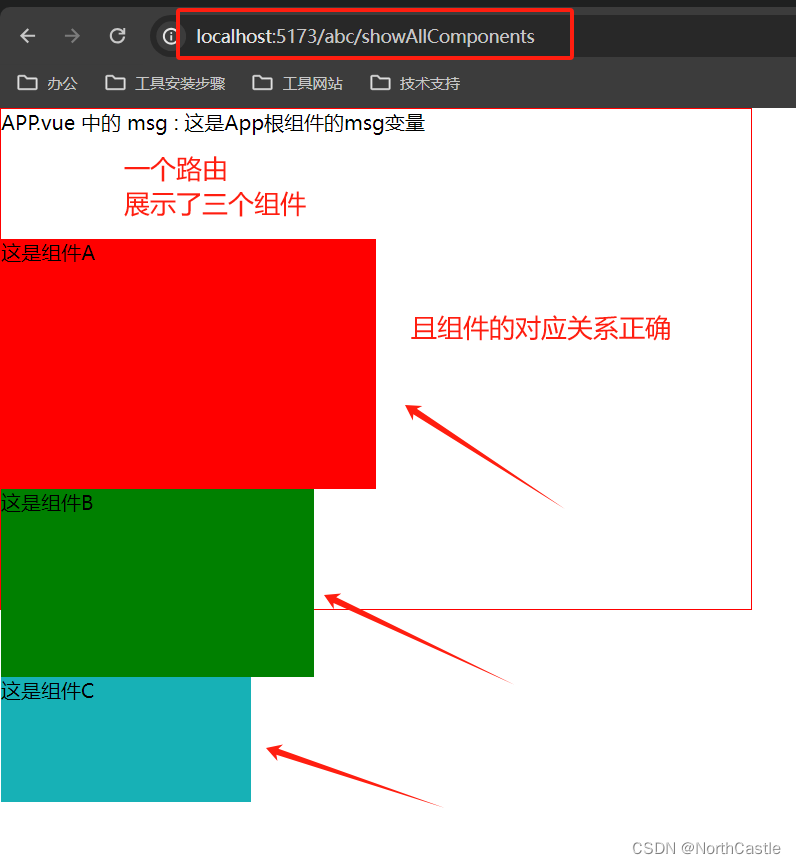
但是,可以通过给<router-view>指定 name 属性的方式,实现同时渲染多个组件的效果。
这也叫做命名视图。
注意点
1、因为一个路由需要对应多个组件,所以在进行路由配置时需要使用
components来代替component;
2、在使用
<router-view>时指定name属性,不指定的,默认是default;
3、
components中使用key-value的形式配置组件,
key: 就是<router-view>的 name 属性的值
value: 就是要渲染的组件
路由中的配置就像下面这样 :

  {
        path:'/showAllComponents',
        name:'aroute',
        components:{ // 指定多个组件
            default : componentA,  // 默认名称 default
            first : componentB, // name = first 的 router-view
            second : componentC  // name = second 的 router-view
        },

    },
使用案例
项目结构如下 :
projectName
	| -- src
		| -- App.vue # 根组件,A B C 三个组件都在这里展示
		| -- componentA.vue
		| -- componentB.vue
		| -- componentC.vue
		| -- router.ts # 路由配置的文件
		| -- mian.ts # 程序的入口ts文件
	| -- index.html # 项目页面入口文件

下面的案例代码只展示重点的部分:
router.ts 路由配置
// 导入 定义路由的两个方法
import {createRouter,createWebHistory}  from 'vue-router'

// 引入两个组件
import componentA from "./componentA.vue";
import componentB from "./componentB.vue";
import componentC from "./componentC.vue";

// 声明路由跳转的路径与组件的对应关系
const routsList = [
    {
        path:'/showAllComponents',
        name:'aroute',
        components:{
            default : componentA,
            first : componentB,
            second : componentC
        },
    },
]

// 创建路由的实例对象
const routerConfigObj = createRouter({
    history:createWebHistory('abc'), // 带一个参数,表示是路由的一个前缀
    routes:routsList // 指定路由的配置列表
})

// 导出路由的对象
export default routerConfigObj;
App.vue 根组件内容
<template>
    <div class="basediv">

        APP.vue 中的 msg : {{ msg }}

        <br><br><br>
        <!-- router-view 进行目标组件的展示 -->
        <router-view></router-view>
        <router-view name="first"></router-view>
        <router-view name="second"></router-view>

    </div>

</template>

<script setup lang="ts">

	// 引入 provide 方法
    import { ref } from 'vue'

    // 声明父组件的一个变量
    const msg = ref('这是App根组件的msg变量')

</script>

<style scoped>
    .basediv{
        width: 600px;
        height: 400px;
        border: 1px solid red;
    }
</style>
运行效果
