linux概述:
Linux是一套免费使用和自由传播的操作系统

我们为什么要学,Linux?

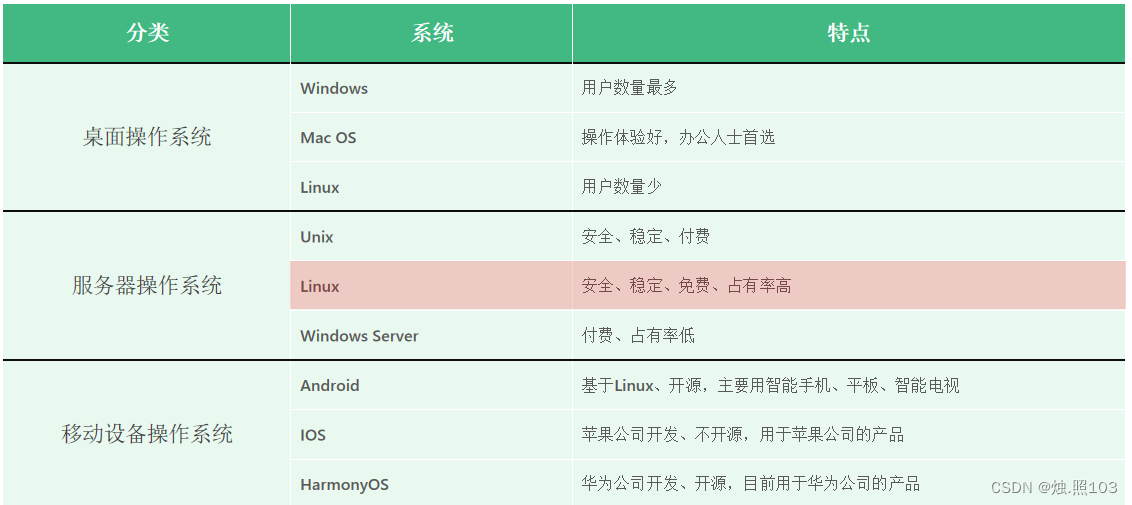
主流操作系统:
linux系统版本:
内核版:
- 由linux核心团队开发,维护
- 免费,开源
- 负责控制硬件
发行版:
- 基于linux内核版进行扩展
- 由各个linux厂商开发,维护
- 有收费版本和免费版本
Linux系统发行版:
- Ubuntu:以桌面应用为主
- RedHat:应用最广泛、收费
- CentOS:RedHat的社区版、免费
- openSUSE:对个人完全免费、图形界面华丽
- Fedora:功能完备、快速更新、免费
- 红旗Linux:北京中科红旗软件技术有限公司开发

系统安装:
Linux系统的安装方式:
- 物理机安装:直接将操作系统安装到服务器硬件上
- 虚拟机安装:通过虚拟机软件安装

虚拟机(Virtual Machine)指通过软件模拟的具有完整硬件系统功能、运行在完全隔离环境中的完整计算机系统。
常用的虚拟机软件:
- VMWare
- VirtualBox
- VMLite WorkStation
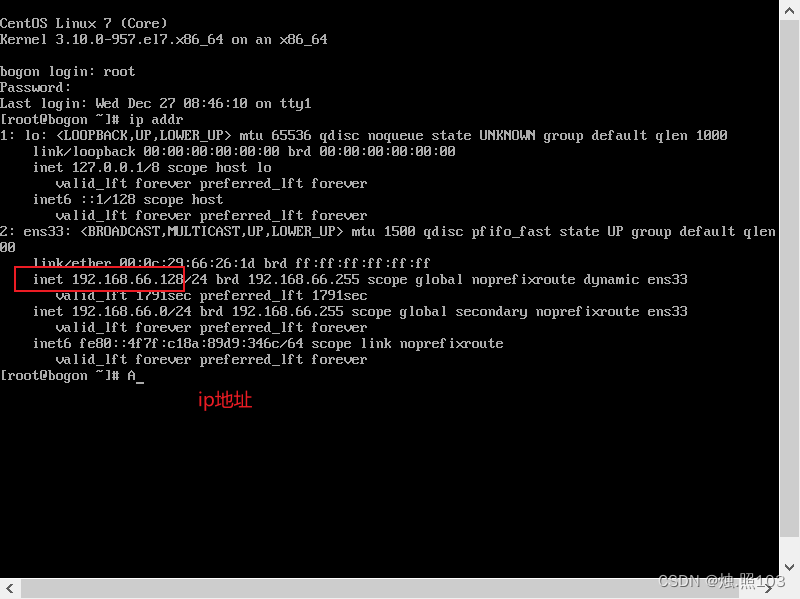
查看IP地址:
通过如下命令查看当前Linux的IP地址:ip addr
远程连接:
常用的SSH(Secure Shell,安全外壳协议)远程连接工具:Putty、SecureCRT、Xshell、finalShell

直接双击运行FinalShell的安装程序完成安装即可

finalShell连接linux:
点击左上角一个像文件的图标,新建连接:
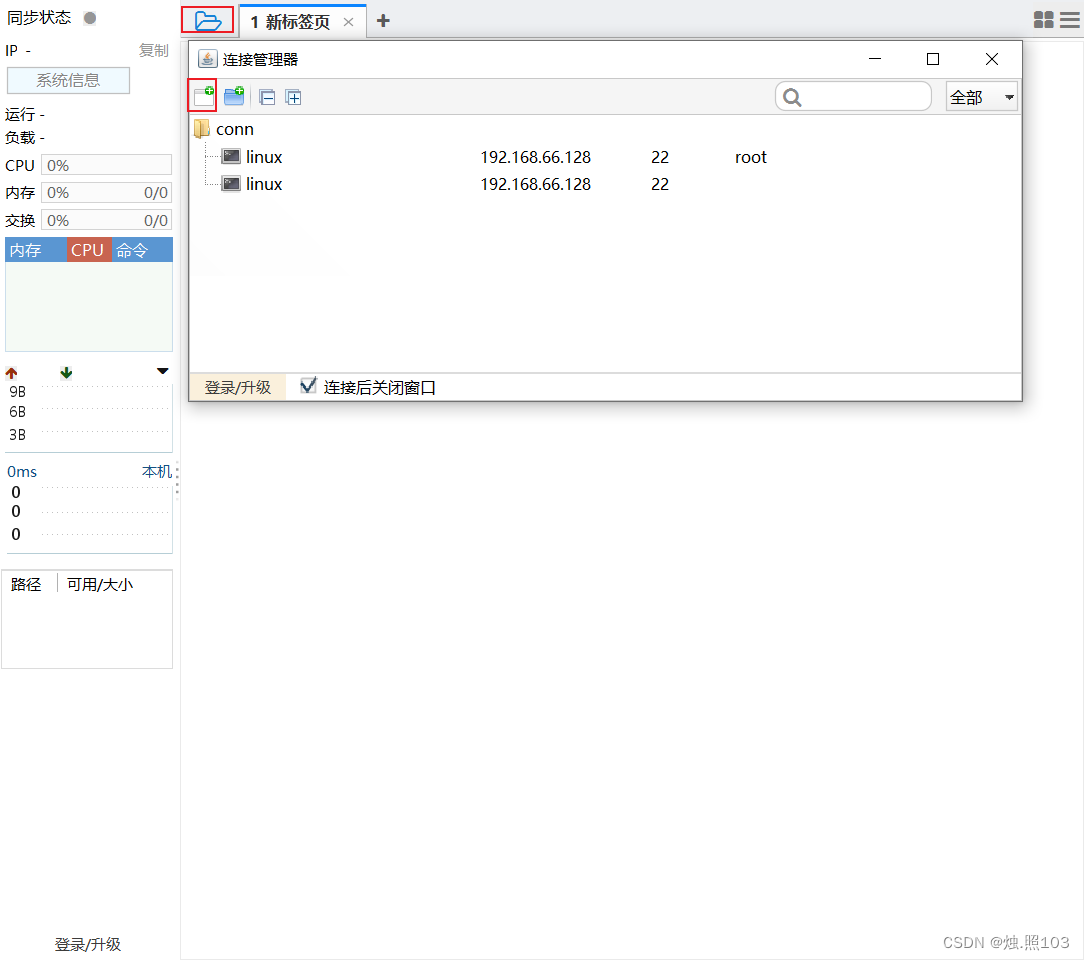
点击ssh连接:
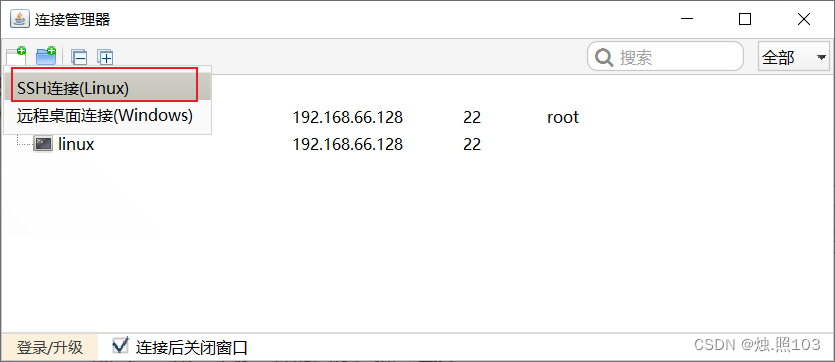
点击ssh连接,输入必要的连接信息:

出现的弹窗:
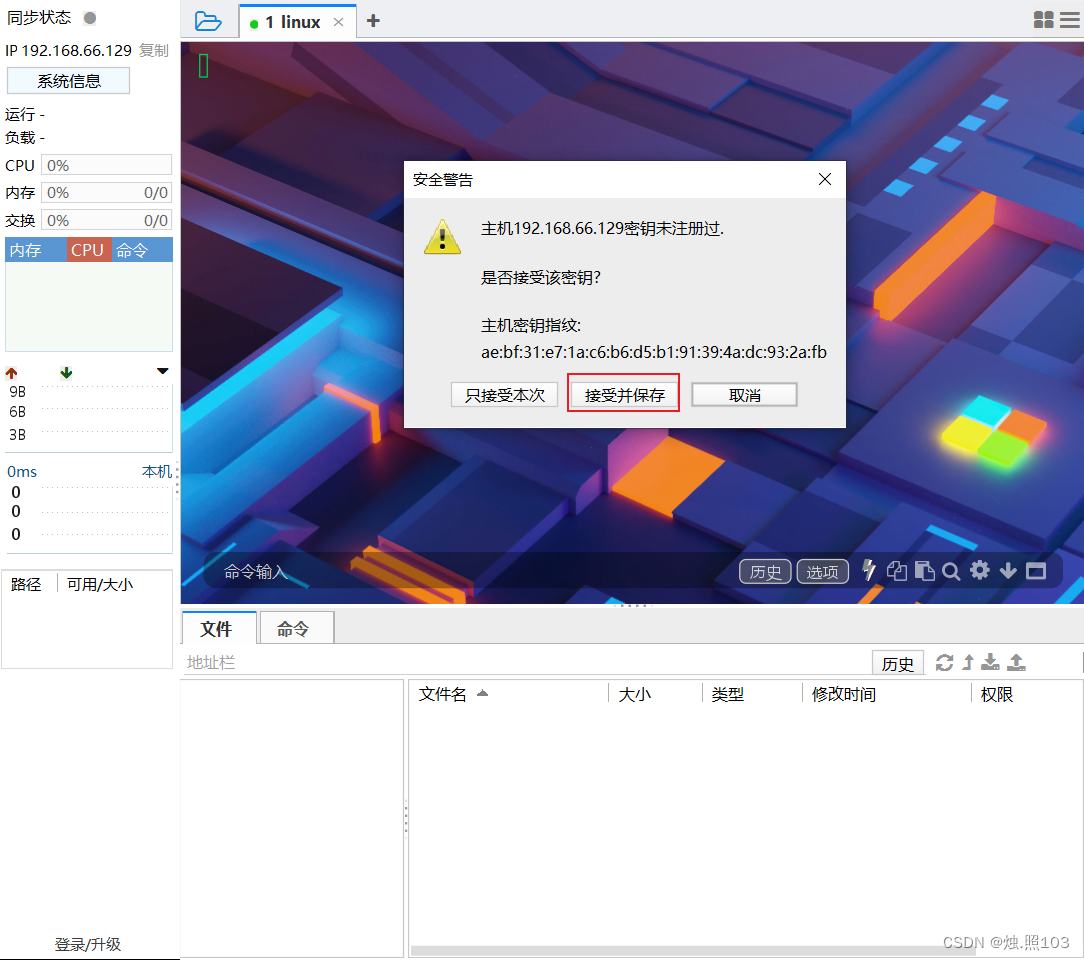
连接成功后的页面:
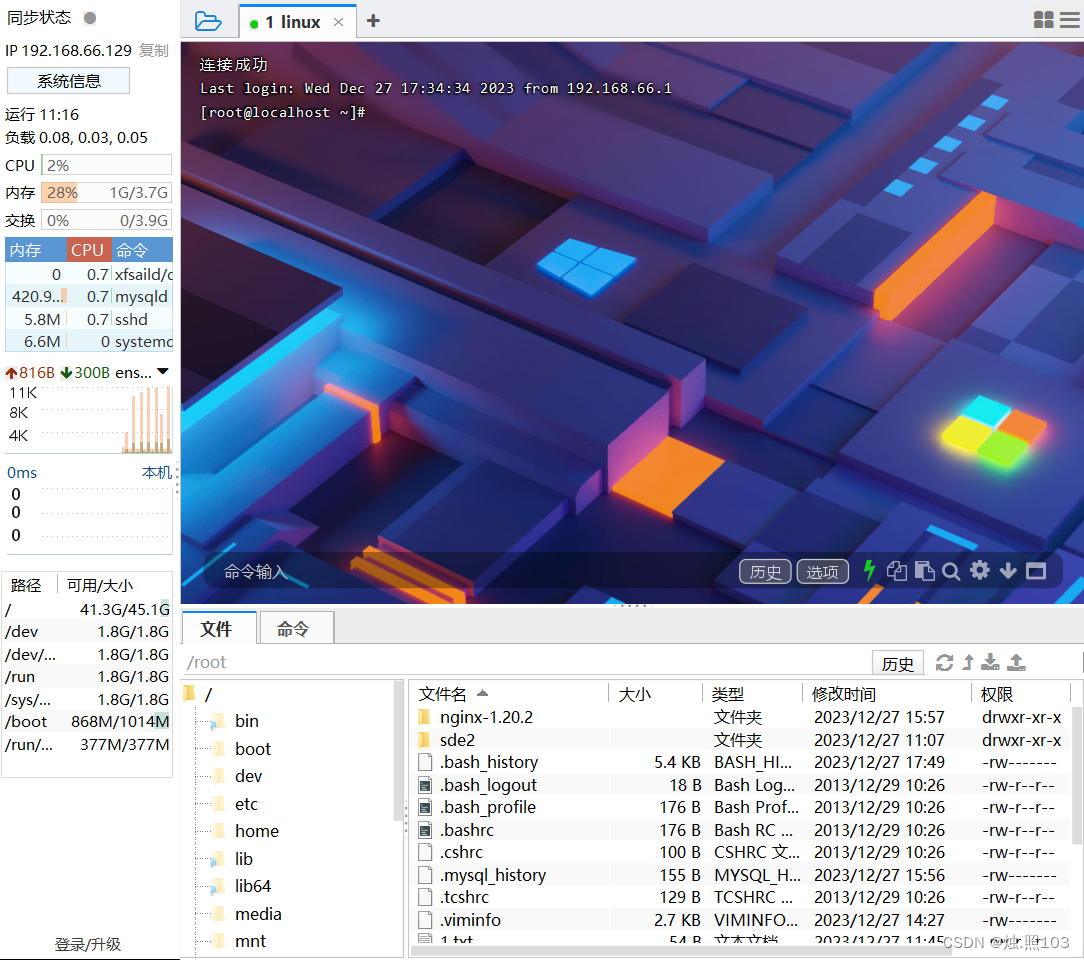
Linux的目录介绍:
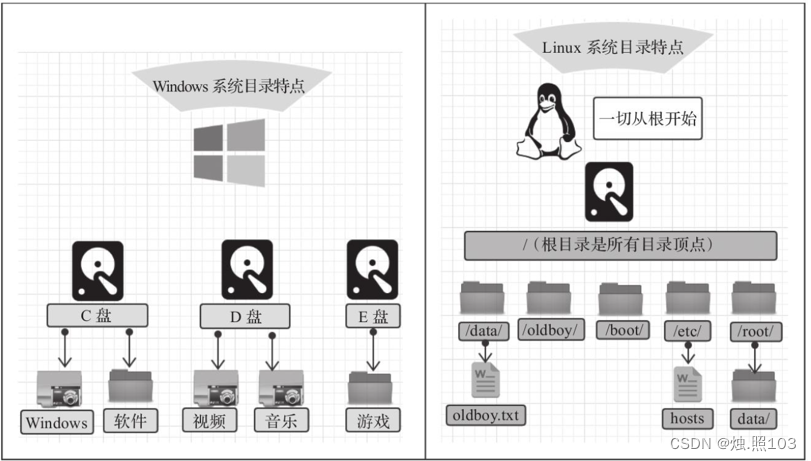
- /是所有目录的顶点
- 目录结构像一颗倒挂的树
Linux系统目录:
- bin 存放二进制可执行文件
- boot 存放系统引导时使用的各种文件
- dev 存放设备文件
- etc 存放系统配置文件
- home 存放系统用户的文件
- lib 存放程序运行所需的共享库和内核模块
- opt 额外安装的可选应用程序包所放置的位置
- root 超级用户目录
- sbin 存放二进制可执行文件,只有root用户才能访问
- tmp 存放临时文件
- usr 存放系统应用程序
- var 存放运行时需要改变数据的文件,例如日志文件

linux常用命令:
文件目录操作命令:
ls
显示指定目录下的内容
语法:
ls [-al] [dir]

[root@localhost usr]# ls


[root@localhost usr]# ls -a

[root@localhost usr]# ls -l

[root@localhost usr]# ll
说明:
- -a 显示所有文件及目录 (. 开头的隐藏文件也会列出)
- -l 除文件名称外,同时将文件型态(d表示目录,-表示文件)、权限、拥有者、文件大小等信息详细列出
注意:
由于我们使用ls命令时经常需要加入-l选项,所以Linux为ls -l命令提供了一种简写方式,即ll
cd
用于切换当前工作目录,即进入指定目录
语法:
cd [dirName]

[root@localhost ~]# cd /usr/local/

[root@localhost ~]# cd sde
[root@localhost sde]# cd ..
[root@localhost ~]# cd sde/
[root@localhost sde]#
cd - 返回上次所在的目录

[root@localhost /]# cd -
/usr/local
[root@localhost local]#
cd ~ 直接回到 /root目录

[root@localhost usr]# cd ~
[root@localhost ~]#
pwd 查看当前所在目录

[root@localhost usr]# pwd
/usr
cd . 当前所在目录

[root@localhost usr]# cd .
[root@localhost usr]#
cd .. 返回上一级目录

[root@localhost local]# cd ..
[root@localhost usr]#
cd ../../ 连续退两级目录

[root@localhost local]# cd ../../
[root@localhost /]#
特殊说明:
- ~ 表示用户的home目录
- . 表示目前所在的目录
- .. 表示目前目录位置的上级目录
举例:
- cd .. 切换到当前目录的上级目录
- cd ~ 切换到用户的home目录
- cd /usr/local 切换到/usr/local目录
- cd - 切换到上一次所在目录
cat
用于显示文件内容
语法:
cat [-n] fileName
说明:
-n :由1开始对所有输出的行数编号
举例:
cat /etc/profile 查看/etc目录下的profile文件内容
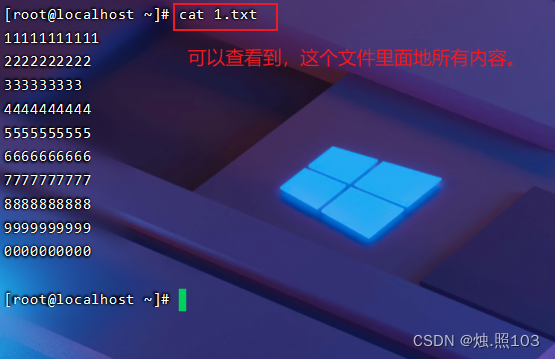
[root@localhost ~]# cat 1.txt
11111111111
2222222222
333333333
4444444444
5555555555
6666666666
7777777777
8888888888
9999999999
0000000000

[root@localhost ~]#
显示行号:

[root@localhost ~]# cat -n 1.txt
     1  11111111111
     2  2222222222
     3  333333333
     4  4444444444
     5  5555555555
     6  6666666666
     7  7777777777
     8  8888888888
     9  9999999999
    10  0000000000
    11
[root@localhost ~]#
clear:清屏:
[root@localhost ~]# clear

more
以分页的形式显示文件内容
语法:
more fileName
操作说明:
- 回车键:向下滚动一行
- 空格键:向下滚动一屏
- b:返回上一屏
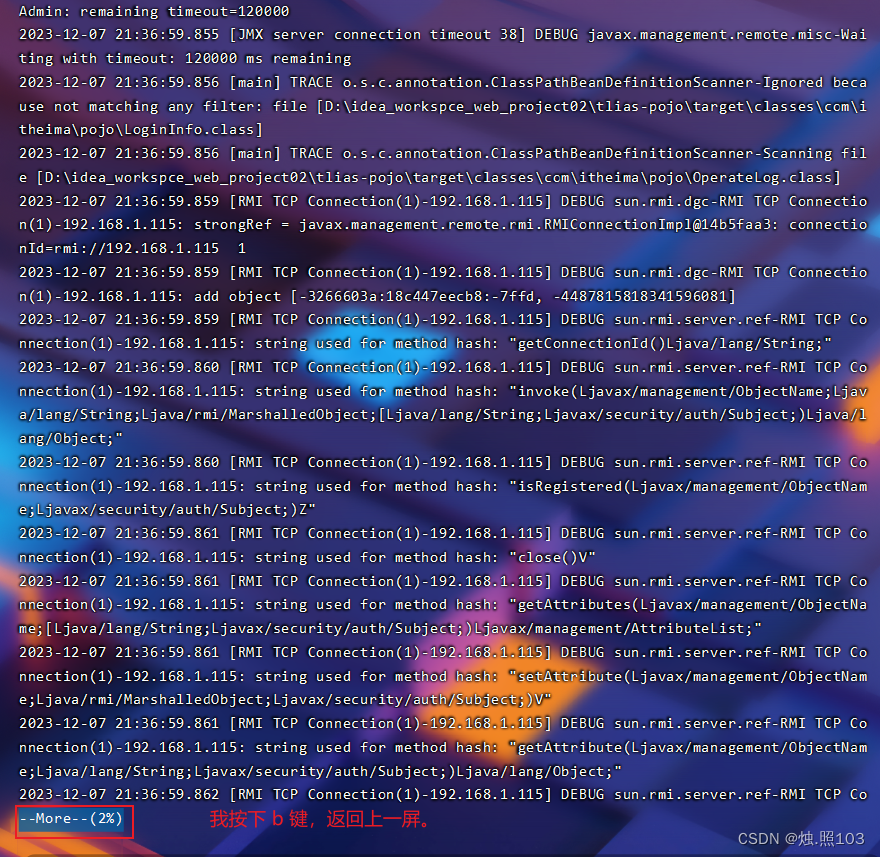
- q或者 Ctrl+c :退出more
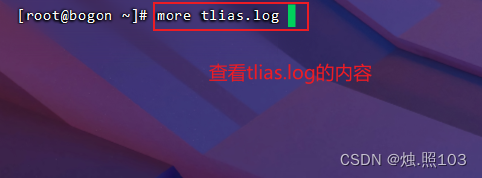
[root@bogon ~]# more tlias.log
可以看到是以分页的形式,展示的tlias.log日志。
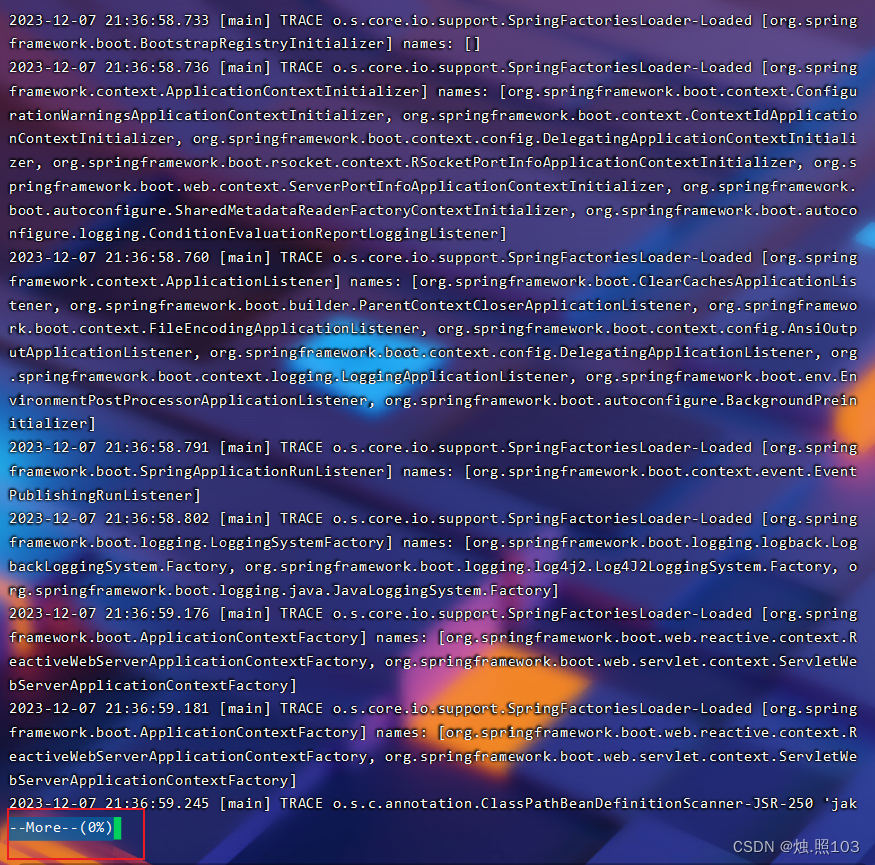
我按下回车键,向下滚动一行。
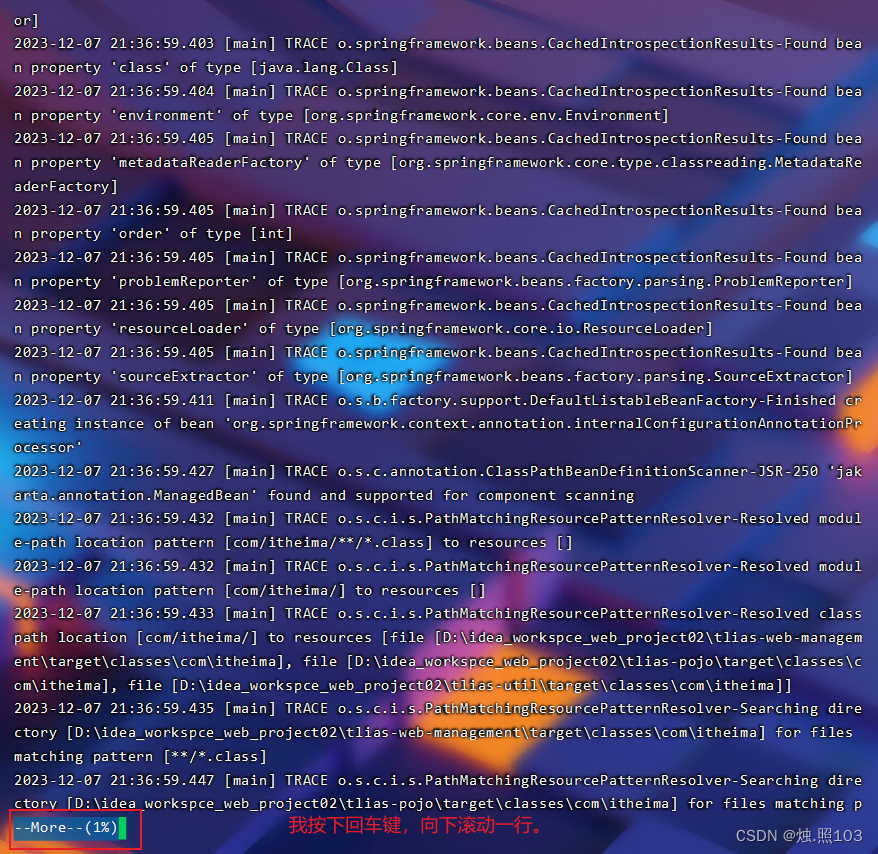
我按下空格键,向下滚动一屏。
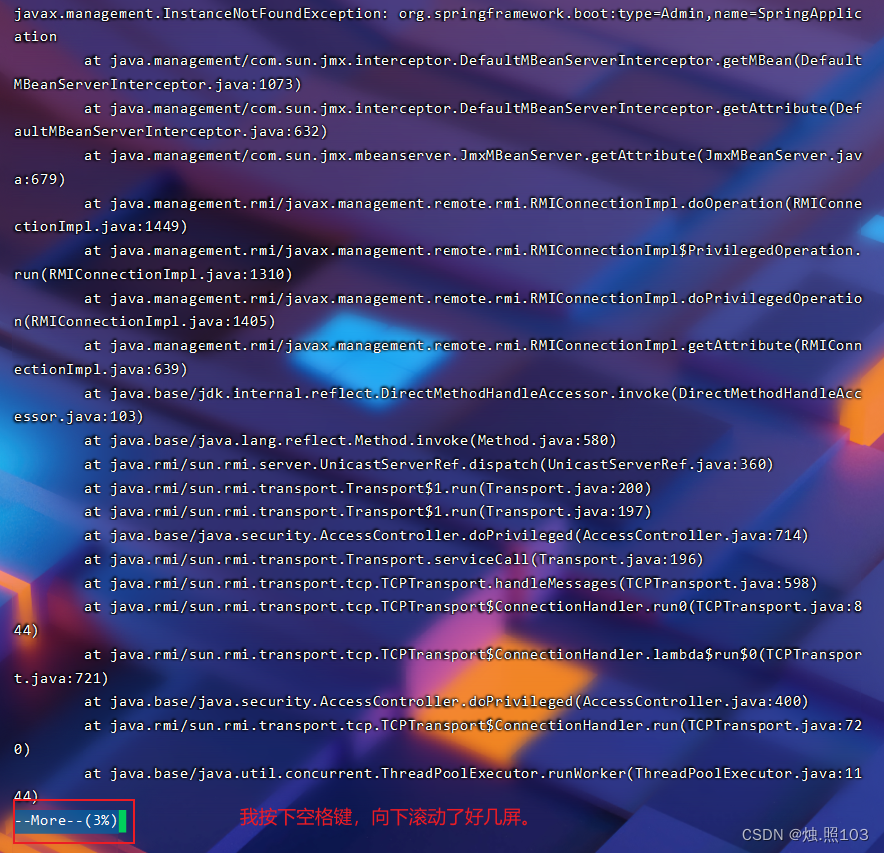
我按下 b 键,返回上一屏。
我按下 q 或者 ctrl + c 退出:
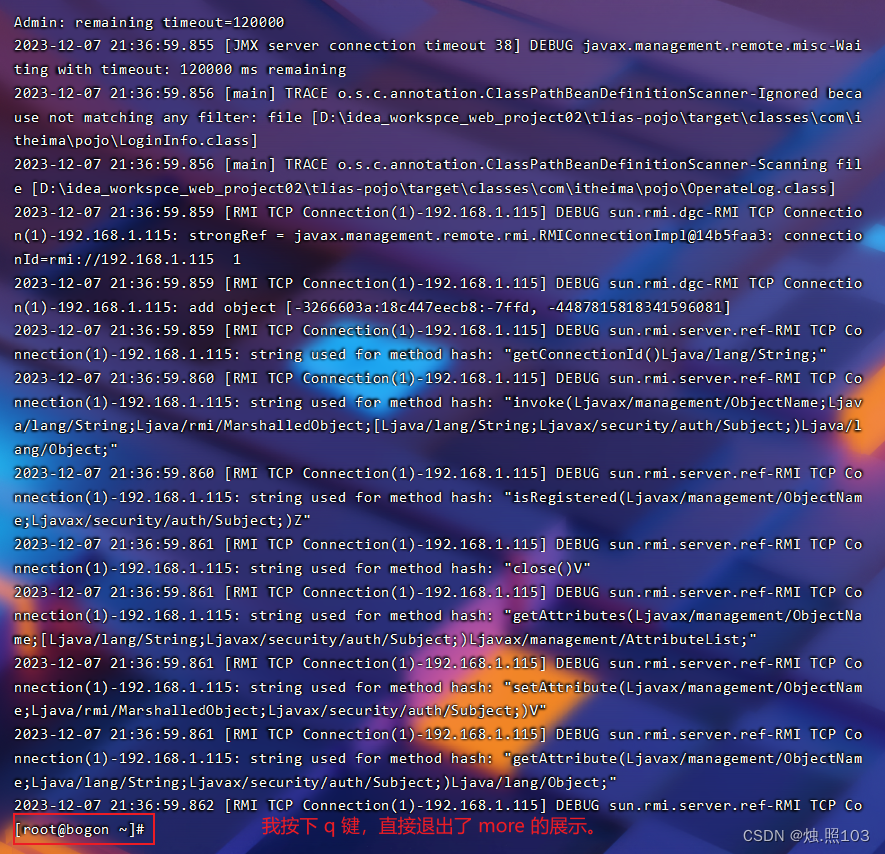
这个是 ctrl + c:

举例:
more /etc/profile 以分页方式显示/etc目录下的profile文件内容
tail
查看文件末尾的内容
语法:
tail [-f] fileName
说明:
-f :动态读取文件末尾内容并显示,通常用于日志文件的内容输出
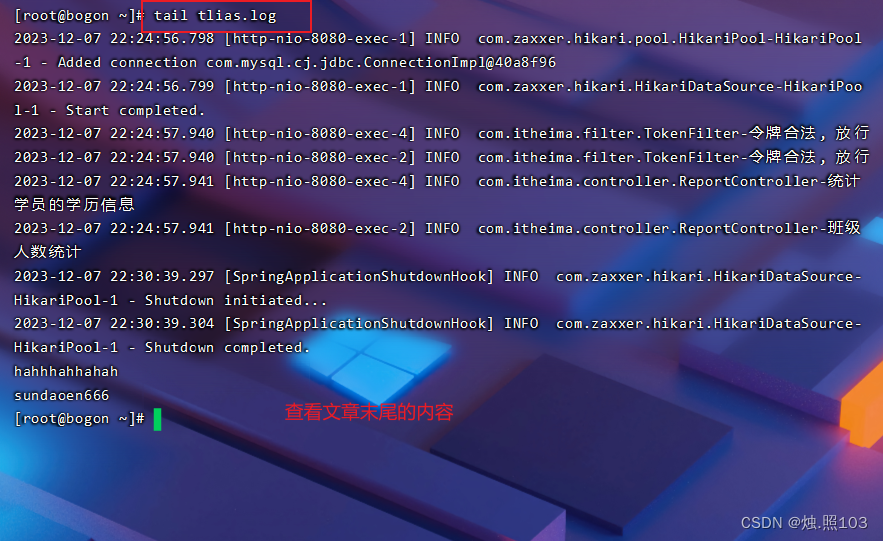
[root@bogon ~]# tail tlias.log
查看后几行的:
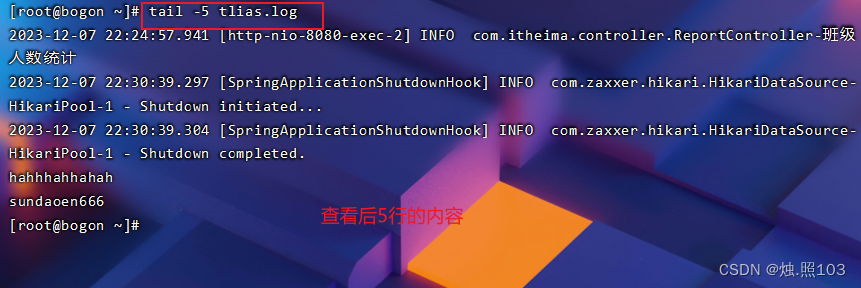
[root@bogon ~]# tail -5 tlias.log
举例:
- tail /etc/profile 显示/etc目录下的profile文件末尾10行的内容
- tail -20 /etc/profile 显示/etc目录下的profile文件末尾20行的内容
- tail -f /sde/my.log 动态读取/sde目录下的my.log文件末尾内容并显示
mkdir
创建目录
语法:
mkdir [-p] dirName
说明:
-p:确保目录名称存在,不存在的就创建一个。通过此选项,可以实现多层目录同时创建
示例1:
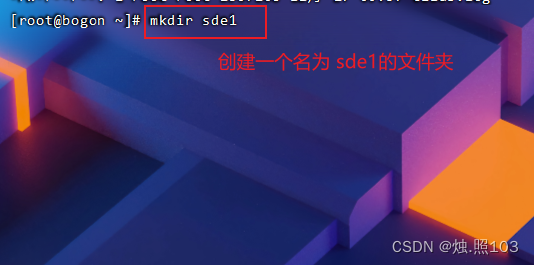
[root@bogon ~]# mkdir sde1

示例2:
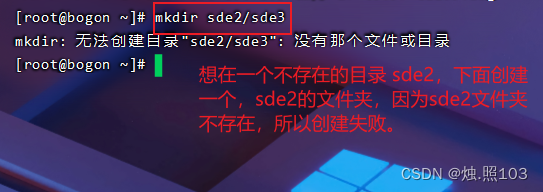
[root@bogon ~]# mkdir sde2/sde3
加上 -p

[root@bogon ~]# mkdir -p sde2/sde3
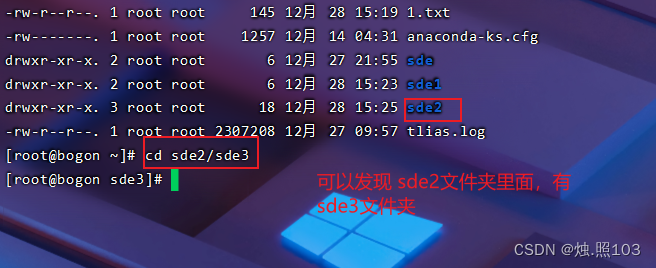
[root@bogon ~]# cd sde2/sde3
举例:
- mkdir sde在当前目录下,建立一个名为sde的子目录
- mkdir -p sde/test 在工作目录下的sde目录中建立一个名为test的子目录,若itcast目录不存在,则建立一个
rmdir
删除空目录
语法:
rmdir [-p] dirName
说明:
-p:当子目录被删除后使父目录为空目录的话,则一并删除
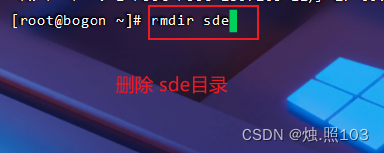
[root@bogon ~]# rmdir sde

加上 -p 删除:
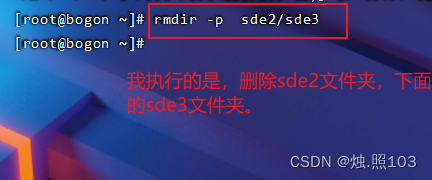
[root@bogon ~]# rmdir -p sde2/sde3

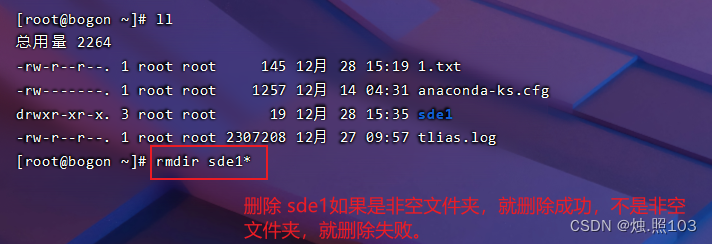
[root@bogon ~]# rmdir sde1*
举例:
- rmdir sde 删除名为sde的空目录
- rmdir -p sde/test 删除sde目录中名为test的子目录,若test目录删除后sde目录变为空目录,则也被删除
- rmdir sde* 删除名称以sde开始的空目录
rm
删除文件或者目录
语法:
rm [-rf] name
使用 rm 删除文件夹,里面要是存在的有文件或者文件夹,就会删除失败。

[root@bogon ~]# rm sde1
使用 -r 递归删除:

[root@bogon ~]# rm -r sde1
rm:是否进入目录"sde1"? y
rm:是否删除目录 "sde1/sde22"?y
rm:是否删除目录 "sde1"?y
[root@bogon ~]#
看效果:

-f 不询问删除:

[root@bogon ~]# rm -rf sde2
[root@bogon ~]#
效果:

说明:
-r:将目录及目录中所有文件(目录)逐一删除,即递归删除
-f:无需确认,直接删除
举例:
- rm -r itcast/ 删除名为itcast的目录和目录中所有文件,删除前需确认
- rm -rf itcast/ 无需确认,直接删除名为itcast的目录和目录中所有文件
- rm -f hello.txt 无需确认,直接删除hello.txt文件
拷贝移动目录:
cp
用于复制文件或目录
语法:
cp [-r] source dest
复制到另一个目录

[root@bogon ~]# cp 1.txt  sde1/
[root@bogon ~]# cd sde1
[root@bogon sde1]# ll
总用量 4
-rw-r--r--. 1 root root 145 12月 28 15:57 1.txt
drwxr-xr-x. 2 root root   6 12月 28 15:56 sde2
[root@bogon sde1]#
在当前目录下,改名复制。
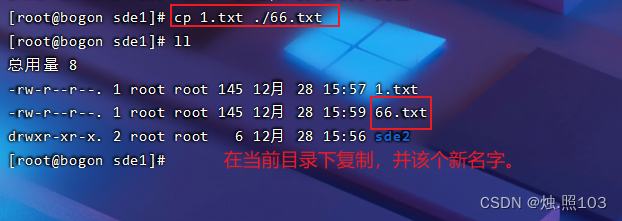
[root@bogon sde1]# cp 1.txt ./66.txt
[root@bogon sde1]# ll
总用量 8
-rw-r--r--. 1 root root 145 12月 28 15:57 1.txt
-rw-r--r--. 1 root root 145 12月 28 15:59 66.txt
drwxr-xr-x. 2 root root   6 12月 28 15:56 sde2
[root@bogon sde1]#
演示:cp -r sde1/ ./daoen
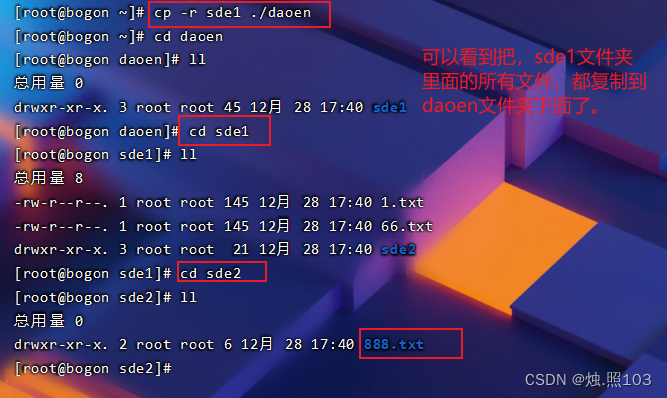
[root@bogon ~]# cp -r sde1 ./daoen
[root@bogon ~]# cd daoen
[root@bogon daoen]# ll
总用量 0
drwxr-xr-x. 3 root root 45 12月 28 17:40 sde1
[root@bogon daoen]# cd sde1
[root@bogon sde1]# ll
总用量 8
-rw-r--r--. 1 root root 145 12月 28 17:40 1.txt
-rw-r--r--. 1 root root 145 12月 28 17:40 66.txt
drwxr-xr-x. 3 root root  21 12月 28 17:40 sde2
[root@bogon sde1]# cd sde2
[root@bogon sde2]# ll
总用量 0
drwxr-xr-x. 2 root root 6 12月 28 17:40 888.txt
[root@bogon sde2]#
演示带 /* 的
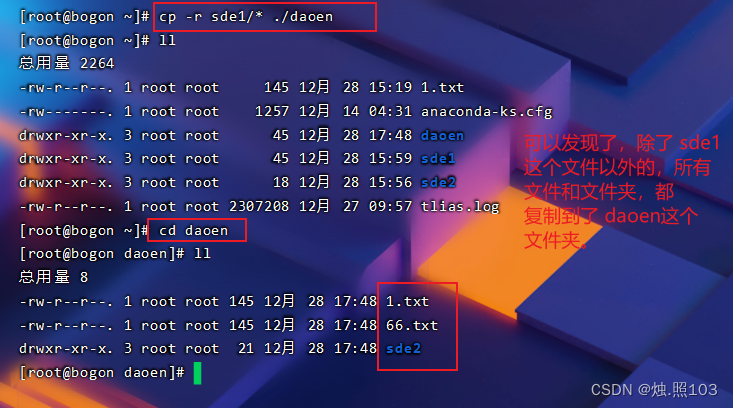
[root@bogon ~]# cp -r sde1/* ./daoen
[root@bogon ~]# ll
总用量 2264
-rw-r--r--. 1 root root     145 12月 28 15:19 1.txt
-rw-------. 1 root root    1257 12月 14 04:31 anaconda-ks.cfg
drwxr-xr-x. 3 root root      45 12月 28 17:48 daoen
drwxr-xr-x. 3 root root      45 12月 28 15:59 sde1
drwxr-xr-x. 3 root root      18 12月 28 15:56 sde2
-rw-r--r--. 1 root root 2307208 12月 27 09:57 tlias.log
[root@bogon ~]# cd daoen
[root@bogon daoen]# ll
总用量 8
-rw-r--r--. 1 root root 145 12月 28 17:48 1.txt
-rw-r--r--. 1 root root 145 12月 28 17:48 66.txt
drwxr-xr-x. 3 root root  21 12月 28 17:48 sde2
[root@bogon daoen]#
说明:
-r:如果复制的是目录需要使用此选项,此时将复制该目录下所有的子目录和文件
举例:
- cp hello.txt sde/ 将hello.txt复制到itcast目录中
- cp hello.txt ./hi.txt 将hello.txt复制到当前目录,并改名为hi.txt
- cp -r itcast/ ./sde/ 将sde目录和目录下所有文件复制到sde66目录下
- cp -r itcast/* ./sde/ 将sde目录下所有文件复制到sde66目录下
mv
为文件或目录改名、或将文件或目录移动到其它位置
语法:
mv source dest
演示改名:

[root@bogon ~]# ll
总用量 2264
-rw-r--r--. 1 root root     145 12月 28 15:19 1.txt
-rw-------. 1 root root    1257 12月 14 04:31 anaconda-ks.cfg
drwxr-xr-x. 3 root root      45 12月 28 15:59 sde1
drwxr-xr-x. 3 root root      18 12月 28 15:56 sde2
-rw-r--r--. 1 root root 2307208 12月 27 09:57 tlias.log
[root@bogon ~]# mv 1.txt 666.txt
[root@bogon ~]# ll
总用量 2264
-rw-r--r--. 1 root root     145 12月 28 15:19 666.txt
-rw-------. 1 root root    1257 12月 14 04:31 anaconda-ks.cfg
drwxr-xr-x. 3 root root      45 12月 28 15:59 sde1
drwxr-xr-x. 3 root root      18 12月 28 15:56 sde2
-rw-r--r--. 1 root root 2307208 12月 27 09:57 tlias.log
[root@bogon ~]#
演示移动:
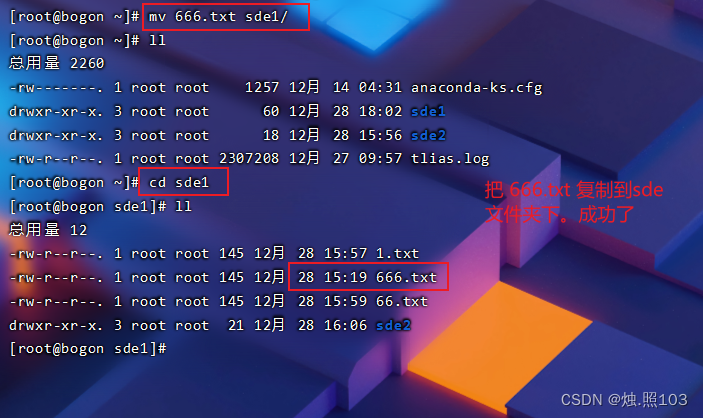
[root@bogon ~]# mv 666.txt sde1/
[root@bogon ~]# ll
总用量 2260
-rw-------. 1 root root    1257 12月 14 04:31 anaconda-ks.cfg
drwxr-xr-x. 3 root root      60 12月 28 18:02 sde1
drwxr-xr-x. 3 root root      18 12月 28 15:56 sde2
-rw-r--r--. 1 root root 2307208 12月 27 09:57 tlias.log
[root@bogon ~]# cd sde1
[root@bogon sde1]# ll
总用量 12
-rw-r--r--. 1 root root 145 12月 28 15:57 1.txt
-rw-r--r--. 1 root root 145 12月 28 15:19 666.txt
-rw-r--r--. 1 root root 145 12月 28 15:59 66.txt
drwxr-xr-x. 3 root root  21 12月 28 16:06 sde2
[root@bogon sde1]#
移动到不存在的文件夹,就是改名字。
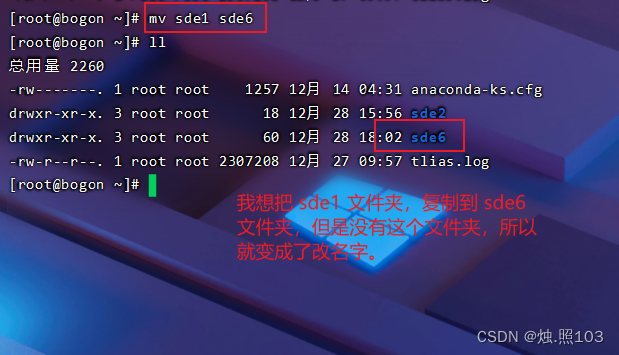
[root@bogon ~]# mv sde1 sde6
[root@bogon ~]# ll
总用量 2260
-rw-------. 1 root root    1257 12月 14 04:31 anaconda-ks.cfg
drwxr-xr-x. 3 root root      18 12月 28 15:56 sde2
drwxr-xr-x. 3 root root      60 12月 28 18:02 sde6
-rw-r--r--. 1 root root 2307208 12月 27 09:57 tlias.log
[root@bogon ~]#
移动到一个已经存在的目录:

[root@bogon ~]# ll
总用量 2260
-rw-------. 1 root root    1257 12月 14 04:31 anaconda-ks.cfg
drwxr-xr-x. 2 root root       6 12月 28 18:15 sde
drwxr-xr-x. 3 root root      18 12月 28 15:56 sde2
drwxr-xr-x. 3 root root      60 12月 28 18:02 sde6
-rw-r--r--. 1 root root 2307208 12月 27 09:57 tlias.log
[root@bogon ~]# mv sde sde2
[root@bogon ~]# ll
总用量 2260
-rw-------. 1 root root    1257 12月 14 04:31 anaconda-ks.cfg
drwxr-xr-x. 4 root root      29 12月 28 18:15 sde2
drwxr-xr-x. 3 root root      60 12月 28 18:02 sde6
-rw-r--r--. 1 root root 2307208 12月 27 09:57 tlias.log
[root@bogon ~]# cd sde2
[root@bogon sde2]# ll
总用量 0
drwxr-xr-x. 2 root root 6 12月 28 18:15 sde
drwxr-xr-x. 2 root root 6 12月 28 15:56 sde3
[root@bogon sde2]#
举例:
- mv hello.txt hi.txt 将hello.txt改名为hi.txt
- mv hi.txt sde/ 将文件hi.txt移动到sde目录中
- mv hi.txt sde/hello.txt 将hi.txt移动到sde目录中,并改名为hello.txt
- mv sde/ sde1/ 如果sde1目录不存在,将sde目录改名为sde1
- mv sde/ sde1/ 如果sde1目录存在,将sde目录移动到sde1目录中
打包压缩命令:
tar:
文件进行打包、解包、压缩、解压
语法:
tar [-zcxvf] fileName [files]
- 包文件后缀为.tar表示只是完成了打包,并压缩
- 包文件后缀为.tar.gz表示打包的同时还进行压缩
说明:
- -z:z代表的是gzip,通过gzip命令处理文件,gzip可以对文件压缩或者解压
- -c:c代表的是create,即创建新的包文件
- -x:x代表的是extract,实现从包文件中还原文件
- -v:v代表的是verbose,显示命令的执行过程
- -f:f代表的是file,用于指定包文件的名称
演示打包不压缩:

[root@bogon ~]# tar -cvf sde.tar sde2
sde2/
sde2/sde3/
sde2/sde/
[root@bogon ~]# ll
总用量 2272
-rw-------. 1 root root    1257 12月 14 04:31 anaconda-ks.cfg
drwxr-xr-x. 4 root root      29 12月 28 18:15 sde2
drwxr-xr-x. 3 root root      60 12月 28 18:02 sde6
-rw-r--r--. 1 root root   10240 12月 28 18:54 sde.tar
-rw-r--r--. 1 root root 2307208 12月 27 09:57 tlias.log
[root@bogon ~]#
解压:
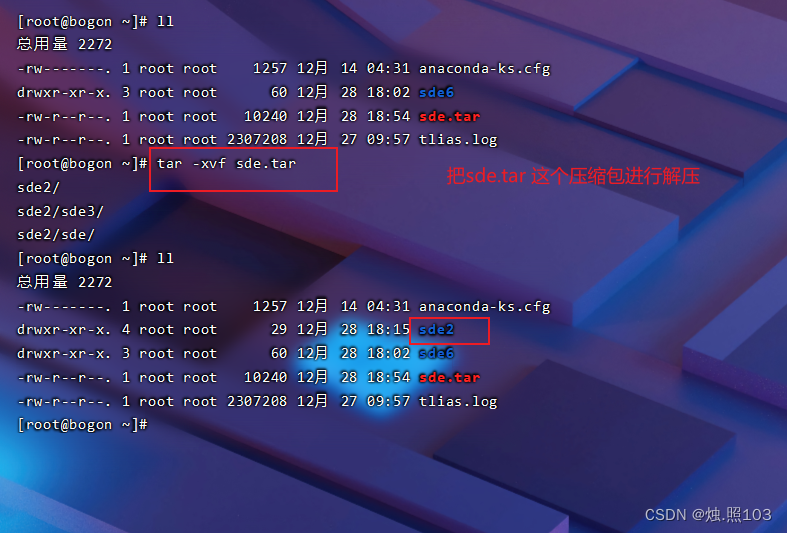
[root@bogon ~]# ll
总用量 2272
-rw-------. 1 root root    1257 12月 14 04:31 anaconda-ks.cfg
drwxr-xr-x. 3 root root      60 12月 28 18:02 sde6
-rw-r--r--. 1 root root   10240 12月 28 18:54 sde.tar
-rw-r--r--. 1 root root 2307208 12月 27 09:57 tlias.log
[root@bogon ~]# tar -xvf sde.tar
sde2/
sde2/sde3/
sde2/sde/
[root@bogon ~]# ll
总用量 2272
-rw-------. 1 root root    1257 12月 14 04:31 anaconda-ks.cfg
drwxr-xr-x. 4 root root      29 12月 28 18:15 sde2
drwxr-xr-x. 3 root root      60 12月 28 18:02 sde6
-rw-r--r--. 1 root root   10240 12月 28 18:54 sde.tar
-rw-r--r--. 1 root root 2307208 12月 27 09:57 tlias.log
[root@bogon ~]#
演示将一个目录中的文件,全部打包。
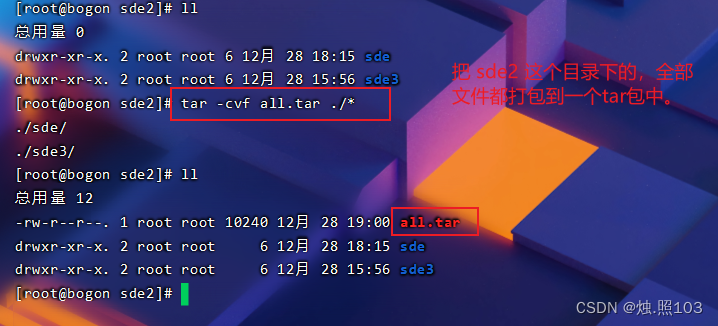
[root@bogon sde2]# ll
总用量 0
drwxr-xr-x. 2 root root 6 12月 28 18:15 sde
drwxr-xr-x. 2 root root 6 12月 28 15:56 sde3
[root@bogon sde2]# tar -cvf all.tar ./*
./sde/
./sde3/
[root@bogon sde2]# ll
总用量 12
-rw-r--r--. 1 root root 10240 12月 28 19:00 all.tar
drwxr-xr-x. 2 root root     6 12月 28 18:15 sde
drwxr-xr-x. 2 root root     6 12月 28 15:56 sde3
[root@bogon sde2]#
进行解压操作:

[root@bogon sde2]# ll
总用量 12
-rw-r--r--. 1 root root 10240 12月 28 19:00 all.tar
[root@bogon sde2]# tar -xvf all.tar
./sde/
./sde3/
[root@bogon sde2]# ll
总用量 12
-rw-r--r--. 1 root root 10240 12月 28 19:00 all.tar
drwxr-xr-x. 2 root root     6 12月 28 18:15 sde
drwxr-xr-x. 2 root root     6 12月 28 15:56 sde3
[root@bogon sde2]#
压缩并打包:
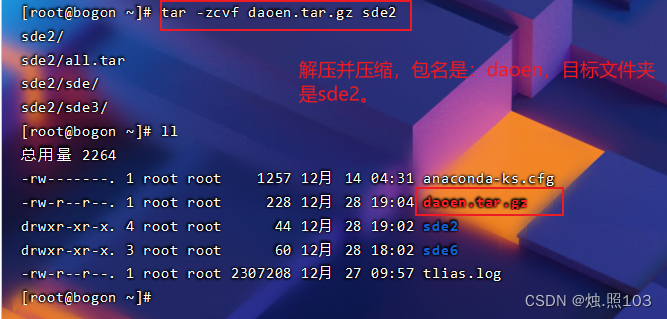
[root@bogon ~]# tar -zcvf daoen.tar.gz sde2
sde2/
sde2/all.tar
sde2/sde/
sde2/sde3/
[root@bogon ~]# ll
总用量 2264
-rw-------. 1 root root    1257 12月 14 04:31 anaconda-ks.cfg
-rw-r--r--. 1 root root     228 12月 28 19:04 daoen.tar.gz
drwxr-xr-x. 4 root root      44 12月 28 19:02 sde2
drwxr-xr-x. 3 root root      60 12月 28 18:02 sde6
-rw-r--r--. 1 root root 2307208 12月 27 09:57 tlias.log
[root@bogon ~]#
解压缩:
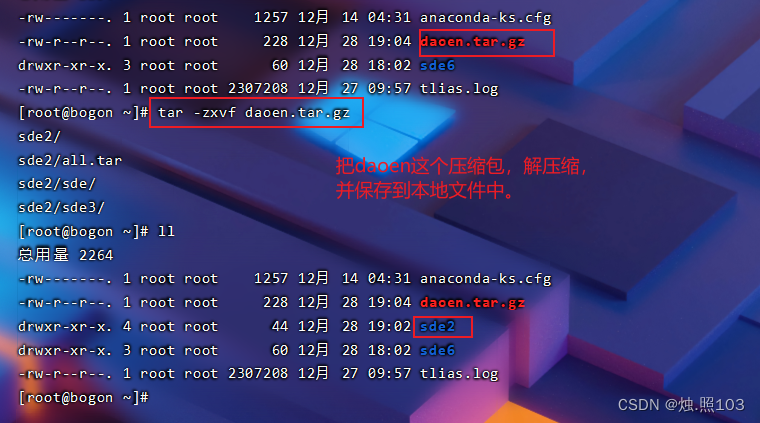
[root@bogon ~]# tar -zxvf daoen.tar.gz
sde2/
sde2/all.tar
sde2/sde/
sde2/sde3/
[root@bogon ~]# ll
总用量 2264
-rw-------. 1 root root    1257 12月 14 04:31 anaconda-ks.cfg
-rw-r--r--. 1 root root     228 12月 28 19:04 daoen.tar.gz
drwxr-xr-x. 4 root root      44 12月 28 19:02 sde2
drwxr-xr-x. 3 root root      60 12月 28 18:02 sde6
-rw-r--r--. 1 root root 2307208 12月 27 09:57 tlias.log
[root@bogon ~]#

-rw-r--r--. 1 root root     228 12月 28 19:04 daoen.tar.gz
drwxr-xr-x. 4 root root      44 12月 28 19:02 sde2
drwxr-xr-x. 3 root root      60 12月 28 18:02 sde6
-rw-r--r--. 1 root root 2307208 12月 27 09:57 tlias.log
[root@bogon ~]# tar -zxvf daoen.tar.gz -C /usr/local
sde2/
sde2/all.tar
sde2/sde/
sde2/sde3/
[root@bogon ~]# cd /usr/local
[root@bogon local]# ll
总用量 0
drwxr-xr-x.  2 root root  65 12月 27 17:25 appjar
drwxr-xr-x.  2 root root   6 4月  11 2018 bin
drwxr-xr-x.  2 root root   6 4月  11 2018 etc
drwxr-xr-x.  2 root root   6 4月  11 2018 games
drwxr-xr-x.  2 root root   6 4月  11 2018 include
drwxr-xr-x.  9 root root 136 12月 27 13:39 jdk-21.0.1
drwxr-xr-x.  2 root root   6 4月  11 2018 lib
drwxr-xr-x.  2 root root   6 4月  11 2018 lib64
drwxr-xr-x.  2 root root   6 4月  11 2018 libexec
drwxr-xr-x. 10 root root 141 12月 27 14:30 mysql
drwxr-xr-x. 11 root root 151 12月 27 15:58 nginx
drwxr-xr-x.  2 root root   6 4月  11 2018 sbin
drwxr-xr-x.  4 root root  44 12月 28 19:02 sde2
drwxr-xr-x.  5 root root  49 12月 14 04:28 share
drwxr-xr-x.  2 root root   6 4月  11 2018 src
[root@bogon local]#
文本编辑命令:
vi/vim:
vi命令是Linux系统提供的一个文本编辑工具,可以对文件内容进行编辑,类似于Windows中的记事本
语法:
vi fileName(要编辑的文件名)
说明:
- 1、vim是从vi发展来的一个功能更加强大的文本编辑工具,在编辑文件时可以对文本内容进行着色,方便我们对文件进行编辑处理,所以实际工作中vim更加常用。
- 2、要使用vim命令,需要我们自己完成安装。可以使用下面的命令来完成安装:
yum install vim

vim:
作用:
对文件内容进行编辑,vim其实就是一个文本编辑器
语法:
vim fileName
三个模式介绍:

从命令行模式,到低行模式 是 按的 Shift + :
命令行模式的快捷键:

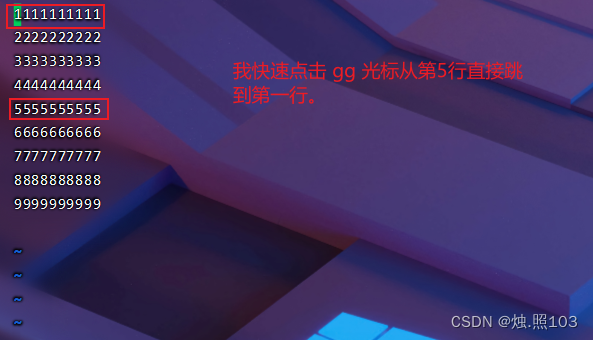
- gg 定位到文本内容的第一行
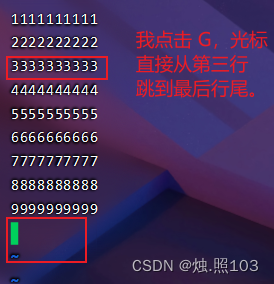
- G 定位到文本内容的最后一行
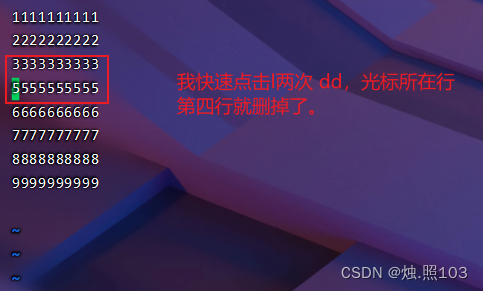
- dd 删除光标所在行的数据
- ndd 删除当前光标所在行及之后的n行数据
- u 撤销操作
- i或a或o 进入插入模式
操作演示:
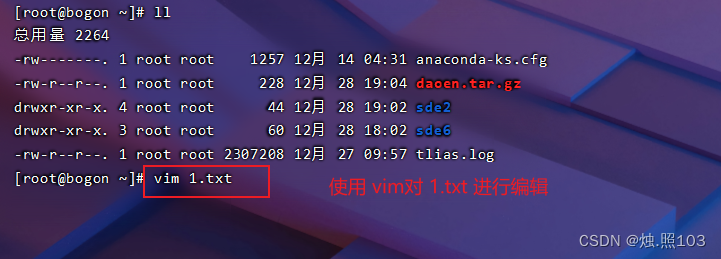
刚刚执行的是 vim 1.txt 然后点击了回车,先是进入到了命令行模式:

我按一下 i a o 这三个其中一个,进入插入模式:

然后我们就可以输入内容了:

进入低行模式:我按的是 Shift + :

对文件进行保存:

也可以输入 x 退出并保存:
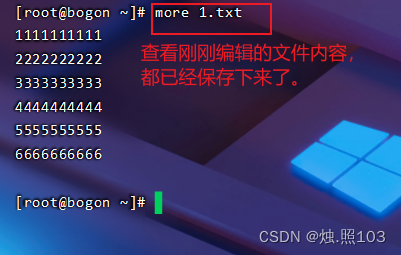
测试:

看看新内容是否在:
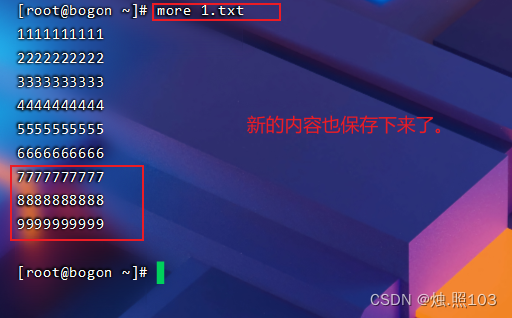
插入操作的,快捷操作的演示(命令行模式):
gg
G
dd
ndd 例如:2dd(一次直接删除 2行)5dd(一次直接删除5行)

u

低行模式的快捷操作:
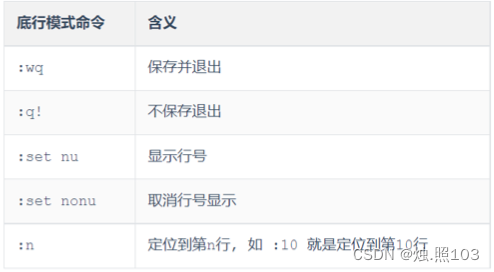
:wq 保存并退出
:q! 不保存退出
:set nu 显示行号
:set nonu 取消行号显示
:n 定位到低n行,如 : 10 就是定位到第 10 行
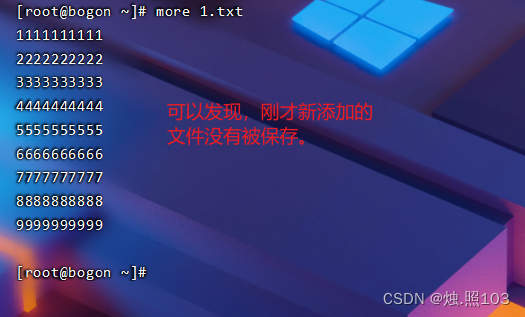
低行模式,快捷操作演示:
q!

看效果:
set nu

set nonu

: n

查找命令:
find:
在指定目录下查找文件
语法:
find dirName -option fileName

[root@bogon ~]# ll
总用量 2268
-rw-r--r--. 1 root root     100 12月 28 19:51 1.txt
-rw-------. 1 root root    1257 12月 14 04:31 anaconda-ks.cfg
-rw-r--r--. 1 root root     228 12月 28 19:04 daoen.tar.gz
drwxr-xr-x. 2 root root       6 12月 28 20:11 hello.java
drwxr-xr-x. 4 root root      44 12月 28 19:02 sde2
drwxr-xr-x. 3 root root      60 12月 28 18:02 sde6
-rw-r--r--. 1 root root 2307208 12月 27 09:57 tlias.log
[root@bogon ~]# find . -name *.java
./hello.java
[root@bogon ~]#
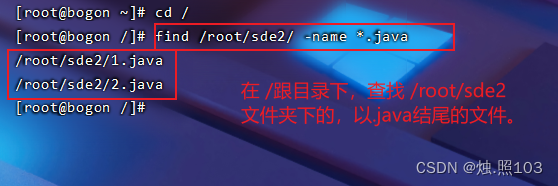
[root@bogon ~]# cd /
[root@bogon /]# find /root/sde2/ -name *.java
/root/sde2/1.java
/root/sde2/2.java
[root@bogon /]#
举例:
- find . –name *.java 在当前目录及其子目录下查找.java结尾文件
- find /itcast -name *.java 在/itcast目录及其子目录下查找.java结尾的文件
grep:
从指定文件中查找指定的文本内容
语法:
grep word fileName
指定精准查找:

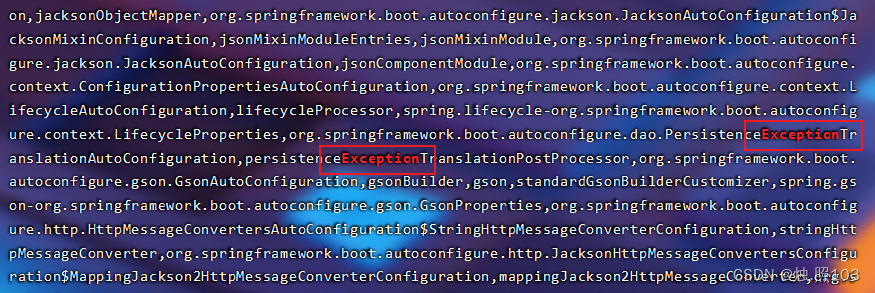
[root@bogon ~]# grep Exception tlias.log
可以发现,找到的都标红了。

忽略大小写的查找:
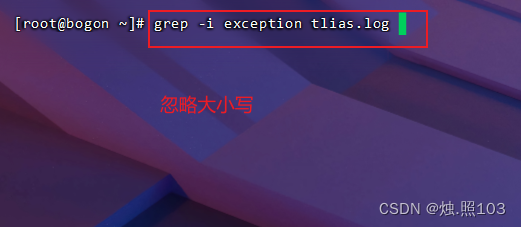
查找结果:
举例:
- grep Hello HelloWorld.java 查找HelloWorld.java文件中出现的Hello字符串的位置
- grep hello *.java 查找当前目录中所有.java结尾的文件中包含hello字符串的位置
