文章目录
- 0. 数据下载
- 1. 背景描述
- 2. 预测目的
- 3. 数据总览
- 4. 开始处理
- 4.1 图书
- 4.1.1 yearOfPublication
- 4.1.2 publisher
- 4.2 用户数据集
- 4.2.1 userID
- 4.2.2 Age
- 4.3 评级数据集
- 4.3.1 统计
- 5. 基于简单流行度的推荐系统
- 6. 基于协同过滤的推荐系统
- 6.1 基于用户的协同过滤
- 6.2 基于项目的协同过滤
0. 数据下载
关注公众号:『AI学习星球』
回复:基于协同过滤的图书推荐系统 即可获取数据下载。
论文辅导或算法学习可以通过公众号滴滴我

1. 背景描述
在图书推荐系统中,能够针对用户画像,用户行为及物品特征构建推荐系统。
2. 预测目的
在线推荐系统是许多电子商务网站的事情。推荐系统广泛地向最适合其口味和特征的顾客推荐产品。
3. 数据总览
针对Book Crossing数据集,开始构建图书推荐系统。该数据集包含三个用户,书籍和评级表。显式评级以1-10的等级表示(较高的值表示较高的升值),隐式评级以0表示
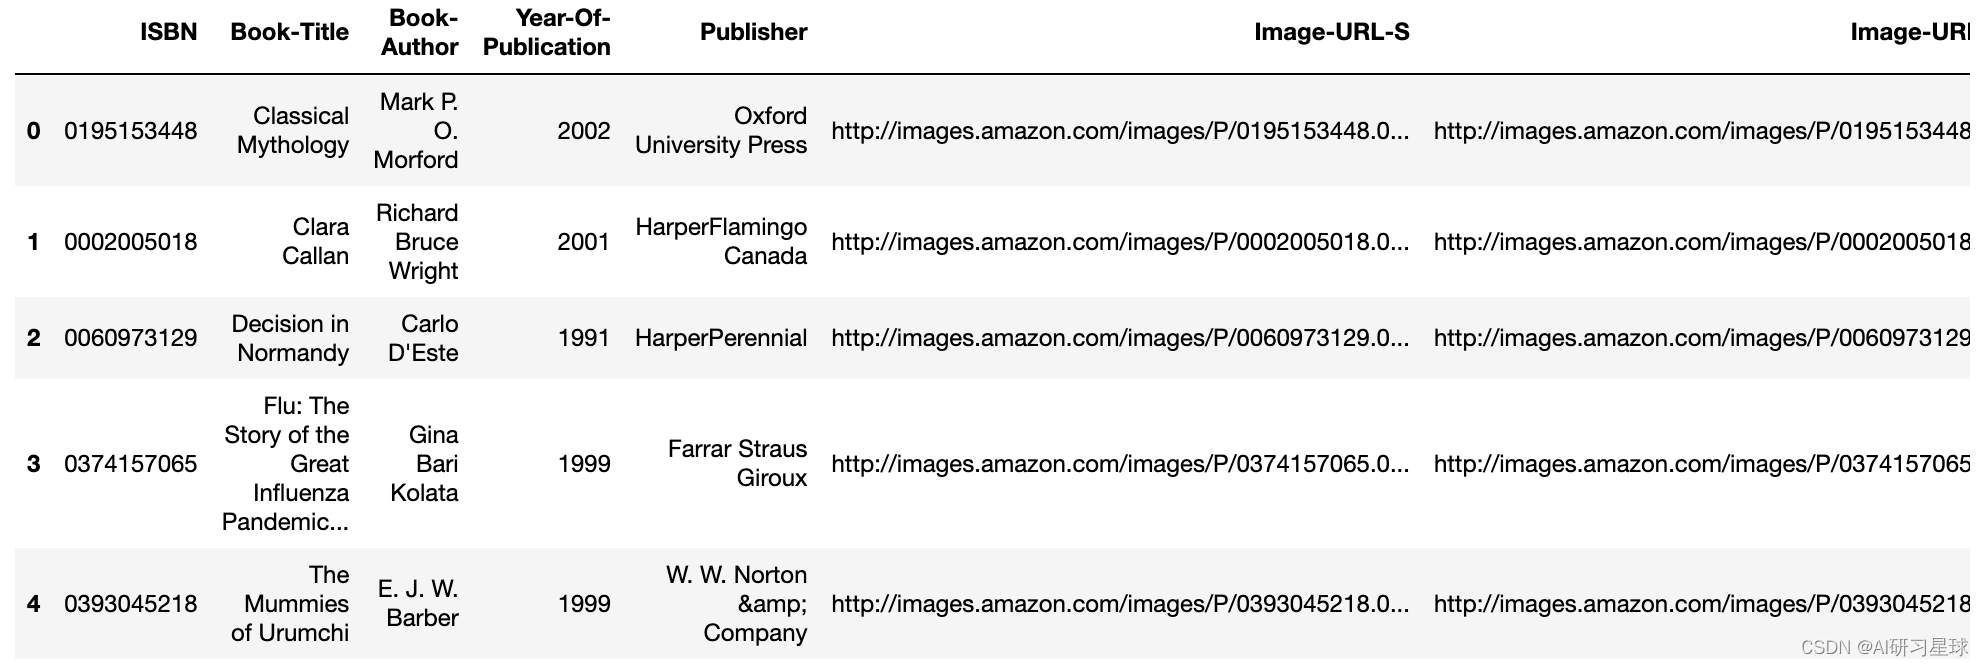
图书表字段
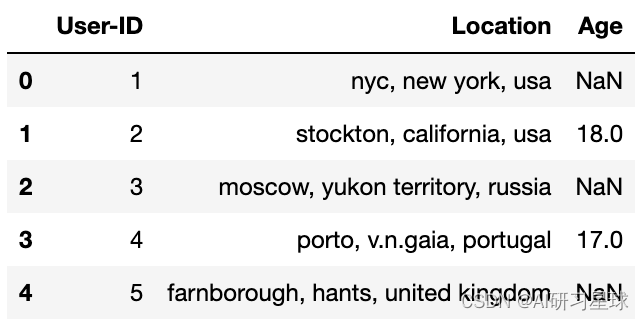
用户数据集
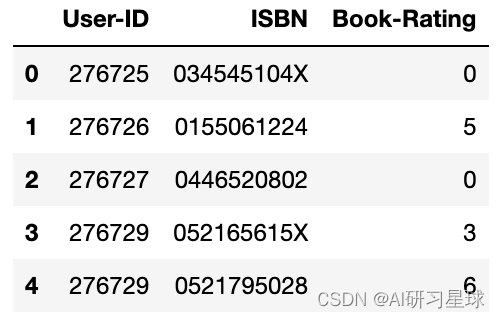
评级数据集
4. 开始处理
import pandas as pd
import matplotlib.pyplot as plt
import sklearn.metrics as metrics
# from sklearn.metrics import accuracy_score
import numpy as np
from sklearn.neighbors import NearestNeighbors
from scipy.spatial.distance import correlation
from sklearn.metrics.pairwise import pairwise_distances
import ipywidgets as widgets
from IPython.display import display, clear_output
from contextlib import contextmanager
import warnings
warnings.filterwarnings('ignore')
import numpy as np
import os, sys
import re
import seaborn as sns
首先,我们加载数据集并检查书籍,用户和评级数据集的形状,如下所示:
books = pd.read_csv('dataset/BX-Books.csv', sep=';', error_bad_lines=False, encoding="latin-1")
books.columns = ['ISBN', 'bookTitle', 'bookAuthor', 'yearOfPublication', 'publisher', 'imageUrlS', 'imageUrlM', 'imageUrlL']
users = pd.read_csv('dataset/BX-Users.csv', sep=';', error_bad_lines=False, encoding="latin-1")
users.columns = ['userID', 'Location', 'Age']
ratings = pd.read_csv('dataset/BX-Book-Ratings.csv', sep=';', error_bad_lines=False, encoding="latin-1")
ratings.columns = ['userID', 'ISBN', 'bookRating']
print (books.shape)
print (users.shape)
print (ratings.shape)
(271360, 8)
(278858, 3)
(1149780, 3)
4.1 图书
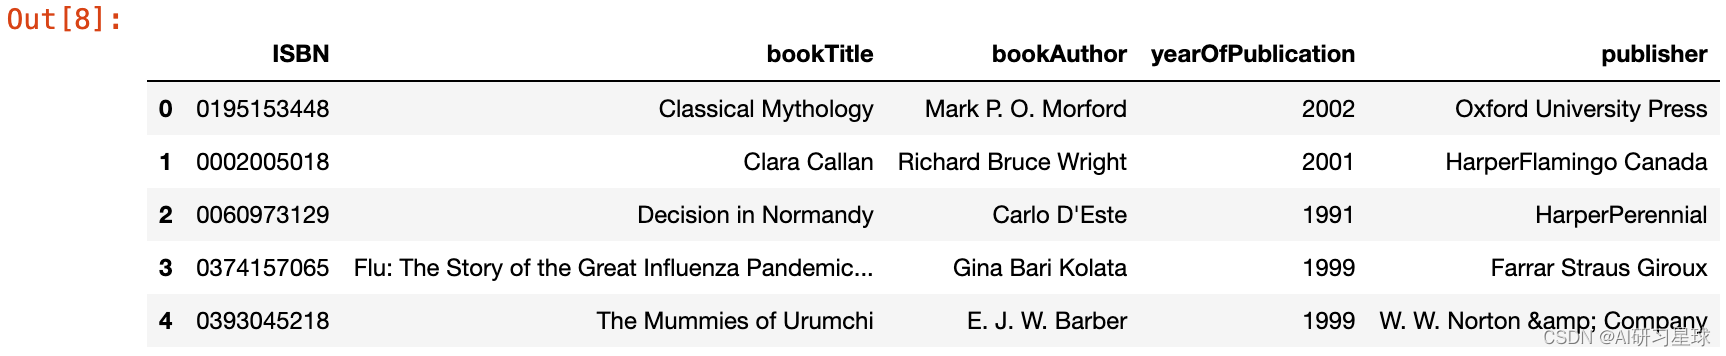
逐个探索每个数据集并从书籍数据集开始,我们可以看到图像URL列似乎不需要进行分析,因此可以删除这些列。
books.head()
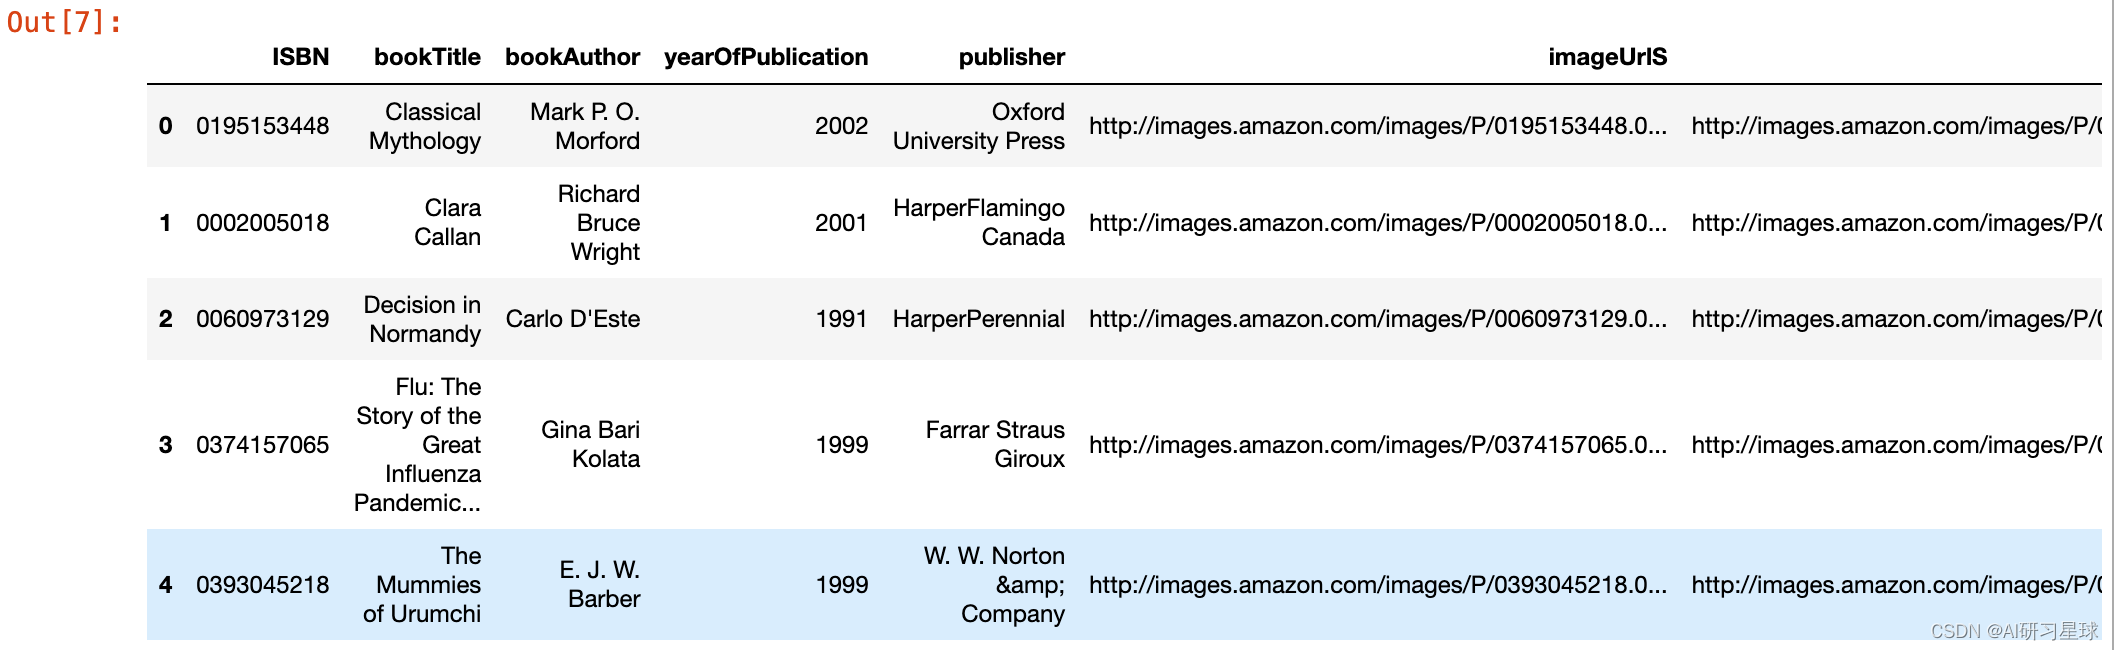
books.drop(['imageUrlS', 'imageUrlM', 'imageUrlL'],axis=1,inplace=True)
books.head()
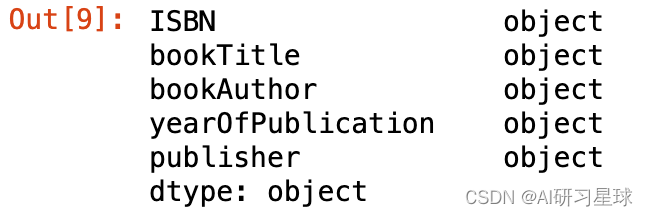
我们现在检查每个列的数据类型,并更正缺失和不一致的条目。我也在调整列宽以显示列的全文。
books.dtypes
4.1.1 yearOfPublication
现在我们检查此属性的唯一值。
books.yearOfPublication.unique()
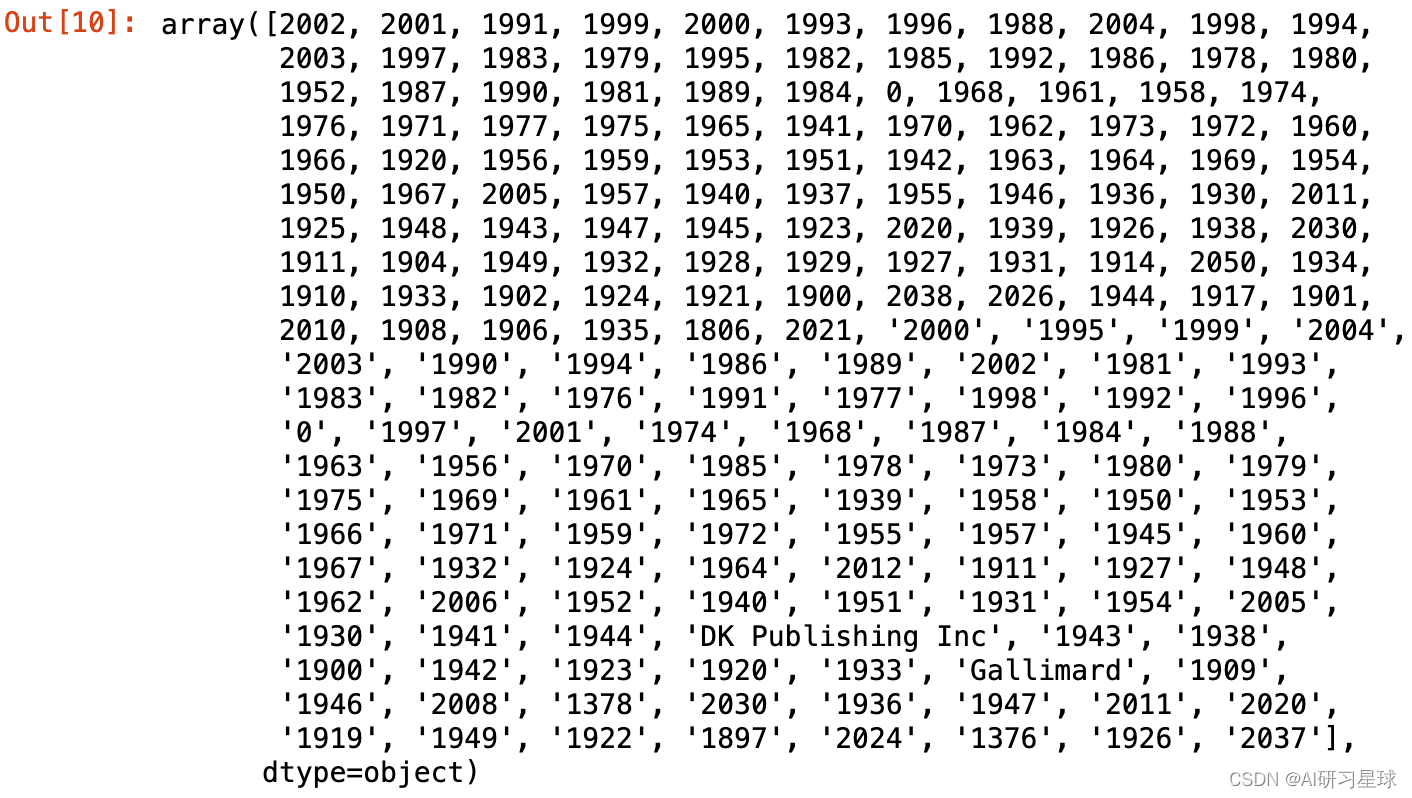
yearOfPublication中有一些不正确的条目。
由于csv文件中的一些错误,发布商名称’DK Publishing Inc’和’Gallimard’在数据集中被错误地加载为yearOfPublication。
此外,某些值是字符串,并且在某些地方已将相同年份作为数字输入。
我们将对这些行进行必要的更正,并将yearOfPublication的数据类型设置为int。
books.loc[books.yearOfPublication == 'DK Publishing Inc',:]

# ISBN '0789466953'
books.loc[books.ISBN == '0789466953','yearOfPublication'] = 2000
books.loc[books.ISBN == '0789466953','bookAuthor'] = "James Buckley"
books.loc[books.ISBN == '0789466953','publisher'] = "DK Publishing Inc"
books.loc[books.ISBN == '0789466953','bookTitle'] = "DK Readers: Creating the X-Men, How Comic Books Come to Life (Level 4: Proficient Readers)"
#ISBN '078946697X'
books.loc[books.ISBN == '078946697X','yearOfPublication'] = 2000
books.loc[books.ISBN == '078946697X','bookAuthor'] = "Michael Teitelbaum"
books.loc[books.ISBN == '078946697X','publisher'] = "DK Publishing Inc"
books.loc[books.ISBN == '078946697X','bookTitle'] = "DK Readers: Creating the X-Men, How It All Began (Level 4: Proficient Readers)"
books.loc[(books.ISBN == '0789466953') | (books.ISBN == '078946697X'),:]

继续纠正出版年鉴的类型
books.yearOfPublication=pd.to_numeric(books.yearOfPublication, errors='coerce')
sorted(books['yearOfPublication'].unique())
[0, 1376, 1378, 1806, 1897, 1900, 1901, 1902, 1904, 1906, 1908, 1909, 1910, 1911, 1914, 1917, 1919, 1920, 1921, 1922, 1923, 1924, 1925, 1926, 1927, 1928, 1929, 1930, 1931, 1932, 1933, 1934, 1935, 1936, 1937, 1938, 1939, 1940, 1941, 1942, 1943, 1944, 1945, 1946, 1947, 1948, 1949, 1950, 1951, 1952, 1953, 1954, 1955, 1956, 1957, 1958, 1959, 1960, 1961, 1962, 1963, 1964, 1965, 1966, 1967, 1968, 1969, 1970, 1971, 1972, 1973, 1974, 1975, 1976, 1977, 1978, 1979, 1980, 1981, 1982, 1983, 1984, 1985, 1986, 1987, 1988, 1989, 1990, 1991, 1992, 1993, 1994, 1995, 1996, 1997, 1998, 1999, 2000, 2001, 2002, 2003, 2004, 2005, 2006, 2008, 2010, 2011, 2012, 2020, 2021, 2024, 2026, 2030, 2037, 2038, 2050]
现在可以看出yearOfPublication的类型为int,其值范围为0-2050。
由于该数据集建于2004年,我假设2006年之后的所有年份都无效,保留两年的保证金,以防数据集可能已更新。
对于所有无效条目(包括0),我将这些条目转换为NaN,然后用剩余年份的平均值替换它们。
books.loc[(books.yearOfPublication > 2006) | (books.yearOfPublication == 0),'yearOfPublication'] = np.NAN
用年出版的平均价值代替NaNs在案例数据集被更新的情况下保留一定的空白
books.yearOfPublication.fillna(round(books.yearOfPublication.mean()), inplace=True)
books.yearOfPublication.isnull().sum()
0
将dtype重置为int32
books.yearOfPublication = books.yearOfPublication.astype(np.int32)
4.1.2 publisher
来到“publisher”专栏,我已经处理了两个NaN值,将其替换为“其他”,因为在进行一些调查后无法推断出版商名称(检查jupyter notebook embed)
books.loc[books.publisher.isnull(),:]

调查有NaNs的行
以“Tyrant Moon”的书名来查看是否能得到任何线索
books.loc[(books.bookTitle == 'Tyrant Moon'),:]

检查行是否有书签作为查找器,看看我们是否能得到任何线索
与不同的出版商和图书作者的所有行
books.loc[(books.bookTitle == 'Finders Keepers'),:]
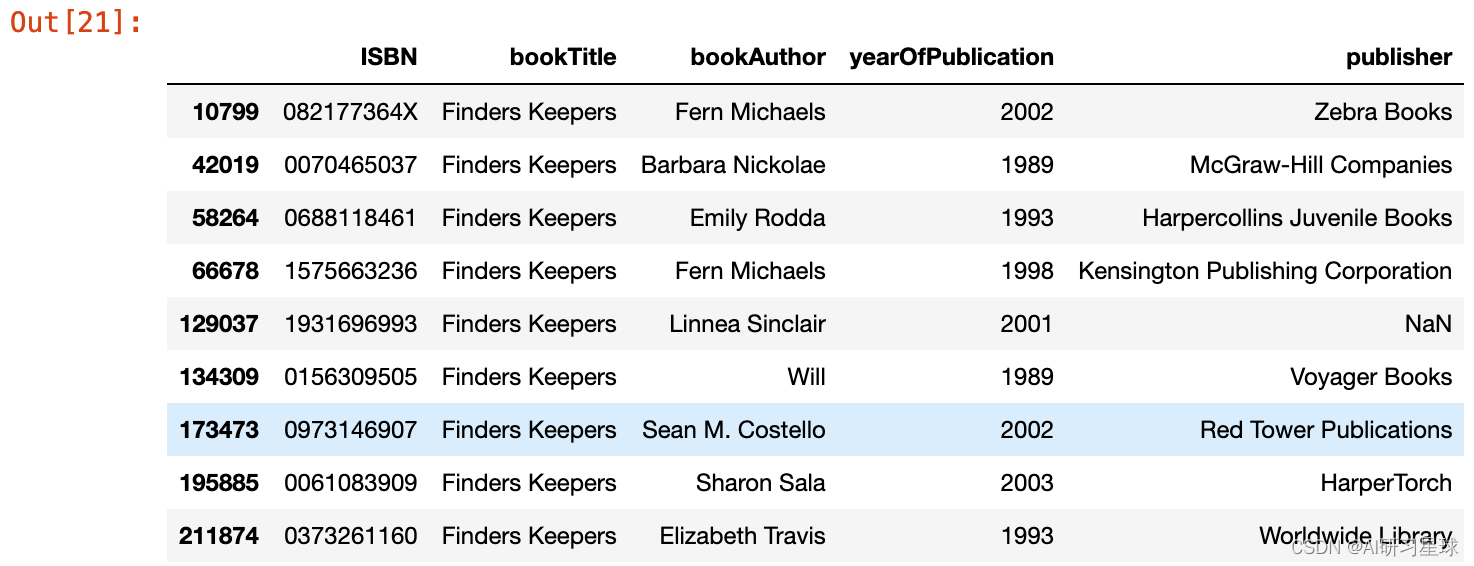
由图书作者检查以找到模式
都有不同的出版商。这里没有线索
books.loc[(books.bookAuthor == 'Elaine Corvidae'),:]

因为没有什么共同的东西可以推断出NaNs的发布者,将它们替换为“other”
books.loc[(books.ISBN == '193169656X'),'publisher'] = 'other'
books.loc[(books.ISBN == '1931696993'),'publisher'] = 'other'
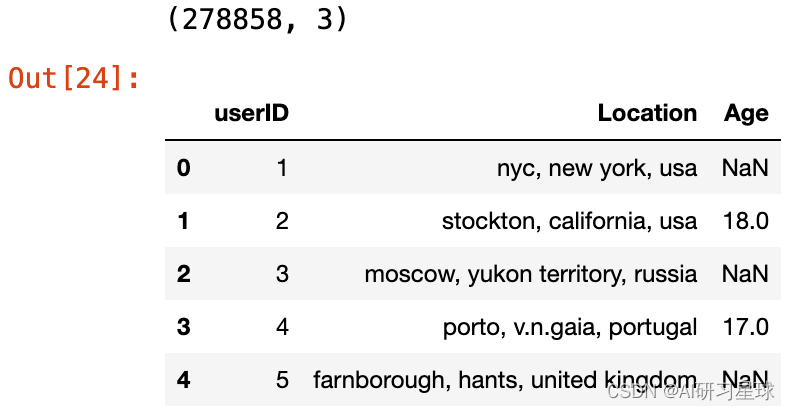
4.2 用户数据集
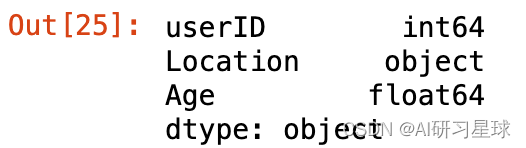
现在我们探索用户数据集,首先检查其形状,前几列和数据类型。
print (users.shape)
users.head()
users.dtypes
4.2.1 userID
users.userID.values
array([ 1, 2, 3, …, 278856, 278857, 278858])
4.2.2 Age
检查唯一值后,userID看起来正确。但是,Age列具有NaN和一些非常高的值。在我看来,5岁以下和90岁以上的年龄没有多大意义,因此,这些正在被NaN取代。然后将所有NaN替换为Age的平均值,并将其数据类型设置为int。
sorted(users.Age.unique())
[nan, 0.0, 1.0, 2.0, 3.0, 4.0, 5.0, 6.0, 7.0, 8.0, 9.0, 10.0, 11.0, 12.0, 13.0, 14.0, 15.0, 16.0, 17.0, 18.0, 19.0, 20.0, 21.0, 22.0, 23.0, 24.0, 25.0, 26.0, 27.0, 28.0, 29.0, 30.0, 31.0, 32.0, 33.0, 34.0, 35.0, 36.0, 37.0, 38.0, 39.0, 40.0, 41.0, 42.0, 43.0, 44.0, 45.0, 46.0, 47.0, 48.0, 49.0, 50.0, 51.0, 52.0, 53.0, 54.0, 55.0, 56.0, 57.0, 58.0, 59.0, 60.0, 61.0, 62.0, 63.0, 64.0, 65.0, 66.0, 67.0, 68.0, 69.0, 70.0, 71.0, 72.0, 73.0, 74.0, 75.0, 76.0, 77.0, 78.0, 79.0, 80.0, 81.0, 82.0, 83.0, 84.0, 85.0, 86.0, 87.0, 88.0, 89.0, 90.0, 91.0, 92.0, 93.0, 94.0, 95.0, 96.0, 97.0, 98.0, 99.0, 100.0, 101.0, 102.0, 103.0, 104.0, 105.0, 106.0, 107.0, 108.0, 109.0, 110.0, 111.0, 113.0, 114.0, 115.0, 116.0, 118.0, 119.0, 123.0, 124.0, 127.0, 128.0, 132.0, 133.0, 136.0, 137.0, 138.0, 140.0, 141.0, 143.0, 146.0, 147.0, 148.0, 151.0, 152.0, 156.0, 157.0, 159.0, 162.0, 168.0, 172.0, 175.0, 183.0, 186.0, 189.0, 199.0, 200.0, 201.0, 204.0, 207.0, 208.0, 209.0, 210.0, 212.0, 219.0, 220.0, 223.0, 226.0, 228.0, 229.0, 230.0, 231.0, 237.0, 239.0, 244.0]
年龄栏有一些无效的条目,比如nan,0和非常高的值,比如100和以上
在我看来,低于5和90以上的值对我们的图书评级案例没有多大意义。因此,用NaNs替换这些
users.loc[(users.Age > 90) | (users.Age < 5), 'Age'] = np.nan
用平均值代替NaN
users.Age = users.Age.fillna(users.Age.mean())
将数据类型设置为int
users.Age = users.Age.astype(np.int32)
sorted(users.Age.unique())
[5, 6, 7, 8, 9, 10, 11, 12, 13, 14, 15, 16, 17, 18, 19, 20, 21, 22, 23, 24, 25, 26, 27, 28, 29, 30, 31, 32, 33, 34, 35, 36, 37, 38, 39, 40, 41, 42, 43, 44, 45, 46, 47, 48, 49, 50, 51, 52, 53, 54, 55, 56, 57, 58, 59, 60, 61, 62, 63, 64, 65, 66, 67, 68, 69, 70, 71, 72, 73, 74, 75, 76, 77, 78, 79, 80, 81, 82, 83, 84, 85, 86, 87, 88, 89, 90]
我这里没有对Location列进行任何处理。但是,如果您希望可以进一步将其拆分为城市,州,国家,并使用文本处理模型进行一些处理
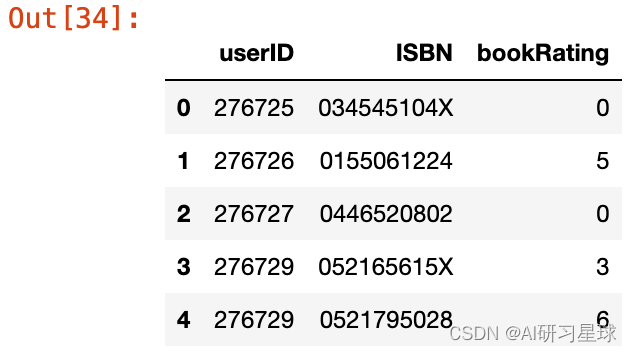
4.3 评级数据集
我们检查评级数据集的形状和前几行。它揭示了我们的用户手册评级矩阵将非常稀疏,因为与评级矩阵的大小(用户数量×书籍数量)相比,实际评级非常低。
ratings.shape
(1149780, 3)
如果每个用户对每个条目进行评级,那么评级数据集将有nusers * nbooks条目,这表明数据集非常稀疏。
n_users = users.shape[0]
n_books = books.shape[0]
print (n_users * n_books)
75670906880
ratings.head(5)
ratings.bookRating.unique()
array([ 0, 5, 3, 6, 8, 7, 10, 9, 4, 1, 2], dtype=int64)
除非将新书添加到图书数据集中,否则评级数据集应该只存在于我们的图书数据集里的书籍。
ratings_new = ratings[ratings.ISBN.isin(books.ISBN)]
print (ratings.shape)
print (ratings_new.shape)
(1149780, 3)
(1031136, 3)
可以看到,有许多行,有图书ISBN,而不是书籍数据集的一部分被删除了
除非新用户被添加到用户数据集,否则评级数据集应该有来自用户数据集的用户的评级。
ratings = ratings[ratings.userID.isin(users.userID)]
print (ratings.shape)
print (ratings_new.shape)
(1149780, 3)
(1031136, 3)
没有新用户添加,因此我们将使用高于数据集的新用户(1031136,3)
print ("number of users: " + str(n_users))
print ("number of books: " + str(n_books))
number of users: 278858
number of books: 271360
很明显,用户已经评价了一些书籍,这些书籍不是原始书籍数据集的一部分。数据集的稀疏度可以如下计算:
sparsity=1.0-len(ratings_new)/float(n_users*n_books)
print ('图书交叉数据集的稀疏级别是 ' +  str(sparsity*100) + ' %')
图书交叉数据集的稀疏级别是 99.99863734155898 %
由1-10表示的显式评级和由0表示的隐含评级现在必须分开。我们将仅使用明确的评级来构建我们的图书推荐系统。同样,用户也被分为明确评级的人和记录其隐性行为的人。
ratings.bookRating.unique()
array([ 0, 5, 3, 6, 8, 7, 10, 9, 4, 1, 2], dtype=int64)
因此,对隐式和显式的评级数据集进行了划分
ratings_explicit = ratings_new[ratings_new.bookRating != 0]
ratings_implicit = ratings_new[ratings_new.bookRating == 0]
print (ratings_new.shape)
print (ratings_explicit.shape)
print (ratings_implicit.shape)
(1031136, 3)
(383842, 3)
(647294, 3)
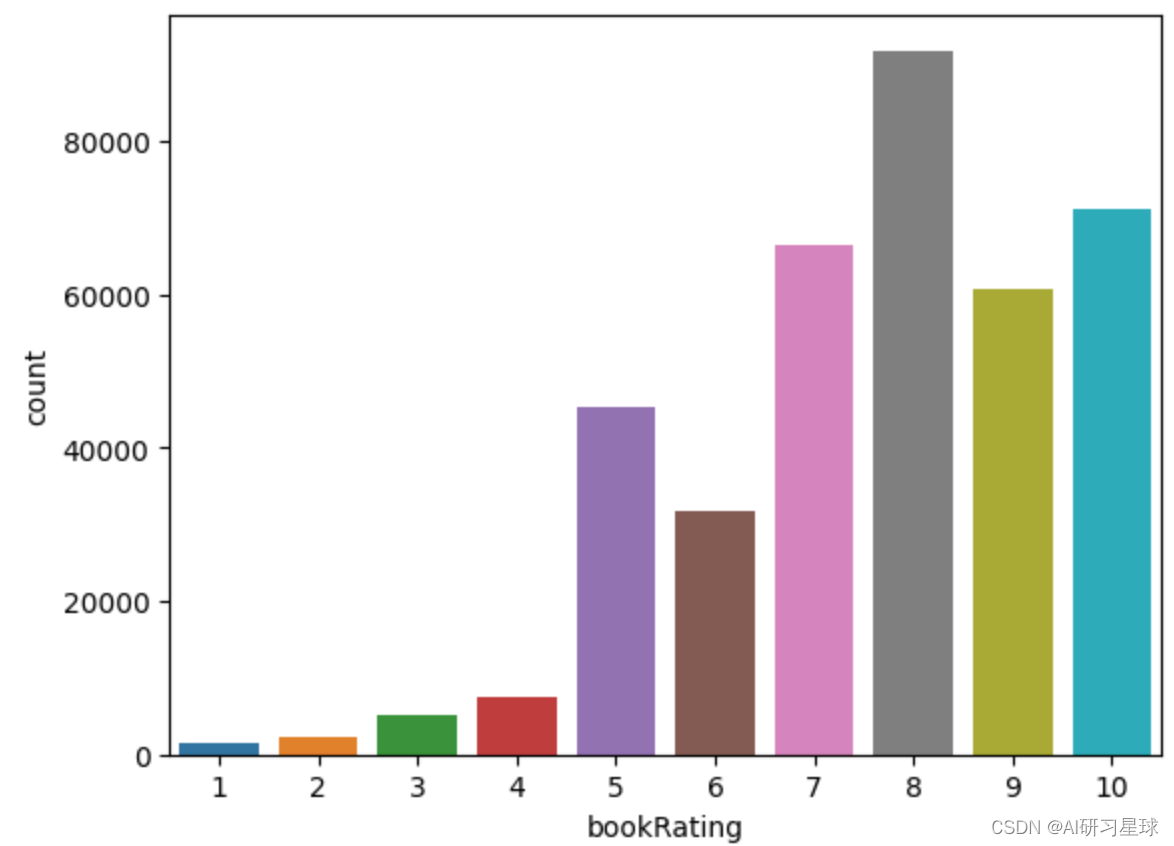
4.3.1 统计
bookRating的计数图表示更高的评级在用户中更常见,评级8的评级最高。
sns.countplot(data=ratings_explicit , x='bookRating')
plt.show()
5. 基于简单流行度的推荐系统
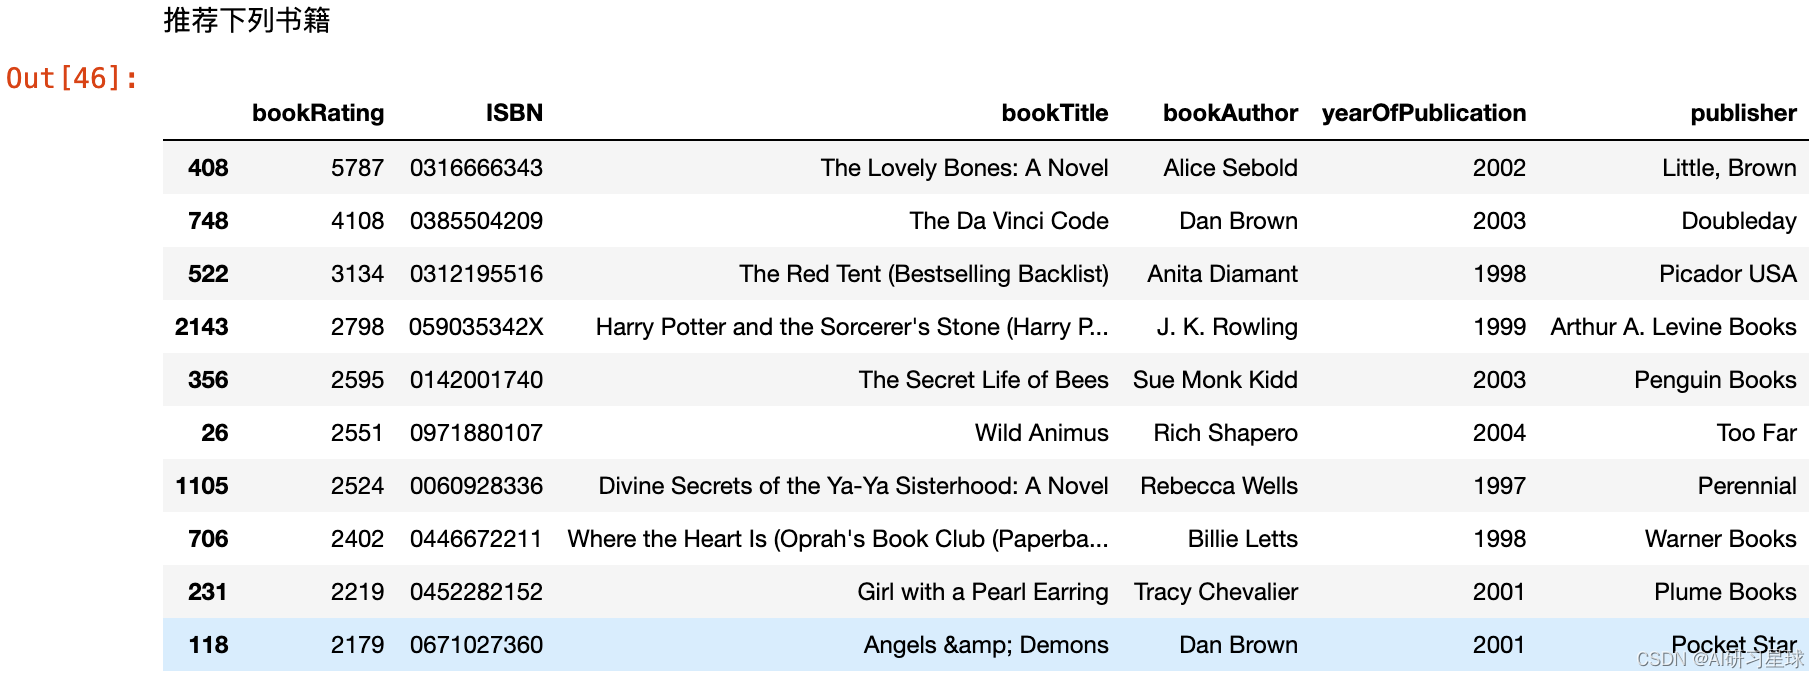
此时,可以基于不同书籍的用户评级的计数来构建基于简单流行度的推荐系统。很明显, J. K. Rowling撰写的书很受欢迎。
ratings_count = pd.DataFrame(ratings_explicit.groupby(['ISBN'])['bookRating'].sum())
top10 = ratings_count.sort_values('bookRating', ascending = False).head(10)
print ("推荐下列书籍")
top10.merge(books, left_index = True, right_on = 'ISBN')
类似地隔离那些在1-10中给出明确评分的用户以及那些隐含行为被跟踪的用户
users_exp_ratings = users[users.userID.isin(ratings_explicit.userID)]
users_imp_ratings = users[users.userID.isin(ratings_implicit.userID)]
print (users.shape)
print (users_exp_ratings.shape)
print (users_imp_ratings.shape)
(278858, 3)
(68091, 3)
(52451, 3)
6. 基于协同过滤的推荐系统
为了应对我的机器具有的计算能力并减少数据集大小,我正在考虑已经评定至少100本书籍和至少有100个评级的书籍的用户。
counts1 = ratings_explicit['userID'].value_counts()
ratings_explicit = ratings_explicit[ratings_explicit['userID'].isin(counts1[counts1 >= 100].index)]
counts = ratings_explicit['bookRating'].value_counts()
ratings_explicit = ratings_explicit[ratings_explicit['bookRating'].isin(counts[counts >= 100].index)]
从显式的评级表生成评级矩阵
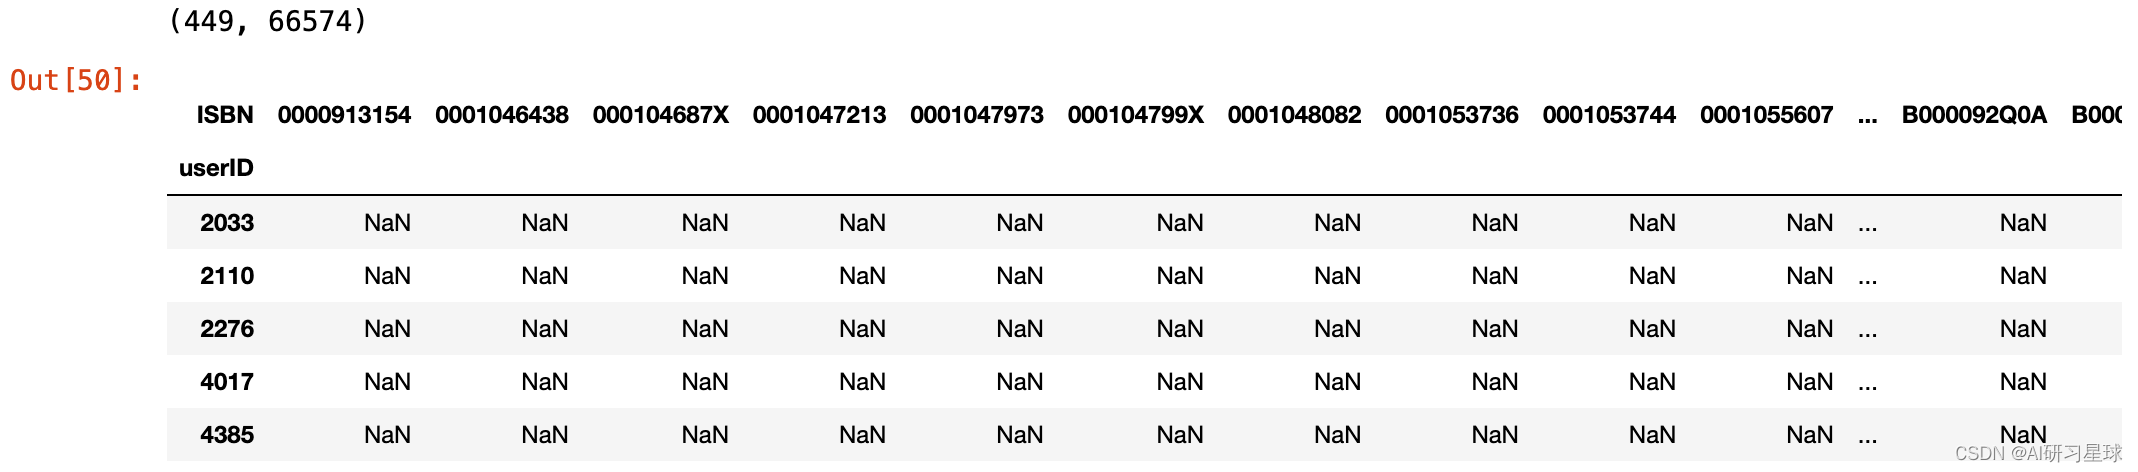
构建基于CF的推荐系统的下一个关键步骤是从评级表生成用户项目评级矩阵。
ratings_matrix = ratings_explicit.pivot(index='userID', columns='ISBN', values='bookRating')
userID = ratings_matrix.index
ISBN = ratings_matrix.columns
print(ratings_matrix.shape)
ratings_matrix.head()
n_users = ratings_matrix.shape[0] #只考虑那些给出明确评级的用户
n_books = ratings_matrix.shape[1]
print (n_users, n_books)
449 66574
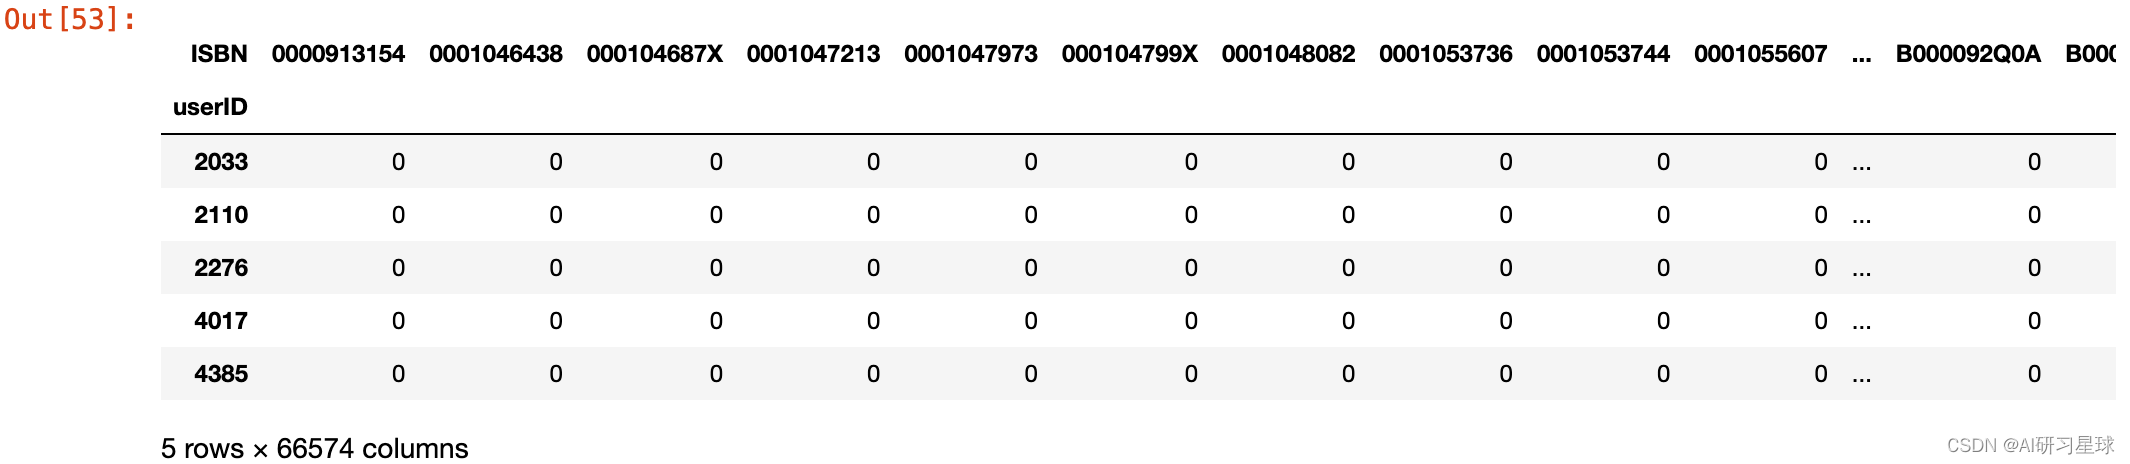
因为NaN不能通过训练算法来处理,将它们替换为0,这表示没有评级
设置数据类型
ratings_matrix.fillna(0, inplace = True)
ratings_matrix = ratings_matrix.astype(np.int32)
ratings_matrix.head(5)
复查稀疏
sparsity=1.0-len(ratings_explicit)/float(users_exp_ratings.shape[0]*n_books)
print ('图书交叉数据集的稀疏级别是 ' +  str(sparsity*100) + ' %')
图书交叉数据集的稀疏级别是 99.99772184106935 %
6.1 基于用户的协同过滤
我将重用我的基于CF的推荐系统示例的功能。函数findsimilaruser输入userID和rating矩阵并返回k个类似用户的相似性和索引。
这个函数找到k个相似的用户,给定用户id和评级矩阵
这些相似点是通过使用配对距离获得的
global metric,k
k=10
metric='cosine'
def findksimilarusers(user_id, ratings, metric = metric, k=k):
    similarities=[]
    indices=[]
    model_knn = NearestNeighbors(metric = metric, algorithm = 'brute')
    model_knn.fit(ratings)
    loc = ratings.index.get_loc(user_id)
    distances, indices = model_knn.kneighbors(ratings.iloc[loc, :].values.reshape(1, -1), n_neighbors = k+1)
    similarities = 1-distances.flatten()

    return similarities,indices
函数predict_userbased基于基于用户的方法预测指定用户 - 项目组合的评级。
def predict_userbased(user_id, item_id, ratings, metric = metric, k=k):
    prediction=0
    user_loc = ratings.index.get_loc(user_id)
    item_loc = ratings.columns.get_loc(item_id)
    similarities, indices=findksimilarusers(user_id, ratings,metric, k) #similar users based on cosine similarity
    mean_rating = ratings.iloc[user_loc,:].mean() #to adjust for zero based indexing
    sum_wt = np.sum(similarities)-1
    product=1
    wtd_sum = 0

    for i in range(0, len(indices.flatten())):
        if indices.flatten()[i] == user_loc:
            continue;
        else:
            ratings_diff = ratings.iloc[indices.flatten()[i],item_loc]-np.mean(ratings.iloc[indices.flatten()[i],:])
            product = ratings_diff * (similarities[i])
            wtd_sum = wtd_sum + product

    #在非常稀疏的数据集的情况下,使用基于协作的方法的相关度量可能会给出负面的评价
    #在这里的处理如下
    if prediction <= 0:
        prediction = 1
    elif prediction >10:
        prediction = 10

    prediction = int(round(mean_rating + (wtd_sum/sum_wt)))
    print ('用户预测等级 {0} -> item {1}: {2}'.format(user_id,item_id,prediction))

    return prediction
测试
predict_userbased(11676,'0001056107',ratings_matrix)
用户预测等级 11676 -> item 0001056107: 2
功能recommendedItem使用上述功能来推荐基于用户或基于项目的方法的书籍(基于所选方法和度量组合)。如果图书的预测评级大于或等于6,并且图书尚未评级,则会提出建议。您可以在调用此函数时选择相似性度量(余弦/相关)。
def recommendItem(user_id, ratings, metric=metric):
if (user_id not in ratings.index.values) or type(user_id) is not int:
print("User id should be a valid integer from this list :\n\n {} ".format(re.sub('[\[\]]', '', np.array_str(ratings_matrix.index.values))))
else:
ids = ['Item-based (correlation)','Item-based (cosine)','User-based (correlation)','User-based (cosine)']
select = widgets.Dropdown(options=ids, value=ids[0],description='Select approach', width='1000px')
def on_change(change):
clear_output(wait=True)
prediction = []
if change['type'] == 'change' and change['name'] == 'value':
if (select.value == 'Item-based (correlation)') | (select.value == 'User-based (correlation)') :
metric = 'correlation'
else:
metric = 'cosine'
with suppress_stdout():
if (select.value == 'Item-based (correlation)') | (select.value == 'Item-based (cosine)'):
for i in range(ratings.shape[1]):
if (ratings[str(ratings.columns[i])][user_id] !=0): #not rated already
prediction.append(predict_itembased(user_id, str(ratings.columns[i]) ,ratings, metric))
else:
prediction.append(-1) #for already rated items
else:
for i in range(ratings.shape[1]):
if (ratings[str(ratings.columns[i])][user_id] !=0): #not rated already
prediction.append(predict_userbased(user_id, str(ratings.columns[i]) ,ratings, metric))
else:
prediction.append(-1) #for already rated items
prediction = pd.Series(prediction)
prediction = prediction.sort_values(ascending=False)
recommended = prediction[:10]
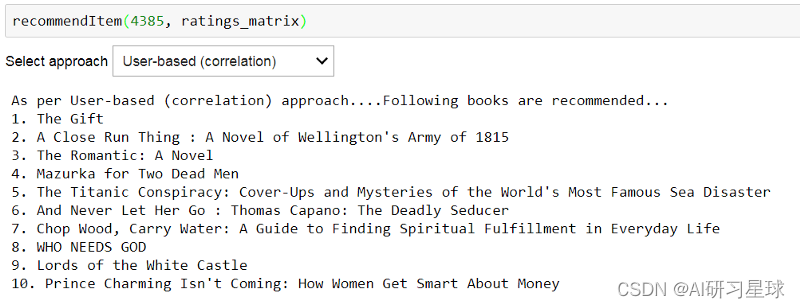
print("As per {0} approach....Following books are recommended...".format(select.value))
for i in range(len(recommended)):
print("{0}. {1}".format(i+1,books.bookTitle[recommended.index[i]].encode('utf-8')))
select.observe(on_change)
display(select)
而且Voila !!! 根据基于用户的CF方法,检查用户4385的前10本书籍建议。
recommendItem(4385,ratings_matrix)
6.2 基于项目的协同过滤
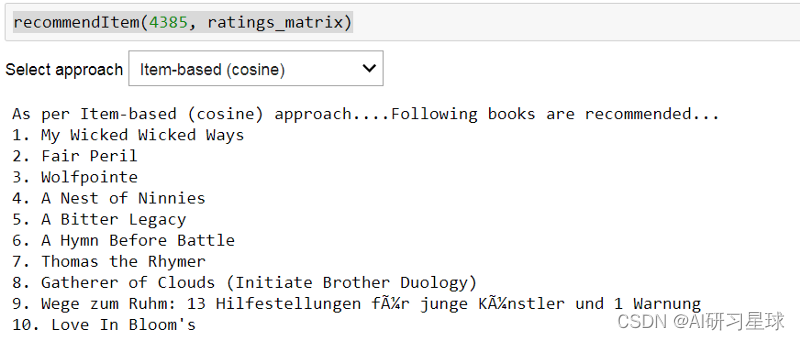
已经为基于项目的CF编写了类似的函数来查找类似的书籍并预测用户对每本书的评级。相同的功能recommendedItem可用于根据基于项目的方法和选定的指标推荐书籍。如果图书的预测评级大于或等于6,并且图书尚未评级,则会提出建议。
def findksimilaritems(item_id, ratings, metric=metric, k=k):
    similarities=[]
    indices=[]
    ratings=ratings.T
    loc = ratings.index.get_loc(item_id)
    model_knn = NearestNeighbors(metric = metric, algorithm = 'brute')
    model_knn.fit(ratings)

    distances, indices = model_knn.kneighbors(ratings.iloc[loc, :].values.reshape(1, -1), n_neighbors = k+1)
    similarities = 1-distances.flatten()

    return similarities,indices
def predict_itembased(user_id, item_id, ratings, metric = metric, k=k):
    prediction= wtd_sum =0
    user_loc = ratings.index.get_loc(user_id)
    item_loc = ratings.columns.get_loc(item_id)
    similarities, indices=findksimilaritems(item_id, ratings) #similar users based on correlation coefficients
    sum_wt = np.sum(similarities)-1
    product=1
    for i in range(0, len(indices.flatten())):
        if indices.flatten()[i] == item_loc:
            continue;
        else:
            product = ratings.iloc[user_loc,indices.flatten()[i]] * (similarities[i])
            wtd_sum = wtd_sum + product
    prediction = int(round(wtd_sum/sum_wt))

    #在非常稀疏的数据集的情况下,使用基于协作的方法的相关度量可能会给出负面的评价
    #在这里处理的是下面的//代码,没有下面的代码片段,下面的代码片段是为了避免负面影响
    #在使用相关度规时,可能会出现非常稀疏的数据集的预测
    if prediction <= 0:
        prediction = 1
    elif prediction >10:
        prediction = 10

    print ('用户预测等级 {0} -> item {1}: {2}'.format(user_id,item_id,prediction)    )

    return prediction
测试
prediction = predict_itembased(11676,'0001056107',ratings_matrix)
用户预测等级 11676 -> item 0001056107: 1
哇!!!根据基于项目的CF方法检查用户4385的前10本书籍建议。这些与基于用户的方法建议的显着不同。
recommendItem(4385,ratings_matrix)
关注公众号:『AI学习星球』
回复:基于协同过滤的图书推荐系统 即可获取数据下载。
论文辅导或算法学习可以通过公众号滴滴我