🌈🌈🌈今天给大家分享的是——阻塞队列的自定义实现,通过自定义实现一个阻塞队列,可以帮助我们更清晰、更透彻的理解阻塞队列的底层原理。
清风的CSDN博客
🛩️🛩️🛩️希望我的文章能对你有所帮助,有不足的地方还请各位看官多多指教,大家一起学习交流!🛩️🛩️🛩️
✈️✈️✈️动动你们发财的小手,点点关注点点赞!在此谢过啦!哈哈哈!✈️✈️✈️


目录
一、阻塞队列的作用
二、阻塞队列实现
2.1 普通队列实现
2.1.1 构造方法
2.1.2 入队列
2.1.3 出队列
2.2 阻塞队列实现
2.2.1 保证线程安全
2.2.2 保证内存可见性
2.2.3 阻塞功能的实现
三、基于自定义阻塞队列,模拟生产者消费者模型
一、阻塞队列的作用
一个分布式系统中,会经常出现这样的情况:有的机器能承担的压力更大,有的能承担的压力更小:
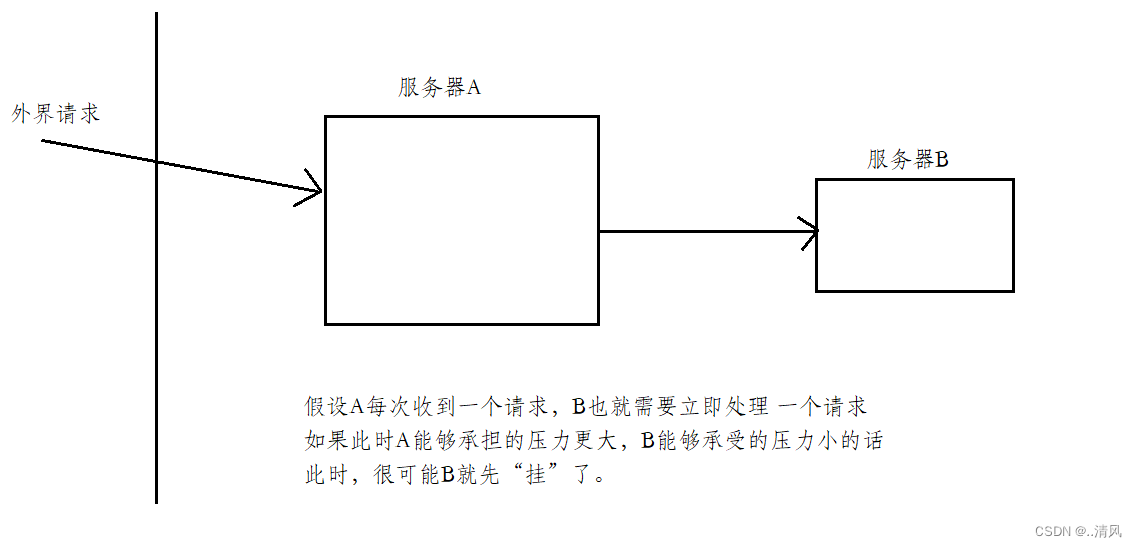 如果按照生产者消费者模型,那就另当别论了。
假设此时通过队列来让A和B进行交互:
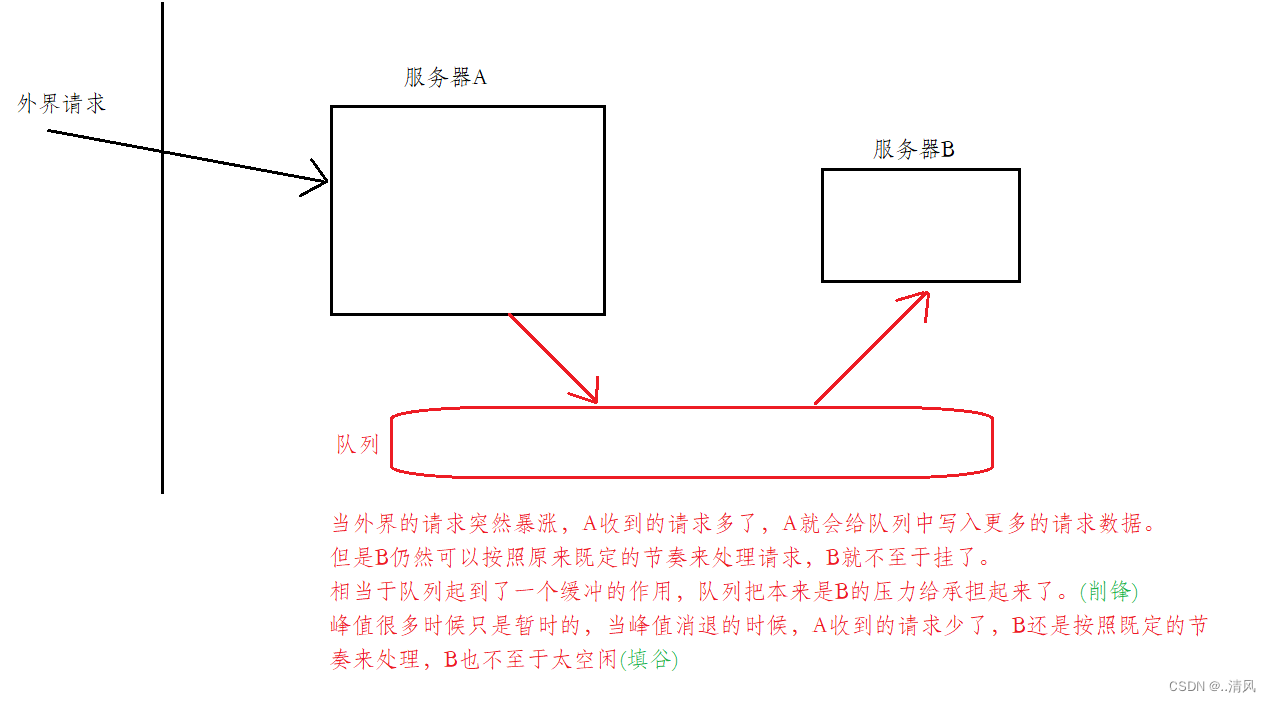
二、阻塞队列实现
2.1 普通队列实现
在实现阻塞队列之前,我们先把普通的队列(基于数组的循环队列)进行一个简单的实现,然后通过进一步的改进,把普通的队列改造成一个阻塞队列。
class MyBlockingQueue{
    private int[] items;

    private int head = 0;//队列头指针

    private int tail = 0;//队列尾指针

    private int size = 0;//队列当前元素个数

    public MyBlockingQueue(){}
    //入队列
    public void put(int elem){}

    //出队列
    public int take(){}

}
2.1.1 构造方法
 public MyBlockingQueue(){
        this.items = new int[100];
    }
2.1.2 入队列
   //入队列
    public void put(int elem){
        if (size >= items.length){
            return;
        }
        items[tail] = elem;
        if (tail >= items.length){//判断尾指针是否到达末尾
            tail = 0;
        }
        tail++;
        size++;
    }
2.1.3 出队列
    //出队列
    public int take(){
        if(size == 0){
            return -1;
        }
        int elem = items[head];
        if (head >= items.length){
            head = 0;
        }
        head++;
        size--;
        return elem;
    }
2.2 阻塞队列实现
现在,我们就把上面的队列改造成阻塞队列。
2.2.1 保证线程安全
在当前的代码下,如果是多线程的情况,调用put或者take,这两个方法中都涉及到了对变量的修改,这样就会出现线程安全问题。这就需要我们进行加锁。
    //入队列
    public void put(int elem){
        synchronized (this){
            if (size >= items.length){
                return;
            }
            items[tail] = elem;
            if (tail >= items.length){
                tail = 0;
            }
            tail++;
            size++;
        }
    }
//出队列
public int take(){
synchronized (this){
if(size == 0){
return -1;
}
int elem = items[head];
if (head >= items.length){
head = 0;
}
head++;
size--;
return elem;
}
}2.2.2 保证内存可见性
光加锁就够吗?我们可以看到,多线程的情况下,不光是对变量进行修改,还有读操作等等,那就有可能出现一个线程在读,另外一个线程在修改,这个读的线程没有读到。所以,此处除了加锁之外,还需要考虑内存可见性问题。也就是说,当其他线程进行修改的时候,我们要保证当前线程可以读到这个修改,所以我们把变量加上volatile关键字。
    volatile private int head = 0;
    volatile private int tail = 0;
    volatile private int size = 0;
2.2.3 阻塞功能的实现
解决了上述问题后,我们就需要考虑一下如何实现阻塞功能了。
实现阻塞有两方面:
- 当队列满的时候,再进行put(入队),就会产生阻塞。阻塞到队列中元素出队后,就去唤醒当前因队列满而被阻塞的状态。
- 当队列空的时候,再进行take(出队),就会产生阻塞。阻塞到队列中有元素入队时,去唤醒当前因队列空而被阻塞的状态。
    //入队列
    public void put(int elem) throws InterruptedException {
        synchronized (this){
            while (size >= items.length){
                //队列满了
                //return;
                this.wait();
            }
            items[tail] = elem;
            if (tail >= items.length){
                tail = 0;
            }
            tail++;
            size++;
            //成功入队
            this.notify();//唤醒因队列空而被阻塞的状态
        }
    }

    //出队列
    public int take() throws InterruptedException {
        synchronized (this){
            while (size == 0){
                //队列空
                //return -1;
                this.wait();
            }
            int elem = items[head];
            if (head >= items.length){
                head = 0;
            }
            head++;
            size--;
            this.notify();//使用这个notify唤醒队列满的阻塞状态
            return elem;
        }
    }

}
好了,经过上面的改进,我们就已经实现了一个简单的阻塞队列,下面是改进后的完整代码:
class MyBlockingQueue{
    private int[] items;
    volatile private int head = 0;
    volatile private int tail = 0;
    volatile private int size = 0;
    public MyBlockingQueue(){
        this.items = new int[100];
    }
    //入队列
    public void put(int elem) throws InterruptedException {
        synchronized (this){
            while (size >= items.length){
                //队列满了
                //return;
                this.wait();
            }
            items[tail] = elem;
            if (tail >= items.length){
                tail = 0;
            }
            tail++;
            size++;
            //成功入队
            this.notify();//唤醒因队列空而被阻塞的状态
        }
    }

    //出队列
    public int take() throws InterruptedException {
        synchronized (this){
            while (size == 0){
                //队列空
                //return -1;
                this.wait();
            }
            int elem = items[head];
            if (head >= items.length){
                head = 0;
            }
            head++;
            size--;
            this.notify();//使用这个notify唤醒队列满的阻塞状态
            return elem;
        }
    }

}
三、基于自定义阻塞队列,模拟生产者消费者模型
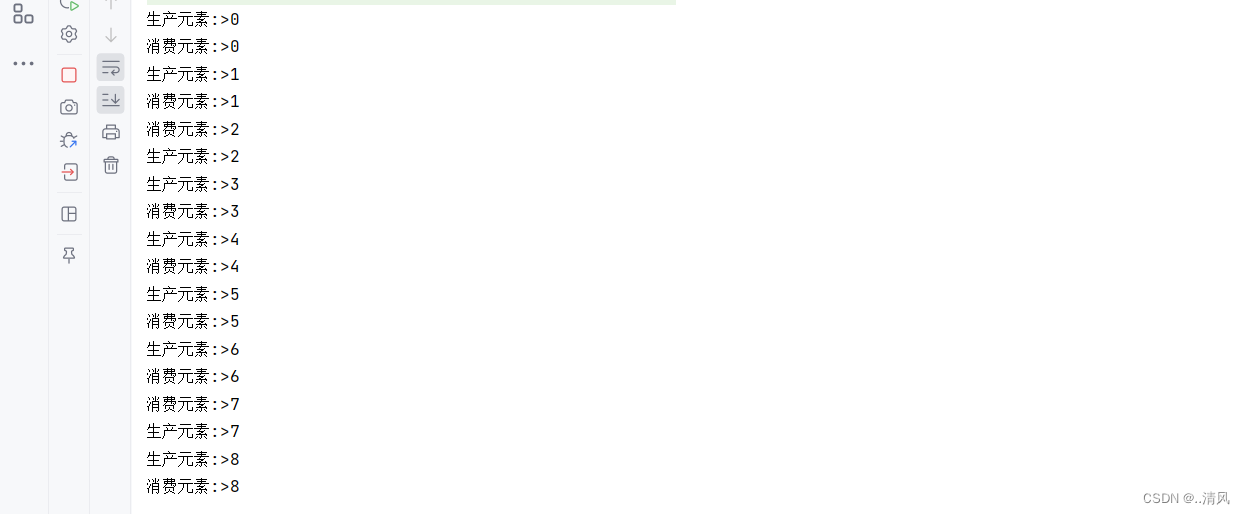
实现阻塞队列之后,我们利用阻塞队列简单模拟一下生产者消费者模型:
    public static void main(String[] args) {
        MyBlockingQueue queue = new MyBlockingQueue();
        //生产者线程
        Thread product = new Thread(()->{
            int count = 0;
            while (true){
                try {
                    queue.put(count);
                    System.out.println("生产元素:>"+count);
                    count++;
                    Thread.sleep(1000);
                } catch (InterruptedException e) {
                    e.printStackTrace();
                }
            }
        });
        //消费者线程
        Thread consummer = new Thread(()->{
            while (true){
                try {
                    int elem = queue.take();
                    System.out.println("消费元素:>"+elem);
                } catch (InterruptedException e) {
                    e.printStackTrace();
                }
            }
        });
        product.start();
        consummer.start();
    }
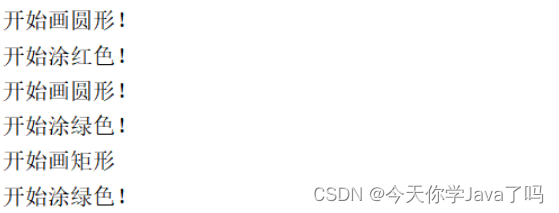
运行结果:
🌈🌈🌈好啦,今天的分享就到这里!
🛩️🛩️🛩️希望各位看官读完文章后,能够有所提升。
🎉🎉🎉创作不易,还希望各位大佬支持一下!
✈️✈️✈️点赞,你的认可是我创作的动力!
⭐⭐⭐收藏,你的青睐是我努力的方向!
✏️✏️✏️评论:你的意见是我进步的财富!


