1、OSG光照
OSG 全面支持 OpenGL 的光照特性,包括材质属性(material property)、光照属性(light property)和光照模型(lighting model)。与 OpenGL 相似,OSG 中的光源也是不可见的,而非渲染一个灯泡或其他自然形状。同样,光源会创建着色效果,但并不创建阴影,osgShadow 可以用来创建阴影。
1.1 osg::Light 类
OSG 将 OpenGL 中的 glLight()作了一个 light 状态的类封装,用于保存灯光的模式与属性参数信息。osg::Light 类派生自 osg::StateAttribute 类,继承了对模式与属性参数信息的操作接口。在 osg::light 类中通过 apply(State&state)函数将灯光的状态参数信息应用到 OpenGL 的状态机中。
osg::Light 类包括的属性参数如下:
int _lightnum; //灯光数量
Vec4 _ambient; //环境光颜色
Vec4 _diffuse; //漫射光颜色
Vec4 _specular; //镜面光颜色
Vec4 _position; //光源的位置信息
Vec3 _direction; //光源的方向
float _constant_attenuation; //常量衰减
float _linear_attenuation; //线性衰减
float _quadratic_attenuation;//二次方衰减
float _spot_exponent; //指数衰减
float _spot_cutoff; //关闭衰减(spread)
上面的参数应该都比较容易理解。OSG 支持最多 8 个光源,即 GL_LIGHT0~GL_LIGHT7,这与OpenGL 版本也有关系。
1.2 osg::LightSource 类
osg::LightSource 类直接继承自 osg::Group。作为一个灯光管理类,继承了 osg::Group 类的管理节点的接口;将灯光作为一个节点可以加入到场景图中进行渲染。
osg::LightSource 类中的成员函数为:
void setReferenceFrame (ReferenceFrame rf)//设置帧引用
帧引用包括如下两个枚举变量:
enum ReferenceFrame
{
RELATIVE_RF, //相对帧引用
ABSOLUTE_RF //绝对帧引用
};
设置光源的引用帧时,不是相对于父节点的帧引用,就是相对于绝对坐标的帧,默认的设置为RELATIVE_RF,设置帧引用为 RELATIVE_RF 同样会设置 CullingActive 的标志量为(ON)状态,并且对它的父节点也起作用;否则,对它与它所有的父节点都禁用拣选(Culling),对防止不合适的拣选是必需的,如果绝对光源在场景图的深处将会对拣选的时间有影响,因此,推荐在场景的顶部使用绝对的光源。
1.3 场景中使用光源
在一个场景中添加光源主要包括以下步骤:
(1)指定场景模型的法线。
(2)允许光照并设置光照状态。
(3)指定光源属性并关联到场景图形。
对于场景中的模型,只有当其中设有单位法线时才会正确地显示光照。当场景中的模型没有指定法线时,可以用前面讲到的 osgUtil::SmoothingVisitor 自动生成法线。需要注意的是,法向量必须单位化。有时场景中的模型虽然指定了单位法向量,但是光照的计算结果过于明亮或过于暗淡(可能是缩放变换造成的),这时最有效的解决方案是在 StateSet 中允许法线的重放缩模式,代码如下:
osg::StateSet*state = geode->setOrCreateStateSet();
state->setMode(GL_RESCALE_NORMAL, osg::StateAttribute::ON);
与在 OpenGL 中相同,这一特性可以保证法线在均匀放缩变换时仍然保持单位长度。如果场景中的放缩变换是非均匀的,那么读者可以允许法线归一化模式,以保证法线为单位长度。由于要进行法线的重新放缩,归一化模式往往会耗费大量的时间,编程时要尽量避免。归一化模式的代码如下:
osg::StateSet*state = geode->setOrCreateStateSet();
state->setMode(GL_NORMALIZE, osg::StateAttribute::ON);
要在 OSG 中获得光照效果,需要允许光照并至少允许一个光源。程序 osgviewer 在默认情况下就是这样做的,它在根节点的 StateSet 中已经设置了相应的模式。读者可以在自己的程序中进行相同的设置。下面的代码段用于允许光照并为根节点的 StateSet 允许两个光源(GL_LIGHT0 和 GL_LIGHT1):
osg::StateSet*state = root->getOrCreateStateSet();
state->setMode(GL_LIGHTING, osg::StateAttribute::ON);
state->setMode(GL_LIGHT0, osg::StateAttribute::ON);
state->setMode(GL_LIGHT1, osg::StateAttribute::ON);
在场景中添加一个光源,可以创建一个 osg::Light 对象以定义光源参数,然后将 osg::Light 添加到一个 osg::LightSource 节点中,并将 LightSource 节点添加到场景图形。osg::LightSource 是一个包含了唯一的 Light 定义的高效的组节点,而由 osg::Light 定义的光源将对整个场景产生影响。下面的代码实现将 osg::Light 添加到 osg::LightSource 对象中:
osg::ref_ptr<osg::LightSource> ls = new osg::LightSource;
ls->setLight(light.get());
在实际生活中,当光照照射到物体上时都会反射等现象,所以,在对光源的设置完成以后需要设置模型的表面材质,下面先看看关于光照的两个示例。
1.4 简单光源示例

#include <windows.h>
#include <osgViewer/Viewer>
#include <osg/Vec3>
#include <osg/Vec4>
#include <osg/Quat>
#include <osg/Matrix>
#include <osg/ShapeDrawable>
#include <osg/Geometry>
#include <osg/Geode>
#include <osg/Notify>
#include <osg/MatrixTransform>
#include <osg/Texture3D>
#include <osg/Stencil>
#include <osg/ColorMask>
#include <osg/GLExtensions>
#include <osg/Depth>
#include <osg/AnimationPath>
#include <osg/Transform>
#include <osg/Material>
#include <osg/NodeCallback>
#include <osg/Depth>
#include <osg/CullFace>
#include <osg/TexMat>
#include <osg/TexGen>
#include <osg/TexEnv>
#include <osg/TextureCubeMap>
#include <osgViewer/ViewerEventHandlers> //事件监听
#include <osgGA/StateSetManipulator> //事件响应类,对渲染状态进行控制
#include <osgUtil/Simplifier> //简化几何体
#include <osgDB/WriteFile>
#include <osgDB/ReadFile>
#include <osg/Camera>
#include <osg/Light>
#include <osg/LightSource>
#include <osg/BoundingSphere>
#include <osg/BoundingBox>
#include <osgUtil/Optimizer>

#include <iostream>

#pragma comment(lib, "OpenThreadsd.lib")
#pragma comment(lib, "osgd.lib")
#pragma comment(lib, "osgDBd.lib")
#pragma comment(lib, "osgUtild.lib")
#pragma comment(lib, "osgGAd.lib")
#pragma comment(lib, "osgViewerd.lib")
#pragma comment(lib, "osgTextd.lib")

//向场景中添加光源
osg::ref_ptr<osg::Group> createLight(osg::ref_ptr<osg::Node> node)
{
	osg::ref_ptr<osg::Group> lightRoot = new osg::Group();
	lightRoot->addChild(node);

	//开启光照
	osg::ref_ptr<osg::StateSet> stateset = new osg::StateSet();
	stateset = lightRoot->getOrCreateStateSet();
	stateset->setMode(GL_LIGHTING, osg::StateAttribute::ON);
	stateset->setMode(GL_LIGHT0, osg::StateAttribute::ON);

	//计算包围盒
	osg::BoundingSphere bs;
	node->computeBound();
	bs = node->getBound();

	//创建一个Light对象
	osg::ref_ptr<osg::Light> light = new osg::Light();
	light->setLightNum(0);

	//设置方向
	light->setDirection(osg::Vec3(0.0f, 0.0f, 1.0f));

	//设置位置
	light->setPosition(osg::Vec4(bs.center().x(), bs.center().y(), bs.center().z() + bs.radius(), 1.0f));

	//设置环境光的颜色
	light->setAmbient(osg::Vec4(0.0f, 1.0f, 0.0f, 1.0f));

	//设置散射光的颜色
	light->setDiffuse(osg::Vec4(1.0f, 0.0f, 0.0f, 1.0f));

	//设置恒衰减指数
	light->setConstantAttenuation(1.0f);

	//设置线形衰减指数
	light->setLinearAttenuation(0.0f);

	//设置二次方衰减指数
	light->setQuadraticAttenuation(0.0f);

	//创建光源
	osg::ref_ptr<osg::LightSource> lightSource = new osg::LightSource();
	lightSource->setLight(light.get());

	lightRoot->addChild(lightSource.get());

	return lightRoot.get();
}

int main()
{
	osg::ref_ptr<osgViewer::Viewer> viewer = new osgViewer::Viewer();

	osg::ref_ptr<osg::Group> root = new osg::Group();

	//读取模型
	osg::ref_ptr<osg::Node> node = osgDB::readNodeFile("cessna.osgt");

	//向场景中添加光源
	root->addChild(createLight(node.get()));

	//优化场景数据
	osgUtil::Optimizer optimzer;
	optimzer.optimize(root.get());

	//方便查看在多边形之间切换,以查看三角网
	viewer->addEventHandler(new osgGA::StateSetManipulator(viewer->getCamera()->getOrCreateStateSet()));
	viewer->addEventHandler(new osgViewer::StatsHandler());
	viewer->addEventHandler(new osgViewer::WindowSizeHandler());
	viewer->setSceneData(root.get());
	viewer->setUpViewInWindow(600, 600, 800, 600);

	return viewer->run();
}
1.5 聚光灯示例

#include <windows.h>
#include <osgViewer/Viewer>
#include <osg/Vec3>
#include <osg/Vec4>
#include <osg/Quat>
#include <osg/Matrix>
#include <osg/ShapeDrawable>
#include <osg/Geometry>
#include <osg/Geode>
#include <osg/Notify>
#include <osg/MatrixTransform>
#include <osg/Texture3D>
#include <osg/Stencil>
#include <osg/ColorMask>
#include <osg/GLExtensions>
#include <osg/Depth>
#include <osg/AnimationPath>
#include <osg/Transform>
#include <osg/Material>
#include <osg/NodeCallback>
#include <osg/Depth>
#include <osg/CullFace>
#include <osg/TexMat>
#include <osg/TexGen>
#include <osg/TexEnv>
#include <osg/TextureCubeMap>
#include <osgViewer/ViewerEventHandlers> //事件监听
#include <osgGA/StateSetManipulator> //事件响应类,对渲染状态进行控制
#include <osgUtil/Simplifier> //简化几何体
#include <osgDB/WriteFile>
#include <osgDB/ReadFile>
#include <osg/Camera>
#include <osg/Light>
#include <osg/LightSource>
#include <osg/BoundingSphere>
#include <osg/BoundingBox>
#include <osgUtil/Optimizer>
#include <osg/TexGenNode>
#include <osgUtil/DelaunayTriangulator>
#include <iostream>
#include <osg/Material>
#include <osg/CullFace>

#pragma comment(lib, "OpenThreadsd.lib")
#pragma comment(lib, "osgd.lib")
#pragma comment(lib, "osgDBd.lib")
#pragma comment(lib, "osgUtild.lib")
#pragma comment(lib, "osgGAd.lib")
#pragma comment(lib, "osgViewerd.lib")
#pragma comment(lib, "osgTextd.lib")

/*
 *创建聚光灯纹理贴图
 *创建聚光灯状态属性(前面的纹理贴图也是渲染状态属性之一)
 *创建聚光灯节点
 *创建路径动画
 *创建地形平面(变量vertex报错,注释掉这个类,在场景中将之直接设置为模型牛)
 *创建动画模型(路径为前面设置好的路径动画),将聚光灯节点添加添加到其中,则聚光灯是动态的(飞机)
 *创建场景:创建动画模型和地形平面(地形平面出错,此处设为飞机),动画模型为聚光灯位置,地形平面(牛)为聚光灯照射的地方;将状态属性添加到组节点
 *则飞机飞到哪个地方(即聚光灯在哪里),牛的哪个地方就照亮
*/
//创建聚光灯纹理的mipmap贴图
osg::ref_ptr<osg::Image> createSpotLightImage(const osg::Vec4 centerColour, const osg::Vec4& backgroudColour, unsigned int size, float power)
{
	//创建Image对象
	osg::ref_ptr<osg::Image> image = new osg::Image();
	//动态分配一个size*size大小的image
	image->allocateImage(size, size, 1, GL_RGBA, GL_UNSIGNED_BYTE);
	//填充image
	//以中心为原点,颜色逐渐向四周衰减
	float mid = (float(size) - 1) * 0.5f;
	float div = 2.0f / float(size);
	for (unsigned int r = 0; r < size; ++r)
	{
		unsigned char* ptr = image->data(0, r, 0);
		for (unsigned int c = 0; c < size; ++c)
		{
			float dx = (float(c) - mid) * div;
			float dy = (float(r) - mid) * div;
			float r = powf(1.0f - sqrtf(dx * dx + dy * dy), power);
			if (r < 0.0f)
				r = 0.0f;
			osg::Vec4 color = centerColour * r + backgroudColour * (1.0f - r);
			*ptr++ = (unsigned char)((color[0]) * 255.0f);
			*ptr++ = (unsigned char)((color[1]) * 255.0f);
			*ptr++ = (unsigned char)((color[2]) * 255.0f);
			*ptr++ = (unsigned char)((color[3]) * 255.0f);
		}
	}
	return image.release();
}

//创建聚光灯状态属性
osg::ref_ptr<osg::StateSet> createSpotLightDecoratorState(unsigned int lightNum, unsigned int textureUnit)
{
	//设置中心的颜色和环境光的颜色
	osg::Vec4 centerColour(1.0f, 1.0f, 1.0f, 1.0f);
	osg::Vec4 ambientColour(0.5f, 0.5f, 0.5f, 1.0f);
	//创建聚光灯纹理
	osg::ref_ptr<osg::Texture2D> texture = new osg::Texture2D();
	texture->setImage(createSpotLightImage(centerColour, ambientColour, 64, 1.0));
	texture->setBorderColor(osg::Vec4(ambientColour));
	texture->setWrap(osg::Texture::WRAP_S, osg::Texture::CLAMP_TO_BORDER);
	texture->setWrap(osg::Texture::WRAP_T, osg::Texture::CLAMP_TO_BORDER);
	texture->setWrap(osg::Texture::WRAP_R, osg::Texture::CLAMP_TO_BORDER);
	osg::ref_ptr<osg::StateSet> stateset = new osg::StateSet();
	//开启ID为lightNum的光照
	stateset->setMode(GL_LIGHT0 + lightNum, osg::StateAttribute::ON);
	//设置自动生成纹理坐标
	stateset->setTextureMode(textureUnit, GL_TEXTURE_GEN_S, osg::StateAttribute::ON);
	stateset->setTextureMode(textureUnit, GL_TEXTURE_GEN_T, osg::StateAttribute::ON);
	stateset->setTextureMode(textureUnit, GL_TEXTURE_GEN_R, osg::StateAttribute::ON);
	stateset->setTextureMode(textureUnit, GL_TEXTURE_GEN_Q, osg::StateAttribute::ON);
	//打开纹理单元
	stateset->setTextureAttributeAndModes(textureUnit, texture.get(), osg::StateAttribute::ON);
	return stateset.release();
}

//创建聚光灯节点
osg::ref_ptr<osg::Node> createSpotLightNode(const osg::Vec3& position, const osg::Vec3& direction, float angle, unsigned int lightNum, unsigned int textureUnit)
{
	//创建光源
	osg::ref_ptr<osg::LightSource> lightsource = new osg::LightSource();
	osg::ref_ptr<osg::Light> light = lightsource->getLight();
	light->setLightNum(lightNum);
	light->setPosition(osg::Vec4(position, 1.0f));
	light->setAmbient(osg::Vec4(0.00f, 0.00f, 0.05f, 1.0f));
	light->setDiffuse(osg::Vec4(1.0f, 1.0f, 1.0f, 1.0f));
	//计算法向量
	osg::Vec3 up(0.0f, 0.0f, 1.0f);
	up = (direction ^ up) ^ direction;
	up.normalize();
	//创建自动生成纹理坐标节点
	osg::ref_ptr<osg::TexGenNode> texgenNode = new osg::TexGenNode();
	//关联纹理单元
	texgenNode->setTextureUnit(textureUnit);
	//设置纹理坐标生成器
	osg::ref_ptr<osg::TexGen> texgen = texgenNode->getTexGen();
	//设置模式为视觉线性
	texgen->setMode(osg::TexGen::EYE_LINEAR);
	//从视图中指定参考平面
	texgen->setPlanesFromMatrix(osg::Matrixd::lookAt(position, position + direction, up) * osg::Matrixd::perspective(angle, 1.0, 0.1, 100));
	osg::ref_ptr<osg::Group> group = new osg::Group();
	group->addChild(lightsource);
	group->addChild(texgenNode.get());
	return group.release();
}
//创建动画路径
osg::ref_ptr<osg::AnimationPath> createAnimationPath(const osg::Vec3 center, float radius, double looptime)
{
	osg::ref_ptr<osg::AnimationPath> animationPath = new osg::AnimationPath();
	animationPath->setLoopMode(osg::AnimationPath::LOOP);
	int numSamples = 40;
	float yaw = 0.0f;
	float yaw_delta = 2.0f * osg::PI / ((float)numSamples - 1.0f);
	float roll = osg::inDegrees(30.0f);
	double time = 0.0f;
	double time_delta = looptime / (double)numSamples;
	for (int i = 0; i < numSamples; ++i)
	{
		osg::Vec3 position(center + osg::Vec3(sinf(yaw) * radius, cosf(yaw) * radius, 0.0f));
		osg::Quat rotation(osg::Quat(roll, osg::Vec3(0.0, 1.0, 0.0)) * osg::Quat(-(yaw + osg::inDegrees(90.0f)), osg::Vec3(0.0, 0.0, 1.0)));
		animationPath->insert(time, osg::AnimationPath::ControlPoint(position, rotation));
		yaw += yaw_delta;
		time += time_delta;
	}
	return animationPath.release();
}

//创建动画模型
osg::ref_ptr<osg::Node> createMovingModel(const osg::Vec3 center, float radius)
{
	osg::ref_ptr<osg::Group> model = new osg::Group();
	osg::ref_ptr<osg::Node> cessna = osgDB::readNodeFile("cessna.osg");
	if (cessna.get())
	{
		const osg::BoundingSphere& bs = cessna->getBound();
		float size = radius / bs.radius() * 0.3f;
		osg::ref_ptr<osg::MatrixTransform> positioned = new osg::MatrixTransform();
		positioned->setDataVariance(osg::Object::STATIC);
		positioned->setMatrix(osg::Matrix::translate(-bs.center()) * osg::Matrix::scale(size, size, size) * osg::Matrix::rotate(osg::inDegrees(180.0f), 0.0f, 0.0f, 2.0f));
		positioned->addChild(cessna.get());
		float animationLength = 10.0f;
		osg::ref_ptr<osg::AnimationPath> animationPath = createAnimationPath(center, radius, animationLength);
		osg::ref_ptr<osg::MatrixTransform> xform = new osg::MatrixTransform();
		xform->setUpdateCallback(new osg::AnimationPathCallback(animationPath, 0.0f, 2.0));
		xform->addChild(positioned);
		//添加聚光灯节点
		xform->addChild(createSpotLightNode(osg::Vec3(0.0f, 0.0f, 0.0f), osg::Vec3(0.0f, 1.0f, -1.0f), 60.0f, 0, 1));
		model->addChild(xform.get());
	}
	return model.release();
}

//创建地形平面
osg::ref_ptr<osg::Node> createBase()
{
	//创建顶点数组
	osg::ref_ptr<osg::Vec3Array> coords = new osg::Vec3Array();
	//添加顶点数据
	int nMin = -5;
	int nMax = 10;
	for (int i = -100; i < 100; i += 10)
	{
		if (i > -100 && i < 0)
		{
			nMin = -6;
			nMax = 3;
		}
		else if (i > 0 && i < 50)
		{
			nMin = -3;
			nMax = 7;
		}
		else if (i > 50 && i < 100)
		{
			nMin = 5;
			nMax = 3;
		}

		for (int j = -100; j < 100; j += 10)
		{
			float nZ = (float)(nMin, nMax) / 2;
			osg::Vec3 vertex(i, j, nZ);
			coords->push_back(vertex);
		}
	}

	//创建颜色数组
	osg::ref_ptr<osg::Vec4Array> color = new osg::Vec4Array();
	//添加颜色数据
	for (unsigned int i = 0; i < 400; i++)
	{
		int nR = rand() % 10 + 2;
		color->push_back(osg::Vec4(0.0f, (double)nR / 10.0, 0.0f, 0.5f));
	}

	//创建Delaunay三角网对象
	osg::ref_ptr<osgUtil::DelaunayTriangulator> dt = new osgUtil::DelaunayTriangulator(coords.get());
	//生成三角网
	dt->triangulate();

	//创建几何体
	osg::ref_ptr<osg::Geometry> pGeometry = new osg::Geometry();

	//设置顶点数组
	pGeometry->setVertexArray(coords.get());

	osg::ref_ptr<osg::Image> sImagePath = osgDB::readImageFile("Terrain.png");
	if (sImagePath.get())
	{
		osg::ref_ptr<osg::Texture2D> texture2D = new osg::Texture2D;
		texture2D->setImage(sImagePath.get());

		// 绑定纹理后,释放内部的ref_ptr<Image>,删除image图像
		texture2D->setUnRefImageDataAfterApply(true);

		// 建立纹理顶点
		osg::ref_ptr<osg::Vec2Array> pVec2Array = new osg::Vec2Array;
		for (int i = -100; i < 100; i += 10)
		{
			for (int j = -100; j < 100; j += 10)
			{
				osg::Vec2 textCoord(0.0, 0.0);
				textCoord.x() = (double)(j + 100.0) / 200.0;
				textCoord.y() = (double)(i + 100.0) / 200.0;
				pVec2Array->push_back(textCoord);
			}
		}

		// Texture类关联到渲染状态StateSet
		osg::ref_ptr<osg::StateSet> pStateSet = pGeometry->getOrCreateStateSet();

		// 将纹理关联给StateSet纹理单元0、osg::StateAttribute::OFF关闭纹理
		pStateSet->setTextureAttributeAndModes(0, texture2D.get(), osg::StateAttribute::ON);

		pGeometry->setTexCoordArray(0, pVec2Array.get());

		// 建立法线数组normal
		osg::ref_ptr<osg::Vec3Array> pVec3ArrayNormal = new osg::Vec3Array;
		pGeometry->setNormalArray(pVec3ArrayNormal.get());
		pGeometry->setNormalBinding(osg::Geometry::BIND_OVERALL);

		//垂直于Z轴负方向
		pVec3ArrayNormal->push_back(osg::Vec3(0.0, 0.0, 1.0));
		pGeometry->setStateSet(pStateSet);
	}
	else
	{
		//设置颜色数组
		pGeometry->setColorArray(color.get());

		//设置颜色的绑定方式为单个顶点
		pGeometry->setColorBinding(osg::Geometry::BIND_PER_VERTEX);
	}

	//添加到绘图基元
	pGeometry->addPrimitiveSet(dt->getTriangles());

	osg::ref_ptr <osg::Geode> pGNode = new osg::Geode;

	pGNode->addChild(pGeometry);

	return pGNode.release();

}


//创建场景
osg::ref_ptr<osg::Node> createModel()
{
	osg::Vec3 center(0.0f, 0.0f, 0.0f);
	float radius = 60.0f;
	//创建动画模型
	osg::ref_ptr<osg::Node> shadower = createMovingModel(center, radius * 0.5f);
	//创建地形平面
	osg::ref_ptr<osg::Node> shadowed = osgDB::readNodeFile("cow.osg");
	//osg::ref_ptr<osg::Node> shadowed = createBase(center - osg::Vec3(0.0f, 0.0f, radius * 0.1), radius);
	//创建场景组节点
	osg::ref_ptr<osg::Group> root = new osg::Group();
	//设置状态属性
	root->setStateSet(createSpotLightDecoratorState(0, 1));
	//添加子节点
	root->addChild(shadower.get());
	root->addChild(shadowed.get());
	return root.release();
}

int main()
{
	osg::ref_ptr<osgViewer::Viewer> viewer = new osgViewer::Viewer();

	osg::ref_ptr<osg::Group> root = new osg::Group();

	//添加场景
	root->addChild(createModel());

	//优化场景数据
	osgUtil::Optimizer optimzer;
	optimzer.optimize(root.get());

	//方便查看在多边形之间切换,以查看三角网
	viewer->addEventHandler(new osgGA::StateSetManipulator(viewer->getCamera()->getOrCreateStateSet()));
	viewer->addEventHandler(new osgViewer::StatsHandler());
	viewer->addEventHandler(new osgViewer::WindowSizeHandler());
	viewer->setSceneData(root.get());
	viewer->setUpViewInWindow(600, 600, 800, 600);

	return viewer->run();
	return 0;
}
2、OSG材质
2.1 材质类
OSG 材质类(osg::Material)继承自 osg::StateAttribute 类。osg::Material 封装了 OpenGL 的 glMaterial()和 glColorMaterial()指令的函数功能。
在场景中设置节点的材质属性,首先要创建一个 osg::Material 对象,然后设置颜色和其他参数,再关联到场景图形的 StateSet 中,如下面的代码:
osg::StateSet* state = node->getOrCreateStateSet();
osg::ref_ptr<osg::Material> mat = new osg::Material;
state->setAttribute( mat.get() );
osg::Material 类包含的主要属性如下:
bool _ambientFrontAndBack; //前面与后面的环境光
Vec4 _ambientFront; //前面的环境光, r、g、b、w
Vec4 _ambientBack; //后面的环境光,r、g、b、w
bool _diffuseFrontAndBack; //前面与后面的漫射光
Vec4 _diffuseFront; //前面的漫射光,r、g、b、w
Vec4 _diffuseBack; //后面的漫射光,r、g、b、w
bool _specularFrontAndBack; //前面与后面的镜面光
Vec4 _specularFront; //前面的镜面光,r、g、b、w
Vec4 _specularBack; //后面的镜面光,r、g、b、w
bool _emissionFrontAndBack; //前面与后面的发射光(emission)
Vec4 _emissionFront; //前面的 emission,r、g、b、w
Vec4 _emissionBack; //后面的 emission,r、g、b、w
bool _shininessFrontAndBack; //前面与后面的发光(shininess)
float _shininessFront; //前面的 shininess
float _shininessBack; //后面的 shininess
注意:shininess 是一个在 0~128.0 之间的值,值越大,亮点越小、越亮。
OSG 材质的面如下:
enum Face
{
FRONT = GL_FRONT, //前
BACK = GL_BACK, //后
FRONT_AND_BACK = GL_FRONT_AND_BACK //前、后
};
OSG 材质的颜色模式如下:
enum ColorMode
{
AMBIENT = GL_AMBIENT, //环境光颜色
DIFFUSE = GL_DIFFUSE, //漫射光颜色
SPECULAR = GL_SPECULAR, //镜面光颜色
EMISSION = GL_EMISSION, //发射光颜色
AMBIENT_AND_DIFFUSE = GL_AMBIENT_AND_DIFFUSE, //环境与漫射光颜色
OFF //关闭模式
};
在进行很多 OpenGL 的操作时,直接设置材质属性可能会过于耗费资源,而 OSG 提供了一种颜色跟踪材质的高效方法,操作比直接修改材质属性的效率更高,颜色跟踪材质(color material)允许用户程序通过改变当前颜色的方法,自动改变某一特定的材质属性。在许多情形下,这一操作比直接修改材质属性的效率要高,能加强光照场景和无光照场景的联系,并满足应用程序对材质的需要。
允许颜色跟踪材质的特性需要调用 setColorMode()方法。osg::Material 类为之定义了枚举量AMBIENT、DIFFUSE、SPECULAR、EMISSION、AMBIENT_AND_DIFFUSE 以及 OFF。默认情况下,颜色跟踪模式被设置为 OFF,颜色跟踪材质被禁止。如果用户程序设置颜色跟踪模式为其他的值,那么 OSG 将为特定的材质属性开启颜色跟踪材质特性,此时主颜色的改变将会改变相应的材质属性。
注意:根据颜色跟踪模式的取值不同,Material 类会自动允许或禁止GL_COLOR_MATERIAL。因此,用户程序不需要调用 setAttributeAndModes()来允许或禁止相关的模式值。
2.2 材质类示例
#include <windows.h>
#include <osgViewer/Viewer>
#include <osg/Vec3>
#include <osg/Vec4>
#include <osg/Quat>
#include <osg/Matrix>
#include <osg/ShapeDrawable>
#include <osg/Geometry>
#include <osg/Geode>
#include <osg/Notify>
#include <osg/MatrixTransform>
#include <osg/Texture3D>
#include <osg/Stencil>
#include <osg/ColorMask>
#include <osg/GLExtensions>
#include <osg/Depth>
#include <osg/AnimationPath>
#include <osg/Transform>
#include <osg/Material>
#include <osg/NodeCallback>
#include <osg/Depth>
#include <osg/CullFace>
#include <osg/TexMat>
#include <osg/TexGen>
#include <osg/TexEnv>
#include <osg/TextureCubeMap>
#include <osgViewer/ViewerEventHandlers> //事件监听
#include <osgGA/StateSetManipulator> //事件响应类,对渲染状态进行控制
#include <osgUtil/Simplifier> //简化几何体
#include <osgDB/WriteFile>
#include <osgDB/ReadFile>
#include <osg/Camera>
#include <osg/Light>
#include <osg/LightSource>
#include <osg/BoundingSphere>
#include <osg/BoundingBox>
#include <osgUtil/Optimizer>
#include <osg/TexGenNode>
#include <osgUtil/DelaunayTriangulator>
#include <iostream>
#include <osg/Material>
#include <osg/CullFace>
#pragma comment(lib, "OpenThreadsd.lib")
#pragma comment(lib, "osgd.lib")
#pragma comment(lib, "osgDBd.lib")
#pragma comment(lib, "osgUtild.lib")
#pragma comment(lib, "osgGAd.lib")
#pragma comment(lib, "osgViewerd.lib")
#pragma comment(lib, "osgTextd.lib")
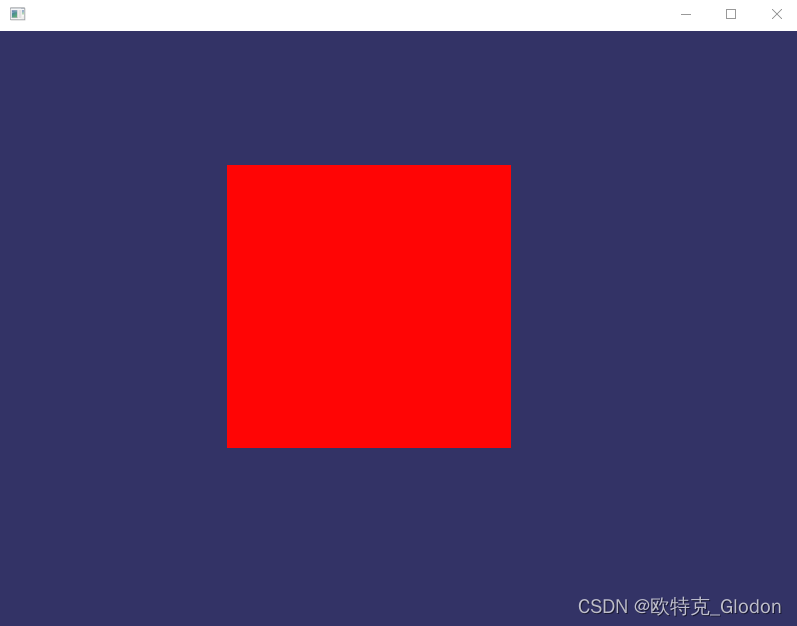
//创建一个四边形节点
osg::ref_ptr<osg::Node> createNode()
{
osg::ref_ptr<osg::Geode> geode = new osg::Geode();
osg::ref_ptr<osg::Geometry> geom = new osg::Geometry();
//设置顶点
osg::ref_ptr<osg::Vec3Array> vc = new osg::Vec3Array();
vc->push_back(osg::Vec3(0.0f, 0.0f, 0.0f));
vc->push_back(osg::Vec3(1.0f, 0.0f, 0.0f));
vc->push_back(osg::Vec3(1.0f, 0.0f, 1.0f));
vc->push_back(osg::Vec3(0.0f, 0.0f, 1.0f));
geom->setVertexArray(vc.get());
//设置纹理坐标
osg::ref_ptr<osg::Vec2Array> vt = new osg::Vec2Array();
vt->push_back(osg::Vec2(0.0f, 0.0f));
vt->push_back(osg::Vec2(1.0f, 0.0f));
vt->push_back(osg::Vec2(1.0f, 1.0f));
vt->push_back(osg::Vec2(0.0f, 1.0f));
geom->setTexCoordArray(0, vt.get());
//设置法线
osg::ref_ptr<osg::Vec3Array> nc = new osg::Vec3Array();
nc->push_back(osg::Vec3(0.0f, -1.0f, 0.0f));
geom->setNormalArray(nc.get());
geom->setNormalBinding(osg::Geometry::BIND_OVERALL);
//添加图元
geom->addPrimitiveSet(new osg::DrawArrays(osg::PrimitiveSet::QUADS, 0, 4));
//绘制
geode->addDrawable(geom.get());
return geode.get();
}
int main()
{
osg::ref_ptr<osgViewer::Viewer> viewer = new osgViewer::Viewer();
osg::ref_ptr<osg::Group> root = new osg::Group();
osg::ref_ptr<osg::Node> node = createNode();
//得到状态属性
osg::ref_ptr<osg::StateSet> stateset = new osg::StateSet();
stateset = node->getOrCreateStateSet();
//创建材质对象
osg::ref_ptr<osg::Material> mat = new osg::Material();
//设置正面散射颜色
mat->setDiffuse(osg::Material::FRONT, osg::Vec4(1.0f, 0.0f, 0.0f, 1.0f));
//设置正面镜面颜色
mat->setSpecular(osg::Material::FRONT, osg::Vec4(1.0f, 0.0f, 0.0f, 1.0f));
//设置正面指数
mat->setShininess(osg::Material::FRONT, 90.0f);
stateset->setAttribute(mat.get());
//设置背面剔除
osg::ref_ptr<osg::CullFace> cullface = new osg::CullFace(osg::CullFace::BACK);
stateset->setAttribute(cullface.get());
stateset->setMode(GL_CULL_FACE, osg::StateAttribute::OFF);
root->addChild(node.get());
//优化场景数据
osgUtil::Optimizer optimzer;
optimzer.optimize(root.get());
//方便查看在多边形之间切换,以查看三角网
viewer->addEventHandler(new osgGA::StateSetManipulator(viewer->getCamera()->getOrCreateStateSet()));
viewer->addEventHandler(new osgViewer::StatsHandler());
viewer->addEventHandler(new osgViewer::WindowSizeHandler());
viewer->setSceneData(root.get());
viewer->setUpViewInWindow(600, 600, 800, 600);
return viewer->run();
}