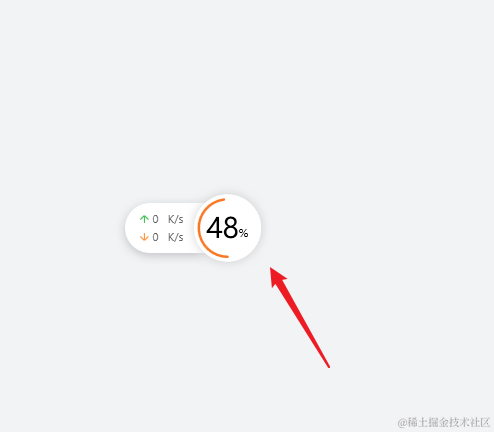
这次要实现的是这种效果,能够在页面上推拽和点击的,拖拽的话,就跟随鼠标移动,点击的话,就触发新的行为,当然也有指定某些区域不能拖拽,接下来就一起来看看有什么难点吧~
需要监听的鼠标事件
既然是web页面,那肯定要监听的就算鼠标事件
mousedown(MDN: https://developer.mozilla.org/zh-CN/docs/Web/API/Element/mousedown_event)
mousemove(MDN: https://developer.mozilla.org/zh-CN/docs/Web/API/Element/mousemove_event )
mouseup(MDN: https://developer.mozilla.org/zh-CN/docs/Web/API/Element/mouseup_event)
这三个事件应该大家都不陌生mousedown(鼠标按下),mousemove(鼠标移动), mouseup(鼠标抬起)
mousedown
window.onload = () => {
  ballDom.addEventListener('mousedown', ballMoveDown)
  ballDom.addEventListener('touchstart', ballMoveDown)
}

window.unload = () => {
  ballDom.removeEventListener('mousedown', ballMoveDown)
  ballDom.removeEventListener('touchstart', ballMoveDown)
}
页面初始化完成就监听这两个事件,touchstart是为了在移动端也能正常,所以也监听。
页面卸载,就取消绑定事件。
接下来就算鼠标按下事件触发,就需要监听鼠标移动和鼠标抬起事件
const ballMoveDown = (event) => {
      window.addEventListener('mousemove', ballMove, false)
      window.addEventListener('mouseup', ballUp, false)
      window.addEventListener('touchmove', ballMove, false)
      window.addEventListener('touchend', ballUp, false)
    }
mouseup
同样,鼠标抬起,需要把这些事件给取消
const ballUp = (event) => {
      // 移除鼠标移动事件
      window.removeEventListener('mousemove', ballMove)
      window.removeEventListener('touchmove', ballMove)
      // 移除鼠标松开事件
      window.removeEventListener('mouseup', ballUp)
      window.removeEventListener('touchend', ballUp)
    }
接下来,最重要的就是鼠标移动
mousemove
由于鼠标移动到哪里,我们需要把悬浮球也移动到相应的位置,所以我这里使用的是transform属性,使用这个属性的好处就是,不会脱离文档流,不影响页面布局,可以优化动画的性能。
然后,就是计算了,(event.touches[0].clientX, event.touches[0].clientY)可以得到鼠标在页面上的坐标,这会是我们的移动距离吗?
这里区分情况,如果你是全屏都是移动区域,那肯定就是啦
如果移动的区域不是全屏,就需要计算了。
所以我们页面初始化的时候,需要得到移动区域的范围,我这里就用上下左右来表示
window.onload = () => {
  // 移动的范围
  containerProfile = {
    bottom: window.innerHeight,
    left: 0,
    right: window.innerWidth,
    top: 0
  }

  ballDom.addEventListener('mousedown', ballMoveDown)
  ballDom.addEventListener('touchstart', ballMoveDown)
}
拿到移动的范围,我们就可以开始计算了
const ballDom = document.getElementById('ballBtn')

const ballMove = (event) => {
  const clientX = event.touches && event.touches[0] && event.touches[0].clientX || event.clientX
  const clientY = event.touches && event.touches[0] && event.touches[0].clientY || event.clientY

  ballDom.style.transform = `translate3d(${clientX}px, ${clientY}px, 0)`
}
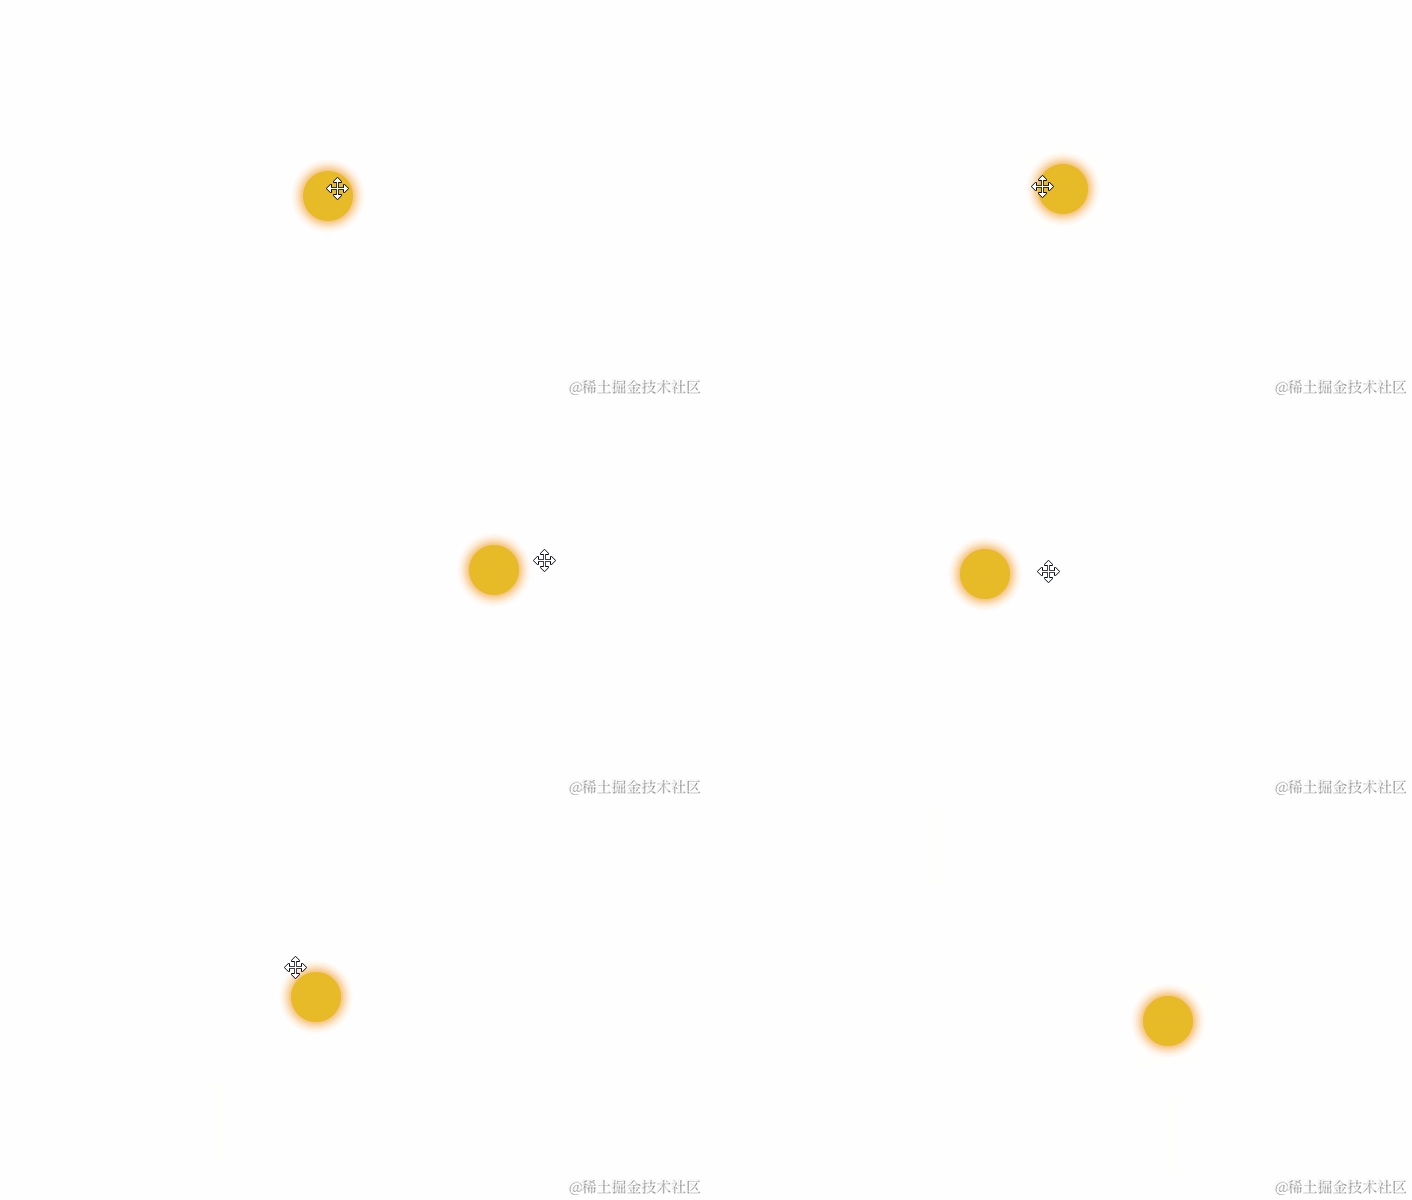
效果如下图:
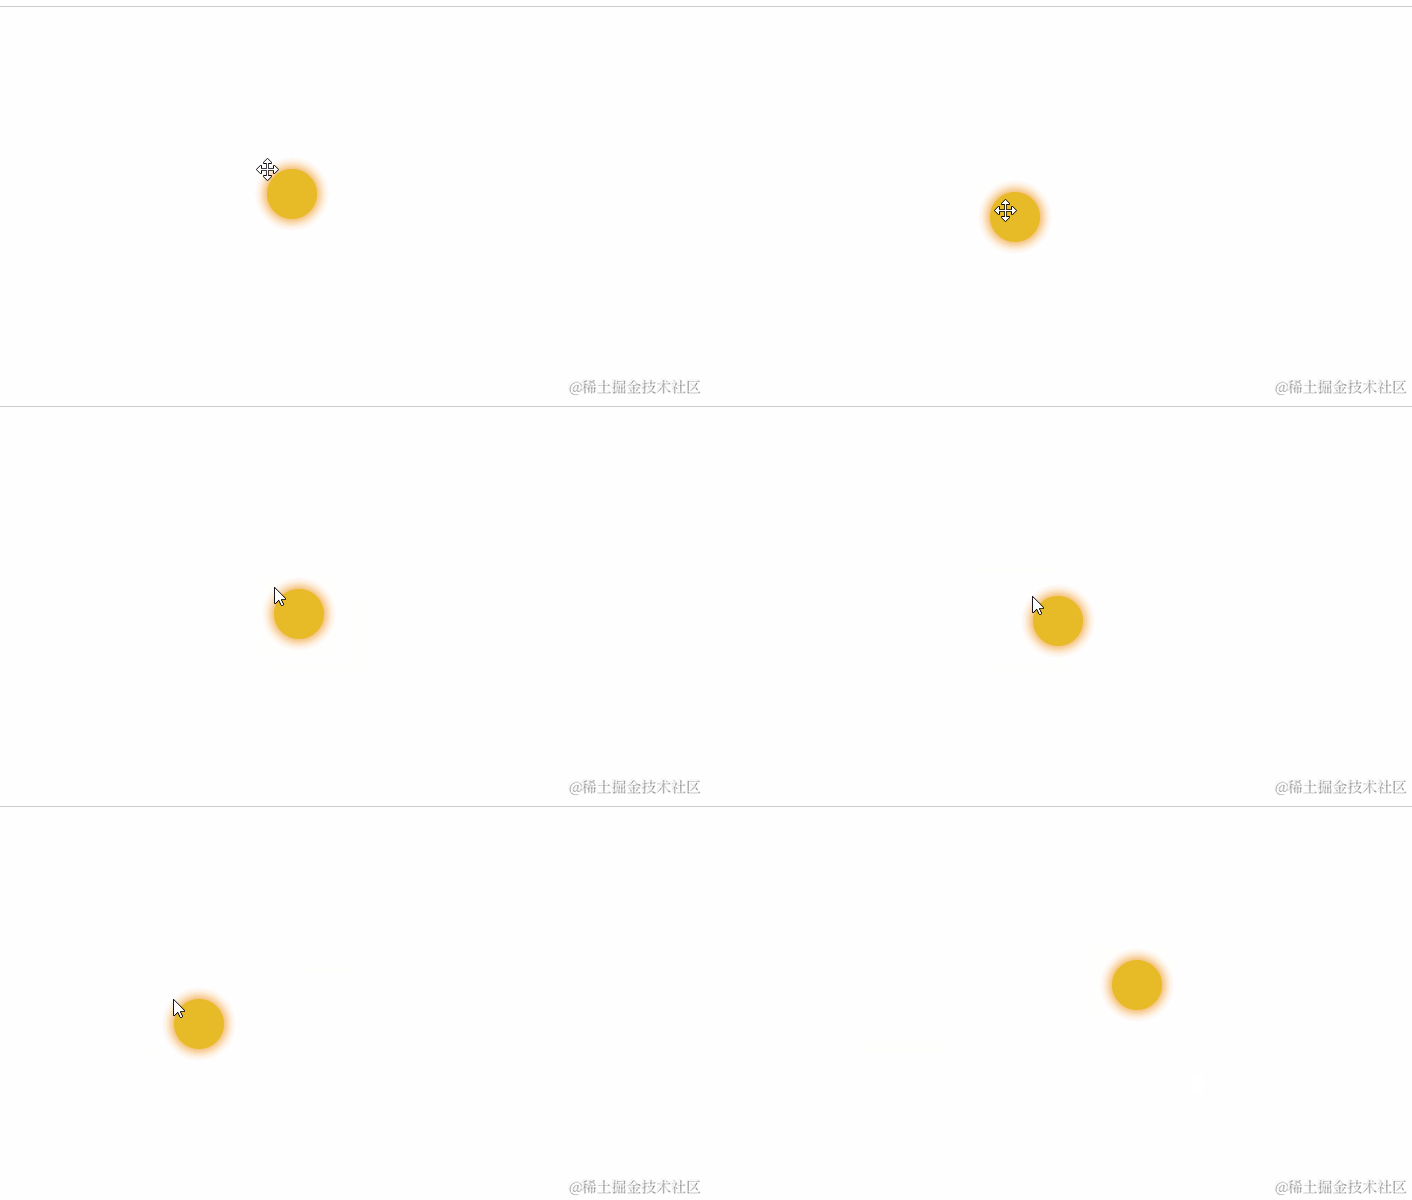
然后,你会发现,鼠标一直在悬浮球的左上角,而不是居中的位置,这是为什么导致的,以开始鼠标是在元素内部的,然后一移动,就移动到元素左上角了呢?

所以,我们应该在鼠标按下的时候,记录一下鼠标的位置,然后鼠标移动的时候,计算这个距离

这样就能的得到鼠标按下和鼠标移动时,鼠标两个位置之间的距离
const moveXDiff = clientX - mousedownPos.x // 鼠标在x 轴移动的距离
const moveYDiff = clientY - mousedownPos.y // 鼠标在y 轴移动的距离
那这肯定不是移动后,悬浮球的位置,因为这跟距离肯定特别小,还要加上悬浮球未移动前的top和left
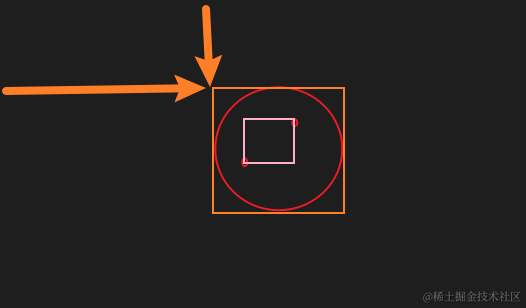
按下和鼠标移动的两个位置之间的距离,就算元素需要移动的距离

鼠标按下的时候,需要获取到元素在移动前的位置

const moveXDiff = clientX - mousedownPos.x // 鼠标在x 轴移动的距离
const moveYDiff = clientY - mousedownPos.y // 鼠标在y 轴移动的距离
// 悬浮球的位置
const canMoveX = bindDomProfile.left + moveXDiff
const canMoveY = bindDomProfile.top + moveYDiff
现在就能正常的移动了,这样移动就变得很丝滑了
以为到这里就结束了吗?还不行哦,还需要优化一下
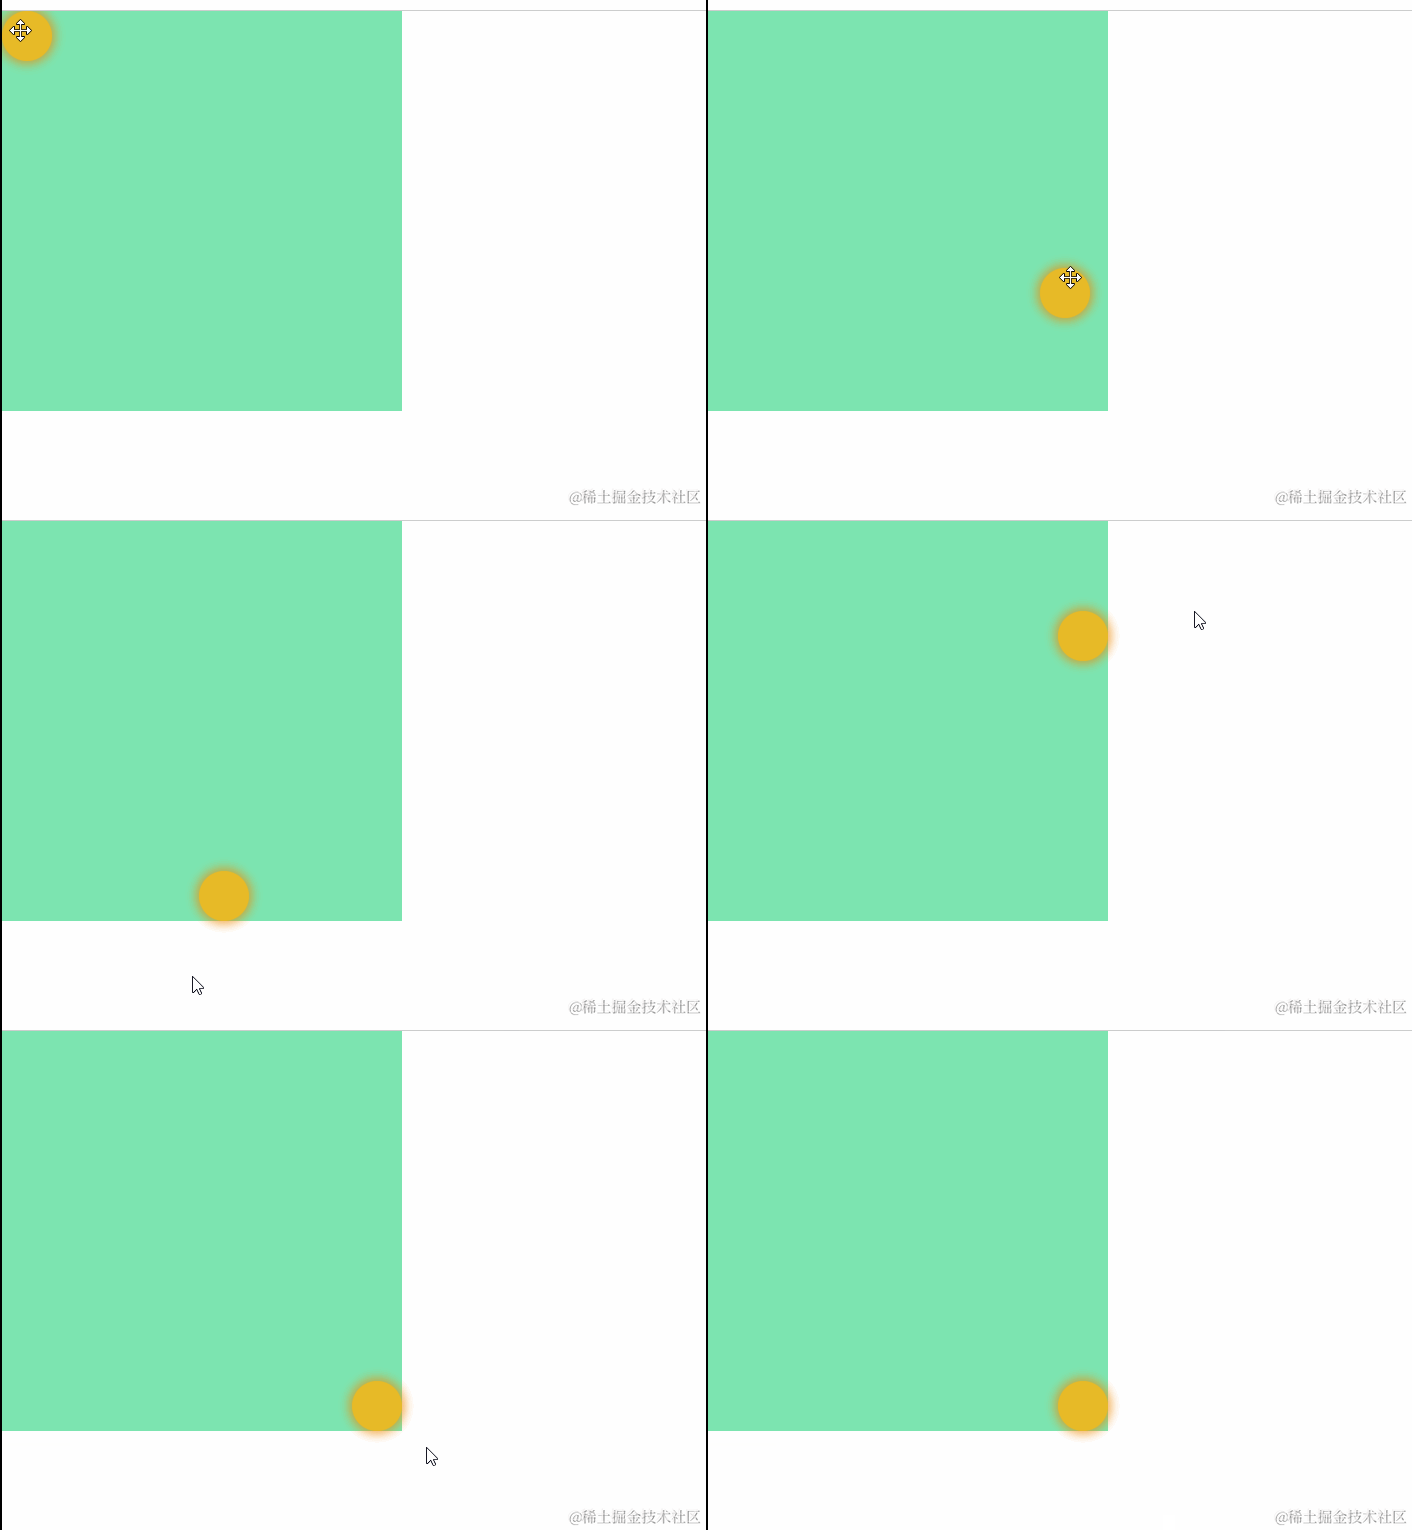
我们之前是获取了鼠标移动的范围的,那么在移动的时候,我们肯定需要限制一下范围,不能超出屏幕了还能移动,对吧~
限制一下,不能超过移动的最大范围
const moveArrangeX = containerProfile.right - bindDomProfile.width // 元素可在x 轴移动的最大值
const moveArrangeY = containerProfile.bottom - bindDomProfile.height // 元素可在y 轴移动的最大值

let canMoveX = Math.max(0, Math.min(bindDomProfile.left + moveXDiff, moveArrangeX))
let canMoveY = Math.max(0, Math.min(bindDomProfile.top + moveYDiff, moveArrangeY))
限制在400*400的区域内
window.onload = () => {
      // 拖拽的范围
      containerProfile = {
        bottom: 400,
        left: 0,
        right: 400,
        top: 0
      }

      ballDom.addEventListener('mousedown', ballMoveDown)
      ballDom.addEventListener('touchstart', ballMoveDown)
      // 监听drag 一系列事件 防止元素松开鼠标的时候还可以拖动
      ballDom.addEventListener('dragstart', ballUp)
      ballDom.addEventListener('dragover', ballUp)
      ballDom.addEventListener('drop', ballUp)

      ballDom.addEventListener('click', clickBall)
    }
现在移动的最基本功能,已经满足啦,接下来在此基础上,新增其他功能
移动之后触发点击事件
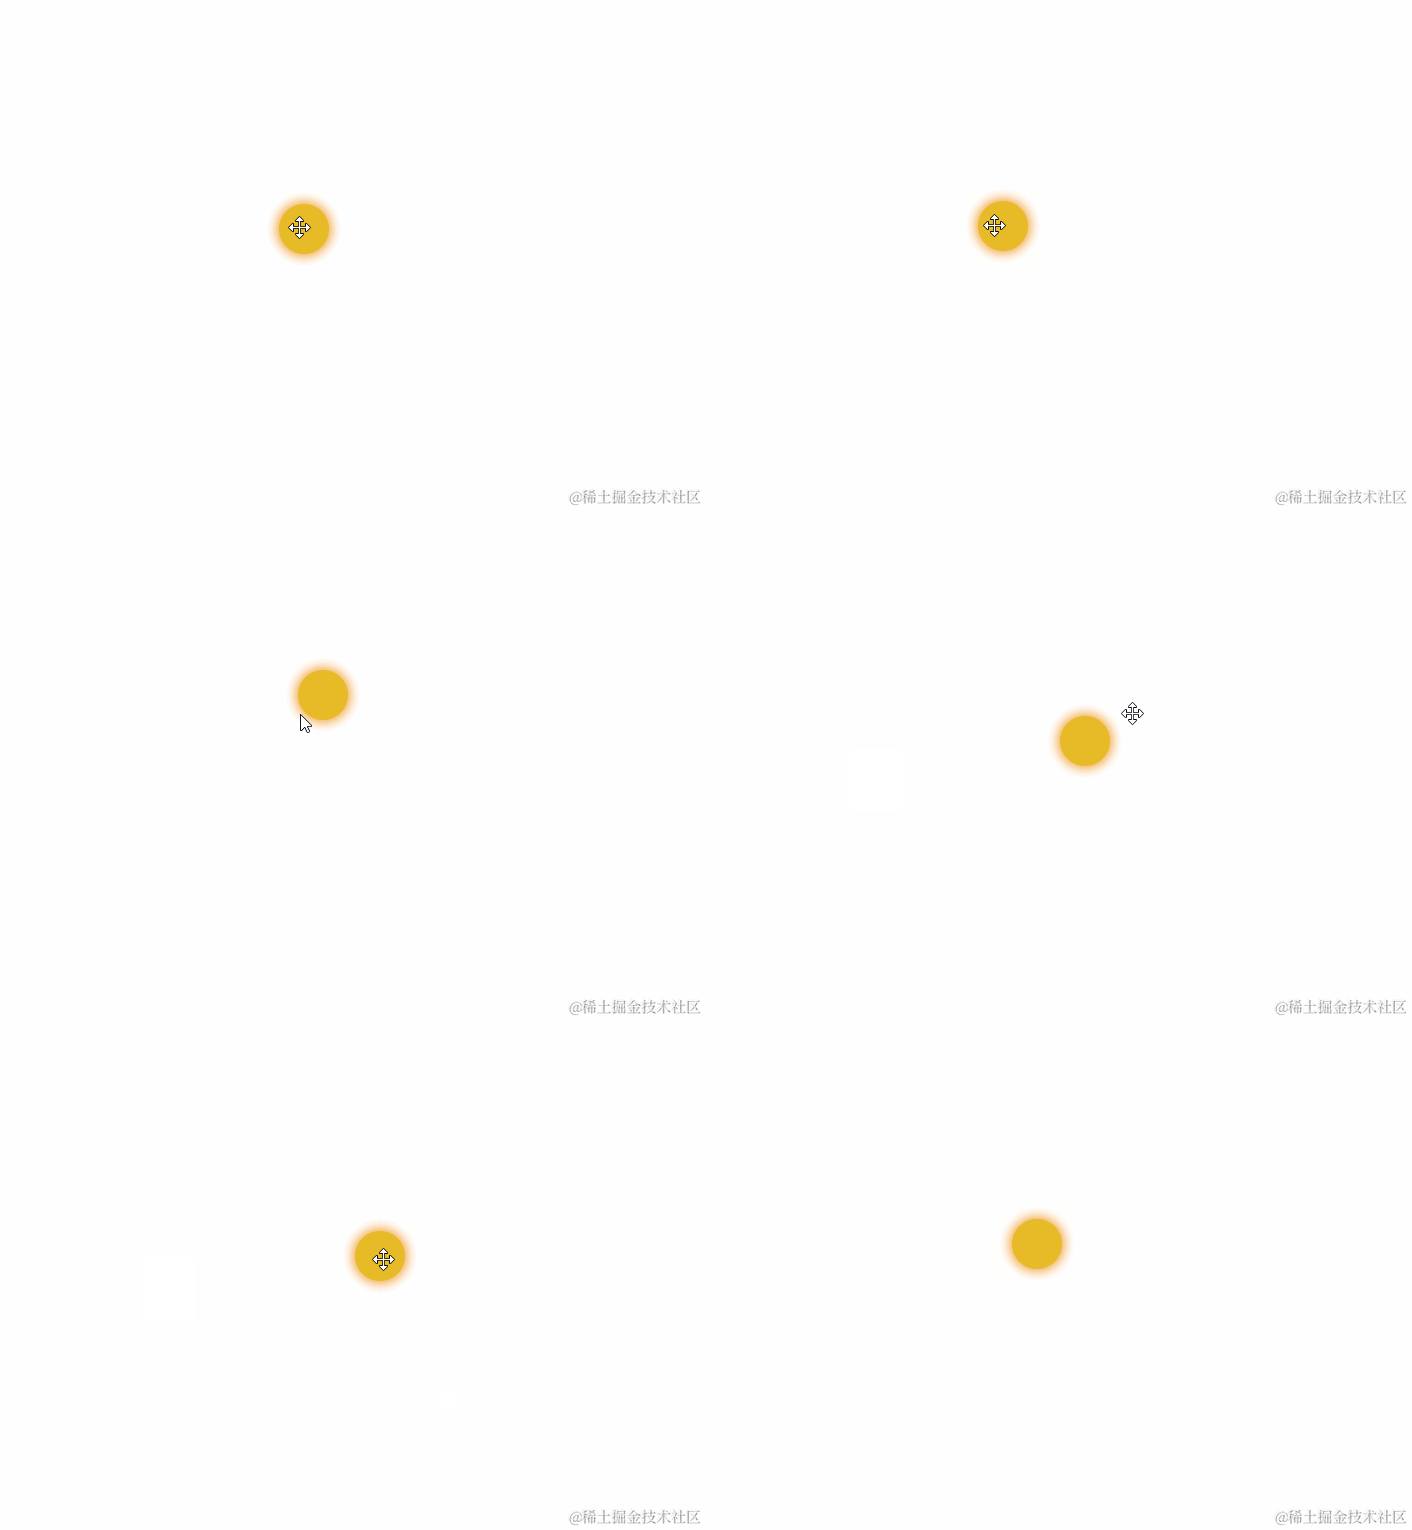
除了悬浮球移动,肯定还是希望它能够执行点击事件,但是你会发现,绑定了点击事件之后,移动也会触发点击
效果如下:
const clickBall = () => {
  ballDom.classList.add('playBall')
  setTimeout(() => {
    ballDom.classList.remove('playBall')
  }, 500)
}

 window.onload = () => {
  // 拖拽的范围
  containerProfile = {
    bottom: 400,
    left: 0,
    right: 400,
    top: 0
  }

  ballDom.addEventListener('mousedown', ballMoveDown)
  ballDom.addEventListener('touchstart', ballMoveDown)
  // 监听drag 一系列事件 防止元素松开鼠标的时候还可以拖动
  ballDom.addEventListener('dragstart', ballUp)
  ballDom.addEventListener('dragover', ballUp)
  ballDom.addEventListener('drop', ballUp)

  ballDom.addEventListener('click', clickBall)
}
这样肯定就不满意了,也许点击悬浮球,是为了执行点击的逻辑,但是移动,肯定是不能触发点击的
怎么办呢?其实很好解决,只需要加个变量,移动的时候,不触发点击逻辑就可以了
正常情况下是这样:
点击:mousedown -> mouseup -> click
移动:mousedown -> mousemove -> mouseup -> click
let isDragging = false

const ballMoveDown = (event) => {
  isDragging = false
  bindDomProfile = ballDom.getBoundingClientRect()
  mousedownPos.x = event.touches && event.touches[0].clientX || event.clientX
  mousedownPos.y = event.touches && event.touches[0].clientY ||event.clientY

  window.addEventListener('mousemove', ballMove, false)
  window.addEventListener('mouseup', ballUp, false)
  window.addEventListener('touchmove', ballMove, false)
  window.addEventListener('touchend', ballUp, false)
}

const ballMove = (event) => {
  isDragging = true
  const moveArrangeX = containerProfile.right - bindDomProfile.width // 元素可在x 轴移动的最大值
  const moveArrangeY = containerProfile.bottom - bindDomProfile.height // 元素可在y 轴移动的最大值
  const clientX = event.touches && event.touches[0] && event.touches[0].clientX || event.clientX
  const clientY = event.touches && event.touches[0] && event.touches[0].clientY || event.clientY

  const moveXDiff = clientX - mousedownPos.x // 鼠标在x 轴移动的距离
  const moveYDiff = clientY - mousedownPos.y // 鼠标在y 轴移动的距离
  let canMoveX = Math.max(0, Math.min(bindDomProfile.left + moveXDiff, moveArrangeX))
  let canMoveY = Math.max(0, Math.min(bindDomProfile.top + moveYDiff, moveArrangeY))
  ballDom.style.transform = `translate3d(${canMoveX}px, ${canMoveY}px, 0)`
}

const clickBall = () => {
  if (!isDragging) {
    ballDom.classList.add('playBall')
    setTimeout(() => {
      ballDom.classList.remove('playBall')
    }, 500)
  }
}
这样就解决了这个问题,接下来来个难度大点的需求
异常情况下,点击的时候也触发了mousemove事件
这就需要css控制pointer-events
https://developer.mozilla.org/zh-CN/docs/Web/CSS/pointer-events
使用pointer-events来阻止元素成为鼠标事件目标不一定意味着元素上的事件侦听器永远不会触发。如果元素后代明确指定了pointer-events属性并允许其成为鼠标事件的目标,那么指向该元素的任何事件在事件传播过程中都将通过父元素,并以适当的方式触发其上的事件侦听器。当然,位于父元素但不在后代元素上的鼠标活动都不会被父元素和后代元素捕获(鼠标活动将会穿过父元素而指向位于其下面的元素)。
我们希望为 HTML 提供更为精细的控制(而不仅仅是auto和none),以控制元素哪一部分何时会捕获鼠标事件。如果你有独特的想法,请添加至wiki 页面的 Use Cases 部分,以帮助我们如何针对 HTML 扩展pointer-events。
该属性也可用来提高滚动时的帧频。的确,当滚动时,鼠标悬停在某些元素上,则触发其上的 hover 效果,然而这些影响通常不被用户注意,并多半导致滚动出现问题。对body元素应用pointer-events:none,禁用了包括hover在内的鼠标事件,从而提高滚动性能。
const ballMove = (event) => {
  console.log('mousemove')
  isDragging = true
  const moveArrangeX = containerProfile.right - bindDomProfile.width // 元素可在x 轴移动的最大值
  const moveArrangeY = containerProfile.bottom - bindDomProfile.height // 元素可在y 轴移动的最大值
  const clientX = event.touches && event.touches[0] && event.touches[0].clientX || event.clientX
  const clientY = event.touches && event.touches[0] && event.touches[0].clientY || event.clientY

  const moveXDiff = clientX - mousedownPos.x // 鼠标在x 轴移动的距离
  const moveYDiff = clientY - mousedownPos.y // 鼠标在y 轴移动的距离
  let canMoveX = Math.max(0, Math.min(bindDomProfile.left + moveXDiff, moveArrangeX))
  let canMoveY = Math.max(0, Math.min(bindDomProfile.top + moveYDiff, moveArrangeY))

  ballDom.style.transform = `translate3d(${canMoveX}px, ${canMoveY}px, 0)`
  ballDom.style.pointerEvents = 'none'
}

const ballUp = (event) => {
  console.log('mouseup')
  // 移除鼠标移动事件
  window.removeEventListener('mousemove', ballMove)
  window.removeEventListener('touchmove', ballMove)
  // 移除鼠标松开事件
  window.removeEventListener('mouseup', ballUp)
  window.removeEventListener('touchend', ballUp)
  ballDom.style.pointerEvents = null
}
加上这个属性之后, 移动就不会触发点击事件了
移动:mousedown -> mousemove -> mouseup
点击:mousedown->mouseup->click
移动范围内,指定区域不能移入
这是什么意思呢?
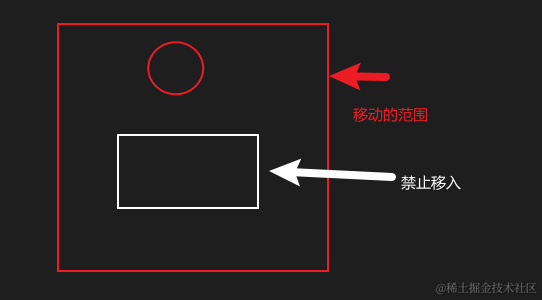
看图更加容易理解,真很显然,就是在移动的时候要做判断,移入移动的区域位于禁止移入的范围中,那就需要将悬浮球停留在禁止移入的边缘线上。
当然如果鼠标进入到禁止移动的区域中,那应该立刻结束移动事件,也就是手动触发mouseover,因为不能让悬浮球碰壁了,鼠标进入禁止移入的区域,出来时,还能继续移动,对吧
这里,第二个很好解决
// 拿到禁止移动的尺寸
const unMoveContain = unMoveArea.getBoundingClientRect()

const ballMove = (event) => {
  ...
  const forbidViewX = Math.floor(unMoveContain.left) // (forbidViewX, forbidViewY)是禁止区域的左上角
  const forbidViewY = Math.floor(unMoveContain.top)

  const forbidViewWidth = Math.ceil(unMoveContain.width)
  const forbidViewHeight = Math.ceil(unMoveContain.height)
	// 结束移动,只要移动进禁止区域,就结束移动
  if (clientX > forbidViewX && clientX < (forbidViewWidth + forbidViewX) && clientY > forbidViewY && clientY < (forbidViewHight + forbidViewY)) {
    ballUp()
  }
  ...
}
鼠标进入禁止区域的条件,如图:
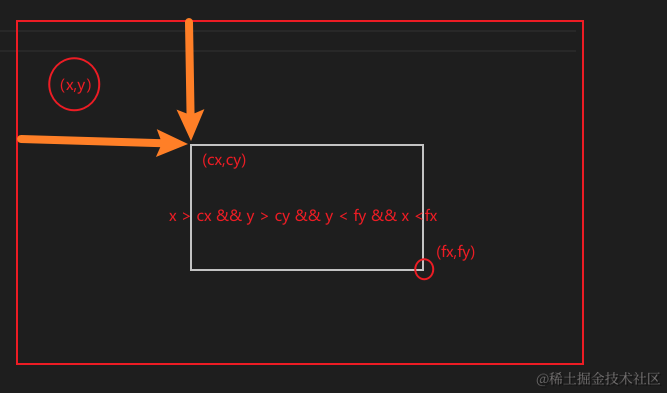
上图的cx和cy
let cx = forbidViewX
let cy = forbidViewY
let fx = forbidViewX + forbidViewWidth
let fy = forbidViewY + forbidViewHeight
找到条件之后,条件内,需要怎么做呢?
如果鼠标的坐标距离禁止区域的4条边最近的一条边,那悬浮球就会停在这条边上,也就是说,这里可能是x轴坐标不变,也可能是y坐标不变

距离禁止区域的4条边
这需要计算出来
let topLeftY = Math.abs(clientY - forbidViewY) // 当前坐标y轴距离禁止区域上方距离
let bottomLeftY = Math.abs(clientY - (forbidViewHeight + forbidViewY)) // 当前坐标y轴距离禁止区域下方距离
let topRightX = Math.abs(clientX - (forbidViewWidth + forbidViewX)) // 当前坐标x轴距离禁止区域右方距离
let topLeftX = Math.abs(clientX - forbidViewX) // 当前坐标x轴距离禁止区域左方距离
然后需要比较这四条边,哪条边最端,得到鼠标是从哪条边移入禁止区域的
const minVal = Math.min(...[topLeftY, topLeftX, bottomLeftY, topRightX])
得到最短的边之后,接下来就是悬浮球的坐标了
if (topLeftY == minVal) {
  canMoveY = forbidViewY - bindDomProfile.height // 距离禁止区域上方最近,悬浮球y坐标位于禁止区域最上方
} else if (bottomLeftY  === minVal) {
  canMoveY = forbidViewHeight + forbidViewY // 距离禁止区域下方最近,悬浮球y坐标位于禁止区域最下方
} else if (topRightX === minVal) {
  canMoveX = forbidViewWidth + forbidViewX // 距离禁止区域右边最近,悬浮球x坐标位于禁止最右边
} else if (topLeftX  === minVal){
  canMoveX = forbidViewX - bindDomProfile.width // 距离禁止区域左边最近,悬浮球x坐标位于禁止最右边
}
这两条边是需要减去悬浮球的宽高的,因为鼠标移入了,鼠标本身就需要在悬浮球里的,那悬浮球就不能一半进入禁止区域
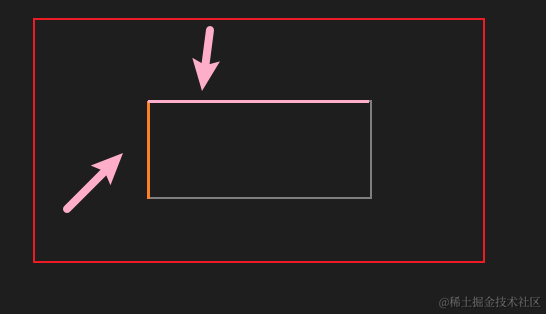
这就是mousemove的全部代码了,看下面
const handleForbidArea = ({canMoveX, canMoveY, clientX, clientY}) => {
  const forbidViewX = Math.floor(unMoveContain.left) // (forbidViewX, forbidViewY)是禁止区域的左上角
  const forbidViewY = Math.floor(unMoveContain.top)

  const forbidViewWidth = Math.ceil(unMoveContain.width)
  const forbidViewHeight = Math.ceil(unMoveContain.height)

  // 结束拖拽,只要拖拽进禁止区域,就结束拖拽
  if (clientX > forbidViewX && clientX < (forbidViewWidth + forbidViewX) && clientY > forbidViewY && clientY < (forbidViewHeight + forbidViewY)) {
    ballUp()
  }
  // 控制悬浮球不能进入禁止区域
  if (clientX > forbidViewX && clientY > forbidViewY && clientY < (forbidViewHeight + forbidViewY) && clientX < (forbidViewWidth + forbidViewX)) {
    let topLeftY = Math.abs(clientY - forbidViewY) // 当前坐标y轴距离禁止区域上方距离
    let bottomLeftY = Math.abs(clientY - (forbidViewHeight + forbidViewY)) // 当前坐标y轴距离禁止区域下方距离
    let topRightX = Math.abs(clientX - (forbidViewWidth + forbidViewX)) // 当前坐标x轴距离禁止区域右方距离
    let topLeftX = Math.abs(clientX - forbidViewX) // 当前坐标x轴距离禁止区域左方距离

    const minVal = Math.min(...[topLeftY, topLeftX, bottomLeftY, topRightX])
    if (topLeftY == minVal) {
      canMoveY = forbidViewY - bindDomProfile.height // 距离禁止区域上方最近,悬浮球y坐标位于禁止区域最上方
    } else if (bottomLeftY  === minVal) {
      canMoveY = forbidViewHeight + forbidViewY // 距离禁止区域下方最近,悬浮球y坐标位于禁止区域最下方
    } else if (topRightX === minVal) {
      canMoveX = forbidViewWidth + forbidViewX // 距离禁止区域右边最近,悬浮球x坐标位于禁止最右边
    } else if (topLeftX  === minVal){
      canMoveX = forbidViewX - bindDomProfile.width // 距离禁止区域左边最近,悬浮球x坐标位于禁止最右边
    }
  }
  return {x: canMoveX, y: canMoveY}
}

const ballMove = (event) => {
  isDragging = true
  const moveArrangeX = containerProfile.right - bindDomProfile.width // 元素可在x 轴移动的最大值
  const moveArrangeY = containerProfile.bottom - bindDomProfile.height // 元素可在y 轴移动的最大值
  const clientX = event.touches && event.touches[0] && event.touches[0].clientX || event.clientX
  const clientY = event.touches && event.touches[0] && event.touches[0].clientY || event.clientY

  const moveXDiff = clientX - mousedownPos.x // 鼠标在x 轴移动的距离
  const moveYDiff = clientY - mousedownPos.y // 鼠标在y 轴移动的距离
  let canMoveX = Math.max(0, Math.min(bindDomProfile.left + moveXDiff, moveArrangeX))
  let canMoveY = Math.max(0, Math.min(bindDomProfile.top + moveYDiff, moveArrangeY))
  let { x, y } = handleForbidArea({canMoveX, canMoveY, clientX, clientY})

  ballDom.style.transform = `translate3d(${x}px, ${y}px, 0)`
}
最终效果就是这样的:

如果出现松开鼠标,还能拖动的情况,就需要监听drag一系列事件,这个不一定都会出现,因为这只是在鼠标移动的时候,mousemove事件还没有执行完,导致鼠标离开了悬浮球,然后再鼠标抬起,这跟个时候就会产生这个现象。
// 监听drag 一系列事件 防止元素松开鼠标的时候还可以拖动
ballDom.addEventListener('dragstart', ballUp)
ballDom.addEventListener('dragover', ballUp)
ballDom.addEventListener('drop', ballUp)
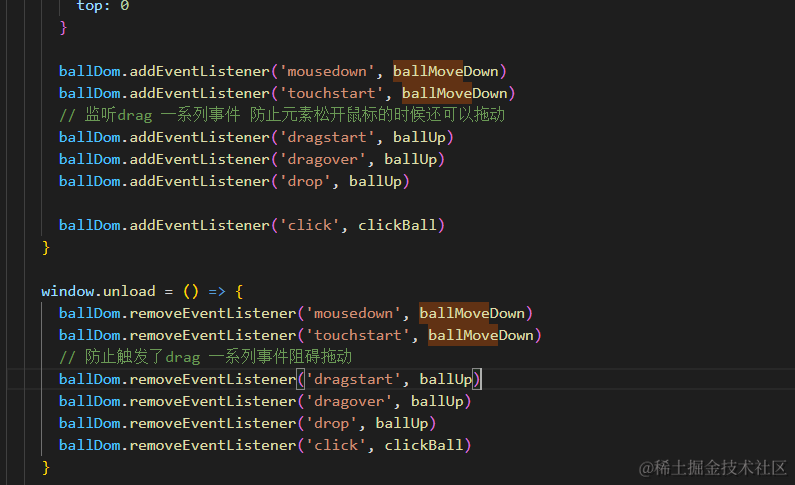
全部的代码:
jcode
总结
1.处理图像边界问题,最好画图,比较清晰,单纯的想象,容易遗漏
2.JavaScript基础很重要


