一.前言
从本篇开始,我将对springboot框架做一个有趣的探究,探究一下它的流程,虽然源码看不懂,不过我们可以一点一点慢慢深挖,好了,下面我们来看一下本篇的知识,这个logo是如何打印出来的?
二.分析
springboot在启动的时候会打印一个spring的logo以及对应的版本等信息,下面我们看一下这个是如何打印的?
我们先新建一个springboot空项目,然后我们先看一下启动类:

很平常的一个启动类,那么他是如何打印的呢?看到这里有个run方法,既然run方法能启动项目,那么run方法里面肯定调用了main()方法,我们点进去看一下这个SpringApplication类:
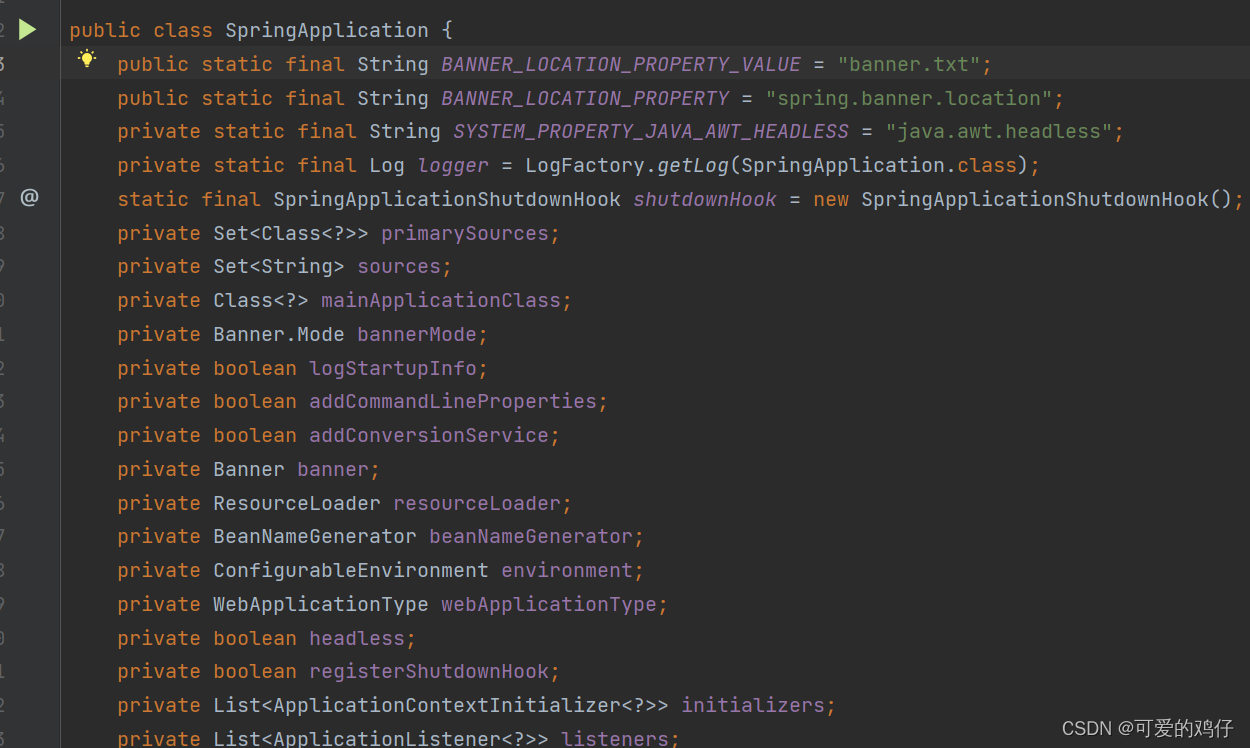
好家伙,这么多属性,别急,我们先先看一下,我们发现他第一个属性是个字符串叫banner.txt,这时我突然想到之前学修改springboot启动Logo时,只需要在resoures目录下创建一个banner.txt文件,然后写入我们的Logo,那么它就会变成我们的logo,是不是这样呢?我们先试一下:
在resources目录下创建banner.txt文件,然后写入:
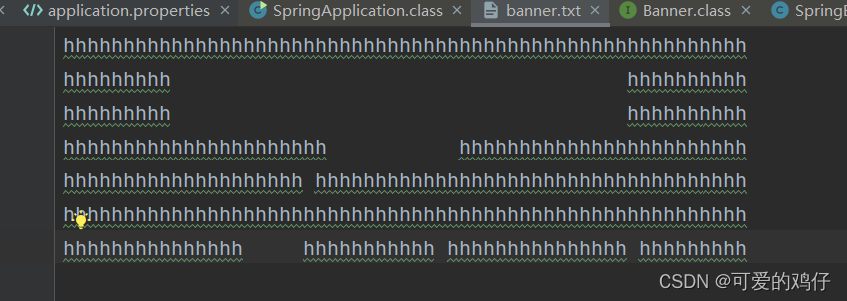
随便一个文字型的logo,然后我们启动项目:

看到了我们的springlogo变成了我们自己的logo,好,那么为什么默认是spring的logo呢?
继续看一下,有哪些方法或者属性:

我们发现这个类中还有一个Banner类的成员变量,我们点进去看一下:
@FunctionalInterface
public interface Banner {
    void printBanner(Environment environment, Class<?> sourceClass, PrintStream out);

    public static enum Mode {
        OFF,
        CONSOLE,
        LOG;

        private Mode() {
        }
    }
}
发现它是一个接口,有一个默认的printBanner方法,不过既然是接口,那么我们需要去找它的实现类,我们看一下它有哪些实现类?

可以看到,它有五个实现类,还有ImageBanner这个,这个应该是打印图片Logo的,还有
我们看他最后一个SpringBootBanner类,点进去看一下:
class SpringBootBanner implements Banner {
    private static final String[] BANNER = new String[]{"", "  .   ____          _            __ _ _", " /\\\\ / ___'_ __ _ _(_)_ __  __ _ \\ \\ \\ \\", "( ( )\\___ | '_ | '_| | '_ \\/ _` | \\ \\ \\ \\", " \\\\/  ___)| |_)| | | | | || (_| |  ) ) ) )", "  '  |____| .__|_| |_|_| |_\\__, | / / / /", " =========|_|==============|___/=/_/_/_/"};
    private static final String SPRING_BOOT = " :: Spring Boot :: ";
    private static final int STRAP_LINE_SIZE = 42;

    SpringBootBanner() {
    }

    public void printBanner(Environment environment, Class<?> sourceClass, PrintStream printStream) {
        String[] var4 = BANNER;
        int var5 = var4.length;

        for(int var6 = 0; var6 < var5; ++var6) {
            String line = var4[var6];
            printStream.println(line);
        }

        String version = SpringBootVersion.getVersion();
        version = version != null ? " (v" + version + ")" : "";
        StringBuilder padding = new StringBuilder();

        while(padding.length() < 42 - (version.length() + " :: Spring Boot :: ".length())) {
            padding.append(" ");
        }

        printStream.println(AnsiOutput.toString(new Object[]{AnsiColor.GREEN, " :: Spring Boot :: ", AnsiColor.DEFAULT, padding.toString(), AnsiStyle.FAINT, version}));
        printStream.println();
    }
}
我们发现,它有一个final的String数组,里面有一些字符,然后它的printBanner方法里面的while循环里面还有好像是打印::Spring Boot::的代码,现在我们可以确定,它是吧图标写在数组里面的,然后直接打印这个数组了,不信的话,吧这个类单独拿出来,测试一下:
@SpringBootTest
class StudyAutoConfigurationApplicationTests {

    private static final String[] BANNER = new String[]{"", "  .   ____          _            __ _ _", " /\\\\ / ___'_ __ _ _(_)_ __  __ _ \\ \\ \\ \\", "( ( )\\___ | '_ | '_| | '_ \\/ _` | \\ \\ \\ \\", " \\\\/  ___)| |_)| | | | | || (_| |  ) ) ) )", "  '  |____| .__|_| |_|_| |_\\__, | / / / /", " =========|_|==============|___/=/_/_/_/"};
    private static final String SPRING_BOOT = " :: Spring Boot :: ";
    private static final int STRAP_LINE_SIZE = 42;


    @Test
    void contextLoads() throws IOException {

        printBanner();
    }
        public void printBanner() throws IOException {

           // PrintStream printStream = new PrintStream(Files.newOutputStream(Paths.get("a.txt")));


            String[] var4 = BANNER;
            int var5 = var4.length;

            for(int var6 = 0; var6 < var5; ++var6) {
                String line = var4[var6];
                System.out.println(line);
            }

            String version = SpringBootVersion.getVersion();
            version = " (v" + version + ")";
            StringBuilder padding = new StringBuilder();

            while(padding.length() < 42 - (version.length() + " :: Spring Boot :: ".length())) {
                padding.append(" ");
            }

            System.out.println(AnsiOutput.toString(AnsiColor.GREEN, " :: Spring Boot :: ", AnsiColor.DEFAULT, padding.toString(), AnsiStyle.FAINT, version));
            System.out.println();
        }

}
我们在springboot的测试类中封装这些属性和方法,然后我们测试一下:
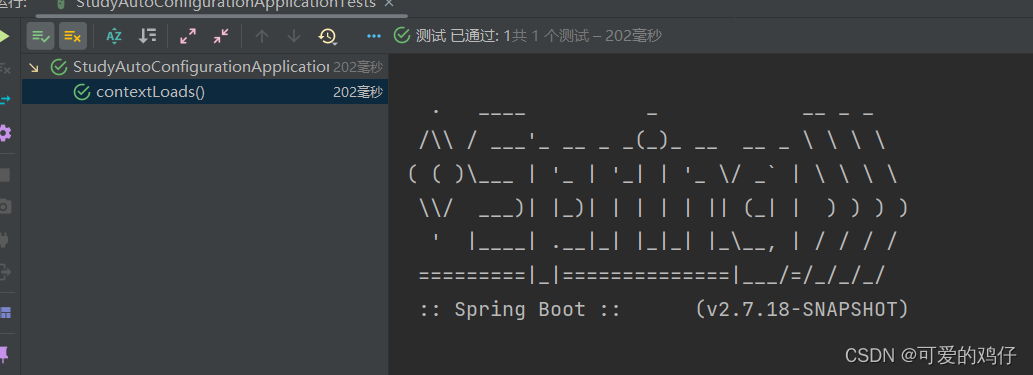
可以看到,成功的打印出来了logo,这样就解决了心中的疑惑,
不过之前我们还看到有一个ImageBanner类,这个应该是打印图片的,我们先看一下:
public class ImageBanner implements Banner {
    private static final String SYSTEM_PROPERTY_JAVA_AWT_HEADLESS = "java.awt.headless";
    private static final String PROPERTY_PREFIX = "spring.banner.image.";
    private static final Log logger = LogFactory.getLog(ImageBanner.class);
    private static final double[] RGB_WEIGHT = new double[]{0.2126, 0.7152, 0.0722};
    private final Resource image;

    public ImageBanner(Resource image) {
        Assert.notNull(image, "Image must not be null");
        Assert.isTrue(image.exists(), "Image must exist");
        this.image = image;
    }
可以看到它好像需要一个java.awt.headless还有一个spring.banner.image.前缀的文件,看一下他的printBanner方法:
    public void printBanner(Environment environment, Class<?> sourceClass, PrintStream out) {
        try {
            if (System.getProperty("java.awt.headless") == null) {
                System.setProperty("java.awt.headless", "true");
            }

            this.printBanner(environment, out);
        } catch (Throwable var5) {
            logger.warn(LogMessage.format("Image banner not printable: %s (%s: '%s')", this.image, var5.getClass(), var5.getMessage()));
            logger.debug("Image banner printing failure", var5);
        }

    }

    private void printBanner(Environment environment, PrintStream out) throws IOException {
        int width = (Integer)this.getProperty(environment, "width", Integer.class, 76);
        int height = (Integer)this.getProperty(environment, "height", Integer.class, 0);
        int margin = (Integer)this.getProperty(environment, "margin", Integer.class, 2);
        boolean invert = (Boolean)this.getProperty(environment, "invert", Boolean.class, false);
        AnsiColors.BitDepth bitDepth = this.getBitDepthProperty(environment);
        PixelMode pixelMode = this.getPixelModeProperty(environment);
        Frame[] frames = this.readFrames(width, height);

        for(int i = 0; i < frames.length; ++i) {
            if (i > 0) {
                this.resetCursor(frames[i - 1].getImage(), out);
            }

            this.printBanner(frames[i].getImage(), margin, invert, bitDepth, pixelMode, out);
            this.sleep(frames[i].getDelayTime());
        }

    }
可以看到,读取了宽度,高度,margin,invert等属性,不过控制台应该没法演示,它应该是Java的图形化编程用的,awt
好了,以上就是对springboot的logo原理分析了,这也是作为springboot系列文章的开端,希望以后能带来更多好玩有趣的知识!




![[Docker]八.Docker 容器跨主机通讯](https://img-blog.csdnimg.cn/c0b6d670e6c3491a85cecad1b3a3f593.png)
