目录
- 插件市场
- 效果如下图
- 注意
- 使用my-share.vue
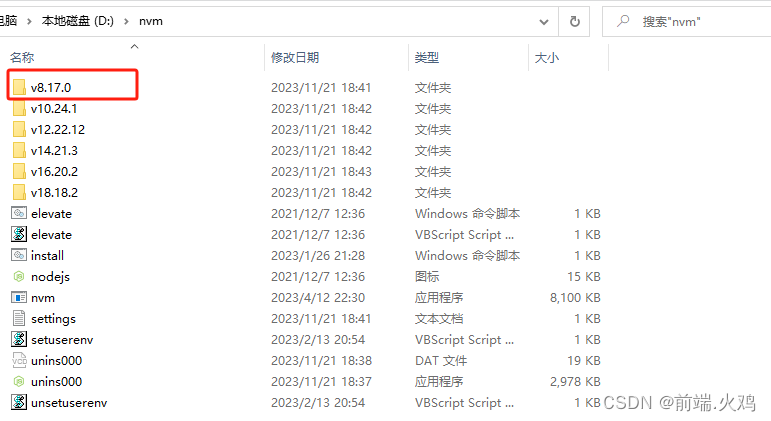
- 插件文件如下图片
- hch-poster
- utils
- index.js
- draw-demo.vue
- hch-poster.vue
- 最后
插件市场
插件市场
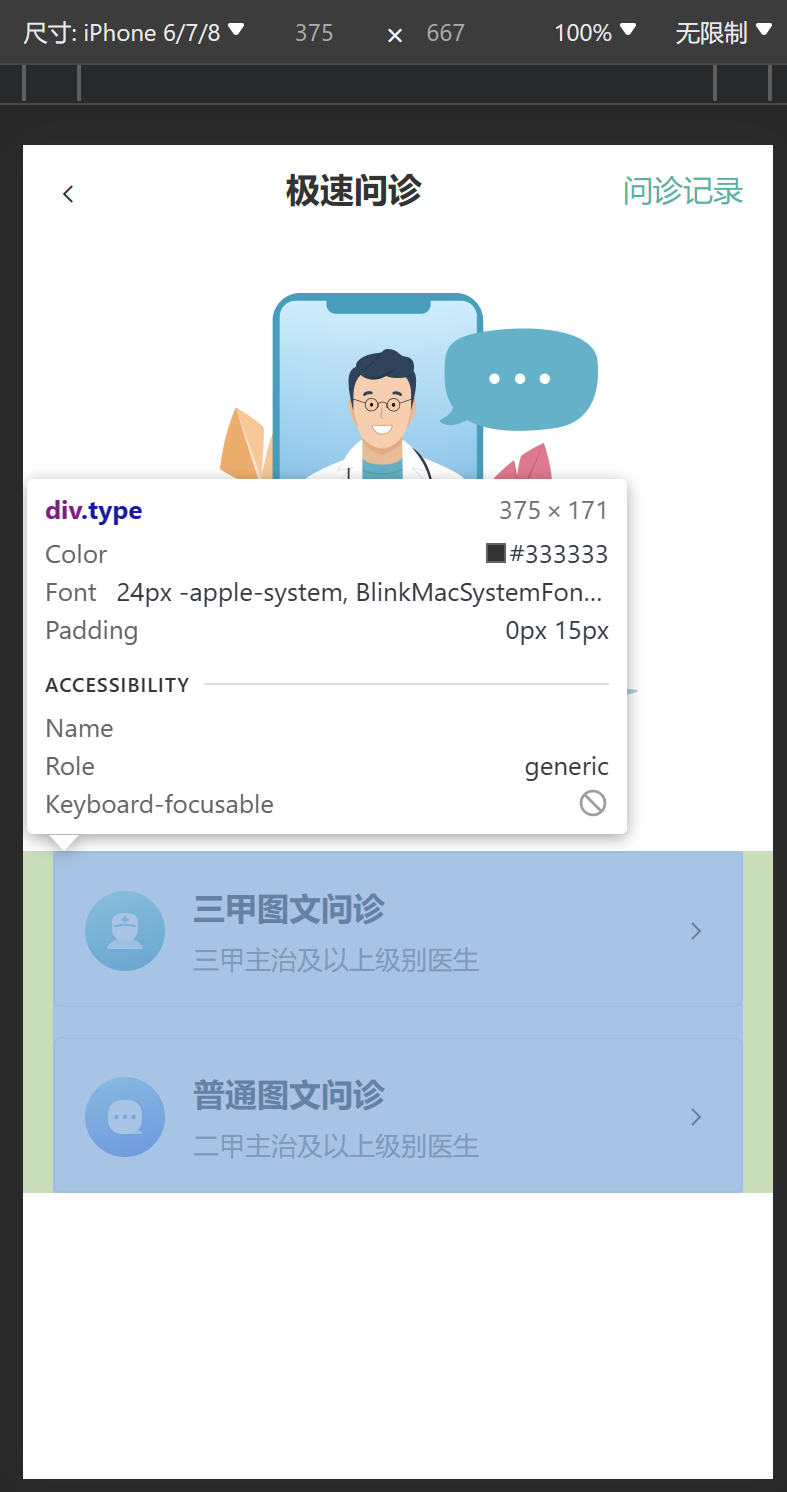
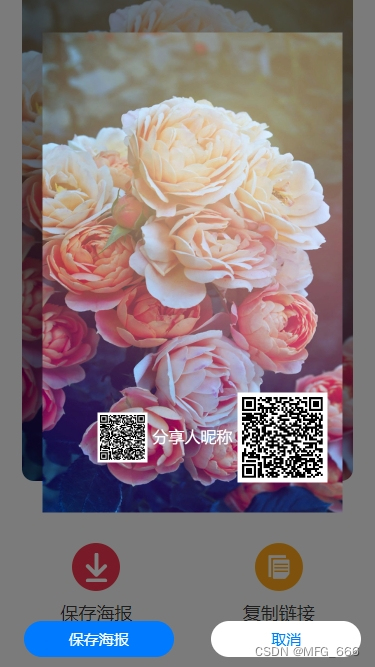
效果如下图
注意
主要:使用my-share.vue和绘制canvas的hch-poster.vue这两个使用
使用my-share.vue
<template>
<!-- my-share -->
<view class="container">
<!-- 标题 -->
<!-- <view class="top-stylrify">
<view class="title">
<view class="title-back" @click="backPrivious"><</view>
<view>邀请推荐</view>
<view></view>
</view>
</view> -->
<!-- 轮播图 -->
<view class="carsoul">
<swiper :current="current" @change="swiperChange" :circular="true">
<swiper-item v-for="(poster, index) in posters" :key="index">
<image class="carsoul_bg" :src="poster.file_path" mode="aspectFill" />
<view class="qrcode-container">
<view class="qrcode-container-lft">
<image src="../../../../static/wx.png" mode="aspectFill"></image>
</view>
<view class="qrcode-container-ctr">
{{titleText}}
</view>
<view class="qrcode-container-img">
<image class="qrcode" :src="qrcodeUrl" mode="aspectFit" />
</view>
</view>
</swiper-item>
</swiper>
<view class="progress-wrapper">
<view v-for="(item, index) in posters" :key="index" class="progress-item"
:class="{ 'active': index === current }"></view>
</view>
</view>
<view class="sharepicturesto">
<view class="sharepicturesto-lft">
</view>
<view class="sharepicturesto-ctr">
分享图片到
</view>
<view class="sharepicturesto-rgt">
</view>
</view>
<!-- 按钮区 -->
<!-- 只在H5显示 -->
<!-- #ifdef H5 -->
<view class="btns-wrap">
<view class="wrapBtn" type="default" @click="downloadPoster">
<image src="/static/user/share/user-share-down.png" mode="aspectFill"></image>
<text>保存海报</text>
</view>
<view class="wrapBtn" type="default" @click="copyLink">
<image src="/static/user/share/user-share-copy.png" mode="aspectFill"></image>
<text>复制链接</text>
</view>
</view>
<!-- #endif -->
<!-- 除了H5都显示 -->
<!-- #ifndef H5 -->
<view class="btns-wrap">
<view class="wrapBtn" type="default" @click="share(0, 'WXSceneSession')">
<image src="/static/user/share/user-share-weixin.png" mode="aspectFill"></image>
<text>微信好友</text>
</view>
<view class="wrapBtn" type="default" @click="share(0, 'WXSenceTimeline')">
<image src="/static/user/share/user-share-circle.png" mode="aspectFill"></image>
<text>朋友圈</text>
</view>
<view class="wrapBtn" type="default" @click="downloadPoster">
<image src="/static/user/share/user-share-down.png" mode="aspectFill"></image>
<text>保存海报</text>
</view>
</view>
<!-- #endif -->
<!-- 插件位置 https://ext.dcloud.net.cn/plugin?id=5770 -->
<!-- <hch-poster ref="hchPoster" @cancel="handleCancel" :posterData.sync="posterData" /> -->
<hch-poster ref="hchPoster" :posterData.sync="posterData" />
</view>
</template>
<script>
import HchPoster from "../../../../components/hch-poster/hch-poster.vue"
// import config from '@/config.js'; //
export default {
components: {
HchPoster
},
data() {
return {
posters: [],
shareLink: '', // 设置分享链接
qrcodeUrl: '', // 设置二维码链接
headerImgUrl: '',
titleText: '分享人昵称',
current: 0, // 设置轮播图标识
deliveryFlag: false,
posterData: {
poster: {
//根据屏幕大小自动生成海报背景大小
url: '', //图片地址
r: 10, //圆角半径
w: 300, //海报宽度
h: 480, //海报高度
p: 20 //海报内边距padding
},
mainImg: {
//海报主商品图
url: 'https://huangchunhongzz.gitee.io/imgs/poster/product.png', //图片地址
r: 10, //圆角半径
w: 250, //宽度
h: 200, //高度
// w: 250, //宽度
// h: 100, //高度
// mt: 20, //margin-top
// r: 50 //圆角半径
},
// 分享人昵称文字设置
title: {
//商品标题
text: '', //文本
fontSize: 16, //字体大小
color: '#FFFFFF', //颜色
lineHeight: 25, //行高
mt: 10, //margin-top
},
// 二维码图片
// 控制二维码图片移动找import HchPoster from "../../../../components/hch-poster/hch-poster.vue"组件里面的await drawSquarePic这个方法里面
codeImg: {
//小程序码
// url: 'https://huangchunhongzz.gitee.io/imgs/poster/code.png', //图片地址
url: '', //图片地址
w: 90, //宽度
h: 90, //高度
mt: 20, //margin-top
r: 50, //圆角半径
},
// 头像图片
// 控制头像图片移动找import HchPoster from "../../../../components/hch-poster/hch-poster.vue"组件里面的await drawSquarePic这个方法里面
headerImg: {
// url: 'https://huangchunhongzz.gitee.io/imgs/poster/code.png', //图片地址
url: '', //图片地址
w: 50, //宽度
h: 50, //高度
mt: 10, //margin-top
r: 50 //圆角半径
},
tips: [
//提示信息
{
text: '', //文本
fontSize: 16, //字体大小
color: '#FFFFFF', //字体颜色
align: 'center', //对齐方式
lineHeight: 10, //行高
mt: 0 //margin-top
},
{
text: '', //文本
fontSize: 12, //字体大小
color: '#2f1709', //字体颜色
align: 'center', //对齐方式
lineHeight: 25, //行高
mt: 20 //margin-top
}
]
},
// 微信好友和朋友圈参数新加参考 产品详情里面
// http://localhost:8081/h5/#/pages/product/detail/detail
appParams: {
title: '',
summary: '',
path: ''
},
detail: {},
/*分享配置*/
shareConfig: {},
// logo
logo: ''
}
},
// 获取初始数据
mounted() {},
onShow() {
// 下面全是引入swiper数据 start!!!
this.getCavasSwiperImgData();
// 上面全是引入swiper数据 end!!!
this.getShareData()
},
methods: {
// 返回资产页面
backPrivious() {
uni.navigateBack({
delta: 1
});
},
// 轮播图标识
swiperChange(e) {
const {
current,
source
} = e.detail;
if (source === 'touch' && current === this.posters.length) {
// 如果是用户通过滑动触发的,并且当前滑动到最后一张图
this.current = 0; // 将当前索引重置为第一张图的索引
} else {
this.current = current;
}
},
// 获取邀请海报,二维码和邀请链接
async getCavasSwiperImgData() {
let self = this;
let source = self.getPlatform();
uni.showLoading({
title: '加载中',
});
self._get('plus.agent.qrcode/poster', {
source: source
},
res => {
uni.hideLoading();
if (res.data) {
// swiper轮播图数据图片
self.posters = res.data.poster;
// #ifdef H5
// 二维码图片路径
self.qrcodeUrl = res.data.qrcode;
// #endif
// 小程序二维码还没有图片!!!!!!,现在用的是二维码的图片
// 除了H5都显示小程序图片
// #ifndef H5
self.qrcodeUrl = res.data.qrcode;
// #endif
// 复制链接路径
self.shareLink = res.data.url;
// 假设头像头像路径
self.headerImgUrl = res.data.qrcode;
// console.log(res.data.poster,'poster');
// console.log(res.data.qrcode,'qrcode');
let refereeId = res.data.url.split('?')[1].split('&')[0].split('=')[1];
uni.setStorageSync('referee_id', refereeId);
// http://localhost:8081/h5/#/pages/product/detail/detail
// 之前产品详情是通过,点击打开弹窗触发参数
// 调完接口触发微信好友和朋友圈参数
//#ifndef H5
self.appParams.title = self.detail.product_name;
self.appParams.summary = self.detail.product_name;
// // 构建页面参数
// 这个应该是user_id可能或者图片id
let params = self.getShareUrlParams({
product_id: self.product_id
});
self.appParams.path = '/pages/user/newIndex/my-share/my-share?' + params;
self.appParams.image = self.detail.image[0].file_path;
self.isAppShare = true;
//#endif
// self.taskFunc();//分享成功接口方法
}
});
},
taskFunc() {
let self = this;
self._post(
'plus.task.Task/dayTask', {
task_type: 'product'
},
res => {
console.log('分享成功');
}
);
},
// 点击下载保存相册按钮
downloadPoster() {
this.posterData.poster.url = this.posters[this.current].file_path;
this.posterData.codeImg.url = this.qrcodeUrl
// 下面新加
this.posterData.headerImg.url = this.headerImgUrl
this.posterData.title.text = this.titleText
this.$refs.hchPoster.posterShow()
this.deliveryFlag = false;
},
// 取消弹出页面
handleClose() {
this.deliveryFlag = false
},
// 点击按钮后复制链接
copyLink() {
let self = this;
uni.setClipboardData({
data: self.shareLink,
success() {
uni.showToast({
title: '链接已复制',
icon: 'success'
});
},
fail() {
uni.showToast({
title: '复制失败',
icon: 'none'
});
}
});
},
// 获取分享配置应该是
getShareData() {
let self = this;
self._get(
'settings/appShare', {},
function(res) {
self.shareConfig = res.data.appshare;
self.logo = res.data.logo;
}
);
},
// 分享方法
share: function(shareType, scene) {
let shareOPtions = {
provider: "weixin",
scene: scene, //WXSceneSession”分享到聊天界面,“WXSenceTimeline”分享到朋友圈
type: shareType,
success: function(res) {
console.log("success:" + JSON.stringify(res));
},
fail: function(err) {
console.log("fail:" + JSON.stringify(err));
}
}
if (this.shareConfig.type != 2) {
shareOPtions.summary = this.appParams.summary;
shareOPtions.imageUrl = this.logo;
shareOPtions.title = this.appParams.title;
// 公众号/h5
if (this.shareConfig.type == 1) {
shareOPtions.href = this.shareConfig.open_site + this.appParams.path;
} else if (this.shareConfig.type == 3) {
//下载页
if (this.shareConfig.bind_type == 1) {
shareOPtions.href = this.shareConfig.down_url;
} else {
shareOPtions.href = config.app_url + "/index.php/api/user.useropen/invite?app_id=" + config
.app_id + "&referee_id=" + uni.getStorageSync('user_id');
}
}
} else {
// 分享到小程序
shareOPtions.scene = 'WXSceneSession';
shareOPtions.type = 5;
shareOPtions.imageUrl = this.appParams.image ? this.appParams.image : this.logo;
shareOPtions.title = this.appParams.title;
shareOPtions.miniProgram = {
id: this.shareConfig.gh_id,
path: this.appParams.path,
webUrl: this.shareConfig.web_url,
type: 0
};
}
uni.share(shareOPtions);
},
}
};
</script>
<style lang="scss" scoped>
.container {
padding: 10rpx;
}
.title {
text-align: center;
font-size: 36rpx;
margin-bottom: 20rpx;
display: flex;
align-items: center;
justify-content: space-between;
}
/** 轮播图效果开始 **/
.carsoul {
// margin-top: 100rpx;
margin-top: 20rpx;
}
swiper {
// width: 80%;
// height: 450px;
width: 662rpx;
height: 1054rpx;
// background: #D8D8D8;
border-radius: 24rpx 24rpx 24rpx 24rpx;
opacity: 1;
/* 根据需求调整高度 */
margin: 0 auto;
}
/deep/ swiper uni-image {
border-radius: 24rpx 24rpx 24rpx 24rpx !important;
}
/deep/ swiper image {
border-radius: 24rpx 24rpx 24rpx 24rpx !important;
}
swiper-item {
width: 100%;
}
.qrcode {
width: 200rpx;
/* 调整二维码的宽度 */
height: 200rpx;
/* 调整二维码的高度 */
margin-bottom: 60rpx;
}
.progress-wrapper {
position: relative;
display: flex;
justify-content: center;
align-items: center;
margin-top: -20px;
}
.progress-item {
width: 20px;
height: 5px;
margin: 0 5px;
border-radius: 2.5px;
background-color: #d0d0d0;
/* 暗白色 */
}
.progress-item.active {
background-color: #fff;
/* 白色 */
}
/** 轮播图效果结束 **/
/** 功能按钮区位置开始 **/
.btns-wrap {
width: 100%;
// height: 300rpx;
margin-top: 54rpx;
margin-bottom: 72rpx;
display: flex;
justify-content: space-around;
align-items: center;
}
.wrapBtn {
width: 100%;
text-align: center;
}
.wrapBtn image {
width: 96rpx;
height: 96rpx;
opacity: 1;
text-align: center;
margin: 0 auto;
margin-bottom: 20rpx;
}
.wrapBtn text {
margin-top: 20rpx;
font-size: 36rpx;
font-family: Source Han Sans-Regular, Source Han Sans;
font-weight: 400;
color: #3D3D3D;
line-height: 50rpx;
text-align: center;
}
/** 功能按钮区位置结束 **/
.sharepicturesto {
display: flex;
justify-content: center;
align-items: center;
margin-top: 50rpx;
}
.sharepicturesto-lft {
width: 48rpx;
height: 4rpx;
background: linear-gradient(270deg, #000000 0%, rgba(216, 216, 216, 0) 100%);
border-radius: 0rpx 0rpx 0rpx 0rpx;
opacity: 1;
}
.sharepicturesto-ctr {
font-size: 36rpx;
font-family: Source Han Sans-Regular, Source Han Sans;
font-weight: 400;
color: #3D3D3D;
line-height: 50rpx;
margin-left: 20rpx;
margin-right: 20rpx;
}
.sharepicturesto-rgt {
width: 48rpx;
height: 4rpx;
background: linear-gradient(270deg, #000000 0%, rgba(216, 216, 216, 0) 100%);
border-radius: 0rpx 0rpx 0rpx 0rpx;
opacity: 1;
transform: rotate(180deg);
}
// 底部整体位置移动
.qrcode-container {
position: absolute;
bottom: 0px;
/* 调整二维码距离底部的位置 */
left: 0;
right: 0;
display: flex;
justify-content: center;
align-items: center;
}
.qrcode-container-lft {
width: 80rpx;
height: 80rpx;
opacity: 1;
position: relative;
left: 50rpx;
}
.qrcode-container-lft image {
width: 80rpx;
height: 80rpx;
opacity: 1;
}
.qrcode-container-ctr {
font-size: 32rpx;
font-family: Source Han Sans-Regular, Source Han Sans;
font-weight: 400;
color: #FFFFFF;
line-height: 50rpx;
padding-left: 18rpx;
padding-right: 24rpx;
position: relative;
left: 50rpx;
}
.qrcode-container-img {
position: relative;
top: 20rpx;
left: 50rpx;
}
.qrcode-container-img image {
width: 182rpx;
height: 182rpx;
border-radius: 0rpx 0rpx 0rpx 0rpx;
opacity: 1;
}
.carsoul .carsoul_bg{
width: 100%;
height: 100%;
}
</style>
插件文件如下图片
components/hch-poster
看好文件之间等级
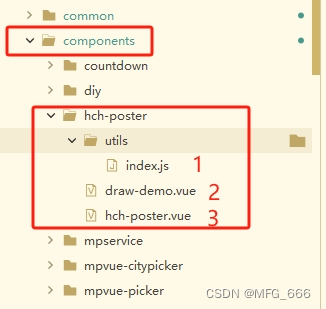
hch-poster
utils
index.js
/*
 * @Description: 公共方法
 * @Version: 1.0.0
 * @Autor: hch
 * @Date: 2021-07-22 00:01:09
 */
/**
 * @description: 绘制正方形(可以定义圆角),并且有图片地址的话填充图片
 * @param {CanvasContext} ctx canvas上下文
 * @param {number} x 圆角矩形选区的左上角 x坐标
 * @param {number} y 圆角矩形选区的左上角 y坐标
 * @param {number} w 圆角矩形选区的宽度
 * @param {number} h 圆角矩形选区的高度
 * @param {number} r 圆角的半径
 * @param {String} url 图片的url地址
 */
export function drawSquarePic(ctx, x, y, w, h, r, url) {
	ctx.save()
	ctx.beginPath()
	// 绘制左上角圆弧
	ctx.arc(x + r, y + r, r, Math.PI, Math.PI * 1.5)
	// 绘制border-top
	// 画一条线 x终点、y终点
	ctx.lineTo(x + w - r, y)
	// 绘制右上角圆弧
	ctx.arc(x + w - r, y + r, r, Math.PI * 1.5, Math.PI * 2)
	// 绘制border-right
	ctx.lineTo(x + w, y + h - r)
	// 绘制右下角圆弧
	ctx.arc(x + w - r, y + h - r, r, 0, Math.PI * 0.5)
	// 绘制左下角圆弧
	ctx.arc(x + r, y + h - r, r, Math.PI * 0.5, Math.PI)
	// 绘制border-left
	ctx.lineTo(x, y + r)
	// 填充颜色(需要可以自行修改)
	ctx.setFillStyle('#ffffff')
	ctx.fill()
	// 剪切,剪切之后的绘画绘制剪切区域内进行,需要save与restore 这个很重要 不然没办法保存
	ctx.clip()

	// 绘制图片
	return new Promise((resolve, reject) => {
		if (url) {
			wx.getImageInfo({
				src: url,
				success(res) {
					ctx.drawImage(res.path, x, y, w, h)
					ctx.restore() //恢复之前被切割的canvas,否则切割之外的就没办法用
					ctx.draw(true)
					resolve()
				},
				fail(res) {
					console.log('fail -> res', res)
					uni.showToast({
						title: '图片下载异常',
						duration: 2000,
						icon: 'none'
					})
				}
			})
		} else {
			ctx.draw(true)
			resolve()
		}
	})
}

/**
 * @description: 获取设备信息
 * @param {type}
 * @return {type}
 * @author: hch
 */
export function getSystem() {
	let system = wx.getSystemInfoSync()
	let scale = system.windowWidth / 375 //按照苹果留 375*667比例 其他型号手机等比例缩放 显示
	return {
		w: system.windowWidth,
		h: system.windowHeight,
		scale: scale
	}
}

/**
 * @description: 绘制文本时文本的总体高度
 * @param {Object} ctx canvas上下文
 * @param {String} text 需要输入的文本
 * @param {Number} x X轴起始位置
 * @param {Number} y Y轴起始位置
 * @param {Number} maxWidth 单行最大宽度
 * @param {Number} fontSize 字体大小
 * @param {String} color 字体颜色
 * @param {Number} lineHeight 行高
 * @param {String} textAlign 字体对齐方式
 */
export function drawTextReturnH(
	ctx,
	text,
	x,
	y,
	maxWidth = 375,
	fontSize = 14,
	color = '#000',
	lineHeight = 30,
	// textAlign = 'left'
	textAlign = 'center' //文本中心点位置设置
) {
	if (textAlign) {
		ctx.setTextAlign(textAlign) //设置文本的水平对齐方式  ctx.setTextAlign这个可以兼容百度小程序 ,注意:ctx.textAlign百度小程序有问题
		switch (textAlign) {
			case 'center':
				x = getSystem().w / 2
				break

			case 'right':
				x = (getSystem().w - maxWidth) / 2 + maxWidth
				break

			default:
				// 左对齐
				x = (getSystem().w - maxWidth) / 2
				break
		}
	}
	let arrText = text.split('')
	let line = ''
	for (let n = 0; n < arrText.length; n++) {
		let testLine = line + arrText[n]
		ctx.font = fontSize + 'px sans-serif' //设置字体大小,注意:百度小程序 用ctx.setFontSize设置字体大小后,计算字体宽度会无效
		ctx.setFillStyle(color) //设置字体颜色
		let metrics = ctx.measureText(testLine) //measureText() 方法返回包含一个对象,该对象包含以像素计的指定字体宽度。
		let testWidth = metrics.width
		if (testWidth > maxWidth && n > 0) {
			ctx.fillText(line, x, y)
			line = arrText[n]
			y += lineHeight
		} else {
			line = testLine
		}
	}
	ctx.fillText(line, x, y)
	ctx.draw(
		true) //本次绘制是否接着上一次绘制。即 reserve 参数为 false,则在本次调用绘制之前 native 层会先清空画布再继续绘制;若 reserve 参数为 true,则保留当前画布上的内容,本次调用 drawCanvas 绘制的内容覆盖在上面,默认 false。
	return y
}
draw-demo.vue
<!--
 * @Description: 生成海报组件
 * @Version: 1.0.0
 * @Autor: hch
 * @Date: 2020-08-07 14:48:41
 * @LastEditors: Please set LastEditors
 * @LastEditTime: 2021-07-30 09:25:07
 * 保存海报按钮和关闭按钮 在html代码中写出来 绑定点击方法然后透明 再用canvas 覆盖
-->

<template>
  <view class="content">
    <view class="btn" @tap="handleDraw('square1')">正方形</view>
    <view class="btn" @tap="handleDraw('square2')">圆角方形</view>
    <view class="btn" @tap="handleDraw('square3')">圆形</view>
    <view class="btn" @tap="handleDraw('pic1')">图片</view>
    <view class="btn" @tap="handleDraw('text1')">左对齐文本</view>
    <view class="btn" @tap="handleDraw('text2')">居中对齐文本</view>
    <view class="btn" @tap="handleDraw('text3')">右对齐文本</view>

    <view
      class="canvas-content"
      v-show="canvasShow"
      :style="'width:' + system.w + 'px; height:' + system.h + 'px;'"
    >
      <!-- 遮罩层 -->
      <view class="canvas-mask"></view>
      <!-- :width="system.w" :height="system.h" 支付宝必须要这样设置宽高才有效果 -->
      <canvas
        class="canvas"
        :canvas-id="canvasId"
        :id="canvasId"
        :style="'width:' + system.w + 'px; height:' + system.h + 'px;'"
        :width="system.w"
        :height="system.h"
      ></canvas>
      <view class="button-wrapper">
        <!-- 保存海报按钮 -->
        <!-- #ifndef MP-QQ -->
        <!-- cover-view 标签qq小程序有问题 -->
        <cover-view class="save-btn cancel-btn" @tap="handleCancel">取消</cover-view>
        <!-- #endif -->
        <!-- #ifdef MP-QQ -->
        <view class="save-btn cancel-btn" @tap="handleCancel">取消</view>
        <!-- #endif -->
      </view>
    </view>
  </view>
</template>

<script>
  import { drawSquarePic, drawTextReturnH, getSystem } from './utils'
  export default {
    data() {
      return {
        canvasId: 'canvas',
        system: {},
        canvasShow: false,
        square1: {
          //正方形
          x: 40,
          y: 40,
          r: 0, //圆角半径
          w: 80, //宽度
          h: 80 //高度
        },
        square2: {
          //圆角方形
          x: 40,
          y: 40,
          r: 10, //圆角半径
          w: 80, //宽度
          h: 80 //高度
        },
        square3: {
          //圆形
          x: 40,
          y: 40,
          r: 40, //圆角半径
          w: 80, //宽度
          h: 80 //高度
        },
        pic1: {
          x: 40,
          y: 40,
          url: 'https://huangchunhongzz.gitee.io/imgs/poster/product.png',
          r: 0, //圆角半径
          w: 250, //宽度
          h: 200 //高度
        },
        text1: {
          x: 0,
          y: 40,
          text: '今日上新水果,牛奶草莓',
          fontSize: 16, //字体大小
          color: '#000', //颜色
          lineHeight: 25, //行高
          mt: 0 //margin-top
        },
        text2: {
          x: 0,
          y: 40,
          text: '今日上新水果,牛奶草莓',
          fontSize: 16, //字体大小
          color: 'blue', //颜色
          lineHeight: 25, //行高
          mt: 0, //margin-top
          align: 'center' //对齐方式
        },
        text3: {
          x: 0,
          y: 40,
          text: '今日上新水果,牛奶草莓',
          fontSize: 16, //字体大小
          color: 'red', //颜色
          lineHeight: 25, //行高
          mt: 0, //margin-top
          align: 'right' //对齐方式
        }
      }
    },
    created() {
      // 获取设备信息
      this.system = getSystem()
    },
    methods: {
      /**
       * @description: 展示海报
       * @param {type}
       * @return {type}
       * @author: hch
       */
      handleDraw(type) {
        console.log('handleDraw -> type', type)
        this.canvasShow = true
        this.draw(type)
      },
      /**
       * @description: 绘制
       * @author: hch
       */
      draw(type) {
        uni.showLoading({
          title: '绘制中...'
        })
        if (this.ctx) {
          this.ctx.clearRect(0, 0, this.system.w, this.system.h) //清空之前的海报
          this.ctx.restore() //恢复之前被切割的canvas,否则切割之外的就没办法用
        } else {
          this.ctx = uni.createCanvasContext(this.canvasId, this)
        }
        let drawData = this[type]
        if (type === 'square1' || type === 'square2' || type === 'square3' || type === 'pic1') {
          // 绘制图像/图片
          drawSquarePic(
            this.ctx,
            drawData.x,
            drawData.y,
            drawData.w,
            drawData.h,
            drawData.r,
            drawData.url
          )
        } else {
          // 绘制文本
          let textY = drawTextReturnH(
            this.ctx,
            drawData.text,
            drawData.x,
            drawData.y,
            this.system.w,
            drawData.fontSize,
            drawData.color,
            drawData.lineHeight,
            drawData.align
          )
        }

        uni.hideLoading()
      },
      /**
       * @description: 取消海报
       * @param {type}
       * @return {type}
       * @author: hch
       */
      handleCancel() {
        this.canvasShow = false
      }
    }
  }
</script>

<style lang="scss">
  .content {
    margin-bottom: 80rpx;
    overflow: hidden;
    border-bottom: 1rpx solid $uni-border-color;

    .btn {
      float: left;
      width: 30%;
      margin: 10rpx;
      font-size: 30rpx;
      line-height: 72rpx;
      color: #fff;
      text-align: center;
      background: $uni-btn-color;
      border-radius: 45rpx;
      border-radius: 36rpx;
    }
  }

  .canvas-content {
    position: absolute;
    top: 0;
    z-index: 9;

    .canvas-mask {
      position: fixed;
      top: 0;
      right: 0;
      bottom: 0;
      left: 0;
      z-index: 9;
      width: 100%;
      height: 100%;
      background: $uni-btn-color;
    }

    .canvas {
      z-index: 10;
    }

    .button-wrapper {
      position: fixed;
      bottom: 20rpx;
      z-index: 16;
      display: flex;
      width: 100%;
      height: 72rpx;
      justify-content: space-around;
    }

    .save-btn {
      z-index: 16;
      width: 40%;
      height: 100%;
      font-size: 30rpx;
      line-height: 72rpx;
      color: #fff;
      text-align: center;
      background: $uni-btn-color;
      border-radius: 45rpx;
      border-radius: 36rpx;
    }

    .cancel-btn {
      color: $uni-btn-color;
      background: #fff;
    }

    .canvas-close-btn {
      position: fixed;
      top: 30rpx;
      right: 0;
      z-index: 12;
      width: 60rpx;
      height: 60rpx;
      padding: 20rpx;
    }
  }
</style>
hch-poster.vue
<!--
 * @Description: 生成海报组件
 * @Version: 1.0.0
 * @Autor: hch
 * @Date: 2020-08-07 14:48:41
 * @LastEditors: Please set LastEditors
 * @LastEditTime: 2021-07-31 18:11:35
 * 保存海报按钮和关闭按钮 在html代码中写出来 绑定点击方法然后透明 再用canvas 覆盖
 * https://ext.dcloud.net.cn/plugin?id=5770
-->

<template>
	<view class="canvas-content" v-show="canvasShow" :style="'width:' + system.w + 'px; height:' + system.h + 'px;'">
		<!-- 遮罩层 -->
		<view class="canvas-mask"></view>
		<!-- 海报 -->
		<!-- :width="system.w" :height="system.h" 支付宝必须要这样设置宽高才有效果 -->
		<canvas class="canvas" canvas-id="myCanvas" id="myCanvas"
			:style="'width:' + system.w + 'px; height:' + system.h + 'px;'" :width="system.w"
			:height="system.h"></canvas>
		<view class="button-wrapper">
			<!-- 保存海报按钮 -->
			<!-- #ifndef MP-QQ -->
			<!-- cover-view 标签qq小程序有问题 -->
			<!-- 之前用的这个在手机不显示文字 -->
			<!--  <cover-view class="save-btn" @tap="handleSaveCanvasImage">保存海报</cover-view>
			<cover-view class="save-btn cancel-btn" @tap="handleCanvasCancel">取消</cover-view> -->

			<view class="save-btn" @tap="handleSaveCanvasImage">保存海报</view>
			<view class="save-btn cancel-btn" @tap="handleCanvasCancel">取消</view>
			<!-- #endif -->
			<!-- #ifdef MP-QQ -->
			<view class="save-btn" @tap="handleSaveCanvasImage">保存海报</view>
			<view class="save-btn cancel-btn" @tap="handleCanvasCancel">取消</view>
			<!-- #endif -->
		</view>
	</view>
</template>

<script>
	import {
		drawSquarePic,
		drawTextReturnH,
		getSystem
	} from './utils'
	export default {
		data() {
			return {
				system: {},
				canvasShow: false
			}
		},
		props: {
			posterData: {
				type: Object,
				default: () => {
					return {}
				}
			}
		},
		computed: {
			/**
			 * @description: 计算海报背景数据
			 * @param {*}
			 * @return {*}
			 * @author: hch
			 */
			poster() {
				let data = this.posterData
				let system = this.system
				let posterBg = {
					url: data.poster.url,
					r: data.poster.r * system.scale,
					w: data.poster.w * system.scale,
					h: data.poster.h * system.scale,
					x: (system.w - data.poster.w * system.scale) / 2,
					y: (system.h - data.poster.h * system.scale) / 2,
					p: data.poster.p * system.scale
				}
				return posterBg
			},
			/**
			 * @description: 计算海报头部主图
			 * @param {*}
			 * @return {*}
			 * @author: hch
			 */
			mainImg() {
				let data = this.posterData
				let system = this.system
				let posterMain = {
					url: data.mainImg.url,
					r: data.mainImg.r * system.scale,
					w: data.mainImg.w * system.scale,
					h: data.mainImg.h * system.scale,
					x: (system.w - data.mainImg.w * system.scale) / 2,
					y: this.poster.y + data.poster.p * system.scale
				}
				return posterMain
			},
			/**
			 * @description: 计算海报标题
			 * @param {*}
			 * @return {*}
			 * @author: hch
			 */
			title() {
				let data = this.posterData
				let system = this.system
				let posterTitle = data.title
				posterTitle.x = this.mainImg.x
				posterTitle.y = this.mainImg.y + this.mainImg.h + data.title.mt * system.scale
				return posterTitle
			},
			/**
			 * @description: 计算小程序码
			 * @param {*}
			 * @return {*}
			 * @author: hch
			 */
			codeImg() {
				let data = this.posterData
				let system = this.system
				let posterCode = {
					url: data.codeImg.url,
					r: data.codeImg.r * system.scale,
					w: data.codeImg.w * system.scale,
					h: data.codeImg.h * system.scale,
					x: (system.w - data.codeImg.w * system.scale) / 2,
					y: data.codeImg.mt * system.scale //y需要加上绘图后文本的y
				}
				return posterCode
			},

			/**
			 * @description: 计算小程序码
			 * @param {*}
			 * @return {*}
			 * @author: hch
			 */
			headerImg() {
				let data = this.posterData
				let system = this.system
				let posterCode = {
					url: data.headerImg.url,
					r: data.headerImg.r * system.scale,
					w: data.headerImg.w * system.scale,
					h: data.headerImg.h * system.scale,
					x: (system.w - data.headerImg.w * system.scale) / 2,
					y: data.headerImg.mt * system.scale //y需要加上绘图后文本的y
				}
				return posterCode
			}


		},
		created() {
			// 获取设备信息
			this.system = getSystem()
		},
		methods: {
			/**
			 * @description: 展示海报
			 * @param {type}
			 * @return {type}
			 * @author: hch
			 */
			posterShow() {
				this.canvasShow = true
				this.creatPoster()
			},
			/**
			 * @description: 生成海报
			 * @author: hch
			 */
			async creatPoster() {
				uni.showLoading({
					title: '生成海报中...'
				})
				const ctx = uni.createCanvasContext('myCanvas', this)
				this.ctx = ctx
				ctx.clearRect(0, 0, this.system.w, this.system.h) //清空之前的海报
				ctx.draw() //清空之前的海报
				// 根据设备屏幕大小和距离屏幕上下左右距离,及圆角绘制背景
				let poster = this.poster
				let mainImg = this.mainImg
				let codeImg = this.codeImg
				let headerImg = this.headerImg


				let title = this.title

				await drawSquarePic(ctx, poster.x, poster.y, poster.w, poster.h, poster.r, poster.url)


				// 位置移动方法
				// 先看有没有文字,有文字,按照如下步骤,
				// 步骤一:先看文本位置,靠左,中,右,然后找到下面方法设置
				// import {drawTextReturnH} from './utils' 找到drawTextReturnH方法 textAlign = 'center'

				// 步骤二:根据文本位置设置定位图片


				// 绘制标题 textY 绘制文本的y位置

				// 我感觉应该是以这个文本textY位中心点移动,现在文本是居中状态,之前靠左边,文本定位设置在
				// 这个方法里面drawTextReturnH引入的js方法里面
				// import {drawTextReturnH} from './utils' 找到drawTextReturnH方法 textAlign = 'center'

				console.log('creatPoster -> title.x', title.x)

				// 整体移动 以文本为中心点Y轴上下整体移动,X轴是左,中,右,设置在// import {drawTextReturnH} from './utils' 找到drawTextReturnH方法 textAlign = 'center' right,left里面控制位置
				let textY = drawTextReturnH(
					ctx,
					title.text,
					title.x,
					title.y + 180,
					mainImg.w,
					title.fontSize,
					title.color,
					title.lineHeight
				)

				// 步骤二

				// 头像顶部
				// 这里控制图片移动位置,X轴,Y轴移动
				await drawSquarePic(
					ctx,
					headerImg.x - 70, //控制X轴移动
					headerImg.y + textY - 40,//步骤二 Y轴必须加textY这个,应为要以文本为中心点		 //控制Y轴移动	根据文本textY这个为中心点移动
					headerImg.w,
					headerImg.h,
					0,
					headerImg.url
				)
				// 头像底部


				// 步骤二
				// 绘制小程序码

				// 现在更换接口是二维码图片
				// 这里控制图片移动位置,X轴,Y轴移动
				await drawSquarePic(
					ctx,
					codeImg.x + 90, //控制X轴移动
					codeImg.y + textY - 70, //步骤二 Y轴必须加textY这个,应为要以文本为中心点		 //控制Y轴移动		根据文本textY这个为中心点移动
					// codeImg.x, //控制X轴移动
					// codeImg.y, //控制Y轴移动
					codeImg.w,
					codeImg.h,
					0,
					codeImg.url
				)
				// 小程序的名称
				// 长按/扫描识别查看商品
				let y = 0
				this.posterData.tips.forEach((element, i) => {
					if (i == 0) {
						y = codeImg.y + textY + element.mt + codeImg.h
					} else {
						y += element.mt
					}
					y = drawTextReturnH(
						ctx,
						element.text,
						title.x,
						y,
						mainImg.w,
						element.fontSize,
						element.color,
						element.lineHeight,
						element.align
					)
				})
				uni.hideLoading()
			},
			/**
			 * @description: 保存到系统相册
			 * @param {type}
			 * @return {type}
			 * @author: hch
			 */
			handleSaveCanvasImage() {
				uni.showLoading({
					title: '保存中...'
				})
				let _this = this
				// 把画布转化成临时文件
				// #ifndef MP-ALIPAY
				// 支付宝小程序外,其他都是用这个方法 canvasToTempFilePath
				uni.canvasToTempFilePath({
						x: this.poster.x,
						y: this.poster.y,
						width: this.poster.w, // 画布的宽
						height: this.poster.h, // 画布的高
						destWidth: this.poster.w * 5,
						destHeight: this.poster.h * 5,
						canvasId: 'myCanvas',
						success(res) {
							//保存图片至相册
							// #ifndef H5
							// 除了h5以外的其他端
							uni.saveImageToPhotosAlbum({
								filePath: res.tempFilePath,
								success(res) {
									uni.hideLoading()
									uni.showToast({
										title: '图片保存成功,可以去分享啦~',
										duration: 2000,
										icon: 'none'
									})
									_this.handleCanvasCancel()
								},
								fail() {
									uni.showToast({
										title: '保存失败,稍后再试',
										duration: 2000,
										icon: 'none'
									})
									uni.hideLoading()
								}
							})
							// #endif

							// #ifdef H5
							// h5的时候
							uni.showToast({
								title: '请长按保存',
								duration: 3000,
								icon: 'none'
							})
							_this.handleCanvasCancel()
							_this.$emit('previewImage', res.tempFilePath)
							// #endif
						},
						fail(res) {
							console.log('fail -> res', res)
							uni.showToast({
								title: '保存失败,稍后再试',
								duration: 2000,
								icon: 'none'
							})
							uni.hideLoading()
						}
					},
					this
				)
				// #endif
				// #ifdef MP-ALIPAY
				// 支付宝小程序条件下 toTempFilePath
				this.ctx.toTempFilePath({
						x: this.poster.x,
						y: this.poster.y,
						width: this.poster.w, // 画布的宽
						height: this.poster.h, // 画布的高
						destWidth: this.poster.w * 5,
						destHeight: this.poster.h * 5,
						success(res) {
							//保存图片至相册
							my.saveImage({
								url: res.apFilePath,
								showActionSheet: true,
								success(res) {
									uni.hideLoading()
									uni.showToast({
										title: '图片保存成功,可以去分享啦~',
										duration: 2000,
										icon: 'none'
									})
									_this.handleCanvasCancel()
								},
								fail() {
									uni.showToast({
										title: '保存失败,稍后再试',
										duration: 2000,
										icon: 'none'
									})
									uni.hideLoading()
								}
							})
						},
						fail(res) {
							console.log('fail -> res', res)
							uni.showToast({
								title: '保存失败,稍后再试',
								duration: 2000,
								icon: 'none'
							})
							uni.hideLoading()
						}
					},
					this
				)
				// #endif
			},
			/**
			 * @description: 取消海报
			 * @param {type}
			 * @return {type}
			 * @author: hch
			 */
			handleCanvasCancel() {
				this.canvasShow = false
				this.$emit('cancel', true)
			}
		}
	}
</script>

<style lang="scss">
	$uni-btn-color: #007aff;

	.content {
		height: 100%;
		text-align: center;
	}

	.canvas-content {
		position: absolute;
		top: 0;

		.canvas-mask {
			position: fixed;
			top: 0;
			right: 0;
			bottom: 0;
			left: 0;
			z-index: 9;
			width: 100%;
			height: 100%;
			background: rgba(0, 0, 0, 0.5);
		}

		.canvas {
			z-index: 10;
		}

		.button-wrapper {
			position: fixed;
			bottom: 20rpx;
			z-index: 16;
			display: flex;
			width: 100%;
			height: 72rpx;
			justify-content: space-around;
		}

		.save-btn {
			z-index: 16;
			width: 40%;
			height: 100%;
			font-size: 30rpx;
			line-height: 72rpx;
			color: #fff;
			text-align: center;
			background: $uni-btn-color;
			border-radius: 45rpx;
			border-radius: 36rpx;
		}

		.cancel-btn {
			color: $uni-btn-color;
			background: #fff;
		}

		.canvas-close-btn {
			position: fixed;
			top: 30rpx;
			right: 0;
			z-index: 12;
			width: 60rpx;
			height: 60rpx;
			padding: 20rpx;
		}
	}
</style>
最后
感觉文章好的话记得点个心心和关注和收藏,有错的地方麻烦指正一下,如果需要转载,请标明出处,多谢!!!
