基于机器学习(CNN+opencv+python)的车牌识别
- 下载本文机器学习(CNN+opencv+python)的车牌识别系统完整的代码和参考报告链接(或者可以联系博主koukou(壹壹23七2五六98),获取源码和报告)https://download.csdn.net/download/shooter7/88548767
- 此处是另外一个系统描述的链接:机器学习Opencv和SVM的车牌识别系统,可用于毕设课设。https://blog.csdn.net/shooter7/article/details/129935028
文章目录
- 基于机器学习(CNN+opencv+python)的车牌识别
- 摘要
- 调试导入和运行结果展示
- 识别流程分解
- 车牌定位
- 字符分割
- 源码操作流程
摘要
车牌识别是计算机视觉领域的一个重要应用,它利用图像处理和模式识别技术对车辆的车牌进行自动识别。CNN(卷积神经网络)是一种深度学习模型,近年来在图像识别任务中取得了显著的成果。CNN车牌识别的过程包括以下几个步骤:1.图像预处理:对输入的车辆图片进行灰度化、二值化、去噪等处理,以减少噪声和不必要的信息。2.特征提取:利用卷积层和池化层从预处理后的图像中提取出有用的特征,如边缘、角点、纹理等。3.分类器训练:将提取出的特征输入到全连接层中,通过反向传播算法对网络参数进行优化,使网络能够准确地识别车牌号码。4.车牌定位:在识别过程中,还需要对车牌进行定位,以便准确地提取出车牌上的数字和字母。5.输出结果:最后,将识别出的车牌号码输出给用户或其他应用程序使用。
调试导入和运行结果展示
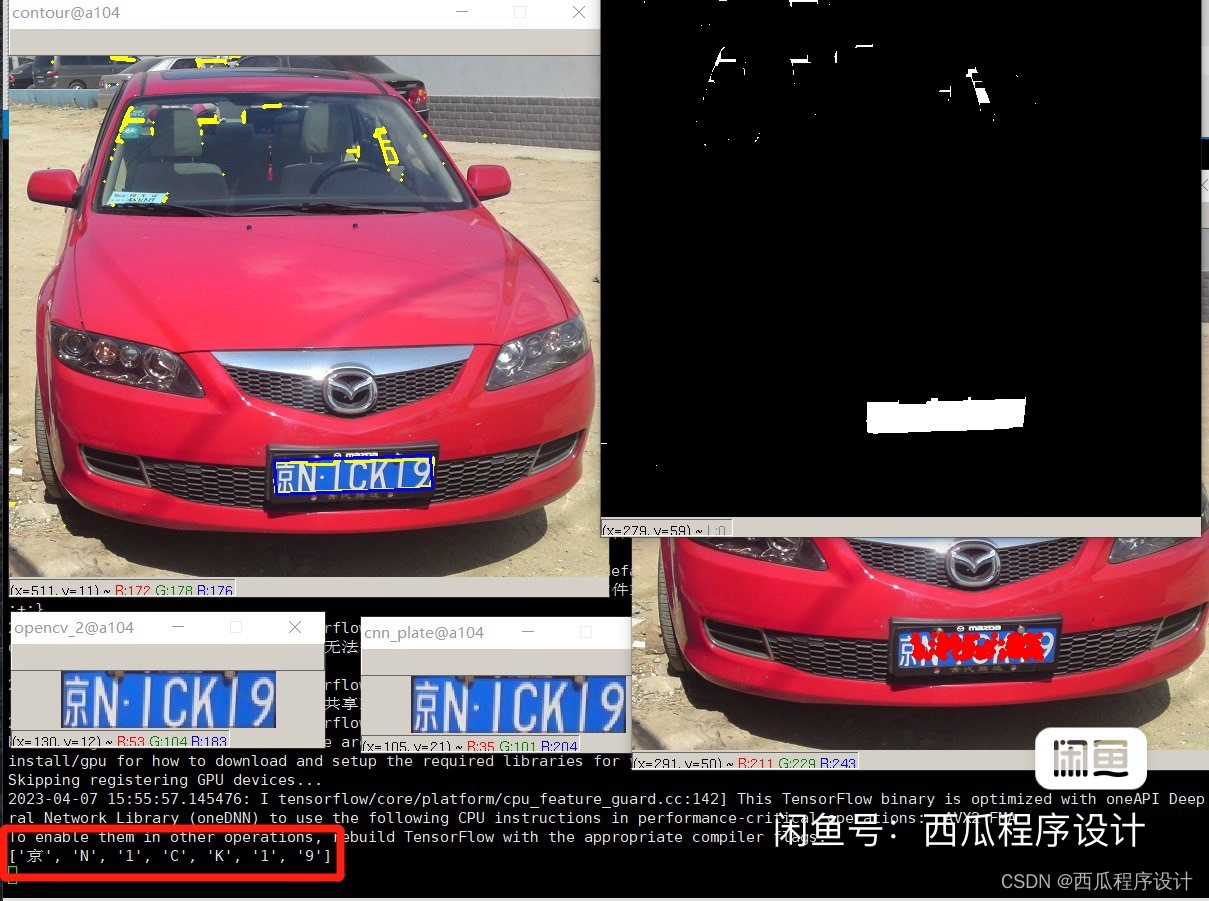
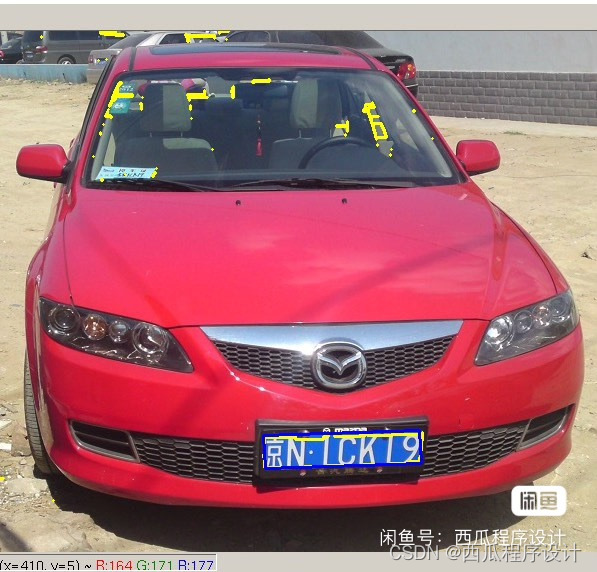
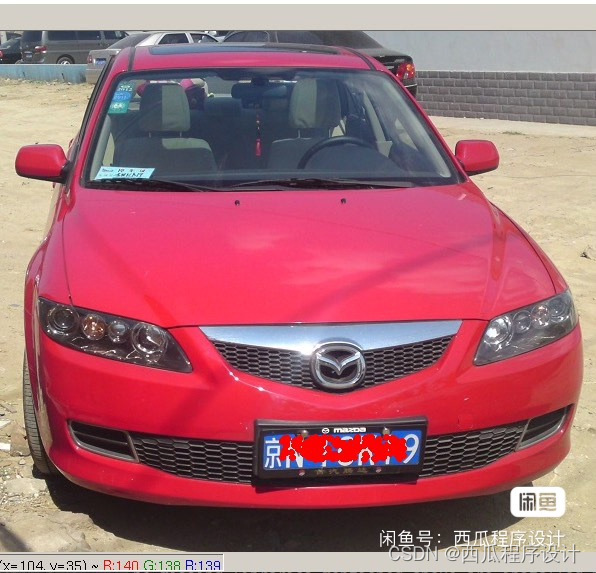
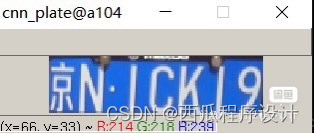
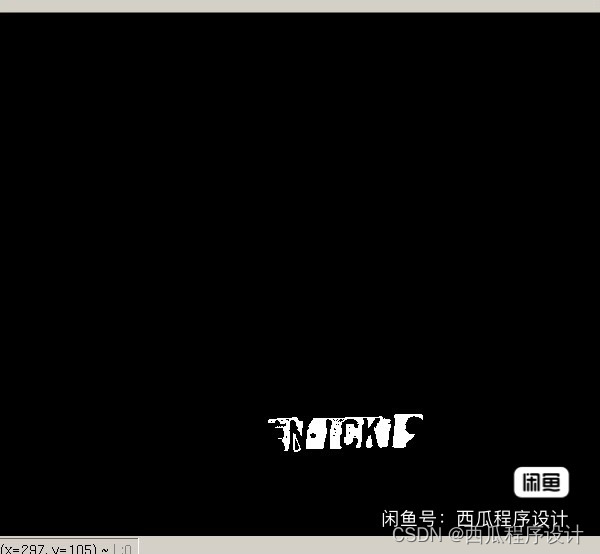
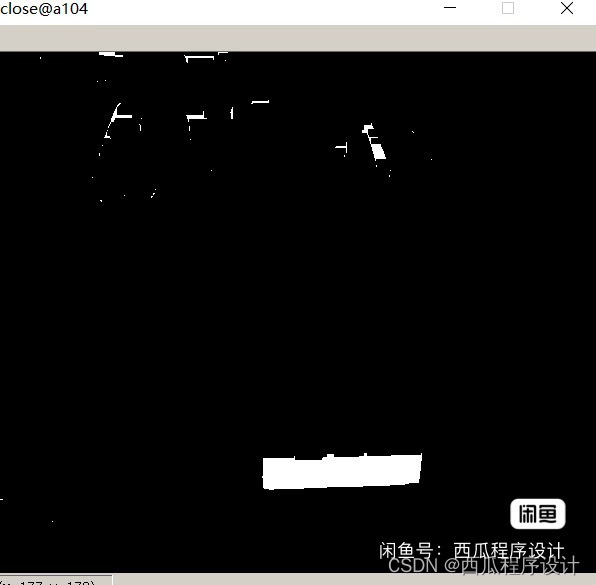
识别流程分解
关于车牌预处理,网上有很多说法,不过都差不太多。预处理的目的在于找到“疑似车牌”的大概位置,为下一步定位车牌做准备
- 加载原始图片加载原始图片
- RGB图片转灰度图:减少数据量
- 均值模糊
- sobel获取垂直边缘
- 原始图片从RGB转HSV:车牌背景色一般是蓝色或黄色(至于h、s、v的设置参考这里:
- 从sobel处理后的图片找到蓝色或黄色区域:从HSV中取出蓝色、黄色区域,和sobel处理后的图片相乘
- 二值化
- 闭运算
车牌定位
在CNN车牌识别中,车牌定位是一个重要的过程。这个过程主要包括以下步骤:
- 图像预处理:对输入的车辆图片进行灰度化、二值化、去噪等处理,以减少噪声和不必要的信息。
- 车牌区域定位:通过图像处理技术,如边缘检测、形状分析等方法,从预处理后的图像中找出可能包含车牌的区域。这是定位车牌的第一步。
- 车牌截取:在确定了可能包含车牌的区域后,需要从原图中截取出这个区域,以便后续进行字符分割和识别。
- 字符分割与识别:将截取的车牌区域分割成一个一个的小图,即字符图片。然后依次对这些字符图片进行识别,先识别省份,再识别城市、再识别号码。
- 输出结果:最后,将识别出的车牌号码以及对应的省份、城市信息输出给用户或其他应用程序使用。

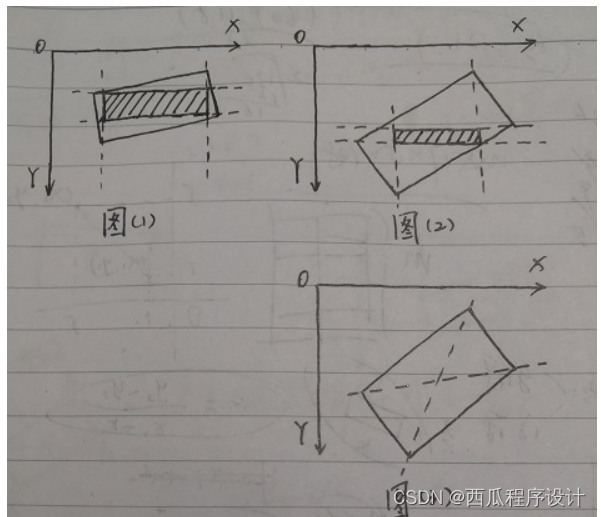
这里主要用到漫水填充算法(类似PS的魔术棒),通过在矩形区域生成种子点,种子点的颜色必须是蓝色或黄色,在填充后的掩模上绘制外接矩形,再依次判断这个外接矩形的尺寸是否符合车牌要求,最后再把矩形做仿射变换校准位置。
字符分割
字符轮廓提取:利用卷积神经网络等技术,对预处理后的图像进行特征提取,并进一步提取出字符的轮廓。
字符分割:根据字符轮廓,将车牌中的字符一个个分割出来。这一步骤通常需要设定一个合适的阈值,通过阈值处理来找出波峰,即字符的分隔点。
返回字符图像列表:分割完成后,将各个字符的图片整理成一个列表,以便后续进行识别。

分割完后,用CNN算法进行车牌识别
源码操作流程
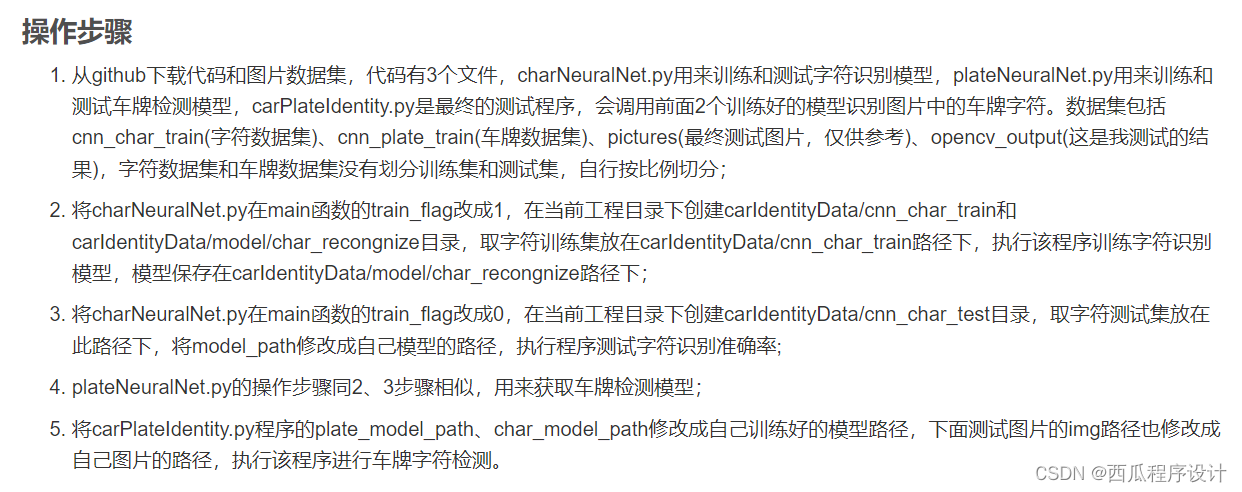
- 部分源码
import cv2
import os
import sys
import numpy as np
import tensorflow._api.v2.compat.v1 as tf
tf.disable_v2_behavior()

char_table = ['0', '1', '2', '3', '4', '5', '6', '7', '8', '9', 'A', 'B', 'C', 'D', 'E', 'F', 'G', 'H', 'I', 'J', 'K',
              'L', 'M', 'N', 'O', 'P', 'Q', 'R', 'S', 'T', 'U', 'V', 'W', 'X', 'Y', 'Z', '川', '鄂', '赣', '甘', '贵',
              '桂', '黑', '沪', '冀', '津', '京', '吉', '辽', '鲁', '蒙', '闽', '宁', '青', '琼', '陕', '苏', '晋',
              '皖', '湘', '新', '豫', '渝', '粤', '云', '藏', '浙']

def hist_image(img):
    assert img.ndim==2
    hist = [0 for i in range(256)]
    img_h,img_w = img.shape[0],img.shape[1]

    for row in range(img_h):
        for col in range(img_w):
            hist[img[row,col]] += 1
    p = [hist[n]/(img_w*img_h) for n in range(256)]
    p1 = np.cumsum(p)
    for row in range(img_h):
        for col in range(img_w):
            v = img[row,col]
            img[row,col] = p1[v]*255
    return img

def find_board_area(img):
    assert img.ndim==2
    img_h,img_w = img.shape[0],img.shape[1]
    top,bottom,left,right = 0,img_h,0,img_w
    flag = False
    h_proj = [0 for i in range(img_h)]
    v_proj = [0 for i in range(img_w)]

    for row in range(round(img_h*0.5),round(img_h*0.8),3):
        for col in range(img_w):
            if img[row,col]==255:
                h_proj[row] += 1
        if flag==False and h_proj[row]>12:
            flag = True
            top = row
        if flag==True and row>top+8 and h_proj[row]<12:
            bottom = row
            flag = False

    for col in range(round(img_w*0.3),img_w,1):
        for row in range(top,bottom,1):
            if img[row,col]==255:
                v_proj[col] += 1
        if flag==False and (v_proj[col]>10 or v_proj[col]-v_proj[col-1]>5):
            left = col
            break
    return left,top,120,bottom-top-10
# 车牌定位
def locate_carPlate(orig_img,pred_image):
    carPlate_list = []
    temp1_orig_img = orig_img.copy() #调试用
    temp2_orig_img = orig_img.copy() #调试用
    contours,heriachy = cv2.findContours(pred_image,cv2.RETR_EXTERNAL,cv2.CHAIN_APPROX_SIMPLE)
    for i,contour in enumerate(contours):
        cv2.drawContours(temp1_orig_img, contours, i, (0, 255, 255), 2)
        # 获取轮廓最小外接矩形,返回值rotate_rect
        rotate_rect = cv2.minAreaRect(contour)
        # 根据矩形面积大小和长宽比判断是否是车牌
        if verify_scale(rotate_rect):
            print("1")
            ret,rotate_rect2 = verify_color(rotate_rect,temp2_orig_img)
            if ret == False:
                continue
            # 车牌位置矫正
            car_plate = img_Transform(rotate_rect2, temp2_orig_img)
            car_plate = cv2.resize(car_plate,(car_plate_w,car_plate_h)) #调整尺寸为后面CNN车牌识别做准备
            #========================调试看效果========================#
            box = cv2.boxPoints(rotate_rect2)
            for k in range(4):
                n1,n2 = k%4,(k+1)%4
                cv2.line(temp1_orig_img,(int(box[n1][0]),int(box[n1][1])),(int(box[n2][0]),int(box[n2][1])),(255,0,0),2)
            cv2.imshow('opencv_' + str(i), car_plate)
            print("2")
            #========================调试看效果========================#
            carPlate_list.append(car_plate)

    cv2.imshow('contour', temp1_orig_img)
    #cv2.waitKey(0)
    return carPlate_list

# 左右切割
def horizontal_cut_chars(plate):
    char_addr_list = []
    area_left,area_right,char_left,char_right= 0,0,0,0
    img_w = plate.shape[1]

    # 获取车牌每列边缘像素点个数
    def getColSum(img,col):
        sum = 0
        for i in range(img.shape[0]):
            sum += round(img[i,col]/255)
        return sum;

    sum = 0
    for col in range(img_w):
        sum += getColSum(plate,col)
    # 每列边缘像素点必须超过均值的60%才能判断属于字符区域
    col_limit = 0#round(0.5*sum/img_w)
    # 每个字符宽度也进行限制
    charWid_limit = [round(img_w/12),round(img_w/5)]
    is_char_flag = False

    for i in range(img_w):
        colValue = getColSum(plate,i)
        if colValue > col_limit:
            if is_char_flag == False:
                area_right = round((i+char_right)/2)
                area_width = area_right-area_left
                char_width = char_right-char_left
                if (area_width>charWid_limit[0]) and (area_width<charWid_limit[1]):
                    char_addr_list.append((area_left,area_right,char_width))
                char_left = i
                area_left = round((char_left+char_right) / 2)
                is_char_flag = True
        else:
            if is_char_flag == True:
                char_right = i-1
                is_char_flag = False
    # 手动结束最后未完成的字符分割
    if area_right < char_left:
        area_right,char_right = img_w,img_w
        area_width = area_right - area_left
        char_width = char_right - char_left
        if (area_width > charWid_limit[0]) and (area_width < charWid_limit[1]):
            char_addr_list.append((area_left, area_right, char_width))
    return char_addr_list

def get_chars(car_plate):
    img_h,img_w = car_plate.shape[:2]
    h_proj_list = [] # 水平投影长度列表
    h_temp_len,v_temp_len = 0,0
    h_startIndex,h_end_index = 0,0 # 水平投影记索引
    h_proj_limit = [0.2,0.8] # 车牌在水平方向得轮廓长度少于20%或多余80%过滤掉
    char_imgs = []

    # 将二值化的车牌水平投影到Y轴,计算投影后的连续长度,连续投影长度可能不止一段
    h_count = [0 for i in range(img_h)]
    for row in range(img_h):
        temp_cnt = 0
        for col in range(img_w):
            if car_plate[row,col] == 255:
                temp_cnt += 1
        h_count[row] = temp_cnt
        if temp_cnt/img_w<h_proj_limit[0] or temp_cnt/img_w>h_proj_limit[1]:
            if h_temp_len != 0:
                h_end_index = row-1
                h_proj_list.append((h_startIndex,h_end_index))
                h_temp_len = 0
            continue
        if temp_cnt > 0:
            if h_temp_len == 0:
                h_startIndex = row
                h_temp_len = 1
            else:
                h_temp_len += 1
        else:
            if h_temp_len > 0:
                h_end_index = row-1
                h_proj_list.append((h_startIndex,h_end_index))
                h_temp_len = 0

    # 手动结束最后得水平投影长度累加
    if h_temp_len != 0:
        h_end_index = img_h-1
        h_proj_list.append((h_startIndex, h_end_index))
    # 选出最长的投影,该投影长度占整个截取车牌高度的比值必须大于0.5
    h_maxIndex,h_maxHeight = 0,0
    for i,(start,end) in enumerate(h_proj_list):
        if h_maxHeight < (end-start):
            h_maxHeight = (end-start)
            h_maxIndex = i
    if h_maxHeight/img_h < 0.5:
        return char_imgs
    chars_top,chars_bottom = h_proj_list[h_maxIndex][0],h_proj_list[h_maxIndex][1]

    plates = car_plate[chars_top:chars_bottom+1,:]
    cv2.imwrite('./carIdentityData/opencv_output/car.jpg',car_plate)
    cv2.imwrite('./carIdentityData/opencv_output/plate.jpg', plates)
    char_addr_list = horizontal_cut_chars(plates)

    for i,addr in enumerate(char_addr_list):
        char_img = car_plate[chars_top:chars_bottom+1,addr[0]:addr[1]]
        char_img = cv2.resize(char_img,(char_w,char_h))
        char_imgs.append(char_img)
    return char_imgs

def cnn_recongnize_char(img_list,model_path):
    g2 = tf.Graph()
    sess2 = tf.Session(graph=g2)
    text_list = []

    if len(img_list) == 0:
        return text_list
    with sess2.as_default():
        with sess2.graph.as_default():
            model_dir = os.path.dirname(model_path)
            saver = tf.train.import_meta_graph(model_path)
            saver.restore(sess2, tf.train.latest_checkpoint(model_dir))
            graph = tf.get_default_graph()
            net2_x_place = graph.get_tensor_by_name('x_place:0')
            net2_keep_place = graph.get_tensor_by_name('keep_place:0')
            net2_out = graph.get_tensor_by_name('out_put:0')

            data = np.array(img_list)
            # 数字、字母、汉字,从67维向量找到概率最大的作为预测结果
            net_out = tf.nn.softmax(net2_out)
            preds = tf.argmax(net_out,1)
            my_preds= sess2.run(preds, feed_dict={net2_x_place: data, net2_keep_place: 1.0})

            for i in my_preds:
                text_list.append(char_table[i])
            return text_list

if __name__ == '__main__':
    cur_dir = sys.path[0]
    car_plate_w,car_plate_h = 136,36
    char_w,char_h = 20,20
    plate_model_path = os.path.join(cur_dir, './carIdentityData/model/plate_recongnize/model.ckpt-510.meta')
    char_model_path = os.path.join(cur_dir,'./carIdentityData/model/char_recongnize/model.ckpt-550.meta')
    img = cv2.imread('../images/images/pictures/3.jpg')

    # 预处理
    pred_img = pre_process(img)

    # 车牌定位
    car_plate_list = locate_carPlate(img,pred_img)
    print(car_plate_list)
    # CNN车牌过滤
    ret,car_plate = cnn_select_carPlate(car_plate_list,plate_model_path)
    if ret == False:
        print("未检测到车牌")
        sys.exit(-1)
    cv2.imshow('cnn_plate',car_plate)

    # 字符提取
    char_img_list = extract_char(car_plate)

    # CNN字符识别
    text = cnn_recongnize_char(char_img_list,char_model_path)
    print(text)

    cv2.waitKey(0)

