[内存泄漏][PyTorch](create_graph=True)

news2024/10/5 23:28:48

PyTorch保存计算图导致内存泄漏

  • 1. 内存泄漏定义
  • 2. 问题发现背景
  • 3. pytorch中关于这个问题的讨论

1. 内存泄漏定义

  内存泄漏(Memory Leak)是指程序中已动态分配的堆内存由于某种原因程序未释放或无法释放,造成系统内存的浪费,导致程序运行速度减慢甚至系统崩溃等严重后果。

2. 问题发现背景

  在使用深度学习求解PDE时,由于经常需要计算高阶导数,在pytorch框架下写的代码需要用到torch.autograd.grad(create_graph=True)或者torch.backward(create_graph=True)这个参数,然后发现了这个内存泄漏的问题。如果要保存计算图用来计算高阶导数,那么其所占的内存不会被释放,会一直占用。也就是如果设置create_graph=True,那么其保存的计算图所占的内存只有在程序运行结束时才会释放,这样导致了一个问题,即如果在循环中需要保存计算图,例如每个循环都需要计算一次黑塞矩阵,那么这个内存占用就会越来越多,最终导致out of memory报错。
在这里插入图片描述

3. pytorch中关于这个问题的讨论

  官网中关于这个问题的讨论见https://github.com/pytorch/pytorch/issues/7343,这里提出的内存泄漏的例子如下:

import torch
import gc

_ = torch.randn(1, device='cuda')
del _
torch.cuda.synchronize()
gc.collect()
print(torch.cuda.memory_allocated())
x = torch.randn(1, device='cuda', requires_grad=True)
y = x.tanh()
y.backward(torch.ones_like(y), create_graph=True)
del x, y
torch.cuda.synchronize()
gc.collect()
print(torch.cuda.memory_allocated())

在这里插入图片描述
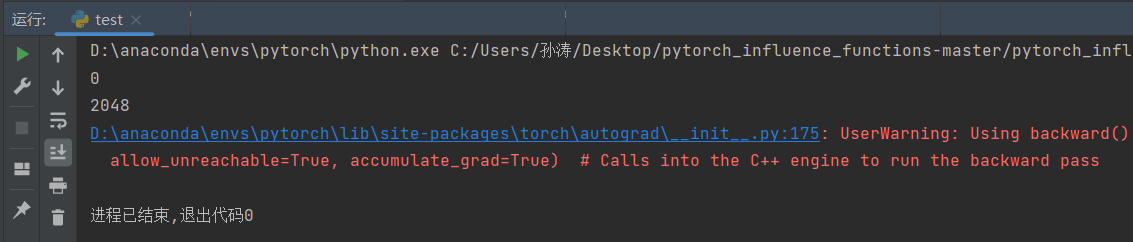
可以看到虽然删除了变量,依然造成了内存泄漏。这里红色的警告就是关于这个内存泄漏的问题。

UserWarning: Using backward() with create_graph=True will create a reference cycle between
the parameter and its gradient which can cause a memory leak. We recommend using autograd.grad 
when creating the graph to avoid this. If you have to use this function, make sure to reset 
the .grad fields of your parameters to None after use to break the cycle and avoid the leak. 
(Triggered internally at C:\cb\pytorch_1000000000000\work\torch\csrc\autograd\engine.cpp:1000.)
allow_unreachable=True, accumulate_grad=True) 
# Calls into the C++ engine to run the backward pass

看这个UserWarning,提示我们使用torch.autograd.grad()函数可以避免这个梯度泄漏,然后对代码进行改动:

import torch
import gc
from torch.autograd import grad

_ = torch.randn(1, device='cuda')
del _
torch.cuda.synchronize()
gc.collect()
print(torch.cuda.memory_allocated())
x = torch.randn(1, device='cuda', requires_grad=True)
y = x.tanh()
z = grad(y, x, retain_graph=True, create_graph=True)
# y.backward(torch.ones_like(y), create_graph=True)
del x, y, z
torch.cuda.synchronize()
gc.collect()
print(torch.cuda.memory_allocated())

在这里插入图片描述
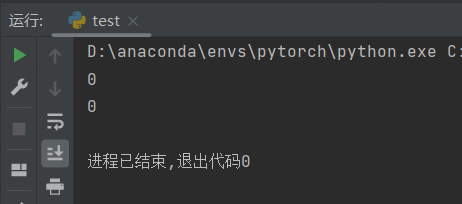
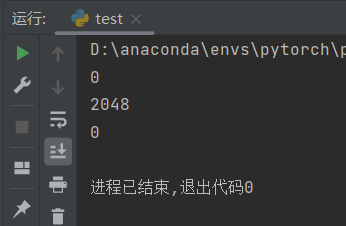
结果显示没有梯度泄漏。进一步,我们求一下二阶导数:

import torch
import gc
from torch.autograd import grad

_ = torch.randn(1, device='cuda')
del _
torch.cuda.synchronize()
gc.collect()
print(torch.cuda.memory_allocated())
x = torch.randn(1, device='cuda', requires_grad=True)
y = x.tanh()
z = grad(y, x, retain_graph=True, create_graph=True)
print(torch.cuda.memory_allocated())
q = grad(z, x)
del x, y, z, q
torch.cuda.synchronize()
gc.collect()
print(torch.cuda.memory_allocated())

在这里插入图片描述
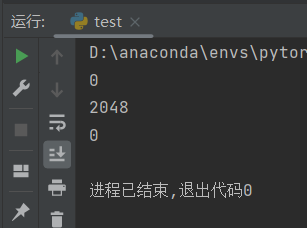
结果也没有内存泄漏。但是,如果我们不删除结果二阶导数q,这样是出于如果写在一个函数中,需要将q作为return值返回的情况。

import torch
import gc
from torch.autograd import grad

_ = torch.randn(1, device='cuda')
del _
torch.cuda.synchronize()
gc.collect()
print(torch.cuda.memory_allocated())
x = torch.randn(1, device='cuda', requires_grad=True)
y = x.tanh()
z = grad(y, x, retain_graph=True, create_graph=True)
print(torch.cuda.memory_allocated())
q = grad(z, x)
del x, y, z
torch.cuda.synchronize()
gc.collect()
print(torch.cuda.memory_allocated())

在这里插入图片描述
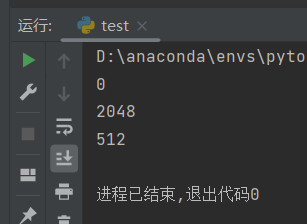
可以看到,这还是会导致一部分内存泄漏。那如果我们一定要返回q,又不想内存泄漏,这里本人想到一直办法,就是将q转换成numpy数据类型,返回这个numpy数组,就不会导致内存泄漏了。

import torch
import gc
from torch.autograd import grad

_ = torch.randn(1, device='cuda')
del _
torch.cuda.synchronize()
gc.collect()
print(torch.cuda.memory_allocated())
x = torch.randn(1, device='cuda', requires_grad=True)
y = x.tanh()
z = grad(y, x, retain_graph=True, create_graph=True)
print(torch.cuda.memory_allocated())
q = grad(z, x)
k = q[0].cpu().numpy()
del x, y, z, q
torch.cuda.synchronize()
gc.collect()
print(torch.cuda.memory_allocated())

在这里插入图片描述

本文来自互联网用户投稿,该文观点仅代表作者本人,不代表本站立场。本站仅提供信息存储空间服务,不拥有所有权,不承担相关法律责任。如若转载,请注明出处:http://www.coloradmin.cn/o/1223802.html

如若内容造成侵权/违法违规/事实不符,请联系多彩编程网进行投诉反馈,一经查实,立即删除!

相关文章

蓝桥杯每日一题2023.11.18

题目描述 蓝桥杯大赛历届真题 - C 语言 B 组 - 蓝桥云课 (lanqiao.cn) 题目分析 本题使用搜索,将每一个格子进行初始赋值方便确定是否为相邻的数,将空出的两个格子首先当作已经填好数值为100,此时从第一个格子右边的格子开始搜索&#xff…

vscode编写verilog的插件【对齐、自动生成testbench文件】

vscode编写verilog的插件: 插件名称:verilog_testbench,用于自动生成激励文件 安装教程:基于VS Code的Testbench文件自动生成方法——基于VS Code的Verilog编写环境搭建SP_哔哩哔哩_bilibili 优化的方法:https://blog.csdn.net…

ROSCon 2023 大会回顾

系列文章目录 文章目录 系列文章目录前言一、会议内容二、其他活动 前言 我们与 ROSCon 2023 全体 700 多名与会者的合影。 视频回放链接 一、会议内容 ROSCon 2023 是我们第十二届年度 ROS 开发者大会,于 2023 年 10 月 18 日至 20 日在路易斯安那州新奥尔良举行。…

字符串函数详解

一.字母大小写转换函数. 1.1.tolower 结合cppreference.com 有以下结论&#xff1a; 1.头文件为#include <ctype.h> 2.使用规则为 #include <stdio.h> #include <ctype.h> int main() {char ch A;printf("%c\n",tolower(ch));//大写转换为小…

ThinkPHP 系列漏洞

目录 2、thinkphp5 sql注入2 3、thinkphp5 sql注入3 4、 thinkphp5 SQL注入4 5、 thinkphp5 sql注入5 6、 thinkphp5 sql注入6 7、thinkphp5 文件包含漏洞 8、ThinkPHP5 RCE 1 9、ThinkPHP5 RCE 2 10、ThinkPHP5 rce3 11、ThinkPHP 5.0.X 反序列化漏洞 12、ThinkPHP…

anaconda安装依赖报错ERROR: Cannot unpack file C:\Users\33659\AppData\Loca...|问题记录

执行命令&#xff1a; # 安装matplotlib依赖 pip install matplotlib-i http://mirrors.aliyun.com/pypi/simple/ --trusted-host mirrors.aliyun.com出现问题&#xff1a; ERROR: Cannot unpack file C:\Users\33659\AppData\Local\Temp\pip-unpack-0au_blfq\simple (downloa…

U-boot(二):主Makefile

本文主要探讨210的主Makefile。 Makefile uboot版本号&#xff1a; VERSION&#xff1a;主板本号 PATCHLEVEL&#xff1a;次版本号 SUBLEVEL&#xff1a;再次版本号 EXTRAVERSION:附加信息 VERSION 1 PATC…

二元分类模型评估方法

文章目录 前言一、混淆矩阵二、准确率三、精确率&召回率四、F1分数五、ROC 曲线六、AUC&#xff08;曲线下面积&#xff09;七、P-R曲线类别不平衡问题中如何选择PR与ROC 八、 Python 实现代码混淆矩阵、命中率、覆盖率、F1值ROC曲线、AUC面积 指标 公式 意义 真正例 (TP)被…

无需API开发,伯俊科技实现电商与客服系统的无缝集成

伯俊科技的无代码开发实现系统连接 自1999年成立以来&#xff0c;伯俊科技一直致力于为企业提供全渠道一盘货的服务。凭借其24年的深耕零售行业的经验&#xff0c;伯俊科技推出了一种无需API开发的方法&#xff0c;实现电商系统和客服系统的连接与集成。这种无代码开发的方式不…

java的包装类

目录 1. 包装类 1.1 基本数据类型和对应的包装类 1.2 装箱和拆箱 1.3 自动装箱和自动拆箱 1. 包装类 在Java中&#xff0c;由于基本类型不是继承自Object&#xff0c;为了在泛型代码中可以支持基本类型&#xff0c;Java给每个基本类型都对应了 一个包装类型。 若想了解…

MySQL用逗号分割的id怎么实现in (逗号分割的id字符串)。find_in_set(`id`, ‘1,2,3‘) 函数

1.MySQL 1.1.正确写法 select * from student where find_in_set(s_id, 1,2,3); 1.2.错误示范 select * from student where find_in_set(s_id, 1,2 ,3); -- 注意&#xff0c;中间不能有空格。1、3 select * from student where find_in_set(s_id, 1,2, 3); -- 注意…

sqli-labs关卡19(基于http头部报错盲注)通关思路

文章目录 前言一、回顾上一关知识点二、靶场第十九关通关思路1、判断注入点2、爆数据库名3、爆数据库表4、爆数据库列5、爆数据库关键信息 总结 前言 此文章只用于学习和反思巩固sql注入知识&#xff0c;禁止用于做非法攻击。注意靶场是可以练习的平台&#xff0c;不能随意去尚…

IDEA创建文件添加作者及时间信息

前言 当使用IDEA进行软件开发时&#xff0c;经常需要在代码文件中添加作者和时间信息&#xff0c;以便更好地维护和管理代码。 但是如果每次都手动编辑 以及修改那就有点浪费时间了。 实践 其实我们可以将注释日期 作者 配置到 模板中 同时配置上动态获取内容 例如时间 这样…

【MyBatisPlus】快速入门

文章目录 1. 简单使用2. 条件构造器 —— 针对于复杂查询3. 自定义SQL4. IService4.1 基本接口方法4.1.1 新增4.1.2 删除4.1.3 修改4.1.4 查找 4.2 开发基础业务接口4.3 开发复杂业务接口4.4 Lambda方法4.5 批量新增 5. 代码生成6. 分页功能6.1 分页插件基本使用6.1 通用分页实…

数据结构与算法设计分析——常用搜索算法

目录 一、穷举搜索二、图的遍历算法&#xff08;一&#xff09;深度优先搜索&#xff08;DFS&#xff09;&#xff08;二&#xff09;广度优先搜索&#xff08;BFS&#xff09; 三、回溯法&#xff08;一&#xff09;回溯法的定义&#xff08;二&#xff09;回溯法的应用 四、分…

node 第十九天 使用node插件node-jsonwebtoken实现身份令牌jwt认证

实现效果如下 前后端分离token登录身份验证效果演示 node-jsonwebtoken 基于node实现的jwt方案&#xff0c; jwt也就是jsonwebtoken, 是一个web规范可以去了解一下~ 一个标准的jwt由三部分组成 第一部分&#xff1a;头部 第二部分&#xff1a;载荷&#xff0c;比如可以填入加密…

VS2022 配置 OpenCV并开始第一个程序

VS2022安装 首先下载 VisualStudioSetup.exe 下载连接&#xff1a;Visual Studio 2022 IDE - 适用于软件开发人员的编程工具 点击上面的链接即可进入到下载页面。进入到下载页面&#xff0c;可看到有几个版本可选&#xff0c;如下&#xff1a; 我选择的是企业版&#xff1a;E…

23年宁波职教中心CTF竞赛-决赛

Web 拳拳组合 进去页面之后查看源码&#xff0c;发现一段注释&#xff0c;写着小明喜欢10的幂次方&#xff0c;那就是10、100、1000、10000 返回页面&#xff0c;在点击红色叉叉的时候抓包&#xff0c;修改count的值为10、100、1000、10000 然后分别获得以下信息 ?count1…

Web(5)Burpsuite之文件上传漏洞

1.搭建网站&#xff1a;为网站设置没有用过的端口号 2.中国蚁剑软件的使用 通过一句话木马获得权限 3.形象的比喻&#xff08;风筝&#xff09; 4.实验操作 参考文章&#xff1a; 文件上传之黑名单绕过_文件上传黑名单绕过_pigzlfa的博客-CSDN博客 后端验证特性 与 Window…