SpringBoot之手写starter
在开始之前呢,我们需要了解一些概念
1、starter介绍
spring boot 在配置上相比spring要简单许多, 其核心在于spring-boot-starter, 在使用spring boot来搭建一个项目时, 只需要引入官方提供的starter, 就可以直接使用, 免去了各种配置。starter简单来讲就是引入了一些相关依赖和一些初始化的配置。
Spring官方提供了很多starter,第三方也可以定义starter。为了加以区分,starter从名称上进行了如下规范:
- Spring官方提供的starter名称为:spring-boot-starter-xxx 例如Spring官方提供的spring-boot-starter-web
- 第三方提供的starter名称为:xxx-spring-boot-starter 例如由mybatis提供的mybatis-spring-boot-starter
2、starter原理
Spring Boot之所以能够帮我们简化项目的搭建和开发过程,主要是基于它提供的起步依赖和自动配置。
2.2.1 起步依赖
起步依赖,其实就是将具备某种功能的坐标打包到一起,可以简化依赖导入的过程。例如,我们导入spring-boot-starter-web这个starter,则和web开发相关的jar包都一起导入到项目中了。如下图所示:

我们看似只是添加了一个启动依赖,其实是引入了很多的jar包。
我们可以简单理解为,使用starter就是为了引入跟它关联的jar包。
2.2.2 自动配置
自动配置,就是无须手动配置xml,自动配置并管理bean,可以简化开发过程。也就是 @EnableAutoConfig注解的作用。后面在代码中在思考一下
ok,开始代码!
代码实现
1、先新建一个空项目 spring-boot-starter-diy,主要是为了后面方便测试
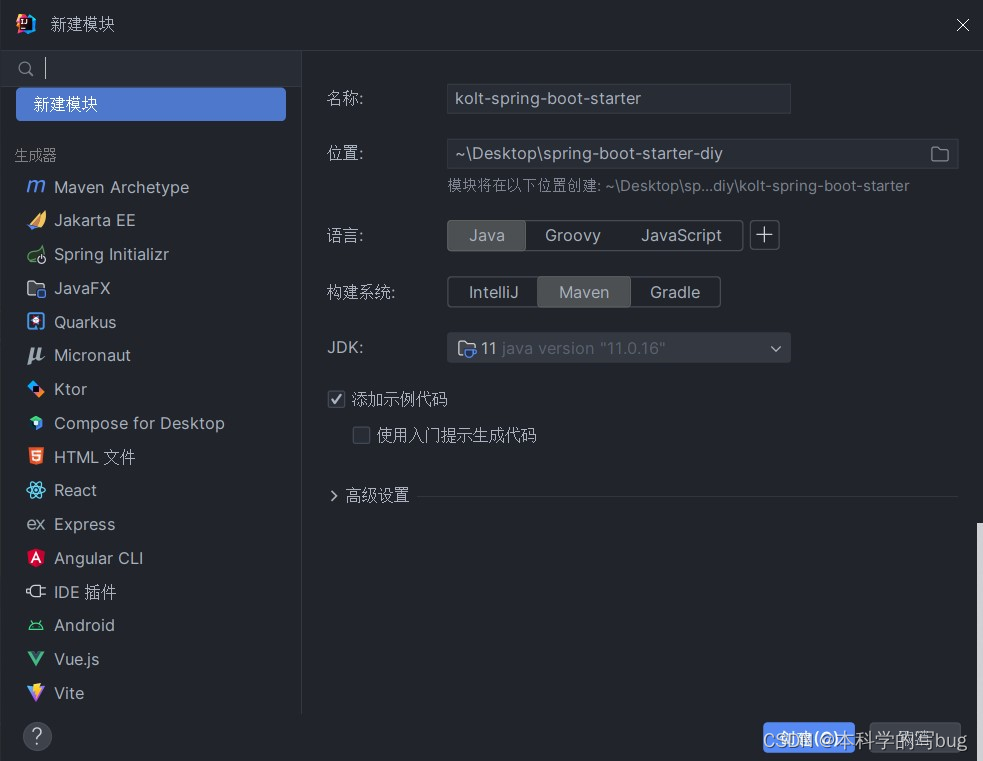
2、新建一个普通Maven模块:kolt-spring-boot-starter
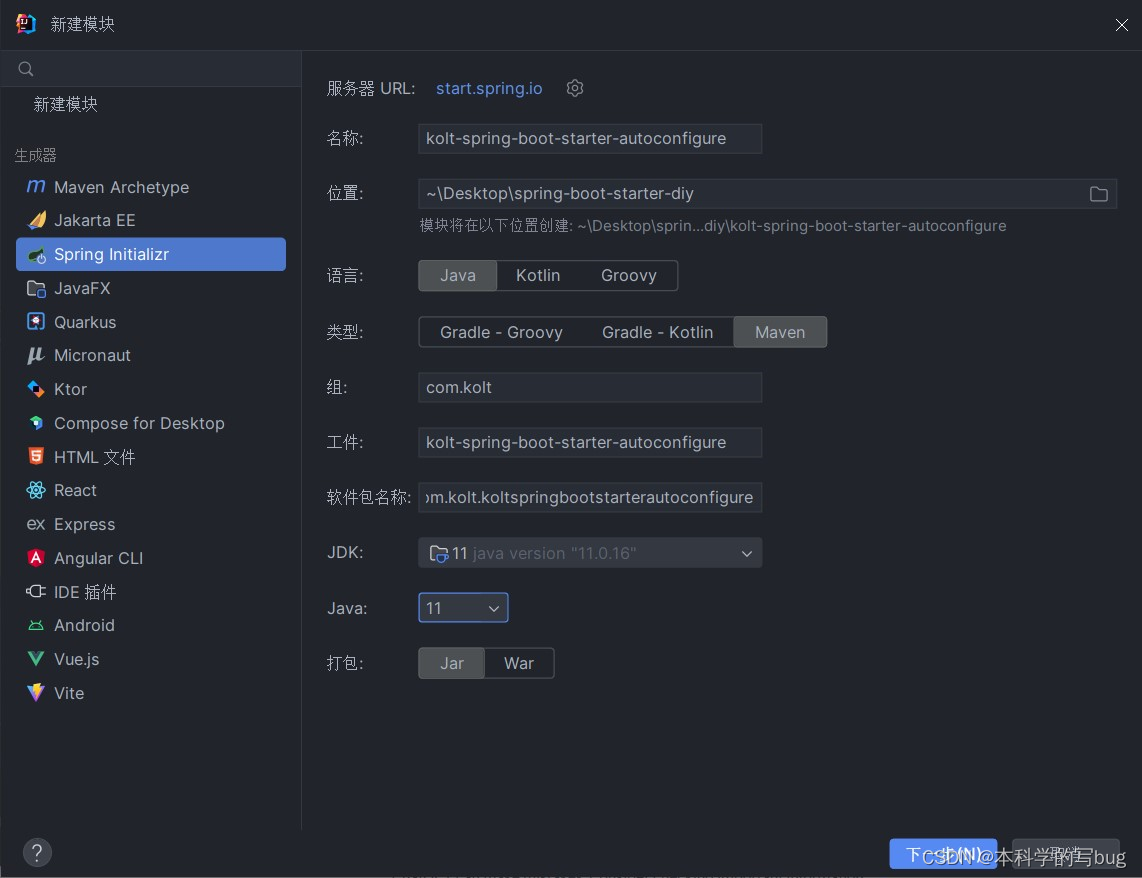
3、新建一个Springboot模块:kolt-spring-boot-starter-autoconfigure
4、在我们的starter中导入 autoconfigure的依赖!
<dependencies>
    <dependency>
        <groupId>com.kolt</groupId>
        <artifactId>kolt-spring-boot-starter-autoconfigure</artifactId>
        <version>0.0.1-SNAPSHOT</version>
    </dependency>
</dependencies>
为啥要这样写,还记得我们上面所说的吗,starter就是为了导入一系列的jar包。我们导入一个starter,那么他依赖的其他东西我们也要呀,对吧,这样理解starter就是一组完成某些功能的jar包的集合。
5、将 autoconfigure 项目下多余的文件都删掉,Pom中只留下一个 starter,这是所有的启动器基本配置。同时主启动类什么的都不需要,全都删掉
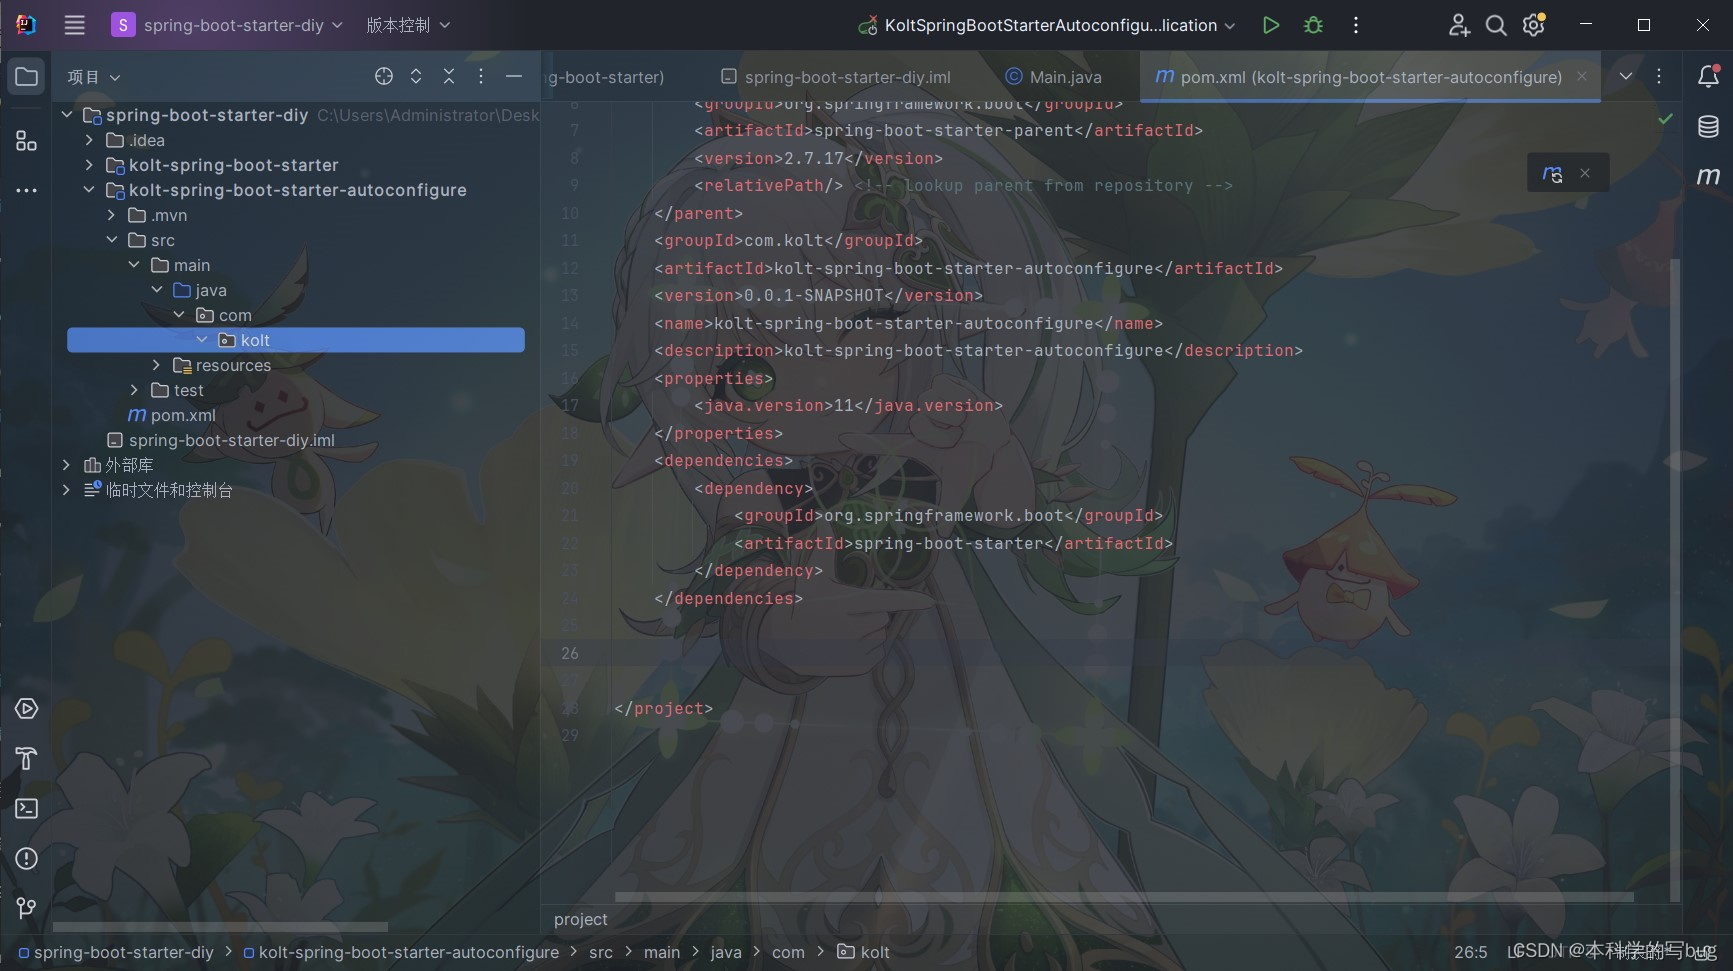
提醒:记得把test测试目录也给删除,要不然打包会出问题,上面截图忘记删了
6、我们真正的功能实现实在我们的autoconfigure项目中
7、我们编写一个自己的服务
public class HelloService {
    HelloProperties helloProperties;

    public HelloProperties getHelloProperties() {
        return helloProperties;
    }

    public void setHelloProperties(HelloProperties helloProperties) {
        this.helloProperties = helloProperties;
    }

    public String sayHello(String name) {
        return helloProperties.getPrefix() + name + helloProperties.getSuffix();

    }
}
8、编写HelloProperties配置类(这个不是必须的)
@ConfigurationProperties(prefix = "kolt.hello")//这个将类的属性与我们的配置文件进行关联
//比如我们连接数据库经常用到的 name,root之类的我们就可以使用一个类与配置文件关联
//同时这个类也能被服务进行调用,比直接读取配置文件方便很多
public class HelloProperties {
    private String prefix;
    private String suffix;
    public String getPrefix() {
        return prefix;
    }
    public void setPrefix(String prefix) {
        this.prefix = prefix;
    }
    public String getSuffix() {
        return suffix;
    }
    public void setSuffix(String suffix) {
        this.suffix = suffix;
    }
}
9、编写我们的自动配置类HelloServiceAutoConfiguration
我们自动配置导入的就是这个配置类,把这个类交给 容器,同时通过这个类把我们的 服务类与配置文件类(也就是xxProperties类)交给容器。
@Configuration
@ConditionalOnWebApplication //web应用生效
@EnableConfigurationProperties(HelloProperties.class)
public class HelloServiceAutoConfiguration {

    //因为下面要用到这个,我们才要拿到这个
    @Autowired(required = false)
    HelloProperties helloProperties;

    //我们的服务类并没有使用注解交给ioc
    //以bean的形式返回,使用者接触不到源码,安全
    @Bean
    public HelloService helloService(){
        HelloService service = new HelloService();
        service.setHelloProperties(helloProperties);
        return service;
    }
}
10、在配置类项目的resource目录下编写一个自己的META-INF/spring.factories
# Auto Configure
org.springframework.boot.autoconfigure.EnableAutoConfiguration=\
com.kolt.HelloServiceAutoConfiguration
11、编写完成,使用maven打包到我们的本地仓库,要不然怎么使用(这一步千万不要忘了哦)
测试
1、新建一个SpringBoot项目
2、导入我们自己写的启动器
<dependency>
			<groupId>com.kolt</groupId>
			<artifactId>kolt-spring-boot-starter</artifactId>
			<version>1.0-SNAPSHOT</version>
</dependency>
<!--这个地方其实直接引用我们的autoconfigure也是可以的,因为starter里面只依赖了这一个-->
3、编写一个HelloController 进行测试我们自己写的接口
@RestController
public class HelloController {

    //看这里,看这里,我们的测试项目里面有 HelloService对象吗!没有把,哪里来的
    //当然是从容器中拿到的,容器又是从哪里获得的呢?!当然是我们的自动配置啦
    @Autowired(required = false)
    HelloService helloService;

    @RequestMapping("/hello")
    public String hello(){
        return helloService.sayHello("自定义starter");
    }
}
4、编写配置文件 application.properties
kolt.hello.prefix = www.
kolt.hello.suffix = .com
5、启动项目进行测试

测试成功!
大家手写一个starter其实更能理解自动配置的原理。

