目录
一、虚拟机安装
二、镜像下载安装
1、镜像下载
2、虚拟机创建
3、虚拟机系统安装
三、虚拟机配置
1、IP固定
2、配置yum阿里源
3、关闭防火墙
4、 关闭selinux
5、 禁止swap交换
6、内核参数修改
7、设置kubernetes源
四、docker安装
五、虚拟机分组
六、k8s安装
1、安装k8s
2、安装k8s镜像
3、初始化K8S集群
六、下载calico
七、配置 Kubernetes 集群中的默认存储类型
八、kubeSphere安装
九、删除kubeSphere
这边使用虚拟机下载依赖配置环境以及模拟服务器各个节点。
一、虚拟机安装
VMware下载地址:VMware Workstation 17.5.0 Pro for Windows
也可以根据你的情况来换不同版本,但是下载需要注册,后续可以去网上找免费版本或破解方法。
下载后点击安装可能提示重启,按照要求重启即可。
这一步更改安装位置。
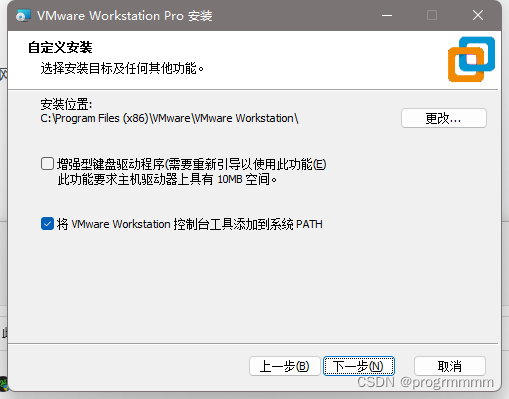
其他配置可以全部默认,一直点击下一步直到安装成功。
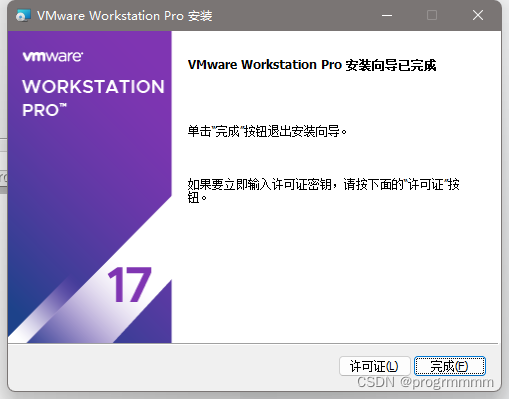
打开之后这个样子就是安装完成了,许可可以搜到然后输入
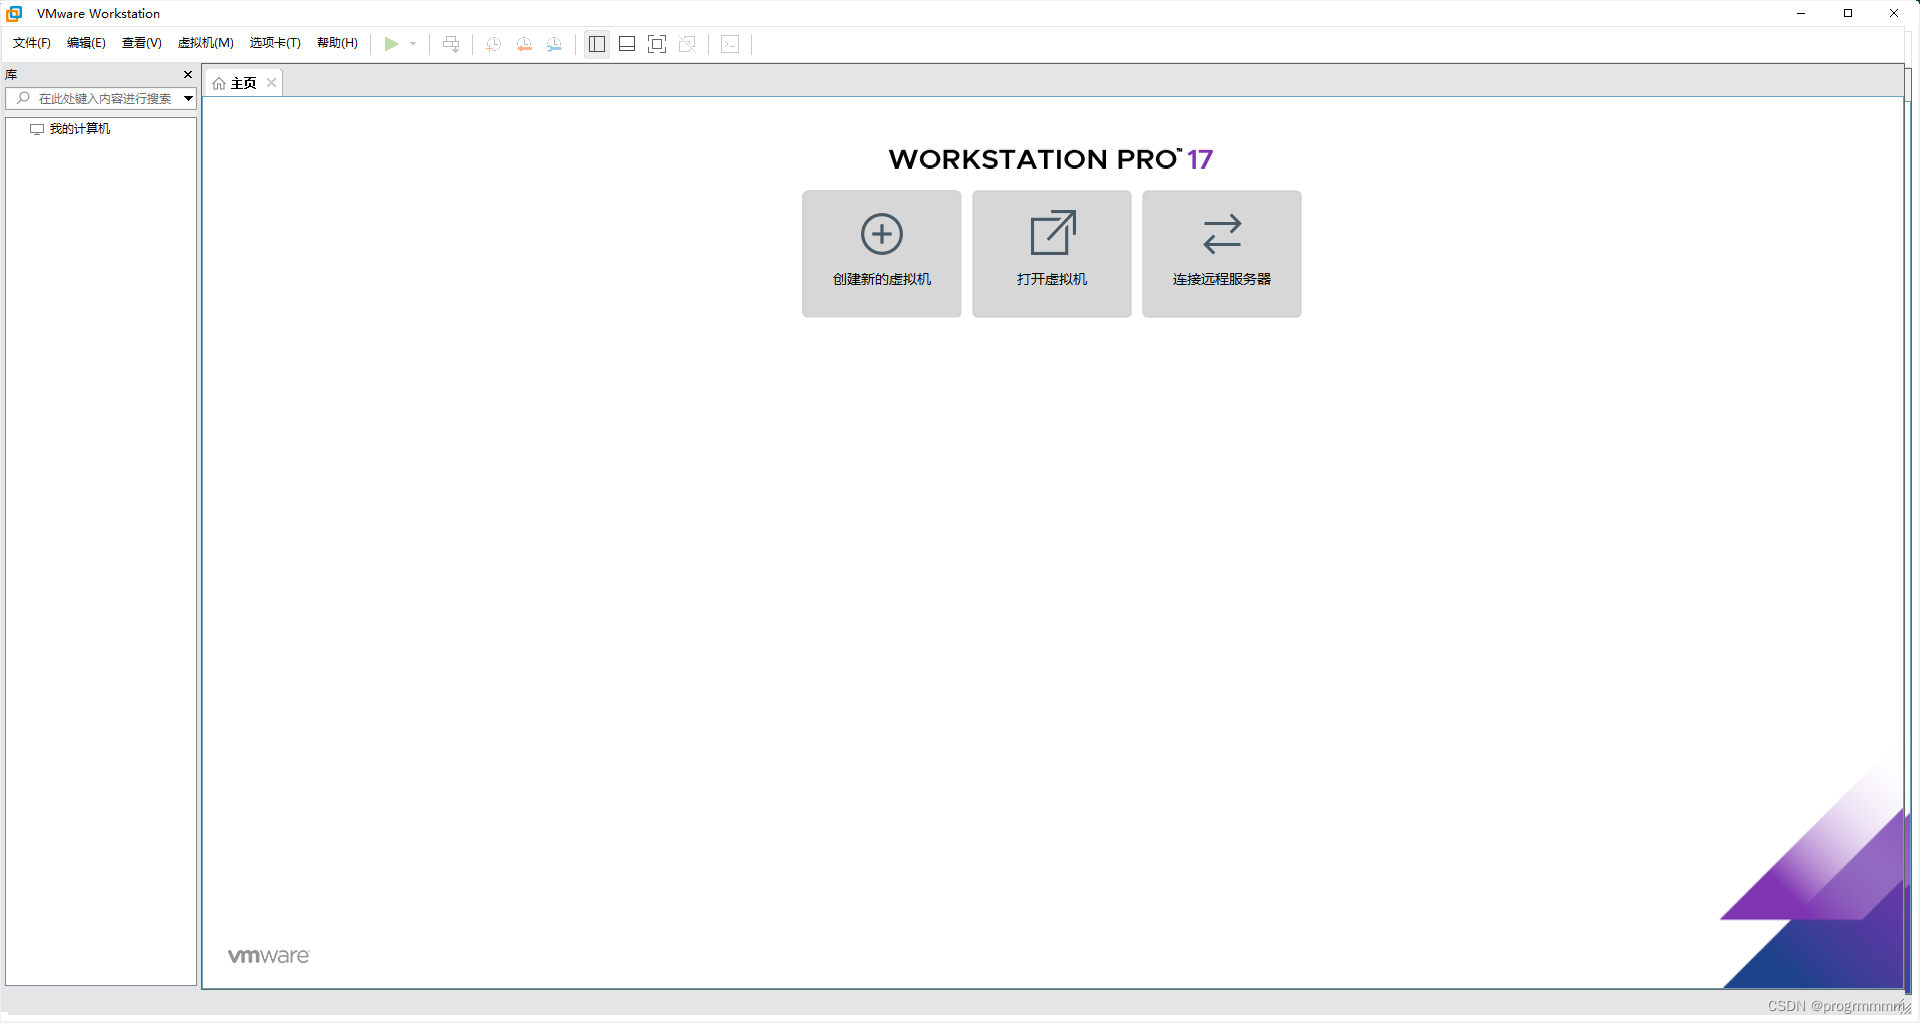
二、镜像下载安装
1、镜像下载
这边使用centos7并安装图形化界面来进行配置
大约4.4G,下载地址:centos7
2、虚拟机创建
打开vm,点击创建新的虚拟机,要用新下载的centos镜像安装三个虚拟机,一个虚拟机当master节点,其他两个当node节点。
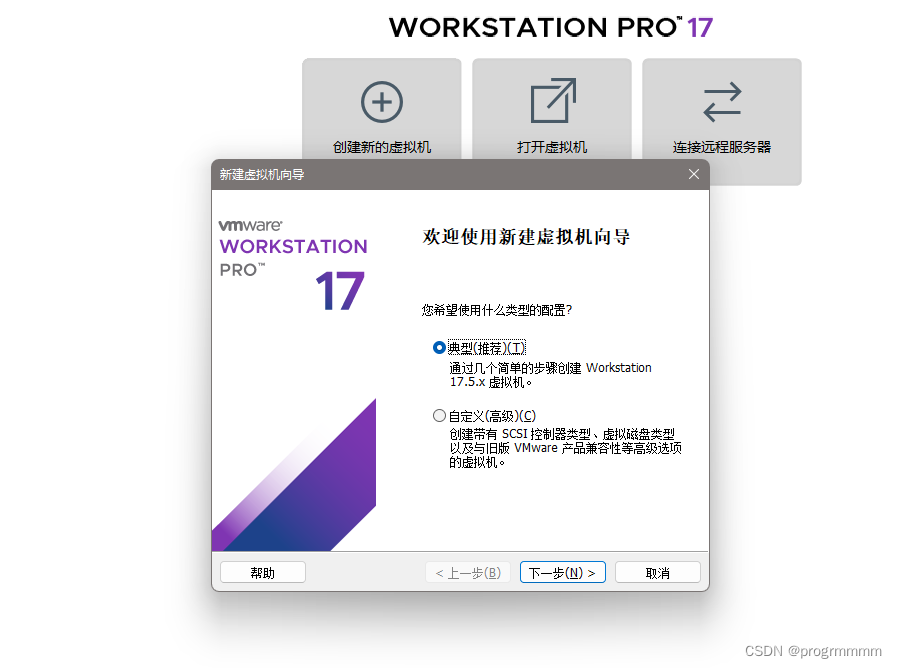
直接点击下一步,并在安装来源中选择刚下载的centos的iso镜像文件然后点击下一步
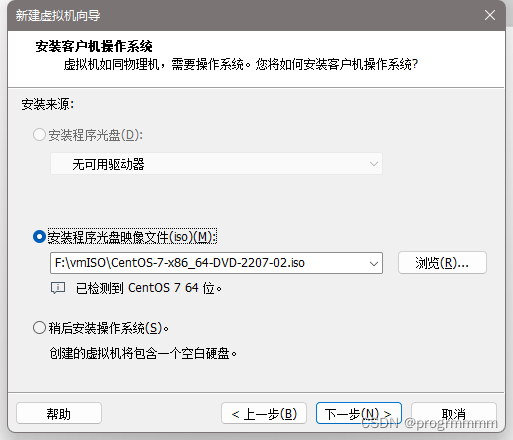
虚拟机起名master,并选择安装虚拟机的位置并点击下一步
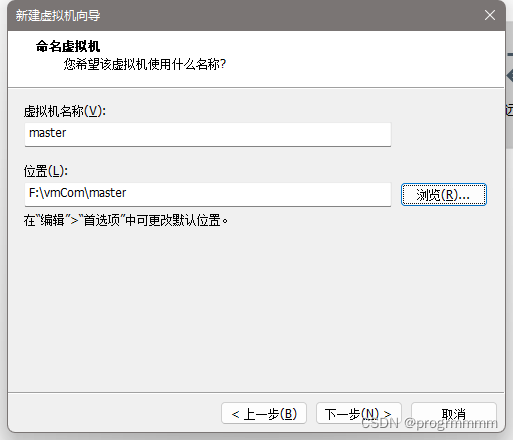
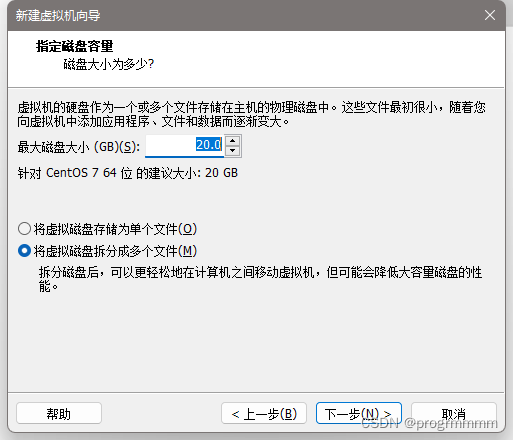
这里默认即可点击下一步
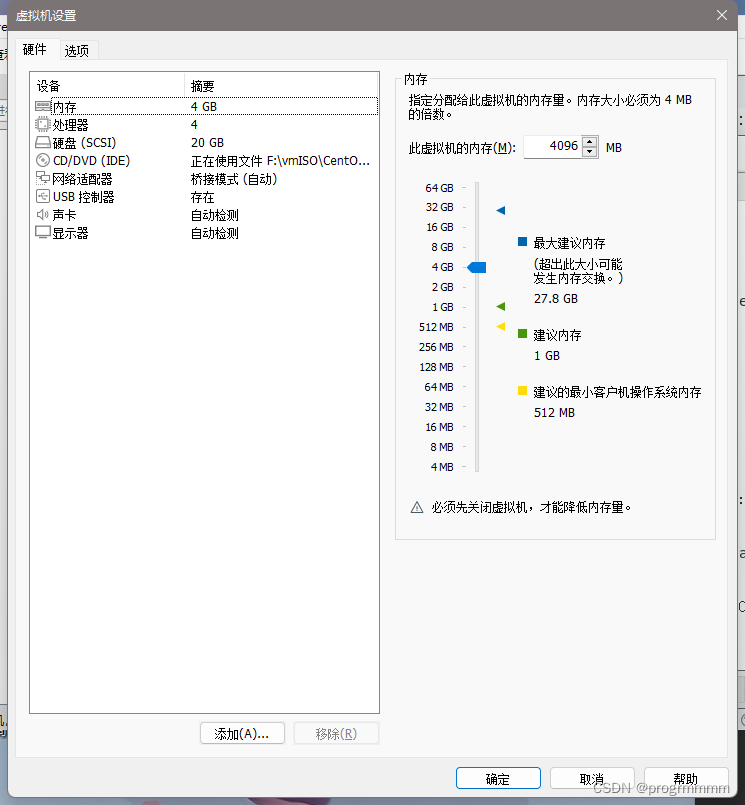
这一步需要更改配置,因为k8s有配置需求,点击自定义硬件
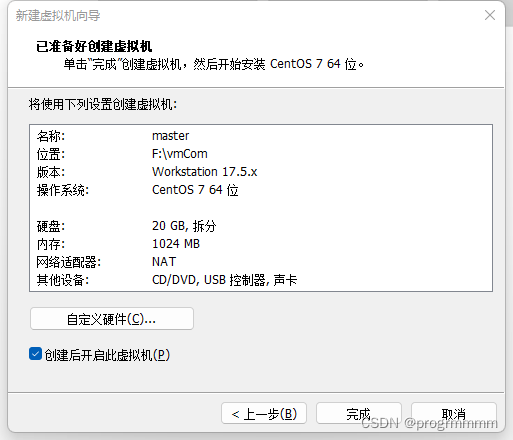
做以下更改
(1)内存改为4GB
(2)处理器改为4
(3)网络适配器改为桥接(桥接可以让虚拟机获得IP而不是共享IP,后面要用到)
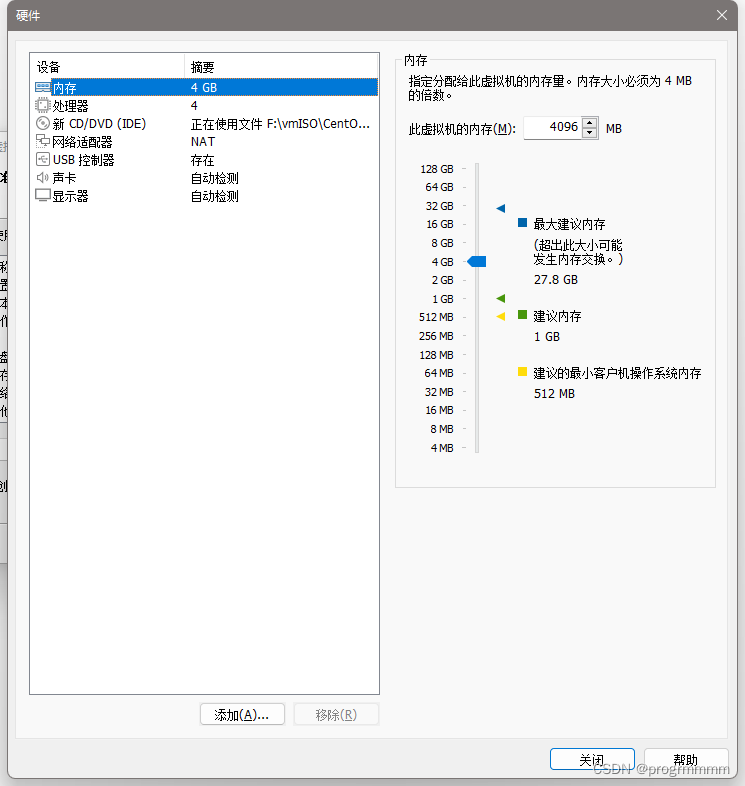
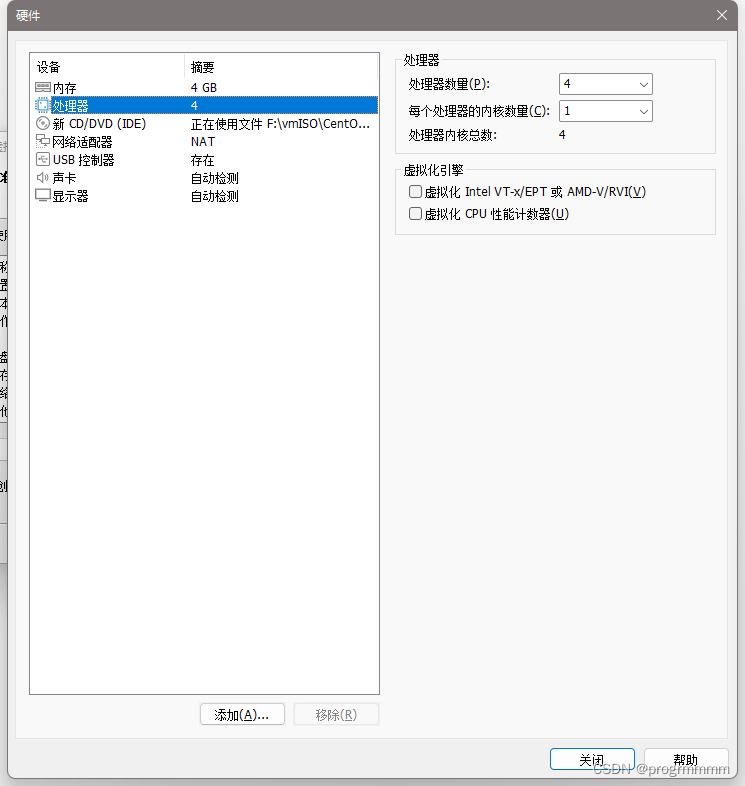

然后点击完成。
由此安装完成了第一个虚拟机。再用同样的方法创建另外两个虚拟机,这两个虚拟机安装过程和上述相同。不同点只需要改两个地方:虚拟机名称和安装目录
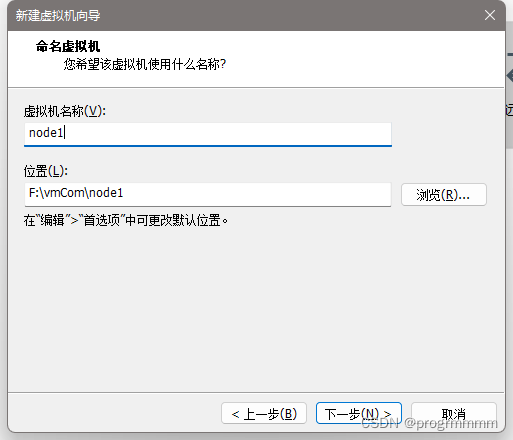
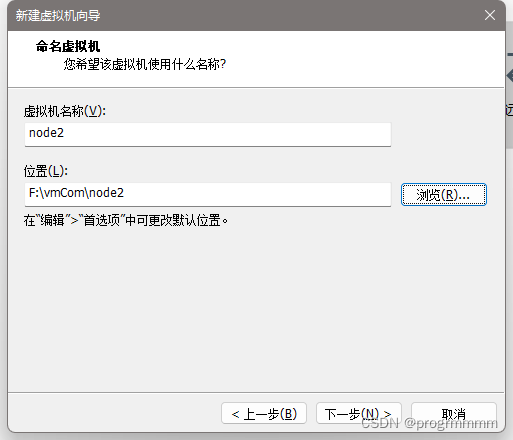
将三个虚拟机都安装完成后,就可以开始给虚拟机安装centos操作系统了。

3、虚拟机系统安装
以下操作三个虚拟机都要进行:
(1)进入虚拟机,按上下键选择第一个并等待
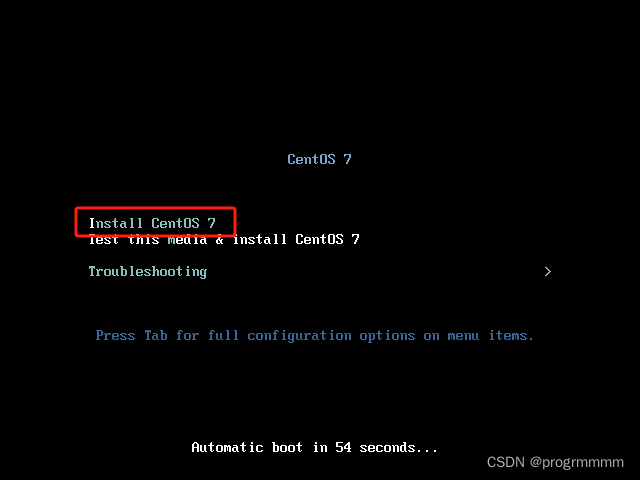
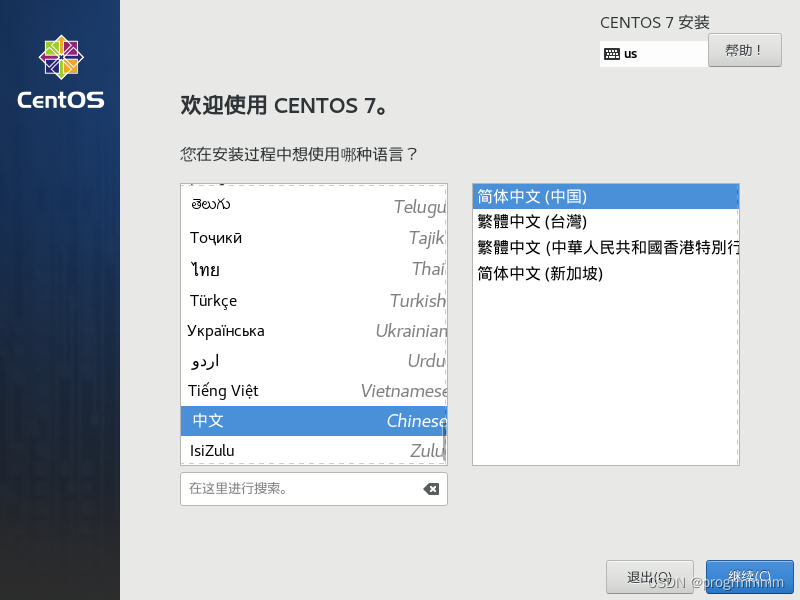
(2) 选择中文并点击继续
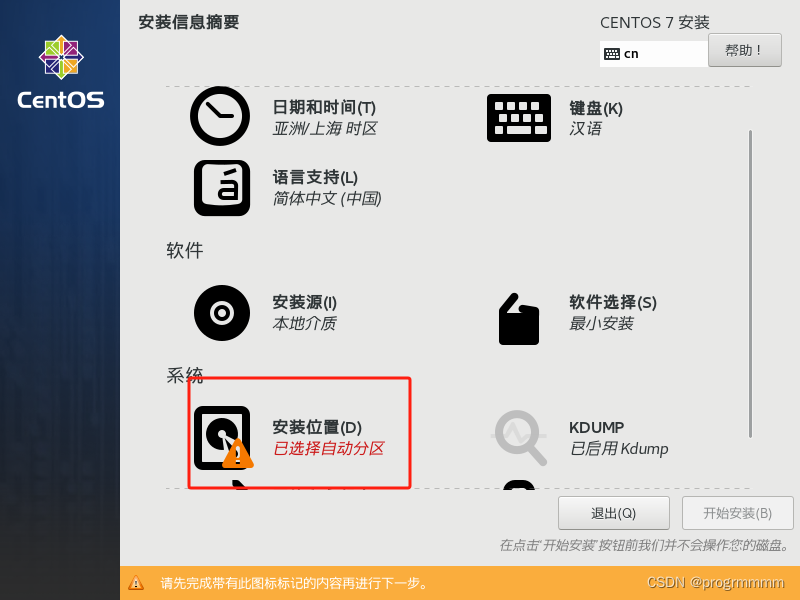
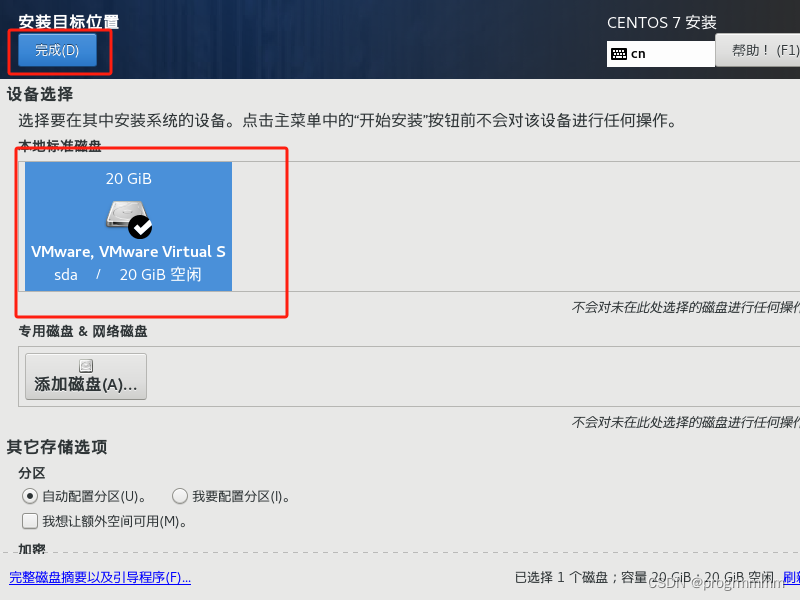
(3)点击安装位置,并选择分配好的磁盘,再点击完成。就可以看到安装位置选项不在报警告
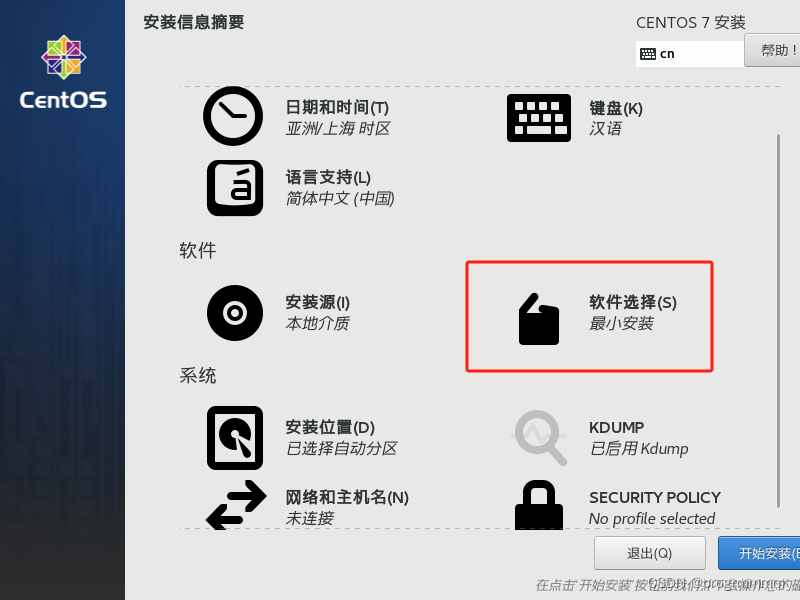
(4) 点击软件选择,并选择GUI的服务器,然后选择左侧相应需要安装的项目。然后点击完成。点击完成后可能要等待一段时间
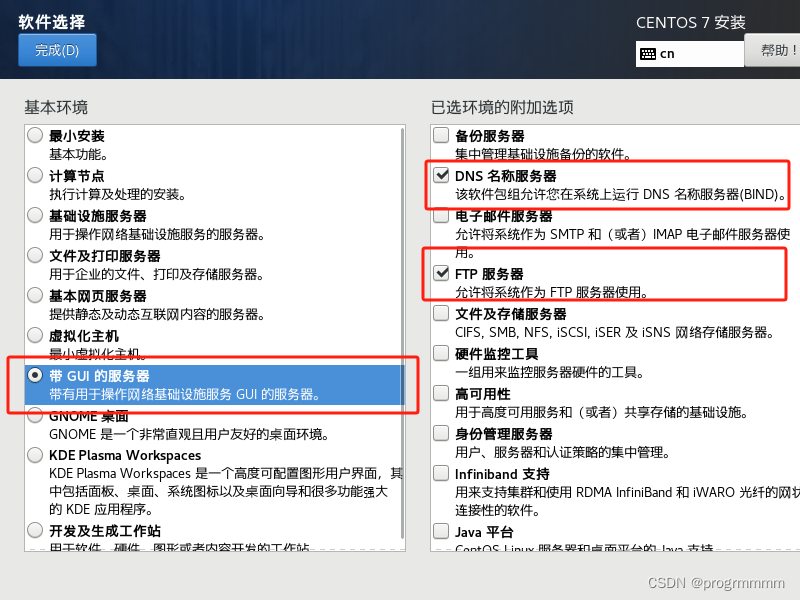
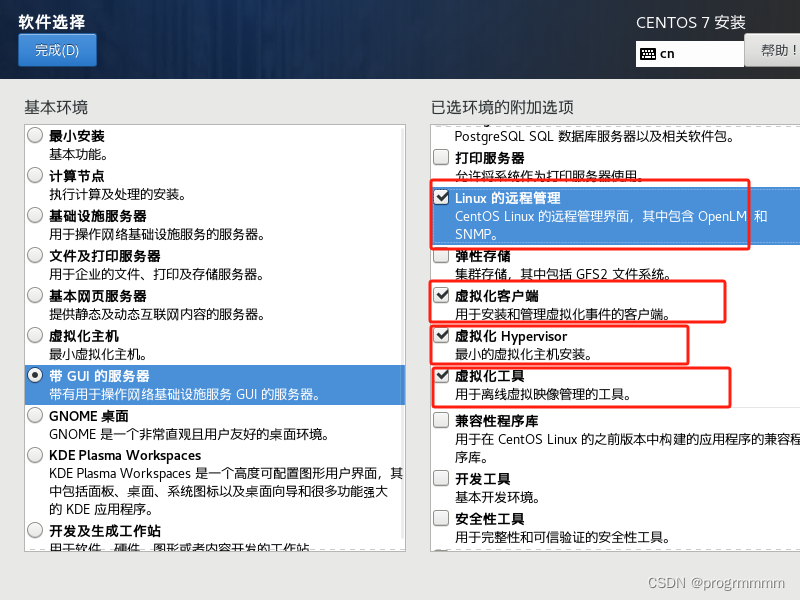
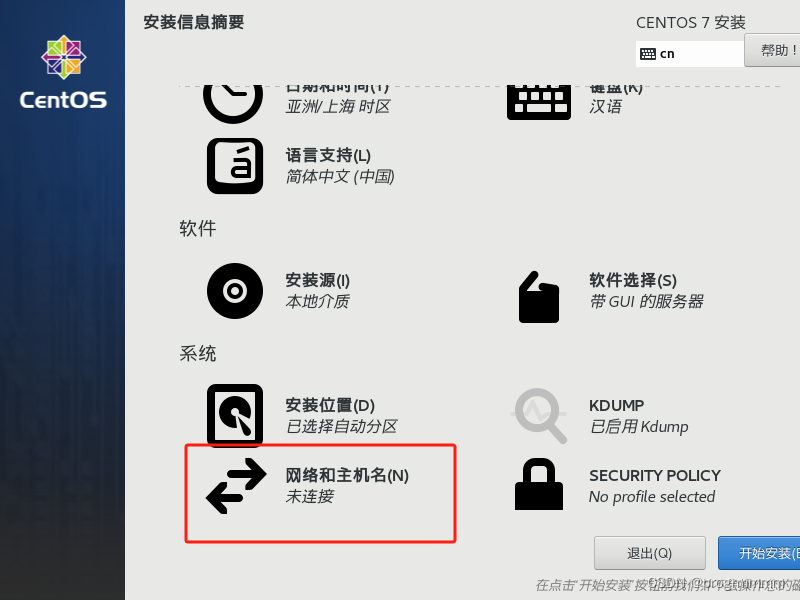
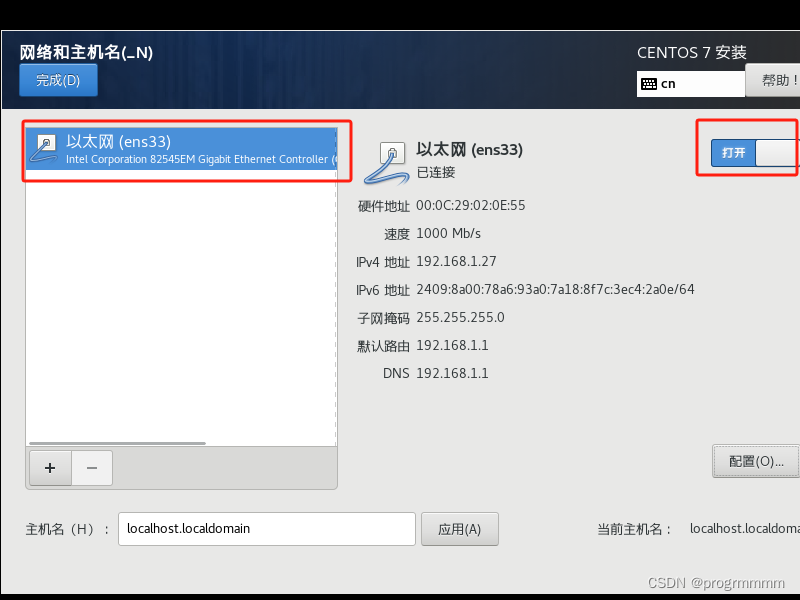
(5) 点击网络和主机名进行网络配置,选择以太网并将其打开,然后点击完成(IP固定等安装完系统后操作,更快一点)
(6)点击开始安装
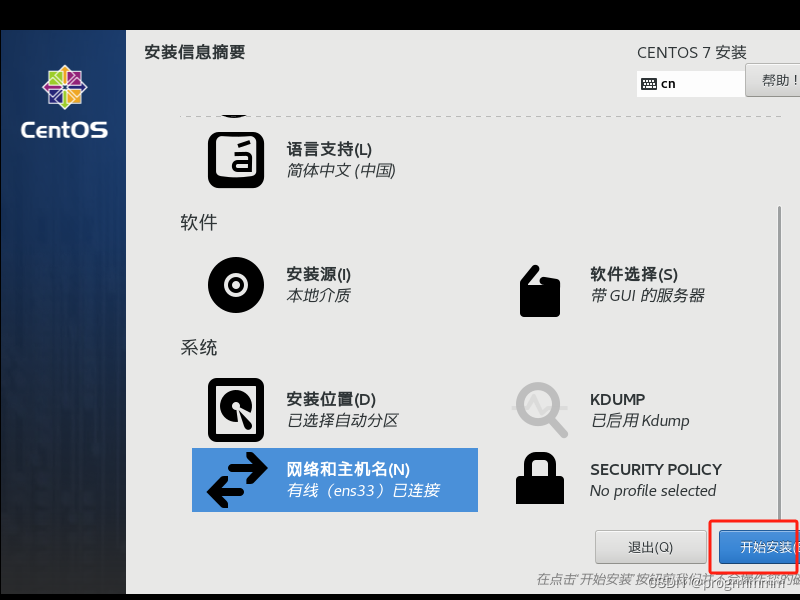
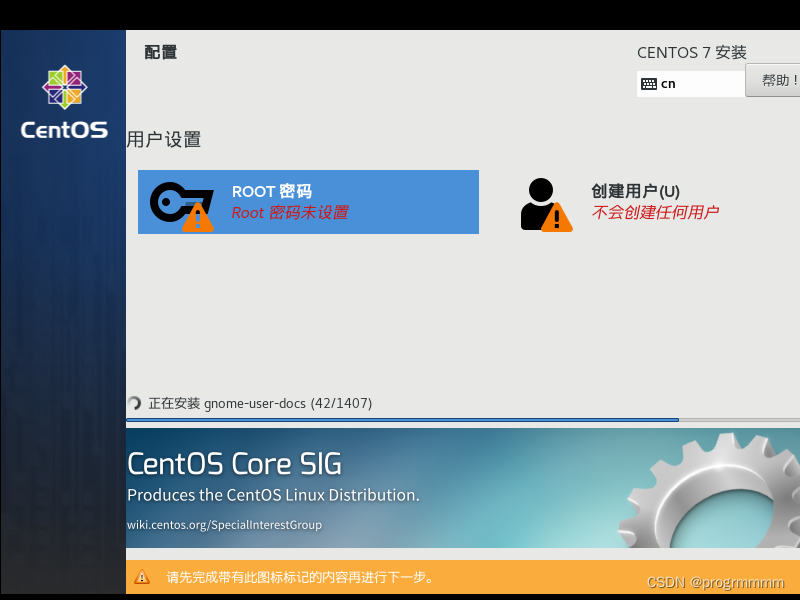
(7)点击ROOT密码,虚拟机不是不是服务器设置123456就可以了,然后点击完成
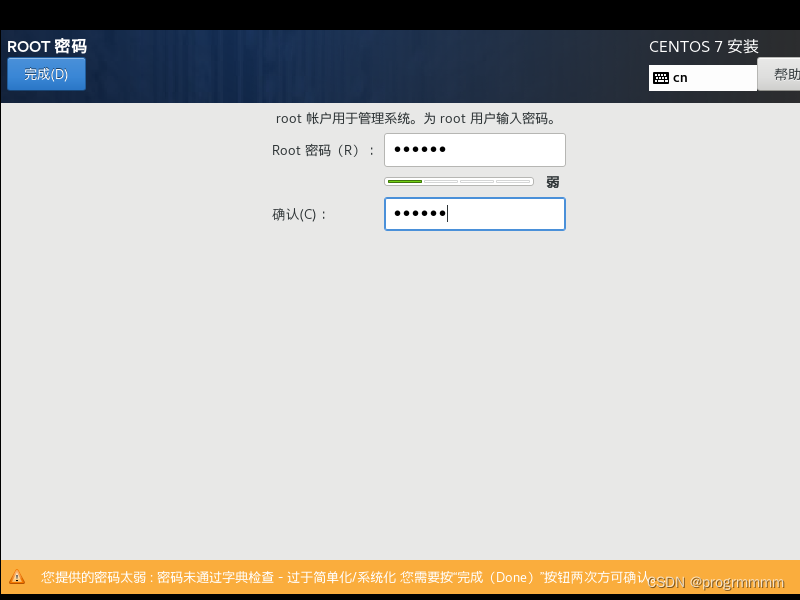
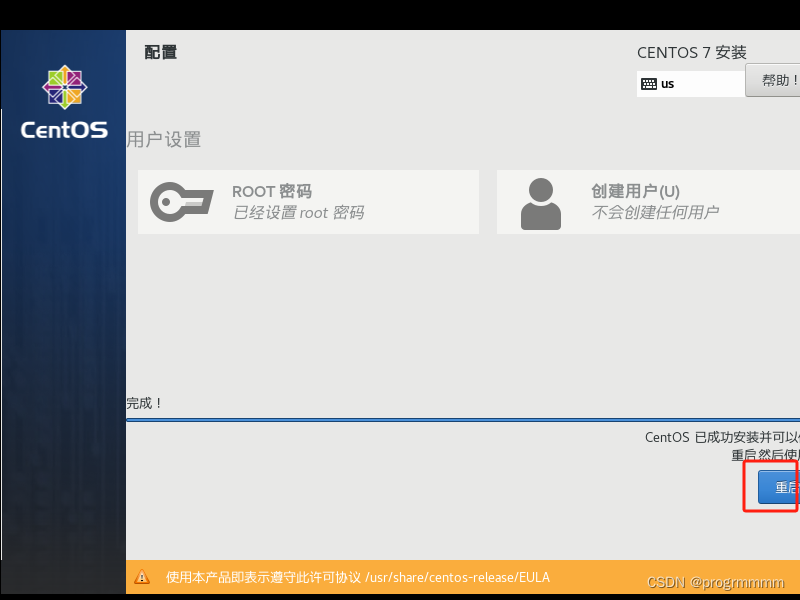
(8)等待系统安装完成,并点击重启,重启可能让你选择是否进入centos系统,按一下回车就行了
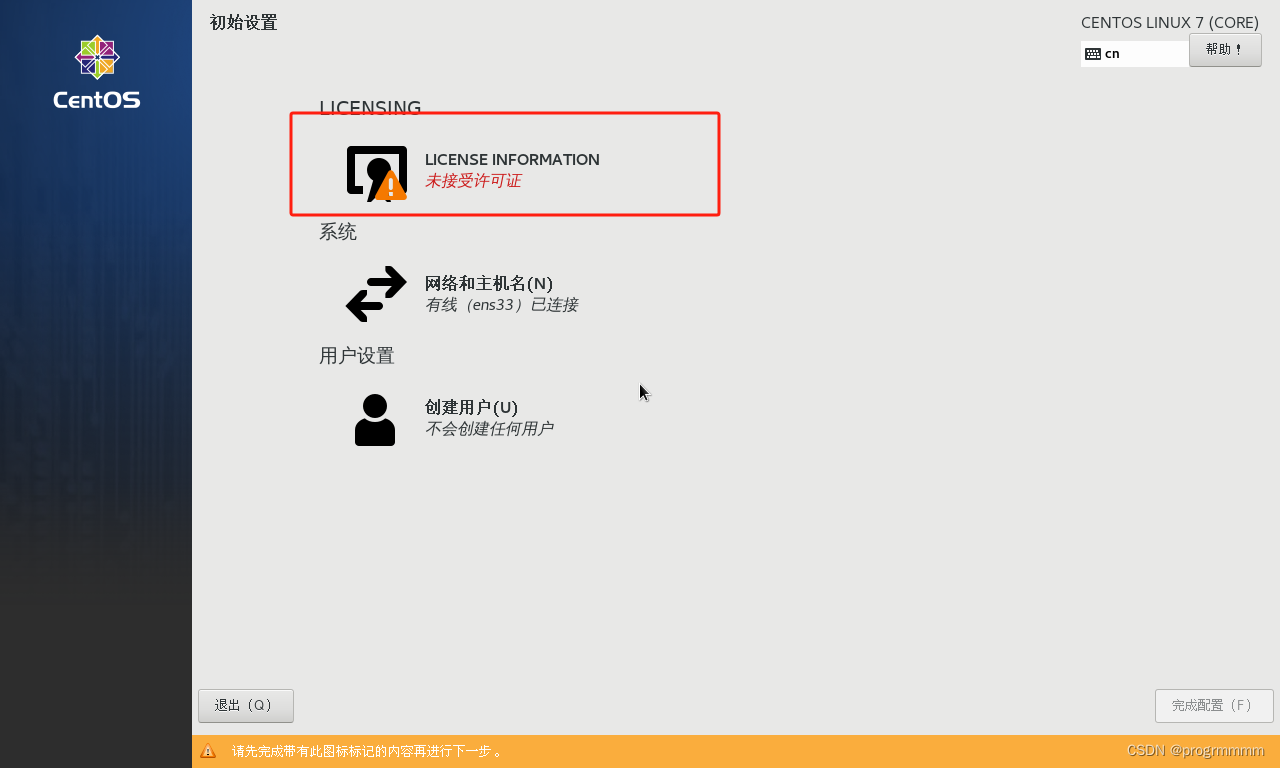
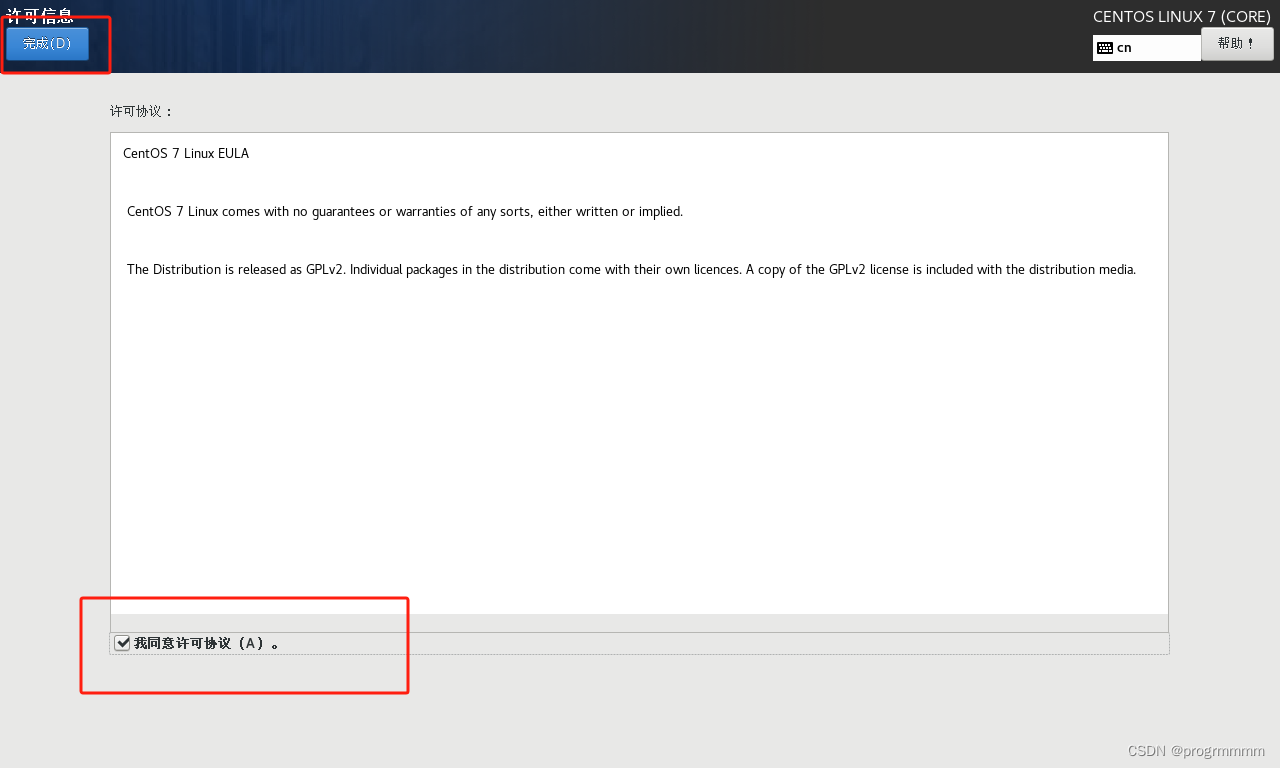
(9)重启后点击LICENSE INFORMATION然后勾中同意点击完成,然后点击完成配置

(10)centos需要你建立一个非root账户,一路点前进就行了。
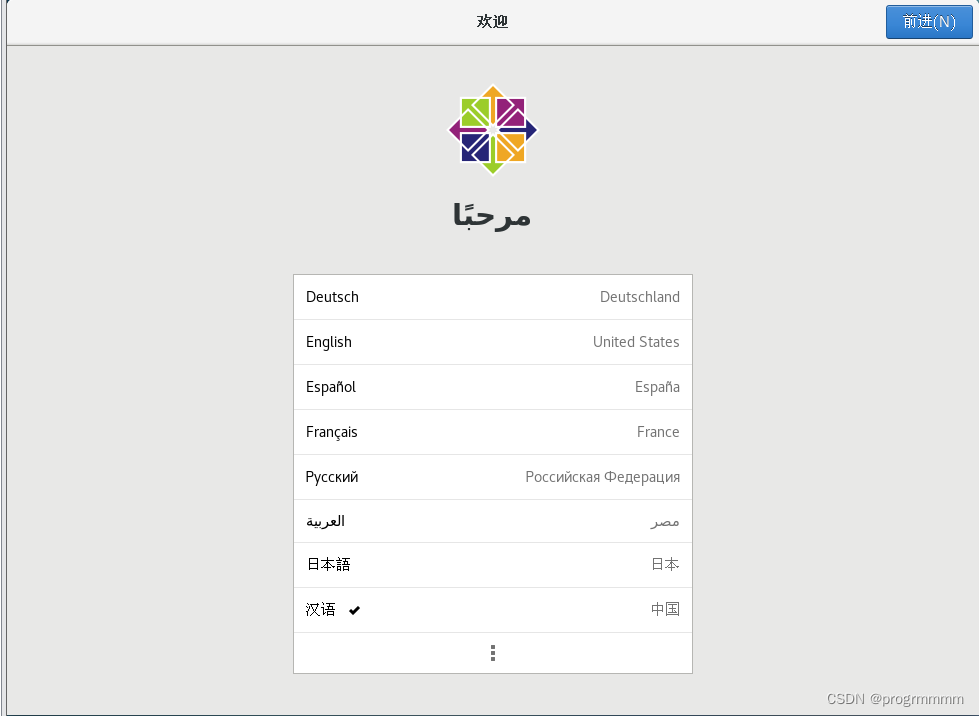
这个地方输入root(其实输入什么都无所谓)
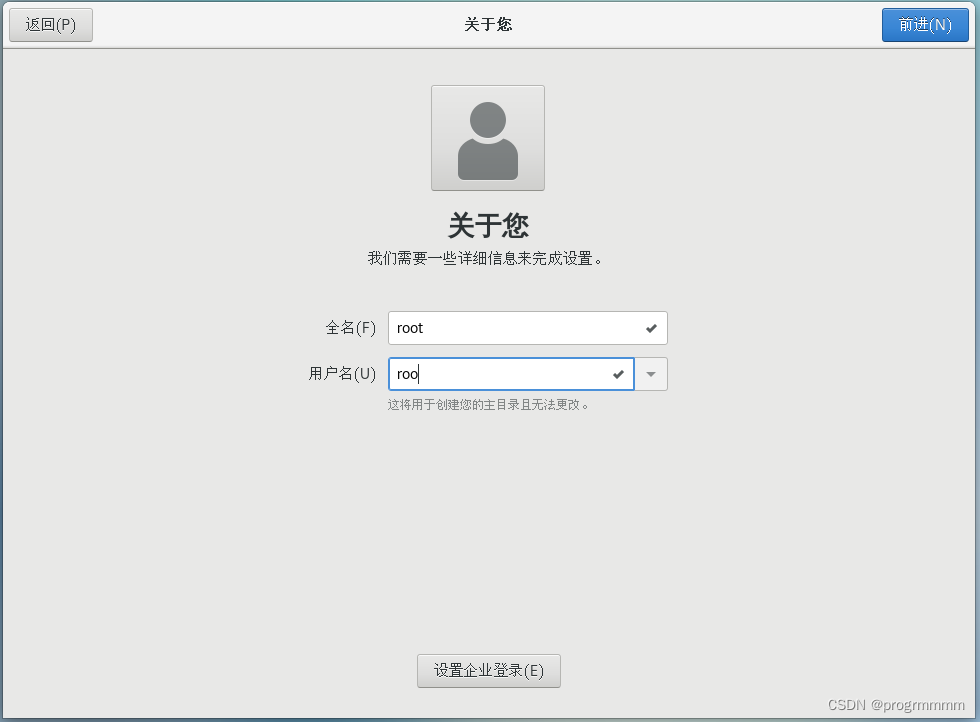 这里需要输入一个稍微复杂的密码才能点击前进,字母数字符号组合
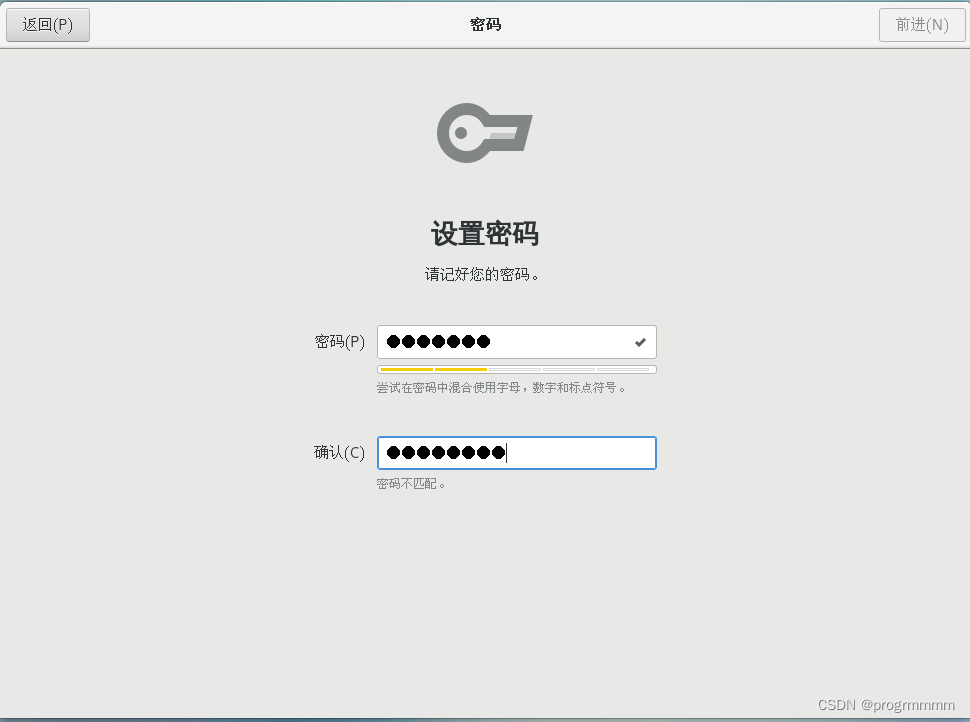
到此系统就安装完成了,三个虚拟机都要按照上述步骤操作。

三、虚拟机配置
关于centos系统的操作都要在root用户下进行。点击系统右上角按钮。然后点击注销。用root账号和123456密码登录。否则可能会出现权限问题,比如打开的文件是只读的。


点击未列出或以另外一个身份登录,然后输入用户名输入root,密码输入123456
现在账户上这个root并不是root账户,是刚进入系统创建的roo用户
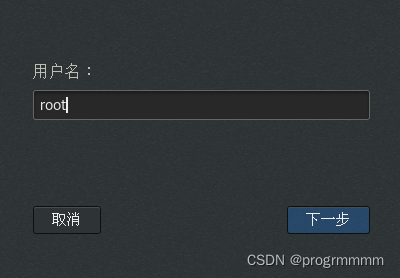
所有编辑文件的操作尽量先按一下i再复制,否则可能复制不全
以下配置三个虚拟机都要进行
1、IP固定
根据你自己的IP段号,保证不重复的情况下给三个虚拟机固定IP,我这边分别设置的是:
master:192.168.1.100
node1:192.168.1.101
node2:192.168.1.102
打开虚拟机终端,输入命令:
ifconfig可以看到虚拟机ip为一个ens33下的个ip。当你的环境不是虚拟机的是普通系统或者服务器可能名称不是ens33,只要找到是哪个决定的ip就好了。
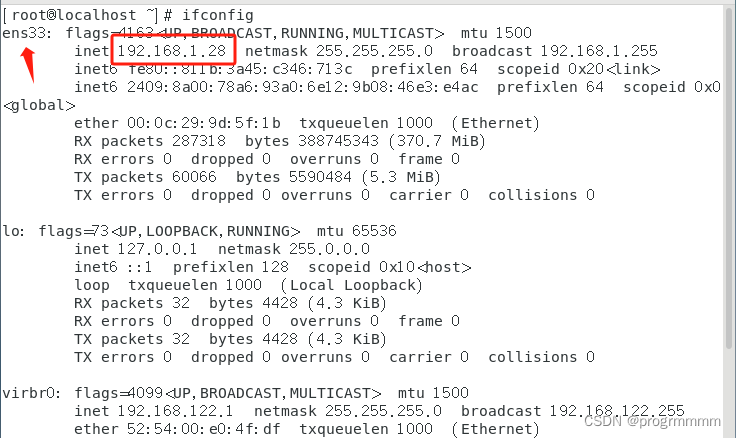
终端输入以下命令并回车,可以看到以下内容(如上述,如果你的环境决定ip的不是ens33,那就进入/etc/sysconfig/network-scripts/目录下找到对应文件并用vi或者vim编辑)【还是说一下吧...:进入编辑界面按i编辑,:wq保存,:q!退出】:
vi /etc/sysconfig/network-scripts/ifcfg-ens33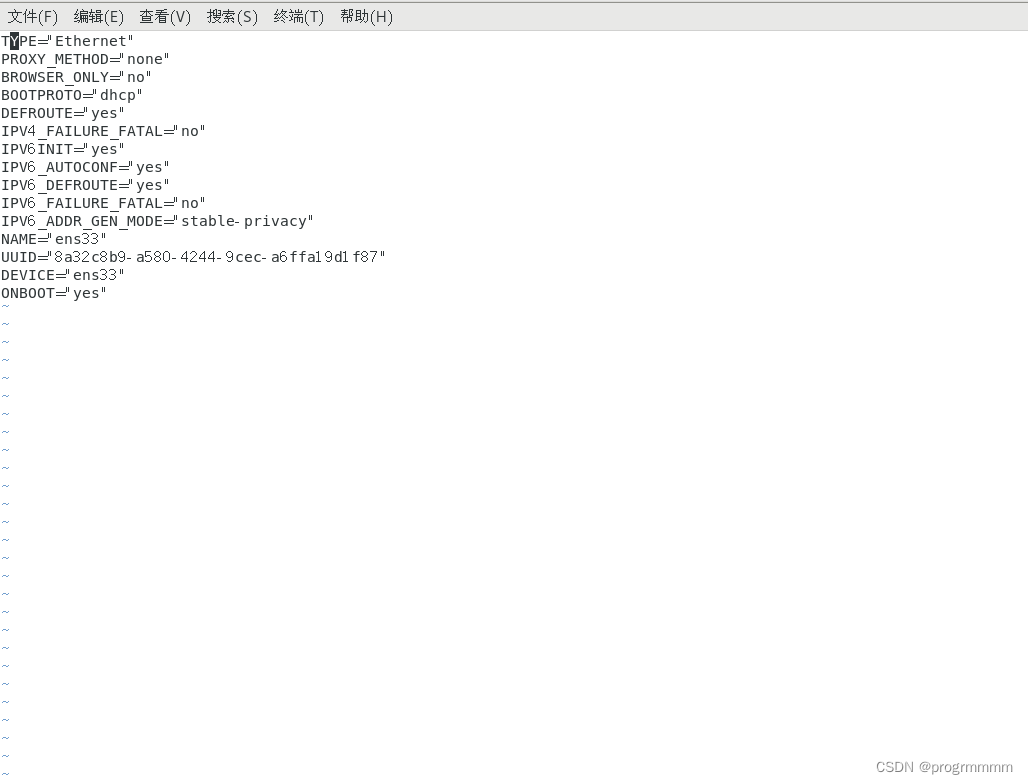
#设置为静态
BOOTPROTO="static"
#ip
IPADDR=192.168.1.100
#子网掩码
NETMASK=255.255.255.0
#网关
GATEWAY=192.168.1.1
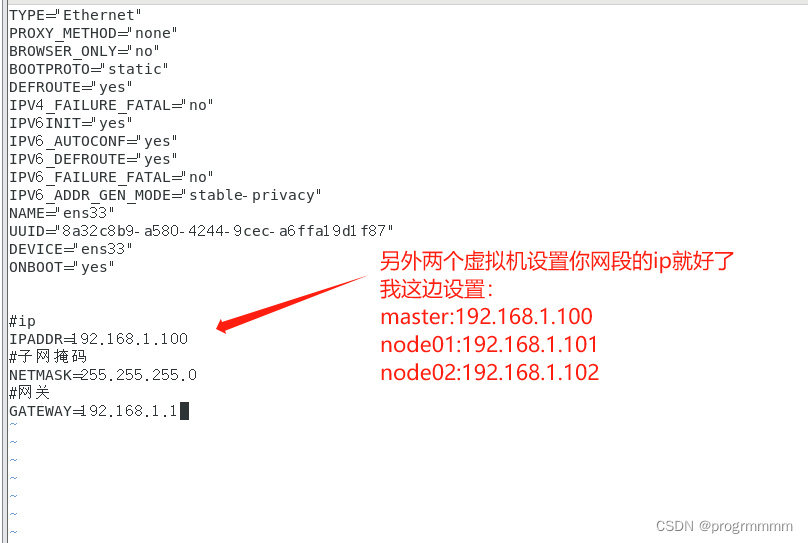
三个虚拟机都设置一下,并保存文件
设置完成ip后需要生效以下,终端输入以下命令回车就可以了。然后用ifconfig命令看一下ip固定是否生效。
service network restart master:
node1:
node2:
2、配置yum阿里源
保证yum下载速度,终端输入:
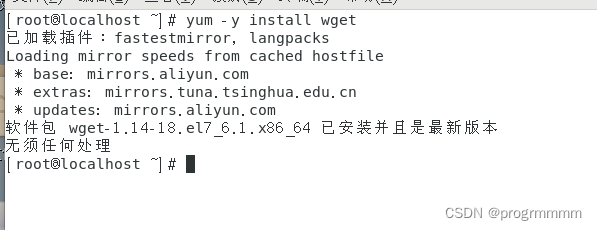
yum -y install wget
备份源指令:
mv /etc/yum.repos.d/CentOS-Base.repo /etc/yum.repos.d/CentOS-Base.repo.bak

下载源指令:
wget -O /etc/yum.repos.d/CentOS-Base.repo http://mirrors.aliyun.com/repo/Centos-7.repo

生效以下(第二个指令可能时间长一点):
yum clean all
yum makecache
3、关闭防火墙
# 查看防火墙状态
firewall-cmd --state
# 临时停止防火墙
systemctl stop firewalld.service
# 禁止防火墙开机启动
systemctl disable firewalld.service

4、 关闭selinux
# 查看selinux状态
getenforce
# 临时关闭selinux
setenforce 0
# 永久关闭selinux
sed -i 's/^ *SELINUX=enforcing/SELINUX=disabled/g' /etc/selinux/config

5、 禁止swap交换
# 临时关闭swap
swapoff -a
# 永久关闭swap
sed -i.bak '/swap/s/^/#/' /etc/fstab

6、内核参数修改
# 修改ipv4
sysctl -w net.ipv4.ip_forward=1
# 添加k8s.conf
vi /etc/sysctl.d/k8s.conf
将以下内容复制近vi打开的k8s.conf:
net.bridge.bridge-nf-call-ip6tables = 1
net.bridge.bridge-nf-call-iptables = 1
终端输入以下指令,让配置生效:
sysctl -p /etc/sysctl.d/k8s.conf注:如果出现了以下报错

可以在终端中输入这段命令后再执行生效配置:
modprobe br_netfilter
7、设置kubernetes源
创建文件配置:
vi /etc/yum.repos.d/kubernetes.repo在文件中输入以下内容并保存
[kubernetes]
name=Kubernetes
baseurl=http://mirrors.aliyun.com/kubernetes/yum/repos/kubernetes-el7-x86_64
enabled=1
gpgcheck=0
repo_gpgcheck=0
gpgkey=http://mirrors.aliyun.com/kubernetes/yum/doc/yum-key.gpg
        http://mirrors.aliyun.com/kubernetes/yum/doc/rpm-package-key.gpg
使配置生效:
yum clean all
yum -y makecache
 以上配置三个虚拟机都要进行
四、docker安装
三个虚拟机都需要安装docker
先配置源
sudo yum-config-manager \
    --add-repo \
    http://mirrors.aliyun.com/docker-ce/linux/centos/docker-ce.repo
再查看当前可以安装哪些版本的docker
sudo yum list docker-ce --showduplicates | sort -r
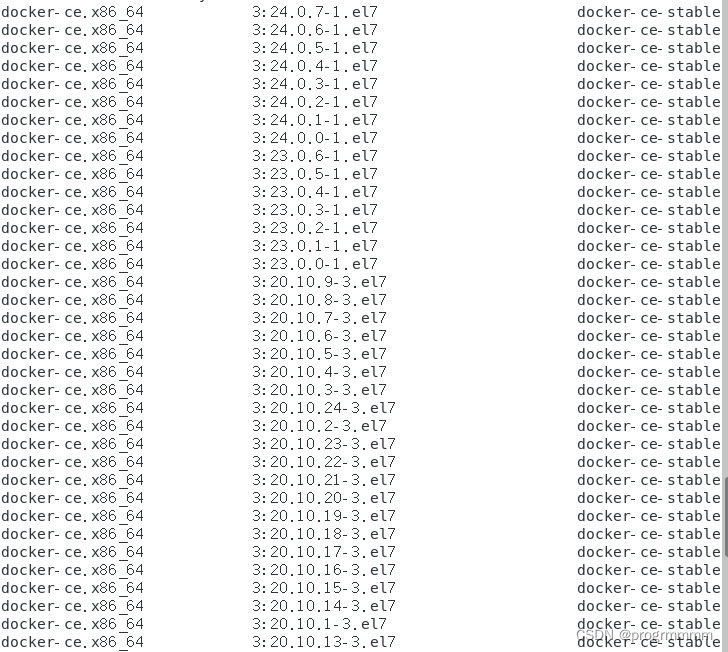
下载20-10-9版本。输入以下指令下载,然后等待:
sudo yum install docker-ce-20.10.9 docker-ce-cli-20.10.9 containerd.io
安装中可能需要多次输入y同意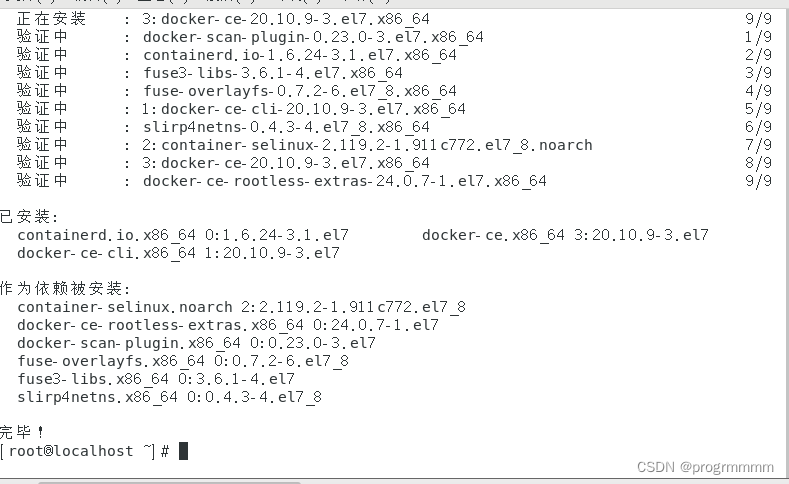
启动docker:
sudo systemctl start docker
设置docker自启动:
sudo systemctl enable docker

输入images查看docker是否安装成功,出现以下内容即为安装成功:
docker images
修改docker配置:
vi /etc/docker/daemon.json输入以下内容,设置源和exec:
{
  "registry-mirrors": ["https://2ywfua5b.mirror.aliyuncs.com"],
  "exec-opts": ["native.cgroupdriver=systemd"]
}
终端输入两句让配置生效 :
systemctl daemon-reload
systemctl restart docker
三个虚拟机都需要安装docker
五、虚拟机分组
这一步三台虚拟机需要分别起自己的机器名,分别执行以下命令:
hostnamectl set-hostname master
hostnamectl set-hostname node1hostnamectl set-hostname node2然后三台机器创建配置文件并编辑,三个虚拟机输入内容相同:
vi /etc/hosts
192.168.1.100   master
192.168.1.101   node1
192.168.1.102   node2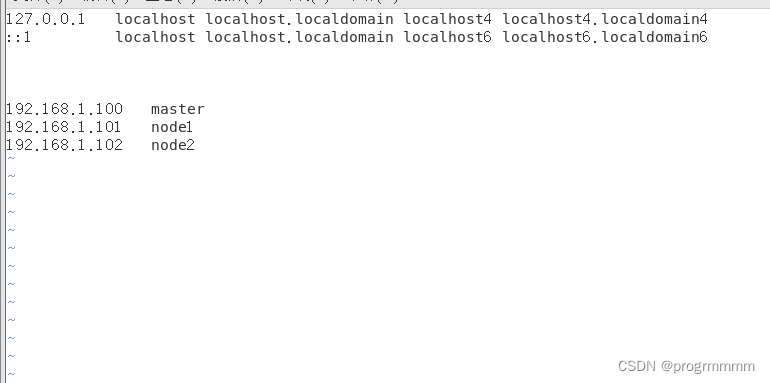
三台机器的配置文件修改完成后终端输入reboot或直接重启虚拟机。
重启后打开终端发现@后面的机器名已经改变
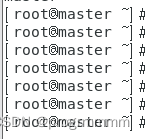
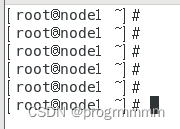
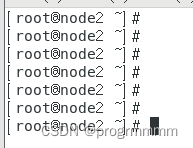
表明配置成功
六、k8s安装
1、安装k8s
三台机器都需要安装k8s
首先查看可以安装哪些版本,输入指令:
yum list kubelet --showduplicates | sort -r
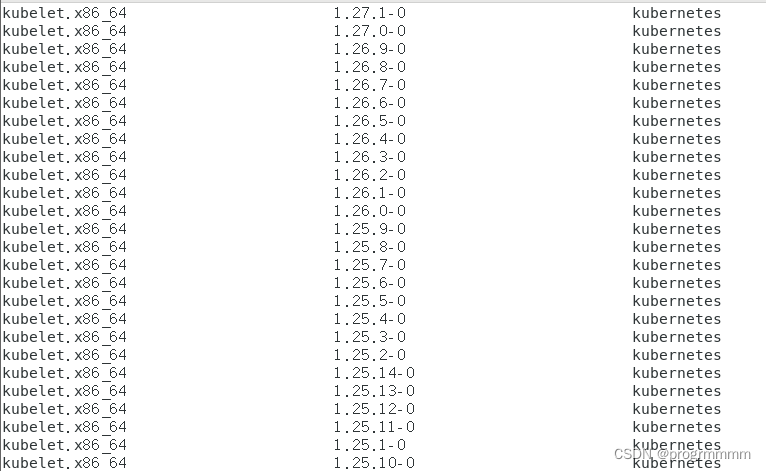
如果还需要安装kubeSphere就需要控制版本了
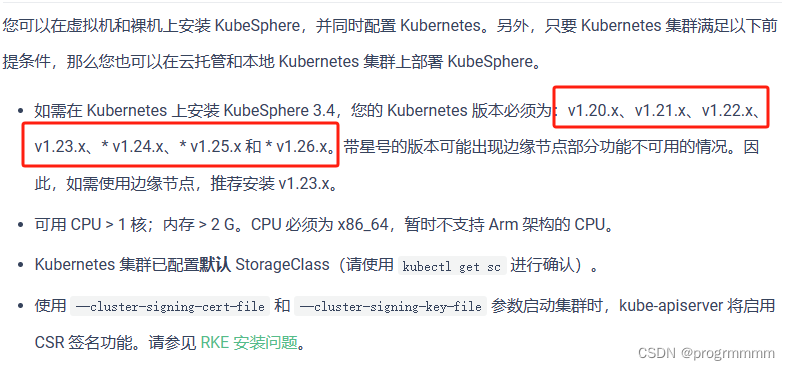
这边找一个稳定版本安装,输入命令后等待安装,版本高了还要改东西,用低的稳定版本:
yum install -y kubelet-1.21.2 kubeadm-1.21.2 kubectl-1.21.2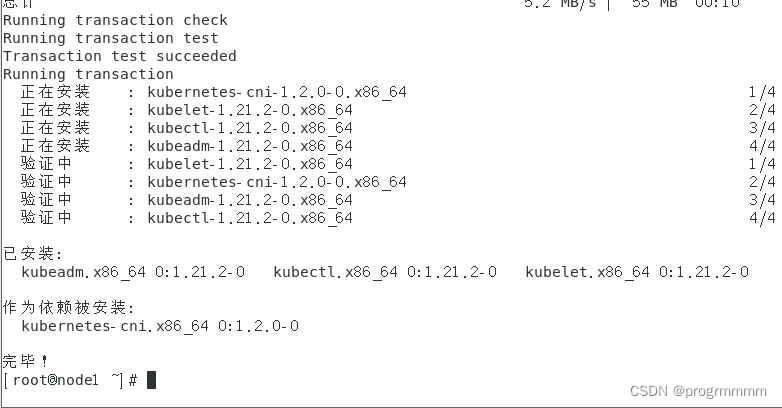
出现以上内容即为安装成功。三台机器都需要安装。
启动k8s服务:
systemctl start kubelet
设置k8s开机自启:
systemctl enable kubelet2、安装k8s镜像
k8s依托于docker,所以需要下载镜像依托docker开启容器来开启k8s服务,三台机器都需要安装。
查看需要下载的镜像:
kubeadm config images list

编辑脚本下载所需镜像:
vi install.sh写入以下内容,脚本为根据上述查询命令进行镜像下载,下载后上传更新镜像name和tag然后删除原镜像:
#!/bin/bash
url=registry.cn-hangzhou.aliyuncs.com/google_containers
# 安装指定的kubectl版本
version=v1.21.2
# 上面查出来的coredns版本号
coredns=1.8.0
images=(`kubeadm config images list --kubernetes-version=$version|awk -F '/' '{print $2}'`)
for imagename in ${images[@]} ; do
   if [ $imagename = "coredns" ]
   then
      docker pull $url/coredns:$coredns
      docker tag $url/coredns:$coredns k8s.gcr.io/coredns/coredns:v1.8.0
      docker rmi -f $url/coredns:$coredns
   else
      docker pull $url/$imagename
      docker tag $url/$imagename k8s.gcr.io/$imagename
      docker rmi -f $url/$imagename
  fi
done
给予sh脚本权限,并执行脚本
chmod 777 install.sh./install.sh脚本执行完成后查看一下下载的镜像:
docker images
三台机器都需要安装
3、初始化K8S集群
在起名master的虚拟机上执行以下命令,其他机器不需要执行【其中ip换成你自己虚拟机的ip】
kubeadm init --kubernetes-version=1.21.2 --apiserver-advertise-address=192.168.1.100 --pod-network-cidr=10.244.0.0/16
等待命令执行【前期如果虚拟机内存和处理器资源没设置的话可能会报性能不足的错误,在这里再说一下,不报错不用管】
成功了可以看到以下内容
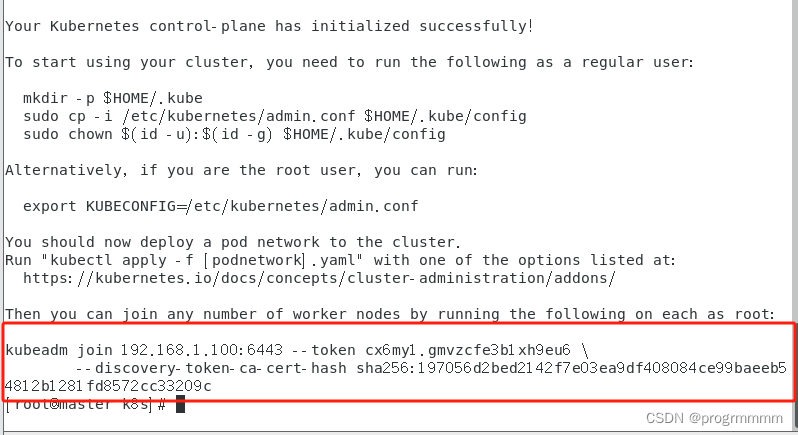
建个文本文档,把红框中的内容保存下来,这是其他机器加入集群的命令。
初始化一下,转存一下配置文件,执行以下命令:
mkdir -p $HOME/.kube
sudo cp -i /etc/kubernetes/admin.conf $HOME/.kube/config
sudo chown $(id -u):$(id -g) $HOME/.kube/config另外两个node节点虚拟机在根目录终端执行这个加入集群的命令。


回到master虚拟机输入终端输入以下内容查看node节点是否加入成功:
kubectl get nodes
六、下载calico
直接执行以下三个命令然后等待就可以了:
curl https://projectcalico.docs.tigera.io/manifests/calico.yaml -O
curl -O https://docs.tigera.io/archive/v3.25/manifests/calico.yaml
kubectl apply -f calico.yaml
不下载的话core可能处于pending状态
看一下下载状态
kubectl get pod --all-namespaces
遇见两个core处于pending状态就重启一下k8s:
systemctl restart kubelet七、配置 Kubernetes 集群中的默认存储类型
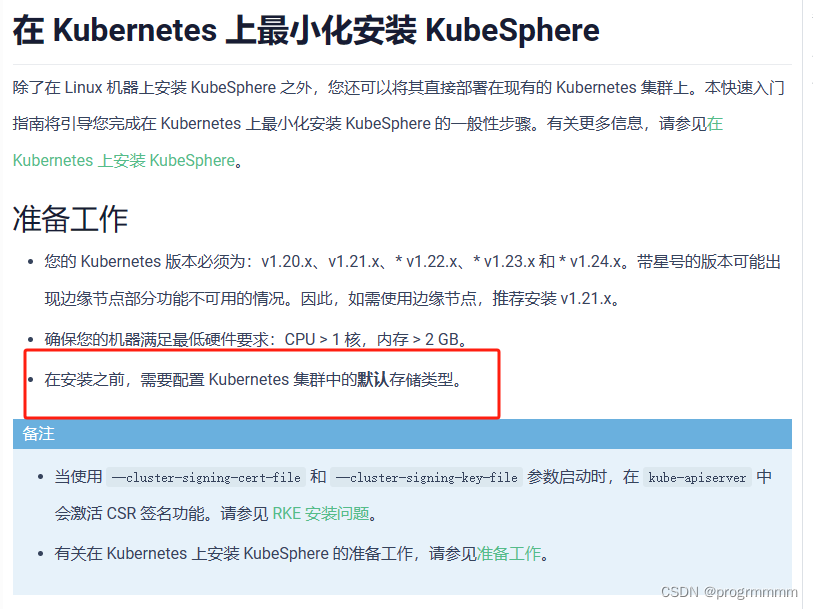
在k8s上安装kubeSphere需要设置k8s的默认储存类,因为只是master节点安装kubeSphere,所以只需要master虚拟机配置默认储存类就可以了。
执行以下命令查看一下有没有默认储存类:
kubectl get storageclass
首先安装nfs,用nfs当默认储存类:
yum install -y nfs-utils
建立存放数据的目录:
mkdir -p /data/k8s
设置挂载路径:
vi /etc/exports创建文件,加入以下内容并保存:
/data/k8s *(rw,no_root_squash)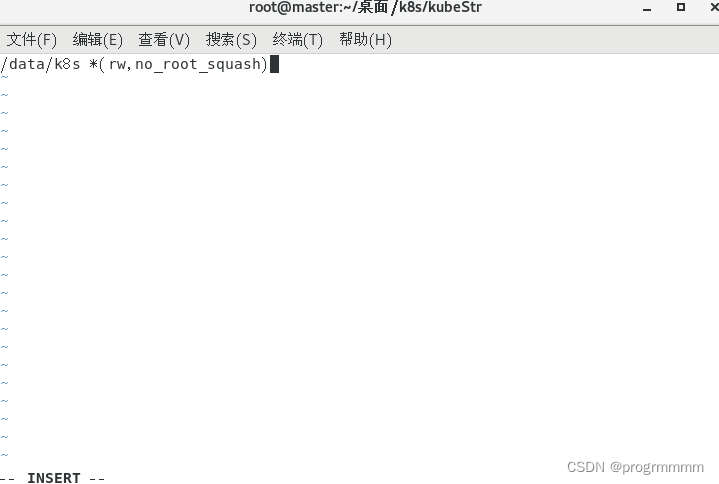
虽然只是master虚拟机安装kubeSphere,但n两个ode虚拟机也要安装nfs,所以在两个node虚拟机上也执行:
yum install -y nfs-utils
然后老样子三个虚拟机都开启nfs并设置开机自启:
systemctl start nfs
systemctl enable nfs


然后下面的操作只需要在master虚拟机上进行了:
创建一个存储目录并进入:
mkdir kubeStr
cd kubeStr
在进入的文件夹中分别创建三个文件:
vi nfs-client.yaml
vi nfs-client-sa.yaml
vi nfs-client-class.yaml
三个文件的内容分别是:
nfs-client.yaml(注意两个ip地址换成你自己的):
kind: Deployment
apiVersion: apps/v1
metadata:
  name: nfs-client-provisioner
spec:
  replicas: 1
  selector:
    matchLabels:
      app: nfs-client-provisioner
  strategy:
    type: Recreate
  template:
    metadata:
      labels:
        app: nfs-client-provisioner
    spec:
      serviceAccountName: nfs-client-provisioner
      containers:
        - name: nfs-client-provisioner
          image: quay.io/external_storage/nfs-client-provisioner:latest
          volumeMounts:
            - name: nfs-client-root
              mountPath: /persistentvolumes
          env:
            - name: PROVISIONER_NAME
              value: fuseim.pri/ifs
            - name: NFS_SERVER
              value: 192.168.1.100
            - name: NFS_PATH
              value: /data/k8s
      volumes:
        - name: nfs-client-root
          nfs:
            server: 192.168.1.100
            path: /data/k8s
vi nfs-client-sa.yaml(这个不用修改):
apiVersion: v1
kind: ServiceAccount
metadata:
  name: nfs-client-provisioner

---
kind: ClusterRole
apiVersion: rbac.authorization.k8s.io/v1
metadata:
  name: nfs-client-provisioner-runner
rules:
  - apiGroups: [""]
    resources: ["persistentvolumes"]
    verbs: ["get", "list", "watch", "create", "delete"]
  - apiGroups: [""]
    resources: ["persistentvolumeclaims"]
    verbs: ["get", "list", "watch", "update"]
  - apiGroups: ["storage.k8s.io"]
    resources: ["storageclasses"]
    verbs: ["get", "list", "watch"]
  - apiGroups: [""]
    resources: ["events"]
    verbs: ["list", "watch", "create", "update", "patch"]
  - apiGroups: [""]
    resources: ["endpoints"]
    verbs: ["create", "delete", "get", "list", "watch", "patch", "update"]

---
kind: ClusterRoleBinding
apiVersion: rbac.authorization.k8s.io/v1
metadata:
  name: run-nfs-client-provisioner
subjects:
  - kind: ServiceAccount
    name: nfs-client-provisioner
    namespace: default
roleRef:
  kind: ClusterRole
  name: nfs-client-provisioner-runner
  apiGroup: rbac.authorization.k8s.io
nfs-client-class.yaml(这个也不用修改):
apiVersion: storage.k8s.io/v1
kind: StorageClass
metadata:
  name: course-nfs-storage
provisioner: fuseim.pri/ifs # or choose another name, must match deployment's env PROVISIONER_NAME'
然后在当前目录执行以下命令,不是以下打印或报错就是文件内容没复制完整:
kubectl create -f nfs-client.yaml
kubectl create -f nfs-client-sa.yaml
kubectl create -f nfs-client-class.yaml
查看刚刚设置的储存类:
kubectl get storageclass
把刚设置的储存类设置为默认储存类,执行以下命令:
kubectl patch storageclass course-nfs-storage -p '{"metadata": {"annotations":{"storageclass.kubernetes.io/is-default-class":"true"}}}'可以看到执行完后就是默认储存类了

就可以开始安装kubeSphere了
八、kubeSphere安装
网址:在 Kubernetes 上最小化安装 KubeSphere

首先网站上让你直接安装两个东西,但是这两个xml文件都在git上,可能因为网络原因下载不下来,这里提供两个文件:
cluster-configuration.yaml:
---
apiVersion: installer.kubesphere.io/v1alpha1
kind: ClusterConfiguration
metadata:
  name: ks-installer
  namespace: kubesphere-system
  labels:
    version: v3.3.2
spec:
  persistence:
    storageClass: ""        # If there is no default StorageClass in your cluster, you need to specify an existing StorageClass here.
  authentication:
    # adminPassword: ""     # Custom password of the admin user. If the parameter exists but the value is empty, a random password is generated. If the parameter does not exist, P@88w0rd is used.
    jwtSecret: ""           # Keep the jwtSecret consistent with the Host Cluster. Retrieve the jwtSecret by executing "kubectl -n kubesphere-system get cm kubesphere-config -o yaml | grep -v "apiVersion" | grep jwtSecret" on the Host Cluster.
  local_registry: ""        # Add your private registry address if it is needed.
  # dev_tag: ""               # Add your kubesphere image tag you want to install, by default it's same as ks-installer release version.
  etcd:
    monitoring: false       # Enable or disable etcd monitoring dashboard installation. You have to create a Secret for etcd before you enable it.
    endpointIps: localhost  # etcd cluster EndpointIps. It can be a bunch of IPs here.
    port: 2379              # etcd port.
    tlsEnable: true
  common:
    core:
      console:
        enableMultiLogin: true  # Enable or disable simultaneous logins. It allows different users to log in with the same account at the same time.
        port: 30880
        type: NodePort

    # apiserver:            # Enlarge the apiserver and controller manager's resource requests and limits for the large cluster
    #  resources: {}
    # controllerManager:
    #  resources: {}
    redis:
      enabled: false
      enableHA: false
      volumeSize: 2Gi # Redis PVC size.
    openldap:
      enabled: false
      volumeSize: 2Gi   # openldap PVC size.
    minio:
      volumeSize: 20Gi # Minio PVC size.
    monitoring:
      # type: external   # Whether to specify the external prometheus stack, and need to modify the endpoint at the next line.
      endpoint: http://prometheus-operated.kubesphere-monitoring-system.svc:9090 # Prometheus endpoint to get metrics data.
      GPUMonitoring:     # Enable or disable the GPU-related metrics. If you enable this switch but have no GPU resources, Kubesphere will set it to zero.
        enabled: false
    gpu:                 # Install GPUKinds. The default GPU kind is nvidia.com/gpu. Other GPU kinds can be added here according to your needs.
      kinds:
      - resourceName: "nvidia.com/gpu"
        resourceType: "GPU"
        default: true
    es:   # Storage backend for logging, events and auditing.
      # master:
      #   volumeSize: 4Gi  # The volume size of Elasticsearch master nodes.
      #   replicas: 1      # The total number of master nodes. Even numbers are not allowed.
      #   resources: {}
      # data:
      #   volumeSize: 20Gi  # The volume size of Elasticsearch data nodes.
      #   replicas: 1       # The total number of data nodes.
      #   resources: {}
      logMaxAge: 7             # Log retention time in built-in Elasticsearch. It is 7 days by default.
      elkPrefix: logstash      # The string making up index names. The index name will be formatted as ks-<elk_prefix>-log.
      basicAuth:
        enabled: false
        username: ""
        password: ""
      externalElasticsearchHost: ""
      externalElasticsearchPort: ""
  alerting:                # (CPU: 0.1 Core, Memory: 100 MiB) It enables users to customize alerting policies to send messages to receivers in time with different time intervals and alerting levels to choose from.
    enabled: false         # Enable or disable the KubeSphere Alerting System.
    # thanosruler:
    #   replicas: 1
    #   resources: {}
  auditing:                # Provide a security-relevant chronological set of records,recording the sequence of activities happening on the platform, initiated by different tenants.
    enabled: false         # Enable or disable the KubeSphere Auditing Log System.
    # operator:
    #   resources: {}
    # webhook:
    #   resources: {}
  devops:                  # (CPU: 0.47 Core, Memory: 8.6 G) Provide an out-of-the-box CI/CD system based on Jenkins, and automated workflow tools including Source-to-Image & Binary-to-Image.
    enabled: false             # Enable or disable the KubeSphere DevOps System.
    # resources: {}
    jenkinsMemoryLim: 4Gi      # Jenkins memory limit.
    jenkinsMemoryReq: 2Gi   # Jenkins memory request.
    jenkinsVolumeSize: 8Gi     # Jenkins volume size.
  events:                  # Provide a graphical web console for Kubernetes Events exporting, filtering and alerting in multi-tenant Kubernetes clusters.
    enabled: false         # Enable or disable the KubeSphere Events System.
    # operator:
    #   resources: {}
    # exporter:
    #   resources: {}
    # ruler:
    #   enabled: true
    #   replicas: 2
    #   resources: {}
  logging:                 # (CPU: 57 m, Memory: 2.76 G) Flexible logging functions are provided for log query, collection and management in a unified console. Additional log collectors can be added, such as Elasticsearch, Kafka and Fluentd.
    enabled: false         # Enable or disable the KubeSphere Logging System.
    logsidecar:
      enabled: true
      replicas: 2
      # resources: {}
  metrics_server:                    # (CPU: 56 m, Memory: 44.35 MiB) It enables HPA (Horizontal Pod Autoscaler).
    enabled: false                   # Enable or disable metrics-server.
  monitoring:
    storageClass: ""                 # If there is an independent StorageClass you need for Prometheus, you can specify it here. The default StorageClass is used by default.
    node_exporter:
      port: 9100
      # resources: {}
    # kube_rbac_proxy:
    #   resources: {}
    # kube_state_metrics:
    #   resources: {}
    # prometheus:
    #   replicas: 1  # Prometheus replicas are responsible for monitoring different segments of data source and providing high availability.
    #   volumeSize: 20Gi  # Prometheus PVC size.
    #   resources: {}
    #   operator:
    #     resources: {}
    # alertmanager:
    #   replicas: 1          # AlertManager Replicas.
    #   resources: {}
    # notification_manager:
    #   resources: {}
    #   operator:
    #     resources: {}
    #   proxy:
    #     resources: {}
    gpu:                           # GPU monitoring-related plug-in installation.
      nvidia_dcgm_exporter:        # Ensure that gpu resources on your hosts can be used normally, otherwise this plug-in will not work properly.
        enabled: false             # Check whether the labels on the GPU hosts contain "nvidia.com/gpu.present=true" to ensure that the DCGM pod is scheduled to these nodes.
        # resources: {}
  multicluster:
    clusterRole: none  # host | member | none  # You can install a solo cluster, or specify it as the Host or Member Cluster.
  network:
    networkpolicy: # Network policies allow network isolation within the same cluster, which means firewalls can be set up between certain instances (Pods).
      # Make sure that the CNI network plugin used by the cluster supports NetworkPolicy. There are a number of CNI network plugins that support NetworkPolicy, including Calico, Cilium, Kube-router, Romana and Weave Net.
      enabled: false # Enable or disable network policies.
    ippool: # Use Pod IP Pools to manage the Pod network address space. Pods to be created can be assigned IP addresses from a Pod IP Pool.
      type: none # Specify "calico" for this field if Calico is used as your CNI plugin. "none" means that Pod IP Pools are disabled.
    topology: # Use Service Topology to view Service-to-Service communication based on Weave Scope.
      type: none # Specify "weave-scope" for this field to enable Service Topology. "none" means that Service Topology is disabled.
  openpitrix: # An App Store that is accessible to all platform tenants. You can use it to manage apps across their entire lifecycle.
    store:
      enabled: false # Enable or disable the KubeSphere App Store.
  servicemesh:         # (0.3 Core, 300 MiB) Provide fine-grained traffic management, observability and tracing, and visualized traffic topology.
    enabled: false     # Base component (pilot). Enable or disable KubeSphere Service Mesh (Istio-based).
    istio:  # Customizing the istio installation configuration, refer to https://istio.io/latest/docs/setup/additional-setup/customize-installation/
      components:
        ingressGateways:
        - name: istio-ingressgateway
          enabled: false
        cni:
          enabled: false
  edgeruntime:          # Add edge nodes to your cluster and deploy workloads on edge nodes.
    enabled: false
    kubeedge:        # kubeedge configurations
      enabled: false
      cloudCore:
        cloudHub:
          advertiseAddress: # At least a public IP address or an IP address which can be accessed by edge nodes must be provided.
            - ""            # Note that once KubeEdge is enabled, CloudCore will malfunction if the address is not provided.
        service:
          cloudhubNodePort: "30000"
          cloudhubQuicNodePort: "30001"
          cloudhubHttpsNodePort: "30002"
          cloudstreamNodePort: "30003"
          tunnelNodePort: "30004"
        # resources: {}
        # hostNetWork: false
      iptables-manager:
        enabled: true
        mode: "external"
        # resources: {}
      # edgeService:
      #   resources: {}
  gatekeeper:        # Provide admission policy and rule management, A validating (mutating TBA) webhook that enforces CRD-based policies executed by Open Policy Agent.
    enabled: false   # Enable or disable Gatekeeper.
    # controller_manager:
    #   resources: {}
    # audit:
    #   resources: {}
  terminal:
    # image: 'alpine:3.15' # There must be an nsenter program in the image
    timeout: 600         # Container timeout, if set to 0, no timeout will be used. The unit is seconds
kubesphere-installer.yaml:
---
apiVersion: apiextensions.k8s.io/v1
kind: CustomResourceDefinition
metadata:
  name: clusterconfigurations.installer.kubesphere.io
spec:
  group: installer.kubesphere.io
  versions:
    - name: v1alpha1
      served: true
      storage: true
      schema:
        openAPIV3Schema:
          type: object
          properties:
            spec:
              type: object
              x-kubernetes-preserve-unknown-fields: true
            status:
              type: object
              x-kubernetes-preserve-unknown-fields: true
  scope: Namespaced
  names:
    plural: clusterconfigurations
    singular: clusterconfiguration
    kind: ClusterConfiguration
    shortNames:
      - cc

---
apiVersion: v1
kind: Namespace
metadata:
  name: kubesphere-system

---
apiVersion: v1
kind: ServiceAccount
metadata:
  name: ks-installer
  namespace: kubesphere-system

---
apiVersion: rbac.authorization.k8s.io/v1
kind: ClusterRole
metadata:
  name: ks-installer
rules:
- apiGroups:
  - ""
  resources:
  - '*'
  verbs:
  - '*'
- apiGroups:
  - apps
  resources:
  - '*'
  verbs:
  - '*'
- apiGroups:
  - extensions
  resources:
  - '*'
  verbs:
  - '*'
- apiGroups:
  - batch
  resources:
  - '*'
  verbs:
  - '*'
- apiGroups:
  - rbac.authorization.k8s.io
  resources:
  - '*'
  verbs:
  - '*'
- apiGroups:
  - apiregistration.k8s.io
  resources:
  - '*'
  verbs:
  - '*'
- apiGroups:
  - apiextensions.k8s.io
  resources:
  - '*'
  verbs:
  - '*'
- apiGroups:
  - tenant.kubesphere.io
  resources:
  - '*'
  verbs:
  - '*'
- apiGroups:
  - certificates.k8s.io
  resources:
  - '*'
  verbs:
  - '*'
- apiGroups:
  - devops.kubesphere.io
  resources:
  - '*'
  verbs:
  - '*'
- apiGroups:
  - monitoring.coreos.com
  resources:
  - '*'
  verbs:
  - '*'
- apiGroups:
  - logging.kubesphere.io
  resources:
  - '*'
  verbs:
  - '*'
- apiGroups:
  - jaegertracing.io
  resources:
  - '*'
  verbs:
  - '*'
- apiGroups:
  - storage.k8s.io
  resources:
  - '*'
  verbs:
  - '*'
- apiGroups:
  - admissionregistration.k8s.io
  resources:
  - '*'
  verbs:
  - '*'
- apiGroups:
  - policy
  resources:
  - '*'
  verbs:
  - '*'
- apiGroups:
  - autoscaling
  resources:
  - '*'
  verbs:
  - '*'
- apiGroups:
  - networking.istio.io
  resources:
  - '*'
  verbs:
  - '*'
- apiGroups:
  - config.istio.io
  resources:
  - '*'
  verbs:
  - '*'
- apiGroups:
  - iam.kubesphere.io
  resources:
  - '*'
  verbs:
  - '*'
- apiGroups:
  - notification.kubesphere.io
  resources:
  - '*'
  verbs:
  - '*'
- apiGroups:
  - auditing.kubesphere.io
  resources:
  - '*'
  verbs:
  - '*'
- apiGroups:
  - events.kubesphere.io
  resources:
  - '*'
  verbs:
  - '*'
- apiGroups:
  - core.kubefed.io
  resources:
  - '*'
  verbs:
  - '*'
- apiGroups:
  - installer.kubesphere.io
  resources:
  - '*'
  verbs:
  - '*'
- apiGroups:
  - storage.kubesphere.io
  resources:
  - '*'
  verbs:
  - '*'
- apiGroups:
  - security.istio.io
  resources:
  - '*'
  verbs:
  - '*'
- apiGroups:
  - monitoring.kiali.io
  resources:
  - '*'
  verbs:
  - '*'
- apiGroups:
  - kiali.io
  resources:
  - '*'
  verbs:
  - '*'
- apiGroups:
  - networking.k8s.io
  resources:
  - '*'
  verbs:
  - '*'
- apiGroups:
  - edgeruntime.kubesphere.io
  resources:
  - '*'
  verbs:
  - '*'
- apiGroups:
  - types.kubefed.io
  resources:
  - '*'
  verbs:
  - '*'
- apiGroups:
  - monitoring.kubesphere.io
  resources:
  - '*'
  verbs:
  - '*'
- apiGroups:
  - application.kubesphere.io
  resources:
  - '*'
  verbs:
  - '*'


---
kind: ClusterRoleBinding
apiVersion: rbac.authorization.k8s.io/v1
metadata:
  name: ks-installer
subjects:
- kind: ServiceAccount
  name: ks-installer
  namespace: kubesphere-system
roleRef:
  kind: ClusterRole
  name: ks-installer
  apiGroup: rbac.authorization.k8s.io

---
apiVersion: apps/v1
kind: Deployment
metadata:
  name: ks-installer
  namespace: kubesphere-system
  labels:
    app: ks-installer
spec:
  replicas: 1
  selector:
    matchLabels:
      app: ks-installer
  template:
    metadata:
      labels:
        app: ks-installer
    spec:
      serviceAccountName: ks-installer
      containers:
      - name: installer
        image: kubesphere/ks-installer:v3.3.2
        imagePullPolicy: "Always"
        resources:
          limits:
            cpu: "1"
            memory: 1Gi
          requests:
            cpu: 20m
            memory: 100Mi
        volumeMounts:
        - mountPath: /etc/localtime
          name: host-time
          readOnly: true
      volumes:
      - hostPath:
          path: /etc/localtime
          type: ""
        name: host-time
将两个xml文件用vi创建并编辑好后就可以在存储两个xml的文件目录执行以下命令了:
kubectl apply -f ./kubesphere-installer.yaml
kubectl apply -f ./cluster-configuration.yaml
可以看到以下打印:
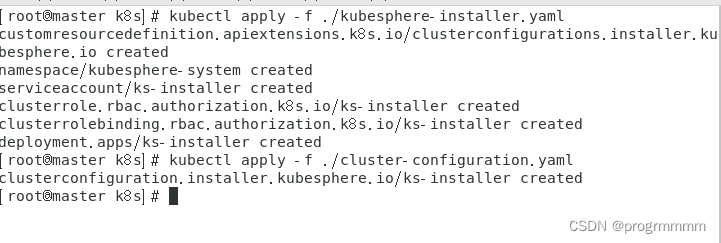
使用以下命令查看下载进度,多看几次,直到全部都running起来:
kubectl get pod --all-namespaces可能需要很长很长时间,等待就可以了
【如果报错就删除kubesphere然后重装,方法在目录九】
很长时间后可以看到全部处于running状态,说明安装成功了。
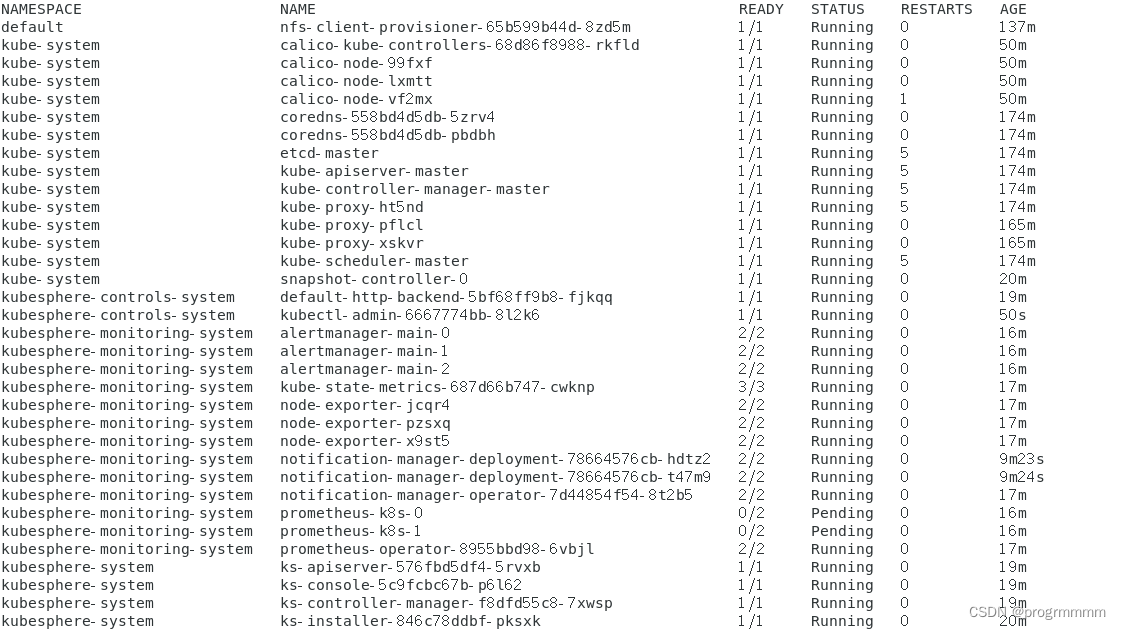
全部pod变为running后,输入命令:
kubectl get svc/ks-console -n kubesphere-system 
就可以使用地址和端口号打开网站了,kubeSphere的默认端口是30880,我这边虚拟器开启服务的地址是192.168.1.100,所以网址就是192.168.1.100:30880
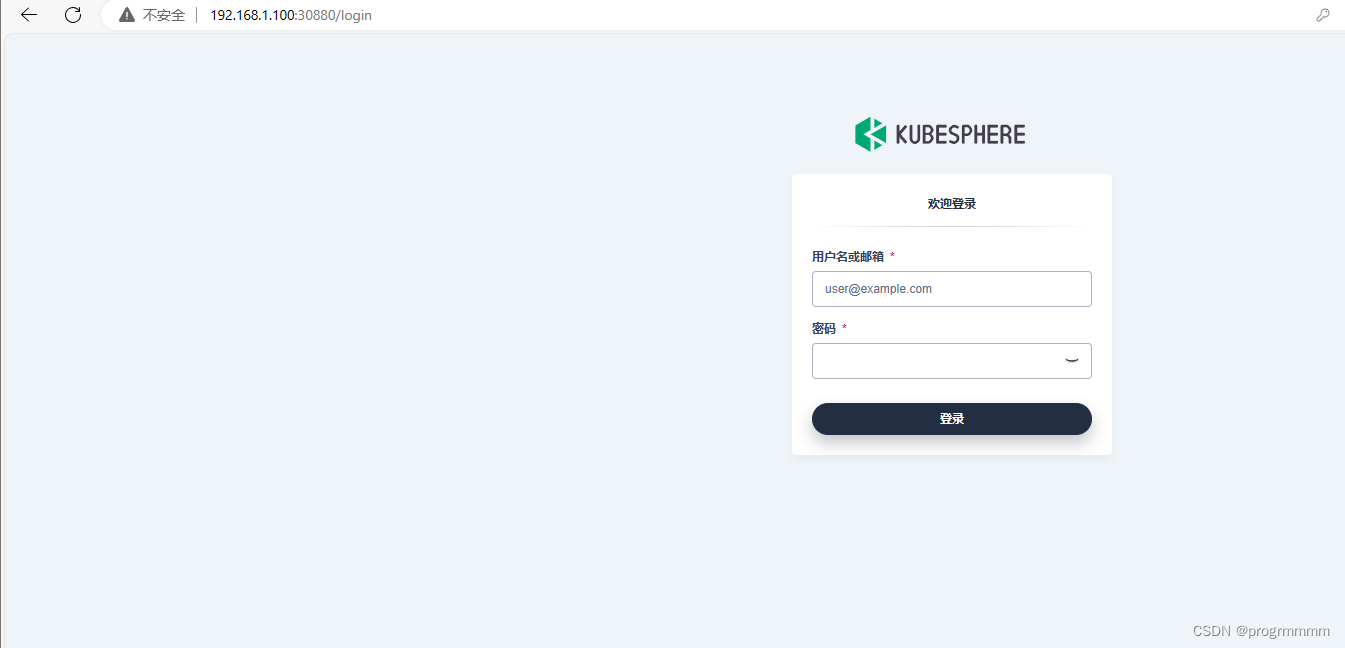
默认账号为:admin
默认密码为:P@88w0rd
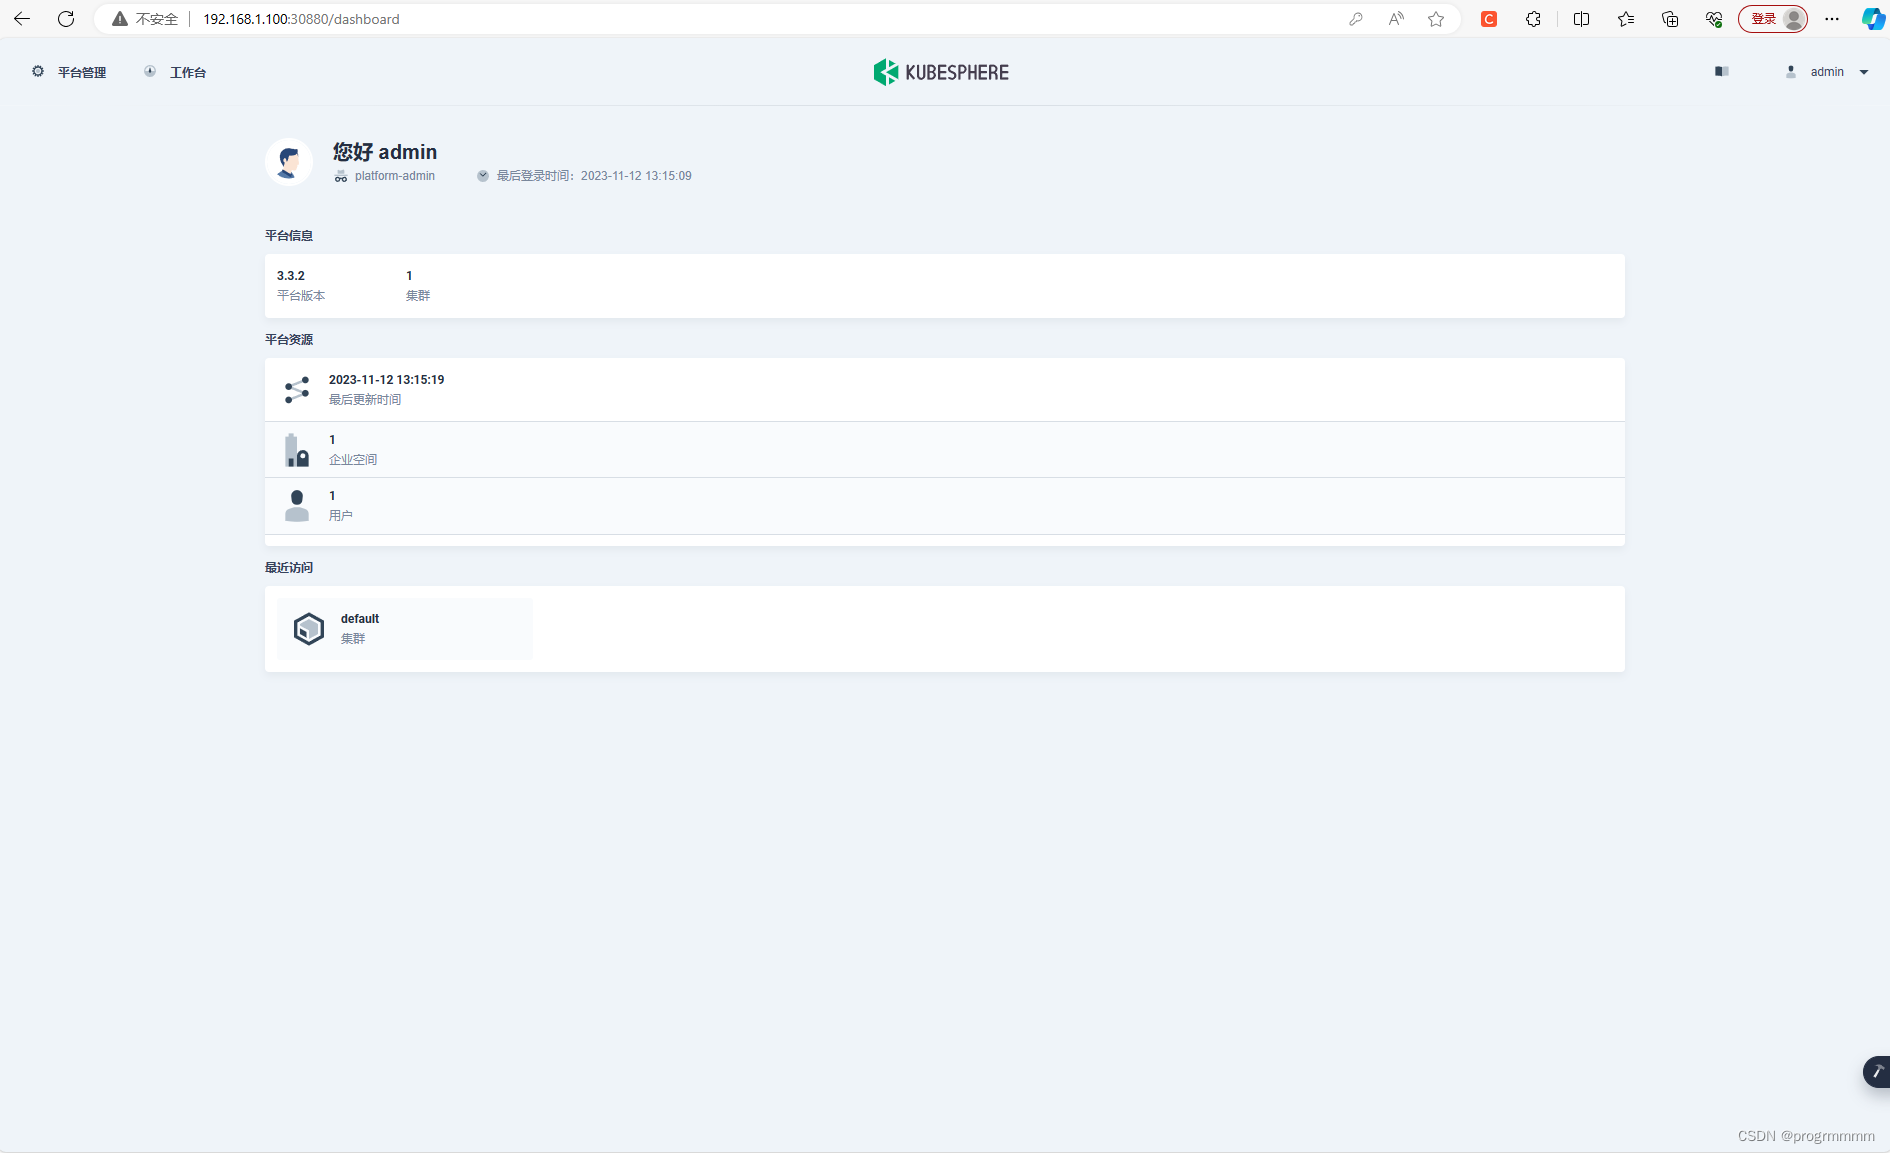
安装完成,有问题评论或私聊
九、删除kubeSphere
如果时间太长或者报错什么的就使用kubeSphere删除脚本,删除后重新安装;单纯像删除就执行脚本就可以了(以下三个命令分别转创建脚本,转换字符,给予权限):
vim kubesphere-delete.sh
sed -i 's/\r//' kubesphere-delete.sh
chmod 777 kubesphere-delete.sh
脚本如下:
#!/usr/bin/env bash

function delete_sure(){
  cat << eof
$(echo -e "\033[1;36mNote:\033[0m")

Delete the KubeSphere cluster, including the module kubesphere-system kubesphere-devops-system kubesphere-monitoring-system kubesphere-logging-system openpitrix-system.
eof

read -p "Please reconfirm that you want to delete the KubeSphere cluster.  (yes/no) " ans
while [[ "x"$ans != "xyes" && "x"$ans != "xno" ]]; do
    read -p "Please reconfirm that you want to delete the KubeSphere cluster.  (yes/no) " ans
done

if [[ "x"$ans == "xno" ]]; then
    exit
fi
}


delete_sure

# delete ks-install
kubectl delete deploy ks-installer -n kubesphere-system 2>/dev/null

# delete helm
for namespaces in kubesphere-system kubesphere-devops-system kubesphere-monitoring-system kubesphere-logging-system openpitrix-system kubesphere-monitoring-federated
do
  helm list -n $namespaces | grep -v NAME | awk '{print $1}' | sort -u | xargs -r -L1 helm uninstall -n $namespaces 2>/dev/null
done

# delete kubefed
kubectl get cc -n kubesphere-system ks-installer -o jsonpath="{.status.multicluster}" | grep enable
if [[ $? -eq 0 ]]; then
  helm uninstall -n kube-federation-system kubefed 2>/dev/null
  #kubectl delete ns kube-federation-system 2>/dev/null
fi


helm uninstall -n kube-system snapshot-controller 2>/dev/null

# delete kubesphere deployment
kubectl delete deployment -n kubesphere-system `kubectl get deployment -n kubesphere-system -o jsonpath="{.items[*].metadata.name}"` 2>/dev/null

# delete monitor statefulset
kubectl delete prometheus -n kubesphere-monitoring-system k8s 2>/dev/null
kubectl delete statefulset -n kubesphere-monitoring-system `kubectl get statefulset -n kubesphere-monitoring-system -o jsonpath="{.items[*].metadata.name}"` 2>/dev/null
# delete grafana
kubectl delete deployment -n kubesphere-monitoring-system grafana 2>/dev/null
kubectl --no-headers=true get pvc -n kubesphere-monitoring-system -o custom-columns=:metadata.namespace,:metadata.name | grep -E kubesphere-monitoring-system | xargs -n2 kubectl delete pvc -n 2>/dev/null

# delete pvc
pvcs="kubesphere-system|openpitrix-system|kubesphere-devops-system|kubesphere-logging-system"
kubectl --no-headers=true get pvc --all-namespaces -o custom-columns=:metadata.namespace,:metadata.name | grep -E $pvcs | xargs -n2 kubectl delete pvc -n 2>/dev/null


# delete rolebindings
delete_role_bindings() {
  for rolebinding in `kubectl -n $1 get rolebindings -l iam.kubesphere.io/user-ref -o jsonpath="{.items[*].metadata.name}"`
  do
    kubectl -n $1 delete rolebinding $rolebinding 2>/dev/null
  done
}

# delete roles
delete_roles() {
  kubectl -n $1 delete role admin 2>/dev/null
  kubectl -n $1 delete role operator 2>/dev/null
  kubectl -n $1 delete role viewer 2>/dev/null
  for role in `kubectl -n $1 get roles -l iam.kubesphere.io/role-template -o jsonpath="{.items[*].metadata.name}"`
  do
    kubectl -n $1 delete role $role 2>/dev/null
  done
}

# remove useless labels and finalizers
for ns in `kubectl get ns -o jsonpath="{.items[*].metadata.name}"`
do
  kubectl label ns $ns kubesphere.io/workspace-
  kubectl label ns $ns kubesphere.io/namespace-
  kubectl patch ns $ns -p '{"metadata":{"finalizers":null,"ownerReferences":null}}'
  delete_role_bindings $ns
  delete_roles $ns
done

# delete clusters
for cluster in `kubectl get clusters -o jsonpath="{.items[*].metadata.name}"`
do
  kubectl patch cluster $cluster -p '{"metadata":{"finalizers":null}}' --type=merge
done
kubectl delete clusters --all 2>/dev/null

# delete workspaces
for ws in `kubectl get workspaces -o jsonpath="{.items[*].metadata.name}"`
do
  kubectl patch workspace $ws -p '{"metadata":{"finalizers":null}}' --type=merge
done
kubectl delete workspaces --all 2>/dev/null

# delete devopsprojects
for devopsproject in `kubectl get devopsprojects -o jsonpath="{.items[*].metadata.name}"`
do
  kubectl patch devopsprojects $devopsproject -p '{"metadata":{"finalizers":null}}' --type=merge
done

for pip in `kubectl get pipeline -A -o jsonpath="{.items[*].metadata.name}"`
do
  kubectl patch pipeline $pip -n `kubectl get pipeline -A | grep $pip | awk '{print $1}'` -p '{"metadata":{"finalizers":null}}' --type=merge
done

for s2ibinaries in `kubectl get s2ibinaries -A -o jsonpath="{.items[*].metadata.name}"`
do
  kubectl patch s2ibinaries $s2ibinaries -n `kubectl get s2ibinaries -A | grep $s2ibinaries | awk '{print $1}'` -p '{"metadata":{"finalizers":null}}' --type=merge
done

for s2ibuilders in `kubectl get s2ibuilders -A -o jsonpath="{.items[*].metadata.name}"`
do
  kubectl patch s2ibuilders $s2ibuilders -n `kubectl get s2ibuilders -A | grep $s2ibuilders | awk '{print $1}'` -p '{"metadata":{"finalizers":null}}' --type=merge
done

for s2ibuildertemplates in `kubectl get s2ibuildertemplates -A -o jsonpath="{.items[*].metadata.name}"`
do
  kubectl patch s2ibuildertemplates $s2ibuildertemplates -n `kubectl get s2ibuildertemplates -A | grep $s2ibuildertemplates | awk '{print $1}'` -p '{"metadata":{"finalizers":null}}' --type=merge
done

for s2iruns in `kubectl get s2iruns -A -o jsonpath="{.items[*].metadata.name}"`
do
  kubectl patch s2iruns $s2iruns -n `kubectl get s2iruns -A | grep $s2iruns | awk '{print $1}'` -p '{"metadata":{"finalizers":null}}' --type=merge
done

kubectl delete devopsprojects --all 2>/dev/null


# delete validatingwebhookconfigurations
for webhook in ks-events-admission-validate users.iam.kubesphere.io network.kubesphere.io validating-webhook-configuration
do
  kubectl delete validatingwebhookconfigurations.admissionregistration.k8s.io $webhook 2>/dev/null
done

# delete mutatingwebhookconfigurations
for webhook in ks-events-admission-mutate logsidecar-injector-admission-mutate mutating-webhook-configuration
do
  kubectl delete mutatingwebhookconfigurations.admissionregistration.k8s.io $webhook 2>/dev/null
done

# delete users
for user in `kubectl get users -o jsonpath="{.items[*].metadata.name}"`
do
  kubectl patch user $user -p '{"metadata":{"finalizers":null}}' --type=merge
done
kubectl delete users --all 2>/dev/null


# delete helm resources
for resource_type in `echo helmcategories helmapplications helmapplicationversions helmrepos helmreleases`; do
  for resource_name in `kubectl get ${resource_type}.application.kubesphere.io -o jsonpath="{.items[*].metadata.name}"`; do
    kubectl patch ${resource_type}.application.kubesphere.io ${resource_name} -p '{"metadata":{"finalizers":null}}' --type=merge
  done
  kubectl delete ${resource_type}.application.kubesphere.io --all 2>/dev/null
done

# delete workspacetemplates
for workspacetemplate in `kubectl get workspacetemplates.tenant.kubesphere.io -o jsonpath="{.items[*].metadata.name}"`
do
  kubectl patch workspacetemplates.tenant.kubesphere.io $workspacetemplate -p '{"metadata":{"finalizers":null}}' --type=merge
done
kubectl delete workspacetemplates.tenant.kubesphere.io --all 2>/dev/null

# delete federatednamespaces in namespace kubesphere-monitoring-federated
for resource in $(kubectl get federatednamespaces.types.kubefed.io -n kubesphere-monitoring-federated -oname); do
  kubectl patch "${resource}" -p '{"metadata":{"finalizers":null}}' --type=merge -n kubesphere-monitoring-federated
done

# delete crds
for crd in `kubectl get crds -o jsonpath="{.items[*].metadata.name}"`
do
  if [[ $crd == *kubesphere.io ]]; then kubectl delete crd $crd 2>/dev/null; fi
done

# delete relevance ns
for ns in kubesphere-alerting-system kubesphere-controls-system kubesphere-devops-system kubesphere-logging-system kubesphere-monitoring-system kubesphere-monitoring-federated openpitrix-system kubesphere-system
do
  kubectl delete ns $ns 2>/dev/null
done
执行脚本,中途需要输入一次yes:
./kubesphere-delete.sh

