一、编程实现语音和开发板通信
- wiringpi库源码
- demo.c
二、基于前面串口的代码修改实现
- uartTool.h
- uartTool.c
- uartTest.c
三、ADB
- adb控制指令
四、手机接入Linux热拔插相关
a. 把手机接入开发板
b. 安装adb工具,在终端输入adb安装指令: sudo apt-get install adb
c. dmeg能查看到手机接入的信息,但是输入adb devices会出现提醒
dinsufficient permissions for device: user in plugdev group; are your udev rules wrong?
d. 配置文件,以支持USB设备的热拔插,支持UDEV的机制
在/etc/udev/rules.d 文件夹下创建规则文件
cd /etc/udev/rules.d/
sudo vim 51-android.rules
在文件中添加内容 SUBSYSTEM==“usb”, ENV{DEVTYPE}==“usb_device”, MODE=“0666”
e. 在手机开发者选项中,打开USB调试,重新拔插手机
f. 手机弹出调试提醒,点确认手机调试模式
一、编程实现语音和开发板通信
将语音模块插入开发板并编程实现基础逻辑代码,添加串口读取一个字符的接口my_serialGetchar();
wiringpi库源码:

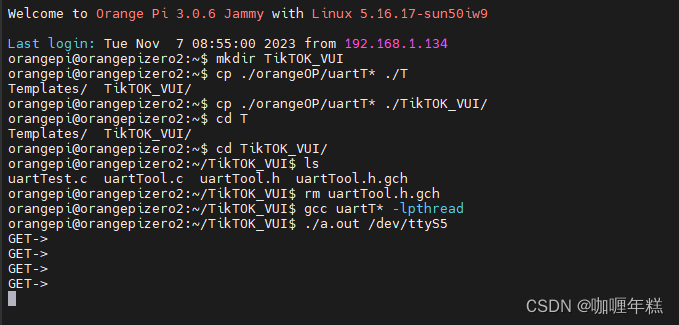
demo.c
char myserialGetchar (const int fd)
{
	char x ;

	if (read(fd , &x, 1) != 1)
		return -1 ;

	return x ;
}
void* readSerial()
{
	char cmd;
	while(1){
		cmd = myserialGetchar(fd);
		switch (cmd) {
    		case 'N' :
    			printf ("NEXT\n") ;
    			system ("adb shell input swipe 540 1300 540 500 100") ;
    			break ;
    		case 'B' :
    			printf ("BACK\n") ;
    			system ("adb shell input swipe 540 500 540 1300 100") ;
    			break ;
    		case 'A' :
    			printf ("AGREE\n") ;
    			system ("adb shell \"seq 2 | while read i;do input tap 540 1050 & input tap 540 1050 & sleep 0.1;done;\"") ;
    			break ;
    		case 'C' :
    			printf ("CLOSE\n") ;
    			system ("adb shell input keyevent 26") ;
    			break ;
		}
	}
}
二、基于前面串口的代码修改实现
uartTool.h
#include <stdio.h>
#include <stdlib.h>
#include <stdint.h>
#include <stdarg.h>
#include <string.h>
#include <termios.h>
#include <unistd.h>
#include <fcntl.h>
#include <sys/ioctl.h>
#include <sys/types.h>
#include <sys/stat.h>

#include "wiringSerial.h"

int my_serialOpen (const char *device, const int baud) ;

void my_serialSendstring (const int fd, const char *s) ;

int my_serialGetstring (const int fd, char *buffer) ;

char my_serialGetchar (const int fd) ;
uartTool.c
#include "wiringSerial.h"
#include "uartTool.h"

int my_serialOpen (const char *device, const int baud)
{
	struct termios options ;   // 创建一个termios结构体,用于串口参数设置
	speed_t myBaud ;   // 创建一个速度类型的变量 myBaud,用于保存波特率
	int status, fd ;   // 创建整数类型的变量 status 和 fd,用于保存状态和文件描述符

	switch (baud){   // 根据传入的波特率参数选择合适的波特率常数
		case   9600: myBaud =   B9600 ; break ;
		case 115200: myBaud = B115200 ; break ;
	}
	if ((fd = open (device, O_RDWR | O_NOCTTY | O_NDELAY | O_NONBLOCK)) == -1)   // 打开串口设备,设置打开选项
	return -1 ;   // 如果打开失败,返回错误代码 -1

	fcntl (fd, F_SETFL, O_RDWR) ;   // 设置文件状态标志

// Get and modify current options: 获取并修改当前的串口参数:

	tcgetattr (fd, &options) ;   // 获取当前的串口参数

	cfmakeraw (&options) ;   // 初始化 termios 结构体为原始模式
	cfsetispeed (&options, myBaud) ;  // 设置输入波特率
    cfsetospeed (&options, myBaud) ;  // 设置输出波特率

    options.c_cflag |= (CLOCAL | CREAD) ;  // 本地连接和使能接收
    options.c_cflag &= ~PARENB ;  // 禁用奇偶校验
    options.c_cflag &= ~CSTOPB ;  // 1位停止位
    options.c_cflag &= ~CSIZE ;  // 用数据位掩码清空数据位设置
    options.c_cflag |= CS8 ;  // 设置8位数据位
	options.c_lflag &= ~(ICANON | ECHO | ECHOE | ISIG) ;   // 禁用规范输入
	options.c_oflag &= ~OPOST ;   // 禁用输出处理

	options.c_cc [VMIN] = 0 ;   // 读取数据的最小字符数
	options.c_cc [VTIME] = 100 ; // Ten seconds (100 deciseconds) 超时等待时间(十分之一秒100ms)

	tcsetattr (fd, TCSANOW, &options) ;   // 设置新的串口参数

	ioctl (fd, TIOCMGET, &status);   // 获取串口控制模式状态

	status |= TIOCM_DTR ;   // 设置 DTR(数据终端就绪)位
	status |= TIOCM_RTS ;   // 设置 RTS(请求发送)位

	ioctl (fd, TIOCMSET, &status);   // 设置串口控制模式状态

	usleep (10000) ;  // 暂停 10 毫秒

	return fd ;   // 返回串口文件描述符
}

void my_serialSendstring (const int fd, const char *s)
{
	int ret ;

	ret = write (fd, s, strlen (s)) ;

	if (ret < 0)
		printf ("Serial Sendstring Error\n") ;
}

int my_serialGetstring (const int fd, char *buffer)
{
	int n_read ;

	n_read = read (fd, buffer, 32) ;

	return n_read ;
}

char my_serialGetchar (const int fd)
{
  char x ;

  if (read (fd, &x, 1) != 1)
    return -1 ;

  return x ;
}
uartTest.c
#include <pthread.h>
#include "uartTool.h"

int fd;

void* readSerial ()
{
    char cmd ;

    while (1) {
    		switch (cmd) {
        		case 'N' :
        			printf ("NEXT\n") ;
        			system ("adb shell input swipe 540 1300 540 500 100") ;
        			break ;
        		case 'B' :
        			printf ("BACK\n") ;
        			system ("adb shell input swipe 540 500 540 1300 100") ;
        			break ;
        		case 'A' :
        			printf ("AGREE\n") ;
        			system ("adb shell \"seq 2 | while read i;do input tap 540 1050 & input tap 540 1050 & sleep 0.1;done;\"") ;
        			break ;
        		case 'C' :
        			printf ("CLOSE\n") ;
        			system ("adb shell input keyevent 26") ;
        			break ;
    		}
    }
}


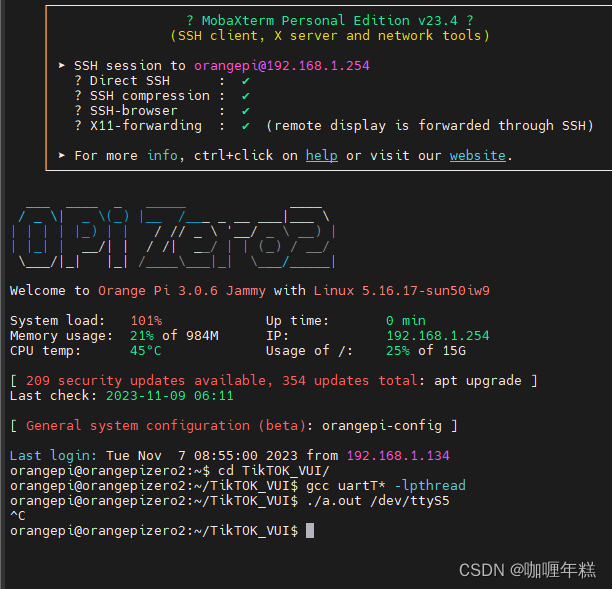
int main (int argc, char **argv)
{
    char deviceName [32] = {'\0'} ;
    pthread_t readt ;

    if (argc < 2) {
        printf ("uage:%s /dev/ttyS?\n", argv[0]) ;
        return -1 ;
    }

    strcpy (deviceName, argv[1]) ;

    if ((fd = my_serialOpen (deviceName, 115200)) == -1) {
        printf ("open %s error\n", deviceName) ;
        return -1;
    }

    pthread_create (&readt, NULL, readSerial, NULL) ;

    while (1) {sleep (10);}

}
三、ADB
ADB(Android Debug Bridge)是一种用于与安卓设备通信和调试的命令行工具。它是Android开发工具包(Android SDK)的一部分,用于在开发过程中连接、控制和调试Android设备或模拟器。
ADB提供了一组命令,允许开发者在计算机上执行各种操作,包括安装和卸载应用程序、传输文件、执行Shell命令、查看设备日志等。使用ADB,开发者可以与设备交互,调试应用程序、分析问题并进行性能优化。
ADB可以通过USB连接或通过网络连接到Android设备。通过USB连接,开发者可以直接将设备连接到计算机,并通过ADB命令与设备进行通信。通过网络连接,开发者可以使用无线网络连接到设备,从而无需使用USB线缆。
需要注意的是,ADB在设备上需要开启开发者选项和USB调试模式才能正常使用。此外,ADB还提供了一些高级功能,如端口转发、截屏、录屏等,以支持更丰富的开发和调试需求。
总的来说,ADB是Android开发中非常重要的工具,它简化了与Android设备的通信和调试过程,为开发者提供了更好的开发环境和工作效率。
ADB(Android Debug Bridge)是一个用于在计算机和 Android 设备之间进行通信的命令行工具。它允许开发者执行各种设备操作,例如安装和调试应用程序、访问设备的 Shell、复制文件到设备或从设备复制文件等。ADB 是 Android SDK 的一部分,开发者可以使用它与 Android 设备进行交互。
以下是一些常用的 ADB 命令:
-
连接设备:
adb devices -
安装应用:
adb install example.apk -
卸载应用:
adb uninstall com.example.package -
启动应用:
adb shell am start -n com.example.package/.MainActivity -
查看设备信息:
adb shell getprop -
复制文件到设备:
adb push localfile.txt /sdcard/ -
从设备复制文件:
adb pull /sdcard/remotefile.txt -
启动设备 Shell:
adb shell -
查看日志:
adb logcat
这只是一些常见的 ADB 命令示例,ADB 提供了更多的功能,可以帮助开发者进行 Android 应用程序的开发、调试和测试。请注意,使用 ADB 前需要确保 Android 设备已启用开发者选项和 USB 调试。
adb控制指令
用 shell 指令来操作手机屏幕,模拟手动滑屏幕
1、向下滑动。从坐标点(540,1300)用100ms滑动到坐标点(540,500)
adb shell input swipe 540 1300 540 500 100
2、 向下滑动。从坐标点(540,500)用100ms滑动到坐标点(540,1300)
adb shell input swipe 540 500 540 1300 100
3、双击。点击坐标点(540,1050)两次,间隔0.1s
adb shell "seq 2 | while read i;do input tap 540 1050 & input tap 540 1050 &sleep 0.1;done;"
4、锁屏。
adb shell input keyevent 26
使用ADB,开发人员可以通过USB连接将计算机与Android设备连接起来,并通过命令行界面执行各种操作。一些常见的ADB命令包括:
-
adb devices:列出当前连接的Android设备。
-
adb shell:进入设备的命令行界面。
-
adb install <path_to_apk>:安装一个Android应用程序。
-
adb uninstall <package_name>:卸载一个已安装的应用程序。
-
adb logcat:查看设备的系统日志。
-
adb pull <remote_path> <local_path>:从设备上复制文件到计算机上。
-
adb push <local_path> <remote_path>:将文件从计算机上复制到设备上。
请注意,使用ADB需要在计算机上安装Android SDK,并且设备的开发者选项和USB调试选项需要启用。使用ADB时要小心,因为一些命令可能会对设备造成不可逆的影响。
四、手机接入Linux热拔插相关
a. 把手机接入开发板
b. 安装adb工具,在终端输入adb安装指令: sudo apt-get install adb
c. dmeg能查看到手机接入的信息,但是输入adb devices会出现提醒
dinsufficient permissions for device: user in plugdev group; are your udev rules wrong?
d. 配置文件,以支持USB设备的热拔插,支持UDEV的机制
在/etc/udev/rules.d 文件夹下创建规则文件
cd /etc/udev/rules.d/
sudo vim 51-android.rules
在文件中添加内容 SUBSYSTEM==“usb”, ENV{DEVTYPE}==“usb_device”, MODE=“0666”
e. 在手机开发者选项中,打开USB调试,重新拔插手机
f. 手机弹出调试提醒,点确认手机调试模式
Linux 中如何挂载 iPhone 外部设备
1、把手机接入开发板
2、安装 adb 工具,在终端输入 adb 安装指令:
sudo apt-get install adb
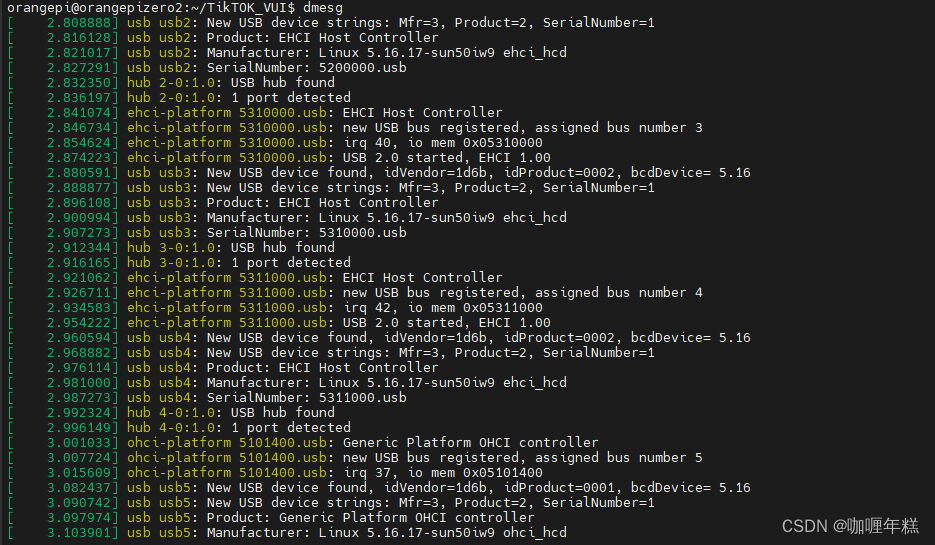
3、dmesg 能查看到手机接入的信息,但是输入adb devices会出现提醒
在手机开发者选项中,打开USB调试,重新拔插手机,点击信任此设备
华为进入开发者模式
iPhone开发者模式
安卓同理
dmesg
adb devices
adb shell

4、配置文件,以支持USB设备的热拔插,支持UDEV的机制
在/etc/udev/rules.d 文件夹下创建规则文件
cd /etc/udev/rules.d/
sudo vim 51-android.rules
在文件中添加内容
SUBSYSTEM=="usb", ENV{DEVTYPE}=="usb_device", MODE="0666"
USB设备的热拔插是指在计算机运行过程中插入或拔出USB设备而无需重新启动计算机或中断正在进行的工作。这种功能由操作系统提供的USB驱动程序和设备管理机制来实现。
UDEV(User Device)是一个设备管理子系统,主要用于动态配置和管理系统中的设备。它可以监测设备的插入和拔出事件,并根据预定义的规则进行自动配置和操作。
当USB设备插入计算机时,UDEV会自动检测设备并通过设备的唯一标识(如设备ID、厂商ID等)匹配相应的规则。根据规则,UDEV可以执行一系列操作,如加载适当的驱动程序、分配设备文件、设置设备权限等。
同样,当USB设备被拔出时,UDEV也会检测到设备的拔出事件,并执行相应的操作,如卸载驱动程序、释放设备文件等。
通过UDEV的机制,操作系统可以实现对USB设备的热拔插支持,提供了便利性和灵活性,使得用户可以方便地连接和断开USB设备,而无需手动进行设备配置或重新启动系统。这对于用户和开发者来说都是非常方便和实用的功能。
