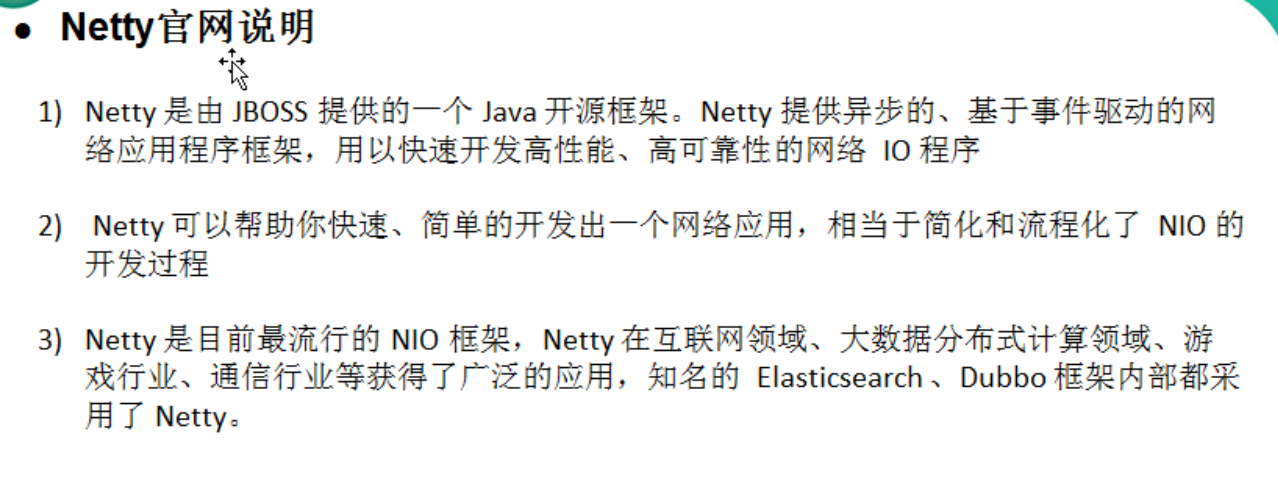
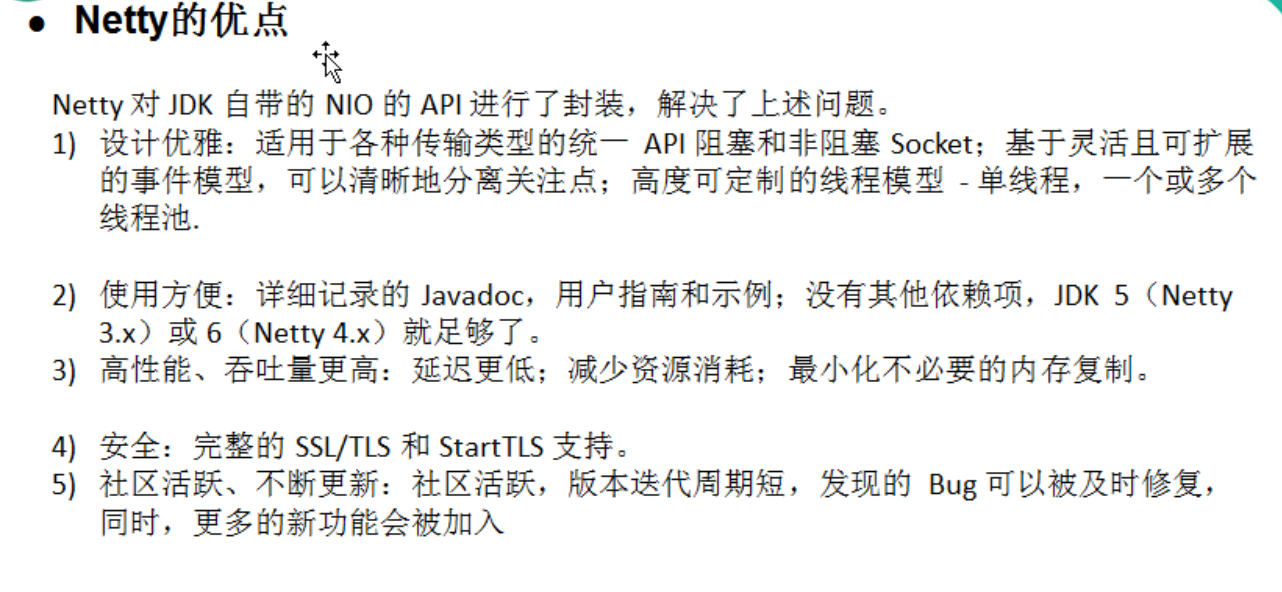

netty高性能架构设计
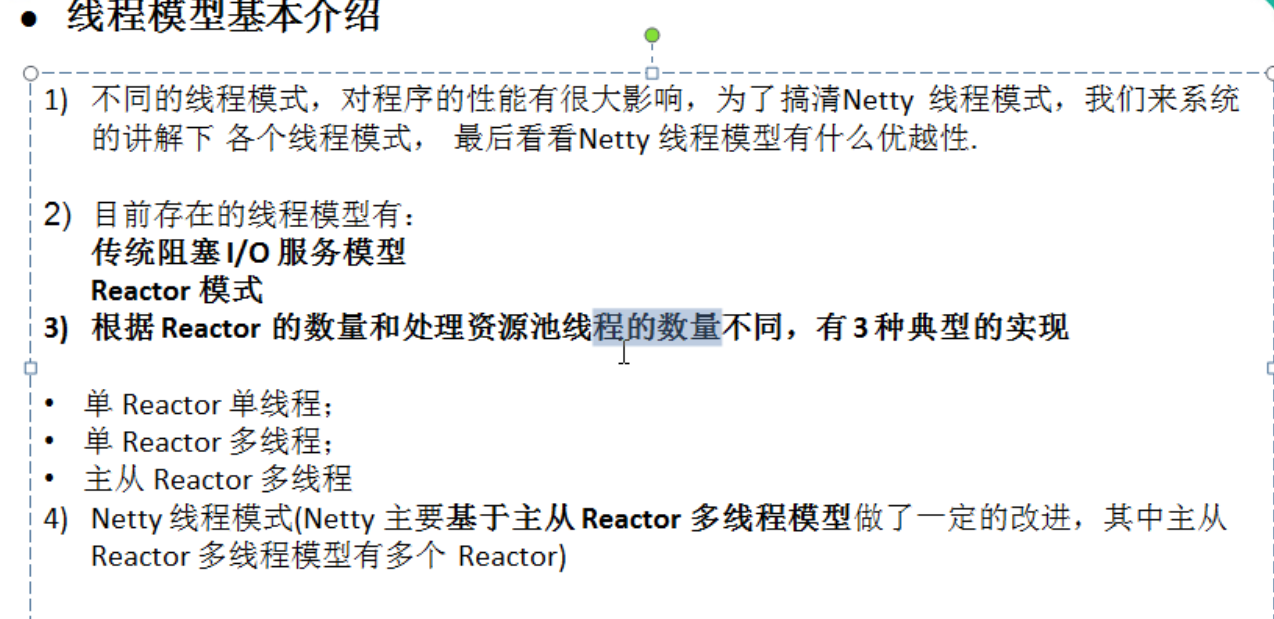
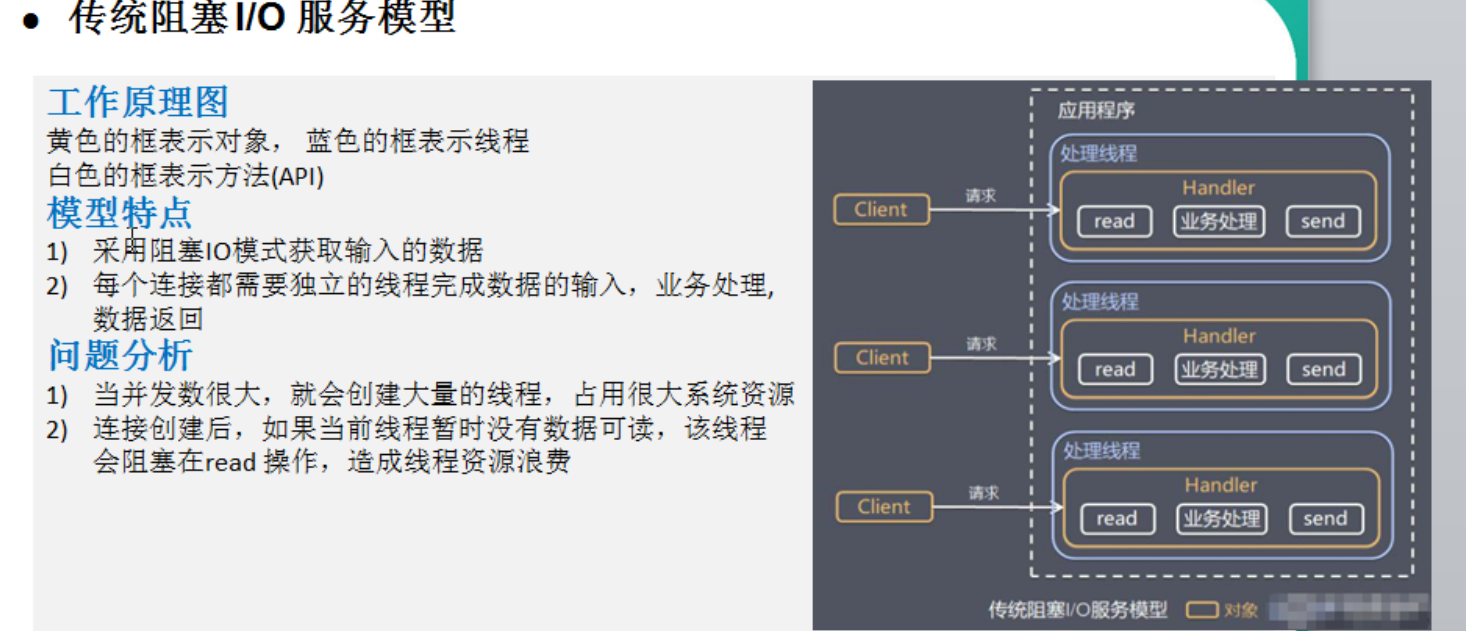

netty
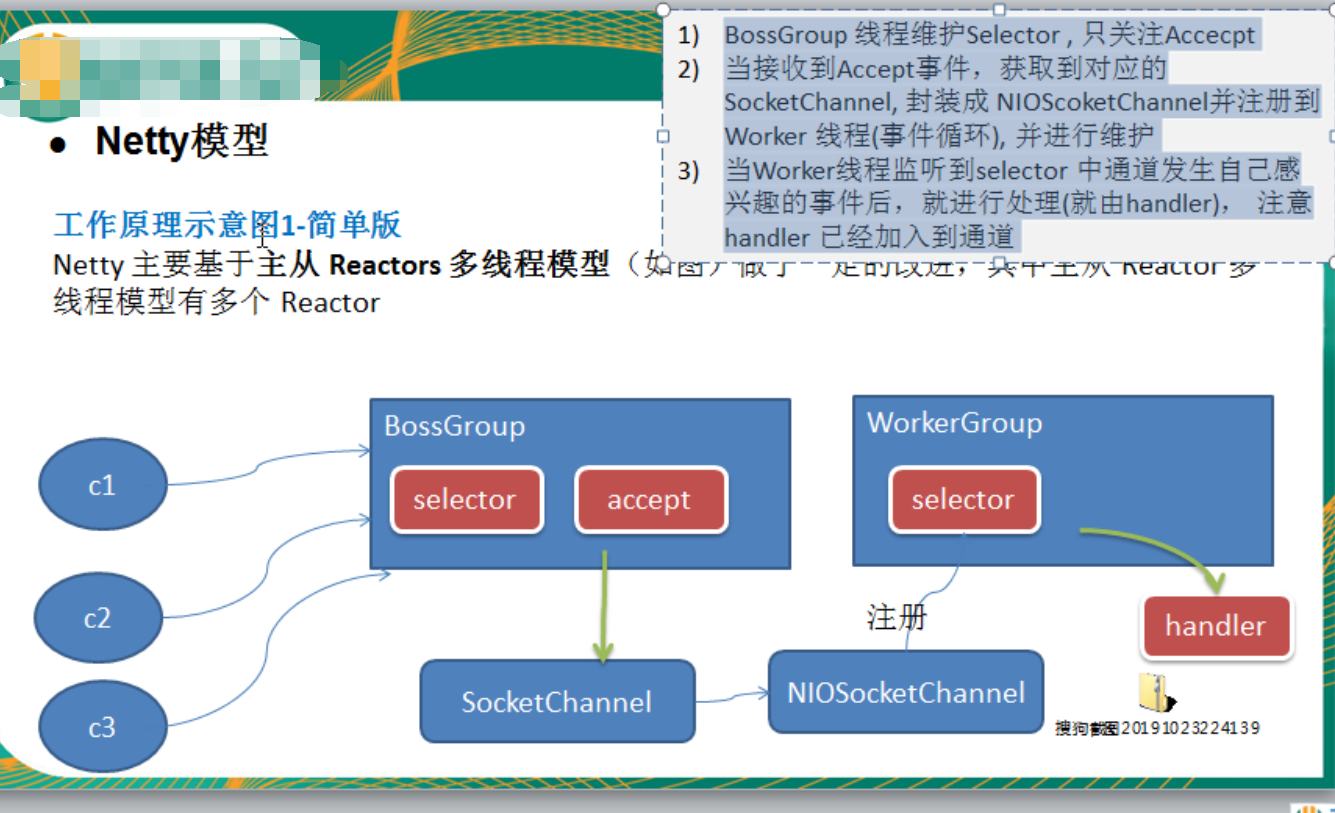
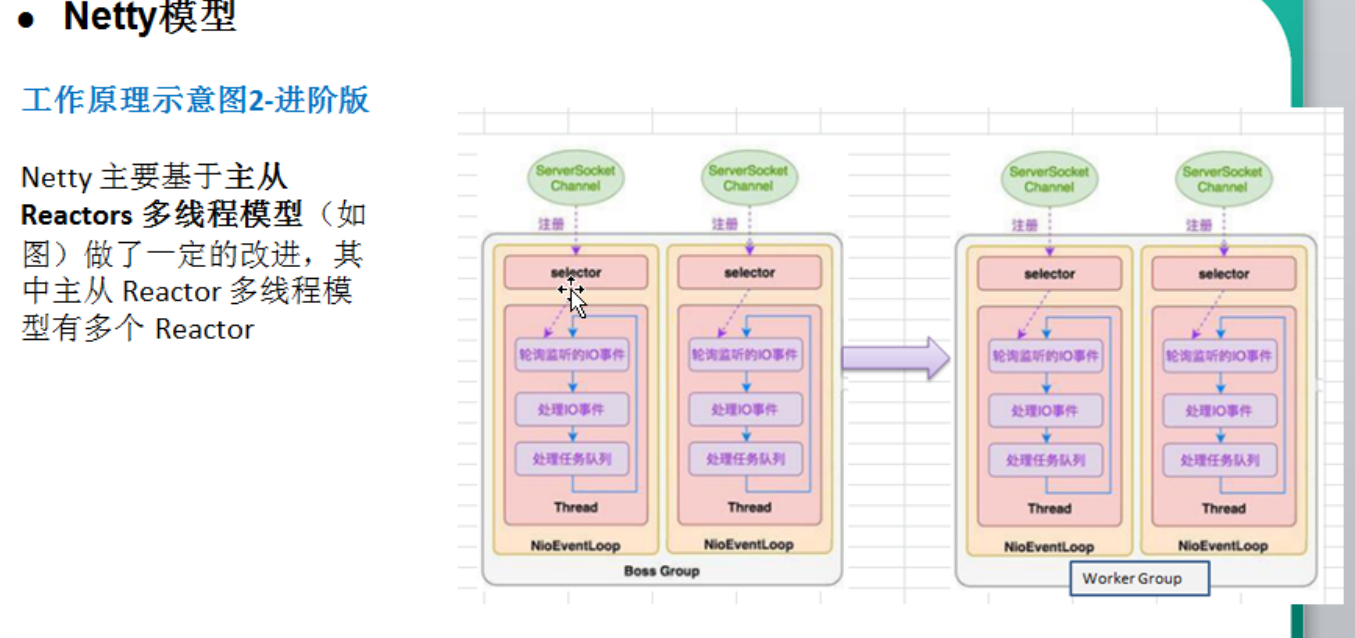
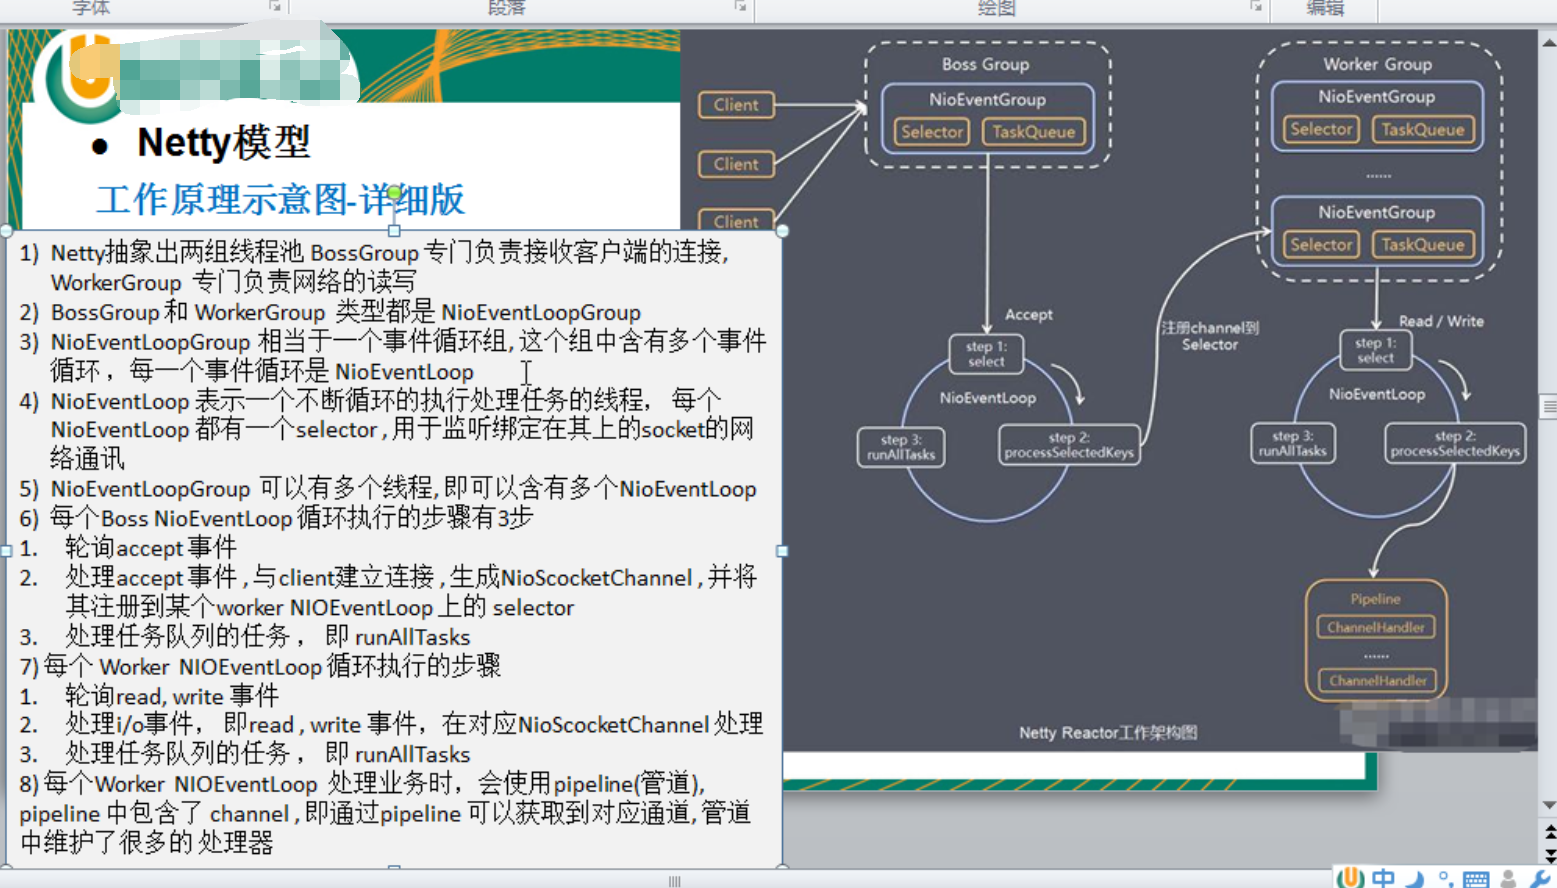
写一个简单的demo
服务器端
package com.atguigu.netty.simple;

import io.netty.bootstrap.ServerBootstrap;
import io.netty.channel.*;
import io.netty.channel.nio.NioEventLoopGroup;
import io.netty.channel.socket.SocketChannel;
import io.netty.channel.socket.nio.NioServerSocketChannel;
import io.netty.channel.socket.nio.NioSocketChannel;

public class NettyServer {
    public static void main(String[] args) throws Exception {
        //创建BossGroup 和 WorkerGroup
        //说明
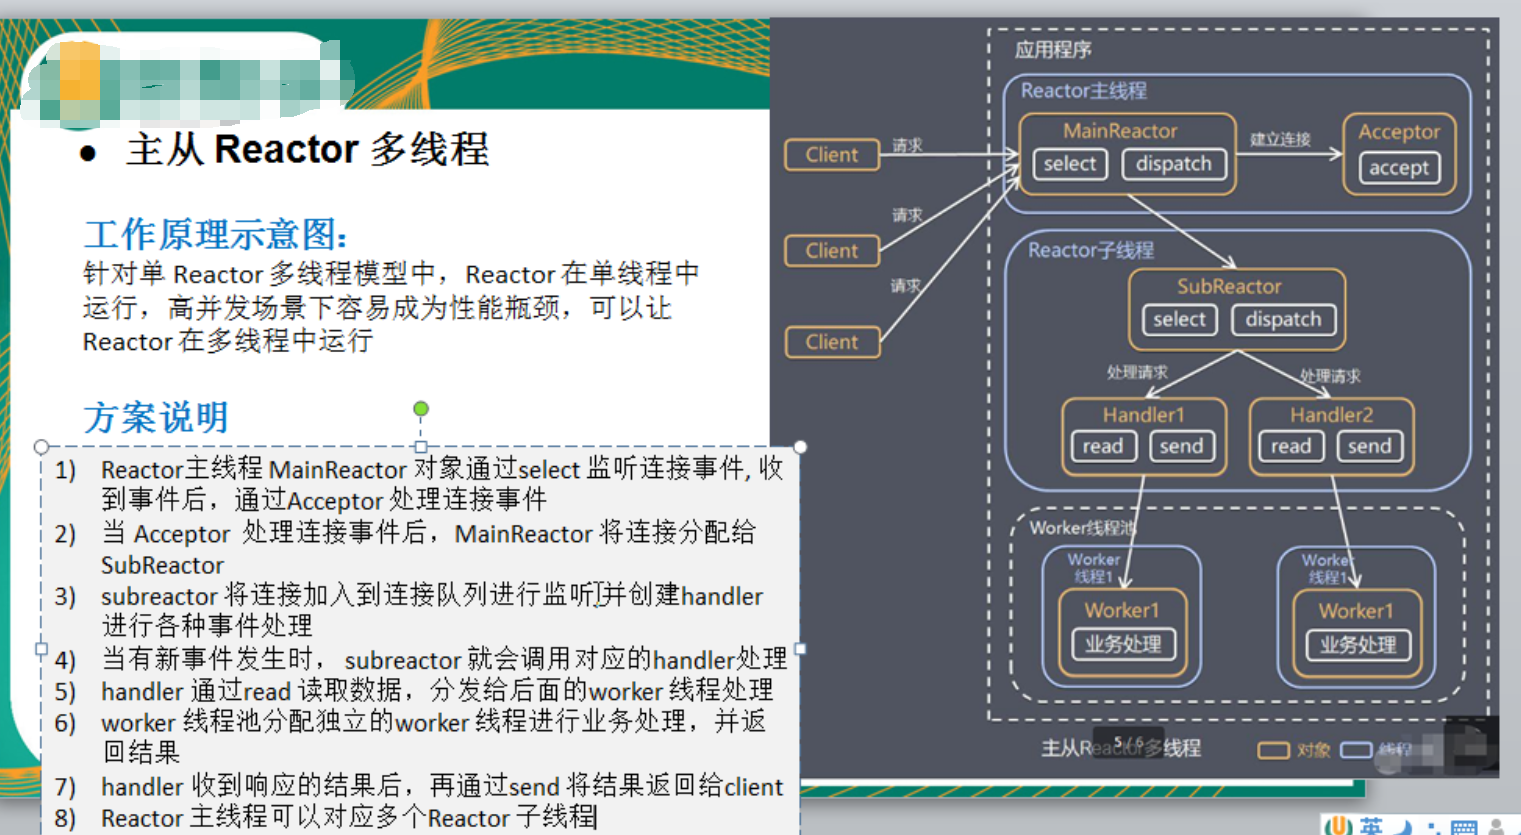
        //1. 创建两个线程组 bossGroup 和 workerGroup
        //2. bossGroup 只是处理连接请求 , 真正的和客户端业务处理,会交给 workerGroup完成
        //3. 两个都是无限循环
        //4. bossGroup 和 workerGroup 含有的子线程(NioEventLoop)的个数
        //   默认实际 cpu核数 * 2
        EventLoopGroup bossGroup = new NioEventLoopGroup(1);
        EventLoopGroup workerGroup = new NioEventLoopGroup(); //8
        try {
            //创建服务器端的启动对象,配置参数
            ServerBootstrap bootstrap = new ServerBootstrap();
            //使用链式编程来进行设置
            bootstrap.group(bossGroup, workerGroup) //设置两个线程组
                    .channel(NioServerSocketChannel.class) //使用NioSocketChannel 作为服务器的通道实现
                    .option(ChannelOption.SO_BACKLOG, 128) // 设置线程队列得到连接个数
                    .childOption(ChannelOption.SO_KEEPALIVE, true) //设置保持活动连接状态
//                    .handler(null) // 该 handler对应 bossGroup , childHandler 对应 workerGroup
                    .childHandler(new ChannelInitializer<SocketChannel>() {//创建一个通道初始化对象(匿名对象)
                        //给pipeline 设置处理器
                        @Override
                        protected void initChannel(SocketChannel ch) throws Exception {
                            System.out.println("客户socketchannel hashcode=" + ch.hashCode()); //可以使用一个集合管理 SocketChannel, 再推送消息时,可以将业务加入到各个channel 对应的 NIOEventLoop 的 taskQueue 或者 scheduleTaskQueue
                            ch.pipeline().addLast(new NettyServerHandler());
                        }
                    }); // 给我们的workerGroup 的 EventLoop 对应的管道设置处理器

            System.out.println(".....服务器 is ready...");

            //绑定一个端口并且同步, 生成了一个 ChannelFuture 对象
            //启动服务器(并绑定端口)
            ChannelFuture cf = bootstrap.bind(6668).sync();

            //给cf 注册监听器,监控我们关心的事件

            cf.addListener(new ChannelFutureListener() {
                @Override
                public void operationComplete(ChannelFuture future) throws Exception {
                    if (cf.isSuccess()) {
                        System.out.println("监听端口 6668 成功");
                    } else {
                        System.out.println("监听端口 6668 失败");
                    }
                }
            });


            //对关闭通道进行监听
            cf.channel().closeFuture().sync();
        }finally {
            bossGroup.shutdownGracefully();
            workerGroup.shutdownGracefully();
        }

    }

}
package com.atguigu.netty.simple;

import io.netty.buffer.ByteBuf;
import io.netty.buffer.Unpooled;
import io.netty.channel.Channel;
import io.netty.channel.ChannelHandlerContext;
import io.netty.channel.ChannelInboundHandlerAdapter;
import io.netty.channel.ChannelPipeline;
import io.netty.util.CharsetUtil;

import java.util.concurrent.TimeUnit;

/*
说明
1. 我们自定义一个Handler 需要继续netty 规定好的某个HandlerAdapter(规范)
2. 这时我们自定义一个Handler , 才能称为一个handler
 */
public class NettyServerHandler extends ChannelInboundHandlerAdapter {

    //读取数据实际(这里我们可以读取客户端发送的消息)
    /*
    1. ChannelHandlerContext ctx:上下文对象, 含有 管道pipeline , 通道channel, 地址
    2. Object msg: 就是客户端发送的数据 默认Object
     */
    @Override
    public void channelRead(ChannelHandlerContext ctx, Object msg) throws Exception {

/*

        //比如这里我们有一个非常耗时长的业务-> 异步执行 -> 提交该channel 对应的
        //NIOEventLoop 的 taskQueue中,

        //解决方案1 用户程序自定义的普通任务

        ctx.channel().eventLoop().execute(new Runnable() {
            @Override
            public void run() {

                try {
                    Thread.sleep(5 * 1000);
                    ctx.writeAndFlush(Unpooled.copiedBuffer("hello, 客户端~(>^ω^<)喵2", CharsetUtil.UTF_8));
                    System.out.println("channel code=" + ctx.channel().hashCode());
                } catch (Exception ex) {
                    System.out.println("发生异常" + ex.getMessage());
                }
            }
        });

        ctx.channel().eventLoop().execute(new Runnable() {
            @Override
            public void run() {

                try {
                    Thread.sleep(5 * 1000);
                    ctx.writeAndFlush(Unpooled.copiedBuffer("hello, 客户端~(>^ω^<)喵3", CharsetUtil.UTF_8));
                    System.out.println("channel code=" + ctx.channel().hashCode());
                } catch (Exception ex) {
                    System.out.println("发生异常" + ex.getMessage());
                }
            }
        });

        //解决方案2 : 用户自定义定时任务 -》 该任务是提交到 scheduleTaskQueue中

        ctx.channel().eventLoop().schedule(new Runnable() {
            @Override
            public void run() {

                try {
                    Thread.sleep(5 * 1000);
                    ctx.writeAndFlush(Unpooled.copiedBuffer("hello, 客户端~(>^ω^<)喵4", CharsetUtil.UTF_8));
                    System.out.println("channel code=" + ctx.channel().hashCode());
                } catch (Exception ex) {
                    System.out.println("发生异常" + ex.getMessage());
                }
            }
        }, 5, TimeUnit.SECONDS);


        System.out.println("go on ...");*/


        System.out.println("服务器读取线程 " + Thread.currentThread().getName() + " channle =" + ctx.channel());
        System.out.println("server ctx =" + ctx);
        System.out.println("看看channel 和 pipeline的关系");
        Channel channel = ctx.channel();
        ChannelPipeline pipeline = ctx.pipeline(); //本质是一个双向链接, 出站入站


        //将 msg 转成一个 ByteBuf
        //ByteBuf 是 Netty 提供的,不是 NIO 的 ByteBuffer.
        ByteBuf buf = (ByteBuf) msg;
        System.out.println("客户端发送消息是:" + buf.toString(CharsetUtil.UTF_8));
        System.out.println("客户端地址:" + channel.remoteAddress());
    }

    //数据读取完毕
    @Override
    public void channelReadComplete(ChannelHandlerContext ctx) throws Exception {

        //writeAndFlush 是 write + flush
        //将数据写入到缓存,并刷新
        //一般讲,我们对这个发送的数据进行编码
        ctx.writeAndFlush(Unpooled.copiedBuffer("hello, 客户端~(>^ω^<)喵1", CharsetUtil.UTF_8));
    }

    //处理异常, 一般是需要关闭通道

    @Override
    public void exceptionCaught(ChannelHandlerContext ctx, Throwable cause) throws Exception {
        ctx.close();
    }
}
客户端
package com.atguigu.netty.simple;

import io.netty.bootstrap.Bootstrap;
import io.netty.channel.ChannelFuture;
import io.netty.channel.ChannelInitializer;
import io.netty.channel.EventLoopGroup;
import io.netty.channel.nio.NioEventLoopGroup;
import io.netty.channel.socket.SocketChannel;
import io.netty.channel.socket.nio.NioSocketChannel;

public class NettyClient {
    public static void main(String[] args) throws Exception {

        //客户端需要一个事件循环组
        EventLoopGroup group = new NioEventLoopGroup();


        try {
            //创建客户端启动对象
            //注意客户端使用的不是 ServerBootstrap 而是 Bootstrap
            Bootstrap bootstrap = new Bootstrap();

            //设置相关参数
            bootstrap.group(group) //设置线程组
                    .channel(NioSocketChannel.class) // 设置客户端通道的实现类(反射)
                    .handler(new ChannelInitializer<SocketChannel>() {
                        @Override
                        protected void initChannel(SocketChannel ch) throws Exception {
                            ch.pipeline().addLast(new NettyClientHandler()); //加入自己的处理器
                        }
                    });

            System.out.println("客户端 ok..");

            //启动客户端去连接服务器端
            //关于 ChannelFuture 要分析,涉及到netty的异步模型
            ChannelFuture channelFuture = bootstrap.connect("127.0.0.1", 6668).sync();
            //给关闭通道进行监听
            channelFuture.channel().closeFuture().sync();
        }finally {

            group.shutdownGracefully();

        }
    }
}
package com.atguigu.netty.simple;

import io.netty.buffer.ByteBuf;
import io.netty.buffer.Unpooled;
import io.netty.channel.ChannelHandlerContext;
import io.netty.channel.ChannelInboundHandlerAdapter;
import io.netty.util.CharsetUtil;

public class NettyClientHandler extends ChannelInboundHandlerAdapter {

    //当通道就绪就会触发该方法
    @Override
    public void channelActive(ChannelHandlerContext ctx) throws Exception {
        System.out.println("client " + ctx);
        ctx.writeAndFlush(Unpooled.copiedBuffer("hello, server: (>^ω^<)喵", CharsetUtil.UTF_8));
    }

    //当通道有读取事件时,会触发
    @Override
    public void channelRead(ChannelHandlerContext ctx, Object msg) throws Exception {

        ByteBuf buf = (ByteBuf) msg;
        System.out.println("服务器回复的消息:" + buf.toString(CharsetUtil.UTF_8));
        System.out.println("服务器的地址: "+ ctx.channel().remoteAddress());
    }

    @Override
    public void exceptionCaught(ChannelHandlerContext ctx, Throwable cause) throws Exception {
        cause.printStackTrace();
        ctx.close();
    }
}
测试
