文章目录
- 前言
- 1. 创建5个配置文件
- 2. 在pom.xml文件中如下配置
- 3. 在application.properties中加入环境变量
前言
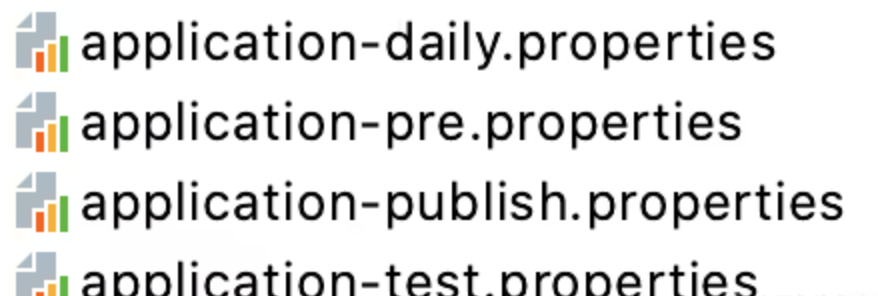
在我们开发项目的时候,一般有四套环境:日常、测试、预发、正式。日常环境作为我们开发环境;测试环境给测试同学测试功能;预发环境给正式环境发布时提供准备;正式环境则是稳定的生产环境。
这四套环境,数据库、中间件以及其他一些配置多多少少都有一些不同,所以如果我们只用一个application配置文件的话肯定是有问题的,一般的做法是准备4个配置文件,用来区分4个环境,每个文件填入的配置内容互不干扰,然后在项目打包的时候指定文件即可。
如下图:
具体做法
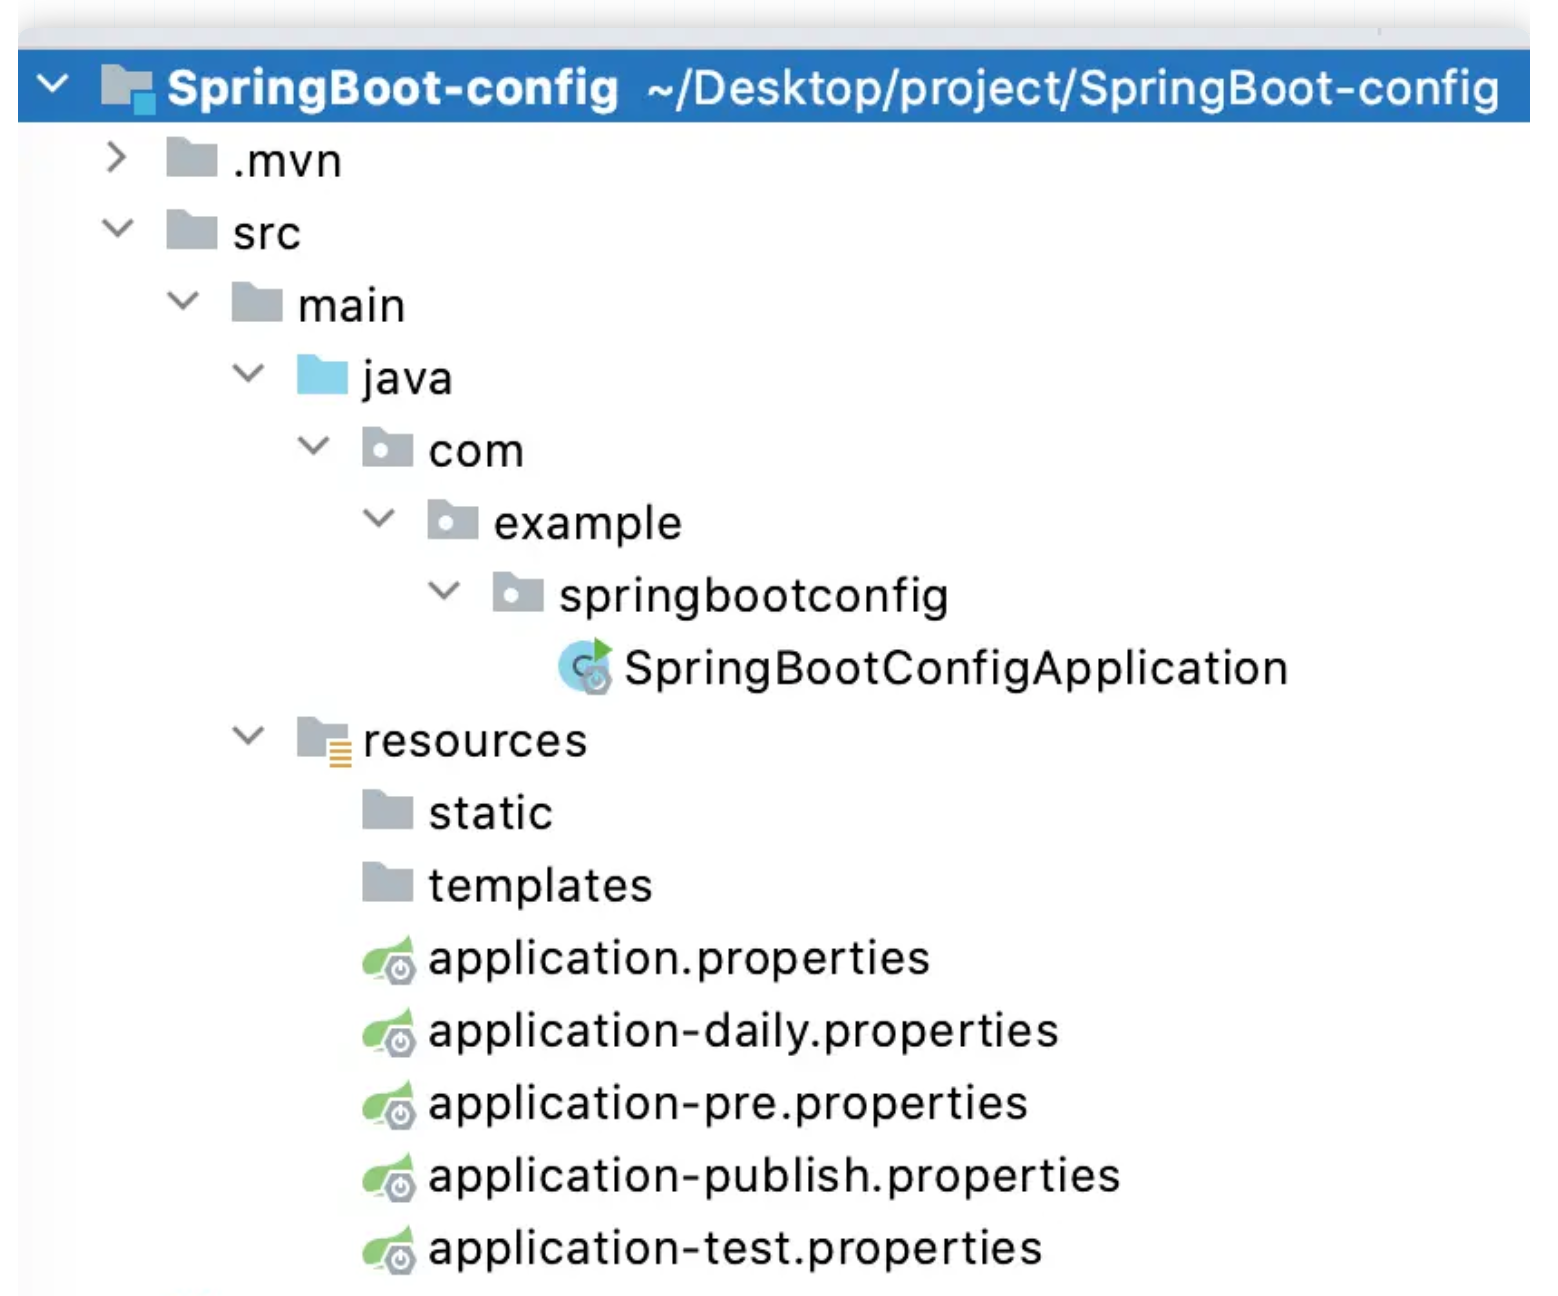
1. 创建5个配置文件
这5个配置文件分别为:
application.properties
application-daily.properties
application-test.properties
application-pre.properties
application-publish.properties
项目结构如下:
这里可能有同学有疑惑,既然有了4个环境的配置文件,为啥还要有application.properties这个文件?
这里的application.properties我们可以当做是一个配置文件容器,它可以将其他配置文件的内容加到这里来。还有一个原因就是因为SpringBoot项目启动的时候只认识application.properties文件,不认识其他四个。
2. 在pom.xml文件中如下配置
<?xml version="1.0" encoding="UTF-8"?>
<project xmlns="http://maven.apache.org/POM/4.0.0" xmlns:xsi="http://www.w3.org/2001/XMLSchema-instance"
         xsi:schemaLocation="http://maven.apache.org/POM/4.0.0 https://maven.apache.org/xsd/maven-4.0.0.xsd">
    <modelVersion>4.0.0</modelVersion>
    <parent>
        <groupId>org.springframework.boot</groupId>
        <artifactId>spring-boot-starter-parent</artifactId>
        <version>2.7.5</version>
        <relativePath/> <!-- lookup parent from repository -->
    </parent>
    <groupId>com.example</groupId>
    <artifactId>SpringBoot-config</artifactId>
    <version>0.0.1-SNAPSHOT</version>
    <name>SpringBoot-config</name>
    <description>Demo project for Spring Boot</description>
    <properties>
        <java.version>1.8</java.version>
    </properties>
    <dependencies>
        <dependency>
            <groupId>org.springframework.boot</groupId>
            <artifactId>spring-boot-starter-web</artifactId>
        </dependency>

        <dependency>
            <groupId>org.springframework.boot</groupId>
            <artifactId>spring-boot-starter-test</artifactId>
            <scope>test</scope>
        </dependency>
    </dependencies>

    <!-- 添加四个环境的变量,变量名为environment -->
    <profiles>
        <profile>
            <id>daily</id>
            <activation>
                <activeByDefault>true</activeByDefault>
            </activation>
            <properties>
                <environment>daily</environment>
            </properties>
        </profile>
        <profile>
            <id>test</id>
            <properties>
                <environment>test</environment>
            </properties>
        </profile>
        <profile>
            <id>pre</id>
            <properties>
                <environment>pre</environment>
            </properties>
        </profile>
        <profile>
            <id>publish</id>
            <properties>
                <environment>publish</environment>
            </properties>
        </profile>
    </profiles>

    <!-- 指定打包插件,以及解压路径 -->
    <build>
        <finalName>springbootconfig</finalName>
        <resources>
            <resource>
                <!-- 指定配置文件所在的resource目录 -->
                <directory>src/main/resources</directory>
                <includes>
                    <include>application.properties</include>
                    <include>application-${environment}.properties</include>
                </includes>
                <filtering>true</filtering>
            </resource>
            <resource>
                <directory>src/main/resources</directory>
                <includes>
                    <include>logback.xml</include>
                </includes>
                <filtering>false</filtering>
            </resource>
            <resource>
                <directory>src/main/resources</directory>
                <filtering>false</filtering>
                <excludes>
                    <exclude>*.xml</exclude>
                    <exclude>*.properties</exclude>
                </excludes>
            </resource>
        </resources>
        <plugins>
            <plugin>
                <groupId>org.springframework.boot</groupId>
                <artifactId>spring-boot-maven-plugin</artifactId>
                <version>2.1.13.RELEASE</version>
                <executions>
                    <execution>
                        <goals>
                            <goal>repackage</goal>
                        </goals>
                    </execution>
                </executions>
                <configuration>
                    <mainClass>com.example.springbootconfig.SpringBootConfigApplication</mainClass>
                </configuration>
            </plugin>
            <!-- 解压fat jar到target/${project-name}目录 -->
            <plugin>
                <artifactId>maven-antrun-plugin</artifactId>
                <executions>
                    <execution>
                        <phase>package</phase>
                        <configuration>
                            <tasks>
                                <unzip
                                        src="${project.build.directory}/${project.build.finalName}.${project.packaging}"
                                        dest="${project.build.directory}/springbootconfig"/>
                            </tasks>
                        </configuration>
                        <goals>
                            <goal>run</goal>
                        </goals>
                    </execution>
                </executions>
            </plugin>
            <plugin>
                <groupId>org.springframework.boot</groupId>
                <artifactId>spring-boot-maven-plugin</artifactId>
            </plugin>
        </plugins>

    </build>
</project>
这里我的配置有3个部分,直接复制我这个文件的同学要注意了。
第一部分
<!-- 添加四个环境的变量,变量名为environment -->
    <profiles>
        <profile>
            <id>daily</id>
            <activation>
                <activeByDefault>true</activeByDefault>
            </activation>
            <properties>
                <environment>daily</environment>
            </properties>
        </profile>
        <profile>
            <id>test</id>
            <properties>
                <environment>test</environment>
            </properties>
        </profile>
        <profile>
            <id>pre</id>
            <properties>
                <environment>pre</environment>
            </properties>
        </profile>
        <profile>
            <id>publish</id>
            <properties>
                <environment>publish</environment>
            </properties>
        </profile>
    </profiles>
这个部分可以直接复制。这里设置environment变量,它的值一共有4个即daily、test、pre、publish,通过activeByDefault标签设置daily为默认配置。
第二部分
<resources>
    <resource>
        <!-- 指定配置文件所在的resource目录 -->
        <directory>src/main/resources</directory>
        <includes>
            <include>application.properties</include>
            <include>application-${environment}.properties</include>
        </includes>
        <filtering>true</filtering>
    </resource>
    <resource>
        <directory>src/main/resources</directory>
        <includes>
            <include>logback.xml</include>
        </includes>
        <filtering>false</filtering>
    </resource>
    <resource>
        <directory>src/main/resources</directory>
        <filtering>false</filtering>
        <excludes>
            <exclude>*.xml</exclude>
            <exclude>*.properties</exclude>
        </excludes>
    </resource>
</resources>
这个部分也可以直接复制。这里配置是指定打包那些类型的文件,有时候我们会遇到这样一个问题,发现有些文件不管怎么打包都没法打到jar包里面去,其实就是这个地方没有配置,默认给过滤掉了。
第三部分
<plugins>
    <plugin>
        <groupId>org.apache.maven.plugins</groupId>
        <artifactId>maven-compiler-plugin</artifactId>
        <version>3.8.1</version>
        <configuration>
            <source>1.8</source>
            <target>1.8</target>
            <encoding>utf-8</encoding>
        </configuration>
    </plugin>
    <plugin>
        <groupId>org.apache.maven.plugins</groupId>
        <artifactId>maven-source-plugin</artifactId>
        <version>2.2</version>
        <executions>
            <execution>
                <id>attach-sources</id>
                <goals>
                    <goal>jar</goal>
                </goals>
            </execution>
        </executions>
        <configuration>
            <finalName>${project.build.finalName}</finalName>
        </configuration>
    </plugin>
    <plugin>
        <groupId>org.springframework.boot</groupId>
        <artifactId>spring-boot-maven-plugin</artifactId>
        <version>2.1.13.RELEASE</version>
        <executions>
            <execution>
                <goals>
                    <goal>repackage</goal>
                </goals>
            </execution>
        </executions>
        <configuration>
            <mainClass>com.example.springbootconfig.SpringBootConfigApplication</mainClass>
        </configuration>
    </plugin>
</plugins>
这个部分要注意后面的mainClass,这里要写你们自己的类路径,不要搞错了。这里指定了打包和解压的插件和文件路径,还有启动类。这里的插件一个都不能少且路径不要配置错误,否则有可能会出现打包失败或者启动时找不到启动类
3. 在application.properties中加入环境变量
application.properties文件中有一个配置:spring.profiles.active。指定它就可以指定当前运行的环境,配置如下:
spring.application.name=SpringBoot-config
server.port=8080
management.server.port=8081
spring.mvc.view.prefix=/
spring.mvc.view.suffix=.html

#通过配置的方式激活环境
spring.profiles.active=@environment@
如果这个时候你是使用的是idea开发工具,那么在右侧的maven插件中就已经可以看到这几个环境了:
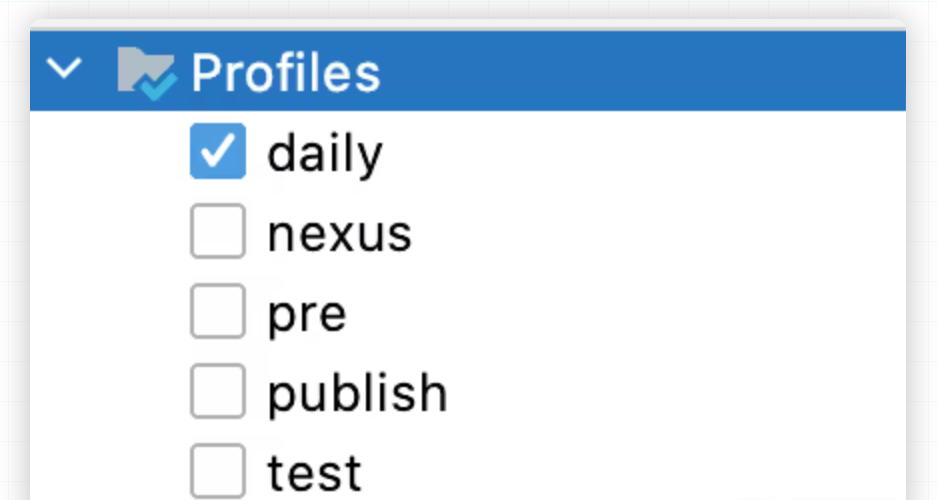
当然没有idea开发工具的同学也不用担心,我们接下来直接使用打包指令就可以了
日常环境打包指令
mvn clean package -Dmaven.test.skip=true -P=daily
测试环境打包指令
mvn clean package -Dmaven.test.skip=true -P=test
预发环境打包指令
mvn clean package -Dmaven.test.skip=true -P=pre
正式环境打包指令
mvn clean package -Dmaven.test.skip=true -P=publish
打包出来的文件如下:
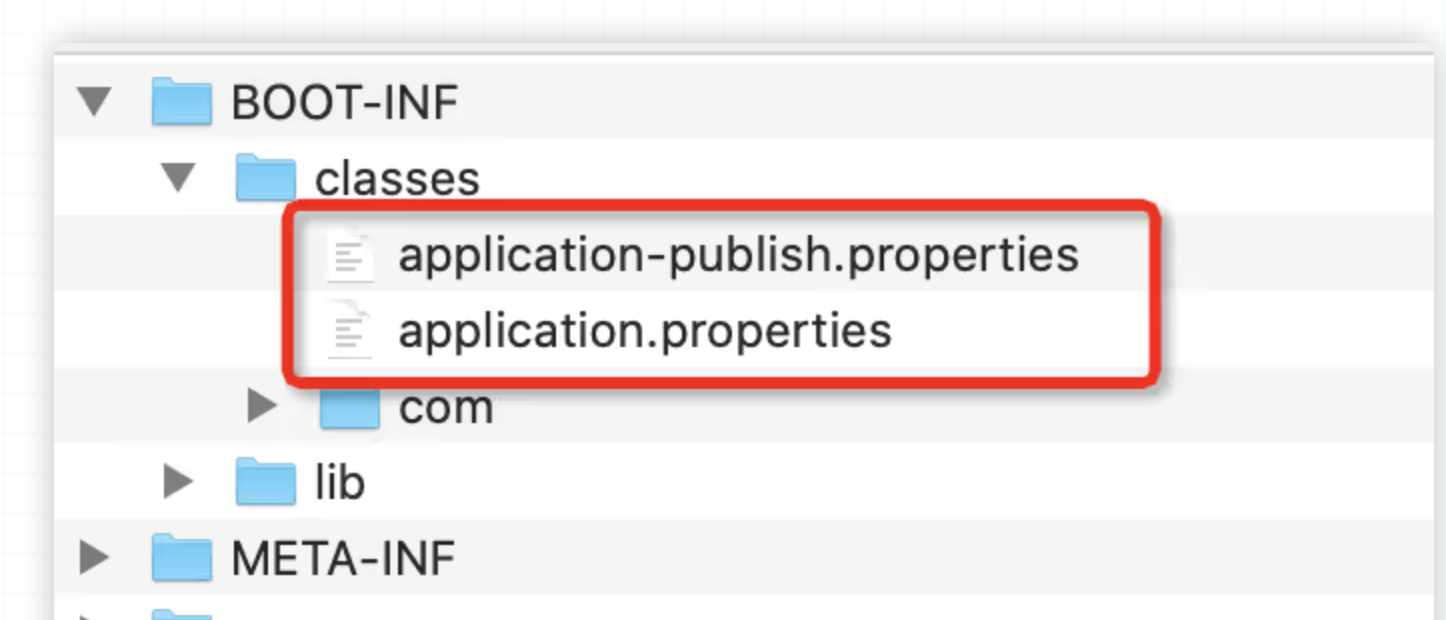
这里就会出现你想要指定环境的配置文件,application.properties中的environment变量也会被替换为
pring.application.name=SpringBoot-config
server.port=8080
management.server.port=8081
spring.mvc.view.prefix=/
spring.mvc.view.suffix=.html

#环境激活
spring.profiles.active=publish
当然,平时调试的时候使用默认的日常环境配置就可以了,打包的时候再去指定具体的环境即可。

