一、部署prometheus
先来说明一下需要用到的组件,需要使用pv、pvc存放prometheus的数据,使用pvc存放数据即使pod挂了删除重建也不会丢失数据,使用configmap挂载prometheus的配置文件和告警规则文件,使用service开放对外访问prometheus服务的端口,使用deployment管理prometheus的pod
创建存放prometheus yaml配置的目录
mkdir /opt/prometheus && cd /opt/prometheus
需要先配置prometheus可调用k8s接口的权限
vi rabc.yaml
apiVersion: v1
kind: ServiceAccount
metadata:
  name: prometheus
  namespace: prometheus
---
apiVersion: rbac.authorization.k8s.io/v1
kind: ClusterRole
metadata:
  name: prometheus
rules:
- apiGroups:
  - ""
  resources:
  - nodes
  - services
  - endpoints
  - pods
  - nodes/proxy
  verbs:
  - get
  - list
  - watch
- apiGroups:
  - "extensions"
  resources:
    - ingresses
  verbs:
  - get
  - list
  - watch
- apiGroups:
  - ""
  resources:
  - configmaps
  - nodes/metrics
  verbs:
  - get
- nonResourceURLs:
  - /metrics
  verbs:
  - get
---
apiVersion: rbac.authorization.k8s.io/v1
kind: ClusterRoleBinding
metadata:
  name: prometheus
roleRef:
  apiGroup: rbac.authorization.k8s.io
  kind: ClusterRole
  name: prometheus
subjects:
- kind: ServiceAccount
  name: prometheus
  namespace: prometheus
编辑configmap配置prometheus配置文件和告警规则
vi configmap
apiVersion: v1
kind: ConfigMap
metadata:
  name: prometheus-conf
  namespace: prometheus
  labels:
    app: prometheus
data:
  prometheus.yml: |-
    global:
      scrape_interval:     15s  # Set the scrape interval to every 15 seconds. Default is every 1 minute.
      evaluation_interval: 15s  # Evaluate rules every 15 seconds. The default is every 1 minute.
      # scrape_timeout is set to the global default (10s).

    # Alertmanager configuration
    alerting:
      alertmanagers:
      - static_configs:
        - targets:
           - 10.1.60.124:30093          #配置alertmanagers的接口

    # Load rules once and periodically evaluate them according to the global 'evaluation_interval'.
    rule_files:
      - "/etc/prometheus/rules/*.yml"    #配置规则文件存放路径
      # - "second_rules.yml"

    # A scrape configuration containing exactly one endpoint to scrape:
    # Here it's Prometheus itself.
    scrape_configs:
      # The job name is added as a label `job=<job_name>` to any timeseries scraped from this config.
      - job_name: 'prometheus'                  #配置prometheus监控数据接口
        # metrics_path defaults to '/metrics'
        # scheme defaults to 'http'.
        static_configs:
          - targets: ['localhost:9090']
      #配置consulmanage接入监控主机
      - job_name: consulmanagement_node_exporter   #配置node_exporter数据监控接口
        scrape_interval: 15s
        scrape_timeout: 5s
        consul_sd_configs:
          - server: '10.1.60.118:8500'
            token: '5f0efcc4-860a-4d7e-a397-3b06998f3aa7'
            refresh_interval: 30s
            services: ['selfnode_exporter']
            tags: ['linux']
        relabel_configs:
          - source_labels: [__meta_consul_tags]
            regex: .*OFF.*
            action: drop
          - source_labels: ['__meta_consul_service']
            target_label: cservice
          - source_labels: ['__meta_consul_service_metadata_vendor']
            target_label: vendor
          - source_labels: ['__meta_consul_service_metadata_region']
            target_label: region
          - source_labels: ['__meta_consul_service_metadata_group']
            target_label: group
          - source_labels: ['__meta_consul_service_metadata_account']
            target_label: account
          - source_labels: ['__meta_consul_service_metadata_name']
            target_label: name
          - source_labels: ['__meta_consul_service_metadata_iid']
            target_label: iid
          - source_labels: ['__meta_consul_service_metadata_exp']
            target_label: exp
          - source_labels: ['__meta_consul_service_metadata_instance']
            target_label: instance
          - source_labels: [instance]
            target_label: __address__
      - job_name: kubernetes_cadvisor    #配置cadvisor数据监控接口
        kubernetes_sd_configs:
        - role: node
        scheme: https
        tls_config:
          ca_file: /var/run/secrets/kubernetes.io/serviceaccount/ca.crt  #配置证书,该路径为prometheus pod内部的路径
          insecure_skip_verify: true    #必须加入此项配置,不然访问接口会报错
        bearer_token_file: /var/run/secrets/kubernetes.io/serviceaccount/token  #配置token,该路径为prometheus pod内部的路径
        relabel_configs:
        - target_label: __address__
          replacement: kubernetes.default.svc:443
        - source_labels: [__meta_kubernetes_node_name]
          regex: (.+)
          target_label: __metrics_path__
          replacement: /api/v1/nodes/${1}/proxy/metrics/cadvisor
        - action: labelmap
          regex: __meta_kubernetes_node_label_(.+)

      - job_name: kube-state-metrics    #配置kube-state-metrics数据监控接口
        kubernetes_sd_configs:
        - role: endpoints
          namespaces:
            names:
            - ops-monit
        relabel_configs:
        - source_labels: [__meta_kubernetes_service_label_app_kubernetes_io_name]
          regex: kube-state-metrics
          replacement: $1
          action: keep
        - action: labelmap
          regex: __meta_kubernetes_service_label_(.+)
        - source_labels: [__meta_kubernetes_namespace]
          action: replace
          target_label: k8s_namespace
        - source_labels: [__meta_kubernetes_service_name]
          action: replace
          target_label: k8s_sname
---
apiVersion: v1
kind: ConfigMap
metadata:
  name: prometheus-rules
  namespace: prometheus
  labels:
    app: prometheus
data:
  node_exporter.yml: |
    groups:
    - name: 服务器资源监控
      rules:
      - alert: 内存使用率过高
        expr: 100 - (node_memory_MemAvailable_bytes / node_memory_MemTotal_bytes) * 100 > 80
        for: 3m
        labels:
          severity: 严重告警
        annotations:
          summary: "{{ $labels.instance }} 内存使用率过高, 请尽快处理!"
          description: "{{ $labels.instance }}内存使用率超过80%,当前使用率{{ $value }}%."
      - alert: 服务器宕机
        expr: up == 0
        for: 1s
        labels:
          severity: 严重告警
        annotations:
          summary: "{{$labels.instance}} 服务器宕机, 请尽快处理!"
          description: "{{$labels.instance}} 服务器延时超过3分钟,当前状态{{ $value }}. "
      - alert: CPU高负荷
        expr: 100 - (avg by (instance,job)(irate(node_cpu_seconds_total{mode="idle"}[5m])) * 100) > 90
        for: 5m
        labels:
          severity: 严重告警
        annotations:
          summary: "{{$labels.instance}} CPU使用率过高,请尽快处理!"
          description: "{{$labels.instance}} CPU使用大于90%,当前使用率{{ $value }}%. "

      - alert: 磁盘IO性能
        expr: avg(irate(node_disk_io_time_seconds_total[1m])) by(instance,job)* 100 > 90
        for: 5m
        labels:
          severity: 严重告警
        annotations:
          summary: "{{$labels.instance}} 流入磁盘IO使用率过高,请尽快处理!"
          description: "{{$labels.instance}} 流入磁盘IO大于90%,当前使用率{{ $value }}%."


      - alert: 网络流入
        expr: ((sum(rate (node_network_receive_bytes_total{device!~'tap.*|veth.*|br.*|docker.*|virbr*|lo*'}[5m])) by (instance,job)) / 100) > 102400
        for: 5m
        labels:
          severity: 严重告警
        annotations:
          summary: "{{$labels.instance}} 流入网络带宽过高,请尽快处理!"
          description: "{{$labels.instance}} 流入网络带宽持续5分钟高于100M. RX带宽使用量{{$value}}."

      - alert: 网络流出
        expr: ((sum(rate (node_network_transmit_bytes_total{device!~'tap.*|veth.*|br.*|docker.*|virbr*|lo*'}[5m])) by (instance,job)) / 100) > 102400
        for: 5m
        labels:
          severity: 严重告警
        annotations:
          summary: "{{$labels.instance}} 流出网络带宽过高,请尽快处理!"
          description: "{{$labels.instance}} 流出网络带宽持续5分钟高于100M. RX带宽使用量{$value}}."

      - alert: TCP连接数
        expr: node_netstat_Tcp_CurrEstab > 10000
        for: 2m
        labels:
          severity: 严重告警
        annotations:
          summary: " TCP_ESTABLISHED过高!"
          description: "{{$labels.instance}} TCP_ESTABLISHED大于100%,当前使用率{{ $value }}%."

      - alert: 磁盘容量
        expr: 100-(node_filesystem_free_bytes{fstype=~"ext4|xfs"}/node_filesystem_size_bytes {fstype=~"ext4|xfs"}*100) > 90
        for: 1m
        labels:
          severity: 严重告警
        annotations:
          summary: "{{$labels.mountpoint}} 磁盘分区使用率过高,请尽快处理!"
          description: "{{$labels.instance}} 磁盘分区使用大于90%,当前使用率{{ $value }}%."
  blackbox_exporter.yml: |
    groups:
    - name: Domain
      rules:
      - alert: 站点可用性
        expr: probe_success{job="blackbox_exporter"} == 0
        for: 1m
        labels:
          alertype: domain
          severity: critical
        annotations:
          description: "{{ $labels.env }}_{{ $labels.name }}({{ $labels.project }}):站点无法访问\n> {{ $labels.instance }}"

      - alert: 站点1h可用性低于80%
        expr: sum_over_time(probe_success{job="blackbox_exporter"}[1h])/count_over_time(probe_success{job="blackbox_exporter"}[1h]) * 100 < 80
        for: 3m
        labels:
          alertype: domain
          severity: warning
        annotations:
          description: "{{ $labels.env }}_{{ $labels.name }}({{ $labels.project }}):站点1h可用性:{{ $value | humanize }}%\n> {{ $labels.instance }}"

      - alert: 站点状态异常
        expr: (probe_success{job="blackbox_exporter"} == 0 and probe_http_status_code > 499) or probe_http_status_code == 0
        for: 1m
        labels:
          alertype: domain
          severity: warning
        annotations:
          description: "{{ $labels.env }}_{{ $labels.name }}({{ $labels.project }}):站点状态异常:{{ $value }}\n> {{ $labels.instance }}"

      - alert: 站点耗时过高
        expr: probe_duration_seconds > 0.5
        for: 2m
        labels:
          alertype: domain
          severity: warning
        annotations:
          description: "{{ $labels.env }}_{{ $labels.name }}({{ $labels.project }}):当前站点耗时:{{ $value | humanize }}s\n> {{ $labels.instance }}"

      - alert: SSL证书有效期
        expr: (probe_ssl_earliest_cert_expiry-time()) / 3600 / 24 < 15
        for: 2m
        labels:
          alertype: domain
          severity: warning
        annotations:
          description: "{{ $labels.env }}_{{ $labels.name }}({{ $labels.project }}):证书有效期剩余{{ $value | humanize }}天\n> {{ $labels.instance }}"
编辑pv、pvc配置
vi pv.yaml
apiVersion: v1
kind: PersistentVolume
metadata:
  name: "prometheus-data-pv"
  labels:
    name: prometheus-data-pv
    release: stable
spec:
  capacity:
    storage: 5Gi
  accessModes:
    - ReadWriteMany            #配置读写方式
  persistentVolumeReclaimPolicy: Retain  #配置回收策略为Retain,既删除pv保留数据
  storageClassName: nfs       #使用nfs存储
  nfs:         #配置nfs路径信息
    path: /volume2/k8s-data/prometheus
    server: 10.1.13.99
vi pvc.yaml
apiVersion: v1
kind: PersistentVolumeClaim
metadata:
  name: prometheus-data-pvc
  namespace: prometheus
spec:
  accessModes:
    - ReadWriteMany
  resources:
    requests:
      storage: 5Gi
  selector:
    matchLabels:
      name: prometheus-data-pv
      release: stable
  storageClassName: nfs
编辑deployment配置
vi deployment.yaml
kind: Deployment
apiVersion: apps/v1
metadata:
  labels:
    app: prometheus
  name: prometheus
  namespace: prometheus
spec:
  replicas: 1
  revisionHistoryLimit: 10
  selector:
    matchLabels:
      app: prometheus
  template:
    metadata:
      labels:
        app: prometheus
    spec:
      serviceAccountName: prometheus     #配置serviceaccount权限
      securityContext:
        runAsUser: 0
      containers:
        - name: prometheus
          image: prom/prometheus:latest
          imagePullPolicy: IfNotPresent
          command:
            - prometheus
            - --config.file=/etc/prometheus/prometheus.yml  #配置文件目录
            - --storage.tsdb.path=/prometheus    #配置数据目录
            - --web.enable-lifecycle      #开启prometheus配置文件热加载
          volumeMounts:
            - mountPath: /etc/localtime
              name: tz-config
            - mountPath: /prometheus
              name: prometheus-data-volume
            - mountPath: /etc/prometheus
              name: prometheus-conf-volume
            - mountPath: /etc/prometheus/rules
              name: prometheus-rules-volume
          ports:
            - containerPort: 9090
              protocol: TCP
      volumes:
        - name: tz-config   #挂载时间配置,与宿主机配置时间同步
          hostPath:
            path: /usr/share/zoneinfo/Asia/Shanghai
        - name: prometheus-data-volume      #挂载pvc存放数据
          persistentVolumeClaim:
            claimName: prometheus-data-pvc
        - name: prometheus-conf-volume     #通过configmap挂载prometheus配置
          configMap:
            name: prometheus-conf
        - name: prometheus-rules-volume   #通过configmap挂载prometheus告警规则配置
          configMap:
            name: prometheus-rules
      tolerations:
        - key: node-role.kubernetes.io/master
          effect: NoSchedule
编辑service配置
vi service.yaml
kind: Service
apiVersion: v1
metadata:
  annotations:
    prometheus.io/scrape: 'true'
  labels:
    app: prometheus
  name: prometheus-service
  namespace: prometheus
spec:
  ports:
    - port: 9090
      targetPort: 9090
      nodePort: 30090
  selector:
    app: prometheus
  type: NodePort
至此创建prometheus的yaml文件准备完成,接下来先创建命名空间,在创建yaml
kubectl create namespace prometheus
kubectl apply -f rabc.yaml
kubectl apply -f configmap
kubectl apply -f pvc.yaml
kubectl apply -f pv.yaml
kubectl apply -f deployment.yaml
kubectl apply -f service.yaml
查看创建的各项服务是否正常
kubectl get pod,svc,configmap,pv,pvc,sa -n prometheus

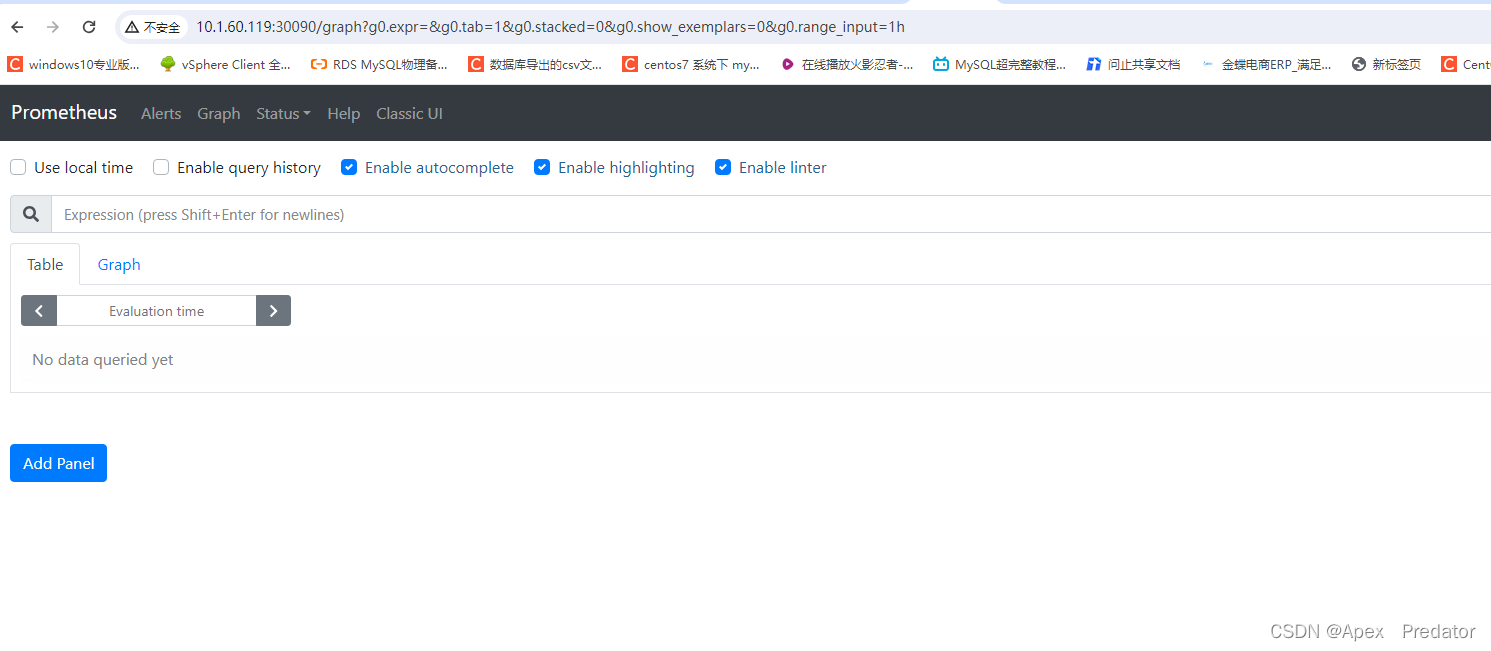
通过service服务访问prometheus web检查Prometheus服务
http://10.1.60.124:30090
这里再补充一下关于prometheus热加载,和configmap自动更新的问题
configmap的yaml文件更新配置后使用apply重载,会自动更新挂载了该configmap配置的pod中的配置文件,不过需要一小会才会自动更新,但是如果在pod挂载configmap的配置中加入了subpath配置的话,configmap更新配置后,是不会自动更新pod里挂载的配置,需要将pod删除重建才会更新里面的配置
在配置了热加载的prometheus中,修改了配置文件,可以不用重启prometheus就可以加载新的配置文件,使用以下命令
curl -X POST -Ls http://10.1.60.124:30090/-/reload
查看是否成功重载
kubectl logs prometheus-5b95bdc6b8-tfpwf -n prometheus | grep "Loading configuration file"

二、部署grafana服务
创建grafana只需要deployment、service、pv、pvc服务即可,grafana也需要存储配置信息
先创建grafana的yaml配置文件目录
mkdit /opt/grafana && cd /opt/grafana
创建pvc、pv的yaml配置文件
vi pv.yaml
apiVersion: v1
kind: PersistentVolume
metadata:
  name: "grafana-data-pv"
  labels:
    name: grafana-data-pv
    release: stable
spec:
  capacity:
    storage: 5Gi
  accessModes:
    - ReadWriteMany
  persistentVolumeReclaimPolicy: Retain
  storageClassName: nfs
  nfs:
    path: /volume2/k8s-data/grafana
    server: 10.1.13.99
vi pvc.yaml
apiVersion: v1
kind: PersistentVolumeClaim
metadata:
  name: grafana-data-pvc
  namespace: prometheus
spec:
  accessModes:
    - ReadWriteMany
  resources:
    requests:
      storage: 5Gi
  selector:
    matchLabels:
      name: grafana-data-pv
      release: stable
  storageClassName: nfs
创建deployment的yaml配置文件
vi deployment.yaml
kind: Deployment
apiVersion: apps/v1
metadata:
  labels:
    app: grafana
  name: grafana
  namespace: prometheus
spec:
  replicas: 1
  revisionHistoryLimit: 10
  selector:
    matchLabels:
      app: grafana
  template:
    metadata:
      labels:
        app: grafana
    spec:
      securityContext:
        runAsUser: 0
      containers:
        - name: grafana
          image: grafana/grafana:9.5.2
          imagePullPolicy: IfNotPresent
          env:
            - name: GF_AUTH_BASIC_ENABLED
              value: "true"
            - name: GF_AUTH_ANONYMOUS_ENABLED
              value: "false"
          readinessProbe:
            httpGet:
              path: /login
              port: 3000
          volumeMounts:
            - mountPath: /etc/localtime
              name: tz-config
            - mountPath: /var/lib/grafana
              name: grafana-data-volume
          ports:
            - containerPort: 3000
              protocol: TCP
      volumes:
        - name: tz-config
          hostPath:
            path: /usr/share/zoneinfo/Asia/Shanghai
        - name: grafana-data-volume
          persistentVolumeClaim:
            claimName: grafana-data-pvc
创建service的yaml配置文件
kind: Service
apiVersion: v1
metadata:
  labels:
    app: grafana
  name: grafana-service
  namespace: prometheus
spec:
  ports:
    - port: 3000
      targetPort: 3000
      nodePort: 30300
  selector:
    app: grafana
  type: NodePort
至此创建grafana的yaml文件准备完成,接下来使用yaml文件创建各个服务
kubectl apply -f pvc.yaml
kubectl apply -f pv.yaml
kubectl apply -f deployment.yaml
kubectl apply -f service.yaml
查看创建的各项服务是否正常
kubectl get pod,pv,pvc,svc -n prometheus

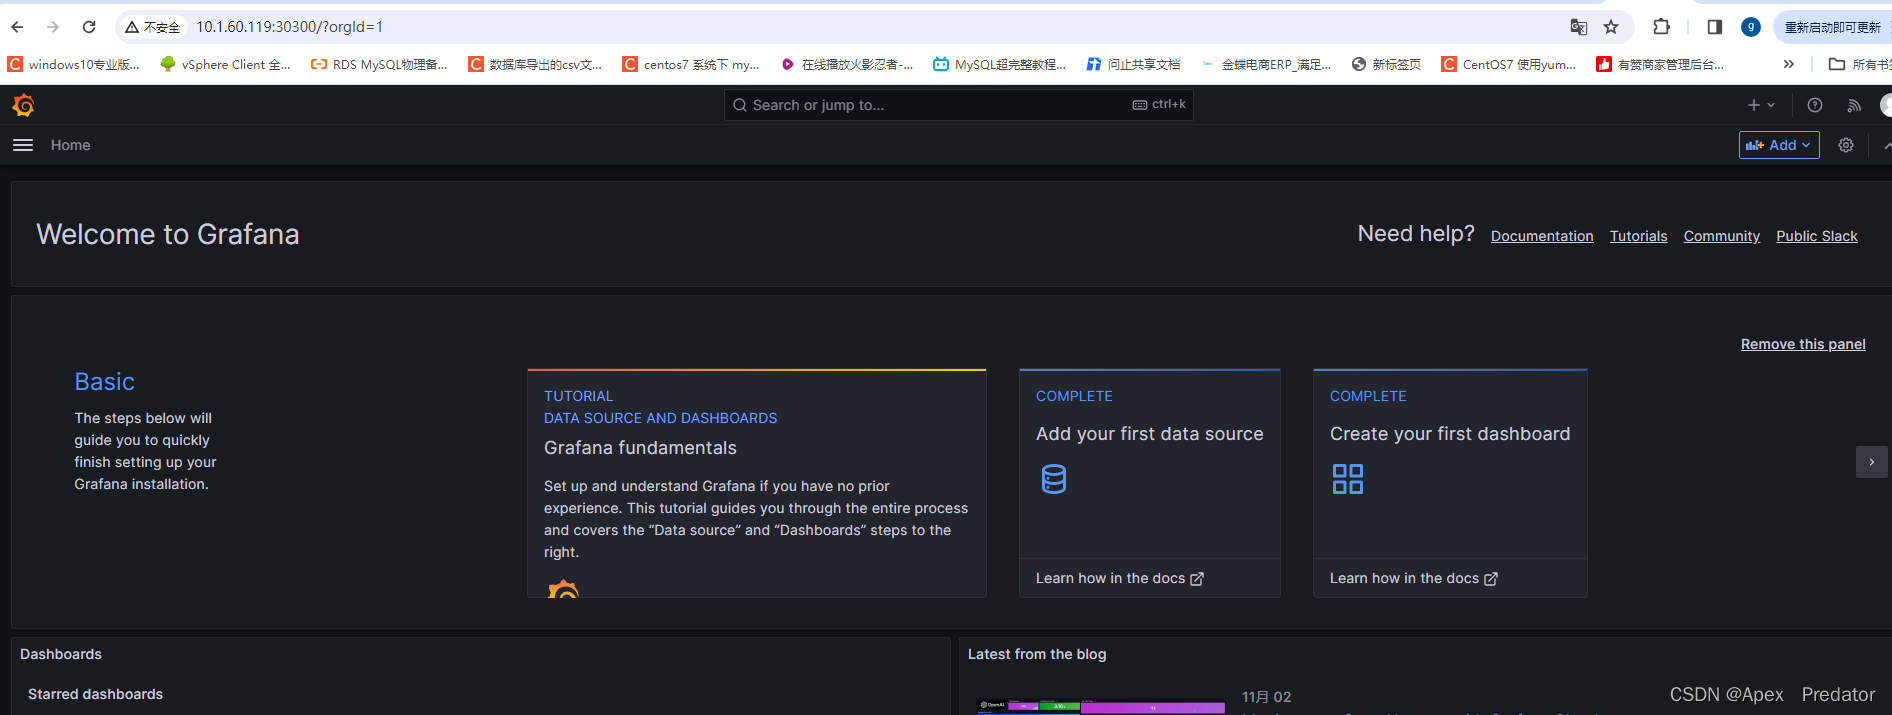
通过service访问grafana web 服务
初始账户和密码为admin/admin,登录后会要求更改密码
http://10.1.60.124:30300
三、部署 prometheus-webhook-dingtalk
使用钉钉发送告警信息,所以部署prometheus-webhook-dingtalk服务,需要使用到deployment、configmap、service服务
创建prometheus-webhook-dingtalk yaml文件目录
mkdir /opt/prometheus-webhook-dingtalk && cd /opt/prometheus-webhook-dingtalk
编辑configmap的yaml文件
vi configmap.yaml
apiVersion: v1   #该configmap有两个配置文件,一个是dingtalk服务的配置文件,一个是关于告警消息的模板文件
data:
  config.yml: |-      #配置文件
    templates:
      - /etc/prometheus-webhook-dingtalk/template.tmpl   #配置模板文件存放目录
    targets:
      webhook1:
        #钉钉机器人webhook设置
        url: https://oapi.dingtalk.com/robot/send?access_token=cfe1e0d1cfb457a31b20d6005785f5c7367542d5bd82725eb1b2f6738d0be418
        # secret for signature
        secret: SEC60b0e5076407b1d1d97c26afa2acb54edf7270b9e23826a65c3f085e48c5dcfd
  template.tmpl: |-     #配置告警消息模板文件
    {{ define "__subject" }}
    [{{ .Status | toUpper }}{{ if eq .Status "firing" }}:{{ .Alerts.Firing | len }}{{ end }}]
    {{ end }}


    {{ define "__alert_list" }}{{ range . }}
    ---
    {{ if .Labels.owner }}@{{ .Labels.owner }}{{ end }}

    **告警主题**: {{ .Annotations.summary }}

    **告警类型**: {{ .Labels.alertname }}

    **告警级别**: {{ .Labels.severity }}

    **告警主机**: {{ .Labels.instance }}

    **告警信息**: {{ index .Annotations "description" }}

    **告警时间**: {{ dateInZone "2006.01.02 15:04:05" (.StartsAt) "Asia/Shanghai" }}
    {{ end }}{{ end }}

    {{ define "__resolved_list" }}{{ range . }}
    ---
    {{ if .Labels.owner }}@{{ .Labels.owner }}{{ end }}

    **告警主题**: {{ .Annotations.summary }}

    **告警类型**: {{ .Labels.alertname }}

    **告警级别**: {{ .Labels.severity }}

    **告警主机**: {{ .Labels.instance }}

    **告警信息**: {{ index .Annotations "description" }}

    **告警时间**: {{ dateInZone "2006.01.02 15:04:05" (.StartsAt) "Asia/Shanghai" }}

    **恢复时间**: {{ dateInZone "2006.01.02 15:04:05" (.EndsAt) "Asia/Shanghai" }}
    {{ end }}{{ end }}


    {{ define "default.title" }}
    {{ template "__subject" . }}
    {{ end }}

    {{ define "default.content" }}
    {{ if gt (len .Alerts.Firing) 0 }}
    **====侦测到{{ .Alerts.Firing | len  }}个故障====**
    {{ template "__alert_list" .Alerts.Firing }}
    ---
    {{ end }}

    {{ if gt (len .Alerts.Resolved) 0 }}
    **====恢复{{ .Alerts.Resolved | len  }}个故障====**
    {{ template "__resolved_list" .Alerts.Resolved }}
    {{ end }}
    {{ end }}


    {{ define "ding.link.title" }}{{ template "default.title" . }}{{ end }}
    {{ define "ding.link.content" }}{{ template "default.content" . }}{{ end }}
    {{ template "default.title" . }}
    {{ template "default.content" . }}
kind: ConfigMap
metadata:
  name: dingtalk-conf
  namespace: prometheus
编辑deployment的yaml文件
vi deployment.yaml
apiVersion: apps/v1
kind: Deployment
metadata:
  name: dingtalk
  namespace: prometheus
  labels:
    app: dingtalk
spec:
  replicas: 1
  selector:
    matchLabels:
      app: dingtalk
  template:
    metadata:
      labels:
        app: dingtalk
    spec:
      restartPolicy: "Always"
      containers:
      - name: dingtalk
        image: timonwong/prometheus-webhook-dingtalk
        imagePullPolicy: "IfNotPresent"
        volumeMounts:
          - name: dingtalk-conf
            mountPath: /etc/prometheus-webhook-dingtalk/
        resources:
          limits:
            cpu: "400m"
            memory: "500Mi"
          requests:
            cpu: "100m"
            memory: "100Mi"
        ports:
        - containerPort: 8060
          name: http
          protocol: TCP
        readinessProbe:
          failureThreshold: 3
          periodSeconds: 5
          initialDelaySeconds: 30
          successThreshold: 1
          tcpSocket:
            port: 8060
        livenessProbe:
          tcpSocket:
            port: 8060
          initialDelaySeconds: 30
          periodSeconds: 10
      volumes:
        - name: dingtalk-conf   #因为只使用了一个configmap服务,所以告警消息模板和配置文件都会挂载到同一目录中
          configMap:
            name: dingtalk-conf
编辑service的yaml文件
vi service.yaml
apiVersion: v1
kind: Service
metadata:
  name: dingtalk
  namespace: prometheus
spec:
  selector:
    app: dingtalk
  ports:
    - name: http
      protocol: TCP
      port: 8060
      targetPort: 8060
      nodePort: 30806
  type: NodePort
至此创建prometheus-webhook-dingtalk的yaml文件准备完成,接下来使用yaml文件创建各个服务
kubectl apply -f configmap.yaml
kubectl apply -f deployment.yaml
kubectl apply -f service.yaml
查看创建的各项服务是否正常
kubectl get pod,configmap,svc -n prometheus

对于prometheus-webhook-dingtalk服务就只是用来将alertmanager告警的信息通过模板在推送到钉钉上,并不存储数据
四、部署alertmanager服务
部署alertmanager服务需要使用到configmap、deployment、serivce服务
创建存放alertmanager yaml配置文件的目录
mkdir /opt/alertmanager && cd /opt/alertmanager
编辑configmap的yaml文件
vi configmap.yaml
apiVersion: v1
data:
  alertmanager.yml: |-
    route:
      group_by: ['dingding']
      group_wait: 30s
      group_interval: 5m
      repeat_interval: 1h
      receiver: 'web.hook'
      routes:
      - receiver: 'web.hook'
        match_re:
          alertname: ".*"
    receivers:
      - name: 'web.hook'
        webhook_configs:
          - url: 'http://10.1.60.124:30806/dingtalk/webhook1/send'  #配置prometheus-webhook-dingtalk的服务接口
            send_resolved: true
    inhibit_rules:
       - source_match:
           severity: 'critical'
         target_match:
           severity: 'warning'
         equal: ['alertname', 'dev', 'instance']
kind: ConfigMap
metadata:
  name: alertmanager-conf
  namespace: prometheus
编辑deployment的yaml文件
vi deployment.yaml
apiVersion: apps/v1
kind: Deployment
metadata:
  name: alertmanager
  namespace: prometheus
  labels:
    app: alertmanager
spec:
  replicas: 1
  selector:
    matchLabels:
      app: alertmanager
  template:
    metadata:
      labels:
        app: alertmanager
    spec:
      containers:
        - name: alertmanager
          image: "prom/alertmanager"
          imagePullPolicy: "IfNotPresent"
          ports:
            - containerPort: 9093
          readinessProbe:
            httpGet:
              path: /#/status
              port: 9093
            initialDelaySeconds: 30
            timeoutSeconds: 30
          volumeMounts:
            - name: config-volume
              mountPath: /etc/alertmanager
            - name: tz-config
              mountPath: /etc/localtime
          resources:
            limits:
              cpu: 10m
              memory: 50Mi
            requests:
              cpu: 10m
              memory: 50Mi
      volumes:
        - name: config-volume
          configMap:
            name: alertmanager-conf
        - name: tz-config
          hostPath:
            path: /usr/share/zoneinfo/Asia/Shanghai
编辑service的yaml文件
vi service.yaml
apiVersion: v1
kind: Service
metadata:
  name: svc-alertmanager
  namespace: prometheus
spec:
  type: NodePort
  ports:
  - port: 9093
    protocol: TCP
    targetPort: 9093
    nodePort: 30093
  selector:
    app: alertmanager
至此创建alertmanager的yaml文件准备完成,接下来使用yaml文件创建各个服务
kubectl apply -f configmap.yaml
kubectl apply -f deployment.yaml
kubectl apply -f service.yaml
查看创建的各项服务是否正常
kubectl get pod,configmap,svc -n prometheus

至此关于在k8s内部署整个prometheus监控通过钉钉告警已经完成 ,关于告警的测试就自行测试,我这边测试过是没有问题的

