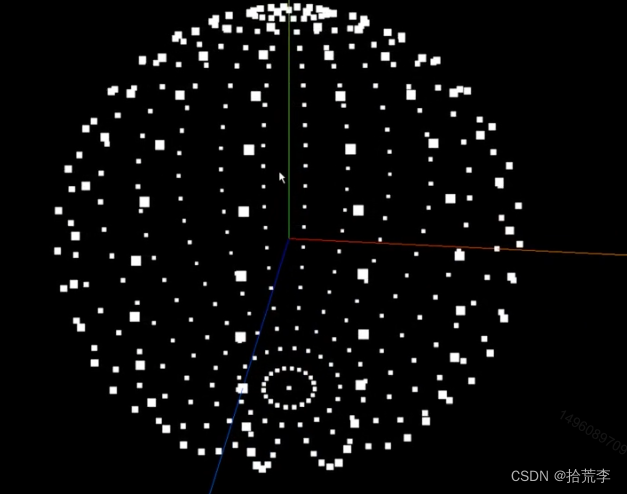
一、初识Points与点材质
// 设置点材质
const pointsMaterial = new THREE.PointsMaterial();
import * as THREE from "three";
// 导入轨道控制器
import { OrbitControls } from "three/examples/jsm/controls/OrbitControls";
// 导入动画库
import gsap from "gsap";
// 导入dat.gui
import * as dat from "dat.gui";

// 目标:认识pointes

const gui = new dat.GUI();
// 1、创建场景
const scene = new THREE.Scene();

// 2、创建相机
const camera = new THREE.PerspectiveCamera(
  75,
  window.innerWidth / window.innerHeight,
  0.1,
  1000
);

// 设置相机位置
camera.position.set(0, 0, 10);
scene.add(camera);

// 创建球几何体
const sphereGeometry = new THREE.SphereBufferGeometry(3, 30, 30);
delete sphereGeometry.attributes.uv;
// const material = new THREE.MeshBasicMaterial({
//   color: 0xff0000,
//   wireframe: true,
// });
// const mesh = new THREE.Mesh(sphereGeometry, material);
// scene.add(mesh);

// 设置点材质
const pointsMaterial = new THREE.PointsMaterial();
pointsMaterial.size = 0.1;
pointsMaterial.color.set(0xfff000);
// 相机深度而衰减
pointsMaterial.sizeAttenuation = true;

// 载入纹理
const textureLoader = new THREE.TextureLoader();
const texture = textureLoader.load("./textures/particles/2.png");
// 设置点材质纹理
pointsMaterial.map = texture;
pointsMaterial.alphaMap = texture;
pointsMaterial.transparent = true;
pointsMaterial.depthWrite = false;
pointsMaterial.blending = THREE.AdditiveBlending;

const points = new THREE.Points(sphereGeometry, pointsMaterial);

scene.add(points);

// 初始化渲染器
const renderer = new THREE.WebGLRenderer();
// 设置渲染的尺寸大小
renderer.setSize(window.innerWidth, window.innerHeight);
// 开启场景中的阴影贴图
renderer.shadowMap.enabled = true;
renderer.physicallyCorrectLights = true;

// console.log(renderer);
// 将webgl渲染的canvas内容添加到body
document.body.appendChild(renderer.domElement);

// // 使用渲染器,通过相机将场景渲染进来
// renderer.render(scene, camera);

// 创建轨道控制器
const controls = new OrbitControls(camera, renderer.domElement);
// 设置控制器阻尼,让控制器更有真实效果,必须在动画循环里调用.update()。
controls.enableDamping = true;

// 添加坐标轴辅助器
const axesHelper = new THREE.AxesHelper(5);
scene.add(axesHelper);
// 设置时钟
const clock = new THREE.Clock();

function render() {
  let time = clock.getElapsedTime();
  controls.update();
  renderer.render(scene, camera);
  //   渲染下一帧的时候就会调用render函数
  requestAnimationFrame(render);
}

render();

// 监听画面变化,更新渲染画面
window.addEventListener("resize", () => {
  //   console.log("画面变化了");
  // 更新摄像头
  camera.aspect = window.innerWidth / window.innerHeight;
  //   更新摄像机的投影矩阵
  camera.updateProjectionMatrix();

  //   更新渲染器
  renderer.setSize(window.innerWidth, window.innerHeight);
  //   设置渲染器的像素比
  renderer.setPixelRatio(window.devicePixelRatio);
});
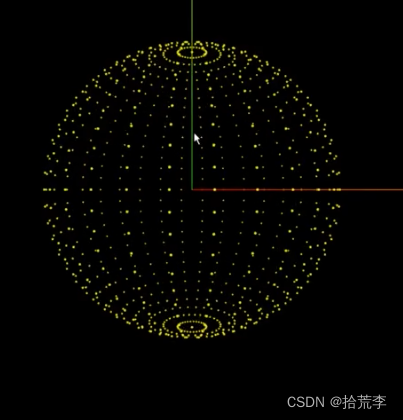
二、深度解析点材质属性
import * as THREE from "three";
// 导入轨道控制器
import { OrbitControls } from "three/examples/jsm/controls/OrbitControls";
// 导入动画库
import gsap from "gsap";
// 导入dat.gui
import * as dat from "dat.gui";

// 目标:认识pointes

const gui = new dat.GUI();
// 1、创建场景
const scene = new THREE.Scene();

// 2、创建相机
const camera = new THREE.PerspectiveCamera(
  75,
  window.innerWidth / window.innerHeight,
  0.1,
  1000
);

// 设置相机位置
camera.position.set(0, 0, 10);
scene.add(camera);

// 创建球几何体
const sphereGeometry = new THREE.SphereBufferGeometry(3, 30, 30);
// const material = new THREE.MeshBasicMaterial({
//   color: 0xff0000,
//   wireframe: true,
// });
// const mesh = new THREE.Mesh(sphereGeometry, material);
// scene.add(mesh);

// 设置点材质
const pointsMaterial = new THREE.PointsMaterial();
pointsMaterial.size = 0.1;
pointsMaterial.color.set(0xfff000);
// 相机深度而衰减
pointsMaterial.sizeAttenuation = true;

// 载入纹理
const textureLoader = new THREE.TextureLoader();
const texture = textureLoader.load("./textures/particles/2.png");
// 设置点材质纹理
pointsMaterial.map = texture;
pointsMaterial.alphaMap = texture;
pointsMaterial.transparent = true; // 允许透明
pointsMaterial.depthWrite = false; // 叠加时使用
pointsMaterial.blending = THREE.AdditiveBlending; // 例子重合之后颜色叠加

const points = new THREE.Points(sphereGeometry, pointsMaterial);

scene.add(points);

// 初始化渲染器
const renderer = new THREE.WebGLRenderer();
// 设置渲染的尺寸大小
renderer.setSize(window.innerWidth, window.innerHeight);
// 开启场景中的阴影贴图
renderer.shadowMap.enabled = true;
renderer.physicallyCorrectLights = true;

// console.log(renderer);
// 将webgl渲染的canvas内容添加到body
document.body.appendChild(renderer.domElement);

// // 使用渲染器,通过相机将场景渲染进来
// renderer.render(scene, camera);

// 创建轨道控制器
const controls = new OrbitControls(camera, renderer.domElement);
// 设置控制器阻尼,让控制器更有真实效果,必须在动画循环里调用.update()。
controls.enableDamping = true;

// 添加坐标轴辅助器
const axesHelper = new THREE.AxesHelper(5);
scene.add(axesHelper);
// 设置时钟
const clock = new THREE.Clock();

function render() {
  let time = clock.getElapsedTime();
  controls.update();
  renderer.render(scene, camera);
  //   渲染下一帧的时候就会调用render函数
  requestAnimationFrame(render);
}

render();

// 监听画面变化,更新渲染画面
window.addEventListener("resize", () => {
  //   console.log("画面变化了");
  // 更新摄像头
  camera.aspect = window.innerWidth / window.innerHeight;
  //   更新摄像机的投影矩阵
  camera.updateProjectionMatrix();

  //   更新渲染器
  renderer.setSize(window.innerWidth, window.innerHeight);
  //   设置渲染器的像素比
  renderer.setPixelRatio(window.devicePixelRatio);
});
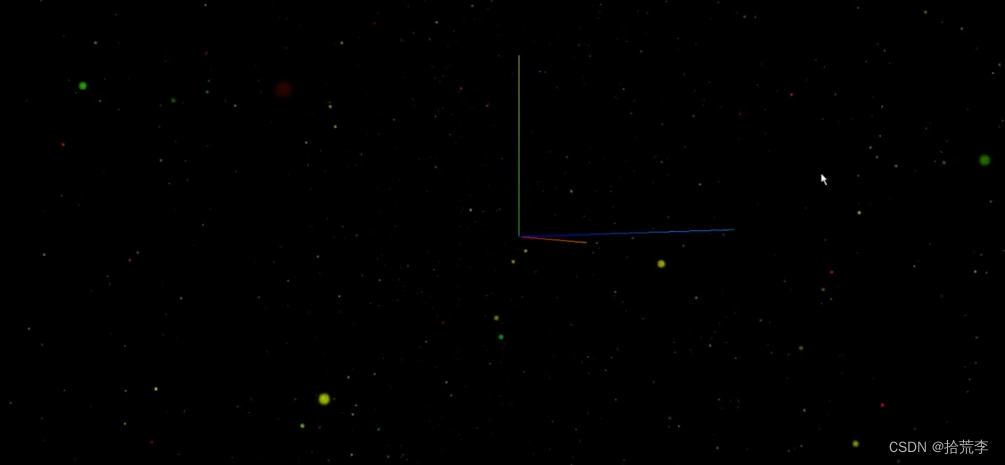
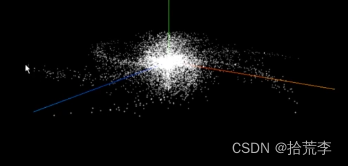
三、应用顶点着色打造绚丽多彩的星空
import * as THREE from "three";
// 导入轨道控制器
import { OrbitControls } from "three/examples/jsm/controls/OrbitControls";
// 导入动画库
import gsap from "gsap";
// 导入dat.gui
import * as dat from "dat.gui";

// 目标:使用pointes设置随机顶点打造星河

const gui = new dat.GUI();
// 1、创建场景
const scene = new THREE.Scene();

// 2、创建相机
const camera = new THREE.PerspectiveCamera(
  75,
  window.innerWidth / window.innerHeight,
  0.1,
  1000
);

// 设置相机位置
camera.position.set(0, 0, 10);
scene.add(camera);

const particlesGeometry = new THREE.BufferGeometry();
const count = 5000;

// 设置缓冲区数组
const positions = new Float32Array(count * 3);
// 设置粒子顶点颜色
const colors = new Float32Array(count * 3);
// 设置顶点
for (let i = 0; i < count * 3; i++) {
  positions[i] = (Math.random() - 0.5) * 100;
  colors[i] = Math.random();
}
particlesGeometry.setAttribute(
  "position",
  new THREE.BufferAttribute(positions, 3)
);
particlesGeometry.setAttribute("color", new THREE.BufferAttribute(colors, 3));

// 设置点材质
const pointsMaterial = new THREE.PointsMaterial();
pointsMaterial.size = 0.5;
pointsMaterial.color.set(0xfff000);
// 相机深度而衰减
pointsMaterial.sizeAttenuation = true;

// 载入纹理
const textureLoader = new THREE.TextureLoader();
const texture = textureLoader.load("./textures/particles/zs2.png");
// 设置点材质纹理
pointsMaterial.map = texture;
pointsMaterial.alphaMap = texture;
pointsMaterial.transparent = true;
pointsMaterial.depthWrite = false;
pointsMaterial.blending = THREE.AdditiveBlending;
// 设置启动顶点颜色
pointsMaterial.vertexColors = true;

const points = new THREE.Points(particlesGeometry, pointsMaterial);

scene.add(points);

// 初始化渲染器
const renderer = new THREE.WebGLRenderer();
// 设置渲染的尺寸大小
renderer.setSize(window.innerWidth, window.innerHeight);
// 开启场景中的阴影贴图
renderer.shadowMap.enabled = true;
renderer.physicallyCorrectLights = true;

// console.log(renderer);
// 将webgl渲染的canvas内容添加到body
document.body.appendChild(renderer.domElement);

// // 使用渲染器,通过相机将场景渲染进来
// renderer.render(scene, camera);

// 创建轨道控制器
const controls = new OrbitControls(camera, renderer.domElement);
// 设置控制器阻尼,让控制器更有真实效果,必须在动画循环里调用.update()。
controls.enableDamping = true;

// 添加坐标轴辅助器
const axesHelper = new THREE.AxesHelper(5);
scene.add(axesHelper);
// 设置时钟
const clock = new THREE.Clock();

function render() {
  let time = clock.getElapsedTime();
  controls.update();
  renderer.render(scene, camera);
  //   渲染下一帧的时候就会调用render函数
  requestAnimationFrame(render);
}

render();

// 监听画面变化,更新渲染画面
window.addEventListener("resize", () => {
  //   console.log("画面变化了");
  // 更新摄像头
  camera.aspect = window.innerWidth / window.innerHeight;
  //   更新摄像机的投影矩阵
  camera.updateProjectionMatrix();

  //   更新渲染器
  renderer.setSize(window.innerWidth, window.innerHeight);
  //   设置渲染器的像素比
  renderer.setPixelRatio(window.devicePixelRatio);
});

import * as THREE from "three";
import { texture, equirectUV } from "three/nodes";

import WebGPU from "three/addons/capabilities/WebGPU.js";
import WebGPURenderer from "three/addons/renderers/webgpu/WebGPURenderer.js";

import { OrbitControls } from "three/addons/controls/OrbitControls.js";

if (WebGPU.isAvailable() === false) {
  document.body.appendChild(WebGPU.getErrorMessage());

  throw new Error("No WebGPU support");
}

const container = document.createElement("div");
document.body.appendChild(container);

camera = new THREE.PerspectiveCamera(
  45,
  window.innerWidth / window.innerHeight,
  0.25,
  20
);
camera.position.set(1, 0, 0);

const equirectTexture = new THREE.TextureLoader().load(
  "textures/2294472375_24a3b8ef46_o.jpg"
);
equirectTexture.flipY = false;

scene = new THREE.Scene();
scene.backgroundNode = texture(equirectTexture, equirectUV(), 0);

function render() {
  controls.update();
  renderer.render(scene, camera);
}

renderer = new WebGPURenderer();
renderer.setPixelRatio(window.devicePixelRatio);
renderer.setSize(window.innerWidth, window.innerHeight);
renderer.setAnimationLoop(render);
container.appendChild(renderer.domElement);

controls = new OrbitControls(camera, renderer.domElement);
controls.autoRotate = true;
controls.rotateSpeed = -0.125; // negative, to track mouse pointer
controls.autoRotateSpeed = 1.0;

window.addEventListener("resize", onWindowResize);

function onWindowResize() {
  camera.aspect = window.innerWidth / window.innerHeight;
  camera.updateProjectionMatrix();

  renderer.setSize(window.innerWidth, window.innerHeight);
}
四、通过封装与相机裁剪实现漫天飞舞的雪花
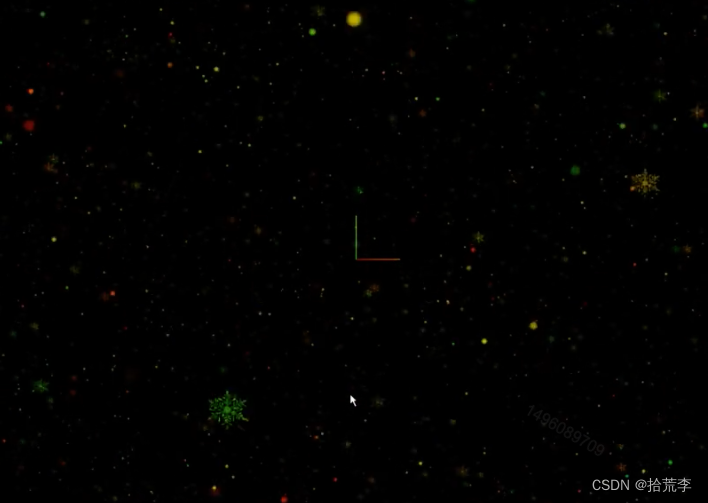
雪花纷飞的效果可以使用旋转模拟
function render() {
  let time = clock.getElapsedTime();
  points.rotation.x = time * 0.3;
  points2.rotation.x = time * 0.5;
  points2.rotation.y = time * 0.4;
  points3.rotation.x = time * 0.2;
  points3.rotation.y = time * 0.2;
  controls.update();
  renderer.render(scene, camera);
  //   渲染下一帧的时候就会调用render函数
  requestAnimationFrame(render);
}

render();
import * as THREE from "three";
// 导入轨道控制器
import { OrbitControls } from "three/examples/jsm/controls/OrbitControls";
// 导入动画库
import gsap from "gsap";
// 导入dat.gui
import * as dat from "dat.gui";

// 目标:设置漫天的雪花

const gui = new dat.GUI();
// 1、创建场景
const scene = new THREE.Scene();

// 2、创建相机
const camera = new THREE.PerspectiveCamera(
  75,
  window.innerWidth / window.innerHeight,
  0.1,
  30
);

// 设置相机位置
camera.position.set(0, 0, 40);
scene.add(camera);

function createPoints(url, size = 0.5) {
  const particlesGeometry = new THREE.BufferGeometry();
  const count = 10000;

  // 设置缓冲区数组
  const positions = new Float32Array(count * 3);
  // 设置粒子顶点颜色
  const colors = new Float32Array(count * 3);
  // 设置顶点
  for (let i = 0; i < count * 3; i++) {
    positions[i] = (Math.random() - 0.5) * 100;
    colors[i] = Math.random();
  }
  particlesGeometry.setAttribute(
    "position",
    new THREE.BufferAttribute(positions, 3)
  );
  particlesGeometry.setAttribute("color", new THREE.BufferAttribute(colors, 3));

  // 设置点材质
  const pointsMaterial = new THREE.PointsMaterial();
  pointsMaterial.size = 0.5;
  pointsMaterial.color.set(0xfff000);
  // 相机深度而衰减
  pointsMaterial.sizeAttenuation = true;

  // 载入纹理
  const textureLoader = new THREE.TextureLoader();
  const texture = textureLoader.load(`./textures/particles/${url}.png`);
  // 设置点材质纹理
  pointsMaterial.map = texture;
  pointsMaterial.alphaMap = texture;
  pointsMaterial.transparent = true;
  pointsMaterial.depthWrite = false;
  pointsMaterial.blending = THREE.AdditiveBlending;
  // 设置启动顶点颜色
  pointsMaterial.vertexColors = true;

  const points = new THREE.Points(particlesGeometry, pointsMaterial);

  scene.add(points);
  return points;
}

const points = createPoints("1", 1.5);
const points2 = createPoints("xh", 1);
const points3 = createPoints("xh", 2);

// 初始化渲染器
const renderer = new THREE.WebGLRenderer();
// 设置渲染的尺寸大小
renderer.setSize(window.innerWidth, window.innerHeight);
// 开启场景中的阴影贴图
renderer.shadowMap.enabled = true;
renderer.physicallyCorrectLights = true;

// console.log(renderer);
// 将webgl渲染的canvas内容添加到body
document.body.appendChild(renderer.domElement);

// // 使用渲染器,通过相机将场景渲染进来
// renderer.render(scene, camera);

// 创建轨道控制器
const controls = new OrbitControls(camera, renderer.domElement);
// 设置控制器阻尼,让控制器更有真实效果,必须在动画循环里调用.update()。
controls.enableDamping = true;

// 添加坐标轴辅助器
const axesHelper = new THREE.AxesHelper(5);
scene.add(axesHelper);
// 设置时钟
const clock = new THREE.Clock();

function render() {
  let time = clock.getElapsedTime();
  points.rotation.x = time * 0.3;
  points2.rotation.x = time * 0.5;
  points2.rotation.y = time * 0.4;
  points3.rotation.x = time * 0.2;
  points3.rotation.y = time * 0.2;
  controls.update();
  renderer.render(scene, camera);
  //   渲染下一帧的时候就会调用render函数
  requestAnimationFrame(render);
}

render();

// 监听画面变化,更新渲染画面
window.addEventListener("resize", () => {
  //   console.log("画面变化了");

  // 更新摄像头
  camera.aspect = window.innerWidth / window.innerHeight;
  //   更新摄像机的投影矩阵
  camera.updateProjectionMatrix();

  //   更新渲染器
  renderer.setSize(window.innerWidth, window.innerHeight);
  //   设置渲染器的像素比
  renderer.setPixelRatio(window.devicePixelRatio);
});
五、运用数学知识打造复杂形状臂旋星系
import * as THREE from "three";
// 导入轨道控制器
import { OrbitControls } from "three/examples/jsm/controls/OrbitControls";
// 导入动画库
import gsap from "gsap";
// 导入dat.gui
import * as dat from "dat.gui";

// 目标:运用数学知识设计特定形状的星系

const gui = new dat.GUI();
// 1、创建场景
const scene = new THREE.Scene();

// 2、创建相机
const camera = new THREE.PerspectiveCamera(
  75,
  window.innerWidth / window.innerHeight,
  0.1,
  30
);

const textureLoader = new THREE.TextureLoader();
const particlesTexture = textureLoader.load("./textures/particles/1.png");
// 设置相机位置
camera.position.set(0, 0, 10);
scene.add(camera);

const params = {
  count: 10000,
  size: 0.1,
  radius: 5,
  branch: 3,
  color: "#ff6030",
  rotateScale: 0.3,
  endColor: "#1b3984",
};

let geometry = null;
let material = null;
let points = null;
const centerColor = new THREE.Color(params.color);
const endColor = new THREE.Color(params.endColor);
const generateGalaxy = () => {
  // 生成顶点
  geometry = new THREE.BufferGeometry();
  //   随机生成位置和
  const positions = new Float32Array(params.count * 3);
  // 设置顶点颜色
  const colors = new Float32Array(params.count * 3);

  //   循环生成点
  for (let i = 0; i < params.count; i++) {
    //   当前的点应该在哪一条分支的角度上
    const branchAngel = (i % params.branch) * ((2 * Math.PI) / params.branch);

    // 当前点距离圆心的距离
    const distance = Math.random() * params.radius * Math.pow(Math.random(), 3);
    const current = i * 3;

    const randomX =
      (Math.pow(Math.random() * 2 - 1, 3) * (params.radius - distance)) / 5;
    const randomY =
      (Math.pow(Math.random() * 2 - 1, 3) * (params.radius - distance)) / 5;
    const randomZ =
      (Math.pow(Math.random() * 2 - 1, 3) * (params.radius - distance)) / 5;

    // const randomX = (Math.pow(Math.random() * 2 - 1, 3) * distance) / 5;
    // const randomY = (Math.pow(Math.random() * 2 - 1, 3) * distance) / 5;
    // const randomZ = (Math.pow(Math.random() * 2 - 1, 3) * distance) / 5;

    positions[current] =
      Math.cos(branchAngel + distance * params.rotateScale) * distance +
      randomX;
    positions[current + 1] = 0 + randomY;
    positions[current + 2] =
      Math.sin(branchAngel + distance * params.rotateScale) * distance +
      randomZ;

    // 混合颜色,形成渐变色
    const mixColor = centerColor.clone();
    mixColor.lerp(endColor, distance / params.radius);

    colors[current] = mixColor.r;
    colors[current + 1] = mixColor.g;
    colors[current + 2] = mixColor.b;
  }

  geometry.setAttribute("position", new THREE.BufferAttribute(positions, 3));
  geometry.setAttribute("color", new THREE.BufferAttribute(colors, 3));

  //   设置点材质
  material = new THREE.PointsMaterial({
    // color: new THREE.Color(params.color),
    size: params.size,
    sizeAttenuation: true,
    depthWrite: false,
    blending: THREE.AdditiveBlending,
    map: particlesTexture,
    alphaMap: particlesTexture,
    transparent: true,
    vertexColors: true,
  });

  points = new THREE.Points(geometry, material);
  scene.add(points);
};
generateGalaxy();

// 初始化渲染器
const renderer = new THREE.WebGLRenderer();
// 设置渲染的尺寸大小
renderer.setSize(window.innerWidth, window.innerHeight);
// 开启场景中的阴影贴图
renderer.shadowMap.enabled = true;
renderer.physicallyCorrectLights = true;

// console.log(renderer);
// 将webgl渲染的canvas内容添加到body
document.body.appendChild(renderer.domElement);

// // 使用渲染器,通过相机将场景渲染进来
// renderer.render(scene, camera);

// 创建轨道控制器
const controls = new OrbitControls(camera, renderer.domElement);
// 设置控制器阻尼,让控制器更有真实效果,必须在动画循环里调用.update()。
controls.enableDamping = true;

// 添加坐标轴辅助器
const axesHelper = new THREE.AxesHelper(5);
scene.add(axesHelper);
// 设置时钟
const clock = new THREE.Clock();

function render() {
  let time = clock.getElapsedTime();

  controls.update();
  renderer.render(scene, camera);
  //   渲染下一帧的时候就会调用render函数
  requestAnimationFrame(render);
}

render();

// 监听画面变化,更新渲染画面
window.addEventListener("resize", () => {
  //   console.log("画面变化了");

  // 更新摄像头
  camera.aspect = window.innerWidth / window.innerHeight;
  //   更新摄像机的投影矩阵
  camera.updateProjectionMatrix();

  //   更新渲染器
  renderer.setSize(window.innerWidth, window.innerHeight);
  //   设置渲染器的像素比
  renderer.setPixelRatio(window.devicePixelRatio);
});