竞赛选题 深度学习人脸表情识别算法 - opencv python 机器视觉

news2025/1/22 20:46:44

文章目录

  • 0 前言
  • 1 技术介绍
    • 1.1 技术概括
    • 1.2 目前表情识别实现技术
  • 2 实现效果
  • 3 深度学习表情识别实现过程
    • 3.1 网络架构
    • 3.2 数据
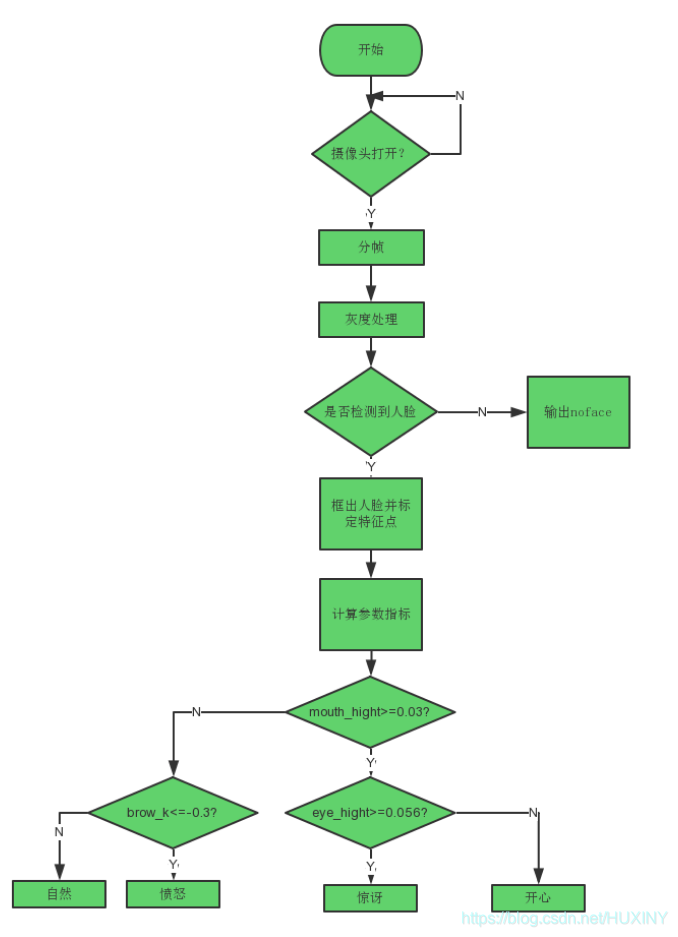
    • 3.3 实现流程
    • 3.4 部分实现代码
  • 4 最后

0 前言

🔥 优质竞赛项目系列,今天要分享的是

🚩 深度学习人脸表情识别系统

该项目较为新颖,适合作为竞赛课题方向,学长非常推荐!

🥇学长这里给一个题目综合评分(每项满分5分)

  • 难度系数:3分
  • 工作量:3分
  • 创新点:4分

🧿 更多资料, 项目分享:

https://gitee.com/dancheng-senior/postgraduate

1 技术介绍

1.1 技术概括

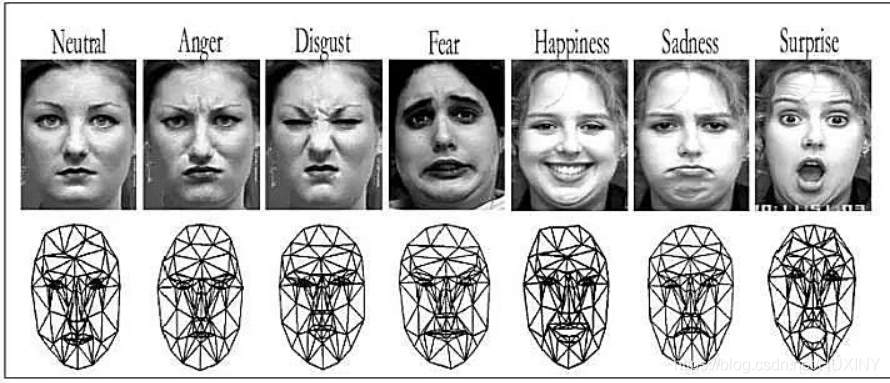
面部表情识别技术源于1971年心理学家Ekman和Friesen的一项研究,他们提出人类主要有六种基本情感,每种情感以唯一的表情来反映当时的心理活动,这六种情感分别是愤怒(anger)、高兴(happiness)、悲伤
(sadness)、惊讶(surprise)、厌恶(disgust)和恐惧(fear)。

尽管人类的情感维度和表情复杂度远不是数字6可以量化的,但总体而言,这6种也差不多够描述了。
在这里插入图片描述

1.2 目前表情识别实现技术

在这里插入图片描述
在这里插入图片描述

2 实现效果

废话不多说,先上实现效果

在这里插入图片描述
在这里插入图片描述

在这里插入图片描述

3 深度学习表情识别实现过程

3.1 网络架构

在这里插入图片描述
面部表情识别CNN架构(改编自 埃因霍芬理工大学PARsE结构图)

其中,通过卷积操作来创建特征映射,将卷积核挨个与图像进行卷积,从而创建一组要素图,并在其后通过池化(pooling)操作来降维。

在这里插入图片描述

3.2 数据

主要来源于kaggle比赛,下载地址。
有七种表情类别: (0=Angry, 1=Disgust, 2=Fear, 3=Happy, 4=Sad, 5=Surprise, 6=Neutral).
数据是48x48 灰度图,格式比较奇葩。
第一列是情绪分类,第二列是图像的numpy,第三列是train or test。

在这里插入图片描述

3.3 实现流程

在这里插入图片描述

3.4 部分实现代码


    import cv2
    import sys
    import json
    import numpy as np
    from keras.models import model_from_json

    emotions = ['angry', 'fear', 'happy', 'sad', 'surprise', 'neutral']
    cascPath = sys.argv[1]
    
    faceCascade = cv2.CascadeClassifier(cascPath)
    noseCascade = cv2.CascadeClassifier(cascPath)

    # load json and create model arch
    json_file = open('model.json','r')
    loaded_model_json = json_file.read()
    json_file.close()
    model = model_from_json(loaded_model_json)
    
    # load weights into new model
    model.load_weights('model.h5')
    
    # overlay meme face
    def overlay_memeface(probs):
        if max(probs) > 0.8:
            emotion = emotions[np.argmax(probs)]
            return 'meme_faces/{}-{}.png'.format(emotion, emotion)
        else:
            index1, index2 = np.argsort(probs)[::-1][:2]
            emotion1 = emotions[index1]
            emotion2 = emotions[index2]
            return 'meme_faces/{}-{}.png'.format(emotion1, emotion2)
    
    def predict_emotion(face_image_gray): # a single cropped face
        resized_img = cv2.resize(face_image_gray, (48,48), interpolation = cv2.INTER_AREA)
        # cv2.imwrite(str(index)+'.png', resized_img)
        image = resized_img.reshape(1, 1, 48, 48)
        list_of_list = model.predict(image, batch_size=1, verbose=1)
        angry, fear, happy, sad, surprise, neutral = [prob for lst in list_of_list for prob in lst]
        return [angry, fear, happy, sad, surprise, neutral]
    
    video_capture = cv2.VideoCapture(0)
    while True:
        # Capture frame-by-frame
        ret, frame = video_capture.read()
    
        img_gray = cv2.cvtColor(frame, cv2.COLOR_BGR2GRAY,1)

        faces = faceCascade.detectMultiScale(
            img_gray,
            scaleFactor=1.1,
            minNeighbors=5,
            minSize=(30, 30),
            flags=cv2.cv.CV_HAAR_SCALE_IMAGE
        )
    
        # Draw a rectangle around the faces
        for (x, y, w, h) in faces:
    
            face_image_gray = img_gray[y:y+h, x:x+w]
            filename = overlay_memeface(predict_emotion(face_image_gray))
    
            print filename
            meme = cv2.imread(filename,-1)
            # meme = (meme/256).astype('uint8')
            try:
                meme.shape[2]
            except:
                meme = meme.reshape(meme.shape[0], meme.shape[1], 1)
            # print meme.dtype
            # print meme.shape
            orig_mask = meme[:,:,3]
            # print orig_mask.shape
            # memegray = cv2.cvtColor(orig_mask, cv2.COLOR_BGR2GRAY)
            ret1, orig_mask = cv2.threshold(orig_mask, 10, 255, cv2.THRESH_BINARY)
            orig_mask_inv = cv2.bitwise_not(orig_mask)
            meme = meme[:,:,0:3]
            origMustacheHeight, origMustacheWidth = meme.shape[:2]
    
            roi_gray = img_gray[y:y+h, x:x+w]
            roi_color = frame[y:y+h, x:x+w]
    
            # Detect a nose within the region bounded by each face (the ROI)
            nose = noseCascade.detectMultiScale(roi_gray)
    
            for (nx,ny,nw,nh) in nose:
                # Un-comment the next line for debug (draw box around the nose)
                #cv2.rectangle(roi_color,(nx,ny),(nx+nw,ny+nh),(255,0,0),2)
    
                # The mustache should be three times the width of the nose
                mustacheWidth =  20 * nw
                mustacheHeight = mustacheWidth * origMustacheHeight / origMustacheWidth
    
                # Center the mustache on the bottom of the nose
                x1 = nx - (mustacheWidth/4)
                x2 = nx + nw + (mustacheWidth/4)
                y1 = ny + nh - (mustacheHeight/2)
                y2 = ny + nh + (mustacheHeight/2)
    
                # Check for clipping
                if x1 < 0:
                    x1 = 0
                if y1 < 0:
                    y1 = 0
                if x2 > w:
                    x2 = w
                if y2 > h:
                    y2 = h

                # Re-calculate the width and height of the mustache image
                mustacheWidth = (x2 - x1)
                mustacheHeight = (y2 - y1)
    
                # Re-size the original image and the masks to the mustache sizes
                # calcualted above
                mustache = cv2.resize(meme, (mustacheWidth,mustacheHeight), interpolation = cv2.INTER_AREA)
                mask = cv2.resize(orig_mask, (mustacheWidth,mustacheHeight), interpolation = cv2.INTER_AREA)
                mask_inv = cv2.resize(orig_mask_inv, (mustacheWidth,mustacheHeight), interpolation = cv2.INTER_AREA)
    
                # take ROI for mustache from background equal to size of mustache image
                roi = roi_color[y1:y2, x1:x2]
    
                # roi_bg contains the original image only where the mustache is not
                # in the region that is the size of the mustache.
                roi_bg = cv2.bitwise_and(roi,roi,mask = mask_inv)
    
                # roi_fg contains the image of the mustache only where the mustache is
                roi_fg = cv2.bitwise_and(mustache,mustache,mask = mask)
    
                # join the roi_bg and roi_fg
                dst = cv2.add(roi_bg,roi_fg)
    
                # place the joined image, saved to dst back over the original image
                roi_color[y1:y2, x1:x2] = dst
    
                break
    
        #     cv2.rectangle(frame, (x, y), (x+w, y+h), (0, 255, 0), 2)
        #     angry, fear, happy, sad, surprise, neutral = predict_emotion(face_image_gray)
        #     text1 = 'Angry: {}     Fear: {}   Happy: {}'.format(angry, fear, happy)
        #     text2 = '  Sad: {} Surprise: {} Neutral: {}'.format(sad, surprise, neutral)
        #
        # cv2.putText(frame, text1, (50, 50), cv2.FONT_HERSHEY_SIMPLEX, 2, (255, 0, 0), 3)
        # cv2.putText(frame, text2, (50, 150), cv2.FONT_HERSHEY_SIMPLEX, 2, (255, 0, 0), 3)
    
        # Display the resulting frame
        cv2.imshow('Video', frame)
    
        if cv2.waitKey(1) & 0xFF == ord('q'):
            break
    
    # When everything is done, release the capture
    video_capture.release()
    cv2.destroyAllWindows()

需要完整代码以及学长训练好的模型,联系学长获取

4 最后

🧿 更多资料, 项目分享:

https://gitee.com/dancheng-senior/postgraduate
本文来自互联网用户投稿,该文观点仅代表作者本人,不代表本站立场。本站仅提供信息存储空间服务,不拥有所有权,不承担相关法律责任。如若转载,请注明出处:http://www.coloradmin.cn/o/1127295.html

如若内容造成侵权/违法违规/事实不符,请联系多彩编程网进行投诉反馈,一经查实,立即删除!

相关文章

Allegro教学:Assembly层和Silkscreen元器件编号如何处理?

在电子工程中&#xff0c;PCB的设计和制造最为关键&#xff0c;而PCB上有多种层&#xff0c;有信号层、电源层、接地层和机械层&#xff0c;今天我们来聊聊Assembly层。来聊聊Silkscreen元器件编号问题&#xff0c;希望本文对小伙伴们有所帮助。 首先在回答这个问题前&#xff…

电脑机械硬盘怎么恢复数据?未备份的话,这几个方法请收好

在当今数字化的时代&#xff0c;数据的重要性不言而喻。然而&#xff0c;当电脑机械硬盘遇到数据丢失问题时&#xff0c;很多用户会感到束手无策。那么&#xff0c;电脑机械硬盘怎么恢复数据&#xff1f;在没有备份数据的情况下&#xff0c;这几个方法请收好。 图片来源于AI制作…

云栖大会?全部免费!!抢先一步看!

2023云栖大会定档10月31日&#xff01; 点击链接免费预约云栖门票&#xff1a; 2023云栖大会-领票页面 2023 云栖大会将于 10.31-11.2 在杭州云栖小镇举办&#xff0c;深度拥抱大数据AI 核心技术&#xff0c;见证阿里云大数据AI产品年度重磅发布及创新。开放融合的科技展示平…

用爬虫代码爬取高音质音频示例

目录 一、准备工作 1、安装Python和相关库 2、确定目标网站和数据结构 二、编写爬虫代码 1、导入库 2、设置代理IP 3、发送HTTP请求并解析HTML页面 4、查找音频文件链接 5、提取音频文件名和下载链接 6、下载音频文件 三、完整代码示例 四、注意事项 1、遵守法律法…

swiper3 无缝滚动 + 鼠标悬停停止/继续

html结构&#xff1a; <div class"peopleSwiper"><div class"swiper-container"><div class"swiper-wrapper"><div class"swiper-slide"><img src"images/people01.png"></div><di…

计算机组成原理——解决了我的一些困惑

这个是复习408时&#xff0c;临时起意&#xff0c;把这些问题记录下来&#xff0c;我现在复习了一半有余&#xff0c;于是把这些发布出来&#xff08;如果后面有新的&#xff0c;我会在这里面进行更新&#xff09; 1、代码中的——类型转换&#xff08;int -> short&#xf…

客户保留是什么意思?

任何一家企业&#xff0c;都需要去思考在销售过程中有多少客户是有效的&#xff1f;又有多少客户是可以保留的&#xff1f;初具规模的企业通过CRM客户管理系统只一味的开发新客户&#xff0c;而忽略客户保留&#xff0c;反而会造成资源的浪费。那么我们常说的客户保留是什么意思…

18 - 如何设置线程池大小?

还记得在 16 讲中说过“线程池的线程数量设置过多会导致线程竞争激烈”吗&#xff1f; 今天再补一句&#xff0c;如果线程数量设置过少的话&#xff0c;还会导致系统无法充分利用计算机资源。那么如何设置才不会影响系统性能呢&#xff1f; 其实线程池的设置是有方法的&#…

出差学小白知识No5:|Ubuntu上关联GitLab账号并下载项目(ssh key配置)

1 注冊自己的gitlab账户 有手就行 2 ubuntu安装git &#xff0c;并查看版本 sudo apt-get install git git --version 3 vim ~/.ssh/config Host gitlab.example.com User your_username Port 22 IdentityFile ~/.ssh/id_rsa PreferredAuthentications publickey 替换gitl…

python实现批量pdf转txt和word

文章目录 背景需求环境安装完整代码效果 背景需求 已经获取到了大量的pdf在download文件夹中&#xff0c;但是我需要的是txt文件和word文件&#xff5e; 环境安装 pip install pdf2docx pdfminer.six完整代码 # pip install pdf2docx pdfminer.siximport os from pdf2docx …

【LeetCode刷题-数组】--27.移除元素

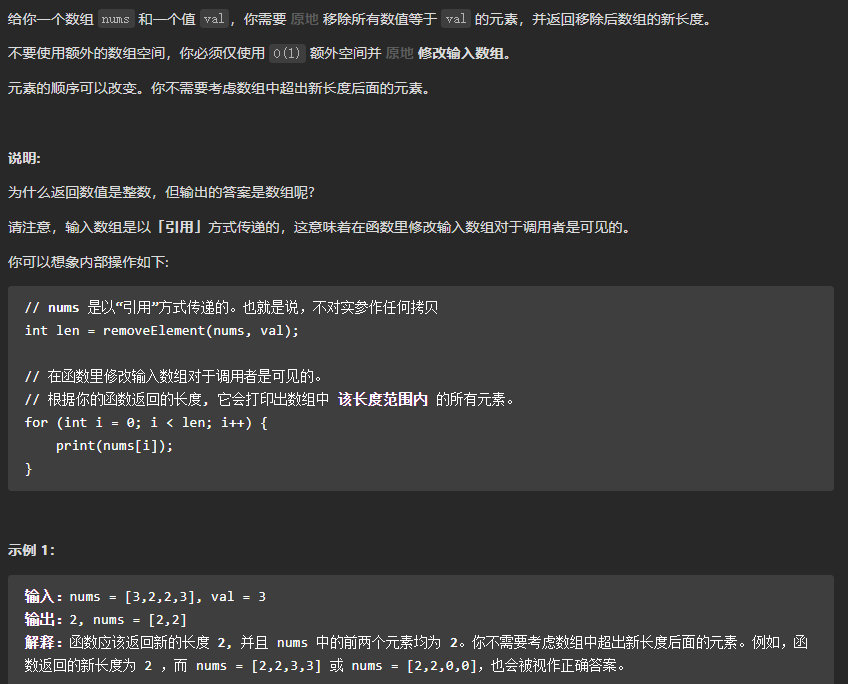
27.移除元素 class Solution {public int removeElement(int[] nums, int val) {int slow 0,fast 0,n nums.length;while(fast < n){if(nums[fast] ! val){nums[slow] nums[fast];slow;}fast;}return slow;} }

Real3D FlipBook jQuery Plugin 3.41 Crack

Real3D FlipBook 和 PDF 查看器 jQuery 插件 - CodeCanyon 待售物品 实时预览 截图 视频预览 Real3D Flipbook jQuery 插件 - 1 Real3D Flipbook jQuery 插件 - 2 Real3D Flipbook jQuery 插件 - 3 新功能 – REAL3D FLIPBOOK JQUERY 插件的 PDF 到图像转换器 一款用于将…

在亚马逊购买产品时怎么选择自动收货方式

在亚马逊购买产品时&#xff0c;通常可以在下单时选择不同的收货方式&#xff0c;包括自动收货方式。以下是一般的购买流程&#xff1a; 登录亚马逊账号&#xff1a;打开网站&#xff0c;登录账号&#xff0c;如果没有账号&#xff0c;可以先创建一个。 浏览和添加商品&#…

Java JSON字符串转换成JSONArray对象,遍历JSONArray

JSON字符串转换成JSONArray对象&#xff0c;遍历JSONArray&#xff1a; // 一个未转化的字符串 String str "[{name:a,value:aa},{name:b,value:bb},{name:c,value:cc},{name:d,value:dd}]" ;// 首先把字符串转成 JSONArray 对象 JSONArray jsonArray JSONArray.p…

初探亚马逊 AI 编程助手 CodeWhisperer

前言 4月18日&#xff0c;亚马逊云科技宣布&#xff0c;实时 AI 编程助手 Amazon CodeWhisperer 正式可用,同时推出的还有供所有开发人员免费使用的个人版&#xff08;CodeWhisperer Individual&#xff09;。Amazon CodeWhisperer 是一个通用的、由机器学习驱动的代码生成器&…

Windows下 MySql 5.7授权远程登陆

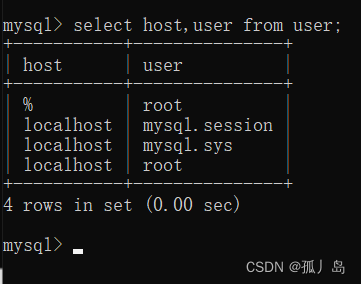
1.用管理员身份打开mysql Client 2.输入密码登录 3.使用mysql数据库&#xff0c;输入“use mysql” 4.查看当前服务中使用的用户 select host,user form user; 5.授权 grant all privileges on *.* to 用户名% identified by 密码 with grant option; 6.成功后&#xff0c;刷…

众和策略:612家公司三季报折射经济复苏力度

超七成前三季度效果同比添加 近三成第三季度效果环比添加 Choice数据闪现&#xff0c;到10月23日&#xff0c;已有612家A股公司宣告前三季度效果或效果预告&#xff0c;其间跨越七成公司结束同比添加&#xff0c;近三成公司第三季度结束了效果环比添加&#xff0c;充分彰显出中…

音视频(一)之使用FFMpeg工具推流并搭建流媒体服务器Nginx + RTMP

协议介绍 RTMP协议 全称&#xff1a;Real Time Messaging Protocol&#xff0c;实时消息传送协议介绍&#xff1a;是Adobe Systems公司为Flash播放器和服务器之间音频、视频和数据传输开发的开放协议协议&#xff1a;长连接TCP原理&#xff1a;每个时刻的数据收到后立刻转发延…

GB28181学习(十一)——控制(PTZ、镜头、光圈等控制)

要求 源设备向目标设备发送控制命令&#xff0c;控制命令类型包括&#xff1a; 摄像机云台控制远程启动录像控制报警布防/撤防报警复位强制关键帧拉框放大/缩小看守位控制PTZ精准控制存储卡格式化目标跟踪软件升级设备配置 设备配置的内容包括&#xff1a; 基本参数视频参数范…

ASO优化之什么是长尾关键词

通常长尾关键词的竞争通常较小&#xff0c;我们可以通过优化长尾关键词&#xff0c;来更轻松地在搜索结果中获得高排名。那么我们需要找到哪些应该优化的关键词以及如何优化。 1、长尾关键词的好处。 长尾关键字中添加的详细信息可以帮助缩小受众群体的范围&#xff0c;使得长…