文章目录
- pytorch基础知识和basicSR中用到的语法
- 1.Sampler类与4种采样方式
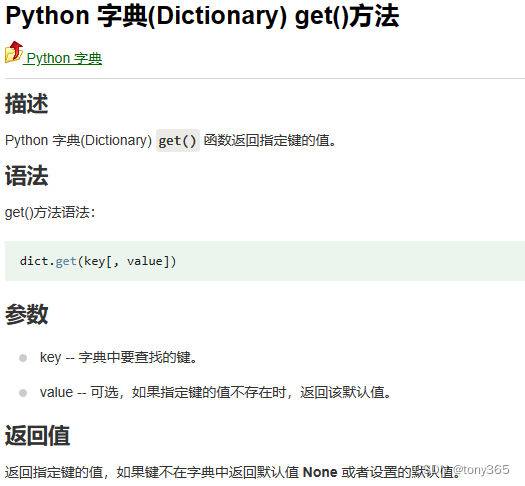
- 2.python dict的get方法使用
- 3.prefetch_dataloader.py
- 4. pytorch 并行和分布式训练
- 4.1 选择要使用的cuda
- 4.2 DataParallel使用方法
- 常规使用方法
- 保存和载入
- 4.3 DistributedDataParallel
- 5.wangdb 入门
- 5.1 sign up(https://wandb.ai/site)
- 5.2 安装和login
- 5.3 demo
- 5.model and train
- 5.1 create model
- 5.2 opt中设置
- 5.2 SRModel 类
pytorch基础知识和basicSR中用到的语法
1.Sampler类与4种采样方式
一文弄懂Pytorch的DataLoader, DataSet, Sampler之间的关系
pytorch源码阅读(三)Sampler类与4种采样方式
下面代码是自定义的一个采样器:
ratio控制扩充数据集的倍数
num_replicas是进程数,一般是world_size
rank: 当前进程的rank
其实目的就是把数据集的索引划分为num_replicas组,供每个进程(process) 处理
至于ratio,是为了使每个epoch训练的数据增多,for saving time when restart the dataloader after each epoch
import math
import torch
from torch.utils.data.sampler import Sampler


class EnlargedSampler(Sampler):
    """Sampler that restricts data loading to a subset of the dataset.

    Modified from torch.utils.data.distributed.DistributedSampler
    Support enlarging the dataset for iteration-based training, for saving
    time when restart the dataloader after each epoch

    Args:
        dataset (torch.utils.data.Dataset): Dataset used for sampling.
        num_replicas (int | None): Number of processes participating in
            the training. It is usually the world_size.
        rank (int | None): Rank of the current process within num_replicas.
        ratio (int): Enlarging ratio. Default: 1.
    """

    def __init__(self, dataset, num_replicas, rank, ratio=1):
        self.dataset = dataset
        self.num_replicas = num_replicas
        self.rank = rank
        self.epoch = 0
        self.num_samples = math.ceil(len(self.dataset) * ratio / self.num_replicas)
        self.total_size = self.num_samples * self.num_replicas

    def __iter__(self):
        # deterministically shuffle based on epoch
        g = torch.Generator()
        g.manual_seed(self.epoch)
        indices = torch.randperm(self.total_size, generator=g).tolist()

        dataset_size = len(self.dataset)
        indices = [v % dataset_size for v in indices]

        # subsample
        indices = indices[self.rank:self.total_size:self.num_replicas]
        assert len(indices) == self.num_samples

        return iter(indices)

    def __len__(self):
        return self.num_samples

    def set_epoch(self, epoch):
        self.epoch = epoch
测试一下:
import numpy as np
if __name__ == "__main__":
    data = np.arange(20).tolist()
    en_sample = EnlargedSampler(data, 2, 0)
    en_sample.set_epoch(1)
    for i in en_sample:
        print(i)
    print('\n------------------\n')
    en_sample = EnlargedSampler(data, 2, 1)
    en_sample.set_epoch(1) # 设置为同一个epoch .  rank=0或者1时生成的index是互补的

    # 或者不用设置,默认为0即可。
    for i in en_sample:
        print(i)
结果:

2.python dict的get方法使用
3.prefetch_dataloader.py
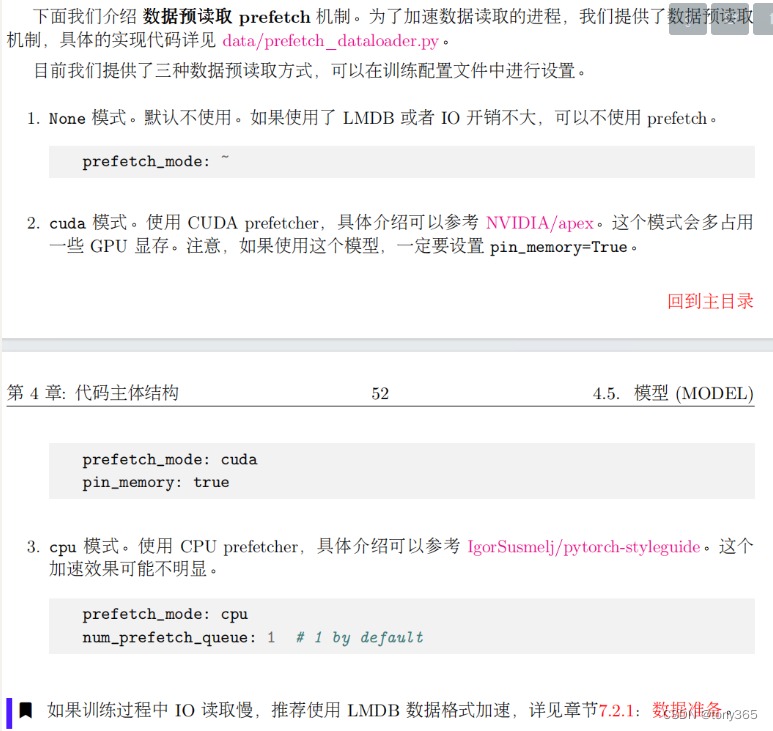
载入本批数据的时候,预先载入下一批数据。主要看next函数
import queue as Queue
import threading
import torch
from torch.utils.data import DataLoader


class PrefetchGenerator(threading.Thread):
    """A general prefetch generator.

    Reference: https://stackoverflow.com/questions/7323664/python-generator-pre-fetch

    Args:
        generator: Python generator.
        num_prefetch_queue (int): Number of prefetch queue.
    """

    def __init__(self, generator, num_prefetch_queue):
        threading.Thread.__init__(self)
        self.queue = Queue.Queue(num_prefetch_queue)
        self.generator = generator
        self.daemon = True
        self.start()

    def run(self):
        for item in self.generator:
            self.queue.put(item)
        self.queue.put(None)

    def __next__(self):
        next_item = self.queue.get()
        if next_item is None:
            raise StopIteration
        return next_item

    def __iter__(self):
        return self


class PrefetchDataLoader(DataLoader):
    """Prefetch version of dataloader.

    Reference: https://github.com/IgorSusmelj/pytorch-styleguide/issues/5#

    TODO:
    Need to test on single gpu and ddp (multi-gpu). There is a known issue in
    ddp.

    Args:
        num_prefetch_queue (int): Number of prefetch queue.
        kwargs (dict): Other arguments for dataloader.
    """

    def __init__(self, num_prefetch_queue, **kwargs):
        self.num_prefetch_queue = num_prefetch_queue
        super(PrefetchDataLoader, self).__init__(**kwargs)

    def __iter__(self):
        return PrefetchGenerator(super().__iter__(), self.num_prefetch_queue)


class CPUPrefetcher():
    """CPU prefetcher.

    Args:
        loader: Dataloader.
    """

    def __init__(self, loader):
        self.ori_loader = loader
        self.loader = iter(loader)

    def next(self):
        try:
            return next(self.loader)
        except StopIteration:
            return None

    def reset(self):
        self.loader = iter(self.ori_loader)


class CUDAPrefetcher():
    """CUDA prefetcher.

    Reference: https://github.com/NVIDIA/apex/issues/304#

    It may consume more GPU memory.

    Args:
        loader: Dataloader.
        opt (dict): Options.
    """

    def __init__(self, loader, opt):
        self.ori_loader = loader
        self.loader = iter(loader)
        self.opt = opt
        self.stream = torch.cuda.Stream()
        self.device = torch.device('cuda' if opt['num_gpu'] != 0 else 'cpu')
        self.preload()

    def preload(self):
        try:
            self.batch = next(self.loader)  # self.batch is a dict
        except StopIteration:
            self.batch = None
            return None
        # put tensors to gpu
        with torch.cuda.stream(self.stream):
            for k, v in self.batch.items():
                if torch.is_tensor(v):
                    self.batch[k] = self.batch[k].to(device=self.device, non_blocking=True)

    def next(self):
        torch.cuda.current_stream().wait_stream(self.stream) # 等待下一批处理完毕
        batch = self.batch # 赋值
        self.preload()     # 预先载入下一批
        return batch

    def reset(self):
        self.loader = iter(self.ori_loader)
        self.preload()
4. pytorch 并行和分布式训练
4.1 选择要使用的cuda
当我们的服务器上有多个GPU,我们应该指明我们使用的GPU是哪一块,如果我们不设置的话,tensor.cuda()方法会默认将tensor保存到第一块GPU上,等价于tensor.cuda(0),这将会导致爆出out of memory的错误。我们可以通过以下两种方式继续设置。
- 在文件最开始部分
#设置在文件最开始部分 import os os.environ["CUDA_VISIBLE_DEVICE"] = "0,1,2" # 设置默认的显卡 - 在命令行运行的时候设置
CUDA_VISBLE_DEVICE=0,1 python train.py # 使用0,1两块GPU
4.2 DataParallel使用方法
常规使用方法
   model = UNetSeeInDark()
   model._initialize_weights()

   gpus = [0,1,2,3]
   model = nn.DataParallel(model, device_ids=gpus)
   device = torch.device('cuda:0')
   model = model.to(device)
   # 如果不使用并行,只需要注释掉 model = nn.DataParallel(model, device_ids=gpus)
   # 如果要更改要使用的gpu, 更改gpus,和device中的torch.device('cuda:0')中的number即可
保存和载入
保存可以使用
# 因为model被DP wrap了,得先取出模型
save_model_path = os.path.join(save_model_dir, f'checkpoint_{epoch:05d}.pth')
# torch.save(model.state_dict(), save_model_path)
torch.save(model.module.state_dict(), save_model_path)
然后载入模型:
model_copy.load_state_dict(torch.load(m_path, map_location=device))
如果没有提出model.module进行保存
在载入的时候可能需要如下方式:
checkpoint = torch.load(m_path)
model_copy.load_state_dict({k.replace('module.', ''): v for k, v in checkpoint.items()})
4.3 DistributedDataParallel
首先DataParallel是单进程多线程的方法,并且仅能工作在单机多卡的情况。而DistributedDataParallel方法是多进程,多线程的,并且适用与单机多卡和多机多卡的情况。即使在在单机多卡的情况下DistributedDataParallell也比DataParallel的速度更快。
目前还未深入理解:
深入理解Pytorch中的分布式训练
pytorch分布式训练
Pytorch中多GPU并行计算教程
PyTorch 并行训练极简 Demo
5.wangdb 入门
直接参看:https://docs.wandb.ai/quickstart
最详细的介绍和入门
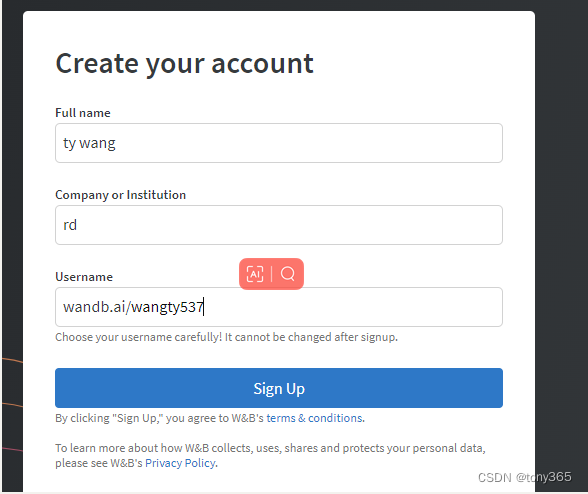
5.1 sign up(https://wandb.ai/site)
5.2 安装和login
pip install wandb
wandb.login() 然后复制API key
5.3 demo
import wandb
import random

# start a new wandb run to track this script
wandb.init(
    # set the wandb project where this run will be logged
    project="my-awesome-project",

    # track hyperparameters and run metadata
    config={
        "learning_rate": 0.02,
        "architecture": "CNN",
        "dataset": "CIFAR-100",
        "epochs": 10,
    }
)

# simulate training
epochs = 10
offset = random.random() / 5
for epoch in range(2, epochs):
    acc = 1 - 2 ** -epoch - random.random() / epoch - offset
    loss = 2 ** -epoch + random.random() / epoch + offset

    # log metrics to wandb
    wandb.log({"acc": acc, "loss": loss})

# [optional] finish the wandb run, necessary in notebooks5b1bb8a27da51a7375b4b52c24a82fe1807877f1
wandb.finish()
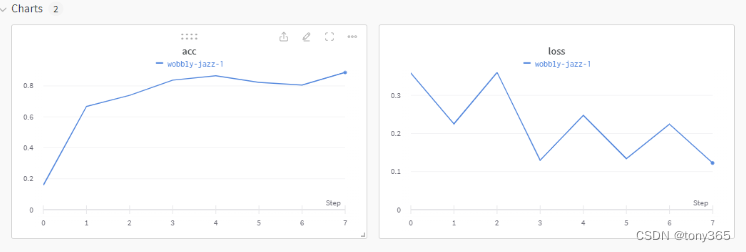
运行之后:
wandb: Currently logged in as: wangty537. Use `wandb login --relogin` to force relogin
wandb: Tracking run with wandb version 0.15.10
wandb: Run data is saved locally in D:\code\denoise\noise-synthesis-main\wandb\run-20230921_103737-j9ezjcqo
wandb: Run `wandb offline` to turn off syncing.
wandb: Syncing run wobbly-jazz-1
wandb:  View project at https://wandb.ai/wangty537/my-awesome-project
wandb:  View run at https://wandb.ai/wangty537/my-awesome-project/runs/j9ezjcqo
wandb: Waiting for W&B process to finish... (success).
wandb:
wandb: Run history:
wandb:  acc ▁▆▇██▇▇█
wandb: loss █▄█▁▅▁▄▁
wandb:
wandb: Run summary:
wandb:  acc 0.88762
wandb: loss 0.12236
wandb:
wandb:  View run wobbly-jazz-1 at: https://wandb.ai/wangty537/my-awesome-project/runs/j9ezjcqo
wandb: Synced 5 W&B file(s), 0 media file(s), 0 artifact file(s) and 0 other file(s)
wandb: Find logs at: .\wandb\run-20230921_103737-j9ezjcqo\logs
然后可以在 https://wandb.ai/home 查看相关信息
https://docs.wandb.ai/quickstart 还介绍了更多高阶应用。
5.model and train
5.1 create model
利用注册机制
# create model
model = build_model(opt)
def build_model(opt):
    """Build model from options.

    Args:
        opt (dict): Configuration. It must contain:
            model_type (str): Model type.
    """
    opt = deepcopy(opt)
    model = MODEL_REGISTRY.get(opt['model_type'])(opt)
    logger = get_root_logger()
    logger.info(f'Model [{model.__class__.__name__}] is created.')
    return model
5.2 opt中设置
model_type: SRModel
scale: 2
5.2 SRModel 类
BaseModel是基类
@MODEL_REGISTRY.register()
class SRModel(BaseModel):
    xxx