目录
1,YOLOv5算法原理介绍
2,代码实现
3,结果展示
1,YOLOv5算法原理介绍
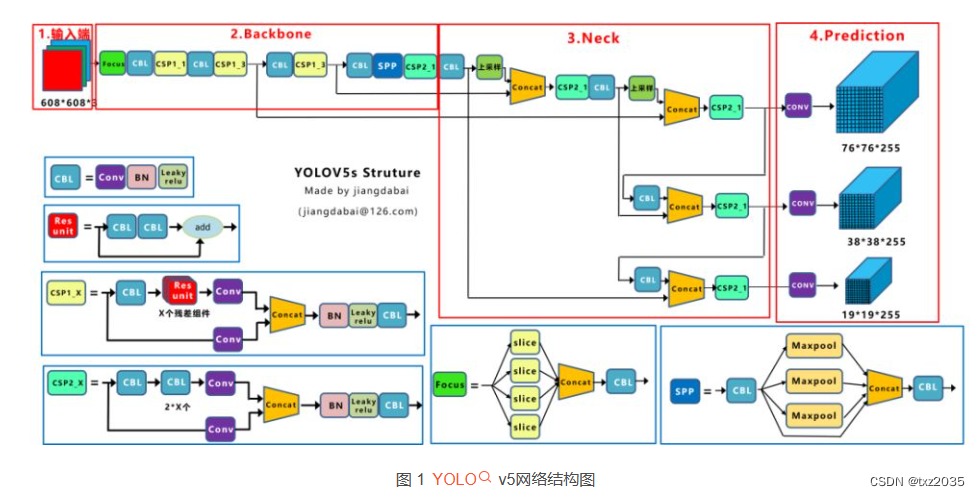
YOLOv5是目前应用广泛的目标检测算法之一,其主要结构分为两个部分:骨干网络和检测头。
骨干网络采用的是CSPDarknet53,这是一种基于Darknet框架的改进版卷积神经网络。CSPDarknet53通过使用残差结构和跨层连接来提高网络的表达能力,并且采用了空洞空间金字塔池化(ASPP)来实现多尺度的信息提取。这样设计的骨干网络具有较强的特征提取能力,可以有效地提取出图像中的目标信息。
检测头是YOLOv5的另一个关键组成部分,主要用于从骨干网络特征图中提取目标检测信息。它由三个子模块组成:SPP、PAN和YOLOv5输出层。
-
SPP模块:空洞空间金字塔池化模块,用于对特征图进行多尺度的池化和下采样操作,从而实现对不同大小的目标进行检测。
-
PAN模块:特征金字塔自上而下的路径,用于将不同层次的特征图融合在一起,并进行上采样操作,以便将低分辨率的特征图与高分辨率的特征图进行融合。
-
YOLOv5输出层:用于在特征图上进行目标检测,输出目标的类别、边界框位置和置信度等信息。其中,YOLOv5输出层采用特定的损失函数(GIoU和Focal Loss)来优化目标检测的精度和鲁棒性。
总体来说,YOLOv5的主要作用是实现对图像中的目标进行快速、准确的检测。与传统的目标检测算法相比,YOLOv5具有以下优点:
-
高速:YOLOv5采用了高效的网络结构和检测头,可以实现高速的目标检测。
-
精度:YOLOv5使用特定的损失函数和多尺度特征提取等技术,可以实现高精度的目标检测。
-
通用性:YOLOv5能够在不同的场景下进行目标检测,具有较强的通用性和适应性。
-
易用性:YOLOv5可以通过预训练模型和微调等方法进行快速部署和使用,具有良好的易用性和可扩展性。
总之,YOLOv5是一种优秀的目标检测算法,具有较高的检测速度和精度,适用于各种不同的计算机视觉任务。
2,代码实现
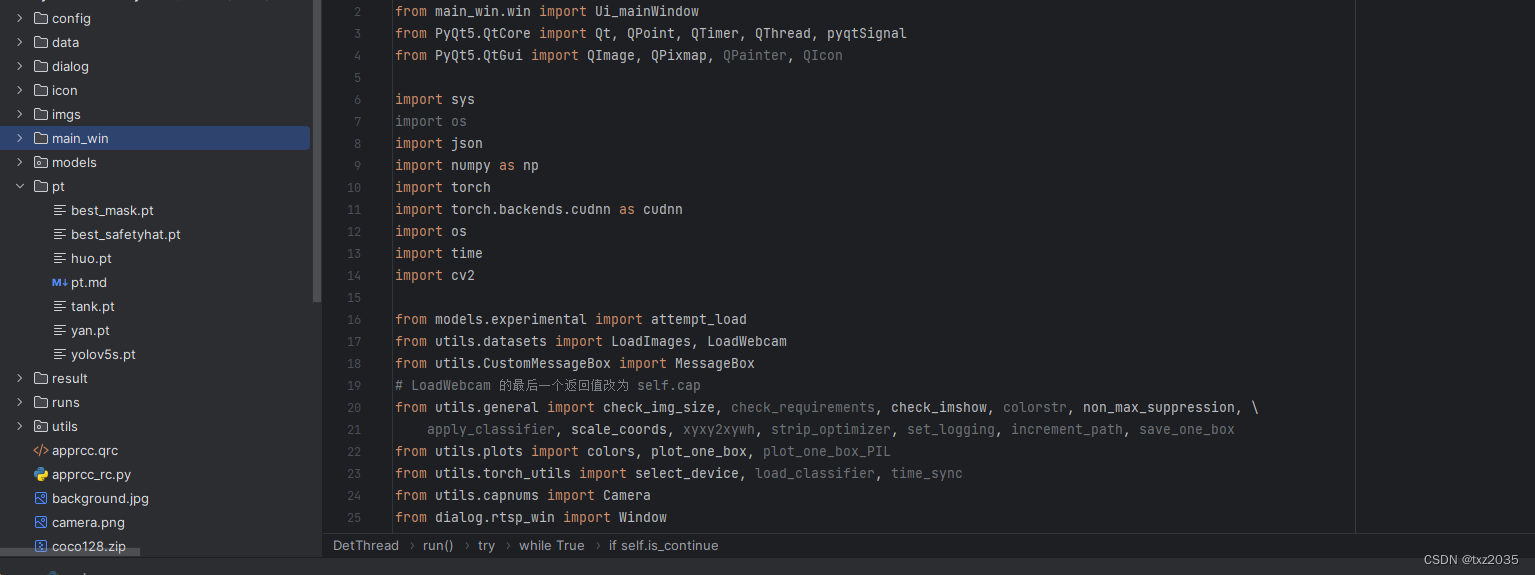
from PyQt5.QtWidgets import QApplication, QMainWindow, QFileDialog, QMenu, QAction
from main_win.win import Ui_mainWindow
from PyQt5.QtCore import Qt, QPoint, QTimer, QThread, pyqtSignal
from PyQt5.QtGui import QImage, QPixmap, QPainter, QIcon

import sys
import os
import json
import numpy as np
import torch
import torch.backends.cudnn as cudnn
import os
import time
import cv2

from models.experimental import attempt_load
from utils.datasets import LoadImages, LoadWebcam
from utils.CustomMessageBox import MessageBox
# LoadWebcam 的最后一个返回值改为 self.cap
from utils.general import check_img_size, check_requirements, check_imshow, colorstr, non_max_suppression, \
    apply_classifier, scale_coords, xyxy2xywh, strip_optimizer, set_logging, increment_path, save_one_box
from utils.plots import colors, plot_one_box, plot_one_box_PIL
from utils.torch_utils import select_device, load_classifier, time_sync
from utils.capnums import Camera
from dialog.rtsp_win import Window


class DetThread(QThread):
    send_img = pyqtSignal(np.ndarray)
    send_raw = pyqtSignal(np.ndarray)
    send_statistic = pyqtSignal(dict)
    # 发送信号:正在检测/暂停/停止/检测结束/错误报告
    send_msg = pyqtSignal(str)
    send_percent = pyqtSignal(int)
    send_fps = pyqtSignal(str)

    def __init__(self):
        super(DetThread, self).__init__()
        self.weights = './yolov5s.pt'           # 设置权重
        self.current_weight = './yolov5s.pt'    # 当前权重
        self.source = '0'                       # 视频源
        self.conf_thres = 0.25                  # 置信度
        self.iou_thres = 0.45                   # iou
        self.jump_out = False                   # 跳出循环
        self.is_continue = True                 # 继续/暂停
        self.percent_length = 1000              # 进度条
        self.rate_check = True                  # 是否启用延时
        self.rate = 100                         # 延时HZ
        self.save_fold = './result'             # 保存文件夹

    @torch.no_grad()
    def run(self,
            imgsz=640,  # inference size (pixels)
            max_det=1000,  # maximum detections per image
            device='',  # cuda device, i.e. 0 or 0,1,2,3 or cpu
            view_img=True,  # show results
            save_txt=False,  # save results to *.txt
            save_conf=False,  # save confidences in --save-txt labels
            save_crop=False,  # save cropped prediction boxes
            nosave=False,  # do not save images/videos
            classes=None,  # filter by class: --class 0, or --class 0 2 3
            agnostic_nms=False,  # class-agnostic NMS
            augment=False,  # augmented inference
            visualize=False,  # visualize features
            update=False,  # update all models
            project='runs/detect',  # save results to project/name
            name='exp',  # save results to project/name
            exist_ok=False,  # existing project/name ok, do not increment
            line_thickness=3,  # bounding box thickness (pixels)
            hide_labels=False,  # hide labels
            hide_conf=False,  # hide confidences
            half=False,  # use FP16 half-precision inference
            ):

        # Initialize
        try:
            device = select_device(device)
            half &= device.type != 'cpu'  # half precision only supported on CUDA

            # Load model
            model = attempt_load(self.weights, map_location=device)  # load FP32 model
            num_params = 0
            for param in model.parameters():
                num_params += param.numel()
            stride = int(model.stride.max())  # model stride
            imgsz = check_img_size(imgsz, s=stride)  # check image size
            names = model.module.names if hasattr(model, 'module') else model.names  # get class names
            if half:
                model.half()  # to FP16

            # Dataloader
            if self.source.isnumeric() or self.source.lower().startswith(('rtsp://', 'rtmp://', 'http://', 'https://')):
                view_img = check_imshow()
                cudnn.benchmark = True  # set True to speed up constant image size inference
                dataset = LoadWebcam(self.source, img_size=imgsz, stride=stride)
                # bs = len(dataset)  # batch_size
            else:
                dataset = LoadImages(self.source, img_size=imgsz, stride=stride)

            # Run inference
            if device.type != 'cpu':
                model(torch.zeros(1, 3, imgsz, imgsz).to(device).type_as(next(model.parameters())))  # run once
            count = 0
            # 跳帧检测
            jump_count = 0
            start_time = time.time()
            dataset = iter(dataset)

            while True:
                # 手动停止
                if self.jump_out:
                    self.vid_cap.release()
                    self.send_percent.emit(0)
                    self.send_msg.emit('停止')
                    if hasattr(self, 'out'):
                        self.out.release()
                    break
3,结果展示
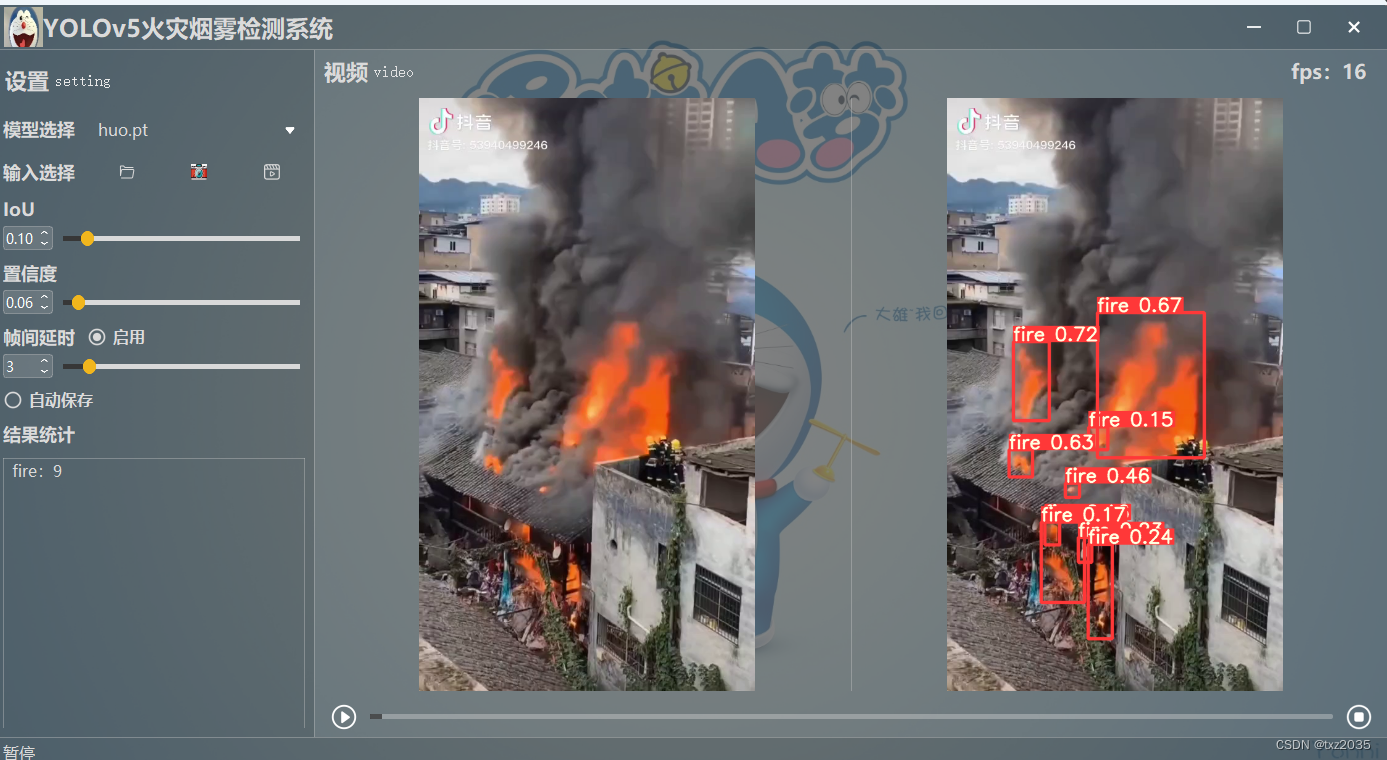
具体效果可以参照b站:YOLOv5火灾检测系统_哔哩哔哩_bilibili


![2023年中国地面安全门产业链、市场规模及行业需求前景分析[图]](https://img-blog.csdnimg.cn/img_convert/ce21d68268150b01159a01b4cd4dd36d.png)


