1.引言
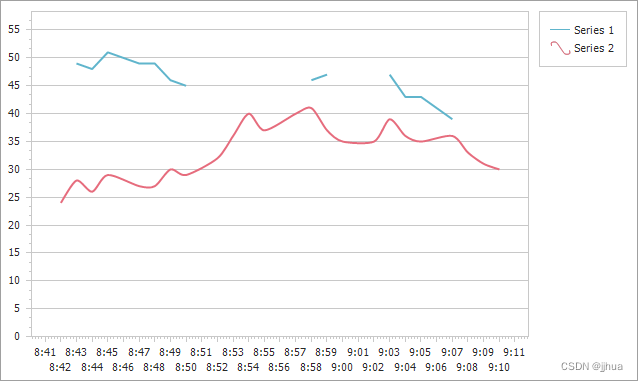
在做数字大屏时,图表能跟着浏览器的尺寸自动变化,本文采用Vue3前端框架,采用TypeScript语言,封装了一个大屏自适应组件,将需要显示的图表放入组件的插槽中,就能实现自适应屏幕大小的效果。
2.实际效果

3.组件代码
/** * @ScaleScreen.vue * @author: zgr * @createTime: 2023/9/22 */

<template>
  <div class="screen-wrapper" ref="screenWrapper" :style="wrapperStyle">
    <slot></slot>
  </div>
</template>

<script lang="ts" setup>
import { CSSProperties, PropType } from 'vue'
import { useFullscreen } from '@vueuse/core'
const { toggle } = useFullscreen()

defineOptions({ name: 'ScaleScreen' })
interface IState {
  originalWidth: string | number
  originalHeight: string | number
  width?: string | number
  height?: string | number
  observer: null | MutationObserver
}
type IAutoScale =
  | boolean
  | {
      x?: boolean
      y?: boolean
    }

const props = defineProps({
  width: {
    type: [String, Number] as PropType<string | number>,
    default: 1920
  },
  height: {
    type: [String, Number] as PropType<string | number>,
    default: 1080
  },
  fullScreen: {
    type: Boolean as PropType<boolean>,
    default: false
  },
  autoScale: {
    type: [Object, Boolean] as PropType<IAutoScale>,
    default: true
  },
  delay: {
    type: Number as PropType<number>,
    default: 500
  },
  boxStyle: {
    type: Object as PropType<CSSProperties>,
    default: () => ({})
  },
  wrapperStyle: {
    type: Object as PropType<CSSProperties>,
    default: () => ({})
  },
  bodyOverflowHidden: {
    type: Boolean as PropType<boolean>,
    default: true
  }
})

const state = reactive<IState>({
  currentWidth: 0,
  currentHeight: 0,
  originalWidth: 0,
  originalHeight: 0,
  observer: null
})
//ref
const screenWrapper = ref<HTMLElement>()

//全屏函数
const toggleFullscreen = () => {
  toggle()
}
//按键F11全屏退出全屏
const KeyDown = (event: KeyboardEvent) => {
  if (event.code == 'F9') {
    toggleFullscreen()
  }
}

const listenKeyDown = () => {
  window.addEventListener('keydown', KeyDown, true) //监听按键事件
}
const removeListenKeyDown = () => {
  window.removeEventListener('keydown', KeyDown, false) //监听按键事件
}

let bodyOverflowHiddenStr: string
/**
 * 防抖函数
 * @param {Function} fn
 * @param {number} delay
 * @returns {() => void}
 */
const debounce = (fn: Function, delay: number) => {
  let timer: NodeJS.Timeout
  return function (...args: any[]): void {
    if (timer) {
      clearTimeout(timer)
    }
    timer = setTimeout(
      () => {
        typeof fn === 'function' && fn.apply(null, args)
        clearTimeout(timer)
      },
      delay > 0 ? delay : 100
    )
  }
}
const initBodyStyle = () => {
  if (props.bodyOverflowHidden) {
    bodyOverflowHiddenStr = document.body.style.overflow
    document.body.style.overflow = 'hidden'
  }
}
const initSize = () => {
  return new Promise((resolve) => {
    // console.log("初始化样式");
    nextTick(() => {
      // region 获取大屏真实尺寸
      if (props.width && props.height) {
        state.currentWidth = props.width
        state.currentHeight = props.height
      } else {
        state.currentWidth = screenWrapper.value?.clientWidth
        state.currentHeight = screenWrapper.value?.clientHeight
      }
      // endregion
      // region 获取画布尺寸
      if (!state.originalHeight || !state.originalWidth) {
        state.originalWidth = window.screen.width
        state.originalHeight = window.screen.height
      }
      // endregion
      resolve()
    })
  })
}
const updateSize = () => {
  if (state.width && state.height) {
    screenWrapper.value!.style.width = `${state.width}px`
    screenWrapper.value!.style.height = `${state.height}px`
  } else {
    screenWrapper.value!.style.width = `${state.originalWidth}px`
    screenWrapper.value!.style.height = `${state.originalHeight}px`
  }
}
const autoScale = (scale: number) => {
  if (!props.autoScale) return
  const domWidth = screenWrapper.value!.clientWidth
  const domHeight = screenWrapper.value!.clientHeight
  const currentWidth = document.body.clientWidth
  const currentHeight = document.body.clientHeight
  screenWrapper.value!.style.transform = `scale(${scale},${scale})`
  let mx = Math.max((currentWidth - domWidth * scale) / 2, 0)
  let my = Math.max((currentHeight - domHeight * scale) / 2, 0)
  if (typeof props.autoScale === 'object') {
    !props.autoScale.x && (mx = 0)
    !props.autoScale.y && (my = 0)
  }
  screenWrapper.value!.style.margin = `${my}px ${mx}px`
}
const updateScale = () => {
  // 获取真实视口尺寸
  const currentWidth = document.body.clientWidth
  const currentHeight = document.body.clientHeight
  // 获取大屏最终的宽高
  const realWidth = state.width || state.originalWidth
  const realHeight = state.height || state.originalHeight
  // 计算缩放比例
  const widthScale = currentWidth / +realWidth
  const heightScale = currentHeight / +realHeight
  // 若要铺满全屏,则按照各自比例缩放
  if (props.fullScreen) {
    screenWrapper.value!.style.transform = `scale(${widthScale},${heightScale})`
    return false
  }
  // 按照宽高最小比例进行缩放
  const scale = Math.min(widthScale, heightScale)
  autoScale(scale)
}

const onResize = debounce(async () => {
  await initSize()
  updateSize()
  updateScale()
}, props.delay)

const initMutationObserver = () => {
  const observer = (state.observer = new MutationObserver(() => {
    onResize()
  }))
  observer.observe(screenWrapper.value!, {
    attributes: true,
    attributeFilter: ['style'],
    attributeOldValue: true
  })
}
//设置数字大屏背景颜色为黑色
const setBgColor = () => {
  document.getElementsByTagName('body')[0].setAttribute('style', 'background: black')
}

onMounted(() => {
  setBgColor()
  initBodyStyle()
  nextTick(async () => {
    await initSize()
    updateSize()
    updateScale()
    window.addEventListener('resize', onResize)
    initMutationObserver()
  })
  listenKeyDown()
})

onBeforeUnmount(() => {
  window.removeEventListener('resize', onResize)
  removeListenKeyDown()
  state.observer?.disconnect()
  if (props.bodyOverflowHidden) {
    document.body.style.overflow = bodyOverflowHiddenStr
  }
})
</script>

<style scoped lang="scss">
.screen-wrapper {
  transition-property: all;
  transition-timing-function: cubic-bezier(0.4, 0, 0.2, 1);
  transition-duration: 500ms;
  position: relative;
  overflow: hidden;
  z-index: 100;
  transform-origin: left top;
}
</style>
4.感谢
1.GitHub - Alfred-Skyblue/v-scale-screen: Vue large screen adaptive component vue大屏自适应组件
2.koi-screen-plus: vue3版本数据大屏模板
3.DataV - Vue3 | DataV - Vue3

