MVC实战项目 Web 三大组件实现 公司管理系统
- 需求:
- 项目实战
- 基于会话跟踪技术实现登录功能
- 基于Filter过滤器实现登录验证功能
- 基于Listener监听器监听ServletCntext对象的创建和销毁
- 会话跟踪技术
- cookie
- session
- 对比
- Filter过滤器入门
- 入门Demo
- Filter执行流程
- Filter拦截路径配置
- Listener监听器入门
Redis章节复习已经过去,新的章节JavaWeb开始了,这个章节中将会回顾JavaWeb实战项目 公司管理代码
这里的主要会介绍:
- 回顾JavaWeb三大组件
- javaWeb项目搭建
- web的会话跟踪技术
公司管理代码会同步在我的gitee中去,觉得不错的同学记得一键三连求关注,感谢:
仓储管理系统: JavaWebProject
会话跟踪技术: CookieSessionProject
需求:
公司管理系统是一个MVC架构的JavaWeb项目,有基本的登录、注册、查阅修改公司信息等基本功能;
在上一节已经搭建好基本框架,接下来我们要实现
- 基于会话跟踪技术保存登录信息
- 继承HttpServlet来实现http请求与响应
- 通过Filter过滤器实现资源限制
- 通过Listener监听器对ServletContext对象进行监听
项目实战
-
创建db表
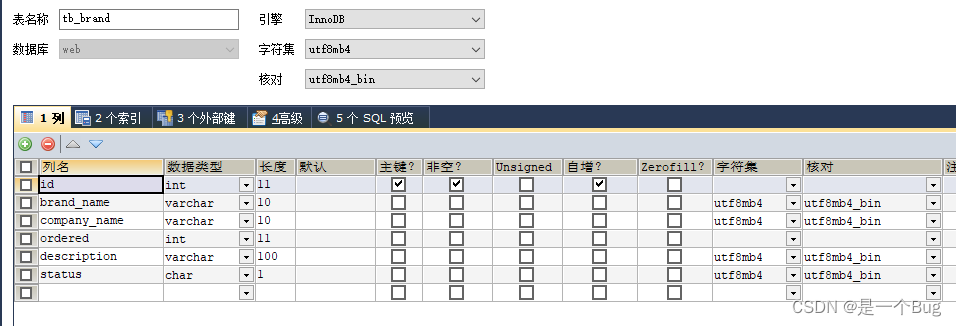

这里注意驼峰命名,要和Source中的代码字段一一对应; -
配置依赖
    <dependencies>
        <!-- mybatis -->
        <dependency>
            <groupId>org.mybatis</groupId>
            <artifactId>mybatis</artifactId>
            <version>3.5.5</version>
        </dependency>

        <!--mysql-->
        <dependency>
            <groupId>mysql</groupId>
            <artifactId>mysql-connector-java</artifactId>
            <version>5.1.34</version>
        </dependency>

        <!--servlet-->
        <dependency>
            <groupId>javax.servlet</groupId>
            <artifactId>javax.servlet-api</artifactId>
            <version>3.1.0</version>
            <scope>provided</scope>
        </dependency>

        <!--jsp-->

        <dependency>
            <groupId>javax.servlet.jsp</groupId>
            <artifactId>jsp-api</artifactId>
            <version>2.2</version>
            <scope>provided</scope>
        </dependency>

        <!--jstl-->
        <dependency>
            <groupId>jstl</groupId>
            <artifactId>jstl</artifactId>
            <version>1.2</version>
        </dependency>
        <dependency>
            <groupId>taglibs</groupId>
            <artifactId>standard</artifactId>
            <version>1.1.2</version>
        </dependency>


    </dependencies>

    <build>
        <plugins>
            <plugin>
                <groupId>org.apache.tomcat.maven</groupId>
                <artifactId>tomcat7-maven-plugin</artifactId>
                <version>2.2</version>
            </plugin>
        </plugins>
    </build>
- 配置Pojo类、Mapper类
public class Brand {
    // id 主键
    private Integer id;
    // 品牌名称
    private String brandName;
    // 企业名称
    private String companyName;
    // 排序字段
    private Integer ordered;
    // 描述信息
    private String description;
    // 状态:0:禁用  1:启用
    private Integer status;
public interface BrandMapper {

    /**
     * 查询所有
     * @return
     */
    @Select("select * from tb_brand")
    @ResultMap("brandResultMap")
    List<Brand> selectAll();

    @Insert("insert into tb_brand values(null,#{brandName},#{companyName},#{ordered},#{description},#{status})")
    void add(Brand brand);

    /**
     * 根据id查询
     * @param id
     * @return
     */
    @Select("select * from tb_brand where id = #{id}")
    @ResultMap("brandResultMap")
    Brand selectById(int id);

    /**
     * 修改
     * @param brand
     */
    @Update("update tb_brand set brand_name = #{brandName},company_name = #{companyName},ordered = #{ordered},description = #{description},status = #{status} where id = #{id}")
    void update(Brand brand);

}
Mapper这边需要对应的命名空间来获取mybatis实体类,其相关的返回类型,也需要在xml中声明
<?xml version="1.0" encoding="UTF-8" ?>
<!DOCTYPE mapper
        PUBLIC "-//mybatis.org//DTD Mapper 3.0//EN"
        "http://mybatis.org/dtd/mybatis-3-mapper.dtd">
<mapper namespace="com.itheima.mapper.BrandMapper">


    <resultMap id="brandResultMap" type="brand">
        <result column="brand_name" property="brandName"></result>
        <result column="company_name" property="companyName"></result>
    </resultMap>
</mapper>
想要实现数据功能,还需要创建对应的工具类来获取SqlSessionFactory
public class SqlSessionFactoryUtils {

    private static SqlSessionFactory sqlSessionFactory;

    static {
        //静态代码块会随着类的加载而自动执行,且只执行一次

        try {
            String resource = "mybatis-config.xml";
            InputStream inputStream = Resources.getResourceAsStream(resource);
            sqlSessionFactory = new SqlSessionFactoryBuilder().build(inputStream);
        } catch (IOException e) {
            e.printStackTrace();
        }
    }


    public static SqlSessionFactory getSqlSessionFactory(){
        return sqlSessionFactory;
    }
}
而工具类来获取SqlSessionFactory要相应的xml配置
<?xml version="1.0" encoding="UTF-8" ?>
<!DOCTYPE configuration
        PUBLIC "-//mybatis.org//DTD Config 3.0//EN"
        "http://mybatis.org/dtd/mybatis-3-config.dtd">
<configuration>
    <!--起别名-->
    <typeAliases>
        <package name="com.itheima.pojo"/>
    </typeAliases>

    <environments default="development">
        <environment id="development">
            <transactionManager type="JDBC"/>
            <dataSource type="POOLED">
                <property name="driver" value="com.mysql.jdbc.Driver"/>
                <property name="url" value="jdbc:mysql://localhost:3306/web?useSSL=false"/>
                <property name="username" value="root"/>
                <property name="password" value="root"/>
            </dataSource>
        </environment>
    </environments>
    <mappers>
        <!--扫描mapper-->
        <package name="com.itheima.mapper"/>
    </mappers>
</configuration>
- 配置对应的Service层
public class BrandService {
    SqlSessionFactory factory = SqlSessionFactoryUtils.getSqlSessionFactory();

    public static void main(String[] args) {

        SqlSessionFactory factory = SqlSessionFactoryUtils.getSqlSessionFactory();
        BrandService service = new BrandService();
        System.out.println(service.selectAll());
    }
    /**
     * 查询所有
     * @return
     */
    public List<Brand> selectAll(){
        //调用BrandMapper.selectAll()

        //2. 获取SqlSession
        SqlSession sqlSession = factory.openSession();
        //3. 获取BrandMapper
        BrandMapper mapper = sqlSession.getMapper(BrandMapper.class);

        //4. 调用方法
        List<Brand> brands = mapper.selectAll();

        sqlSession.close();

        return brands;
    }

    /**
     * 添加
     * @param brand
     */
    public void add(Brand brand){

        //2. 获取SqlSession
        SqlSession sqlSession = factory.openSession();
        //3. 获取BrandMapper
        BrandMapper mapper = sqlSession.getMapper(BrandMapper.class);

        //4. 调用方法
        mapper.add(brand);

        //提交事务
        sqlSession.commit();
        //释放资源
        sqlSession.close();

    }


    /**
     * 根据id查询
     * @return
     */
    public Brand selectById(int id){
        //调用BrandMapper.selectAll()

        //2. 获取SqlSession
        SqlSession sqlSession = factory.openSession();
        //3. 获取BrandMapper
        BrandMapper mapper = sqlSession.getMapper(BrandMapper.class);

        //4. 调用方法
        Brand brand = mapper.selectById(id);

        sqlSession.close();

        return brand;
    }


    /**
     * 修改
     * @param brand
     */
    public void update(Brand brand){

        //2. 获取SqlSession
        SqlSession sqlSession = factory.openSession();
        //3. 获取BrandMapper
        BrandMapper mapper = sqlSession.getMapper(BrandMapper.class);

        //4. 调用方法
        mapper.update(brand);

        //提交事务
        sqlSession.commit();
        //释放资源
        sqlSession.close();

    }
}
- Web层实现
User和Brand是相同的实现方式;
这里我们开始第一个功能
基于会话跟踪技术实现登录功能
@WebServlet("/loginServlet")
public class LoginServlet extends HttpServlet {
    private UserService service = new UserService();

    @Override
    protected void doGet(HttpServletRequest request, HttpServletResponse response) throws ServletException, IOException {
        //1. 获取用户名和密码
        String username = request.getParameter("username");
        String password = request.getParameter("password");

        //获取复选框数据
        String remember = request.getParameter("remember");

        //2. 调用service查询
        User user = service.login(username, password);

        //3. 判断
        if(user != null){
            //登录成功,跳转到查询所有的BrandServlet

            //判断用户是否勾选记住我
            if("1".equals(remember)){
                //勾选了,发送Cookie

                //1. 创建Cookie对象
                Cookie c_username = new Cookie("username",username);
                Cookie c_password = new Cookie("password",password);
                // 设置Cookie的存活时间
                c_username.setMaxAge( 60 * 60 * 24 * 7);
                c_password.setMaxAge( 60 * 60 * 24 * 7);
                //2. 发送
                response.addCookie(c_username);
                response.addCookie(c_password);
            }

            //将登陆成功后的user对象,存储到session
            HttpSession session = request.getSession();
            session.setAttribute("user",user);
			//获得虚拟路径
            String contextPath = request.getContextPath();
            response.sendRedirect(contextPath+"/selectAllServlet");
        }else {
            // 登录失败,

            // 存储错误信息到request
            request.setAttribute("login_msg","用户名或密码错误");

            // 跳转到login.jsp
            request.getRequestDispatcher("/login.jsp").forward(request,response);

        }
    }

    @Override
    protected void doPost(HttpServletRequest request, HttpServletResponse response) throws ServletException, IOException {
        this.doGet(request, response);
    }
}
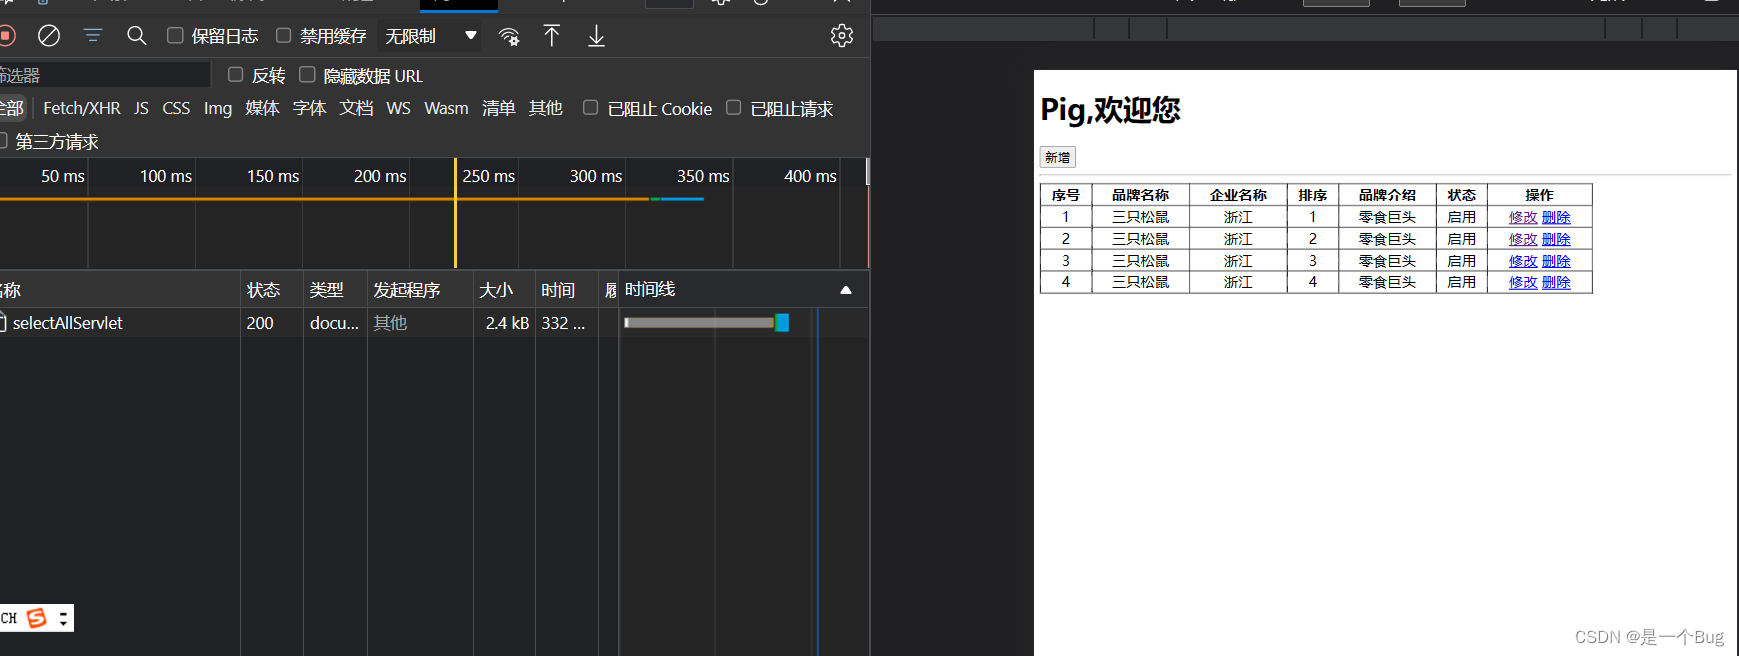
session是基于cookie来创建的 浏览器可以在请求头中存放cookie信息,这些传到服务器中会被解析,响应的session被创建、或被找到,来获取相应的信息;
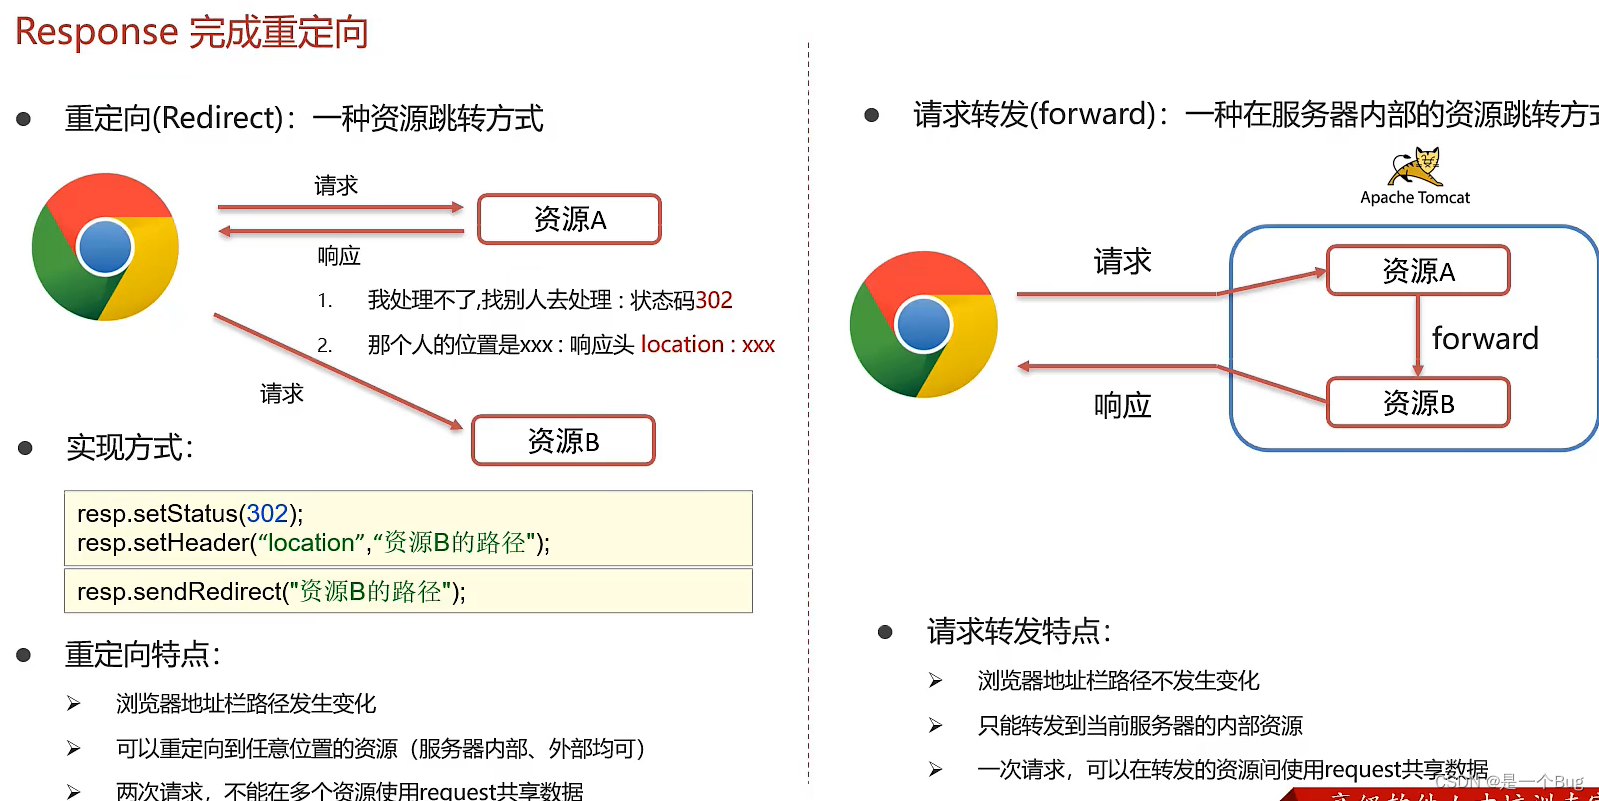
new Cookie创建cookie,setMaxAge设置存活时间,addCookie将其放入响应,存放到浏览器中request.getSession();获取服务器的session对象,session.setAttribute在session中存放键值对信息request.getRequestDispatcher("/login.jsp").forward(request,response);请求转发,
基于Filter过滤器实现登录验证功能
Servlet是为了处理请求存在的,而过滤器可以拦截请求
- 基于会话跟踪技术,从Session中获取数据,判断是否需要返回
chain.doFilter(request, response);继续处理后续请求
这里有关于chain的介绍
public interface FilterChain {
	/**
	* 导致调用链中的下一个筛选器,或者调用筛选器是否是最后一个筛选器
	* 在链中,导致调用链末尾的资源。
	*
	* @param请求沿链传递请求。
	* @param响应响应沿链传递。
	*/
    public void doFilter ( ServletRequest request, ServletResponse response ) throws IOException, ServletException;

}
/**
 * 登录验证的过滤器
 */

@WebFilter("/*")
public class LoginFilter implements Filter {
    @Override
    public void doFilter(ServletRequest request, ServletResponse response, FilterChain chain) throws ServletException, IOException {
        HttpServletRequest req = (HttpServletRequest) request;
        //判断访问资源路径是否和登录注册相关
        String[] urls = {"/login.jsp","/imgs/","/css/","/loginServlet","/register.jsp","/registerServlet","/checkCodeServlet"};
        // 获取当前访问的资源路径
        String url = req.getRequestURL().toString();

        //循环判断
        for (String u : urls) {
            if(url.contains(u)){
                //找到了
                //放行
                chain.doFilter(request, response);
                //break;
                return;
            }
        }
        //1. 判断session中是否有user
        HttpSession session = req.getSession();
        Object user = session.getAttribute("user");

        //2. 判断user是否为null
        if(user != null){
            // 登录过了
            //放行
            chain.doFilter(request, response);
        }else {
            // 没有登陆,存储提示信息,跳转到登录页面

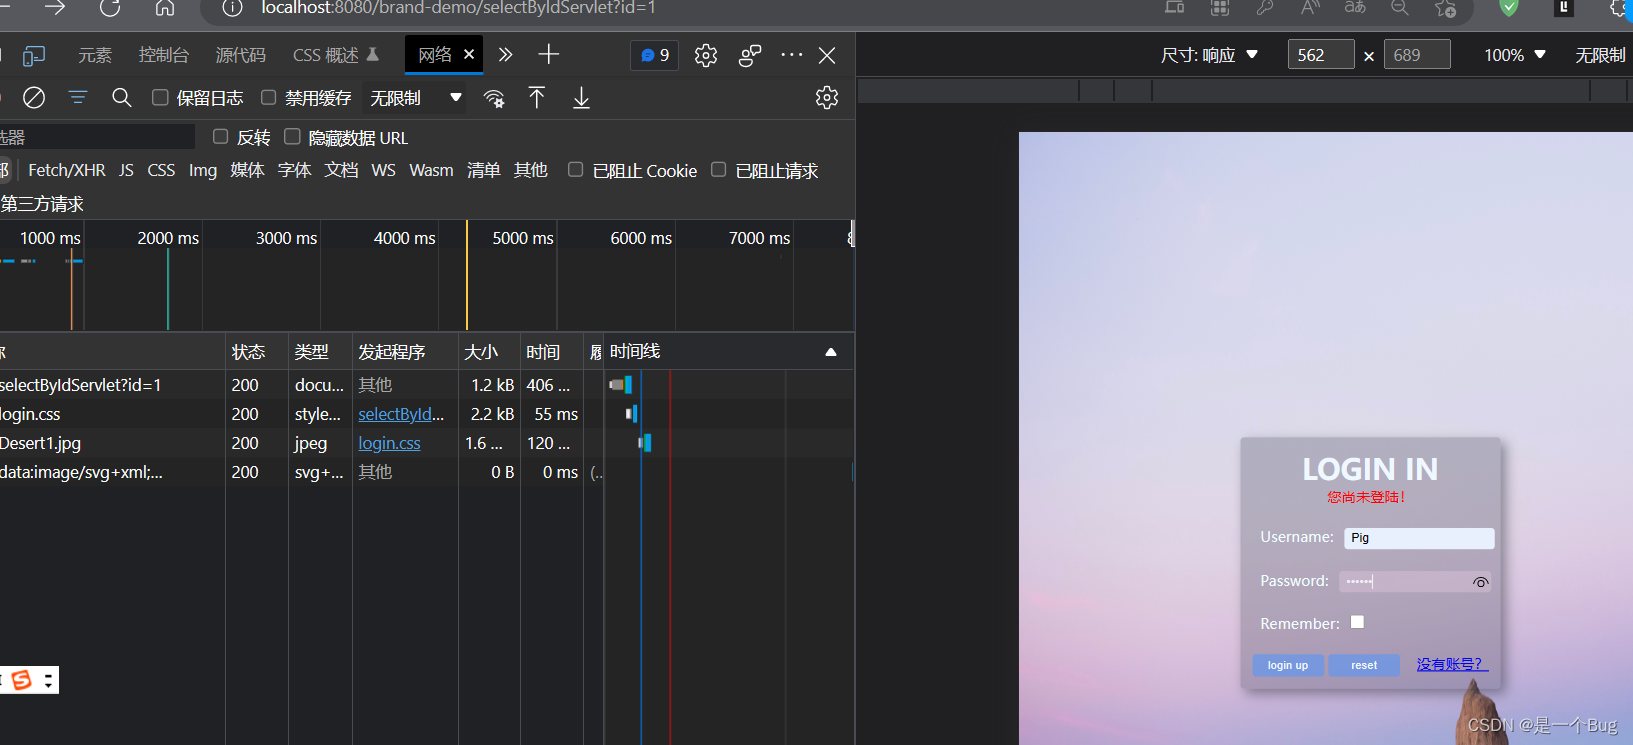
            req.setAttribute("login_msg","您尚未登陆!");
            req.getRequestDispatcher("/login.jsp").forward(req,response);
        }


    }


    public void init(FilterConfig config) throws ServletException {
    }

    public void destroy() {
    }


}
基于Listener监听器监听ServletCntext对象的创建和销毁
Listener就是监听器,我们在JavaSE开发或者Android开发时,经常会给按钮加监听器,当点击这个按钮就会触发监听事件,调用onClick方法,本质是方法回调。在JavaWeb的Listener也是这么个原理,但是它监听的内容不同,它可以监听Application、Session、Request对象,当这些对象发生变化就会调用对应的监听方法。
@WebListener
public class ContextLoaderListener implements ServletContextListener {
    @Override
    public void contextInitialized(ServletContextEvent sce) {
        //加载资源
        System.out.println("ContextLoaderListener...");
    }

    @Override
    public void contextDestroyed(ServletContextEvent sce) {
        //释放资源
    }
}

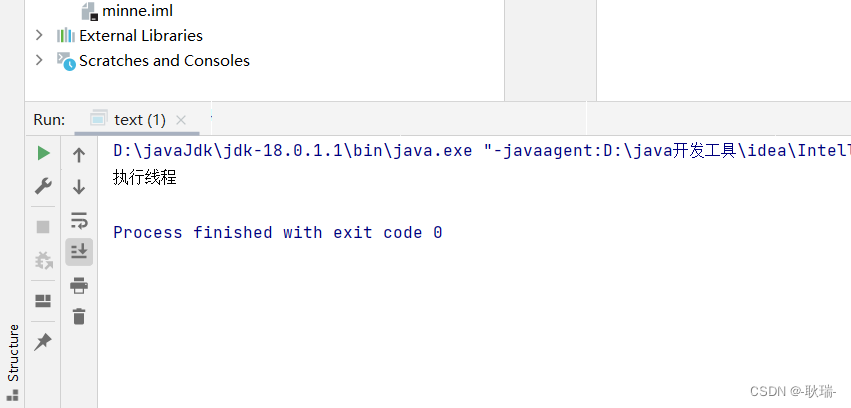
//打印输出
ContextLoaderListener...
[2022-12-19 11:21:30,183] Artifact brand-demo:war exploded: Artifact is deployed successfully
[2022-12-19 11:21:30,183] Artifact brand-demo:war exploded: Deploy took 1,888 milliseconds
会话跟踪技术
为什么要有会话跟踪技术?
- HTTP协议是无状态的,靠HTTP协议是无法实现会话跟踪
- 想要实现会话跟踪,就需要用到Cookie和Session
**会话:**用户打开浏览器,访问web服务器的资源,会话建立,直到有一方断开连接,会话结束。在一次会话中可以包含多次请求和响应。
- 从浏览器发出请求到服务端响应数据给前端之后,一次会话(在浏览器和服务器之间)就被建立了
- 会话被建立后,如果浏览器或服务端都没有被关闭,则会话就会持续建立着
- 浏览器和服务器就可以继续使用该会话进行请求发送和响应,上述的整个过程就被称之为会话。
用实际场景来理解下会话,比如在我们访问京东的时候,当打开浏览器进入京东首页后,浏览器和京东的服务器之间就建立了一次会话,后面的搜索商品,查看商品的详情,加入购物车等都是在这一次会话中完成。
**会话跟踪:**一种维护浏览器状态的方法,服务器需要识别多次请求是否来自于同一浏览器,以便在同一次会话的多次请求间共享数据。
- 服务器会收到多个请求,这多个请求可能来自多个浏览器,如上图中的6个请求来自3个浏览器
- 服务器需要用来识别请求是否来自同一个浏览器
- 服务器用来识别浏览器的过程,这个过程就是会话跟踪
- 服务器识别浏览器后就可以在同一个会话中多次请求之间来共享数据
cookie
什么是Cookie?
Cookie:客户端会话技术,将数据保存到客户端,以后每次请求都携带Cookie数据进行访问。
Cookie如何来使用?
对于Cookie的使用,我们更关注的应该是后台代码如何操作Cookie,对于Cookie的操作主要分两大类,本别是发送Cookie和获取Cookie
- 创建Cookie对象,并设置数据
Cookie cookie = new Cookie("key","value"); - 发送Cookie到客户端,使用response对象:
response.addCookie(cookie);
        //发送Cookie
        //1. 创建Cookie对象
        Cookie cookie = new Cookie("username","zs");
        //2. 发送Cookie,response
        response.addCookie(cookie);
- 获取客户端携带的所有Cookie,使用request对象
Cookie[] cookies = request.getCookies(); - 遍历数组,获取每一个Cookie对象, 使用Cookie对象方法获取数据
cookie.getName(); cookie.getValue();
        //获取Cookie
        //1. 获取Cookie数组
        Cookie[] cookies = request.getCookies();
        //2. 遍历数组
        for (Cookie cookie : cookies) {
            //3. 获取数据
            String name = cookie.getName();
            if("username".equals(name)){
                String value = cookie.getValue();
                System.out.println(name+":"+value);
                break;
            }
        }
Cookie是如何实现的?
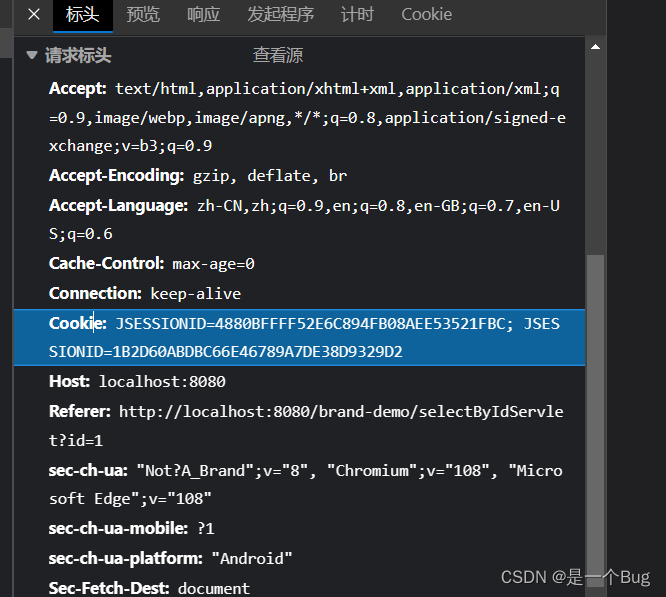
对于Cookie的实现原理是基于HTTP协议的,其中设计到HTTP协议中的两个请求头信息:
-
响应头:set-cookie
-
请求头: cookie
-
前面的案例中已经能够实现,AServlet给前端发送Cookie,BServlet从request中获取Cookie的功能
-
对于AServlet响应数据的时候,Tomcat服务器都是基于HTTP协议来响应数据
-
当Tomcat发现后端要返回的是一个Cookie对象之后,Tomcat就会在响应头中添加一行数据==
Set-Cookie:username=zs== -
浏览器获取到响应结果后,从响应头中就可以获取到
Set-Cookie对应值username=zs,并将数据存储在浏览器的内存中 -
浏览器再次发送请求给BServlet的时候,浏览器会自动在请求头中添加==
Cookie: username=zs==发送给服务端BServlet -
Request对象会把请求头中cookie对应的值封装成一个个Cookie对象,最终形成一个数组
-
BServlet通过Request对象获取到Cookie[]后,就可以从中获取自己需要的数据
session
- 什么是Session?
Session:服务端会话跟踪技术:将数据保存到服务端。
- Session是存储在服务端而Cookie是存储在客户端
- 存储在客户端的数据容易被窃取和截获,存在很多不安全的因素
- 存储在服务端的数据相比于客户端来说就更安全
工作流程
- 在服务端的AServlet获取一个Session对象,把数据存入其中
- 在服务端的BServlet获取到相同的Session对象,从中取出数据
- 就可以实现一次会话中多次请求之间的数据共享了
- 现在最大的问题是如何保证AServlet和BServlet使用的是同一个Session对象(在原理分析会讲解)?
- Session如何来使用?
在JavaEE中提供了HttpSession接口,来实现一次会话的多次请求之间数据共享功能。
- 获取Session对象,使用的是request对象
HttpSession session = request.getSession(); - 存储数据到 session 域中
void setAttribute(String name, Object o) - 根据 key,获取值
Object getAttribute(String name) - 根据 key,删除该键值对
void removeAttribute(String name)
    	//存储到Session中
        //1. 获取Session对象
        HttpSession session = request.getSession();
        //2. 存储数据
        session.setAttribute("username","zs");
        //获取数据,从session中
        //1. 获取Session对象
        HttpSession session = request.getSession();
        //2. 获取数据
        Object username = session.getAttribute("username");
        System.out.println(username);
- Session是如何实现的? 原理分析
Session要想实现一次会话多次请求之间的数据共享,就必须要保证多次请求获取Session的对象是同一个。
如果是不同浏览器或者重新打开浏览器后,打印的Session就不一样了。所以Session实现的也是一次会话中的多次请求之间的数据共享。
Session是如何保证在一次会话中获取的Session对象是同一个呢?
(1)demo1在第一次获取session对象的时候,session对象会有一个唯一的标识,假如是id:10
(2)demo1在session中存入其他数据并处理完成所有业务后,需要通过Tomcat服务器响应结果给浏览器
(3)Tomcat服务器发现业务处理中使用了session对象,就会把session的唯一标识id:10当做一个cookie,添加Set-Cookie:JESSIONID=10到响应头中,并响应给浏览器
(4)浏览器接收到响应结果后,会把响应头中的coookie数据存储到浏览器的内存中
(5)浏览器在同一会话中访问demo2的时候,会把cookie中的数据按照cookie: JESSIONID=10的格式添加到请求头中并发送给服务器Tomcat
(6)demo2获取到请求后,从请求头中就读取cookie中的JSESSIONID值为10,然后就会到服务器内存中寻找id:10的session对象,如果找到了,就直接返回该对象,如果没有则新创建一个session对象
(7)关闭打开浏览器后,因为浏览器的cookie已被销毁,所以就没有JESSIONID的数据,服务端获取到的session就是一个全新的session对象
对比
Cookie 和 Session 都是来完成一次会话内多次请求间数据共享的。
所需两个对象放在一块,就需要思考:
- 区别:
- 存储位置:Cookie 是将数据存储在客户端,Session 将数据存储在服务端
- 安全性:Cookie不安全,Session安全
- 数据大小:Cookie最大3KB,Session无大小限制
- 存储时间:Cookie可以通过setMaxAge()长期存储,Session默认30分钟
- 服务器性能:Cookie不占服务器资源,Session占用服务器资源
- 应用场景:
- 购物车:使用Cookie来存储
- 以登录用户的名称展示:使用Session来存储
- 记住我功能:使用Cookie来存储
- 验证码:使用session来存储
- 结论
- Cookie是用来保证用户在未登录情况下的身份识别
- Session是用来保存用户登录后的数据
Filter过滤器入门
过滤器可以把对资源的请求拦截下来,从而实现一些特殊的功能。
==过滤器一般完成一些通用的操作。==比如每个资源都要写一些代码完成某个功能,我们总不能在每个资源中写这样的代码吧,而此时我们可以将这些代码写在过滤器中,因为请求每一个资源都要经过过滤器。
入门Demo
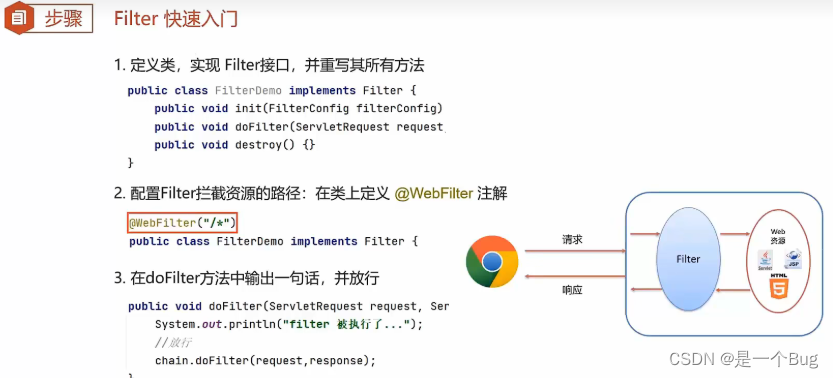
@WebFilter("/*")
public class FilterDemo implements Filter {

    @Override
    public void doFilter(ServletRequest request, ServletResponse response, FilterChain chain) throws IOException, ServletException {
        System.out.println("FilterDemo...");
    }

    @Override
    public void init(FilterConfig filterConfig) throws ServletException {
    }

    @Override
    public void destroy() {
    }
}
现在,资源都查不到了,只有在 doFilter() 方法中添加放行的方法才能访问到 信息; chain.doFilter(request,response);
    @Override
    public void doFilter(ServletRequest request, ServletResponse response, FilterChain chain) throws IOException, ServletException {
        System.out.println("1.FilterDemo...");
        //放行
        chain.doFilter(request,response);
    }
Filter执行流程
如上图是使用过滤器的流程,我们通过以下问题来研究过滤器的执行流程:
-
放行后访问对应资源,资源访问完成后,还会回到Filter中吗?
从上图就可以看出肯定 会 回到Filter中
-
如果回到Filter中,是重头执行还是执行放行后的逻辑呢?
如果是重头执行的话,就意味着
放行前逻辑会被执行两次,肯定不会这样设计了;所以访问完资源后,会回到放行后逻辑,执行该部分代码。
Filter拦截路径配置
拦截路径表示 Filter 会对请求的哪些资源进行拦截,使用 @WebFilter 注解进行配置。如:@WebFilter("拦截路径")
拦截路径有如下四种配置方式:
- 拦截具体的资源:/index.jsp:只有访问index.jsp时才会被拦截
- 目录拦截:/user/*:访问/user下的所有资源,都会被拦截
- 后缀名拦截:*.jsp:访问后缀名为jsp的资源,都会被拦截
- 拦截所有:/*:访问所有资源,都会被拦截
Listener监听器入门
-
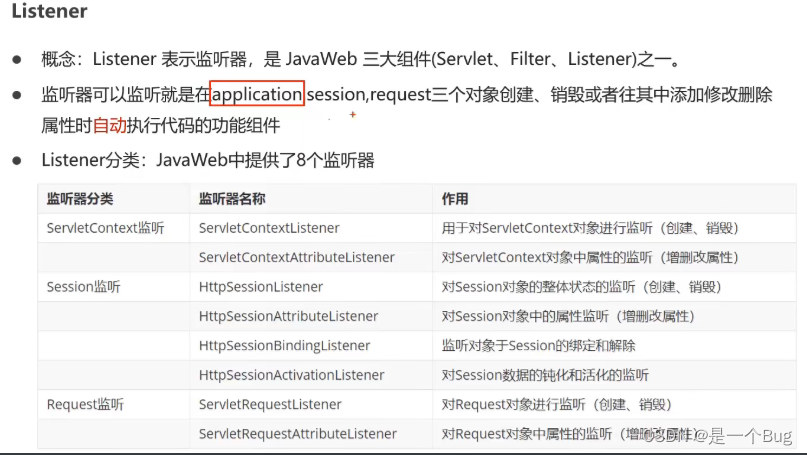
Listener 表示监听器,是 JavaWeb 三大组件(Servlet、Filter、Listener)之一。
-
监听器可以监听就是在
application,session,request三个对象创建、销毁或者往其中添加修改删除属性时自动执行代码的功能组件。request 和 session 我们学习过。而
application是ServletContext类型的对象。ServletContext代表整个web应用,在服务器启动的时候,tomcat会自动创建该对象。在服务器关闭时会自动销毁该对象。





![[备战蓝桥杯系列]蓝桥杯总结部分经典题题解分享](https://img-blog.csdnimg.cn/36d5fe131fde4db8a3605ffbdd82dd97.png)
