您或许知道,作者后续分享网络安全的文章会越来越少。但如果您想学习人工智能和安全结合的应用,您就有福利了,作者将重新打造一个《当人工智能遇上安全》系列博客,详细介绍人工智能与安全相关的论文、实践,并分享各种案例,涉及恶意代码检测、恶意请求识别、入侵检测、对抗样本等等。只想更好地帮助初学者,更加成体系的分享新知识。该系列文章会更加聚焦,更加学术,更加深入,也是作者的慢慢成长史。换专业确实挺难的,系统安全也是块硬骨头,但我也试试,看看自己未来四年究竟能将它学到什么程度,漫漫长征路,偏向虎山行。享受过程,一起加油~
前文详细介绍如何学习提取的API序列特征,并构建机器学习算法实现恶意家族分类,这也是安全领域典型的任务或工作。这篇文章将讲解如何构建深度学习模型实现恶意软件家族分类,常见模型包括CNN、BiLSTM、BiGRU,结合注意力机制的CNN+BiLSTM。基础性文章,希望对您有帮助,如果存在错误或不足之处,还请海涵。且看且珍惜!
文章目录
- 一.恶意软件分析
- 1.静态特征
- 2.动态特征
- 二.基于CNN的恶意家族检测
- 1.数据集
- 2.模型构建
- 3.实验结果
- 三.基于BiLSTM的恶意家族检测
- 1.模型构建
- 2.实验结果
- 四.基于BiGRU的恶意家族检测
- 1.模型构建
- 2.实验结果
- 五.基于CNN+BiLSTM和注意力的恶意家族检测
- 1.模型构建
- 2.实验结果
- 六.总结
作者作为网络安全的小白,分享一些自学基础教程给大家,主要是在线笔记,希望您们喜欢。同时,更希望您能与我一起操作和进步,后续将深入学习AI安全和系统安全知识并分享相关实验。总之,希望该系列文章对博友有所帮助,写文不易,大神们不喜勿喷,谢谢!如果文章对您有帮助,将是我创作的最大动力,点赞、评论、私聊均可,一起加油喔!
前文推荐:
- [当人工智能遇上安全] 1.人工智能真的安全吗?浙大团队外滩大会分享AI对抗样本技术
- [当人工智能遇上安全] 2.清华张超老师 - GreyOne: Discover Vulnerabilities with Data Flow Sensitive Fuzzing
- [当人工智能遇上安全] 3.安全领域中的机器学习及机器学习恶意请求识别案例分享
- [当人工智能遇上安全] 4.基于机器学习的恶意代码检测技术详解
- [当人工智能遇上安全] 5.基于机器学习算法的主机恶意代码识别研究
- [当人工智能遇上安全] 6.基于机器学习的入侵检测和攻击识别——以KDD CUP99数据集为例
- [当人工智能遇上安全] 7.基于机器学习的安全数据集总结
- [当人工智能遇上安全] 8.基于API序列和机器学习的恶意家族分类实例详解
- [当人工智能遇上安全] 9.基于API序列和深度学习的恶意家族分类实例详解
作者的github资源:
- https://github.com/eastmountyxz/AI-Security-Paper
一.恶意软件分析
恶意软件或恶意代码分析通常包括静态分析和动态分析。特征种类如果按照恶意代码是否在用户环境或仿真环境中运行,可以划分为静态特征和动态特征。
那么,如何提取恶意软件的静态特征或动态特征呢? 因此,第一部分将简要介绍静态特征和动态特征。
1.静态特征
没有真实运行的特征,通常包括:
- 字节码:二进制代码转换成了字节码,比较原始的一种特征,没有进行任何处理
- IAT表:PE结构中比较重要的部分,声明了一些函数及所在位置,便于程序执行时导入,表和功能比较相关
- Android权限表:如果你的APP声明了一些功能用不到的权限,可能存在恶意目的,如手机信息
- 可打印字符:将二进制代码转换为ASCII码,进行相关统计
- IDA反汇编跳转块:IDA工具调试时的跳转块,对其进行处理作为序列数据或图数据
- 常用API函数
- 恶意软件图像化
静态特征提取方式:
- CAPA
– https://github.com/mandiant/capa - IDA Pro
- 安全厂商沙箱
2.动态特征
相当于静态特征更耗时,它要真正去执行代码。通常包括:
– API调用关系:比较明显的特征,调用了哪些API,表述对应的功能
– 控制流图:软件工程中比较常用,机器学习将其表示成向量,从而进行分类
– 数据流图:软件工程中比较常用,机器学习将其表示成向量,从而进行分类
动态特征提取方式:
- Cuckoo
– https://github.com/cuckoosandbox/cuckoo - CAPE
– https://github.com/kevoreilly/CAPEv2
– https://capev2.readthedocs.io/en/latest/ - 安全厂商沙箱
二.基于CNN的恶意家族检测
前面的系列文章详细介绍如何提取恶意软件的静态和动态特征,包括API序列。接下来将构建机器学习模型学习API序列实现分类。基本流程如下:

1.数据集
整个数据集包括5类恶意家族的样本,每个样本经过先前的CAPE工具成功提取的动态API序列。数据集分布情况如下所示:(建议读者提取自己数据集的样本,包括BIG2015、BODMAS等)
| 恶意家族 | 类别 | 数量 | 训练集 | 测试集 |
|---|---|---|---|---|
| AAAA | class1 | 352 | 242 | 110 |
| BBBB | class2 | 335 | 235 | 100 |
| CCCC | class3 | 363 | 243 | 120 |
| DDDD | class4 | 293 | 163 | 130 |
| EEEE | class5 | 548 | 358 | 190 |
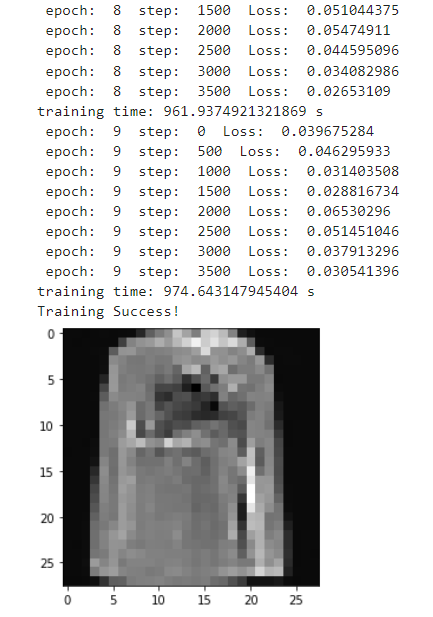
数据集分为训练集、测试集和验证集(部分训练集和测试集组成),如下图所示:

数据集中主要包括四个字段,即序号、恶意家族类别、Md5值、API序列或特征。

需要注意,在特征提取过程中涉及大量数据预处理和清洗的工作,读者需要结合实际需求完成。比如提取特征为空值的过滤代码。
#coding:utf-8
#By:Eastmount CSDN 2023-05-31
import csv
import re
import os

csv.field_size_limit(500 * 1024 * 1024)
filename = "AAAA_result.csv"
writename = "AAAA_result_final.csv"
fw = open(writename, mode="w", newline="")
writer = csv.writer(fw)
writer.writerow(['no', 'type', 'md5', 'api'])
with open(filename,encoding='utf-8') as fr:
    reader = csv.reader(fr)
    no = 1
    for row in reader: #['no','type','md5','api']
        tt = row[1]
        md5 = row[2]
        api = row[3]
        #print(no,tt,md5,api)
        #api空值的过滤
        if api=="" or api=="api":
            continue
        else:
            writer.writerow([str(no),tt,md5,api])
            no += 1
fr.close()
2.模型构建
该模型的基本步骤如下:
第一步 数据读取第二步 OneHotEncoder()编码第三步 使用Tokenizer对词组进行编码第四步 建立CNN模型并训练第五步 预测及评估第六步 验证算法
构建模型如下图所示:

完整代码如下所示:
# -*- coding: utf-8 -*-
# By:Eastmount CSDN 2023-06-27
import pickle
import pandas as pd
import numpy as np
import matplotlib.pyplot as plt
import seaborn as sns
from sklearn import metrics
import tensorflow as tf
from sklearn.preprocessing import LabelEncoder,OneHotEncoder
from keras.models import Model
from keras.layers import LSTM, Activation, Dense, Dropout, Input, Embedding
from keras.layers import Convolution1D, MaxPool1D, Flatten
from keras.optimizers import RMSprop
from keras.layers import Bidirectional
from keras.preprocessing.text import Tokenizer
from keras.preprocessing import sequence
from keras.callbacks import EarlyStopping
from keras.models import load_model
from keras.models import Sequential
from keras.layers.merge import concatenate
import time

"""
import os
os.environ["CUDA_DEVICES_ORDER"] = "PCI_BUS_IS"
os.environ["CUDA_VISIBLE_DEVICES"] = "0"
gpu_options = tf.GPUOptions(per_process_gpu_memory_fraction=0.8)
sess = tf.Session(config=tf.ConfigProto(gpu_options=gpu_options))
"""

start = time.clock()

#---------------------------------------第一步 数据读取------------------------------------
# 读取测数据集
train_df = pd.read_csv("..\\train_dataset.csv")
val_df = pd.read_csv("..\\val_dataset.csv")
test_df = pd.read_csv("..\\test_dataset.csv")

# 指定数据类型 否则AttributeError: 'float' object has no attribute 'lower' 存在文本为空的现象
# train_df.SentimentText = train_df.SentimentText.astype(str)
print(train_df.head())

# 解决中文显示问题
plt.rcParams['font.sans-serif'] = ['KaiTi']   #指定默认字体 SimHei黑体
plt.rcParams['axes.unicode_minus'] = False    #解决保存图像是负号'

#---------------------------------第二步 OneHotEncoder()编码---------------------------------
# 对数据集的标签数据进行编码  (no apt md5 api)
train_y = train_df.apt
print("Label:")
print(train_y[:10])
val_y = val_df.apt
test_y = test_df.apt
le = LabelEncoder()
train_y = le.fit_transform(train_y).reshape(-1,1)
print("LabelEncoder")
print(train_y[:10])
print(len(train_y))
val_y = le.transform(val_y).reshape(-1,1)
test_y = le.transform(test_y).reshape(-1,1)
Labname = le.classes_
print(Labname)

# 对数据集的标签数据进行one-hot编码
ohe = OneHotEncoder()
train_y = ohe.fit_transform(train_y).toarray()
val_y = ohe.transform(val_y).toarray()
test_y = ohe.transform(test_y).toarray()
print("OneHotEncoder:")
print(train_y[:10])

#-------------------------------第三步 使用Tokenizer对词组进行编码-------------------------------
# 使用Tokenizer对词组进行编码
# 当我们创建了一个Tokenizer对象后,使用该对象的fit_on_texts()函数,以空格去识别每个词
# 可以将输入的文本中的每个词编号,编号是根据词频的,词频越大,编号越小
max_words = 1000
max_len = 200
tok = Tokenizer(num_words=max_words)  #使用的最大词语数为1000
print(train_df.api[:5])
print(type(train_df.api))

# 提取token:api
train_value = train_df.api
train_content = [str(a) for a in train_value.tolist()]
val_value = val_df.api
val_content = [str(a) for a in val_value.tolist()]
test_value = test_df.api
test_content = [str(a) for a in test_value.tolist()]
tok.fit_on_texts(train_content)
print(tok)

# 保存训练好的Tokenizer和导入
# saving
with open('tok.pickle', 'wb') as handle:
    pickle.dump(tok, handle, protocol=pickle.HIGHEST_PROTOCOL)
# loading
with open('tok.pickle', 'rb') as handle:
    tok = pickle.load(handle)

# 使用word_index属性可以看到每次词对应的编码
# 使用word_counts属性可以看到每个词对应的频数
for ii,iterm in enumerate(tok.word_index.items()):
    if ii < 10:
        print(iterm)
    else:
        break
print("===================")
for ii,iterm in enumerate(tok.word_counts.items()):
    if ii < 10:
        print(iterm)
    else:
        break

# 使用tok.texts_to_sequences()将数据转化为序列
# 使用sequence.pad_sequences()将每个序列调整为相同的长度
# 对每个词编码之后,每句新闻中的每个词就可以用对应的编码表示,即每条新闻可以转变成一个向量了
train_seq = tok.texts_to_sequences(train_content)
val_seq = tok.texts_to_sequences(val_content)
test_seq = tok.texts_to_sequences(test_content)

# 将每个序列调整为相同的长度
train_seq_mat = sequence.pad_sequences(train_seq,maxlen=max_len)
val_seq_mat = sequence.pad_sequences(val_seq,maxlen=max_len)
test_seq_mat = sequence.pad_sequences(test_seq,maxlen=max_len)
print(train_seq_mat.shape)  #(1241, 200)
print(val_seq_mat.shape)    #(459, 200)
print(test_seq_mat.shape)   #(650, 200)
print(train_seq_mat[:2])

#-------------------------------第四步 建立CNN模型并训练-------------------------------
num_labels = 5
inputs = Input(name='inputs',shape=[max_len], dtype='float64')

# 词嵌入(使用预训练的词向量)
layer = Embedding(max_words+1, 256, input_length=max_len, trainable=False)(inputs)

# 词窗大小分别为3,4,5
cnn = Convolution1D(256, 3, padding='same', strides = 1, activation='relu')(layer)
cnn = MaxPool1D(pool_size=3)(cnn)

# 合并三个模型的输出向量
flat = Flatten()(cnn)
drop = Dropout(0.4)(flat)
main_output = Dense(num_labels, activation='softmax')(drop)
model = Model(inputs=inputs, outputs=main_output)
model.summary()
model.compile(loss="categorical_crossentropy",
              optimizer='adam',      #RMSprop()
              metrics=["accuracy"])

# 增加判断 防止再次训练
flag = "train"
if flag == "train":
    print("模型训练")
    # 模型训练
    model_fit = model.fit(train_seq_mat, train_y, batch_size=64, epochs=15,
                          validation_data=(val_seq_mat,val_y),
                          callbacks=[EarlyStopping(monitor='val_loss',min_delta=0.001)]   #当val-loss不再提升时停止训练 0.0001
                         )

    # 保存模型
    model.save('cnn_model.h5')
    del model  # deletes the existing model

    # 计算时间
    elapsed = (time.clock() - start)
    print("Time used:", elapsed)
    print(model_fit.history)

else:
    print("模型预测")
    # 导入已经训练好的模型
    model = load_model('cnn_model.h5')

    #--------------------------------------第五步 预测及评估--------------------------------
    # 对测试集进行预测
    test_pre = model.predict(test_seq_mat)

    # 评价预测效果,计算混淆矩阵
    confm = metrics.confusion_matrix(np.argmax(test_y,axis=1),
                                     np.argmax(test_pre,axis=1))
    print(confm)
    print(metrics.classification_report(np.argmax(test_y,axis=1),
                                        np.argmax(test_pre,axis=1),
                                        digits=4))
    print("accuracy", metrics.accuracy_score(np.argmax(test_y, axis=1),
                                             np.argmax(test_pre, axis=1)))
    # 结果存储
    f1 = open("cnn_test_pre.txt", "w")
    for n in np.argmax(test_pre, axis=1):
        f1.write(str(n) + "\n")
    f1.close()

    f2 = open("cnn_test_y.txt", "w")
    for n in np.argmax(test_y, axis=1):
        f2.write(str(n) + "\n")
    f2.close()

    plt.figure(figsize=(8,8))
    sns.heatmap(confm.T, square=True, annot=True,
                fmt='d', cbar=False, linewidths=.6,
                cmap="YlGnBu")
    plt.xlabel('True label',size = 14)
    plt.ylabel('Predicted label', size = 14)
    plt.xticks(np.arange(5)+0.5, Labname, size = 12)
    plt.yticks(np.arange(5)+0.5, Labname, size = 12)
    plt.savefig('cnn_result.png')
    plt.show()

    #--------------------------------------第六步 验证算法--------------------------------
    # 使用tok对验证数据集重新预处理
    val_seq = tok.texts_to_sequences(val_content)
    # 将每个序列调整为相同的长度
    val_seq_mat = sequence.pad_sequences(val_seq,maxlen=max_len)
    # 对验证集进行预测
    val_pre = model.predict(val_seq_mat)
    print(metrics.classification_report(np.argmax(val_y,axis=1),
                                        np.argmax(val_pre,axis=1),
                                        digits=4))
    print("accuracy", metrics.accuracy_score(np.argmax(val_y, axis=1),
                                             np.argmax(val_pre, axis=1)))
    # 计算时间
    elapsed = (time.clock() - start)
    print("Time used:", elapsed)
3.实验结果
最终运行结果及其生成文件如下图所示:

输出中间过程结果如下所示:
   no  ...                                                api
0   1  ...  GetSystemInfo;HeapCreate;NtAllocateVirtualMemo...
1   2  ...  GetSystemInfo;HeapCreate;NtAllocateVirtualMemo...
2   3  ...  NtQueryValueKey;GetSystemTimeAsFileTime;HeapCr...
3   4  ...  NtQueryValueKey;NtClose;NtAllocateVirtualMemor...
4   5  ...  NtOpenFile;NtCreateSection;NtMapViewOfSection;...

[5 rows x 4 columns]
Label:
0    class1
1    class1
2    class1
3    class1
4    class1
5    class1
6    class1
7    class1
8    class1
9    class1
Name: apt, dtype: object
LabelEncoder
[[0]
 [0]
 [0]
 [0]
 [0]
 [0]
 [0]
 [0]
 [0]
 [0]]
1241
['class1' 'class2' 'class3' 'class4' 'class5']
OneHotEncoder:
[[1. 0. 0. 0. 0.]
 [1. 0. 0. 0. 0.]
 [1. 0. 0. 0. 0.]
 [1. 0. 0. 0. 0.]
 [1. 0. 0. 0. 0.]
 [1. 0. 0. 0. 0.]
 [1. 0. 0. 0. 0.]
 [1. 0. 0. 0. 0.]
 [1. 0. 0. 0. 0.]
 [1. 0. 0. 0. 0.]]
0    GetSystemInfo;HeapCreate;NtAllocateVirtualMemo...
1    GetSystemInfo;HeapCreate;NtAllocateVirtualMemo...
2    NtQueryValueKey;GetSystemTimeAsFileTime;HeapCr...
3    NtQueryValueKey;NtClose;NtAllocateVirtualMemor...
4    NtOpenFile;NtCreateSection;NtMapViewOfSection;...
Name: api, dtype: object
<class 'pandas.core.series.Series'>
<keras_preprocessing.text.Tokenizer object at 0x0000028E55D36B08>

('regqueryvalueexw', 1)
('ntclose', 2)
('ldrgetprocedureaddress', 3)
('regopenkeyexw', 4)
('regclosekey', 5)
('ntallocatevirtualmemory', 6)
('sendmessagew', 7)
('ntwritefile', 8)
('process32nextw', 9)
('ntdeviceiocontrolfile', 10)
===================
('getsysteminfo', 2651)
('heapcreate', 2996)
('ntallocatevirtualmemory', 115547)
('ntqueryvaluekey', 24120)
('getsystemtimeasfiletime', 52727)
('ldrgetdllhandle', 25135)
('ldrgetprocedureaddress', 199952)
('memcpy', 9008)
('setunhandledexceptionfilter', 1504)
('ntcreatefile', 43260)

(1241, 200)
(459, 200)
(650, 200)
[[  3 135   3   3   2  21   3   3   4   3  96   3   3   4  96   4  96  20
   22  20   3   6   6  23 128 129   3 103  23  56   2 103  23  20   3  23
    3   3   3   3   4   1   5  23  12 131  12  20   3  10   2  10   2  20
    3   4   5  27   3  10   2   6  10   2   3  10   2  10   2   3  10   2
   10   2  10   2  10   2  10   2   3  10   2  10   2  10   2  10   2   3
    3   3  36   4   3  23  20   3   5 207  34   6   6   6  11  11   6  11
    6   6   6   6   6   6   6   6   6  11   6   6  11   6  11   6  11   6
    6  11   6  34   3 141   3 140   3   3 141  34   6   2  21   4  96   4
   96   4  96  23   3   3  12 131  12  10   2  10   2   4   5  27  10   2
    6  10   2  10   2  10   2  10   2  10   2  10   2  10   2  10   2  10
    2  10   2  10   2  10   2  36   4  23   5 207   6   3   3  12 131  12
  132   3]
 [ 27   4  27   4  27   4  27   4  27  27   5  27   4  27   4  27  27  27
   27  27  27  27   5  27   4  27   4  27   4  27   4  27   4  27   4  27
    4  27   4  27   4  27   5  52   2  21   4   5   1   1   1   5  21  25
    2  52  12  33  51  28  34  30   2  52   2  21   4   5  27   5  52   6
    6  52   4   1   5   4  52  54   7   7  20  52   7  52   7   7   6   4
    4  24  24  24  24  24  24  24  24  24  24  24  24  24  24  24  24   5
    5   3   7  50  50  50  95  50  50  50  50  50   4   1   5   4   3   3
    3   3   3   7   7   7   3   7   3   7   3  60   3   3   7   7   7   7
   60   3   7   7   7   7   7   7   7   7  52  20   3   3   3  14  14  60
   18  19  18  19   2  21   4   5  18  19  18  19  18  19  18  19   7   7
    7   7   7   7   7   7   7   7   7  52   7   7   7   7   7  60   7   7
    7   7]]
模型训练过程如下:
模型训练
Epoch 1/15

 1/20 [>.............................] - ETA: 5s - loss: 1.5986 - accuracy: 0.2656
 2/20 [==>...........................] - ETA: 1s - loss: 1.6050 - accuracy: 0.2266
 3/20 [===>..........................] - ETA: 1s - loss: 1.5777 - accuracy: 0.2292
 4/20 [=====>........................] - ETA: 2s - loss: 1.5701 - accuracy: 0.2500
 5/20 [======>.......................] - ETA: 2s - loss: 1.5628 - accuracy: 0.2719
 6/20 [========>.....................] - ETA: 3s - loss: 1.5439 - accuracy: 0.3125
 7/20 [=========>....................] - ETA: 3s - loss: 1.5306 - accuracy: 0.3348
 8/20 [===========>..................] - ETA: 3s - loss: 1.5162 - accuracy: 0.3535
 9/20 [============>.................] - ETA: 3s - loss: 1.5020 - accuracy: 0.3698
10/20 [==============>...............] - ETA: 3s - loss: 1.4827 - accuracy: 0.3969
11/20 [===============>..............] - ETA: 3s - loss: 1.4759 - accuracy: 0.4020
12/20 [=================>............] - ETA: 3s - loss: 1.4734 - accuracy: 0.4036
13/20 [==================>...........] - ETA: 3s - loss: 1.4456 - accuracy: 0.4255
14/20 [====================>.........] - ETA: 3s - loss: 1.4322 - accuracy: 0.4353
15/20 [=====================>........] - ETA: 2s - loss: 1.4157 - accuracy: 0.4469
16/20 [=======================>......] - ETA: 2s - loss: 1.4093 - accuracy: 0.4482
17/20 [========================>.....] - ETA: 2s - loss: 1.4010 - accuracy: 0.4531
18/20 [==========================>...] - ETA: 1s - loss: 1.3920 - accuracy: 0.4601
19/20 [===========================>..] - ETA: 0s - loss: 1.3841 - accuracy: 0.4638
20/20 [==============================] - ETA: 0s - loss: 1.3763 - accuracy: 0.4674
20/20 [==============================] - 20s 1s/step - loss: 1.3763 - accuracy: 0.4674 - val_loss: 1.3056 - val_accuracy: 0.4837

Time used: 26.1328806
{'loss': [1.3762551546096802], 'accuracy': [0.467365026473999],
 'val_loss': [1.305567979812622], 'val_accuracy': [0.48366013169288635]}
最终预测结果如下所示:
模型预测
[[ 40  14  11   1  44]
 [ 16  57  10   0  17]
 [  6  30  61   0  23]
 [ 12  20  15  47  36]
 [ 11  14  19   0 146]]
              precision    recall  f1-score   support

           0     0.4706    0.3636    0.4103       110
           1     0.4222    0.5700    0.4851       100
           2     0.5259    0.5083    0.5169       120
           3     0.9792    0.3615    0.5281       130
           4     0.5489    0.7684    0.6404       190

    accuracy                         0.5400       650
   macro avg     0.5893    0.5144    0.5162       650
weighted avg     0.5980    0.5400    0.5323       650

accuracy 0.54

              precision    recall  f1-score   support

           0     0.9086    0.4517    0.6034       352
           1     0.5943    0.5888    0.5915       107
           2     0.0000    0.0000    0.0000         0
           3     0.0000    0.0000    0.0000         0
           4     0.0000    0.0000    0.0000         0

    accuracy                         0.4837       459
   macro avg     0.3006    0.2081    0.2390       459
weighted avg     0.8353    0.4837    0.6006       459

accuracy 0.48366013071895425

Time used: 14.170902800000002

思考:
然而,整个预测结果效果较差,请读者思考,这是为什么呢?我们能不能通过调参进行优化,又如何改进算法呢?本文仅提供基本思路和代码,更多优化及完善需要读者学会独立解决,加油喔!
三.基于BiLSTM的恶意家族检测
1.模型构建
该模型的基本步骤如下:
第一步 数据读取第二步 OneHotEncoder()编码第三步 使用Tokenizer对词组进行编码第四步 建立BiLSTM模型并训练第五步 预测及评估第六步 验证算法
构建模型如下图所示:

完整代码如下所示:
# -*- coding: utf-8 -*-
# By:Eastmount CSDN 2023-06-27
import pickle
import pandas as pd
import numpy as np
import matplotlib.pyplot as plt
import seaborn as sns
from sklearn import metrics
import tensorflow as tf
from sklearn.preprocessing import LabelEncoder,OneHotEncoder
from keras.models import Model
from keras.layers import LSTM, Activation, Dense, Dropout, Input, Embedding
from keras.layers import Convolution1D, MaxPool1D, Flatten
from keras.optimizers import RMSprop
from keras.layers import Bidirectional
from keras.preprocessing.text import Tokenizer
from keras.preprocessing import sequence
from keras.callbacks import EarlyStopping
from keras.models import load_model
from keras.models import Sequential
from keras.layers.merge import concatenate
import time

start = time.clock()

#---------------------------------------第一步 数据读取------------------------------------
# 读取测数据集
train_df = pd.read_csv("..\\train_dataset.csv")
val_df = pd.read_csv("..\\val_dataset.csv")
test_df = pd.read_csv("..\\test_dataset.csv")
print(train_df.head())

# 解决中文显示问题
plt.rcParams['font.sans-serif'] = ['KaiTi']
plt.rcParams['axes.unicode_minus'] = False

#---------------------------------第二步 OneHotEncoder()编码---------------------------------
# 对数据集的标签数据进行编码  (no apt md5 api)
train_y = train_df.apt
val_y = val_df.apt
test_y = test_df.apt
le = LabelEncoder()
train_y = le.fit_transform(train_y).reshape(-1,1)
val_y = le.transform(val_y).reshape(-1,1)
test_y = le.transform(test_y).reshape(-1,1)
Labname = le.classes_

# 对数据集的标签数据进行one-hot编码
ohe = OneHotEncoder()
train_y = ohe.fit_transform(train_y).toarray()
val_y = ohe.transform(val_y).toarray()
test_y = ohe.transform(test_y).toarray()

#-------------------------------第三步 使用Tokenizer对词组进行编码-------------------------------
# 使用Tokenizer对词组进行编码
max_words = 2000
max_len = 300
tok = Tokenizer(num_words=max_words)

# 提取token:api
train_value = train_df.api
train_content = [str(a) for a in train_value.tolist()]
val_value = val_df.api
val_content = [str(a) for a in val_value.tolist()]
test_value = test_df.api
test_content = [str(a) for a in test_value.tolist()]
tok.fit_on_texts(train_content)
print(tok)

# 保存训练好的Tokenizer和导入
with open('tok.pickle', 'wb') as handle:
    pickle.dump(tok, handle, protocol=pickle.HIGHEST_PROTOCOL)
with open('tok.pickle', 'rb') as handle:
    tok = pickle.load(handle)

# 使用tok.texts_to_sequences()将数据转化为序列
train_seq = tok.texts_to_sequences(train_content)
val_seq = tok.texts_to_sequences(val_content)
test_seq = tok.texts_to_sequences(test_content)

# 将每个序列调整为相同的长度
train_seq_mat = sequence.pad_sequences(train_seq,maxlen=max_len)
val_seq_mat = sequence.pad_sequences(val_seq,maxlen=max_len)
test_seq_mat = sequence.pad_sequences(test_seq,maxlen=max_len)

#-------------------------------第四步 建立LSTM模型并训练-------------------------------
num_labels = 5
model = Sequential()
model.add(Embedding(max_words+1, 128, input_length=max_len))
#model.add(Bidirectional(LSTM(128, dropout=0.3, recurrent_dropout=0.1)))
model.add(Bidirectional(LSTM(128)))
model.add(Dense(128, activation='relu'))
model.add(Dropout(0.3))
model.add(Dense(num_labels, activation='softmax'))
model.summary()
model.compile(loss="categorical_crossentropy",
              optimizer='adam',
              metrics=["accuracy"])

flag = "train"
if flag == "train":
    print("模型训练")
    # 模型训练
    model_fit = model.fit(train_seq_mat, train_y, batch_size=64, epochs=15,
                          validation_data=(val_seq_mat,val_y),
                          callbacks=[EarlyStopping(monitor='val_loss',min_delta=0.0001)]
                         )

    # 保存模型
    model.save('bilstm_model.h5')
    del model  # deletes the existing model

    # 计算时间
    elapsed = (time.clock() - start)
    print("Time used:", elapsed)
    print(model_fit.history)

else:
    print("模型预测")
    model = load_model('bilstm_model.h5')

    #--------------------------------------第五步 预测及评估--------------------------------
    # 对测试集进行预测
    test_pre = model.predict(test_seq_mat)
    confm = metrics.confusion_matrix(np.argmax(test_y,axis=1),
                                     np.argmax(test_pre,axis=1))
    print(confm)
    print(metrics.classification_report(np.argmax(test_y,axis=1),
                                        np.argmax(test_pre,axis=1),
                                        digits=4))
    print("accuracy", metrics.accuracy_score(np.argmax(test_y, axis=1),
                                             np.argmax(test_pre, axis=1)))
    # 结果存储
    f1 = open("bilstm_test_pre.txt", "w")
    for n in np.argmax(test_pre, axis=1):
        f1.write(str(n) + "\n")
    f1.close()

    f2 = open("bilstm_test_y.txt", "w")
    for n in np.argmax(test_y, axis=1):
        f2.write(str(n) + "\n")
    f2.close()

    plt.figure(figsize=(8,8))
    sns.heatmap(confm.T, square=True, annot=True,
                fmt='d', cbar=False, linewidths=.6,
                cmap="YlGnBu")
    plt.xlabel('True label',size = 14)
    plt.ylabel('Predicted label', size = 14)
    plt.xticks(np.arange(5)+0.5, Labname, size = 12)
    plt.yticks(np.arange(5)+0.5, Labname, size = 12)
    plt.savefig('bilstm_result.png')
    plt.show()

    #--------------------------------------第六步 验证算法--------------------------------
    # 使用tok对验证数据集重新预处理
    val_seq = tok.texts_to_sequences(val_content)
    val_seq_mat = sequence.pad_sequences(val_seq,maxlen=max_len)

    # 对验证集进行预测
    val_pre = model.predict(val_seq_mat)
    print(metrics.classification_report(np.argmax(val_y,axis=1),
                                        np.argmax(val_pre,axis=1),
                                        digits=4))
    print("accuracy", metrics.accuracy_score(np.argmax(val_y, axis=1),
                                             np.argmax(val_pre, axis=1)))
    # 计算时间
    elapsed = (time.clock() - start)
    print("Time used:", elapsed)
2.实验结果
训练输出结果如下图所示:
模型训练
Epoch 1/15
 1/20 [>.............................] - ETA: 40s - loss: 1.6114 - accuracy: 0.2031
 2/20 [==>...........................] - ETA: 10s - loss: 1.6055 - accuracy: 0.2969
 3/20 [===>..........................] - ETA: 10s - loss: 1.6015 - accuracy: 0.3281
 4/20 [=====>........................] - ETA: 10s - loss: 1.5931 - accuracy: 0.3477
 5/20 [======>.......................] - ETA: 10s - loss: 1.5914 - accuracy: 0.3469
 6/20 [========>.....................] - ETA: 10s - loss: 1.5827 - accuracy: 0.3698
 7/20 [=========>....................] - ETA: 10s - loss: 1.5785 - accuracy: 0.3884
 8/20 [===========>..................] - ETA: 10s - loss: 1.5673 - accuracy: 0.4121
 9/20 [============>.................] - ETA: 9s - loss: 1.5610 - accuracy: 0.4149
10/20 [==============>...............] - ETA: 9s - loss: 1.5457 - accuracy: 0.4187
11/20 [===============>..............] - ETA: 8s - loss: 1.5297 - accuracy: 0.4148
12/20 [=================>............] - ETA: 8s - loss: 1.5338 - accuracy: 0.4128
13/20 [==================>...........] - ETA: 7s - loss: 1.5214 - accuracy: 0.4279
14/20 [====================>.........] - ETA: 6s - loss: 1.5176 - accuracy: 0.4286
15/20 [=====================>........] - ETA: 5s - loss: 1.5100 - accuracy: 0.4271
16/20 [=======================>......] - ETA: 4s - loss: 1.5065 - accuracy: 0.4258
17/20 [========================>.....] - ETA: 3s - loss: 1.5021 - accuracy: 0.4237
18/20 [==========================>...] - ETA: 2s - loss: 1.4921 - accuracy: 0.4288
19/20 [===========================>..] - ETA: 1s - loss: 1.4822 - accuracy: 0.4334
20/20 [==============================] - ETA: 0s - loss: 1.4825 - accuracy: 0.4327
20/20 [==============================] - 33s 2s/step - loss: 1.4825 - accuracy: 0.4327 - val_loss: 1.4187 - val_accuracy: 0.4074

Time used: 38.565846900000004
{'loss': [1.4825222492218018], 'accuracy': [0.4327155649662018],
 'val_loss': [1.4187402725219727], 'val_accuracy': [0.40740740299224854]}
>>>
最终预测结果如下所示:
模型预测
[[36 18 37  1 18]
 [14 46 34  0  6]
 [ 8 29 73  0 10]
 [16 29 14 45 26]
 [47 15 33  0 95]]
              precision    recall  f1-score   support

           0     0.2975    0.3273    0.3117       110
           1     0.3358    0.4600    0.3882       100
           2     0.3822    0.6083    0.4695       120
           3     0.9783    0.3462    0.5114       130
           4     0.6129    0.5000    0.5507       190

    accuracy                         0.4538       650
   macro avg     0.5213    0.4484    0.4463       650
weighted avg     0.5474    0.4538    0.4624       650

accuracy 0.45384615384615384

              precision    recall  f1-score   support

           0     0.9189    0.3864    0.5440       352
           1     0.4766    0.4766    0.4766       107
           2     0.0000    0.0000    0.0000         0
           3     0.0000    0.0000    0.0000         0
           4     0.0000    0.0000    0.0000         0

    accuracy                         0.4074       459
   macro avg     0.2791    0.1726    0.2041       459
weighted avg     0.8158    0.4074    0.5283       459

accuracy 0.4074074074074074

Time used: 32.2772881

四.基于BiGRU的恶意家族检测
1.模型构建
该模型的基本步骤如下:
第一步 数据读取第二步 OneHotEncoder()编码第三步 使用Tokenizer对词组进行编码第四步 建立BiGRU模型并训练第五步 预测及评估第六步 验证算法
构建模型如下图所示:

完整代码如下所示:
# -*- coding: utf-8 -*-
# By:Eastmount CSDN 2023-06-27
import pickle
import pandas as pd
import numpy as np
import matplotlib.pyplot as plt
import seaborn as sns
from sklearn import metrics
import tensorflow as tf
from sklearn.preprocessing import LabelEncoder,OneHotEncoder
from keras.models import Model
from keras.layers import GRU, LSTM, Activation, Dense, Dropout, Input, Embedding
from keras.layers import Convolution1D, MaxPool1D, Flatten
from keras.optimizers import RMSprop
from keras.layers import Bidirectional
from keras.preprocessing.text import Tokenizer
from keras.preprocessing import sequence
from keras.callbacks import EarlyStopping
from keras.models import load_model
from keras.models import Sequential
from keras.layers.merge import concatenate
import time

start = time.clock()

#---------------------------------------第一步 数据读取------------------------------------
# 读取测数据集
train_df = pd.read_csv("..\\train_dataset.csv")
val_df = pd.read_csv("..\\val_dataset.csv")
test_df = pd.read_csv("..\\test_dataset.csv")
print(train_df.head())

# 解决中文显示问题
plt.rcParams['font.sans-serif'] = ['KaiTi']
plt.rcParams['axes.unicode_minus'] = False

#---------------------------------第二步 OneHotEncoder()编码---------------------------------
# 对数据集的标签数据进行编码  (no apt md5 api)
train_y = train_df.apt
val_y = val_df.apt
test_y = test_df.apt
le = LabelEncoder()
train_y = le.fit_transform(train_y).reshape(-1,1)
val_y = le.transform(val_y).reshape(-1,1)
test_y = le.transform(test_y).reshape(-1,1)
Labname = le.classes_

# 对数据集的标签数据进行one-hot编码
ohe = OneHotEncoder()
train_y = ohe.fit_transform(train_y).toarray()
val_y = ohe.transform(val_y).toarray()
test_y = ohe.transform(test_y).toarray()

#-------------------------------第三步 使用Tokenizer对词组进行编码-------------------------------
# 使用Tokenizer对词组进行编码
max_words = 2000
max_len = 300
tok = Tokenizer(num_words=max_words)

# 提取token:api
train_value = train_df.api
train_content = [str(a) for a in train_value.tolist()]
val_value = val_df.api
val_content = [str(a) for a in val_value.tolist()]
test_value = test_df.api
test_content = [str(a) for a in test_value.tolist()]
tok.fit_on_texts(train_content)
print(tok)

# 保存训练好的Tokenizer和导入
with open('tok.pickle', 'wb') as handle:
    pickle.dump(tok, handle, protocol=pickle.HIGHEST_PROTOCOL)
with open('tok.pickle', 'rb') as handle:
    tok = pickle.load(handle)

# 使用tok.texts_to_sequences()将数据转化为序列
train_seq = tok.texts_to_sequences(train_content)
val_seq = tok.texts_to_sequences(val_content)
test_seq = tok.texts_to_sequences(test_content)

# 将每个序列调整为相同的长度
train_seq_mat = sequence.pad_sequences(train_seq,maxlen=max_len)
val_seq_mat = sequence.pad_sequences(val_seq,maxlen=max_len)
test_seq_mat = sequence.pad_sequences(test_seq,maxlen=max_len)

#-------------------------------第四步 建立GRU模型并训练-------------------------------
num_labels = 5
model = Sequential()
model.add(Embedding(max_words+1, 256, input_length=max_len))
#model.add(Bidirectional(GRU(128, dropout=0.2, recurrent_dropout=0.1)))
model.add(Bidirectional(GRU(256)))
model.add(Dense(256, activation='relu'))
model.add(Dropout(0.4))
model.add(Dense(num_labels, activation='softmax'))
model.summary()
model.compile(loss="categorical_crossentropy",
              optimizer='adam',
              metrics=["accuracy"])

flag = "train"
if flag == "train":
    print("模型训练")
    # 模型训练
    model_fit = model.fit(train_seq_mat, train_y, batch_size=64, epochs=15,
                          validation_data=(val_seq_mat,val_y),
                          callbacks=[EarlyStopping(monitor='val_loss',min_delta=0.005)]
                         )

    # 保存模型
    model.save('gru_model.h5')
    del model  # deletes the existing model

    # 计算时间
    elapsed = (time.clock() - start)
    print("Time used:", elapsed)
    print(model_fit.history)

else:
    print("模型预测")
    model = load_model('gru_model.h5')

    #--------------------------------------第五步 预测及评估--------------------------------
    # 对测试集进行预测
    test_pre = model.predict(test_seq_mat)
    confm = metrics.confusion_matrix(np.argmax(test_y,axis=1),
                                     np.argmax(test_pre,axis=1))
    print(confm)
    print(metrics.classification_report(np.argmax(test_y,axis=1),
                                        np.argmax(test_pre,axis=1),
                                        digits=4))
    print("accuracy", metrics.accuracy_score(np.argmax(test_y, axis=1),
                                             np.argmax(test_pre, axis=1)))
    # 结果存储
    f1 = open("gru_test_pre.txt", "w")
    for n in np.argmax(test_pre, axis=1):
        f1.write(str(n) + "\n")
    f1.close()

    f2 = open("gru_test_y.txt", "w")
    for n in np.argmax(test_y, axis=1):
        f2.write(str(n) + "\n")
    f2.close()

    plt.figure(figsize=(8,8))
    sns.heatmap(confm.T, square=True, annot=True,
                fmt='d', cbar=False, linewidths=.6,
                cmap="YlGnBu")
    plt.xlabel('True label',size = 14)
    plt.ylabel('Predicted label', size = 14)
    plt.xticks(np.arange(5)+0.5, Labname, size = 12)
    plt.yticks(np.arange(5)+0.5, Labname, size = 12)
    plt.savefig('gru_result.png')
    plt.show()

    #--------------------------------------第六步 验证算法--------------------------------
    # 使用tok对验证数据集重新预处理
    val_seq = tok.texts_to_sequences(val_content)
    val_seq_mat = sequence.pad_sequences(val_seq,maxlen=max_len)

    # 对验证集进行预测
    val_pre = model.predict(val_seq_mat)
    print(metrics.classification_report(np.argmax(val_y,axis=1),
                                        np.argmax(val_pre,axis=1),
                                        digits=4))
    print("accuracy", metrics.accuracy_score(np.argmax(val_y, axis=1),
                                             np.argmax(val_pre, axis=1)))
    # 计算时间
    elapsed = (time.clock() - start)
    print("Time used:", elapsed)
2.实验结果
训练输出结果如下图所示:
模型训练
Epoch 1/15

 1/20 [>.............................] - ETA: 47s - loss: 1.6123 - accuracy: 0.1875
 2/20 [==>...........................] - ETA: 18s - loss: 1.6025 - accuracy: 0.2656
 3/20 [===>..........................] - ETA: 18s - loss: 1.5904 - accuracy: 0.3333
 4/20 [=====>........................] - ETA: 18s - loss: 1.5728 - accuracy: 0.3867
 5/20 [======>.......................] - ETA: 17s - loss: 1.5639 - accuracy: 0.4094
 6/20 [========>.....................] - ETA: 17s - loss: 1.5488 - accuracy: 0.4375
 7/20 [=========>....................] - ETA: 16s - loss: 1.5375 - accuracy: 0.4397
 8/20 [===========>..................] - ETA: 16s - loss: 1.5232 - accuracy: 0.4434
 9/20 [============>.................] - ETA: 15s - loss: 1.5102 - accuracy: 0.4358
10/20 [==============>...............] - ETA: 14s - loss: 1.5014 - accuracy: 0.4250
11/20 [===============>..............] - ETA: 13s - loss: 1.5053 - accuracy: 0.4233
12/20 [=================>............] - ETA: 12s - loss: 1.5022 - accuracy: 0.4232
13/20 [==================>...........] - ETA: 11s - loss: 1.4913 - accuracy: 0.4279
14/20 [====================>.........] - ETA: 9s - loss: 1.4912 - accuracy: 0.4286
15/20 [=====================>........] - ETA: 8s - loss: 1.4841 - accuracy: 0.4365
16/20 [=======================>......] - ETA: 7s - loss: 1.4720 - accuracy: 0.4404
17/20 [========================>.....] - ETA: 5s - loss: 1.4669 - accuracy: 0.4375
18/20 [==========================>...] - ETA: 3s - loss: 1.4636 - accuracy: 0.4349
19/20 [===========================>..] - ETA: 1s - loss: 1.4544 - accuracy: 0.4383
20/20 [==============================] - ETA: 0s - loss: 1.4509 - accuracy: 0.4400
20/20 [==============================] - 44s 2s/step - loss: 1.4509 - accuracy: 0.4400 - val_loss: 1.3812 - val_accuracy: 0.3660

Time used: 49.7057119
{'loss': [1.4508591890335083], 'accuracy': [0.4399677813053131],
 'val_loss': [1.381193995475769], 'val_accuracy': [0.3660130798816681]}
最终预测结果如下所示:
模型预测
[[ 30   8   9  17  46]
 [ 13  50   9  13  15]
 [ 10   4  58  29  19]
 [ 11   8   8  73  30]
 [ 25   3  23  14 125]]
              precision    recall  f1-score   support

           0     0.3371    0.2727    0.3015       110
           1     0.6849    0.5000    0.5780       100
           2     0.5421    0.4833    0.5110       120
           3     0.5000    0.5615    0.5290       130
           4     0.5319    0.6579    0.5882       190

    accuracy                         0.5169       650
   macro avg     0.5192    0.4951    0.5016       650
weighted avg     0.5180    0.5169    0.5120       650

accuracy 0.5169230769230769

              precision    recall  f1-score   support

           0     0.8960    0.3182    0.4696       352
           1     0.7273    0.5234    0.6087       107
           2     0.0000    0.0000    0.0000         0
           3     0.0000    0.0000    0.0000         0
           4     0.0000    0.0000    0.0000         0

    accuracy                         0.3660       459
   macro avg     0.3247    0.1683    0.2157       459
weighted avg     0.8567    0.3660    0.5020       459

accuracy 0.3660130718954248

Time used: 60.106339399999996

五.基于CNN+BiLSTM和注意力的恶意家族检测
1.模型构建
该模型的基本步骤如下:
第一步 数据读取第二步 OneHotEncoder()编码第三步 使用Tokenizer对词组进行编码第四步 建立Attention机制第五步 建立Attention+CNN+BiLSTM模型并训练第六步 预测及评估第七步 验证算法
构建模型如下图所示:
Model: "model"
__________________________________________________________________________________________________
Layer (type)                    Output Shape         Param #     Connected to
==================================================================================================
inputs (InputLayer)             [(None, 100)]        0
__________________________________________________________________________________________________
embedding (Embedding)           (None, 100, 256)     256256      inputs[0][0]
__________________________________________________________________________________________________
conv1d (Conv1D)                 (None, 100, 256)     196864      embedding[0][0]
__________________________________________________________________________________________________
conv1d_1 (Conv1D)               (None, 100, 256)     262400      embedding[0][0]
__________________________________________________________________________________________________
conv1d_2 (Conv1D)               (None, 100, 256)     327936      embedding[0][0]
__________________________________________________________________________________________________
max_pooling1d (MaxPooling1D)    (None, 25, 256)      0           conv1d[0][0]
__________________________________________________________________________________________________
max_pooling1d_1 (MaxPooling1D)  (None, 25, 256)      0           conv1d_1[0][0]
__________________________________________________________________________________________________
max_pooling1d_2 (MaxPooling1D)  (None, 25, 256)      0           conv1d_2[0][0]
__________________________________________________________________________________________________
concatenate (Concatenate)       (None, 25, 768)      0           max_pooling1d[0][0]
                                                                 max_pooling1d_1[0][0]
                                                                 max_pooling1d_2[0][0]
__________________________________________________________________________________________________
bidirectional (Bidirectional)   (None, 25, 256)      918528      concatenate[0][0]
__________________________________________________________________________________________________
dense (Dense)                   (None, 25, 128)      32896       bidirectional[0][0]
__________________________________________________________________________________________________
dropout (Dropout)               (None, 25, 128)      0           dense[0][0]
__________________________________________________________________________________________________
attention_layer (AttentionLayer (None, 128)          6500        dropout[0][0]
__________________________________________________________________________________________________
dense_1 (Dense)                 (None, 5)            645         attention_layer[0][0]
==================================================================================================
Total params: 2,002,025
Trainable params: 1,745,769
Non-trainable params: 256,256
完整代码如下所示:
# -*- coding: utf-8 -*-
# By:Eastmount CSDN 2023-06-27
import pickle
import pandas as pd
import numpy as np
import matplotlib.pyplot as plt
import seaborn as sns
import tensorflow as tf
from sklearn import metrics
from sklearn.preprocessing import LabelEncoder,OneHotEncoder
from keras.models import Model
from keras.layers import LSTM, GRU, Activation, Dense, Dropout, Input, Embedding
from keras.layers import Convolution1D, MaxPool1D, Flatten
from keras.optimizers import RMSprop
from keras.layers import Bidirectional
from keras.preprocessing.text import Tokenizer
from keras.preprocessing import sequence
from keras.callbacks import EarlyStopping
from keras.models import load_model
from keras.models import Sequential
from keras.layers.merge import concatenate
import time

start = time.clock()

#---------------------------------------第一步 数据读取------------------------------------
# 读取测数据集
train_df = pd.read_csv("..\\train_dataset.csv")
val_df = pd.read_csv("..\\val_dataset.csv")
test_df = pd.read_csv("..\\test_dataset.csv")
print(train_df.head())

# 解决中文显示问题
plt.rcParams['font.sans-serif'] = ['KaiTi']
plt.rcParams['axes.unicode_minus'] = False

#---------------------------------第二步 OneHotEncoder()编码---------------------------------
# 对数据集的标签数据进行编码  (no apt md5 api)
train_y = train_df.apt
val_y = val_df.apt
test_y = test_df.apt
le = LabelEncoder()
train_y = le.fit_transform(train_y).reshape(-1,1)
val_y = le.transform(val_y).reshape(-1,1)
test_y = le.transform(test_y).reshape(-1,1)
Labname = le.classes_

# 对数据集的标签数据进行one-hot编码
ohe = OneHotEncoder()
train_y = ohe.fit_transform(train_y).toarray()
val_y = ohe.transform(val_y).toarray()
test_y = ohe.transform(test_y).toarray()

#-------------------------------第三步 使用Tokenizer对词组进行编码-------------------------------
# 使用Tokenizer对词组进行编码
max_words = 1000
max_len = 100
tok = Tokenizer(num_words=max_words)

# 提取token:api
train_value = train_df.api
train_content = [str(a) for a in train_value.tolist()]
val_value = val_df.api
val_content = [str(a) for a in val_value.tolist()]
test_value = test_df.api
test_content = [str(a) for a in test_value.tolist()]
tok.fit_on_texts(train_content)
print(tok)

# 保存训练好的Tokenizer和导入
with open('tok.pickle', 'wb') as handle:
    pickle.dump(tok, handle, protocol=pickle.HIGHEST_PROTOCOL)
with open('tok.pickle', 'rb') as handle:
    tok = pickle.load(handle)

# 使用tok.texts_to_sequences()将数据转化为序列
train_seq = tok.texts_to_sequences(train_content)
val_seq = tok.texts_to_sequences(val_content)
test_seq = tok.texts_to_sequences(test_content)

# 将每个序列调整为相同的长度
train_seq_mat = sequence.pad_sequences(train_seq,maxlen=max_len)
val_seq_mat = sequence.pad_sequences(val_seq,maxlen=max_len)
test_seq_mat = sequence.pad_sequences(test_seq,maxlen=max_len)

#-------------------------------第四步 建立Attention机制-------------------------------
"""
由于Keras目前还没有现成的Attention层可以直接使用,我们需要自己来构建一个新的层函数。
  Keras自定义的函数主要分为四个部分,分别是:
  init:初始化一些需要的参数
  bulid:具体来定义权重是怎么样的
  call:核心部分,定义向量是如何进行运算的
  compute_output_shape:定义该层输出的大小

推荐文章 https://blog.csdn.net/huanghaocs/article/details/95752379
推荐文章 https://zhuanlan.zhihu.com/p/29201491
"""
# Hierarchical Model with Attention
from keras import initializers
from keras import constraints
from keras import activations
from keras import regularizers
from keras import backend as K
from keras.engine.topology import Layer

K.clear_session()

class AttentionLayer(Layer):
    def __init__(self, attention_size=None, **kwargs):
        self.attention_size = attention_size
        super(AttentionLayer, self).__init__(**kwargs)

    def get_config(self):
        config = super().get_config()
        config['attention_size'] = self.attention_size
        return config

    def build(self, input_shape):
        assert len(input_shape) == 3

        self.time_steps = input_shape[1]
        hidden_size = input_shape[2]
        if self.attention_size is None:
            self.attention_size = hidden_size

        self.W = self.add_weight(name='att_weight', shape=(hidden_size, self.attention_size),
                                initializer='uniform', trainable=True)
        self.b = self.add_weight(name='att_bias', shape=(self.attention_size,),
                                initializer='uniform', trainable=True)
        self.V = self.add_weight(name='att_var', shape=(self.attention_size,),
                                initializer='uniform', trainable=True)
        super(AttentionLayer, self).build(input_shape)

    #解决方法: Attention The graph tensor has name: model/attention_layer/Reshape:0
    #https://blog.csdn.net/weixin_54227557/article/details/129898614
    def call(self, inputs):
        #self.V = K.reshape(self.V, (-1, 1))
        V = K.reshape(self.V, (-1, 1))
        H = K.tanh(K.dot(inputs, self.W) + self.b)
        #score = K.softmax(K.dot(H, self.V), axis=1)
        score = K.softmax(K.dot(H, V), axis=1)
        outputs = K.sum(score * inputs, axis=1)
        return outputs

    def compute_output_shape(self, input_shape):
        return input_shape[0], input_shape[2]

#-------------------------------第五步 建立Attention+CNN模型并训练-------------------------------
# 构建TextCNN模型
num_labels = 5
inputs = Input(name='inputs',shape=[max_len], dtype='float64')
layer = Embedding(max_words+1, 256, input_length=max_len, trainable=False)(inputs)
cnn1 = Convolution1D(256, 3, padding='same', strides = 1, activation='relu')(layer)
cnn1 = MaxPool1D(pool_size=4)(cnn1)
cnn2 = Convolution1D(256, 4, padding='same', strides = 1, activation='relu')(layer)
cnn2 = MaxPool1D(pool_size=4)(cnn2)
cnn3 = Convolution1D(256, 5, padding='same', strides = 1, activation='relu')(layer)
cnn3 = MaxPool1D(pool_size=4)(cnn3)

# 合并三个模型的输出向量
cnn = concatenate([cnn1,cnn2,cnn3], axis=-1)

# BiLSTM+Attention
#bilstm = Bidirectional(LSTM(100, dropout=0.2, recurrent_dropout=0.1, return_sequences=True))(cnn)
bilstm = Bidirectional(LSTM(128, return_sequences=True))(cnn)  #参数保持维度3
layer = Dense(128, activation='relu')(bilstm)
layer = Dropout(0.3)(layer)
attention = AttentionLayer(attention_size=50)(layer)

output = Dense(num_labels, activation='softmax')(attention)
model = Model(inputs=inputs, outputs=output)
model.summary()
model.compile(loss="categorical_crossentropy",
              optimizer='adam',
              metrics=["accuracy"])


flag = "test"
if flag == "train":
    print("模型训练")
    # 模型训练
    model_fit = model.fit(train_seq_mat, train_y, batch_size=128, epochs=15,
                          validation_data=(val_seq_mat,val_y),
                          callbacks=[EarlyStopping(monitor='val_loss',min_delta=0.0005)]
                         )

    # 保存模型
    model.save('cnn_bilstm_model.h5')
    del model  # deletes the existing model

    #计算时间
    elapsed = (time.clock() - start)
    print("Time used:", elapsed)
    print(model_fit.history)

else:
    print("模型预测")
    model = load_model('cnn_bilstm_model.h5', custom_objects={'AttentionLayer': AttentionLayer(50)}, compile=False)

    #--------------------------------------第六步 预测及评估--------------------------------
    # 对测试集进行预测
    test_pre = model.predict(test_seq_mat)
    confm = metrics.confusion_matrix(np.argmax(test_y,axis=1),np.argmax(test_pre,axis=1))
    print(confm)
    print(metrics.classification_report(np.argmax(test_y,axis=1),
                                        np.argmax(test_pre,axis=1),
                                        digits=4))
    print("accuracy",metrics.accuracy_score(np.argmax(test_y,axis=1),
                                 np.argmax(test_pre,axis=1)))
    # 结果存储
    f1 = open("cnn_bilstm_test_pre.txt", "w")
    for n in np.argmax(test_pre, axis=1):
        f1.write(str(n) + "\n")
    f1.close()

    f2 = open("cnn_bilstm_test_y.txt", "w")
    for n in np.argmax(test_y, axis=1):
        f2.write(str(n) + "\n")
    f2.close()

    plt.figure(figsize=(8,8))
    sns.heatmap(confm.T, square=True, annot=True,
                fmt='d', cbar=False, linewidths=.6,
                cmap="YlGnBu")
    plt.xlabel('True label',size = 14)
    plt.ylabel('Predicted label', size = 14)
    plt.xticks(np.arange(5)+0.5, Labname, size = 12)
    plt.yticks(np.arange(5)+0.5, Labname, size = 12)
    plt.savefig('cnn_bilstm_result.png')
    plt.show()

    #--------------------------------------第七步 验证算法--------------------------------
    # 使用tok对验证数据集重新预处理,并使用训练好的模型进行预测
    val_seq = tok.texts_to_sequences(val_content)
    val_seq_mat = sequence.pad_sequences(val_seq,maxlen=max_len)

    # 对验证集进行预测
    val_pre = model.predict(val_seq_mat)
    print(metrics.classification_report(np.argmax(val_y, axis=1),
                                        np.argmax(val_pre, axis=1),
                                        digits=4))
    print("accuracy", metrics.accuracy_score(np.argmax(val_y, axis=1),
                                             np.argmax(val_pre, axis=1)))
    # 计算时间
    elapsed = (time.clock() - start)
    print("Time used:", elapsed)
2.实验结果
训练输出结果如下图所示:
模型训练
Epoch 1/15

 1/10 [==>...........................] - ETA: 18s - loss: 1.6074 - accuracy: 0.2188
 2/10 [=====>........................] - ETA: 2s - loss: 1.5996 - accuracy: 0.2383
 3/10 [========>.....................] - ETA: 2s - loss: 1.5903 - accuracy: 0.2500
 4/10 [===========>..................] - ETA: 2s - loss: 1.5665 - accuracy: 0.2793
 5/10 [==============>...............] - ETA: 2s - loss: 1.5552 - accuracy: 0.2750
 6/10 [=================>............] - ETA: 1s - loss: 1.5346 - accuracy: 0.2930
 7/10 [====================>.........] - ETA: 1s - loss: 1.5229 - accuracy: 0.3103
 8/10 [=======================>......] - ETA: 1s - loss: 1.5208 - accuracy: 0.3135
 9/10 [==========================>...] - ETA: 0s - loss: 1.5132 - accuracy: 0.3281
10/10 [==============================] - ETA: 0s - loss: 1.5046 - accuracy: 0.3400
10/10 [==============================] - 9s 728ms/step - loss: 1.5046 - accuracy: 0.3400 - val_loss: 1.4659 - val_accuracy: 0.5599

Time used: 13.8141568
{'loss': [1.5045626163482666], 'accuracy': [0.34004834294319153],
 'val_loss': [1.4658586978912354], 'val_accuracy': [0.5599128603935242]}
最终预测结果如下所示:
模型预测
[[ 56  13   1   0  40]
 [ 31  53   0   0  16]
 [ 54  47   3   1  15]
 [ 27  14   1  51  37]
 [ 39  16   8   2 125]]
              precision    recall  f1-score   support

           0     0.2705    0.5091    0.3533       110
           1     0.3706    0.5300    0.4362       100
           2     0.2308    0.0250    0.0451       120
           3     0.9444    0.3923    0.5543       130
           4     0.5365    0.6579    0.5910       190

    accuracy                         0.4431       650
   macro avg     0.4706    0.4229    0.3960       650
weighted avg     0.4911    0.4431    0.4189       650

accuracy 0.4430769230769231

havior.
              precision    recall  f1-score   support

           0     0.8571    0.5625    0.6792       352
           1     0.6344    0.5514    0.5900       107
           2     0.0000    0.0000    0.0000         0
           4     0.0000    0.0000    0.0000         0

    accuracy                         0.5599       459
   macro avg     0.3729    0.2785    0.3173       459
weighted avg     0.8052    0.5599    0.6584       459

accuracy 0.5599128540305011
Time used: 23.0178675

六.总结
写到这里这篇文章就结束,希望对您有所帮助。忙碌的五月、六月,真的很忙,项目本子论文毕业,等忙完后好好写几篇安全博客,感谢支持和陪伴,尤其是家人的鼓励和支持, 继续加油!
- 一.恶意软件分析
1.静态特征
2.动态特征 - 二.基于CNN的恶意家族检测
1.数据集
2.模型构建
3.实验结果 - 三.基于BiLSTM的恶意家族检测
1.模型构建
2.实验结果 - 四.基于BiGRU的恶意家族检测
1.模型构建
2.实验结果 - 五.基于CNN+BiLSTM和注意力的恶意家族检测
1.模型构建
2.实验结果
作者提问如下,欢迎大家补充:
- 恶意软件或二进制常见的特征包括哪些?各自有哪些优缺点。
- 恶意软件转灰度图是常见的家族分类方法,它与本文提出的方法的优缺点是什么?
- 如何提取恶意软件CFG和ICFG呢?提取后又如何被机器学习模型学习?
- 常见的向量表征方法有哪些,各自有哪些特点?您能否实现Word2Vec的代码呢?
- 机器学习和深度学习的联系及区别是什么?如果构建深度学习模型学习API序列,其恶意家族检测效果如何?
- 恶意软件家族分类或恶意代码检测发展到如今现状如何?工业界和学术界各种有哪些特点及局限,如何更好地关联来促进领域发展?
- 二进制方向是否还有更好的创新或突破性方法?其鲁棒性、语义增强、可解释性如何提升。
- 如何实现未知家族的恶意软件检测,又如何实现高威胁恶意软件的溯源呢?
- 恶意软件检测如何更好地和底层硬件及编译器融合?以及如何对抗变种、混淆及对抗。
- 恶意软件检测能通过chatGPT技术快速生成变种吗?又如何对抗该技术的发展。
人生路是一个个十字路口,一次次博弈,一次次纠结和得失组成。得失得失,有得有失,不同的选择,不一样的精彩。虽然累和忙,但看到小珞珞还是挺满足的,感谢家人的陪伴。
小珞:爸爸,你下班回来了啊
我:你今天和婆婆去超市哭了吗?
小珞:是的,我想自己拿小发糕
我:听说被老爷爷老奶奶笑了啊,以后…
小珞:他们笑有什么用嘛!
是啊,哈哈,有什么用嘛小珞珞长大了,小可爱长成了小调皮。最近舍不得打车,改公交和共享摩托,但又寄托于买彩票,我们的500万话说,17年我咋不跟着女神在我们小区买套房呢?到今年感觉能赚近100万,够我在贵州教十年书。都是博弈,都是选择,都是酸甜,望小珞能开心健康成长,爱你们喔,继续干活,加油

(By:Eastmount 2023-09-15 夜于贵阳 http://blog.csdn.net/eastmount/ )