halo个人博客搭建及介绍
halo介绍
halo强大易用的开源建站工具,配合上丰富的模板与插件,帮助你构建你心中的理想站点。具体可以搜索下官网的搭建指南。
博客技术架构
后端
1.spring reactive ,响应式编程,代码风格简单及高并发队列优化相应
2.springboot + springdoc + webflux (RouterFunction )
3.themeleaf + spring _+ standardlect(方言) 4.r2db (兼容性,跨多中数据库,表字段二进制存储,结构单一,字段解析转到代码层面) 5.nginx
6.认证:webflux security 采用的cookie session 方案 ,webflux session 存在内存中
7.权限 角色 --rabc角色 模型 – 角色信息 、 菜单权限、接口 映射关系 默认的几种角色
/registry/roles/super-role 管理员
/registry/roles/anonymous 匿名
/registry/roles/authenticated 内部鉴权
api权限实力:前端登录后拿到用户信息,根据对应的权限控制页面 user–>this::me hasSecurityContext 查询权限
ReactiveAuthorizationManager
用户和密码鉴权之后调用,实现check 方法,鉴权角色(非anonymousUser用户的话,加上authenticated 角色和anonymous角色)具有的dependencies
rbac.authorization.halo.run/dependencies --依赖角色(卷积所有规则) --角色规则
请求分为api resource 和非api resource
/**
* @return true for requests to API resources, like /api/v1/nodes,
* and false for non-resource endpoints like /api, /healthz
*/
boolean isResourceRequest();
规则匹配的的话 优先匹配原则 rabc role api verb(增删查改) who how what
主要匹配api 路径
前端
1.console (业务框架(2.0最新版本) --前段代码和后端代码合一)
2.博客站点 themeLeaf 模板引擎 --代理 web 端口 ,实现跨域
代码风格,但有很多抽象,需要深入阅读
例如webflux 建立博客站点路由
org.springframework.web.servlet.ViewResolver- ViewResolvers 是负责为特定操作和区域设置获取 View 对象的对象。通常,控制器要求 ViewResolvers 转发到具有特定名称的视图(控制器方法返回的字符串),然后应用程序中的所有视图解析器按有序链执行,直到其中一个能够解析该视图,其中在返回 View 对象并将控制权传递给它以呈现 HTML 的情况下。
private RouterFunction<ServerResponse> createRouterFunction(RoutePattern routePattern) {
    return switch (routePattern.identifier()) {
        case POST -> postRouteFactory.create(routePattern.pattern());
        case ARCHIVES -> archiveRouteFactory.create(routePattern.pattern());
        case CATEGORIES -> categoriesRouteFactory.create(routePattern.pattern());
        case CATEGORY -> categoryPostRouteFactory.create(routePattern.pattern());
        case TAGS -> tagsRouteFactory.create(routePattern.pattern());
        case TAG -> tagPostRouteFactory.create(routePattern.pattern());
        case AUTHOR -> authorPostsRouteFactory.create(routePattern.pattern());
        case INDEX -> indexRouteFactory.create(routePattern.pattern());
        default ->
            throw new IllegalStateException("Unexpected value: " + routePattern.identifier());
    };
}
存储到 cachedRouters 来相应
搭建
参考官网搭建,建议使用niginx 搭建。
主题功能开发
以https://github.com/nineya/halo-theme-dream2.0/tree/1.0.5为基础开发,站在前人的肩膀上_
开发工具idea
安装npm管理工具nvm
安装node18(node与npm一一对应版本)
中间可能要设置淘宝镜像npm config get registry
-
开发环境准备
- 安装
nodejs版本需要在15+; - 主题目录下执行
npm i安装依赖;
- 安装
-
npm 命令
npm run lint执行代码风格校验。(windows /unix 开发风格)npm run zip执行安装包打包,在无须重新编译js/css时使用。npm run build执行主题打包操作,主题将被打包为压缩包文件存放在dist/目录下,同时source目录下的文件也将被更新。npm run build --devel开发模式进行主题打包,js和css不会被做压缩和混淆处理,方便排查问题。npm run release --tag=$version发布模式执行主题打包操作,将自动更新主题中的版本号,并使用这个版本标签重新创建FreeCDN清单文件。
github cdn 的使用 cdn 和chrome servicework实践
fork一下源项目自己进行开发
将一些公共的静态资源放在github上,通过cdn引入,博客打开速度就正常了
jsDelivr是一个免费、开源的加速CDN公共服务,托管了许多大大小小的项目,可加速访问托管的项目目录或图片资源。 他支持提供npm、Githu、WordPress上资源cdn服务。
jsDelivr 跟其他同类型服务还有什么不同之处呢? jsDelivr 将重心放在更快速的网路连线,利用 CDN 技术来确保每个地区的使用者都能获得最好的连线速度。 依据 jsDelivr 的说明,它们也是首个「打通中国大陆与海外的免费 CDN 服务」,网页开发者无须担心GFW问题而影响连线。 此外,jsDelivr 可将不同的 JavaScript 或 CSS libraries 整合在一起,透过一段链结来载入网站,非常方便! 如果你正在寻找类似服务,jsDelivr 是个不错的选择。
// github
https://cdn.jsdelivr.net/gh/user/repo@version/file
free cdn使用
servicework原理与使用参考
https://blog.nineya.com/archives/103.html
主题原理实现
主题自定义,spring reactive + Thymeleaf standardlect(方言)
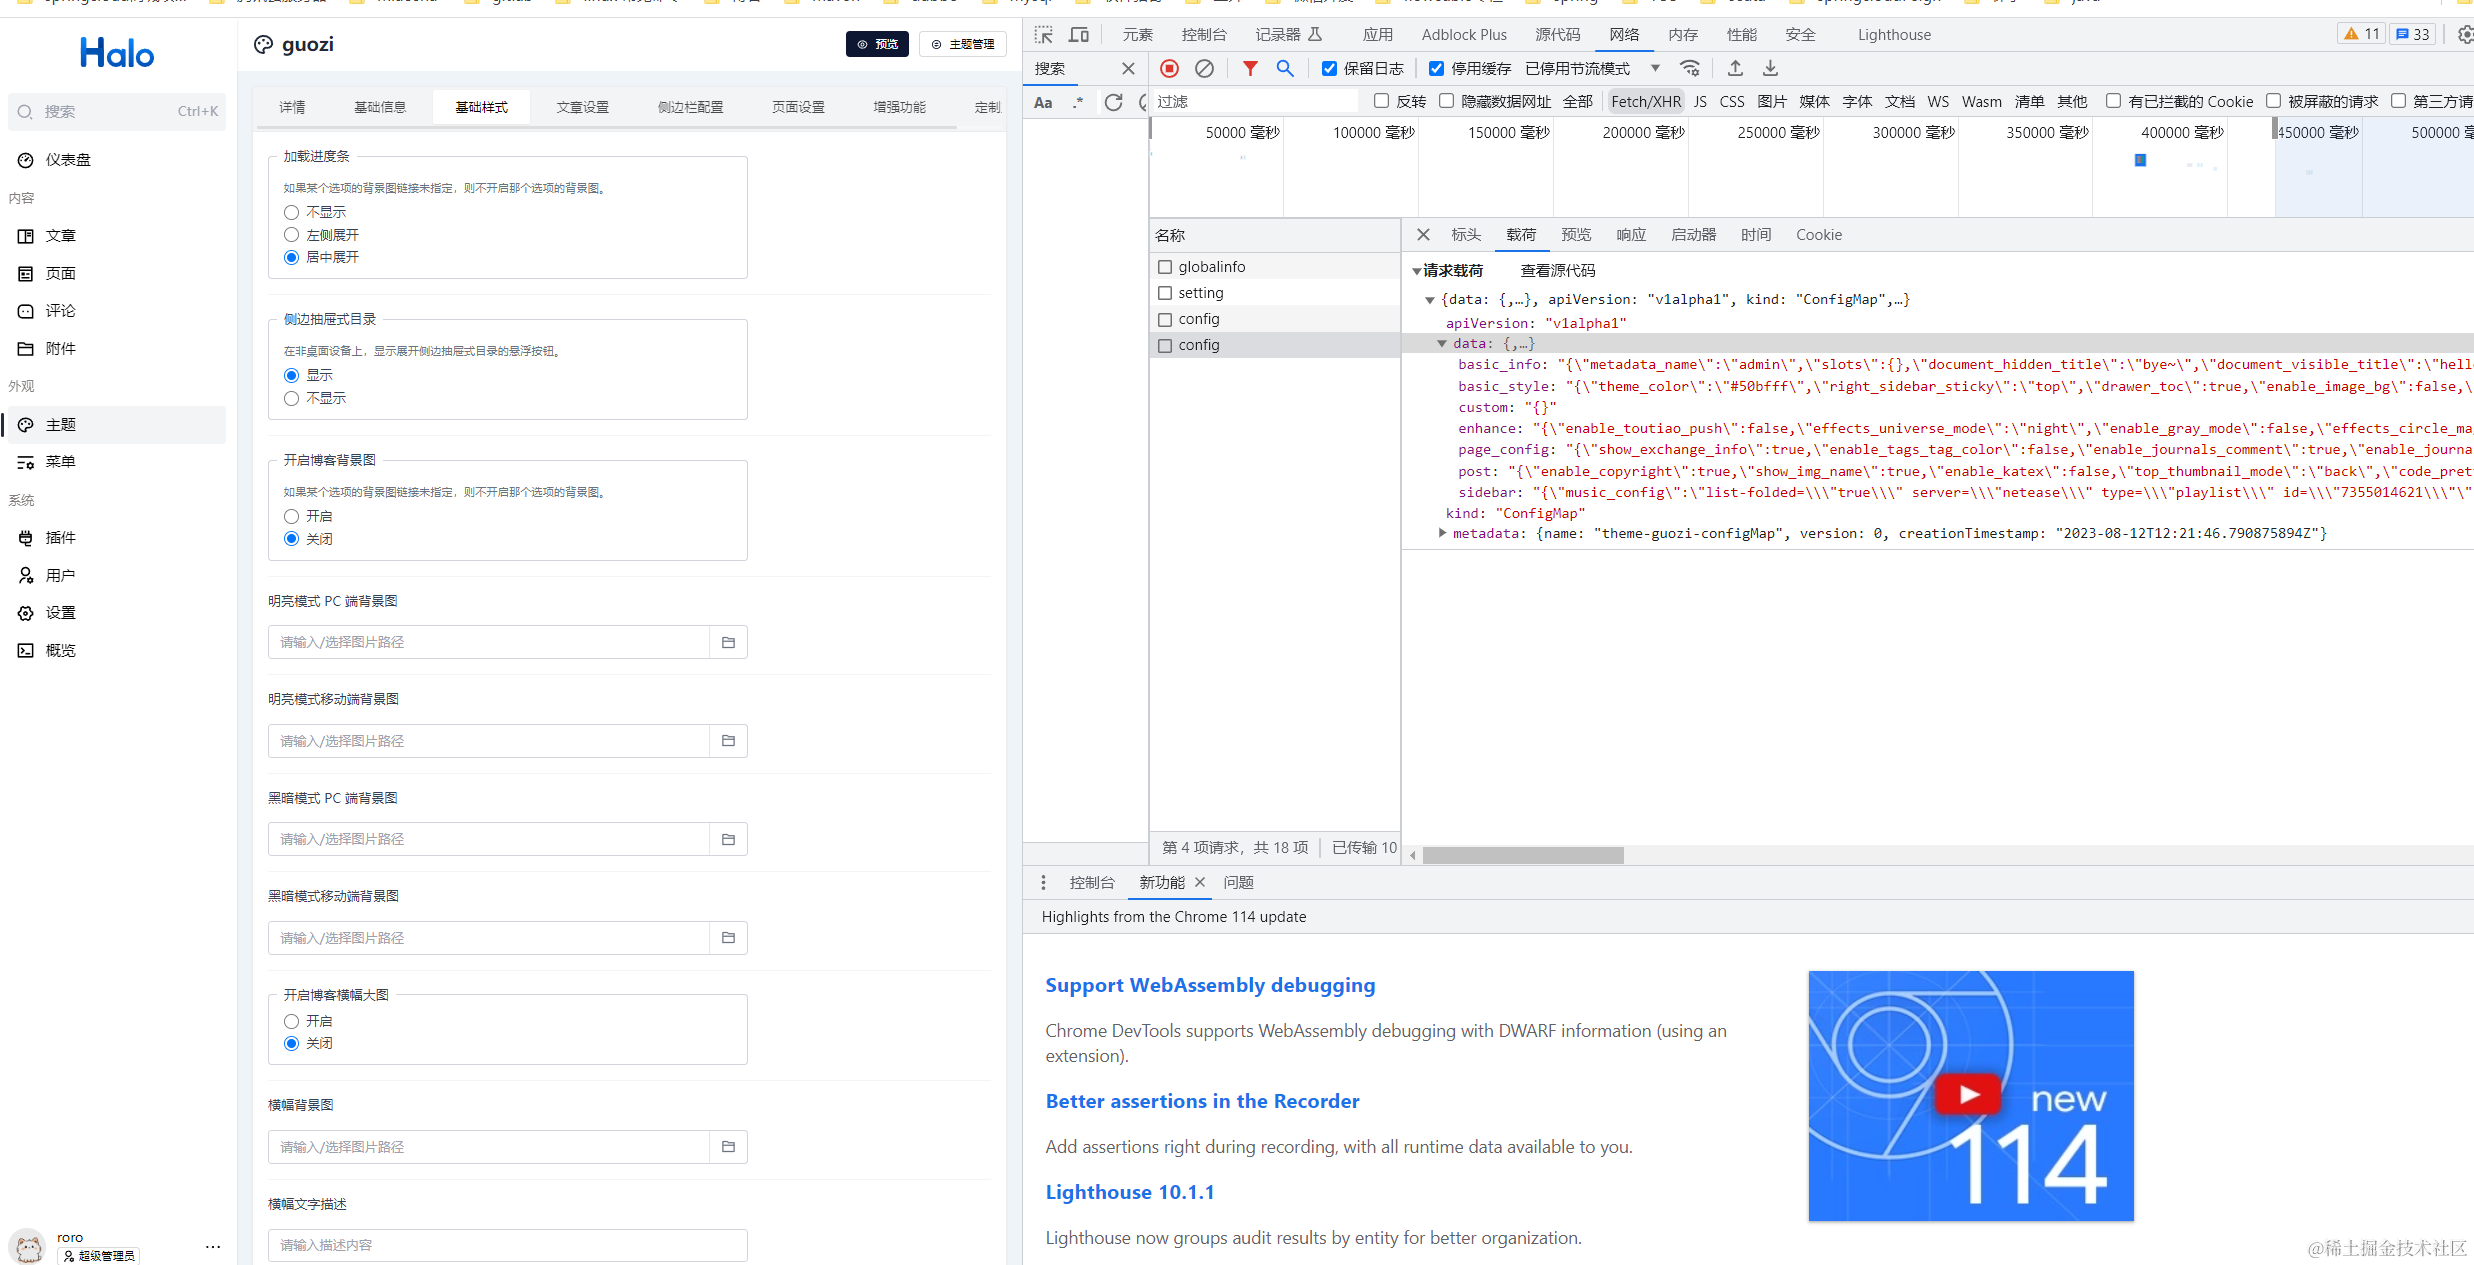
请求获取渲染,根据主题https://81.69.254.72/themes/theme-guozi/assets/css/theme.min.css?mew=1.0.6
请求路径中的主题名称获取对应的ThymeleafTemplateEngine 进行渲染
public static class HaloView extends ThymeleafReactiveView {
@Autowired
private TemplateEngineManager engineManager;
@Autowired
private ThemeResolver themeResolver;
@Override
public Mono<Void> render(Map<String, ?> model, MediaType contentType,
ServerWebExchange exchange) {
return themeResolver.getTheme(exchange).flatMap(theme -> {
// calculate the engine before rendering
setTemplateEngine(engineManager.getTemplateEngine(theme));
exchange.getAttributes().put(PageCacheWebFilter.REQUEST_TO_CACHE, true);
return super.render(model, contentType, exchange);
});
}
......
主题配置实现原理

定义配置内容,数据映射的前端的组件,通过接口安装主题后,回显到控制台页面

后端逻辑对应解析主题的yaml文件,持久化下来
static List<Unstructured> loadThemeResources(Path themePath) {
    try (Stream<Path> paths = Files.list(themePath)) {
        List<FileSystemResource> resources = paths
            .filter(path -> {
                String pathString = path.toString();
                return pathString.endsWith(".yaml") || pathString.endsWith(".yml");
            })
            .filter(path -> {
                String pathString = path.toString();
                for (String themeManifest : THEME_MANIFESTS) {
                    if (pathString.endsWith(themeManifest)) {
                        return false;
                    }
                }
                return true;
            })
            .map(FileSystemResource::new)
            .toList();
        return new YamlUnstructuredLoader(resources.toArray(new Resource[0]))
            .load();
    } catch (IOException e) {
        throw new RuntimeException(e);
    }
}

插件功能开发
https://docs.halo.run/2.9.0-SNAPSHOT/developer-guide/plugin/introduction--插件介绍
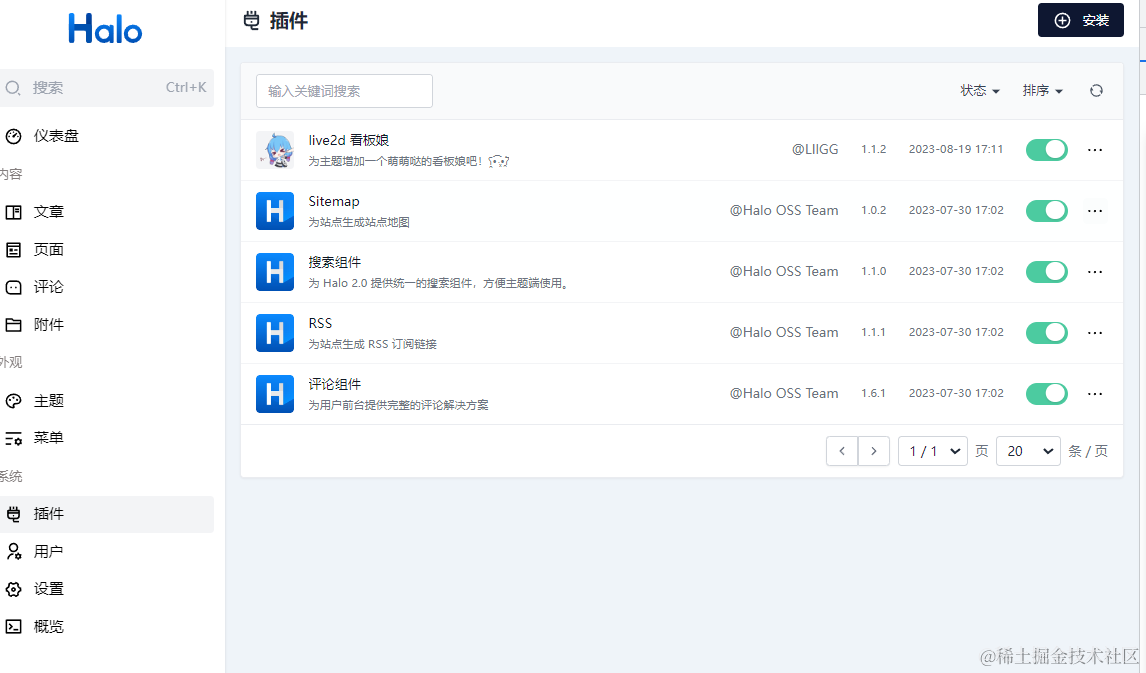
-
安装插件
-
https://81.69.254.72/apis/api.console.halo.run/v1alpha1/plugins/install
private Mono<Plugin> installFromFile(Mono<FilePart> filePartMono,
    Function<Path, Mono<Plugin>> resourceClosure) {
    //将插件流转为jar文件存储到服务器
    var pathMono = filePartMono.flatMap(this::transferToTemp);
    // resourceClosure 文件存储成功后创建数据库记录,文件
    return Mono.usingWhen(pathMono, resourceClosure, this::deleteFileIfExists);
}
-
-
启动插件
HALO的框架利用监听观察者模式,对于指定对象增删查改,有对应的watcher 进行处理,这个得于ReactiveExtensionClient通用的数据库增删查改。
@Override public <E extends Extension> Mono<E> create(E extension) { return Mono.just(extension) .doOnNext(ext -> { var metadata = extension.getMetadata(); // those fields should be managed by halo. metadata.setCreationTimestamp(Instant.now()); metadata.setDeletionTimestamp(null); metadata.setVersion(null); if (!hasText(metadata.getName())) { if (!hasText(metadata.getGenerateName())) { throw new IllegalArgumentException( "The metadata.generateName must not be blank when metadata.name is " + "blank"); } // generate name with random text metadata.setName(metadata.getGenerateName() + randomAlphabetic(5)); } extension.setMetadata(metadata); }) .map(converter::convertTo) .flatMap(extStore -> client.create(extStore.getName(), extStore.getData()) .map(created -> converter.convertFrom((Class<E>) extension.getClass(), created)) .doOnNext(watchers::onAdd)) // 调用对应存储对象的watcher进行处理 .retryWhen(Retry.backoff(3, Duration.ofMillis(100)) // retry when generateName is set .filter(t -> t instanceof DataIntegrityViolationException && hasText(extension.getMetadata().getGenerateName()))); }@Override public void onAdd(Extension extension) { if (isDisposed() || !predicates.onAddPredicate().test(extension)) { return; } // 存储对象对应的处理队列 queue.addImmediately(new Request(extension.getMetadata().getName())); }@Override public Result reconcile(Request request) { //处理队列,利用插件管理器启动插件 try { return client.fetch(Plugin.class, request.name()) .map(plugin -> { if (plugin.getMetadata().getDeletionTimestamp() != null) { cleanUpResourcesAndRemoveFinalizer(request.name()); return Result.doNotRetry(); } addFinalizerIfNecessary(plugin);//走事件模式解耦其他处理 // if true returned, it means it is not ready if (readinessDetection(request.name())) { return new Result(true, null); } reconcilePluginState(plugin.getMetadata().getName()); return Result.doNotRetry(); }) .orElse(Result.doNotRetry()); } catch (DoNotRetryException e) { log.error("Failed to reconcile plugin: [{}]", request.name(), e); persistenceFailureStatus(request.name(), e); return Result.doNotRetry(); } }void doStart(String name) { PluginWrapper pluginWrapper = getPluginWrapper(name); // Check if this plugin version is match requires param. if (!haloPluginManager.validatePluginVersion(pluginWrapper)) { PluginDescriptor descriptor = pluginWrapper.getDescriptor(); String message = String.format( "Plugin requires a minimum system version of [%s], and you have [%s].", descriptor.getRequires(), haloPluginManager.getSystemVersion()); throw new IllegalStateException(message); } if (PluginState.DISABLED.equals(pluginWrapper.getPluginState())) { throw new IllegalStateException( "The plugin is disabled for some reason and cannot be started."); } client.fetch(Plugin.class, name).ifPresent(plugin -> { final Plugin.PluginStatus status = plugin.statusNonNull(); final Plugin.PluginStatus oldStatus = JsonUtils.deepCopy(status); // 调用插件管理器启动插件 PluginState currentState = haloPluginManager.startPlugin(name); if (!PluginState.STARTED.equals(currentState)) { PluginStartingError staringErrorInfo = getStaringErrorInfo(name); log.debug("Failed to start plugin: " + staringErrorInfo.getDevMessage()); throw new IllegalStateException(staringErrorInfo.getMessage()); } plugin.statusNonNull().setLastStartTime(Instant.now()); final String pluginVersion = plugin.getSpec().getVersion(); String jsBundlePath = BundleResourceUtils.getJsBundlePath(haloPluginManager, name); jsBundlePath = applyVersioningToStaticResource(jsBundlePath, pluginVersion); status.setEntry(jsBundlePath); String cssBundlePath = BundleResourceUtils.getCssBundlePath(haloPluginManager, name); cssBundlePath = applyVersioningToStaticResource(cssBundlePath, pluginVersion); status.setStylesheet(cssBundlePath); status.setPhase(currentState); Condition condition = Condition.builder() .type(PluginState.STARTED.toString()) .reason(PluginState.STARTED.toString()) .message("Started successfully") .lastTransitionTime(Instant.now()) .status(ConditionStatus.TRUE) .build(); Plugin.PluginStatus.nullSafeConditions(status) .addAndEvictFIFO(condition); if (!Objects.equals(oldStatus, status)) { client.update(plugin); } });
tips:
该插件还带chatgpt联调功能,不过提供的模型的token需要充值到openai账号获取token

插件原理实现
为什么插件能够自动加载新的bean以及重新加载前端主题文件?
先回答第一个问题
try {
// load and inject bean 加载和注入bean,封装了另外的plugincontext
pluginApplicationInitializer.onStartUp(pluginId);
// create plugin instance and start it
pluginWrapper.getPlugin().start();
requestMappingManager.registerHandlerMappings(pluginWrapper);
// 启动插件
pluginWrapper.setPluginState(PluginState.STARTED);
startedPlugins.add(pluginWrapper);
// 判断记载的不同类处理不同事件 走的插件的上下文,反向注入到主程序的context中
//1.加载路由
//2.Register finders for a plugin.(Template model data finder for theme.)
//3.controllerManager 处理
rootApplicationContext.publishEvent(new HaloPluginStartedEvent(this, pluginWrapper));
} catch (Exception e) {
log.error("Unable to start plugin '{}'",
getPluginLabel(pluginWrapper.getDescriptor()), e);
pluginWrapper.setPluginState(PluginState.FAILED);
startingErrors.put(pluginWrapper.getPluginId(), PluginStartingError.of(
pluginWrapper.getPluginId(), e.getMessage(), e.toString()));
releaseAdditionalResources(pluginId);
} finally {
firePluginStateEvent(new PluginStateEvent(this, pluginWrapper, pluginState));
}
return pluginWrapper.getPluginState();
pluginWrapper是包装了org.pf4j.Plugin的pluginmanager 的一个封装类,用于加载插件包(org.pf4j.Plugin 这个开源插件可以用来获得指定插件执行,属于另外一套机制 可以参考github)
说一插件上下文和pf4j用的是用一个classloader,加载的是相同的类文件
// * The generic IOC container for plugins.
* The plugin-classes loaded through the same plugin-classloader will be put into the same
* {@link PluginApplicationContext} for bean creation.
// 初始化插件context 及注入bean contexts将springReactive 的context区分
private void initApplicationContext(String pluginId) {
if (contextRegistry.containsContext(pluginId)) {
log.debug("Plugin application context for [{}] has bean initialized.", pluginId);
return;
}
StopWatch stopWatch = new StopWatch();
stopWatch.start("createPluginApplicationContext");
PluginApplicationContext pluginApplicationContext =
createPluginApplicationContext(pluginId);
stopWatch.stop();
stopWatch.start("findCandidateComponents");
Set<Class<?>> candidateComponents = findCandidateComponents(pluginId);
stopWatch.stop();
stopWatch.start("registerBean");
for (Class<?> component : candidateComponents) {
log.debug("Register a plugin component class [{}] to context", component);
pluginApplicationContext.registerBean(component);
}
stopWatch.stop();
stopWatch.start("refresh plugin application context");
pluginApplicationContext.refresh();
stopWatch.stop();
contextRegistry.register(pluginId, pluginApplicationContext);
log.debug("initApplicationContext total millis: {} ms -> {}",
stopWatch.getTotalTimeMillis(), stopWatch.prettyPrint());
}
创建插件上下文
private PluginApplicationContext createPluginApplicationContext(String pluginId) {
PluginWrapper plugin = haloPluginManager.getPlugin(pluginId);
// Plugin的classcloder 类由pefj的加载
ClassLoader pluginClassLoader = plugin.getPluginClassLoader();
StopWatch stopWatch = new StopWatch("initialize-plugin-context");
stopWatch.start("Create PluginApplicationContext");
PluginApplicationContext pluginApplicationContext = new PluginApplicationContext();
pluginApplicationContext.setClassLoader(pluginClassLoader);
if (sharedApplicationContextHolder != null) {
pluginApplicationContext.setParent(sharedApplicationContextHolder.getInstance());
}
// populate plugin to plugin application context
pluginApplicationContext.setPluginId(pluginId);
stopWatch.stop();
stopWatch.start("Create DefaultResourceLoader");
DefaultResourceLoader defaultResourceLoader = new DefaultResourceLoader(pluginClassLoader);
pluginApplicationContext.setResourceLoader(defaultResourceLoader);
var mutablePropertySources = pluginApplicationContext.getEnvironment().getPropertySources();
resolvePropertySources(pluginId, pluginApplicationContext)
.forEach(mutablePropertySources::addLast);
stopWatch.stop();
// 获取bean加载工厂类
// BeanDefinition 是对 Bean 的定义,其保存了 Bean 的各种信息,如属性、构造方法参数、是否单例、是否延迟加载等。这里的注册 Bean 是指将 Bean 定义成 BeanDefinition,之后放入 Spring 容器中,我们常说的容器其实就是 Beanfactory 中的一个 Map,key 是 Bean 的名称,value 是 Bean 对应的 BeanDefinition,这个注册 Bean 的方法由 BeanFactory 子类实现。
DefaultListableBeanFactory beanFactory =
(DefaultListableBeanFactory) pluginApplicationContext.getBeanFactory();
stopWatch.start("registerAnnotationConfigProcessors");
AnnotationConfigUtils.registerAnnotationConfigProcessors(beanFactory);
stopWatch.stop();
beanFactory.registerSingleton("pluginWrapper", haloPluginManager.getPlugin(pluginId));
populateSettingFetcher(pluginId, beanFactory);
log.debug("Total millis: {} ms -> {}", stopWatch.getTotalTimeMillis(),
stopWatch.prettyPrint());
return pluginApplicationContext;
}
插件context 共享上下文,会作为父级上下文共享bean
/**
 * Set the parent of this application context, also setting
 * the parent of the internal BeanFactory accordingly.
 * @see org.springframework.beans.factory.config.ConfigurableBeanFactory#setParentBeanFactory
 */
@Override
public void setParent(@Nullable ApplicationContext parent) {
   super.setParent(parent);
   this.beanFactory.setParentBeanFactory(getInternalParentBeanFactory());
}
//Beans in the Core that need to be shared with plugins will be injected into this
SharedApplicationContext createSharedApplicationContext() {
// TODO Optimize creation timing
SharedApplicationContext sharedApplicationContext = new SharedApplicationContext();
sharedApplicationContext.refresh();
DefaultListableBeanFactory beanFactory =
(DefaultListableBeanFactory) sharedApplicationContext.getBeanFactory();
// register shared object here
var extensionClient = rootApplicationContext.getBean(ExtensionClient.class);
var reactiveExtensionClient = rootApplicationContext.getBean(ReactiveExtensionClient.class);
beanFactory.registerSingleton("extensionClient", extensionClient);
beanFactory.registerSingleton("reactiveExtensionClient", reactiveExtensionClient);
DefaultSchemeManager defaultSchemeManager =
rootApplicationContext.getBean(DefaultSchemeManager.class);
beanFactory.registerSingleton("schemeManager", defaultSchemeManager);
beanFactory.registerSingleton("externalUrlSupplier",
rootApplicationContext.getBean(ExternalUrlSupplier.class));
beanFactory.registerSingleton("serverSecurityContextRepository",
rootApplicationContext.getBean(ServerSecurityContextRepository.class));
beanFactory.registerSingleton("attachmentService",
rootApplicationContext.getBean(AttachmentService.class));
// TODO add more shared instance here
return sharedApplicationContext;
}
//反向将reactive context里面的fetcher 注入到插件context里面
private void populateSettingFetcher(String pluginName,
    DefaultListableBeanFactory listableBeanFactory) {
    ReactiveExtensionClient extensionClient =
        rootApplicationContext.getBean(ReactiveExtensionClient.class);
    ReactiveSettingFetcher reactiveSettingFetcher =
        new DefaultReactiveSettingFetcher(extensionClient, pluginName);
    listableBeanFactory.registerSingleton("settingFetcher",
        new DefaultSettingFetcher(reactiveSettingFetcher));
    listableBeanFactory.registerSingleton("reactiveSettingFetcher", reactiveSettingFetcher);
}
总结下:halo 用了单独的上下文,其中继承了部分主程序上下文的bean,作为parentcontext,也就是上文中的SharedApplicationContext,然后插件中的bean,通过plugin机制,加载到单独的上下文中。主题的话是单独加载的js文件。
官方文档有个详细的例子讲解插件的使用,结合该例子可以加深理解
https://docs.halo.run/2.9.0-SNAPSHOT/developer-guide/plugin/examples/todolist

