前言
我们都知道pytest和unittest是兼容的,但是它也有不兼容的地方,比如ddt数据驱动,测试夹具fixtures(即setup、teardown)这些功能在pytest中都不能使用了,因为pytest已经不再继承unittest了。
不使用ddt数据驱动那pytest是如何实现参数化的呢?答案就是mark里自带的一个参数化标签。
一、源码解读
关键代码:@pytest.mark.parametrize
我们先看下源码:def parametrize(self,argnames, argvalues, indirect=False, ids=None, scope=None):,按住ctrl然后点击对应的函数名就可查看源码。
def parametrize(self,argnames, argvalues, indirect=False, ids=None, scope=None):
        """ Add new invocations to the underlying test function using the list
        of argvalues for the given argnames.  Parametrization is performed
        during the collection phase.  If you need to setup expensive resources
        see about setting indirect to do it rather at test setup time.
        :arg argnames: a comma-separated string denoting one or more argument
                       names, or a list/tuple of argument strings.
        :arg argvalues: The list of argvalues determines how often a
            test is invoked with different argument values.  If only one
            argname was specified argvalues is a list of values.  If N
            argnames were specified, argvalues must be a list of N-tuples,
            where each tuple-element specifies a value for its respective
            argname.
        :arg indirect: The list of argnames or boolean. A list of arguments'
            names (self,subset of argnames). If True the list contains all names from
            the argnames. Each argvalue corresponding to an argname in this list will
            be passed as request.param to its respective argname fixture
            function so that it can perform more expensive setups during the
            setup phase of a test rather than at collection time.
        :arg ids: list of string ids, or a callable.
            If strings, each is corresponding to the argvalues so that they are
            part of the test id. If None is given as id of specific test, the
            automatically generated id for that argument will be used.
            If callable, it should take one argument (self,a single argvalue) and return
            a string or return None. If None, the automatically generated id for that
            argument will be used.
            If no ids are provided they will be generated automatically from
            the argvalues.
        :arg scope: if specified it denotes the scope of the parameters.
            The scope is used for grouping tests by parameter instances.
            It will also override any fixture-function defined scope, allowing
            to set a dynamic scope using test context or configuration.
""" 我们来看下主要的四个参数:
参数1-argnames:一个或多个参数名,用逗号分隔的字符串,如"arg1,arg2,arg3",或参数字符串的列表/元组。需要注意的是,参数名需要与用例的入参一致。
参数2-argvalues:参数值,必须是列表类型;如果有多个参数,则用元组存放值,一个元组存放一组参数值,元组放在列表。(实际上元组包含列表、列表包含列表也是可以的,可以动手试一下)
# 只有一个参数username时,列表里都是这个参数的值:
@pytest.mark.parametrize("username", ["user1", "user2", "user3"])
# 有多个参数username、pwd,用元组存放参数值,一个元组对应一组参数:
@pytest.mark.parametrize("username, pwd", [("user1", "pwd1"), ("user2", "pwd2"), ("user3", "pwd3")])
参数3-indirect:默认为False,设置为Ture时会把传进来的参数(argnames)当函数执行。后面会进行详解。
参数4-ids:用例的ID,传字符串列表,它可以标识每一个测试用例,自定义测试数据结果显示,增加可读性;需要注意的是ids的长度需要与测试用例的数量一致。
二、单个参数化
下面我们来看下常用的参数化:
import pytest


data = [(1, 2, 3), (4, 5, 9)]


@pytest.mark.parametrize('a, b, expect', data)
def test_param(a, b, expect):
    print('\n测试数据:{}+{}'.format(a, b))
assert a+b == expect 运行结果:
Testing started at 14:10 ...

============================= test session starts =============================
platform win32 -- Python 3.8.1, pytest-5.4.3, py-1.9.0, pluggy-0.13.1 -- C:\software\python\python.exe
cachedir: .pytest_cache
rootdir: D:\myworkspace\test, inifile: pytest.ini
collecting ... test.py::test_param[1-2-3]
test.py::test_param[4-5-9]
collected 2 items

test.py::test_param[1-2-3] PASSED                                        [ 50%]
测试数据:1+2

test.py::test_param[4-5-9] PASSED                                        [100%]
测试数据:4+5


============================== 2 passed in 0.02s ==============================

Process finished with exit code 0 如上用例参数化后,一条测试数据就会执行一遍用例。
再看下列表包含字典的:
import pytest


def login(user, pwd):
    """登录功"""
    if user == "admin" and pwd == "admin123":
        return {"code": 0, "msg": "登录成功!"}
    else:
        return {"code": 1, "msg": "登陆失败,账号或密码错误!"}


# 测试数据
test_datas = [{"user": "admin", "pwd": "admin123", "expected": "登录成功!"},
              {"user": "", "pwd": "admin123", "expected": "登陆失败,账号或密码错误!"},
              {"user": "admin", "pwd": "", "expected": "登陆失败,账号或密码错误!"}
              ]


@pytest.mark.parametrize("test_data", test_datas)
def test_login(test_data):
    # 测试用例
    res = login(test_data["user"], test_data["pwd"])
    # 断言
    print(111)
assert res["msg"] == test_data["expected"] 运行结果:
Testing started at 14:13 ...

============================= test session starts =============================
platform win32 -- Python 3.8.1, pytest-5.4.3, py-1.9.0, pluggy-0.13.1 -- C:\software\python\python.exe
cachedir: .pytest_cache
rootdir: D:\myworkspace\test, inifile: pytest.ini
collecting ... test.py::test_login[test_data0]
test.py::test_login[test_data1]
test.py::test_login[test_data2]
collected 3 items

test.py::test_login[test_data0] PASSED                                   [ 33%]111

test.py::test_login[test_data1] PASSED                                   [ 66%]111

test.py::test_login[test_data2] PASSED                                   [100%]111


============================== 3 passed in 0.02s ==============================

Process finished with exit code 0
三、多个参数化
一个函数或一个类都可以使用多个参数化装饰器,“笛卡尔积”原理。最终生成的用例是n1*n2*n3...条,如下例子,参数一的值有2个,参数二的值有3个,那么最后生成的用例就是2*3条。
import pytest


data1 = [1, 2]
data2 = ['a', 'b', 'c']


@pytest.mark.parametrize('test1', data1)
@pytest.mark.parametrize('test2', data2)
def test_param(test1, test2):
print('\n测试数据:{}-{}'.format(test1, test2)) 运行结果:
Testing started at 14:15 ...

============================= test session starts =============================
platform win32 -- Python 3.8.1, pytest-5.4.3, py-1.9.0, pluggy-0.13.1 -- C:\software\python\python.exe
cachedir: .pytest_cache
rootdir: D:\myworkspace\test, inifile: pytest.ini
collecting ... test.py::test_param[a-1]
test.py::test_param[a-2]
test.py::test_param[b-1]
test.py::test_param[b-2]
test.py::test_param[c-1]
test.py::test_param[c-2]
collected 6 items

test.py::test_param[a-1] PASSED                                          [ 16%]
测试数据:1-a

test.py::test_param[a-2] PASSED                                          [ 33%]
测试数据:2-a

test.py::test_param[b-1] PASSED                                          [ 50%]
测试数据:1-b

test.py::test_param[b-2] PASSED                                          [ 66%]
测试数据:2-b

test.py::test_param[c-1] PASSED                                          [ 83%]
测试数据:1-c

test.py::test_param[c-2] PASSED                                          [100%]
测试数据:2-c


============================== 6 passed in 0.03s ==============================

Process finished with exit code 0 从上面的例子来看,@pytest.mark.parametrize()其实跟ddt的用法很相似的,多用就好了。
四、标记数据
在参数化中,也可以标记数据进行断言、跳过等
# 标记参数化
@pytest.mark.parametrize("test_input,expected", [
    ("3+5", 8), ("2+4", 6),
    pytest.param("6 * 9", 42, marks=pytest.mark.xfail),
    pytest.param("6 * 6", 42, marks=pytest.mark.skip)
])
def test_mark(test_input, expected):
assert eval(test_input) == expected 运行结果,可以看到2个通过,1个断言失败的,1个跳过的。
Testing started at 14:17 ...

============================= test session starts =============================
platform win32 -- Python 3.8.1, pytest-5.4.3, py-1.9.0, pluggy-0.13.1 -- C:\software\python\python.exe
cachedir: .pytest_cache
rootdir: D:\myworkspace\test, inifile: pytest.ini
collecting ... test.py::test_mark[3+5-8]
test.py::test_mark[2+4-6]
test.py::test_mark[6 * 9-42]
test.py::test_mark[6 * 6-42]
collected 4 items

test.py::test_mark[3+5-8]
test.py::test_mark[2+4-6]
test.py::test_mark[6 * 9-42]
test.py::test_mark[6 * 6-42]

=================== 2 passed, 1 skipped, 1 xfailed in 0.14s ===================

Process finished with exit code 0
PASSED                                         [ 25%]PASSED                                         [ 50%]XFAIL                                       [ 75%]
test_input = '6 * 9', expected = 42

    @pytest.mark.parametrize("test_input,expected", [
        ("3+5", 8), ("2+4", 6),
        pytest.param("6 * 9", 42, marks=pytest.mark.xfail),
        pytest.param("6 * 6", 42, marks=pytest.mark.skip)
    ])
    def test_mark(test_input, expected):
>       assert eval(test_input) == expected
E       AssertionError

test.py:89: AssertionError
SKIPPED                                     [100%]
Skipped: unconditional skip
五、用例ID
前面源码分析说到ids可以标识每一个测试用例;有多少组数据,就要有多少个id,然后组成一个id的列表;现在来看下实例。
import pytest


def login(user, pwd):
    """登录功"""
    if user == "admin" and pwd == "admin123":
        return {"code": 0, "msg": "登录成功!"}
    else:
        return {"code": 1, "msg": "登陆失败,账号或密码错误!"}


# 测试数据
test_datas = [{"user": "admin", "pwd": "admin123", "expected": "登录成功!"},
             {"user": "", "pwd": "admin123", "expected": "登陆失败,账号或密码错误!"},
             {"user": "admin", "pwd": "", "expected": "登陆失败,账号或密码错误!"}
             ]


@pytest.mark.parametrize("test_data", test_datas, ids=["输入正确账号、密码,登录成功",
                                                      "账号为空,密码正确,登录失败",
                                                      "账号正确,密码为空,登录失败",
                                                      ])
def test_login(test_data):
    # 测试用例
    res = login(test_data["user"], test_data["pwd"])
    # 断言
    print(111)
    assert res["msg"] == test_data["expected"]
运行结果:
Testing started at 10:34 ...

============================= test session starts =============================
platform win32 -- Python 3.8.1, pytest-5.4.3, py-1.9.0, pluggy-0.13.1 -- C:\software\python\python.exe
cachedir: .pytest_cache
rootdir: D:\myworkspace\test, inifile: pytest.ini
collecting ... collected 3 items

test.py::test_login[\u8f93\u5165\u6b63\u786e\u8d26\u53f7\u3001\u5bc6\u7801\uff0c\u767b\u5f55\u6210\u529f] PASSED [ 33%]111

test.py::test_login[\u8d26\u53f7\u4e3a\u7a7a\uff0c\u5bc6\u7801\u6b63\u786e\uff0c\u767b\u5f55\u5931\u8d25] PASSED [ 66%]111

test.py::test_login[\u8d26\u53f7\u6b63\u786e\uff0c\u5bc6\u7801\u4e3a\u7a7a\uff0c\u767b\u5f55\u5931\u8d25] PASSED [100%]111


============================== 3 passed in 0.02s ==============================

Process finished with exit code 0 注意: [\u8f93\u5165\u6b63 ...] 这些并不是乱码,是unicode 编码,因为我们输入的是中文,指定一下编码就可以。在项目的根目录的 conftest.py 文件,加以下代码:
def pytest_collection_modifyitems(items):
    """
    测试用例收集完成时,将收集到的item的name和nodeid的中文显示在控制台上
    :return:
    """
    for item in items:
        item.name = item.name.encode("utf-8").decode("unicode_escape")
        print(item.nodeid)
item._nodeid = item.nodeid.encode("utf-8").decode("unicode_escape") 再运行一遍就可以了。
Testing started at 10:38 ...

============================= test session starts =============================
platform win32 -- Python 3.8.1, pytest-5.4.3, py-1.9.0, pluggy-0.13.1 -- C:\software\python\python.exe
cachedir: .pytest_cache
rootdir: D:\myworkspace\test, inifile: pytest.ini
collecting ... test.py::test_login[\u8f93\u5165\u6b63\u786e\u8d26\u53f7\u3001\u5bc6\u7801\uff0c\u767b\u5f55\u6210\u529f]
test.py::test_login[\u8d26\u53f7\u4e3a\u7a7a\uff0c\u5bc6\u7801\u6b63\u786e\uff0c\u767b\u5f55\u5931\u8d25]
test.py::test_login[\u8d26\u53f7\u6b63\u786e\uff0c\u5bc6\u7801\u4e3a\u7a7a\uff0c\u767b\u5f55\u5931\u8d25]
collected 3 items

test.py::test_login[输入正确账号、密码,登录成功] PASSED                 [ 33%]111

test.py::test_login[账号为空,密码正确,登录失败] PASSED                 [ 66%]111

test.py::test_login[账号正确,密码为空,登录失败] PASSED                 [100%]111


============================== 3 passed in 0.02s ==============================

Process finished with exit code 0
最后感谢每一个认真阅读我文章的人,礼尚往来总是要有的,虽然不是什么很值钱的东西,如果你用得到的话可以直接拿走:
软件测试面试小程序
被百万人刷爆的软件测试题库!!!谁用谁知道!!!全网最全面试刷题小程序,手机就可以刷题,地铁上公交上,卷起来!
涵盖以下这些面试题板块:
1、软件测试基础理论 ,2、web,app,接口功能测试 ,3、网络 ,4、数据库 ,5、linux
6、web,app,接口自动化 ,7、性能测试 ,8、编程基础,9、hr面试题 ,10、开放性测试题,11、安全测试,12、计算机基础
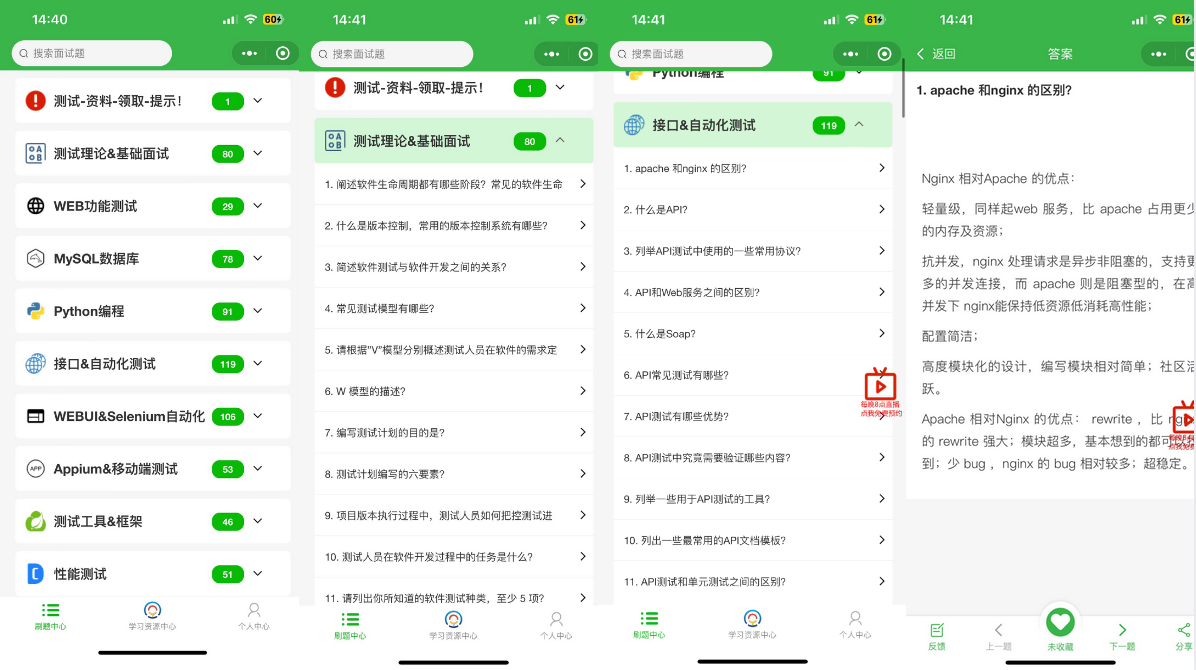
这些资料,对于【软件测试】的朋友来说应该是最全面最完整的备战仓库,这个仓库也陪伴上万个测试工程师们走过最艰难的路程,希望也能帮助到你!

