文章目录
- 前言
- 1. 效果展示
- 代码说明
- 3. 参考文档
- 4. 不合适点
前言
本文来源论文《Simple Copy-Paste is a Strong Data Augmentation Method
for Instance Segmentation》(CVPR2020),对其数据增强方式进行实现。
论文地址:https://arxiv.org/abs/2012.07177
解读:https://mp.weixin.qq.com/s/nKC3bEe3m1eqPDI0LpVTIA
主要思想:

本文参考该数据增强的语义分割实现[1],相应修改为对应目标检测的实现,坐标变换的写法参考[2]。
其中,对应的标注信息为txt格式,如果自己的数据集是VOC或COCO格式,可自行修改,也可先转换成txt格式再使用下述代码。
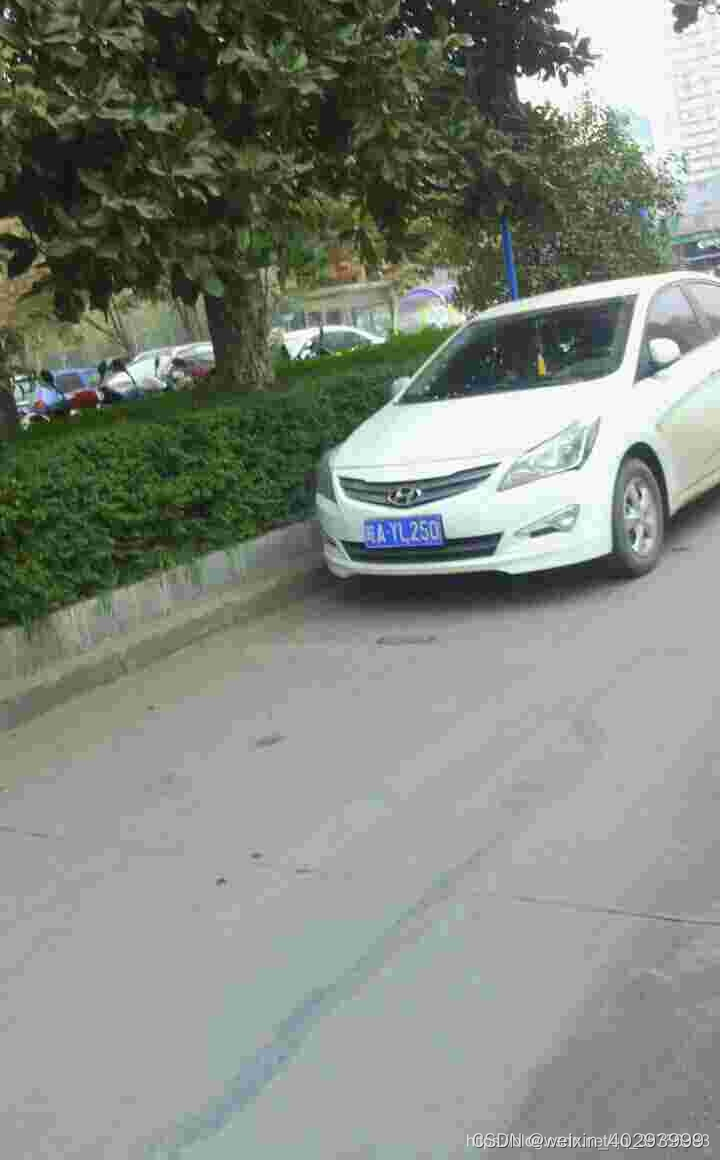
1. 效果展示
数据来源CCPD2019数据集,下图分别为img_main和img_src:
将img_src的车牌目标“复制-粘贴”到img_main的结果:
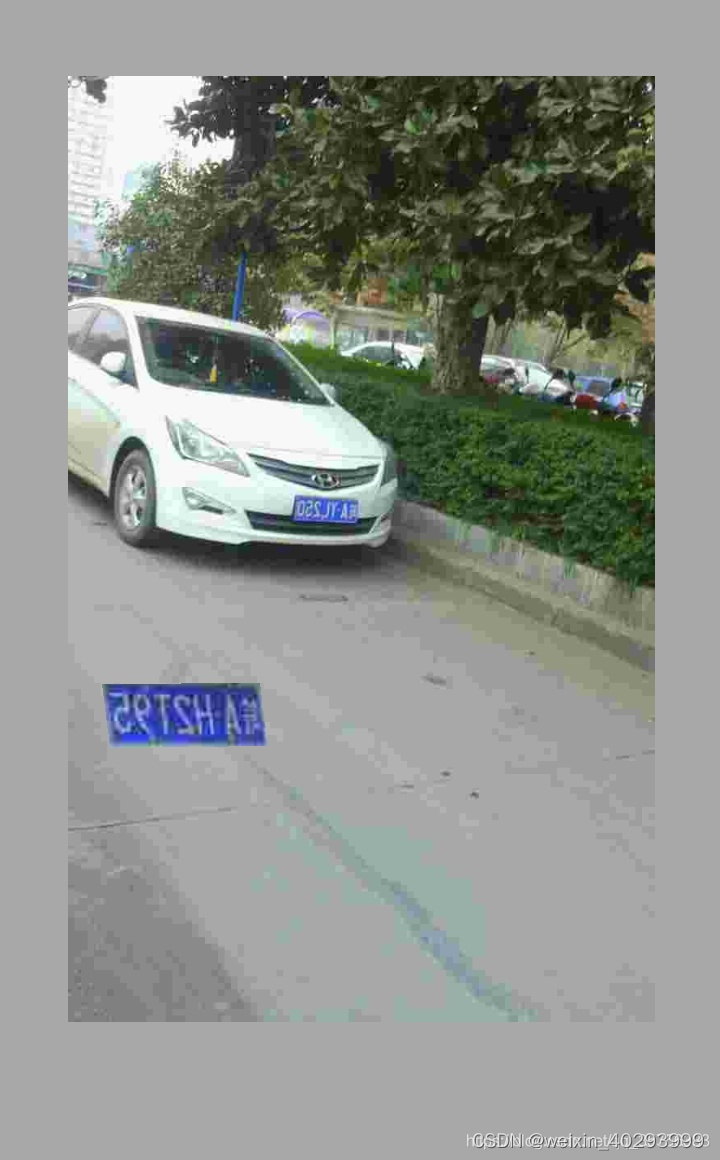
新生成的图片大小与img_main一致,空白的部分会补灰边。
代码说明
'''
Descripttion: Data Augment for Object Detection.
version: 1.0.0
Author: lakuite
Date: 2021-08-06 13:37:38
Copyright: Copyright(c) 2021 lakuite. All Rights Reserved
'''
import numpy as np
import cv2
import os
import tqdm
import argparse
from skimage.draw import polygon
import random
def random_flip_horizontal(img, box, p=0.5):
'''
对img和mask随机进行水平翻转。box为二维np.array。
https://blog.csdn.net/weixin_41735859/article/details/106468551
img[:,:,::-1] gbr-->bgr、img[:,::-1,:] 水平翻转、img[::-1,:,:] 上下翻转
'''
if np.random.random() < p:
w = img.shape[1]
img = img[:, ::-1, :]
box[:, [0, 2, 4, 6]] = w - box[:, [2, 0, 6, 4]] # 仅针对4个点变换
return img, box
def Large_Scale_Jittering(img, box, min_scale=0.1, max_scale=2.0):
'''
对img和box进行0.1-2.0的大尺度抖动,并变回h*w的大小。
'''
rescale_ratio = np.random.uniform(min_scale, max_scale)
h, w, _ = img.shape
# rescale
h_new, w_new = int(h * rescale_ratio), int(w * rescale_ratio)
img = cv2.resize(img, (w_new, h_new), interpolation=cv2.INTER_LINEAR)
# crop or padding
# x,y是随机选择左上角的一个点,让小图片在这个位置,或者让大图片从这个位置开始裁剪
x, y = int(np.random.uniform(0, abs(w_new - w))), int(np.random.uniform(0, abs(h_new - h)))
# 如果图像缩小了,那么其余部分要填充为像素168大小
if rescale_ratio <= 1.0: # padding
img_pad = np.ones((h, w, 3), dtype=np.uint8) * 168
img_pad[y:y + h_new, x:x + w_new, :] = img
box[:, [0, 2, 4, 6]] = box[:, [0, 2, 4, 6]] * w_new/w + x # x坐标
box[:, [1, 3, 5, 7]] = box[:, [1, 3, 5, 7]] * h_new/h + y # y坐标
return img_pad, box
# 如果图像放大了,那么要裁剪成h*w的大小
else: # crop
img_crop = img[y:y + h, x:x + w, :]
box[:, [0, 2, 4, 6]] = box[:, [0, 2, 4, 6]] * w_new/w - x
box[:, [1, 3, 5, 7]] = box[:, [1, 3, 5, 7]] * h_new/h - y
return img_crop, box
def img_add(img_src, img_main, mask_src, box_src):
'''
将src加到main图像中,结果图还是main图像的大小。
'''
if len(img_main.shape) == 3:
h, w, c = img_main.shape
elif len(img_main.shape) == 2:
h, w = img_main.shape
src_h, src_w = img_src.shape[0], img_src.shape[1]
mask = np.asarray(mask_src, dtype=np.uint8)
# mask是二值图片,对src进行局部遮挡,即只露出目标物体的像素。
sub_img01 = cv2.add(img_src, np.zeros(np.shape(img_src), dtype=np.uint8), mask=mask) # 报错深度不一致
mask_02 = cv2.resize(mask, (w, h), interpolation=cv2.INTER_NEAREST)
mask_02 = np.asarray(mask_02, dtype=np.uint8)
sub_img02 = cv2.add(img_main, np.zeros(np.shape(img_main), dtype=np.uint8),
mask=mask_02) # 在main图像上对应位置挖了一块
# main图像减去要粘贴的部分的图,然后加上复制过来的图
img_main = img_main - sub_img02 + cv2.resize(sub_img01, (w, h),
interpolation=cv2.INTER_NEAREST)
box_src[:, [0, 2, 4, 6]] = box_src[:, [0, 2, 4, 6]] * w/src_w
box_src[:, [1, 3, 5, 7]] = box_src[:, [1, 3, 5, 7]] * h/src_h
return img_main, box_src
def normal_(jpg_path, txt_path="", box=None):
"""
根据txt获得box或者根据box获得mask。
:param jpg_path: 图片路径
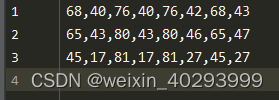
:param txt_path: x1,y1,x2,y2 x3,y3,x4,y4...
:param box: 如果有box,则为根据box生成mask
:return: 图像,box 或 掩码
"""
if isinstance(jpg_path, str): # 如果是路径就读取图片
jpg_path = cv2.imread(jpg_path)
img = jpg_path.copy()
if box is None: # 一定有txt_path
lines = open(txt_path).readlines()
box = []
for line in lines:
ceils = line.strip().split(',')
xy = []
for ceil in ceils:
xy.append(round(float(ceil)))
box.append(np.array(xy))
return np.array(img), np.array(box)
else: # 获得mask
h, w = img.shape[:2]
mask = np.zeros((h, w), dtype=np.float32)
for xy in box: # 对每个框
xy = np.array(xy).reshape(-1, 2)
cv2.fillPoly(mask, [xy.astype(np.int32)], 1)
return np.array(mask)
def is_coincide(polygon_1, polygon_2):
'''
判断2个四边形是否重合
:param polygon_1: [x1, y1,...,x4, y4]
:param polygon_2:
:return: bool,1表示重合
'''
rr1, cc1 = polygon([polygon_1[i] for i in range(0, len(polygon_1), 2)],
[polygon_1[i] for i in range(1, len(polygon_1), 2)])
rr2, cc2 = polygon([polygon_2[i] for i in range(0, len(polygon_2), 2)],
[polygon_2[i] for i in range(1, len(polygon_2), 2)])
try: # 能包含2个四边形的最小矩形长宽
r_max = max(rr1.max(), rr2.max()) + 1
c_max = max(cc1.max(), cc2.max()) + 1
except:
return 0
# 相当于canvas是包含了2个多边形的一个画布,有2个多边形的位置像素为1,重合位置像素为2
canvas = np.zeros((r_max, c_max))
canvas[rr1, cc1] += 1
canvas[rr2, cc2] += 1
intersection = np.sum(canvas == 2)
return 1 if intersection!=0 else 0
def copy_paste(img_main_path, img_src_path, txt_main_path, txt_src_path, coincide=False, muti_obj=True):
'''
整个复制粘贴操作,输入2张图的图片和坐标路径,返回其融合后的图像和坐标结果。
1. 传入随机选择的main图像和src图像的img和txt路径;
2. 对其进行随机水平翻转;
3. 对其进行随机抖动;
4. 获得src变换完后对应的mask;
5. 将src的结果加到main中,返回对应main_new的img和src图的box.
'''
# 读取图像和坐标
img_main, box_main = normal_(img_main_path, txt_main_path)
img_src, box_src = normal_(img_src_path, txt_src_path)
# 随机水平翻转
img_main, box_main = random_flip_horizontal(img_main, box_main)
img_src, box_src = random_flip_horizontal(img_src, box_src)
# LSJ, Large_Scale_Jittering 大尺度抖动,并变回h*w大小
img_main, box_main = Large_Scale_Jittering(img_main, box_main)
img_src, box_src = Large_Scale_Jittering(img_src, box_src)
if not muti_obj or box_src.ndim==1: # 只复制粘贴一个目标
id = random.randint(0, len(box_src)-1)
box_src = box_src[id]
box_src = box_src[np.newaxis, :] # 增加一维
# 获得一系列变换后的img_src的mask
mask_src = normal_(img_src_path, box=box_src)
# 将src结果加到main图像中,返回main图像的大小的叠加图
img, box_src = img_add(img_src, img_main, mask_src, box_src)
# 判断融合后的区域是否重合
if not coincide:
for point_main in box_main:
for point_src in box_src:
if is_coincide(point_main, point_src):
return None, None
box = np.vstack((box_main, box_src))
return img, box
def save_res(img, img_path, box, txt_path):
'''
保存图片和txt坐标结果。
'''
cv2.imwrite(img_path, img)
h, w = img.shape[:2]
with open(txt_path, 'w+') as ftxt:
for point in box: # [x1,y1,...x4,,y4]
strxy = ""
for i, p in enumerate(point):
if i%2==0: # x坐标
p = np.clip(p, 0, w-1)
else: # y坐标
p = np.clip(p, 0, h-1)
strxy = strxy + str(p) + ','
strxy = strxy[:-1] # 去掉最后一个逗号
ftxt.writelines(strxy + "\n")
def main(args):
# 图像和坐标txt文件输入路径
JPEGs = os.path.join(args.input_dir, 'jpg')
BOXes = os.path.join(args.input_dir, 'txt')
# 输出路径
os.makedirs(args.output_dir, exist_ok=True)
os.makedirs(os.path.join(args.output_dir, 'cpAug_jpg'), exist_ok=True)
os.makedirs(os.path.join(args.output_dir, 'cpAug_txt'), exist_ok=True)
# 参与数据增强的图片名称,不含后缀
imgs_list = open(args.aug_txt, 'r').read().splitlines()
flag = '.jpg' # 图像的后缀名 .jpg ,png
tbar = tqdm.tqdm(imgs_list, ncols=100) # 进度条显示
for src_name in tbar:
# src图像
img_src_path = os.path.join(JPEGs, src_name+flag)
txt_src_path = os.path.join(BOXes, src_name+'.txt')
# 随机选择main图像
main_name = np.random.choice(imgs_list)
img_main_path = os.path.join(JPEGs, main_name+flag)
txt_main_path = os.path.join(BOXes, main_name+'.txt')
# 数据增强
img, box = copy_paste(img_main_path, img_src_path, txt_main_path, txt_src_path,
args.coincide, args.muti_obj)
if img is None:
continue
# 保存结果
img_name = "copy_" + src_name + "_paste_" + main_name
save_res(img, os.path.join(args.output_dir, 'cpAug_jpg', img_name+flag),
box, os.path.join(args.output_dir, 'cpAug_txt', img_name+'.txt'))
def get_args():
parser = argparse.ArgumentParser()
parser.add_argument("--input_dir", default="./input_dir", type=str,
help="要进行数据增强的图像路径,路径结构下应有jpg和txt文件夹")
parser.add_argument("--output_dir", default="./output_dir", type=str,
help="保存数据增强结果的路径")
parser.add_argument("--aug_txt", default="./input_dir/test.txt",
type=str, help="要进行数据增强的图像的名字,不包含后缀")
parser.add_argument("--coincide", default=False, type=bool,
help="True表示允许数据增强后的图像目标出现重合,默认不允许重合")
parser.add_argument("--muti_obj", default=False, type=bool,
help="True表示将src图上的所有目标都复制粘贴,False表示只随机粘贴一个目标")
return parser.parse_args()
if __name__ == "__main__":
args = get_args()
main(args)
-
图像路径:
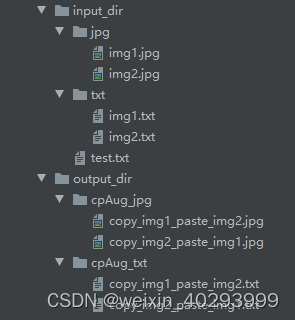
input_dir存放要数据增强的图片和其对应的txt,其中图片和txt名称应相同,图片后缀可修改 flag,默认为.jpg。output_dir输出数据增强后的图片,无需创建。 -
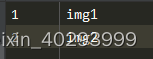
需进行增强的图片列表test.txt,不含后缀:
生成test.txt代码[3]:
# 获取验证集训练集划分的txt文件,划分仅保存名字,不包含后缀

import os
import random

random.seed(0)

xmlfilepath = './input_dir/txt' # 标签路径
saveBasePath = "./input_dir" # 保存的位置

trainval_percent = 0.9 # 训练+验证集的比例,不为1说明有测试集
train_percent = 1 # 训练集在训练+验证集中占的比例,如果代码是从训练集分出的验证集,那就不用改

temp_xml = os.listdir(xmlfilepath)
total_xml = []
for xml in temp_xml:
    if xml.endswith(".txt"):
        total_xml.append(xml)

num = len(total_xml)
list = range(num)
tv = int(num * trainval_percent)
tr = int(tv * train_percent)
trainval = random.sample(list, tv)
train = random.sample(trainval, tr)

print("train and val size", tv)
print("traub suze", tr)
ftrainval = open(os.path.join(saveBasePath, 'trainval.txt'), 'w')
ftest = open(os.path.join(saveBasePath, 'test.txt'), 'w')
ftrain = open(os.path.join(saveBasePath, 'train.txt'), 'w')
fval = open(os.path.join(saveBasePath, 'val.txt'), 'w')

for i in list:
    name = total_xml[i][:-4] + '\n'
    if i in trainval:
        ftrainval.write(name)
        if i in train:
            ftrain.write(name)
        else:
            fval.write(name)
    else:
        ftest.write(name)

ftrainval.close()
ftrain.close()
fval.close()
ftest.close()
运行后可在input_dir下生成4个.txt,其中test.txt仅包含10% input_dir中的图片。
3.标签txt格式:
3. 参考文档
参考文档
[1] 代码复现:Copy-Paste 数据增强for 语义分割 https://blog.csdn.net/oyezhou/article/details/111696577
[2] 目标检测中的数据增强方法(附详细代码讲解)https://www.cnblogs.com/xiamuzi/p/13471386.html
4. 不合适点
以上是人家的代码,但用在我这边不合适,是因为:它的车牌不会有交叉覆盖,我的是烟火识别,
烟和火是两个目标,有覆盖。 所以不合适。
import glob

import cv2
import numpy as np
import random


def crop_image(image, x, y, width, height):
    cropped_image = image[y:y + height, x:x + width]
    return cropped_image


def convert_to_absolute(label, image_width, image_height):
    class_id, relative_x_center, relative_y_center, relative_width, relative_height = label

    # 计算边界框的绝对坐标
    absolute_x_center = relative_x_center * image_width
    absolute_y_center = relative_y_center * image_height
    absolute_width = relative_width * image_width
    absolute_height = relative_height * image_height

    # 计算边界框的左上角和右下角坐标
    left = absolute_x_center - absolute_width / 2
    top = absolute_y_center - absolute_height / 2
    right = absolute_x_center + absolute_width / 2
    bottom = absolute_y_center + absolute_height / 2

    # 返回绝对坐标形式的边界框
    return [class_id, left, top, right, bottom]


def convert_to_yolo_format(class_id, left, top, right, bottom, image_width, image_height):
    # 计算目标框的中心点坐标和宽高
    x = (left + right) / 2
    y = (top + bottom) / 2
    width = right - left
    height = bottom - top

    # 将坐标和尺寸归一化到[0, 1]之间
    x /= image_width
    y /= image_height
    width /= image_width
    height /= image_height

    # 返回Yolo格式的标注
    return f"{class_id} {x} {y} {width} {height}"


def get_src():
    img_list = glob.glob(r"E:\Dataset\zhongwaiyun\data_fire(1w)\data_fire(1w)\scr_copy_paste\images\*.jpg")
    random.shuffle(img_list)
    img_path = img_list[0]
    txt_path = img_list[0].replace("images", "txt").replace(".jpg", ".txt")
    return img_path, txt_path


img_list = glob.glob(r"E:\Dataset\zhongwaiyun\zwy_make_background\*.jpg")
for img_b_path in img_list:
    img_a_path, img_a_txt = get_src()
    image_a = cv2.imread(img_a_path)
    image_height, image_width, _ = image_a.shape
    img_b_txt = img_b_path.replace(".jpg", ".txt").replace("zwy_make_background", "zwy_make_fire_and_smoke")
    img_b_path_new = img_b_path.replace("zwy_make_background", "zwy_make_fire_and_smoke")

    src_location_map = []
    with open(img_a_txt) as f:
        for line_str in f:
            line_info = line_str.strip().split(" ")
            label = [int(line_info[0]), float(line_info[1]), float(line_info[2]), float(line_info[3]),
                     float(line_info[4])]
            class_id, left, top, right, bottom = convert_to_absolute(label, image_width, image_height)
            src_location_map.append([class_id, left, top, right, bottom])

    image_b = cv2.imread(img_b_path)
    res_list = []

    for row in src_location_map:
        class_id, left, top, right, bottom = row
        if left or top or right or bottom:
            try:
                # 目标可以出现在空白图片的任何位置,只要没有超过限制即可
                x = int(left)  # 指定区域的起始横坐标
                y = int(top)  # 指定区域的起始纵坐标
                width = int(right - left)  # 指定区域的宽度
                height = int(bottom - top)  # 指定区域的高度
                cropped_image_a = crop_image(image_a, int(x), int(y), int(width), int(height))

                image_b_height, image_b_width, _ = image_b.shape
                b_x = random.randint(0, int(image_b_width - width - 5))
                b_y = random.randint(0, int(image_b_height - height - 5))
                image_b[b_y:b_y + height, b_x:b_x + width] = cropped_image_a

                res = convert_to_yolo_format(class_id, b_x, b_y, b_x + width, b_y + height, image_b_width, image_b_height)
                print("--==", img_b_txt)
                with open(img_b_txt, "a") as f:
                    f.write(res)
                cv2.imwrite(img_b_path_new, image_b)
                break
            except:
                break


![[LeetCode - Python]844. 比较;含退格的字符串(Easy);415. 字符串相加(Easy)](https://img-blog.csdnimg.cn/6a09bd5b2bfd4a1bb2e26f20cb83eb9a.png)