简介
概述
利用 Spring 自带校验器结合 JSR 注解实现轻量级的 Bean 实体校验器。轻捷、简单、很容易上手,也容易扩展。
三个核心类ValidatorInitializing、ValidatorImpl、ValidatorEnum去掉注释不超过共200行源码实现 10多m 的 Hibernate Validator 多数功能。
后端依赖的话,是我的框架 AJAXJS,当然是非常轻量级的。如果你不打算依赖 AJAXJS,把这三个类抠出来也是非常简单的。
另外,该组件在 Spring MVC 5 下调试通过,无须 Spring Boot 亦可。
源码在:https://gitee.com/sp42_admin/ajaxjs/tree/master/aj-backend/aj-framework/aj-framework/src/main/java/com/ajaxjs/framework/spring/validator。
回顾一下
关于实体校验,笔者很早就进行研究了,有以往几篇博客都探讨过:
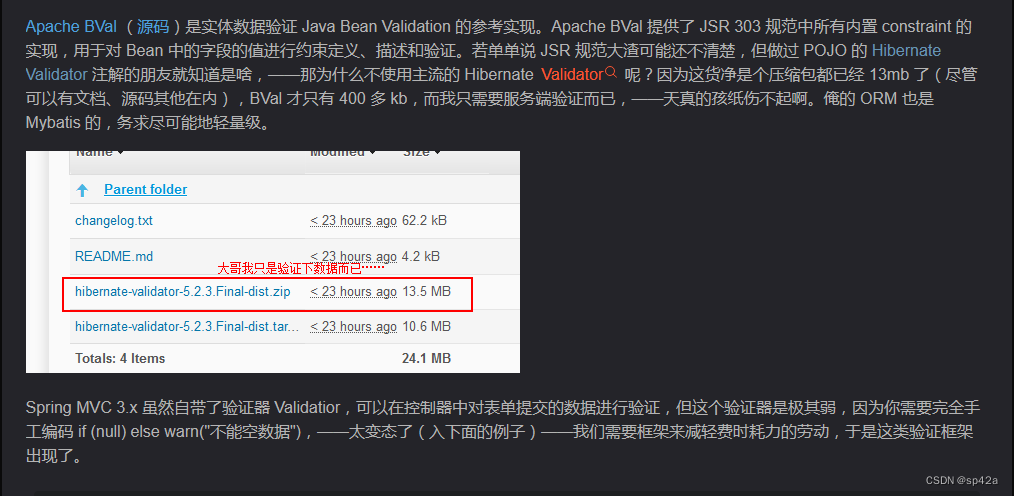
- 数据验证框架 Apache BVal 简介
- 简单实现 Bean 字段校验
- Java 的业务逻辑验证框架 fluent-validator
大路货 Hibernate Validator 肯定不行,早有定论了;相对苗条得多的 Apache BVal 其实也可以,笔者之前一直在用,但直到本组件出来之后,笔者也抛弃 Apache BVal 了……这是笔者早期说的:
其实,Spring 验证器 Validatior 可以绑定 JSR 注解的,不需要你手工编码 if (null) else warn("不能空数据")。不了解 JSR 规范的同学可以看看以下 JSR 介绍:
javax.validation2.0 是 JSR 380 的版本。JSR 380 是 Java 规范请求的缩写,它定义了 Java Bean 验证 API(Java Bean Validation API)。Java Bean 验证 API
提供了一组用于验证对象属性的注解和接口,帮助开发人员进行数据验证和约束。
javax.validation2.0 是 JSR 380 中定义的规范的实现版本,它引入了一些新的特性和改进,以增强 Java Bean 验证功能。例如,javax.validation2.0 支持对集合参数进行验证、支持原始类型的装箱、增加了针对日期和时间类型的约束注解等。在 Java 9 及之后的版本中,javax.validation已经被整合到了 Java SE 标准库中,因此无需额外的依赖就可以直接使用。
于是,基于上述思想,更轻量级的校验器就此诞生了。
用法
配置默认的出错提示信息
首先要在 YAML 增加默认的出错提示信息。
javax-validation:
  javax.validation.constraints.AssertTrue.message: 值必须为 true
  javax.validation.constraints.AssertFalse.message: 值必须为 false
  javax.validation.constraints.DecimalMax.message: 值不能大于 {value}
  javax.validation.constraints.DecimalMin.message: 值不能小于 {value}
  javax.validation.constraints.Digits.message: 数字值超出范围(应为 <{integer} digits>.<{fraction} digits>)
  javax.validation.constraints.Email.message: 值必须为有效的电子邮箱地址
  javax.validation.constraints.Future.message: 值必须为将来的日期
  javax.validation.constraints.FutureOrPresent.message: 值必须为当前或将来的日期
  javax.validation.constraints.Max.message: 值不能大于 {value}
  javax.validation.constraints.Min.message: 值不能小于 {value}
  javax.validation.constraints.Negative.message: 值必须为负数
  javax.validation.constraints.NegativeOrZero.message: 值必须为非正数
  javax.validation.constraints.NotBlank.message: 值不能为空值或空白字符串
  javax.validation.constraints.NotEmpty.message: 值不能为空值、null 或空集合
  javax.validation.constraints.NotNull.message: 值不能为空
  javax.validation.constraints.Null.message: 值必须为空
  javax.validation.constraints.Past.message: 值必须为过去的日期
  javax.validation.constraints.PastOrPresent.message: 值必须为当前或过去的日期
  javax.validation.constraints.Positive.message: 值必须为正数
  javax.validation.constraints.PositiveOrZero.message: 值必须为非负数
  javax.validation.constraints.Pattern.message: 值必须与指定正则表达式匹配
  javax.validation.constraints.Size.message: 大小必须小于 {max},大于 {min}
可见我们完全拥抱 YAML,抛弃了.propperties文件(痛苦的中文转码)。
初始化校验组件
接着注入ValidatorContextAware。这是在 Spring 应用程序上下文初始化完成后设置验证器和参数解析器。这个类的作用是在 Spring 启动时,拦截并修改RequestMappingHandlerAdapter的行为。通过设置自定义的验证器和参数解析器,可以对路径变量进行验证。
@Bean
public ValidatorContextAware ValidatorContextAware() {
    return new ValidatorContextAware();
}
校验 Bean 实体
首先在 controller 里面方法参数上添加@Validated注解,注意是org.springframework.validation.annotation.Validated。
@PostMapping("/test")
public boolean test(@Validated JvmInfo info) {
    System.out.println(info);
    return true;
}
在参数实体属性上添加对应的注解。
import javax.validation.constraints.NotNull;

@Data
public class JvmInfo implements IBaseModel {

    private String name;

    @NotNull
    private String classPath;

    ……
}
遗憾的是当前 Map 入参的校验,无从入手:(
路径参数的校验
这是基于 POST 方法提交实体的校验,那么对于路径上的参数是否支持校验呢?答案是支持的。
在 controller 里面方法参数上直接添加你要校验的注解:
@RequestMapping("/test/{mobileNo}/{idNo}")
public Map<String, Object> test(@PathVariable @MobileNo String mobileNo, @PathVariable @IdCard String idNo) {
便可完成对路径参数的校验了。一般来说既然是路径的参数,那么就是必填非空的了。
值得注意的是,这里的@MobileNo、@IdCard都是自定义的注解,而非标准的 JSR 380 所提供的。这里顺便说说自定义的校验注解的写法。
自定义的校验注解
首先定义注解。
import java.lang.annotation.*;

@Documented
@Target({ElementType.METHOD, ElementType.FIELD, ElementType.PARAMETER})
@Retention(RetentionPolicy.RUNTIME)
public @interface IdCard {
    String message() default "身份证号格式不正确";

    boolean required() default true;
}
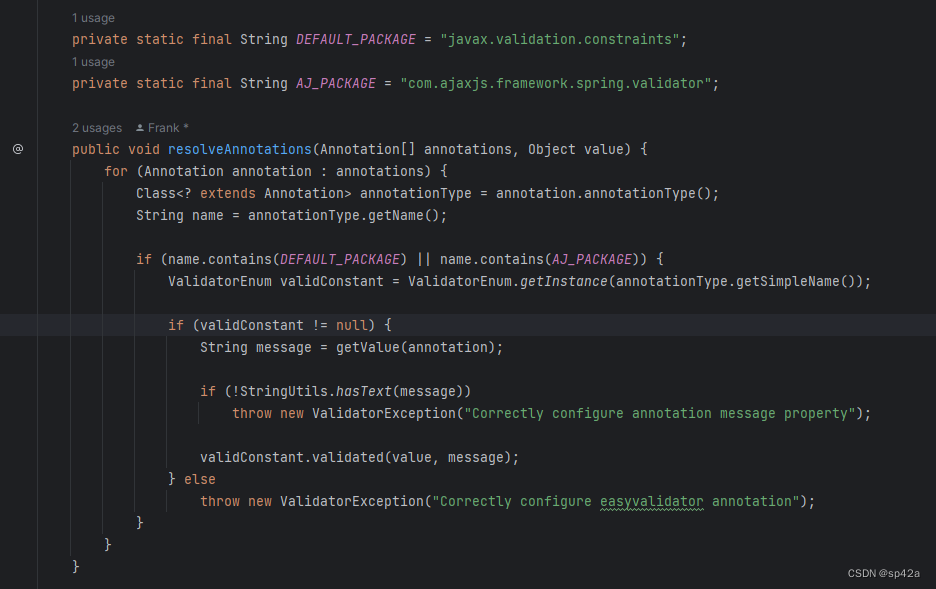
然后在枚举类ValidatorEnum中增加具体的校验方法,如果不通过就抛出ValidatorException异常。
至此就完成了自定义注解的定义。
原理分析
初始化
我们了解,既然是校验入参,那么肯定有种机制提前拦截控制器的执行,获取所有的参数进行校验,不通过的话则不会继续走下面控制器方法的逻辑。
具体的拦截机制就是修改RequestMappingHandlerAdapter的行为——还是 Spring 惯用的套路,在应用程序上下文初始化ApplicationContextAware, InitializingBean完成后得到ApplicationContext从而能够进行配置。详见ValidatorInitializing类:
import org.springframework.beans.BeansException;
import org.springframework.beans.factory.InitializingBean;
import org.springframework.context.ApplicationContext;
import org.springframework.context.ApplicationContextAware;
import org.springframework.core.MethodParameter;
import org.springframework.web.bind.support.ConfigurableWebBindingInitializer;
import org.springframework.web.context.request.NativeWebRequest;
import org.springframework.web.method.support.HandlerMethodArgumentResolver;
import org.springframework.web.servlet.mvc.method.annotation.PathVariableMethodArgumentResolver;
import org.springframework.web.servlet.mvc.method.annotation.RequestMappingHandlerAdapter;

import java.util.List;
import java.util.Objects;
import java.util.stream.Collectors;

/**
 * 在 Spring 应用程序上下文初始化完成后设置验证器和参数解析器
 * 这个类的作用是在 Spring MVC 启动时,拦截并修改 RequestMappingHandlerAdapter 的行为。通过设置自定义的验证器和参数解析器,可以对路径变量进行验证
 */
public class ValidatorInitializing implements ApplicationContextAware, InitializingBean {
    private ApplicationContext cxt;

    @Override
    public void setApplicationContext(ApplicationContext cxt) throws BeansException {
        this.cxt = cxt;
    }

    @Override
    public void afterPropertiesSet() {
        /*
            在 afterPropertiesSet 方法中,我们从应用程序上下文中获取 RequestMappingHandlerAdapter 对象。
            然后,我们将自定义的验证器 ValidatorImpl 设置为 ConfigurableWebBindingInitializer 对象的验证器。
            接着,我们获取到当前的参数解析器列表,并排除了 PathVariableMethodArgumentResolver 类型的解析器。
            然后,我们将自定义的 PathVariableArgumentValidatorResolver 解析器添加到解析器列表的开头。最后,将更新后的解析器列表设置回 RequestMappingHandlerAdapter 对象
         */
        RequestMappingHandlerAdapter adapter = cxt.getBean(RequestMappingHandlerAdapter.class);
        ConfigurableWebBindingInitializer init = (ConfigurableWebBindingInitializer) adapter.getWebBindingInitializer();

        assert init != null;
        init.setValidator(new ValidatorImpl());
        List<HandlerMethodArgumentResolver> resolvers = Objects.requireNonNull(adapter.getArgumentResolvers())
                .stream().filter(r -> !(r.getClass().equals(PathVariableMethodArgumentResolver.class)))
                .collect(Collectors.toList());

        // 路径变量时进行参数验证
        resolvers.add(0, new PathVariableMethodArgumentResolver() {
            @Override
            protected Object resolveName(String name, MethodParameter parameter, NativeWebRequest request) throws Exception {
                Object value = super.resolveName(name, parameter, request);
                // validateIfApplicable
                new ValidatorImpl().resolveAnnotations(parameter.getParameterAnnotations(), value);

                return value;
            }
        });

        adapter.setArgumentResolvers(resolvers);
        System.out.println("init done");
    }
}
init.setValidator(new ValidatorImpl());设置对 Bean 实体的校验;另外,实现PathVariableMethodArgumentResolver接口设置了对路径参数的校验。总的来说,核心是ValidatorImpl这个校验实现类。
ValidatorImpl
下面我们看看ValidatorImpl。它首先实现了 Spring 标准接口Validator,重写了validate(Object target, Errors errors)方法——肯定是参与了 Spring 某种机制才能有得让你参与进来“玩”。
@Override
public void validate(Object target, Errors errors) {
    Field[] declaredFields = target.getClass().getDeclaredFields();

    try {
        for (Field field : declaredFields) {
            if (!Modifier.isStatic(field.getModifiers()) && !Modifier.isFinal(field.getModifiers())) {// isPrivate
                field.setAccessible(true);
                resolveAnnotations(field.getDeclaredAnnotations(), field.get(target));
            }
        }
    } catch (Exception e) {
        if (e instanceof ValidatorException)
            throw (ValidatorException) e;

        throw new ValidatorException(e);
    }
}
这里就是获取了入参 Bean,得到其 Class 解析内部的私有字段,看看有没有要校验的注解,传入到resolveAnnotations()进一步处理。
遍历所有的字段,得到值进行校验,还有出错信息。
总体过程比较简单的说,但是过程中还是有不少技巧的,下面我们看看。
枚举另类的玩法
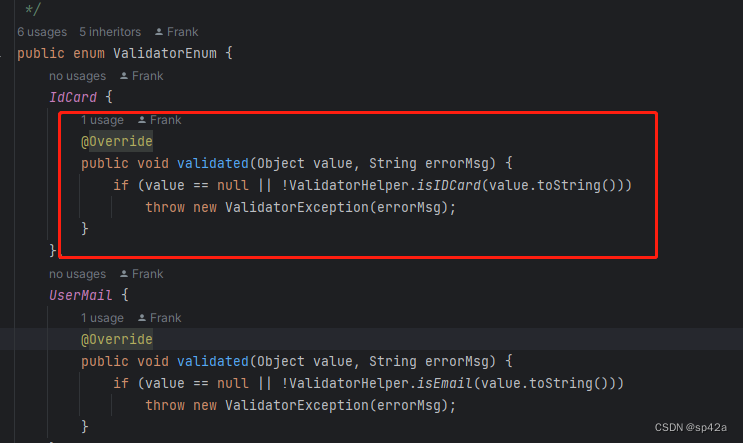
没想到 Java 枚举还可以这样玩:
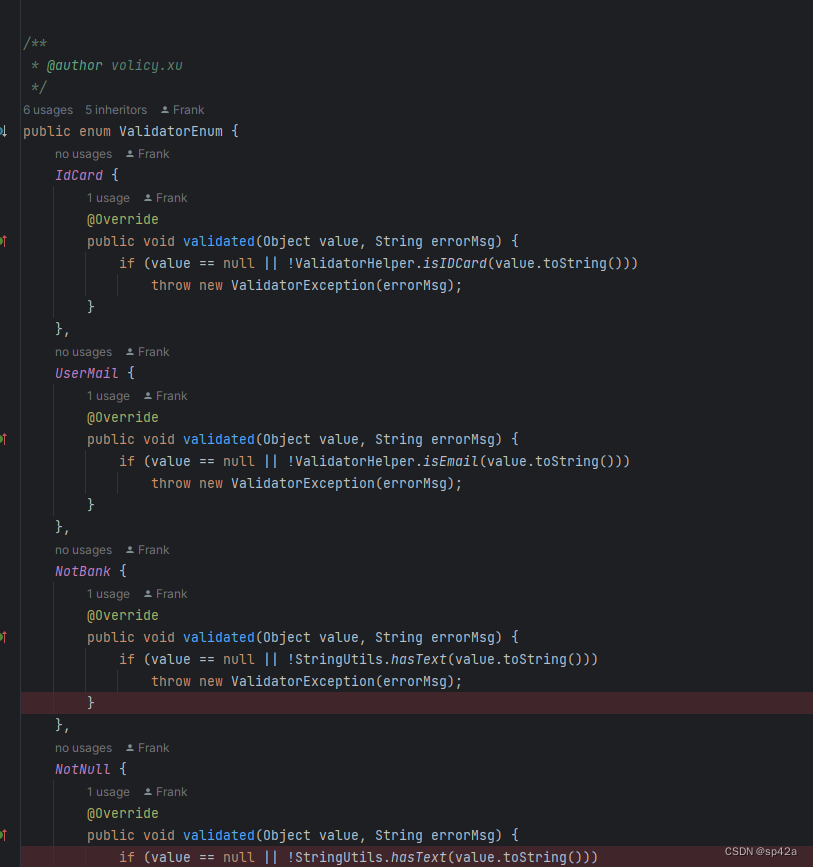
下面还可以设置抽象方法
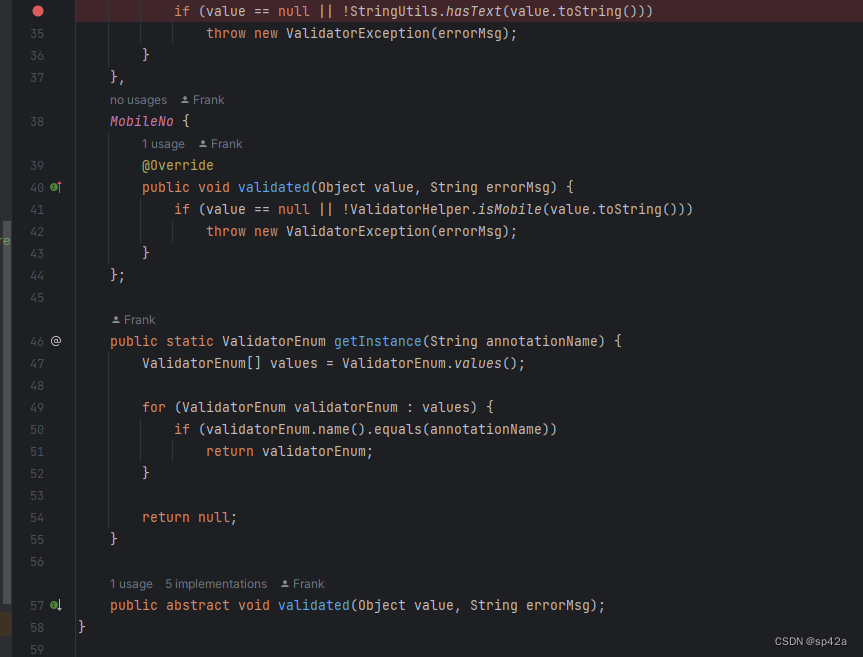
annotationName名字跟注解匹配的话,就执行validated方法。感觉是个方便的单例+key/value 结构,本身枚举的意义不强,就好像有人用枚举做单例模式那样。
遇到小问题:怎么获取 YAML 配置呢?
平时用@value可以方便地获取 yaml 配置,但是当前环境下是一个集合的,最好是返回 Map 给我获取的。但翻遍了 YAML 没有一个公开的方法。但是 Spring 的 PropertySourcesPlaceholderConfigurer类中找到一个私有属性localProperties,这里面有配置的集合,可惜就是private的,但通过下面方法可以巧妙地获取这个localProperties集合。
1、创建一个继承自PropertySourcesPlaceholderConfigurer的子类,并重写postProcessBeanFactory()方法
import org.springframework.beans.factory.config.ConfigurableListableBeanFactory;
import org.springframework.context.support.PropertySourcesPlaceholderConfigurer;

import java.io.IOException;
import java.util.Properties;

/**
 * PropertySourcesPlaceholderConfigurer 是一个由 Spring 提供的用于解析属性占位符的配置类,
 * 它没有提供直接获取私有属性 localProperties 的公开方法。但是,可以通过以下步骤获取 localProperties 的值
 */
public class CustomPropertySourcesPlaceholderConfigure extends PropertySourcesPlaceholderConfigurer {
    private Properties localProperties;

    @Override
    public void postProcessBeanFactory(ConfigurableListableBeanFactory beanFactory) {
        super.postProcessBeanFactory(beanFactory);

        try {
            localProperties = mergeProperties();
        } catch (IOException e) {
            throw new RuntimeException(e);
        }
    }

    public Properties getLocalProperties() {
        return localProperties;
    }
}
2、配置的时候将默认的PropertySourcesPlaceholderConfigurer改下:
/**
 * YAML 配置文件
 *
 * @return YAML 配置文件
 */
@Bean
public PropertySourcesPlaceholderConfigurer properties() {
    PropertySourcesPlaceholderConfigurer cfger = new CustomPropertySourcesPlaceholderConfigure();
    cfger.setIgnoreUnresolvablePlaceholders(true);// Don't fail if @Value is not supplied in properties. Ignore if not found
    YamlPropertiesFactoryBean yaml = new YamlPropertiesFactoryBean();
    ClassPathResource c = new ClassPathResource("application.yml");

    if (c.exists()) {
        yaml.setResources(c);
        cfger.setProperties(Objects.requireNonNull(yaml.getObject()));
    } else System.err.println("未设置 YAML 配置文件");

    return cfger;
}
3、通过CustomPropertySourcesPlaceholderConfigure.getLocalProperties()就可以获取所有的配置了。如下ValidatorImpl类里面的getValue()通过DiContextUtil.getBean()获取CustomPropertySourcesPlaceholderConfigure。
/**
 * 从注解上获取错误信息,如果没有则从默认的 YAML 配置获取
 */
private String getValue(Annotation annotation) {
    String message = (String) AnnotationUtils.getValue(annotation, "message");
    assert message != null;

    if (message.indexOf('{') > -1) { // 注解上没设置 message,要读取配置
        CustomPropertySourcesPlaceholderConfigure bean = DiContextUtil.getBean(CustomPropertySourcesPlaceholderConfigure.class);
        assert bean != null;
        String key = "javax-validation." + message.replaceAll("^\\{|}$", "");
        Object o = bean.getLocalProperties().get(key);

        if (o != null)
            message = o.toString();
    }

    return message;
}
旧时代码
之前玩弄的代码,弃之无味,就留存这里吧。
<dependency>
    <groupId>org.apache.bval</groupId>
    <artifactId>bval-jsr</artifactId>
    <version>2.0.6</version>
    <scope>compile</scope>
</dependency>
/**
 * 数据验证框架
 *
 * @return
 */
@Bean
LocalValidatorFactoryBean localValidatorFactoryBean() {
    LocalValidatorFactoryBean v = new LocalValidatorFactoryBean();
    v.setProviderClass(ApacheValidationProvider.class);

    return v;
}

// Bean 验证前
置拦截器
@Bean
BeanValidation beanValidation() {
    return new BeanValidation();
}
BeanValidation 源码:
import org.springframework.beans.factory.annotation.Autowired;
import org.springframework.util.CollectionUtils;
import org.springframework.validation.beanvalidation.LocalValidatorFactoryBean;

import javax.validation.ConstraintViolation;
import javax.validation.Valid;
import javax.validation.Validator;
import java.lang.annotation.Annotation;
import java.lang.reflect.Method;
import java.lang.reflect.Parameter;
import java.util.Set;

/**
 * Bean 校验拦截器
 */
public class BeanValidation {
    @Autowired
    LocalValidatorFactoryBean v;

    public boolean check(Object bean) {
        Set<ConstraintViolation<Object>> violations = v.getValidator().validate(bean);

        if (!CollectionUtils.isEmpty(violations)) {
            StringBuilder sb = new StringBuilder();

            for (ConstraintViolation<Object> v : violations) {
                sb.append("输入字段[").append(v.getPropertyPath()).append("],当前值[").append(v.getInvalidValue()).append("],校验失败原因[");
                sb.append(v.getMessage()).append("];");
            }

            sb.append("请检查后再提交");

            throw new IllegalArgumentException(sb.toString());
        }

        return true;
    }


    public boolean before(Method beanMethod, Object[] args) {
        Parameter[] parameters = beanMethod.getParameters();
        int i = 0;

        for (Parameter parameter : parameters) {
            Annotation[] annotations = parameter.getAnnotations();

            for (Annotation annotation : annotations) {
                if (annotation instanceof Valid) {
                    Validator validator = v.getValidator();
                    Set<ConstraintViolation<Object>> violations = validator.validate(args[i]);

                    if (!CollectionUtils.isEmpty(violations)) {
                        StringBuilder sb = new StringBuilder();

                        for (ConstraintViolation<Object> v : violations) {
                            sb.append("输入字段[").append(v.getPropertyPath()).append("],当前值[").append(v.getInvalidValue()).append("],校验失败原因[");
                            sb.append(v.getMessage()).append("];");
                        }

                        sb.append("请检查后再提交");

                        throw new IllegalArgumentException(sb.toString());
                    }
                }
            }

            i++;
        }

        return true;
    }
}
参考
- 严重感谢 easyvalidator,就是受到其启动,再重构并优化之的!
- Jakarta Bean Validation specification
- Fluent-validation framework