一、背景
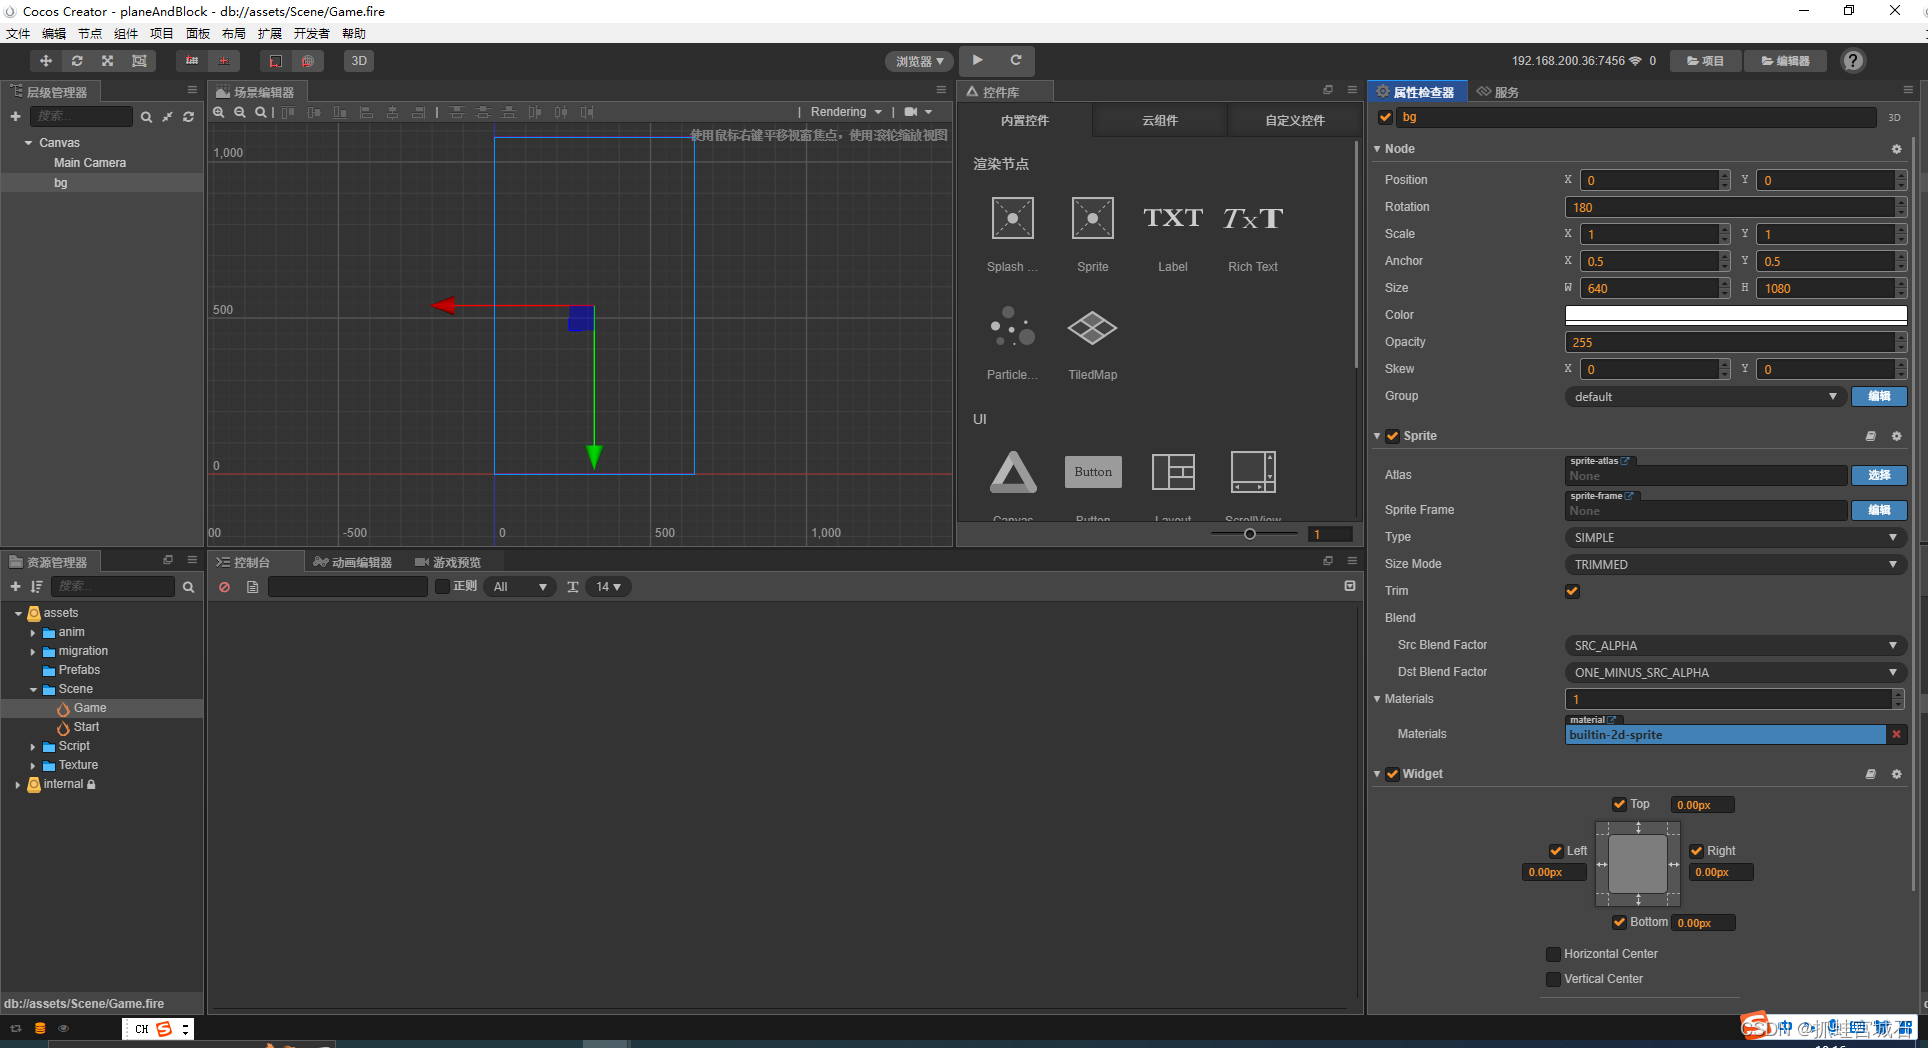
1.新建bg节点
二、飞机节点功能实现
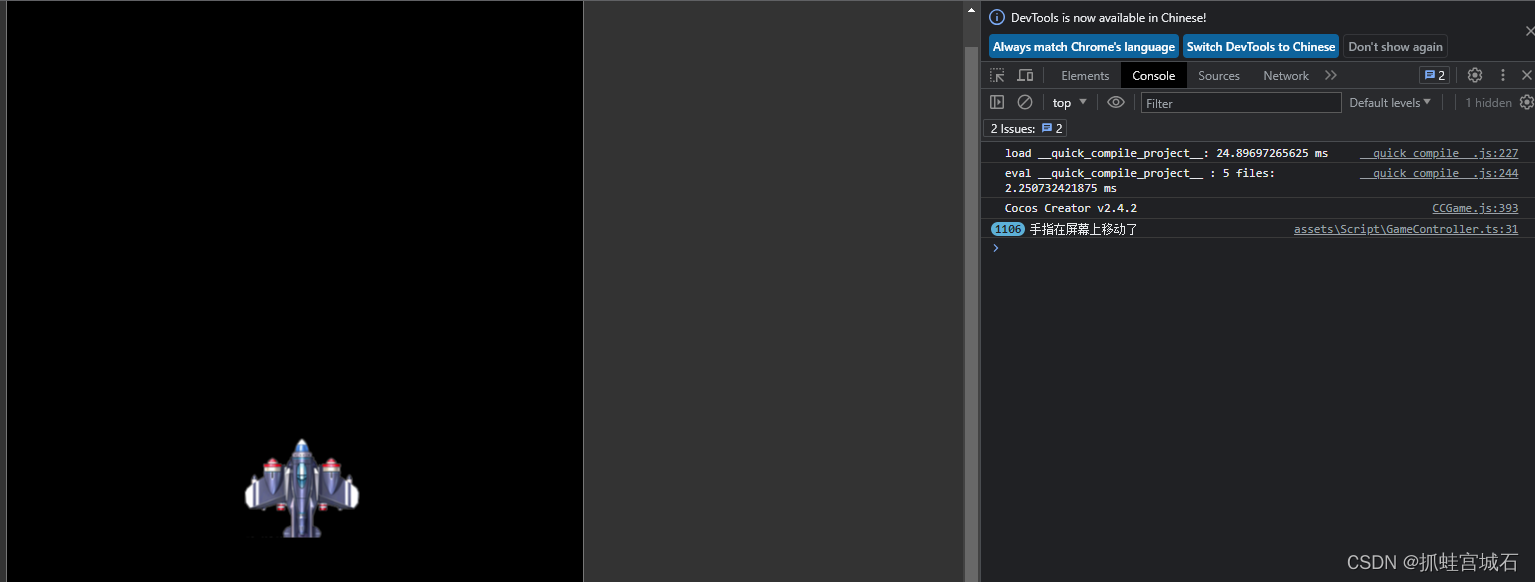
1.移动
1.新建plane节点
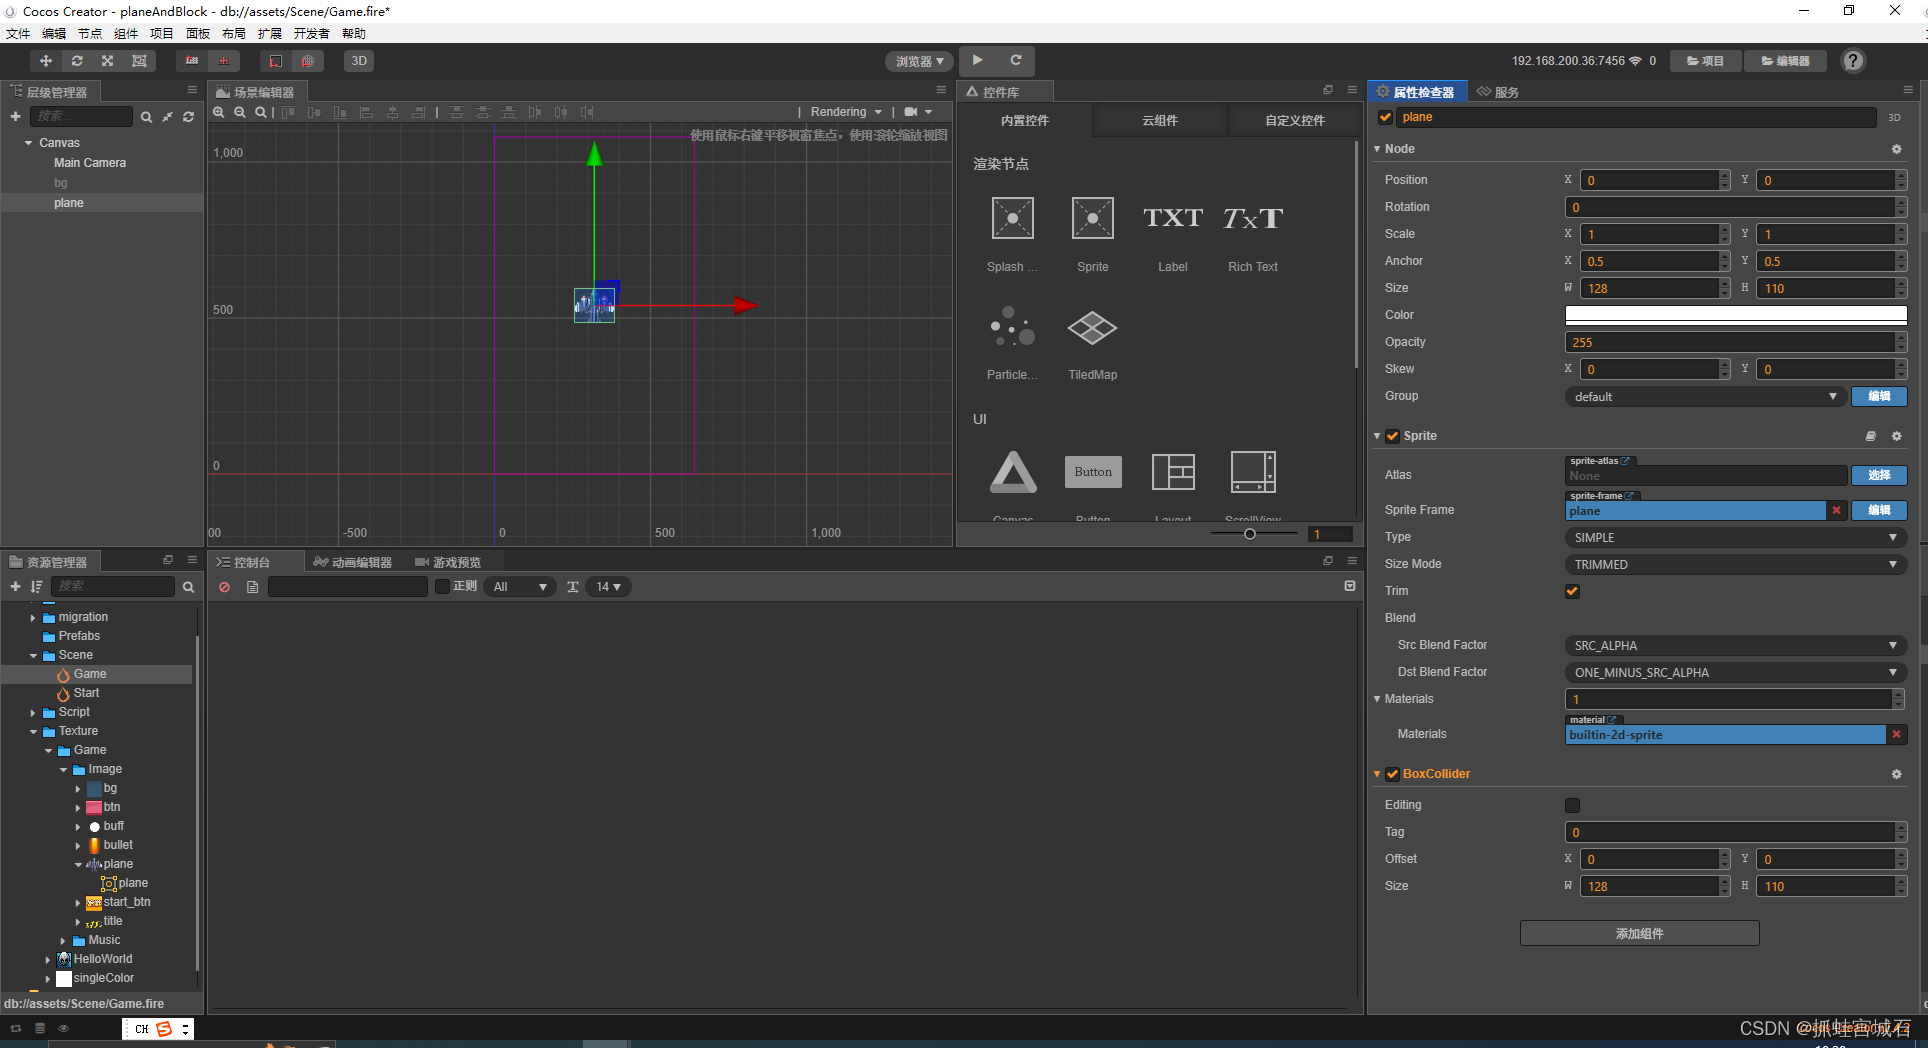
2.新建脚本GameController.ts,并绑定Canvas

GameControll.ts
const { ccclass, property } = cc._decorator;

@ccclass
export default class NewClass extends cc.Component {

    @property(cc.Node)
    canvas: cc.Node = null;

    @property({ type: cc.Node, displayName: "飞机(主角)", tooltip: "主角,也就是飞机节点" })
    plane: cc.Node = null;

    @property({ displayName: "飞机和炮弹是否能移动", tooltip: "飞机和炮弹是否能移动" })
    is_plane_move: boolean = true;


    onLoad() {

        //给Canvas绑定事件
        this.canvas.on(cc.Node.EventType.TOUCH_MOVE, this.onMove, this)
    }

    //移动飞机函数,当手指在屏幕上移动时将执行这个函数
    onMove(event: cc.Event.EventTouch) {
        //打印log
        console.log("手指在屏幕上移动了");

        /*
        //触摸点的坐标
        var pos = new cc.Vec2(event.getLocationX(), event.getLocationY())
        //转换坐标
        //将一个点转换到节点(局部)空间坐标系,这个坐标系以锚点为位置
        pos = this.canvas.convertToNodeSpaceAR(pos)
        //给飞机赋值
        this.plane.position = cc.v3(pos)
        */

        //获取触点在上一次事件时的位置对象,对象包含x和y属性
        if (this.is_plane_move == true) {
            let last_pos = event.getPreviousLocation();
            //获取触点位置
            let pos = event.getLocation()
            //做向量减法
            var dir = last_pos.sub(pos)
            //移动飞机的坐标
            this.plane.x -= dir.x;
            this.plane.y -= dir.y;
        }
    }

update(dt: number): void{

//屏幕上下左右,用来防止飞机飞出屏幕
        let l = (this.canvas.width / 2) + (this.plane.width / 2);
        let r = (this.canvas.width / 2) - (this.plane.width / 2);
        let t = (this.canvas.height / 2) - (this.plane.height / 2);
        let b = (this.canvas.height / 2) + (this.plane.height / 2);

        //超过边界检测
        if (this.plane.x > r) {
            this.plane.x = r;
        }
        if (this.plane.x < l) {
            this.plane.x = l;
        }
        if (this.plane.y > t) {
            this.plane.y = t;
        }
        if (this.plane.y < b) {
            this.plane.y = b;
        }
    }
}
三.子弹
1.新建粒子

 2.新建Bullet脚本,新建bullet预制体

Game.ts
    @property({ type: cc.Prefab, displayName: "炮弹预制体", tooltip: "炮弹的预制体,飞机每时每刻都在发射子弹" })
    bullet: cc.Prefab = null;


    @property({ displayName: "炮弹生成左侧坐标", tooltip: "炮弹生成左侧坐标,以飞机锚点为原点建立坐标系时炮弹的位置" })
    bullet_left_pos: cc.Vec2 = null;

    @property({ displayName: "炮弹生成右侧坐标", tooltip: "炮弹生成右侧坐标,以飞机锚点为原点建立坐标系时炮弹的位置" })
    bullet_right_pos: cc.Vec2 = null;


    @property({ type: cc.Float, displayName: "每秒发射几个炮弹", tooltip: "每秒发射几个炮弹,这个值是始终不变的,当这个值过大时,设备会明显卡顿" })
    bullet_num: number = 10;

    @property({ type: cc.Float, displayName: "炮弹发射速度", tooltip: "子弹发射速度,单位是每秒发射多少个像素,吃到buff会提高" })
    bullet_speed: number = 100;

    @property({ type: cc.Float, displayName: "炮弹攻击力", tooltip: "攻击力,炮弹打到障碍物时减少的生命值,吃到buff会提高" })
    ATK: number = 2;

    @property({ displayName: "是否可以发射炮弹", tooltip: "是否可以发射炮弹,为false时飞机将不再发射炮弹" })
    is_fire: boolean = true

    @property({ displayName: "飞机和炮弹是否能移动", tooltip: "飞机和炮弹是否能移动" })
    is_plane_move: boolean = true;


    //生成飞机左侧炮弹用的变量
    l: number = 0;
    //生成飞机右侧炮弹用的变量
    r: number = 0

update(dt: number): void {
        //炮弹生成
        let time = 1 / this.bullet_num;

        //飞机左侧炮弹生成
        this.l += dt;
        if (this.l > time && this.is_fire == true) {
            //打印log
            console.log("生成左侧炮弹");
            //清零
            this.l = 0;
            //创建炮弹
            this.create_bullet(cc.v3(this.bullet_left_pos))
        }
        //飞机右侧炮弹生成
        this.r += dt
        if (this.r > time && this.is_fire == true) {
            console.log("飞机右侧炮弹生成");
            this.r = 0;
            this.create_bullet(cc.v3(this.bullet_right_pos))
        }
    }


//生成炮弹函数,pos以飞机锚点为原点建立坐标系时炮弹的位置
    create_bullet(pos: cc.Vec3) {
        //实例化新节点
        let node = cc.instantiate(this.bullet);
        //父节点为canvas
        node.parent = this.canvas;
        //获取x
        let x = pos.x + this.plane.x;
        //获取y
        let y = pos.y + this.plane.y;
        //将坐标转换
        let p = this.canvas.convertToNodeSpaceAR(cc.v3(x, y))
        //求出最终坐标
        let position: cc.Vec3 = cc.v3(p.x + (this.canvas.width / 2), p.y + (this.canvas.height / 2))
        //赋值
        node.position = cc.v3(position);
    }
Bullet.ts:
const { ccclass, property } = cc._decorator;

@ccclass
export default class NewClass extends cc.Component {

    //子弹速度
    speed: number = 100;

    //子弹攻击力
    ATK: number = 2;

    onLoad(): void {
        //获取GameController脚本
        let gc = cc.find("Canvas").getComponent("GameController");
        //获取速度和攻击力并赋值
        let speed: number = gc.bullet_speed;
        let ATK: number = gc.ATK;
        this.speed = speed;
        this.ATK = ATK;
    }

    update(dt: number) {
        //获取GameController脚本
        let gc = cc.find("Canvas").getComponent("GameController");

        //自身移动
        if (gc.is_plane_move == true) {
            this.node.y += dt * this.speed;
        }
        //获取canvas节点
        let canvas = cc.find("Canvas");
        //如果自身到了屏幕最上方
        if (this.node.y >= (canvas.height / 2) + (this.node.height / 2)) {
            this.node.destroy();
            console.log("子弹超出了屏幕,自动销毁");
        }

    }
}

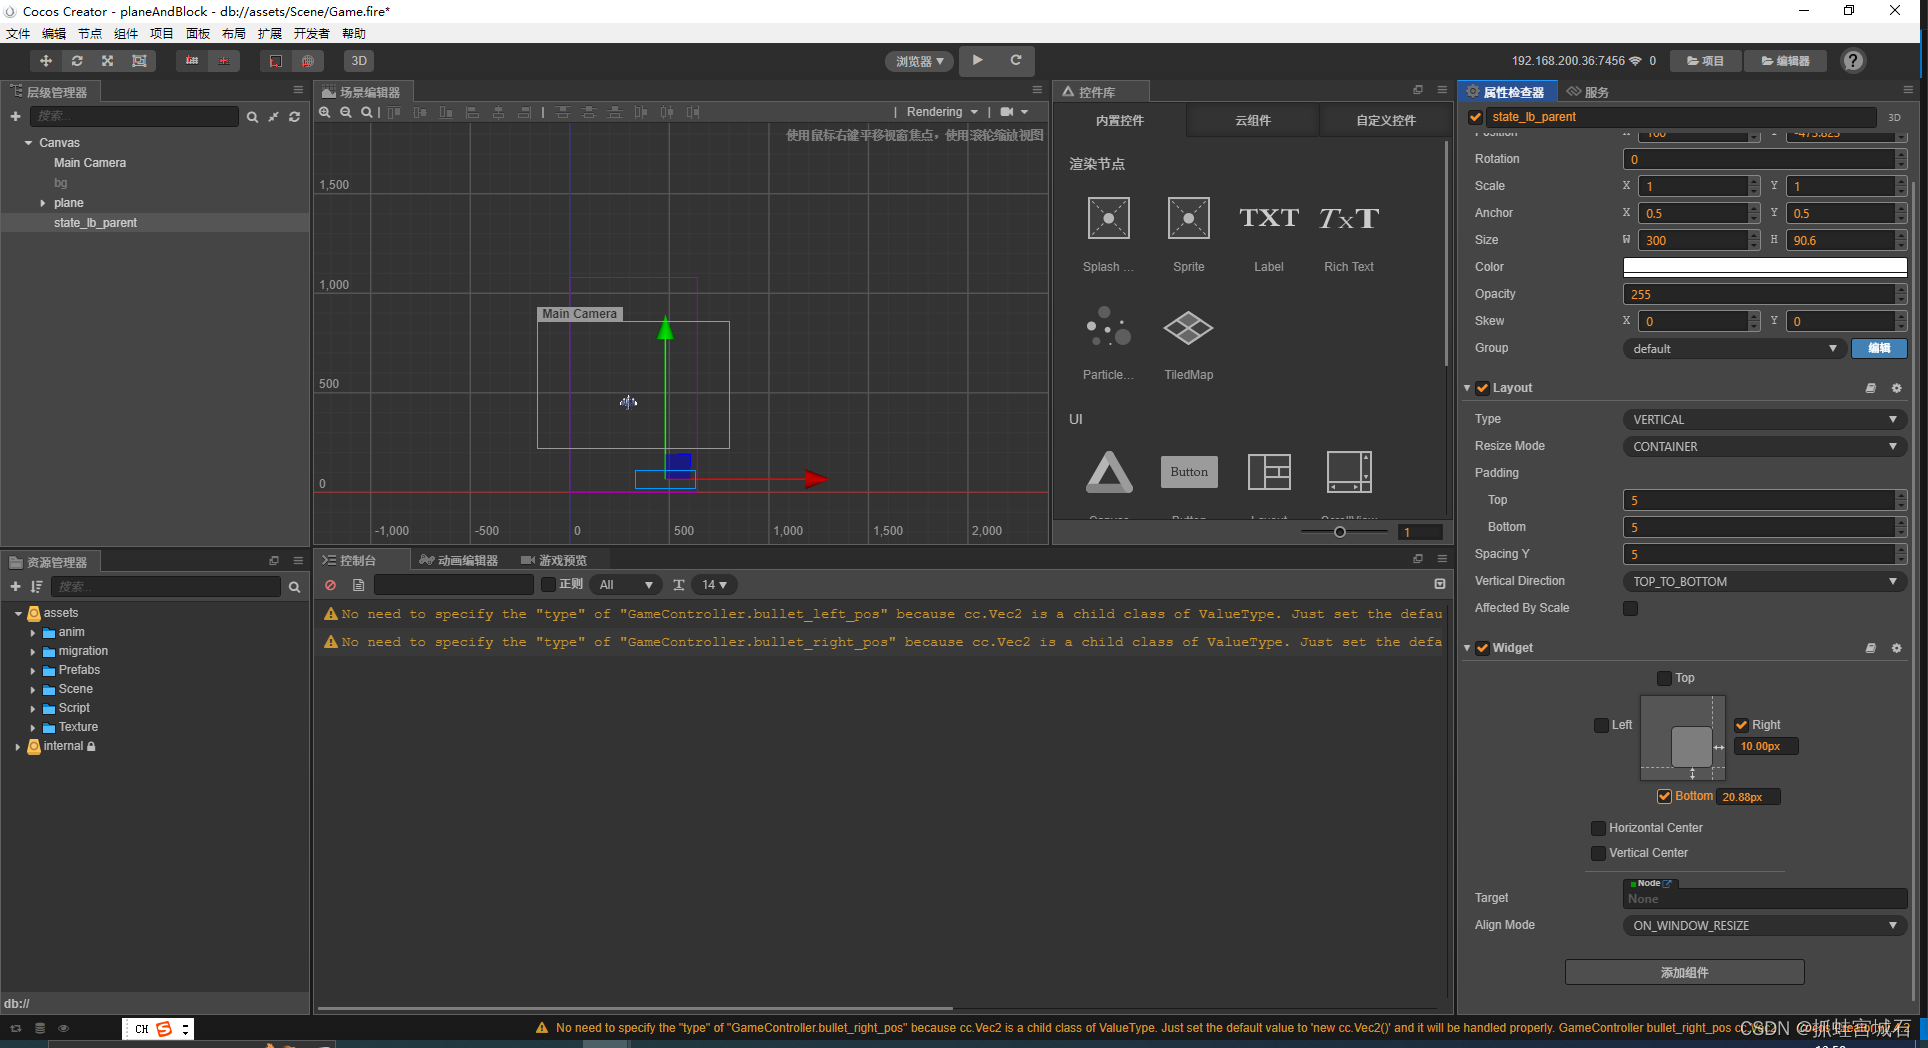
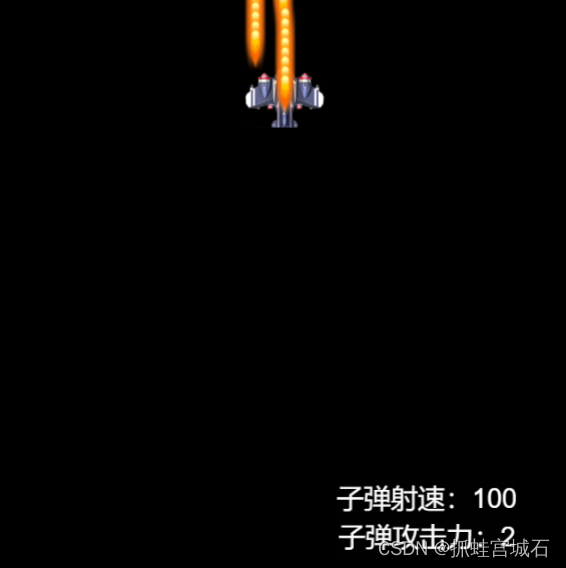
3.子弹信息显示:
1.新建state_lb_parent节点:
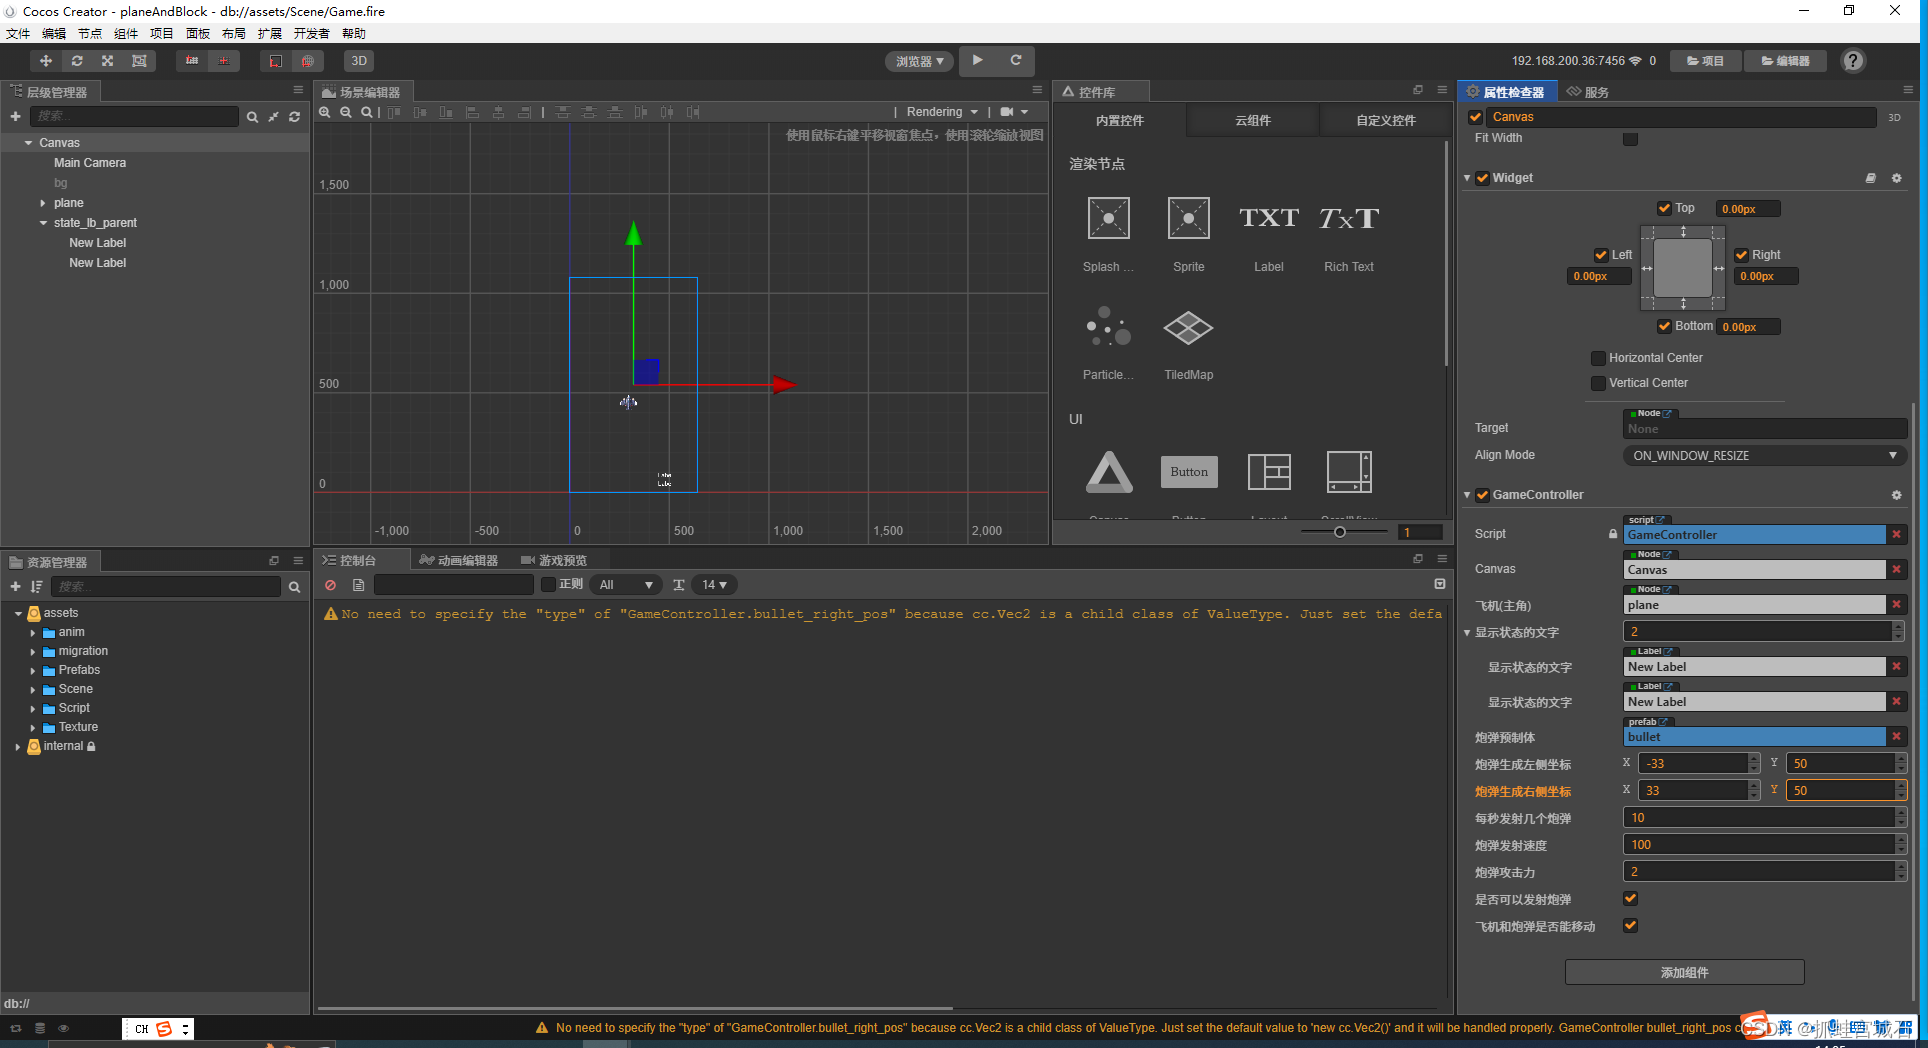
2.新建Label节点

 绑定Canvas
GameController.ts
@property({ type: cc.Label, displayName: "显示状态的文字", tooltip: "显示状态的文字,显示射速,攻击力,两个label前后位置无所谓" })
    state_lb: cc.Label[] = [];


 update(dt: number): void {
        //炮弹生成
        let time = 1 / this.bullet_num;

        //飞机左侧炮弹生成
        this.l += dt;
        if (this.l > time && this.is_fire == true) {
            //打印log
            console.log("生成左侧炮弹");
            //清零
            this.l = 0;
            //创建炮弹
            this.create_bullet(cc.v3(this.bullet_left_pos))
        }
        //飞机右侧炮弹生成
        this.r += dt
        if (this.r > time && this.is_fire == true) {
            console.log("飞机右侧炮弹生成");
            this.r = 0;
            this.create_bullet(cc.v3(this.bullet_right_pos))
        }


        //显示状态
        //子弹射速
        let speed = Math.floor(this.bullet_speed);
        //子弹攻击力
        let ATK = Math.floor(this.ATK)
        //如果速度不为满级正常显示
        if (this.bullet_speed < 10000) {
            this.state_lb[0].string = "子弹射速:" + speed;
        }
        //如果速度不为满级正常显示
        else {
            this.state_lb[0].string = "子弹射速:Max";
        }
        this.state_lb[1].string = "子弹攻击力:" + ATK;
    }
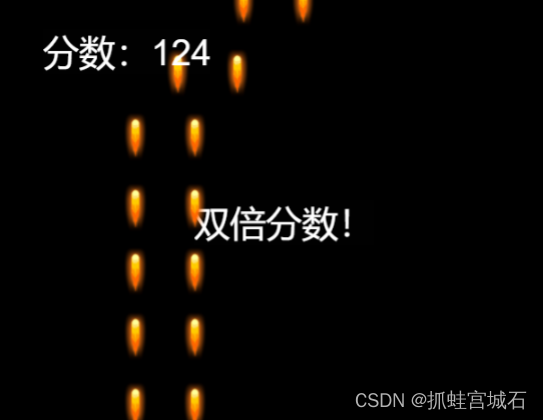
四、显示分数
1.新建摄像机

2.新建节点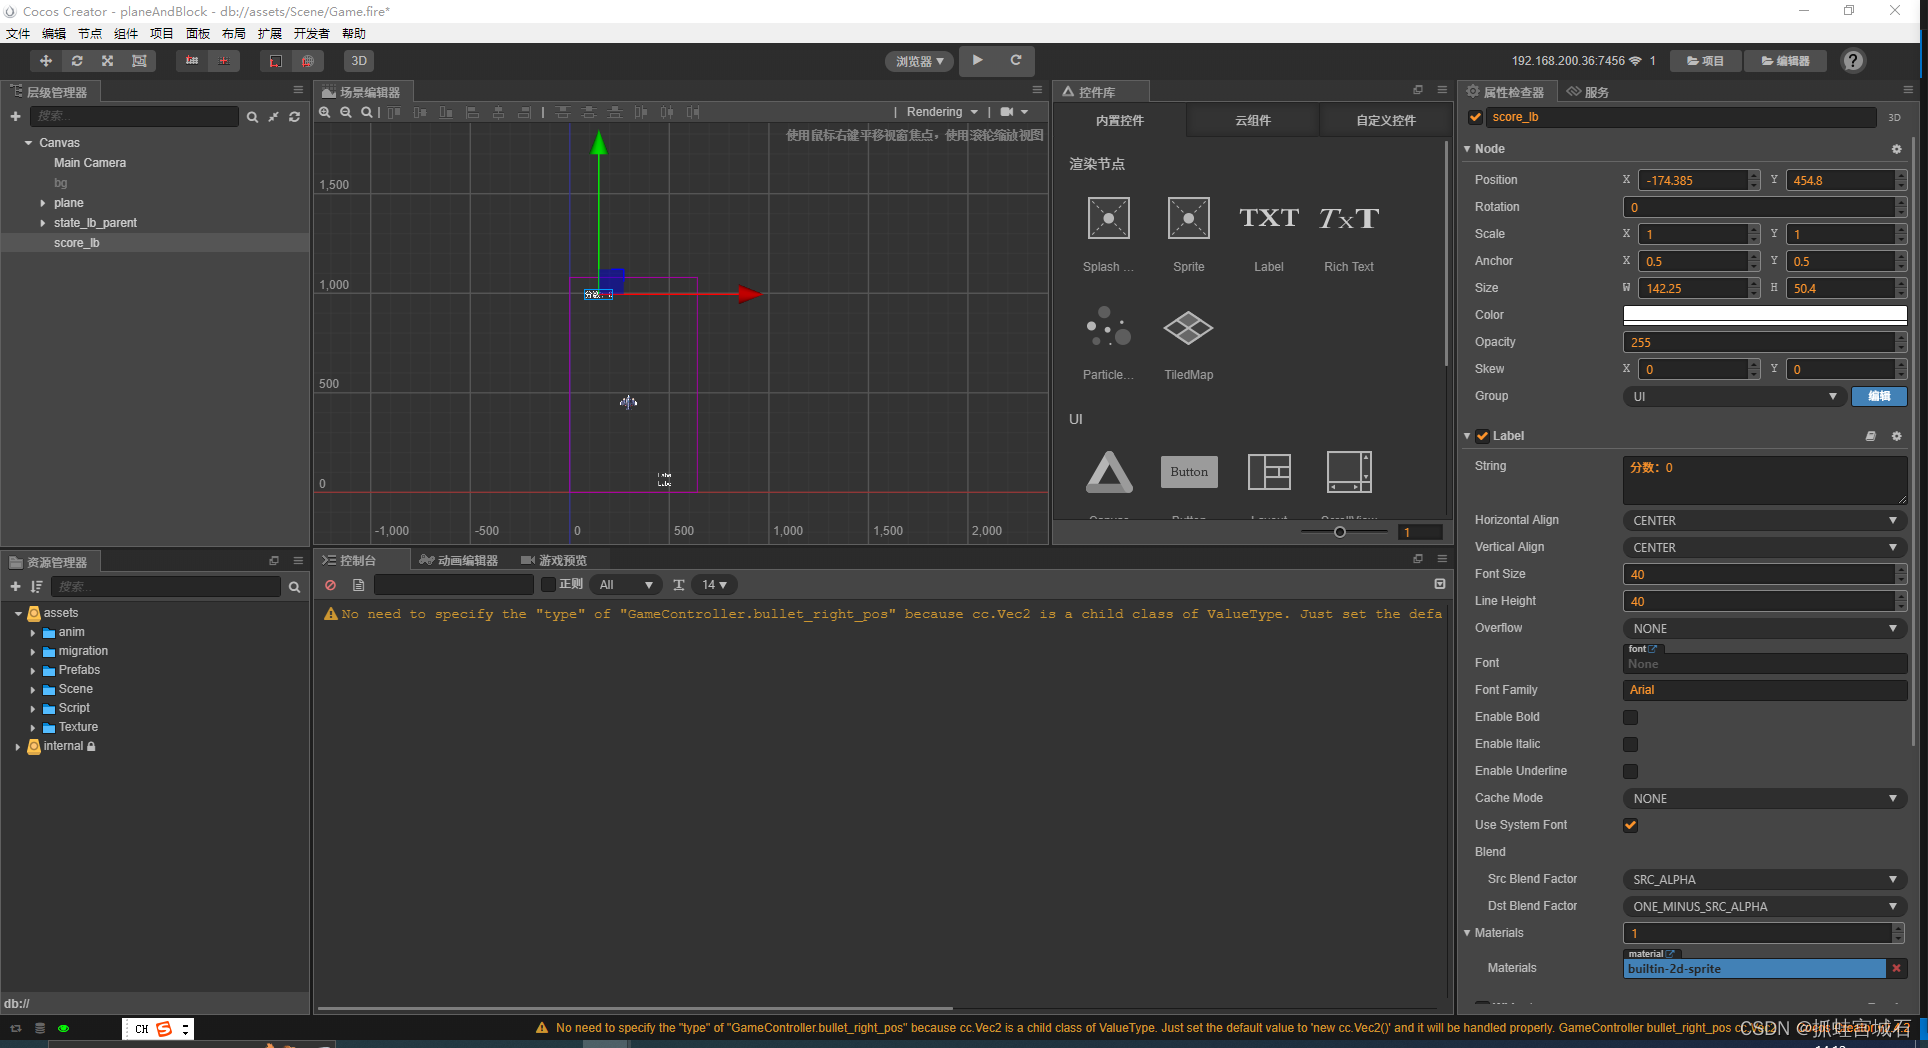
GameController.ts
@property({ type: cc.Label, displayName: "显示分数文字", tooltip: "显示分数的文字" })
    score_lb: cc.Label = null;


 //分数
    score: number = 0;

update(dt: number): void {
        //炮弹生成
        let time = 1 / this.bullet_num;

        //飞机左侧炮弹生成
        this.l += dt;
        if (this.l > time && this.is_fire == true) {
            //打印log
            console.log("生成左侧炮弹");
            //清零
            this.l = 0;
            //创建炮弹
            this.create_bullet(cc.v3(this.bullet_left_pos))
        }
        //飞机右侧炮弹生成
        this.r += dt
        if (this.r > time && this.is_fire == true) {
            console.log("飞机右侧炮弹生成");
            this.r = 0;
            this.create_bullet(cc.v3(this.bullet_right_pos))
        }


        //显示状态
        //子弹射速
        let speed = Math.floor(this.bullet_speed);
        //子弹攻击力
        let ATK = Math.floor(this.ATK)
        //如果速度不为满级正常显示
        if (this.bullet_speed < 10000) {
            this.state_lb[0].string = "子弹射速:" + speed;
        }
        //如果速度不为满级正常显示
        else {
            this.state_lb[0].string = "子弹射速:Max";
        }
        this.state_lb[1].string = "子弹攻击力:" + ATK;


        //显示分数
        //如果分数小于1000正常显示
        if (this.score < 1000) {
            this.score_lb.string = "分数:" + Math.floor(this.score);
        }
        //如果分数大于1000小于10000就用k表示
        else if (this.score < 10000) {
            let s = (Math.floor(this.score) / 1000).toFixed(2);
            this.score_lb.string = "分数:" + s + "K";
        }
        //如果分数大于10000就用w表示
        else {
            let s = (Math.floor(this.score) / 10000).toFixed(2);
            this.score_lb.string = "分数:" + s + "W";
        }
    }
五、障碍
1.生成障碍
1.新建所有障碍父节点

2.新建预制体barrier ,新建Barrier脚本
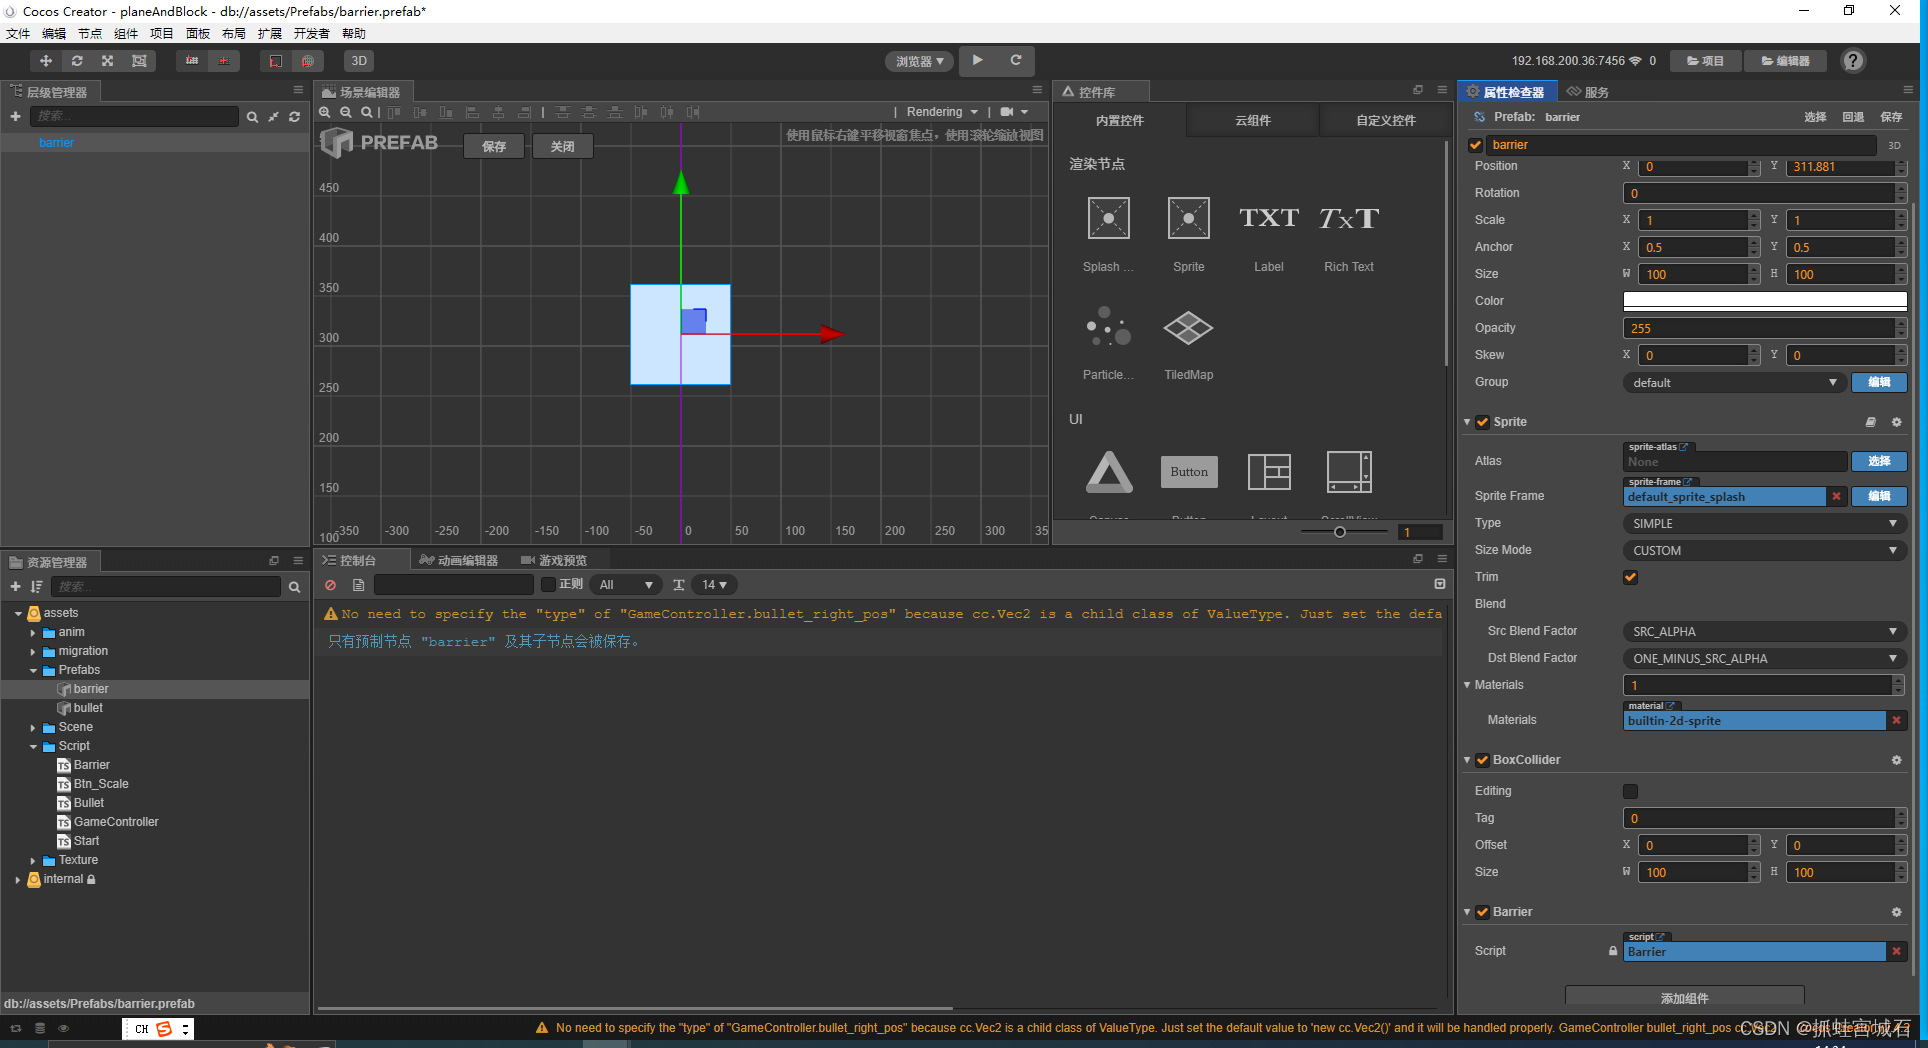 3.新建子节点

GameController.ts
@property({ type: cc.Node, displayName: "所有障碍父节点", tooltip: "所有障碍父节点,这个节点用来消除所有障碍" })
    barrier_parent: cc.Node = null;


@property({ type: cc.Prefab, displayName: "障碍物预制体", tooltip: "障碍物预制体" })
    barrier: cc.Prefab = null;

@property({ displayName: "每个障碍物间距范围", tooltip: "每个障碍物间距范围,最小多少,最大多少" })
    barrier_spacing: cc.Vec2 = cc.v2(10, 50)

    @property({ displayName: "障碍物宽度(必填)", tooltip: "障碍物宽度(必填),代码将根据这个值来计算出障碍物生成的最佳位置" })
    barrier_width: number = 100;

    @property({ displayName: "障碍我高度(必填)", tooltip: "障碍物高度(必填),代码将根据这个值来计算出障碍物生成的最佳位置" })
    barrier_height: number = 100;

    @property({ displayName: "障碍物初始生命值", tooltip: "障碍物初始生命值,其实就是障碍物上面文字的数值,当值为0时障碍物销毁,但是这个值并不是障碍物初始的生命值,因为最终障碍物还加上了随机数" })
    barrier_health: number = 100;

    @property({ type: cc.Float, displayName: "障碍物移动速度", tooltip: "障碍物移动速度,单位是每秒多少个像素" })
    barrier_speed: number = 100;

    @property({ type: cc.Float, displayName: "障碍物生成时间间隔", tooltip: "障碍物生成时间间隔,通过控制这个来调整生成频率,最终的频率为(这个变量*Math.random())+(障碍物高/障碍物移动速度)" })
    generation_interval: number = 0.8;

    @property({ type: cc.Float, displayName: "每生成一次障碍物,障碍物锁增加的生命值", tooltip: "每生成一次障碍物,障碍物锁增加的生命值,最终结果是(这个变量*Math.random())" })
    increase: number = 2;


@property({ displayName: "是否生成障碍物", tooltip: "是否生成障碍物" })
    is_barrier_create: boolean = true;


 @property({ displayName: "障碍物和buff是否可以移动", tooltip: "障碍物和buff是否可以移动" })
    is_barrier_move: boolean = true;


//创建障碍物用的变量(当前)
    cre_bar: number = 0;
    //创建障碍物用的变量(满的)
    cre_bar_f: number = 0;


 onLoad() {

        cc.game.setFrameRate(90)

        //恢复游戏,避免游戏暂停导致无法继续
        cc.director.resume();

        //给Canvas绑定事件
        this.canvas.on(cc.Node.EventType.TOUCH_MOVE, this.onMove, this)

        //创建障碍物
        this.create_barrier();
        this.cre_bar_f = (this.barrier_height / this.barrier_speed) + Math.random() * this.generation_interval;

    }


update(dt: number): void {
        //炮弹生成
        let time = 1 / this.bullet_num;

        //飞机左侧炮弹生成
        this.l += dt;
        if (this.l > time && this.is_fire == true) {
            //打印log
            console.log("生成左侧炮弹");
            //清零
            this.l = 0;
            //创建炮弹
            this.create_bullet(cc.v3(this.bullet_left_pos))
        }
        //飞机右侧炮弹生成
        this.r += dt
        if (this.r > time && this.is_fire == true) {
            console.log("飞机右侧炮弹生成");
            this.r = 0;
            this.create_bullet(cc.v3(this.bullet_right_pos))
        }


        //生成障碍物
        //如果能生成障碍物就加
        if (this.is_barrier_create == true) {
            this.cre_bar = this.cre_bar + dt;
        }
        //可以生成障碍物时
        if (this.cre_bar >= this.cre_bar_f) {
            this.cre_bar = 0;
            this.cre_bar_f = (this.barrier_height / this.barrier_speed) + (Math.random() * this.generation_interval);
            this.create_barrier();
        }


        //显示状态
        //子弹射速
        let speed = Math.floor(this.bullet_speed);
        //子弹攻击力
        let ATK = Math.floor(this.ATK)
        //如果速度不为满级正常显示
        if (this.bullet_speed < 10000) {
            this.state_lb[0].string = "子弹射速:" + speed;
        }
        //如果速度不为满级正常显示
        else {
            this.state_lb[0].string = "子弹射速:Max";
        }
        this.state_lb[1].string = "子弹攻击力:" + ATK;


        //显示分数
        //如果分数小于1000正常显示
        if (this.score < 1000) {
            this.score_lb.string = "分数:" + Math.floor(this.score);
        }
        //如果分数大于1000小于10000就用k表示
        else if (this.score < 10000) {
            let s = (Math.floor(this.score) / 1000).toFixed(2);
            this.score_lb.string = "分数:" + s + "K";
        }
        //如果分数大于10000就用w表示
        else {
            let s = (Math.floor(this.score) / 10000).toFixed(2);
            this.score_lb.string = "分数:" + s + "W";
        }
    }


//创建障碍物函数
    create_barrier(): void {
        //l为最左边,也就是从哪里生成,就是屏幕最左边加上一个随机数
        let l = ((-this.canvas.width / 2) + (this.barrier_width / 2)) + Math.random() * 100;
        //r为最右边,也就是从哪里结束生成,就是屏幕最右边减去一个随机数
        let r = (this.canvas.width / 2) - (this.barrier_width / 2) - Math.random() * 50;
        //获取屏幕最上面的Y坐标
        let top = (this.canvas.height / 2) + (this.barrier_height / 2);
        //获取障碍物之间的间距,值是随机的
        let barrier_spacing = this.randomNumber(this.barrier_spacing.x, this.barrier_spacing.y);

        //while循环生成障碍物
        //如果左边小于右边
        while (l < r) {
            let barrier = cc.instantiate(this.barrier);
            barrier.parent = this.barrier_parent;
            barrier.position = cc.v3(l, top)
            //随机数生成障碍物的间距
            barrier_spacing = this.randomNumber(this.barrier_spacing.x, this.barrier_spacing.y);
            //打印log
            console.log("生成障碍物,目前值为:" + l.toString());

            //左边的值加上障碍物宽和障碍物的间距
            l = l + this.barrier_width + barrier_spacing;
        }
//障碍物的生命值加上障碍物的宽和障碍物的间距
        this.barrier_health += Math.floor(Math.random() * this.increase)
    }


    //随机函数 min为最小值,max为最大值,将返回一个number,值大小的范围为min-max
    randomNumber(min: number, max: number) {
        return (Math.round(Math.random() * (min - max) + max))
    }
Barrier.ts
const { ccclass, property } = cc._decorator;

@ccclass
export default class Barrier extends cc.Component {

    @property({ type: cc.Label, displayName: "显示数值的文字", tooltip: "显示数值的文字" })
    num_lb: cc.Label = null;

    //@property({type: cc.Float, displayName: "自身数值", tooltip: "自身数值,当数值为0时当前节点销毁"})
    num: number = 20;

    //自身速度
    speed: number = 2;


    onLoad(): void {
        //自身和文字随机颜色
        this.node.color = cc.color(this.random_color().x, this.random_color().y, this.random_color().z, 255);
        this.num_lb.node.color = cc.color(this.random_color().x, this.random_color().y, this.random_color().z, 255);

        //防止颜色一样
        //如果自身和文字颜色一样
        if (this.num_lb.node.color == this.node.color) {
            //文字如果不为红色
            if (this.num_lb.node.color != cc.color(255, 0, 0, 255)) {
                //文字变为红色
                this.num_lb.node.color = cc.color(255, 0, 0, 255);
            } else {
                //如果不,则变成黑色
                this.num_lb.node.color = cc.color(0, 0, 0, 255);
            }
        }

        //获取GameController脚本
        let gc = cc.find("Canvas").getComponent("GameController");
        //获取脚本下障碍物的生命值并加上随机数
        let h = (gc.barrier_health) + Math.floor(Math.random() * 10);
        //获取脚本下障碍物的速度
        let s = gc.barrier_speed;

        //赋值
        this.num = h;
        this.speed = s;
    }

    //随机颜色函数
    random_color(): cc.Vec3 {
        let r = this.randomNumber(0, 255);
        let g = this.randomNumber(0, 255);
        let b = this.randomNumber(0, 255);
        return (cc.v3(r, g, b))
    }


    update(dt: number) {
        //将自身生命值取整
        let num = Math.floor(this.num);
        //在Label上显示
        this.num_lb.string = num.toString();

        //获取GameController脚本
        let gc = cc.find("Canvas").getComponent("GameController");

        //自身移动
        if (gc.is_barrier_move == true) {
            this.node.y -= dt * this.speed;
        }
        //获取canvas节点
        let canvas = cc.find("Canvas");
        //如果自身到了屏幕最下方
        if (this.node.y <= -(canvas.height / 2)) {
            //获取GameController脚本
            let gc = cc.find("Canvas").getComponent("GameController");
            //调用游戏结束函数
            /* gc.gameOver() */
        }
    }


    // 随机数函数 min为最小值 max为最大值 将返回一个number,值大小的范围为min-max
    randomNumber(min: number, max: number): number {
        return (Math.round(Math.random() * (min - max) + max));
    }
}
4.绑定Canvas


2.消除障碍
GameController.ts
onLoad() {

        cc.game.setFrameRate(90)

        //恢复游戏,避免游戏暂停导致无法继续
        cc.director.resume();

        //给Canvas绑定事件
        this.canvas.on(cc.Node.EventType.TOUCH_MOVE, this.onMove, this)


        //开启碰撞引擎
        let manager = cc.director.getCollisionManager();
        manager.enabled = true;
        //如果要调试
        if (this.is_debug == true) {
            // 是否绘制碰撞组件的形状,默认为不绘制
            manager.enabledDebugDraw = true;
            //是否绘制碰撞组件的包围盒,默认为不绘制
            manager.enabledDrawBoundingBox = true;
        }
        //创建障碍物
        this.create_barrier();
        this.cre_bar_f = (this.barrier_height / this.barrier_speed) + Math.random() * this.generation_interval;

    }
Brrier.ts
 //碰撞回调
    //当碰撞产生的时候调用other产生碰撞的另一个组件 self产生碰撞的自身的碰撞组件
    onCollisionEnter(other, self) {
        if (other.node.group == "bullet") {

            //获取GameController脚本
            let gc = cc.find("/Canvas").getComponent("GameController");
            //获取Bullet脚本
            let c = other.getComponent("Bullet");

            //从脚本获取攻击力较少自身生命值
            this.reduce_num(c.ATK);

            //销毁子弹
            other.node.destroy();
        }
        //如果自身生命值小于0
        if (this.num <= 0) {
            //自身销毁
            this.node.destroy();
        }
    }
六、Buff
1.生成buff
1.新建显示获得buff类型节点

2.新建Buff脚本,新建buff预制资源
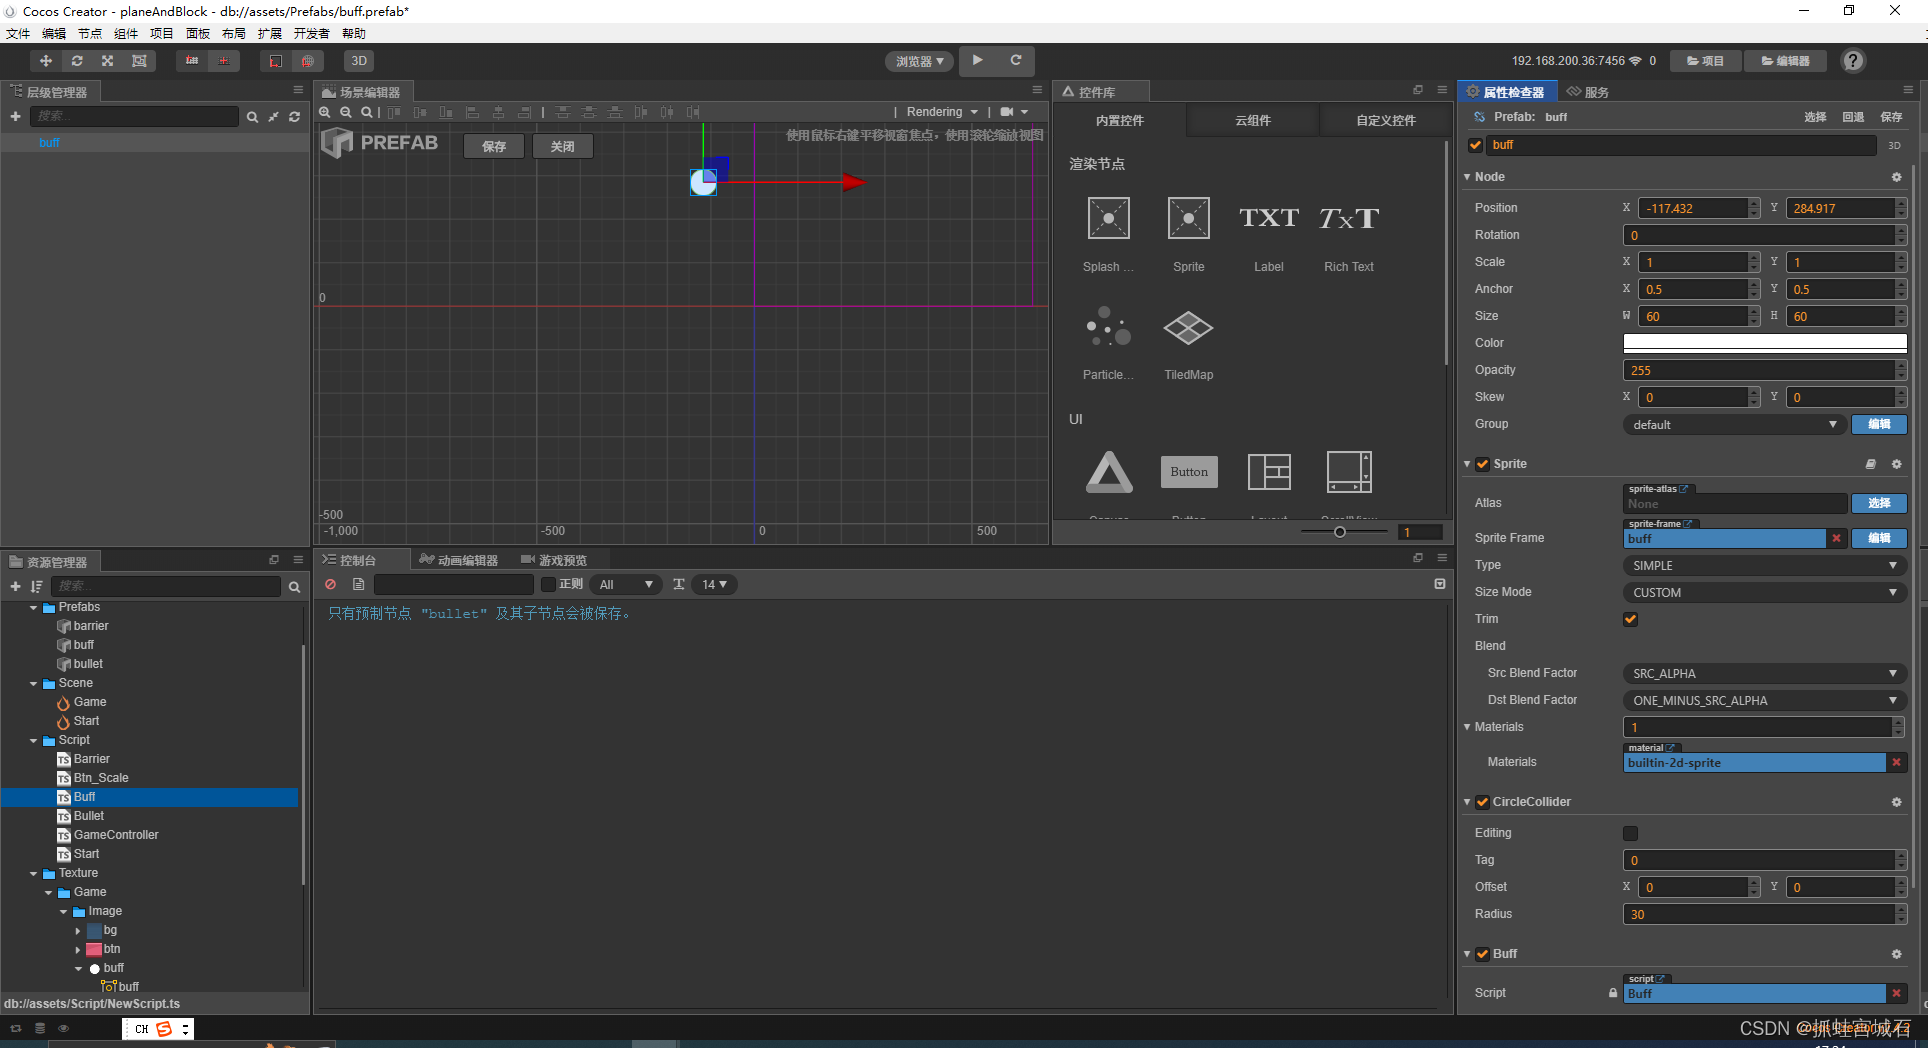
3.新建buff子节点

GameController.ts
@property({ type: cc.Prefab, displayName: "buff预制体", tooltip: "buff预制体" })
    buff: cc.Prefab = null;


 //创建障碍物函数
    create_barrier(): void {
        //l为最左边,也就是从哪里生成,就是屏幕最左边加上一个随机数
        let l = ((-this.canvas.width / 2) + (this.barrier_width / 2)) + Math.random() * 100;
        //r为最右边,也就是从哪里结束生成,就是屏幕最右边减去一个随机数
        let r = (this.canvas.width / 2) - (this.barrier_width / 2) - Math.random() * 50;
        //获取屏幕最上面的Y坐标
        let top = (this.canvas.height / 2) + (this.barrier_height / 2);
        //获取障碍物之间的间距,值是随机的
        let barrier_spacing = this.randomNumber(this.barrier_spacing.x, this.barrier_spacing.y);

        //while循环生成障碍物
        //如果左边小于右边
        while (l < r) {
            //利用随机数,有概率生成buff球
            let n = Math.random() * 100;
            if (n > this.probability) {
                let barrier = cc.instantiate(this.barrier);
                barrier.parent = this.barrier_parent;
                barrier.position = cc.v3(l, top)
            } else if (n < this.probability) {
                //生成buff球,Y坐标是屏幕上方
                let buff = cc.instantiate(this.buff);
                buff.parent = this.barrier_parent;
                buff.position = cc.v3(1, top);
            }
            //随机数生成障碍物的间距
            barrier_spacing = this.randomNumber(this.barrier_spacing.x, this.barrier_spacing.y);
            //打印log
            /*  console.log("生成障碍物,目前值为:" + l.toString()); */

            //左边的值加上障碍物宽和障碍物的间距
            l = l + this.barrier_width + barrier_spacing;
        }

        //障碍物的生命值加上障碍物的宽和障碍物的间距
        this.barrier_health += Math.floor(Math.random() * this.increase)
    }
Buff.ts
const { ccclass, property } = cc._decorator;

@ccclass
export default class NewClass extends cc.Component {


    //自身移动速度
    speed: number = 2;

    onLoad(): void {
        //获取GameController脚本
        let gc = cc.find("Canvas").getComponent("GameController");
        //获取障碍物移动速度
        let s = gc.barrier_speed;
        this.speed = s;
    }

    update(dt: number) {
        //获取GameController脚本
        let gc = cc.find("Canvas").getComponent("GameController");
        //自身移动
        if (gc.is_barrier_move == true) {
            this.node.y -= dt * this.speed;
        }
    }

}
4.绑定Canvas
2.buff碰撞
1.新建double_lb节点
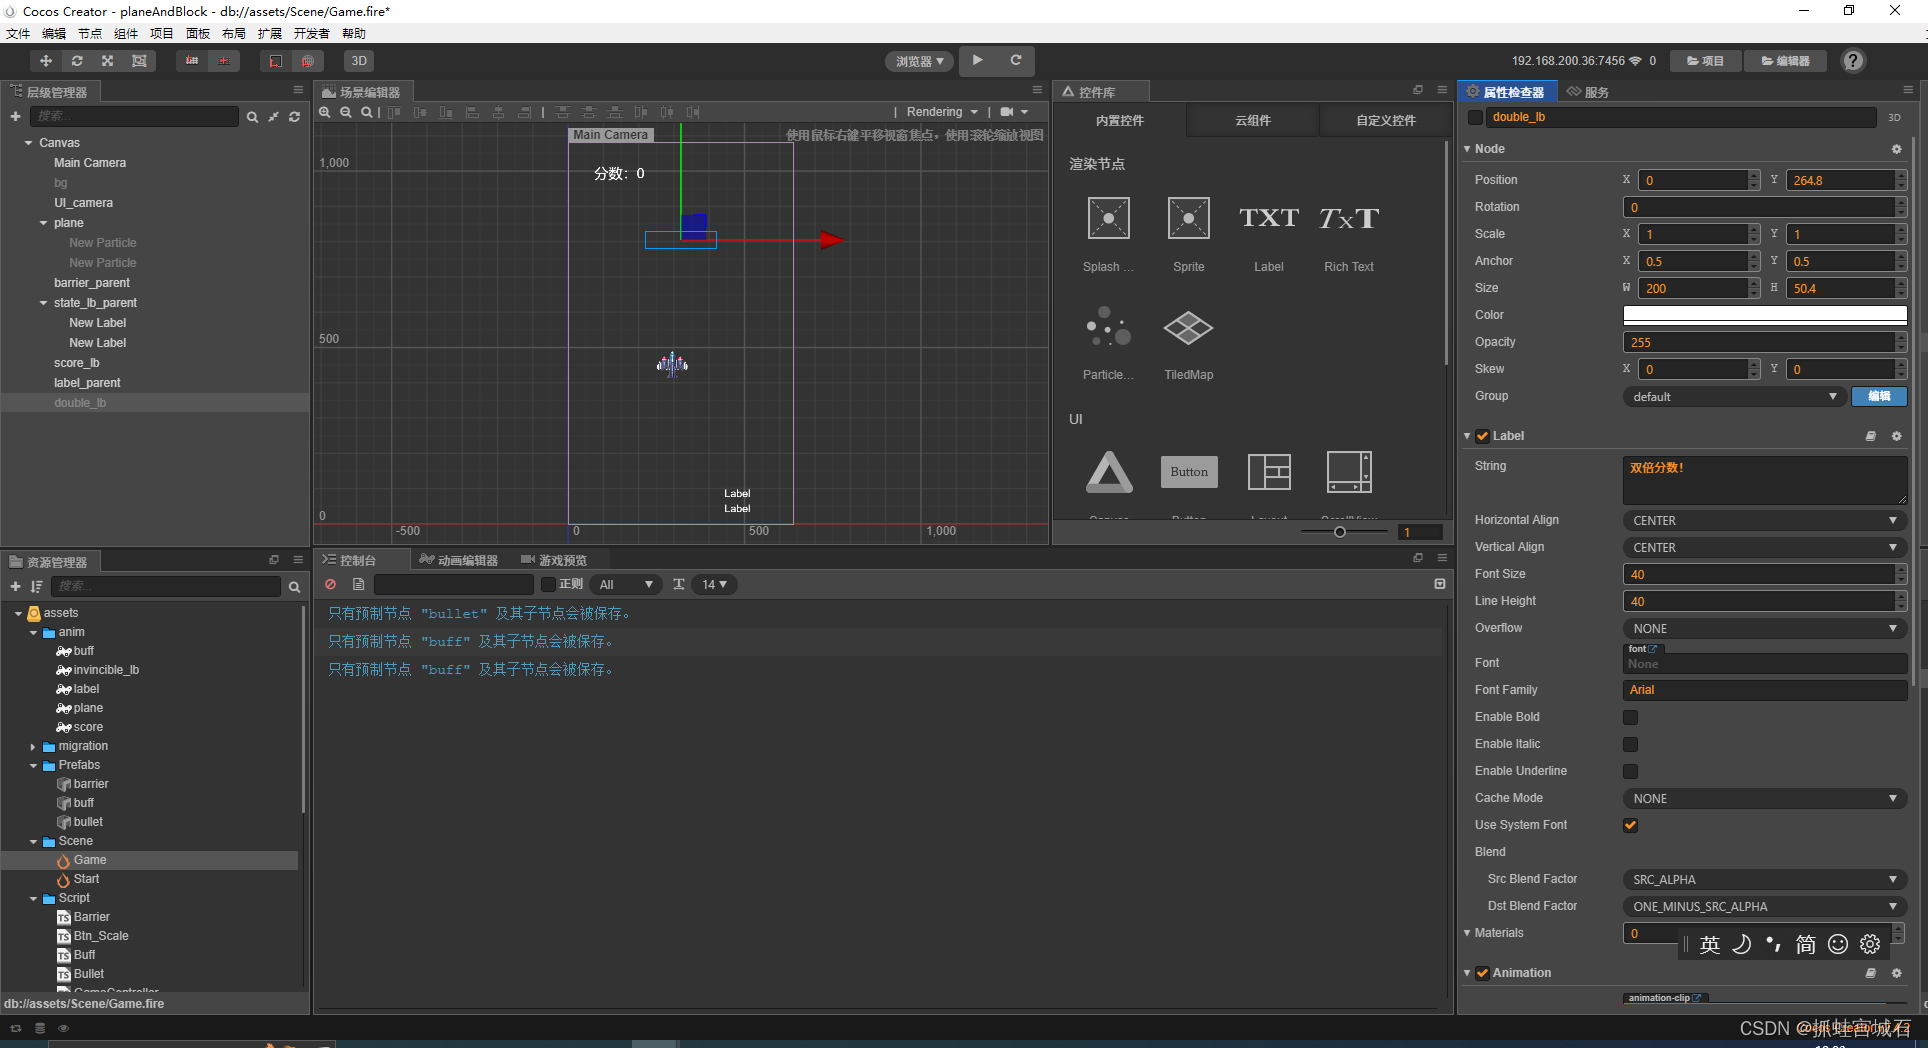
Buff.ts
//碰撞回调
    onCollisionEnter(other,self){
         //获取GameController脚本
         let gc = cc.find("Canvas").getComponent("GameController");

         //如果子弹射速满了,就不增加射速了
         if(gc.bullet_speed<10000){
            //随机数0-10
            let n = this.randomNumber(0,10);
            //有一半几率执行子弹加速函数
            //也有一半几率执行子弹加攻击函数
            if(n>5){
                //加速buff
                gc.enhance_speed();
            }else{
                //加攻击buff
                gc.enhance_ATK();
            }
         }else{
            gc.enhance_ATK()
         }
         //自身销毁
         this.node.destroy()
    }


    // 随机数函数 min为最小值 max为最大值 将返回一个number,值大小的范围为min-max
    randomNumber (min: number, max: number): number {
        return(Math.round(Math.random() * (min - max) + max));
    }
GameController.ts
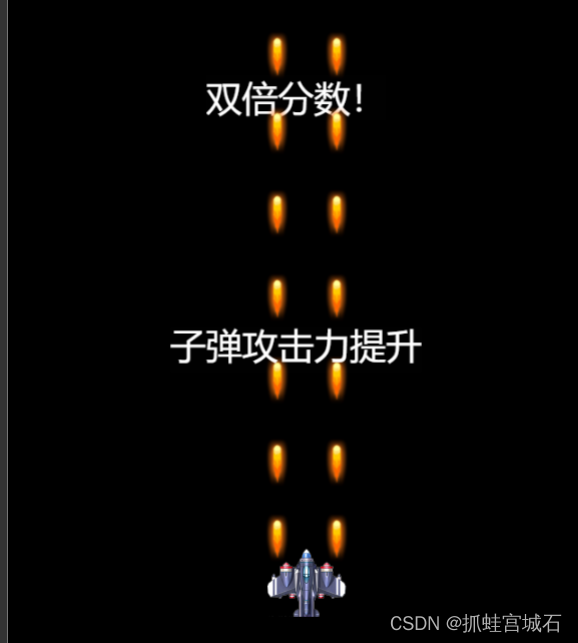
@property({ type: cc.Node, displayName: "显示获得buff类型的label", tooltip: "显示获得buff类型的label" })
    label_parent: cc.Node = null;


    @property({ type: cc.Node, displayName: "显示双倍分数的label", tooltip: "显示双倍分数的label" })
    double_lb: cc.Node = null;

@property({ type: cc.Prefab, displayName: "buff预制体", tooltip: "buff预制体" })
    buff: cc.Prefab = null;


    @property({ displayName: "是否双倍分数", tooltip: "是否双倍分数" })
    is_double: boolean = false;


//增加子弹射速
    enhance_speed() {
        //增加射速
        this.bullet_speed = this.bullet_speed + this.add_buff_num[0];
        //射速加的越来越多
        this.add_buff_num[0] = this.add_buff_num[0] * 1.1;

        //新建一个label来显示吃到的buff
        //新建节点
        let node = new cc.Node
        //父节点是label_parent,这个节点上有Layout组件
        node.parent = this.label_parent;
        //添加cc.Label
        node.getComponent(cc.Label);
        //显示内容
        node.getComponent(cc.Label).string = "子弹射速提升";
        //定时器1秒后销毁
        this.scheduleOnce(function () {
            node.destroy();
        }, 1);


        //双倍分数
        this.double_score(8);
    }


    //增强子弹攻击力
    enhance_ATK() {
        //增加攻击力
        this.ATK = this.ATK + this.add_buff_num[1];
        //攻击力加的越来越多
        this.add_buff_num[1] = this.add_buff_num[1] * 1.1;

        // 新建一个label来显示吃到的buff
        // 新建节点
        let node = new cc.Node;
        // 父节点是label_parent,这个节点上有Layout组件
        node.parent = this.label_parent;
        // 添加cc.Label
        node.addComponent(cc.Label);
        // 显示内容
        node.getComponent(cc.Label).string = "子弹攻击力提升";
        // 定时器 1秒后销毁
        this.scheduleOnce(function () {
            node.destroy();
        }, 1);

        // 双倍分数
        this.double_score(8);
    }

    //双倍分数函数,执行后得分翻倍,time为多少秒后恢复
    double_score(time: number) {
        let self = this;
        //开启双倍分数并且显示文字
        this.is_double = true;
        this.double_lb.active = true;
        //定时器关闭双倍分数并且隐藏文字
        this.scheduleOnce(function () {
            self.is_double = false;
            self.double_lb.active = false;
        }, time);
    }
2.绑定Canvas

七、加分
Barrier.ts
//碰撞回调
    //当碰撞产生的时候调用other产生碰撞的另一个组件 self产生碰撞的自身的碰撞组件
    onCollisionEnter(other, self) {
        if (other.node.group == "bullet") {

            //获取GameController脚本
            let gc = cc.find("/Canvas").getComponent("GameController");
            //获取Bullet脚本
            let c = other.getComponent("Bullet");

            //从脚本获取攻击力较少自身生命值
            this.reduce_num(c.ATK);
             // 如果可以加双倍分数
            if(gc.is_double==true){
                //加分
                gc.add_score((c.ATK)*2)
            }
            //如果不可以加双倍分数
            if(gc.is_double == false){
                gc.add_score(c.ATK);
            }
            //销毁子弹
            other.node.destroy();
        }
        //如果自身生命值小于0
        if (this.num <= 0) {
            //自身销毁
            this.node.destroy();
        }
    }
GameController.ts
update(dt: number): void {
        //炮弹生成
        let time = 1 / this.bullet_num;

        //飞机左侧炮弹生成
        this.l += dt;
        if (this.l > time && this.is_fire == true) {
            //打印log
            /* console.log("生成左侧炮弹"); */
            //清零
            this.l = 0;
            //创建炮弹
            this.create_bullet(cc.v3(this.bullet_left_pos))
        }
        //飞机右侧炮弹生成
        this.r += dt
        if (this.r > time && this.is_fire == true) {
            /* console.log("飞机右侧炮弹生成"); */
            this.r = 0;
            this.create_bullet(cc.v3(this.bullet_right_pos))
        }


        //生成障碍物
        //如果能生成障碍物就加
        if (this.is_barrier_create == true) {
            this.cre_bar = this.cre_bar + dt;
        }
        //可以生成障碍物时
        if (this.cre_bar >= this.cre_bar_f) {
            this.cre_bar = 0;
            this.cre_bar_f = (this.barrier_height / this.barrier_speed) + (Math.random() * this.generation_interval);
            this.create_barrier();
        }


        //显示状态
        //子弹射速
        let speed = Math.floor(this.bullet_speed);
        //子弹攻击力
        let ATK = Math.floor(this.ATK)
        //如果速度不为满级正常显示
        if (this.bullet_speed < 10000) {
            this.state_lb[0].string = "子弹射速:" + speed;
        }
        //如果速度不为满级正常显示
        else {
            this.state_lb[0].string = "子弹射速:Max";
        }
        this.state_lb[1].string = "子弹攻击力:" + ATK;


        //显示分数
        //如果分数小于1000正常显示
        if (this.score < 1000) {
            this.score_lb.string = "分数:" + Math.floor(this.score);
        }
        //如果分数大于1000小于10000就用k表示
        else if (this.score < 10000) {
            let s = (Math.floor(this.score) / 1000).toFixed(2);
            this.score_lb.string = "分数:" + s + "K";
        }
        //如果分数大于10000就用w表示
        else {
            let s = (Math.floor(this.score) / 10000).toFixed(2);
            this.score_lb.string = "分数:" + s + "W";
        }


    //加分函数
    add_score(num: number) {
        this.score = this.score + num;
    }