我们往往会用到多版本的IDEA进行一个Maven项目配置部署,还有tomcat的配置,这里就有你需要的,有低版本的,也有高版本的,根据自己的情况来进行一个操作
一、前言
当涉及到软件开发和项目管理时,使用一个可靠的构建工具是非常重要的。Maven是一个广泛使用的构建工具,它为Java项目提供了一种简化的构建过程和依赖管理。
在本文中,我们将探讨如何部署Maven并开始使用它来构建您的项目。我们将介绍所需的步骤,并向您提供一些有用的提示和建议。
1、具备前提条件
- Java Development Kit(JDK)已安装并正确配置。
- 确保您的系统已配置Java环境变量。
- 下载适用于您操作系统的Maven二进制分发版,并解压缩到您想要安装的位置。
接下来,我们将按照以下步骤来部署Maven:
二、部署(2019.3.3)
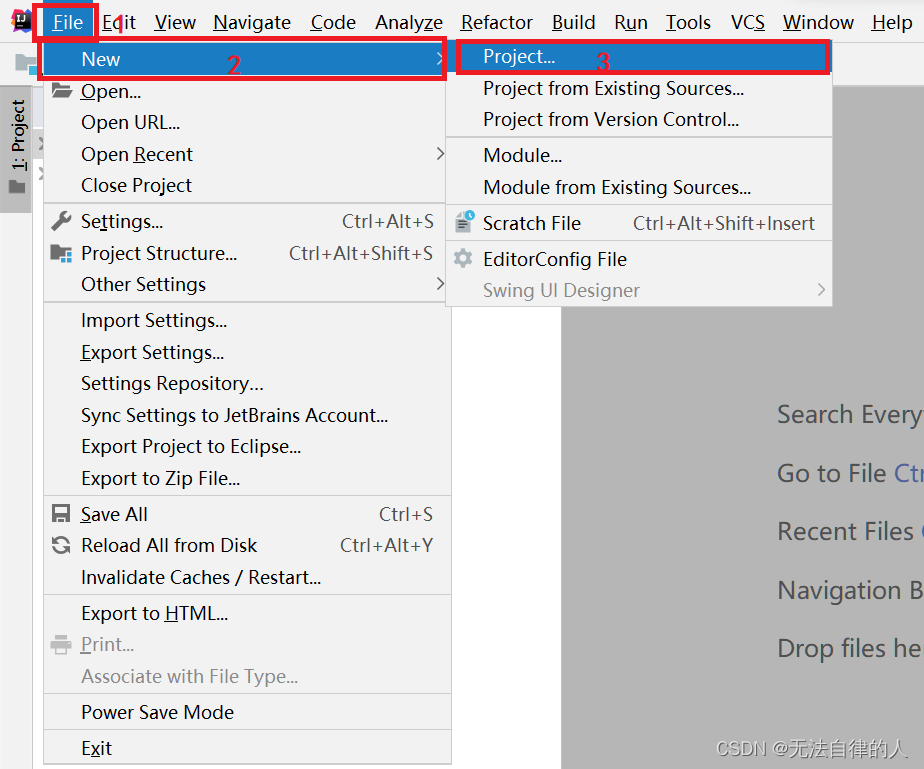
1、新建项目
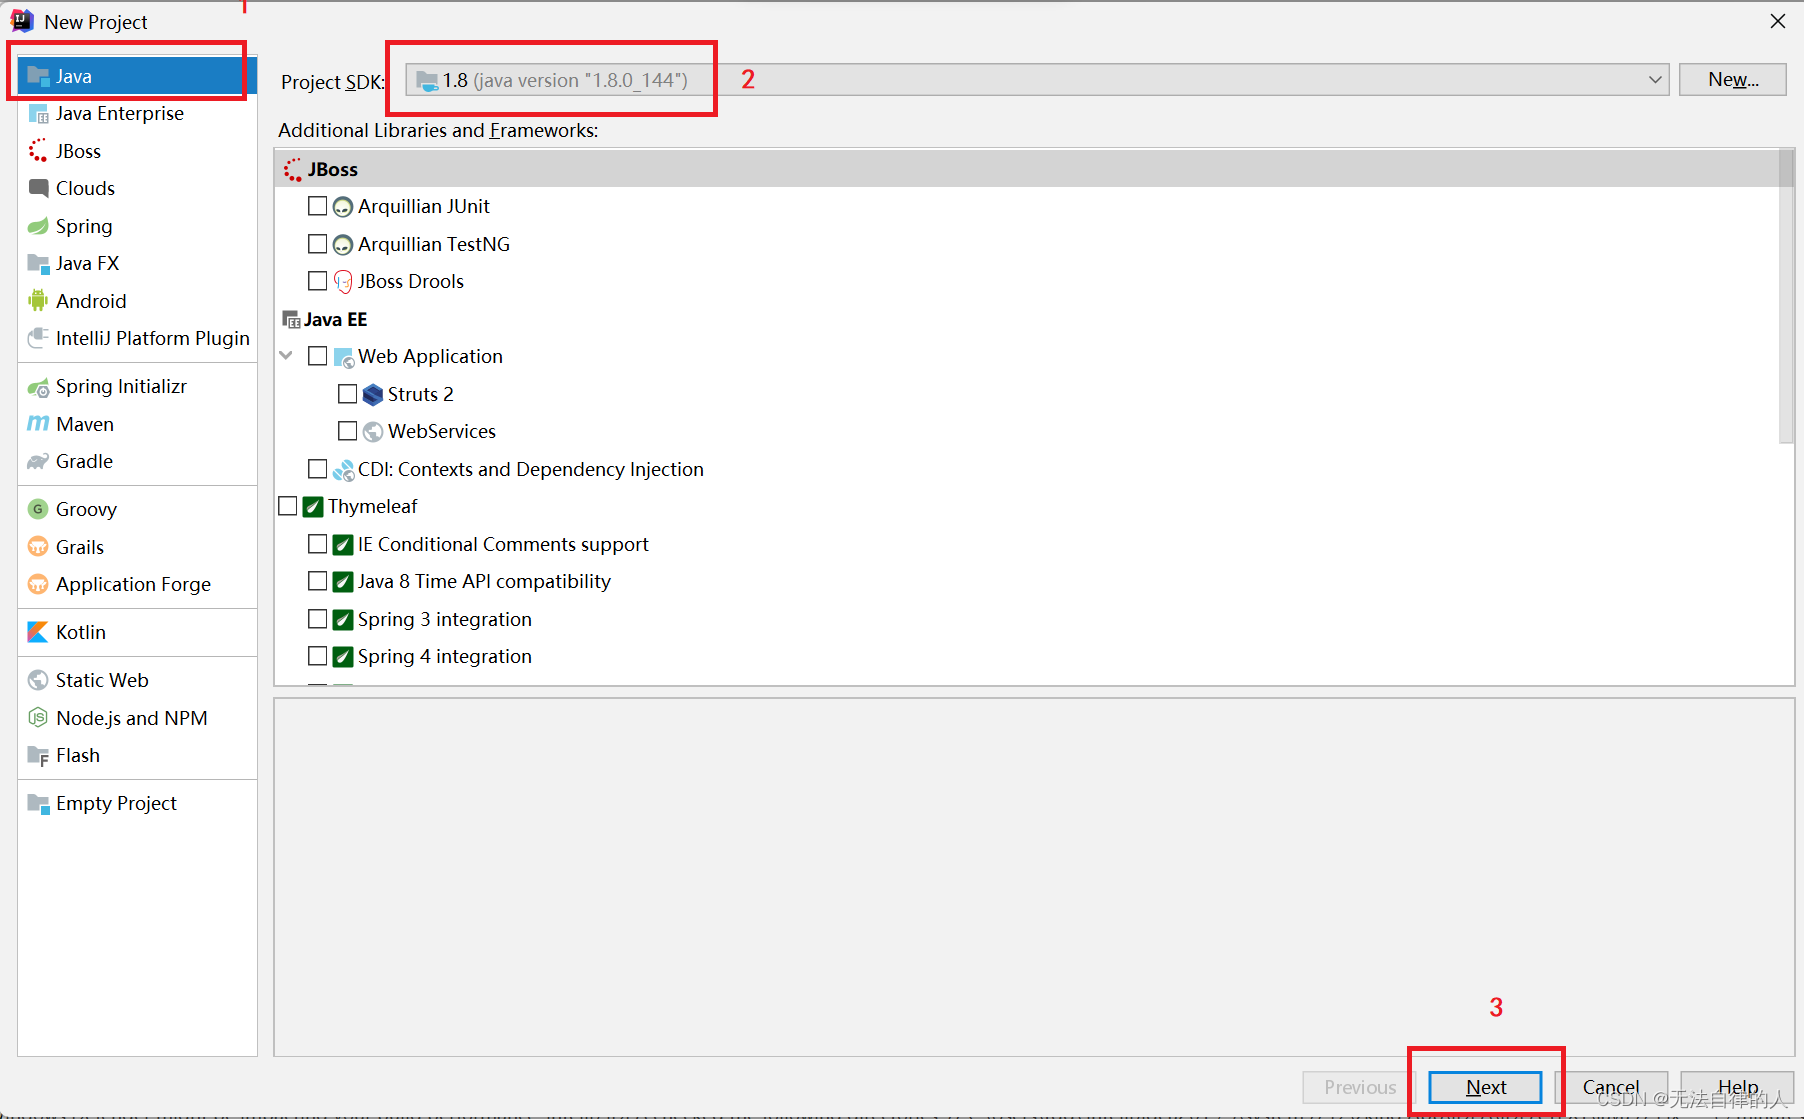
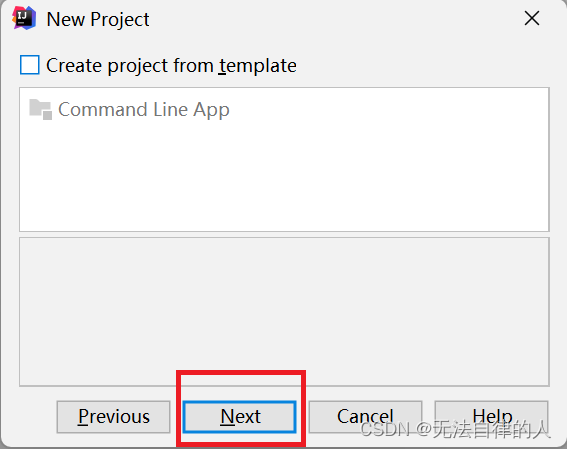
 选择Java项目 ===》选择你的jdk ===》下一步

2、设置
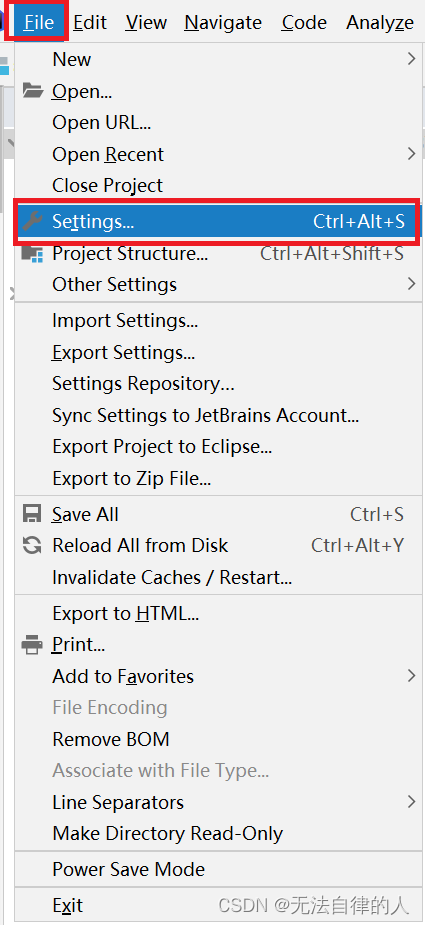
进入设置配置编码及文件设置
File ===》Settings...
- 设置文件编码

- 设置maven配置
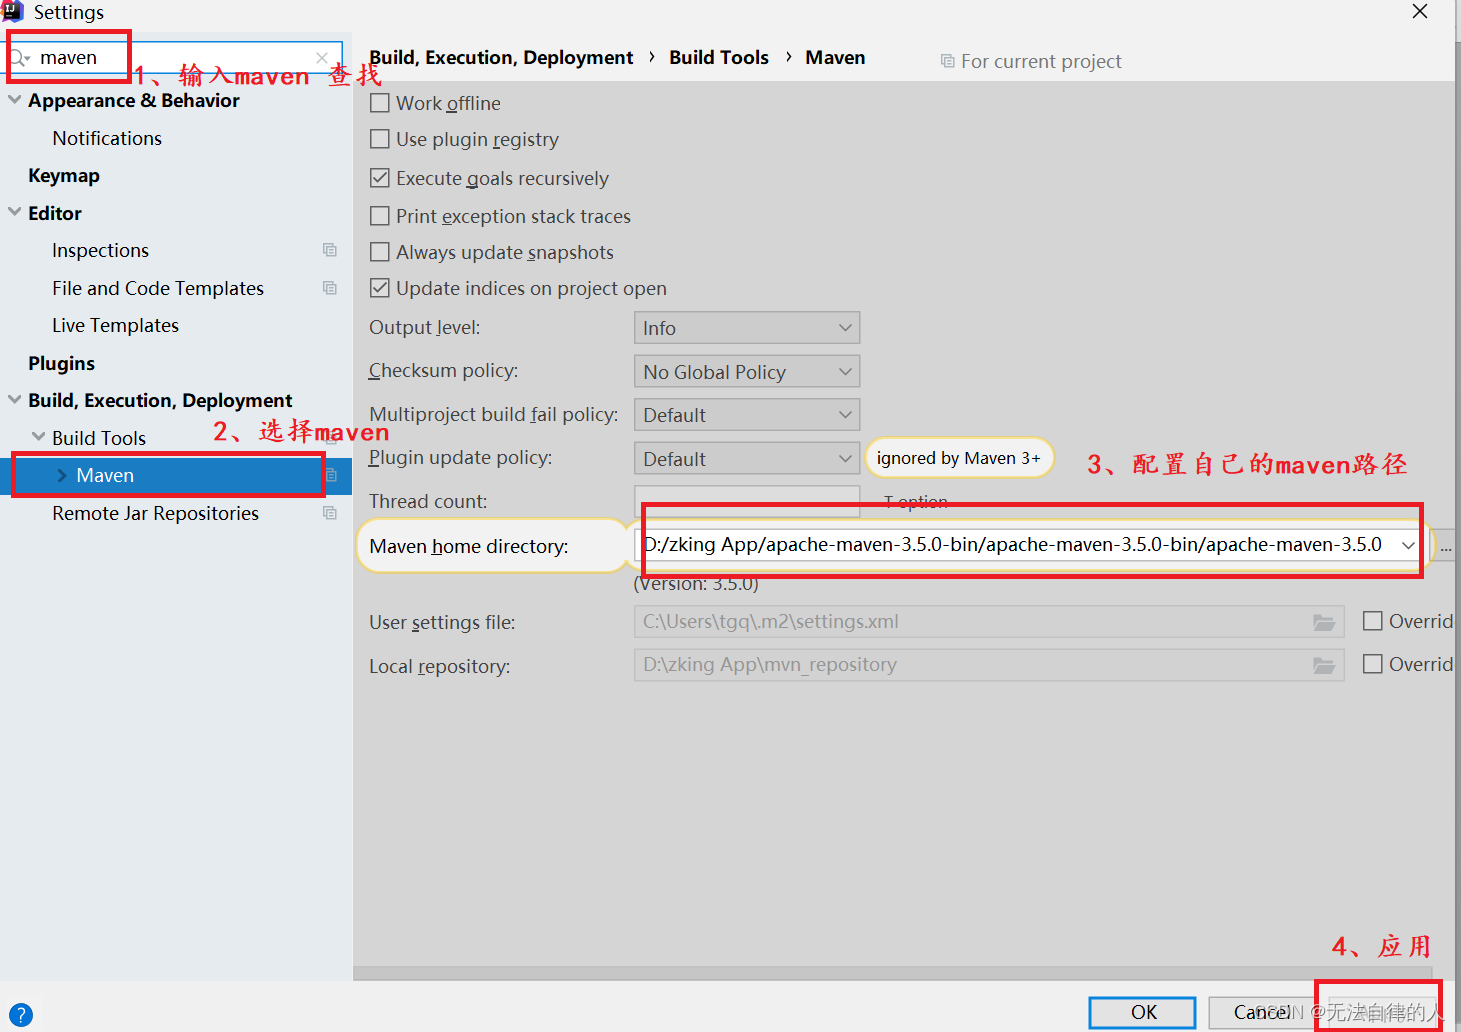
3、新建maven
右键项目 ===》新建一个Module...

选择Maven ===》选择jdk ===》勾选 ===》选择webapp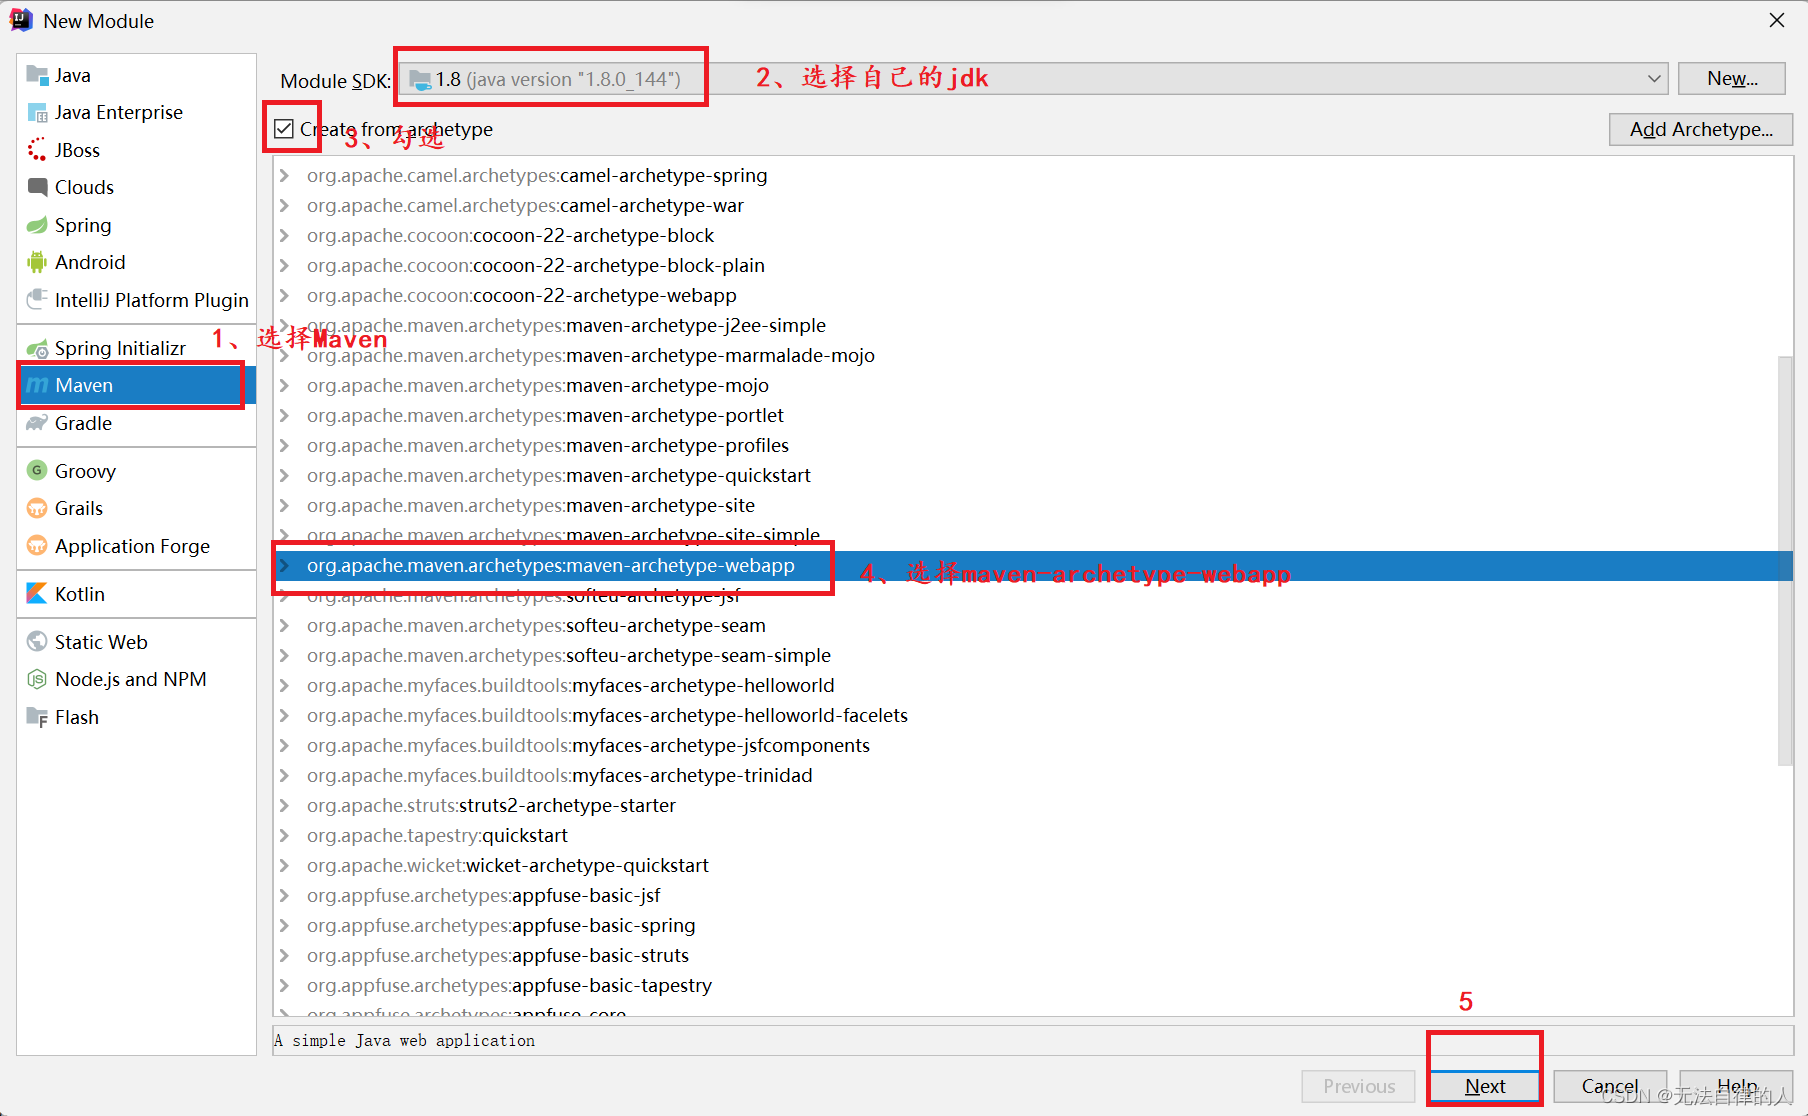
取一个名字,下一步

添加配置 ; Name:archetypeCatalog Value:internal
记得设置这个目录;这个目录是你的安装maven下面的settings.xml,最后Finish

最后出现这个就说明成功了

4、配置maven
pom.xml
找到我们的pom.xml

我们在里面添加我们的依赖
    <dependency>
      <groupId>junit</groupId>
      <artifactId>junit</artifactId>
      <version>4.12</version>
      <scope>test</scope>
    </dependency>

    <dependency>
      <groupId>mysql</groupId>
      <artifactId>mysql-connector-java</artifactId>
      <version>5.1.44</version>
    </dependency>

    <dependency>
      <groupId>javax.servlet</groupId>
      <artifactId>javax.servlet-api</artifactId>
      <version>4.0.1</version>
      <scope>provided</scope>
    </dependency>
配置maven-compiler-plugin插件
        <plugin>
          <groupId>org.apache.maven.plugins</groupId>
          <artifactId>maven-compiler-plugin</artifactId>
          <version>3.7.0</version>
          <configuration>
            <source>1.8</source>
            <target>1.8</target>
            <encoding>UTF-8</encoding>
          </configuration>
        </plugin>
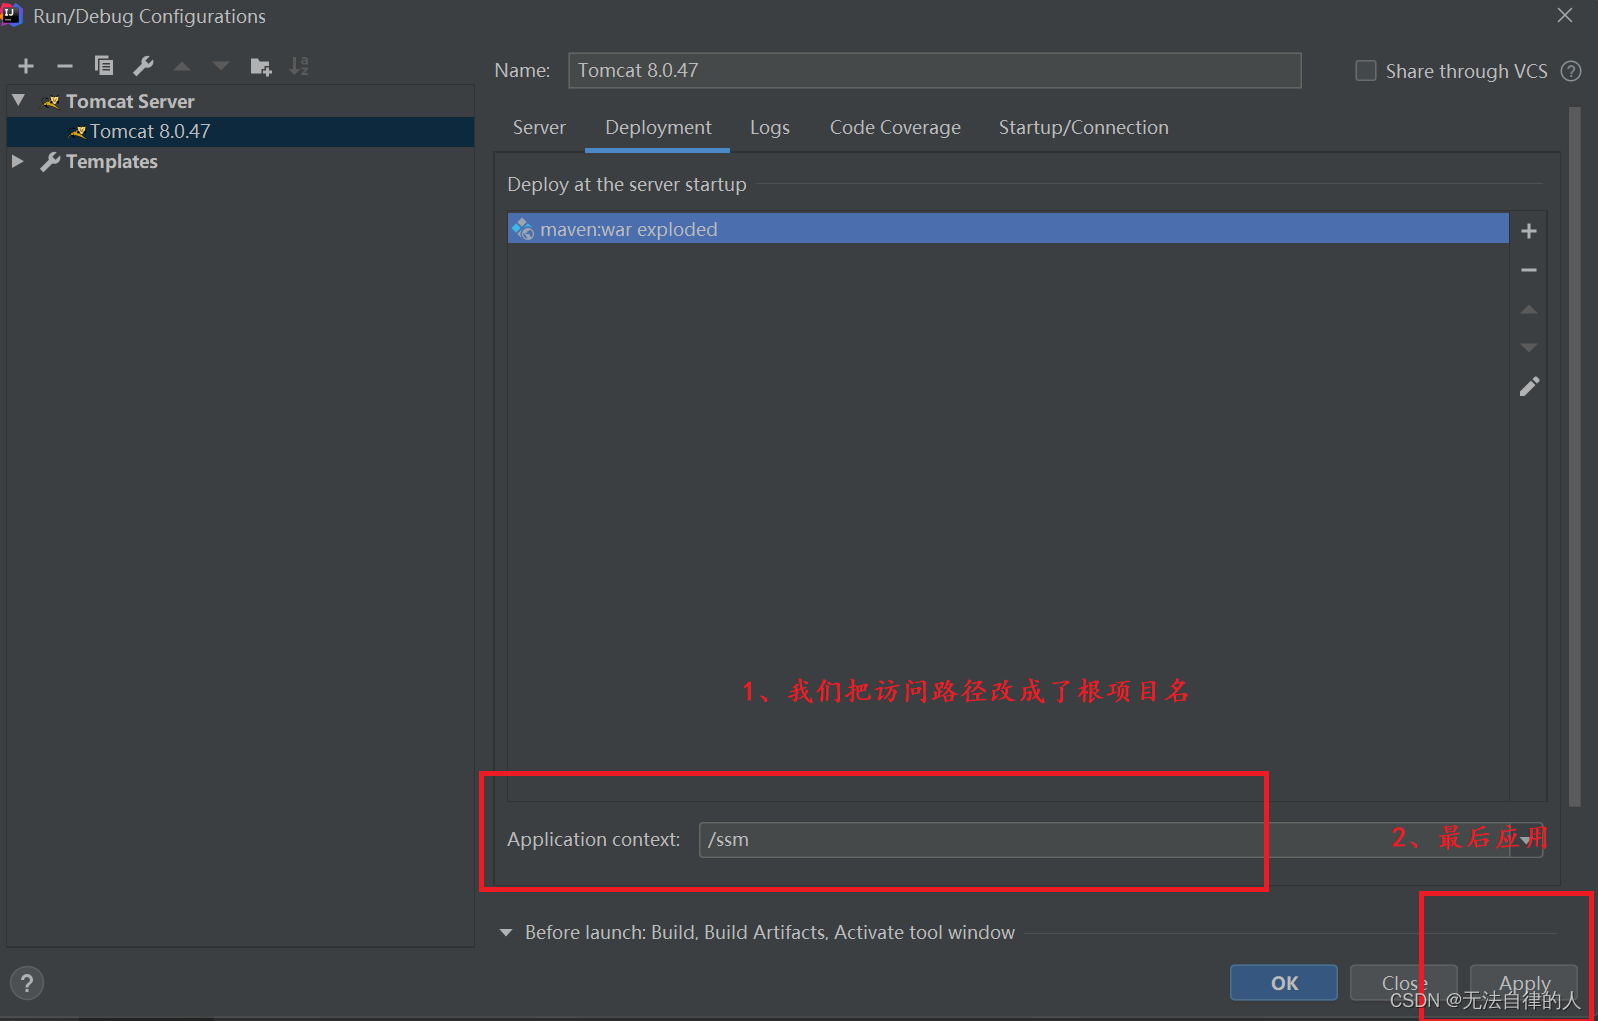
Tomcat配置
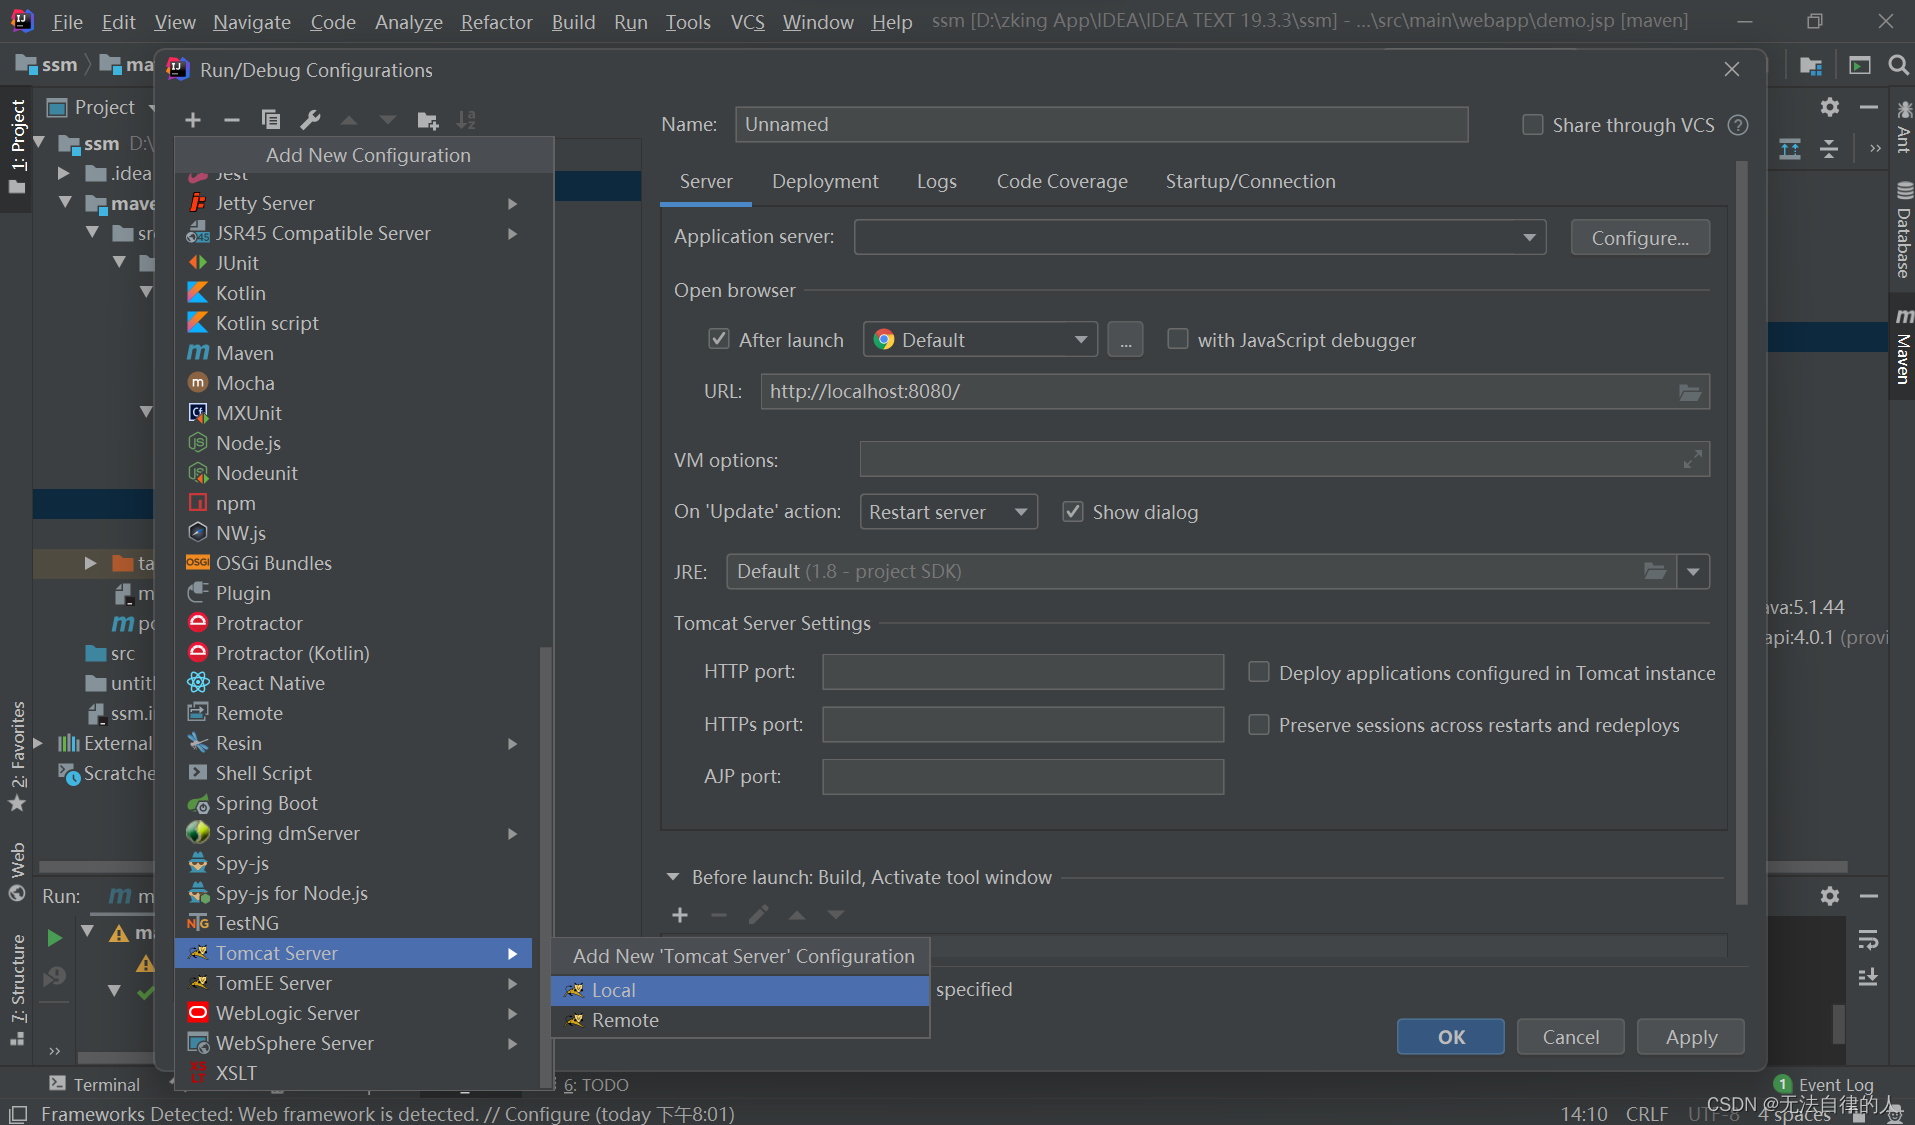
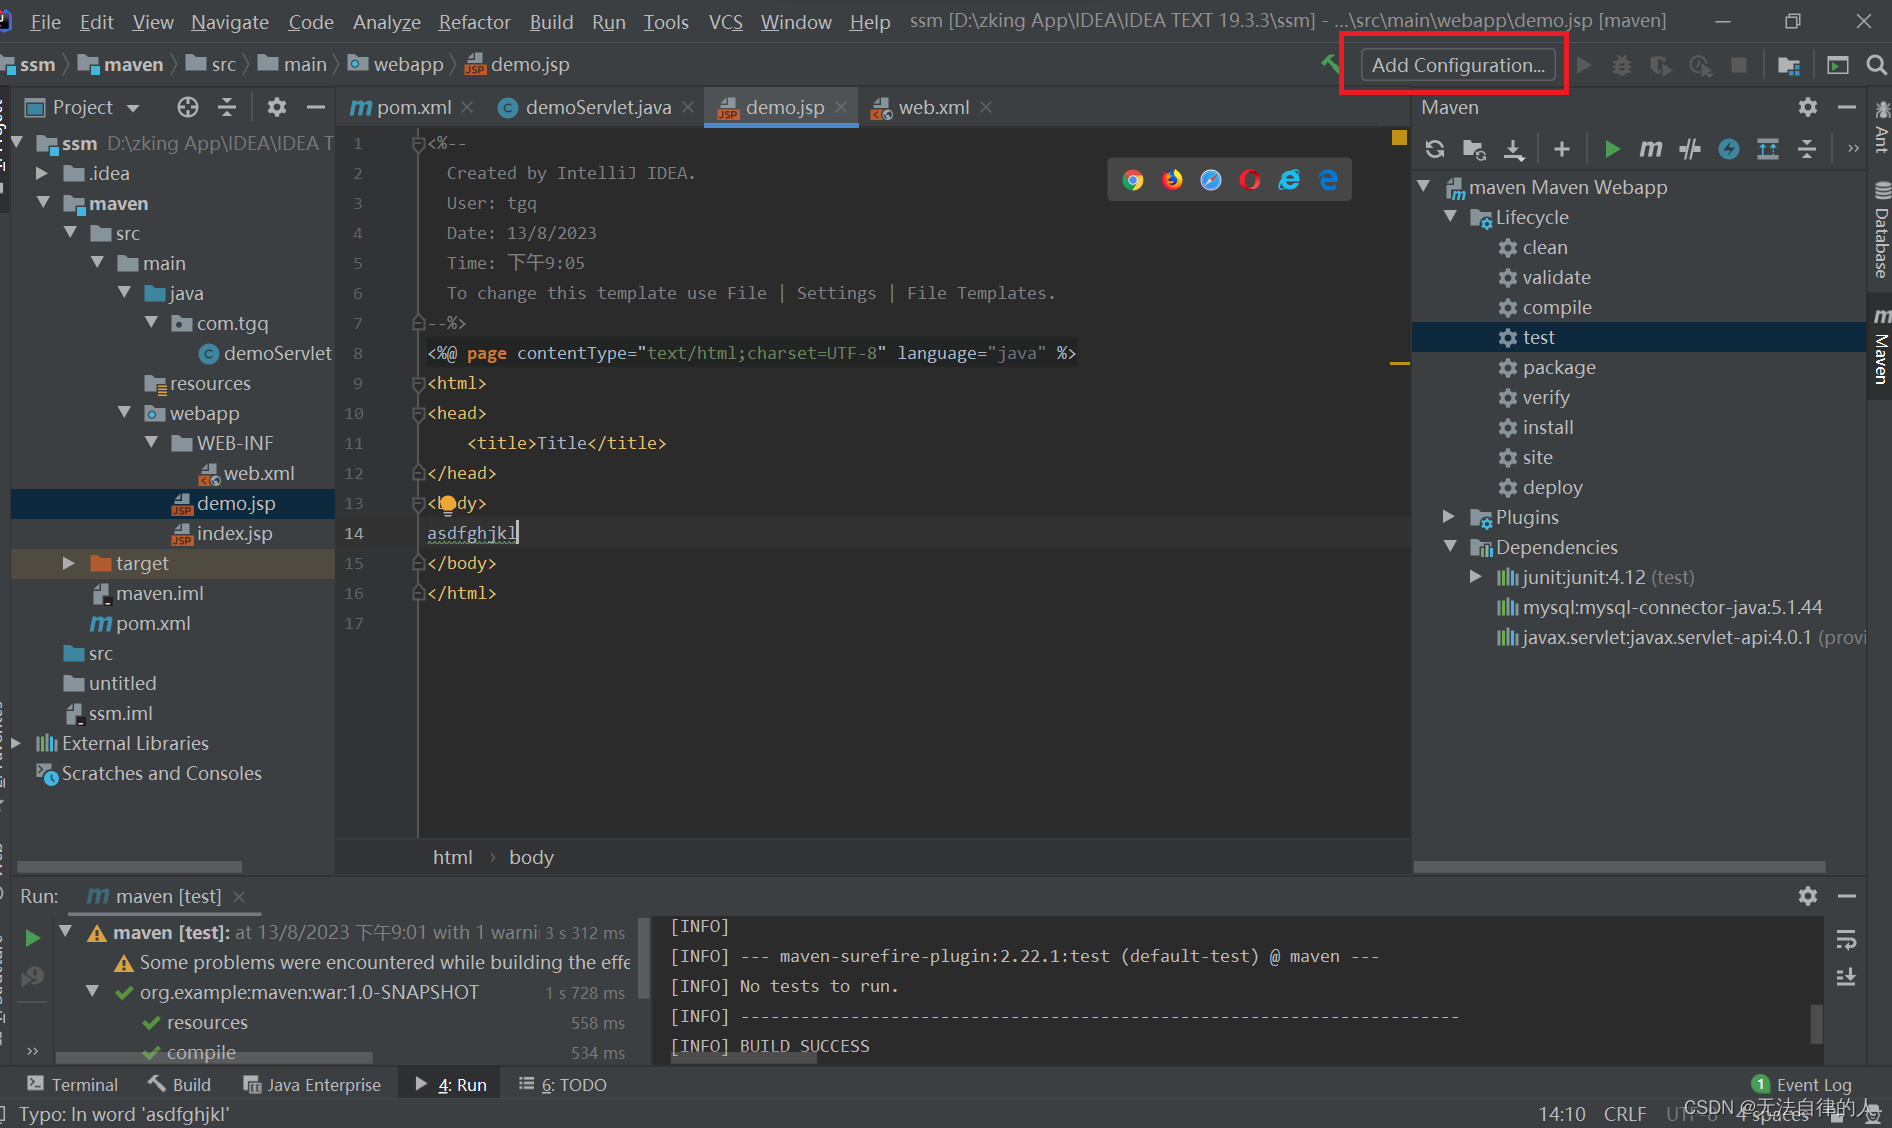
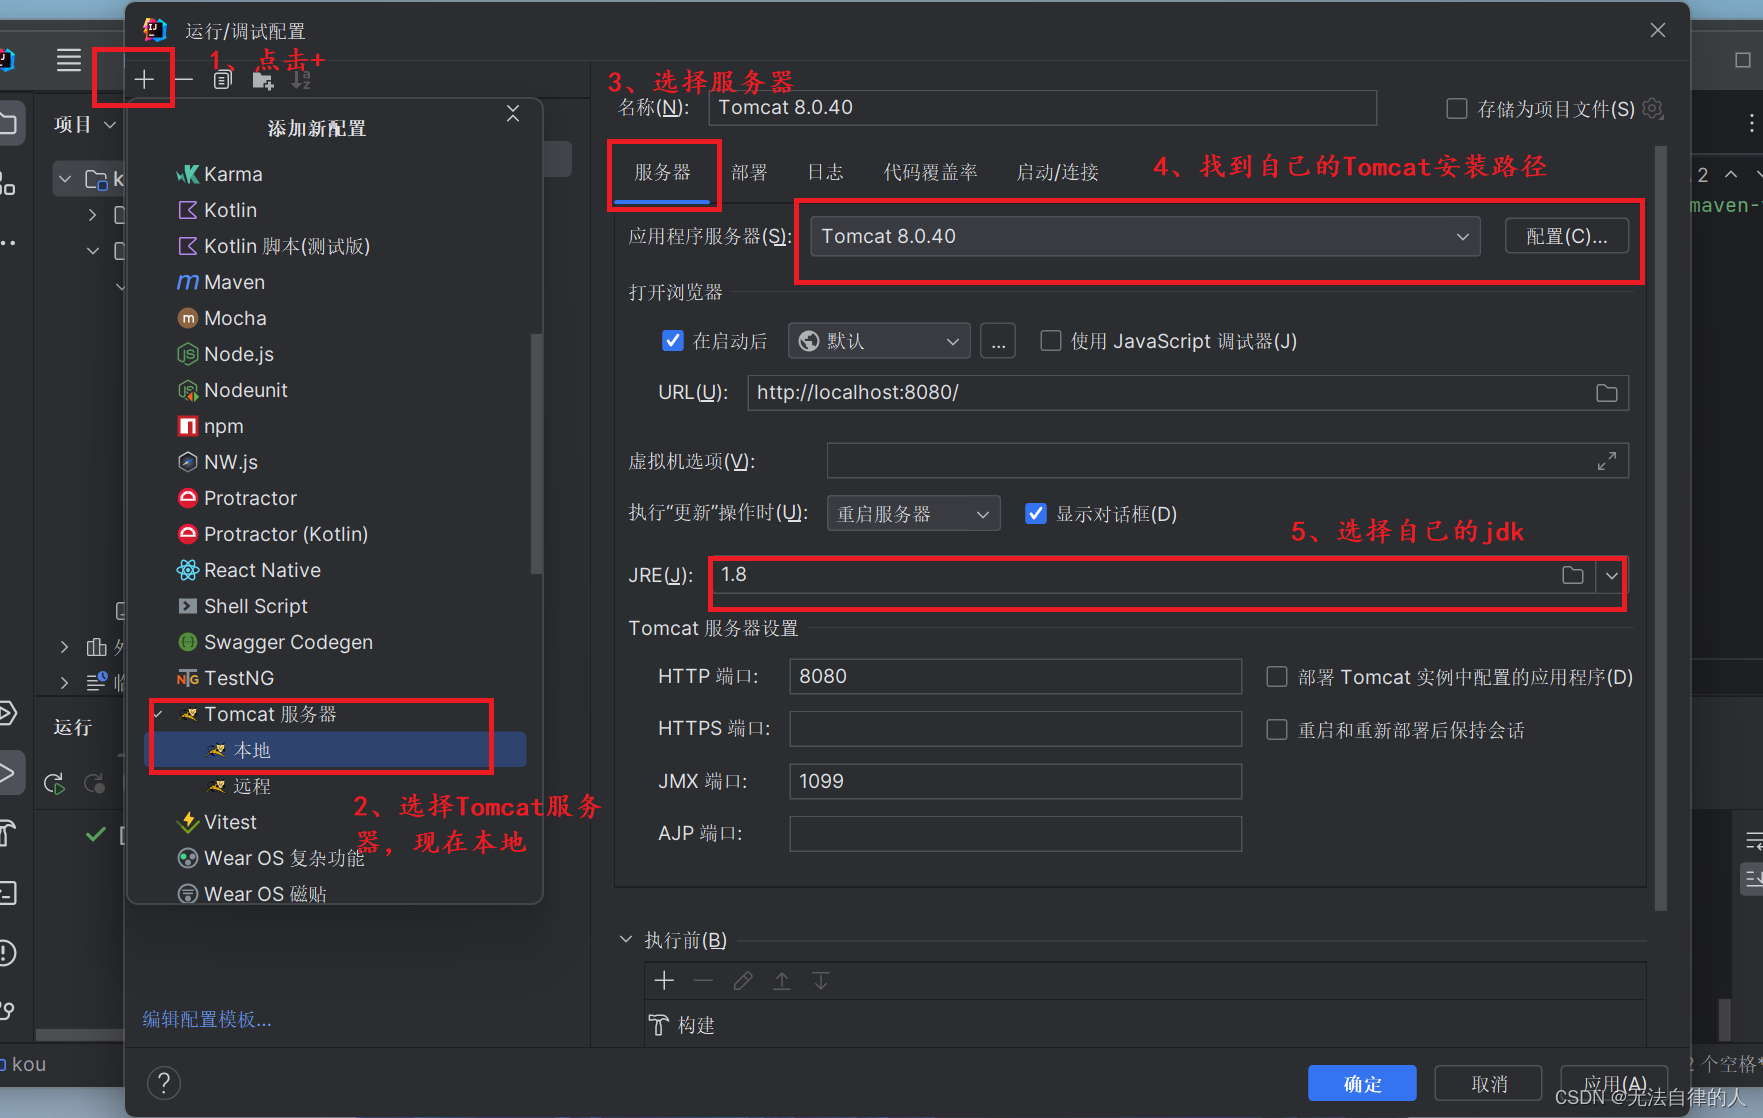
配置自己的tomcat,选择自己的tomcat的位置
选择自己的模块项目
在弹出的窗口选择第二个
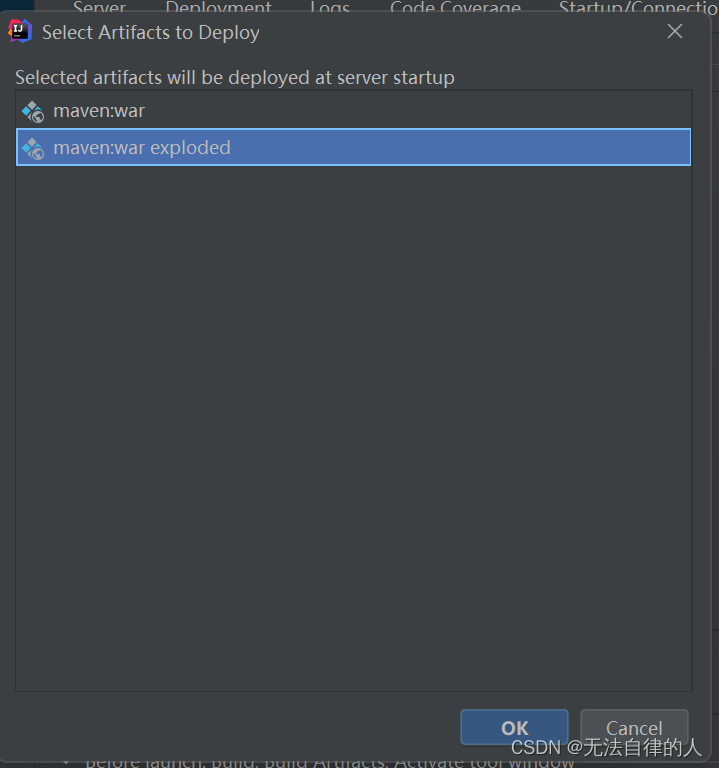
最后我们就是配置成功了。
web.xml
我们可以把我们的web.xml文件由2.3至3.1
<web-app xmlns="http://xmlns.jcp.org/xml/ns/javaee"
         xmlns:xsi="http://www.w3.org/2001/XMLSchema-instance"
         xsi:schemaLocation="http://xmlns.jcp.org/xml/ns/javaee http://xmlns.jcp.org/xml/ns/javaee/web-app_3_1.xsd"
         version="3.1">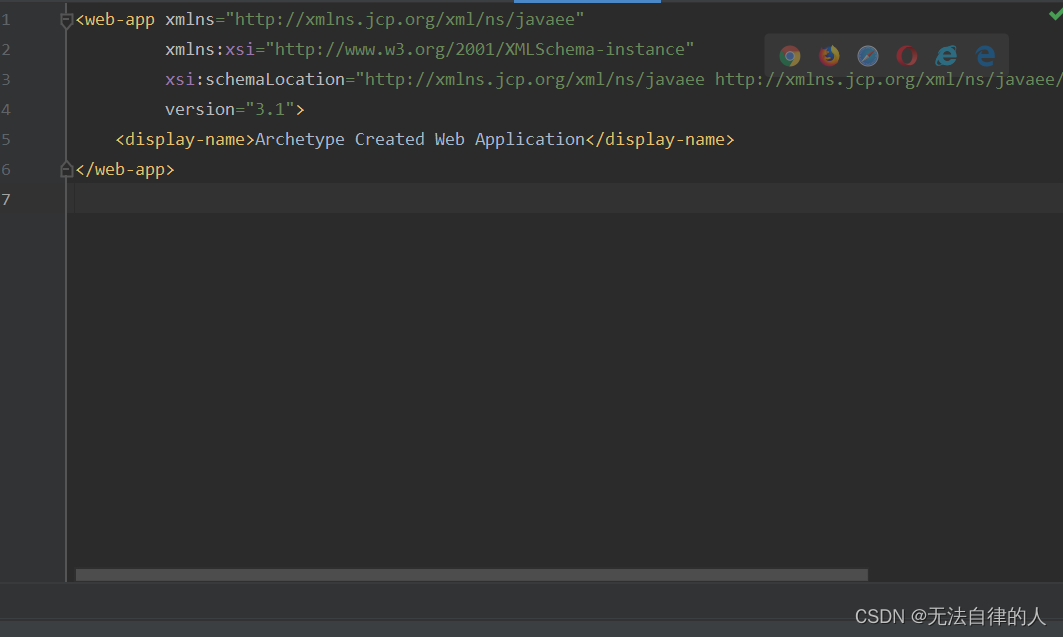
5、测试
package com.tgq;

import javax.servlet.ServletException;
import javax.servlet.annotation.WebServlet;
import javax.servlet.http.HttpServlet;
import javax.servlet.http.HttpServletRequest;
import javax.servlet.http.HttpServletResponse;
import java.io.IOException;

/**
 * @author gq
 * @site www.gq.com
 * @company 自律公司
 * @create  2023-08-13 下午9:03
 */
@WebServlet("/demo")
public class demoServlet extends HttpServlet {
    @Override
    protected void doGet(HttpServletRequest req, HttpServletResponse resp) throws ServletException, IOException {
        this.doPost(req, resp);
    }

    @Override
    protected void doPost(HttpServletRequest req, HttpServletResponse resp) throws ServletException, IOException {
        System.out.println("demo...");
        resp.sendRedirect("demo.jsp");
    }
}
<%--
  Created by IntelliJ IDEA.
  User: tgq
  Date: 13/8/2023
  Time: 下午9:05
  To change this template use File | Settings | File Templates.
--%>
<%@ page contentType="text/html;charset=UTF-8" language="java" %>
<html>
<head>
    <title>Title</title>
</head>
<body>
asdfghjkl
</body>
</html>
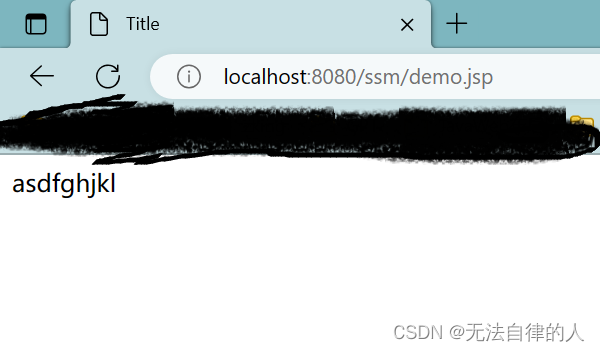
三、部署(2023.1.3)
多余的步骤我就省略掉,和前面基本差不多。
1、部署新建配置
新建一个空的项目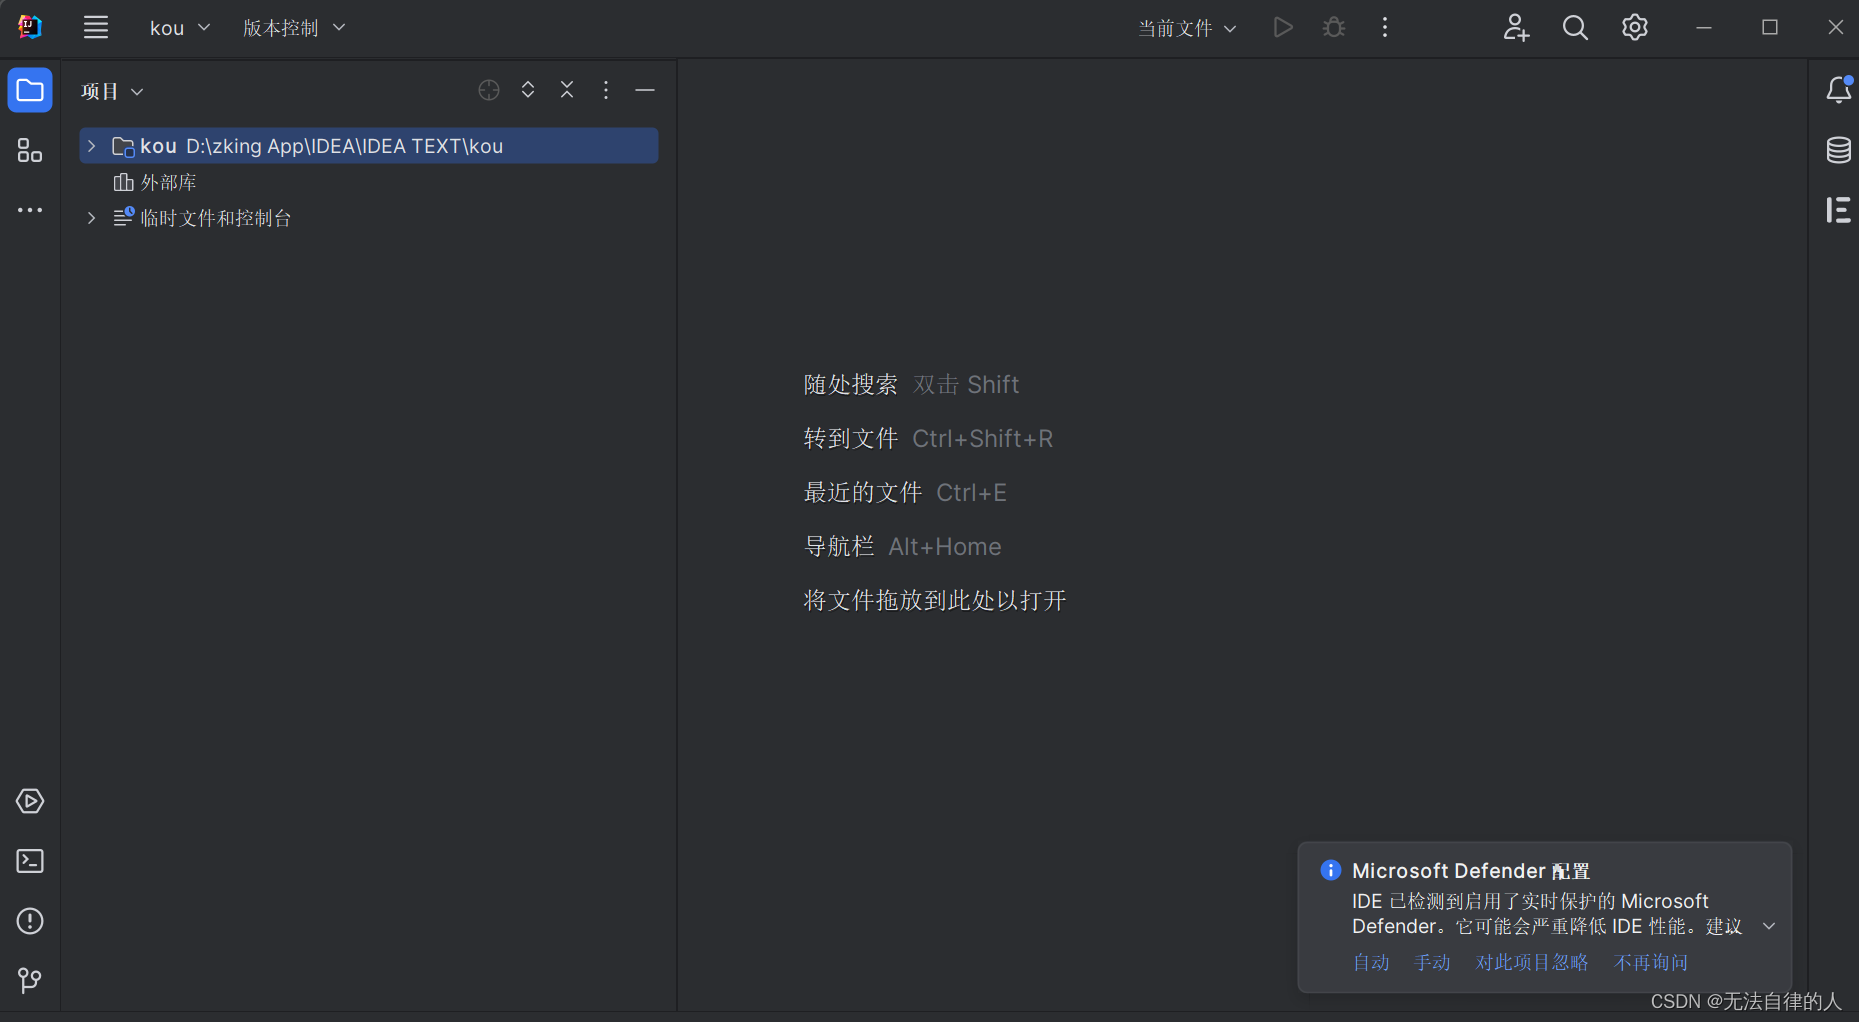
设置我们的设置,设置编码,配置maven。
设置文件编码为UTF-8

配置maven

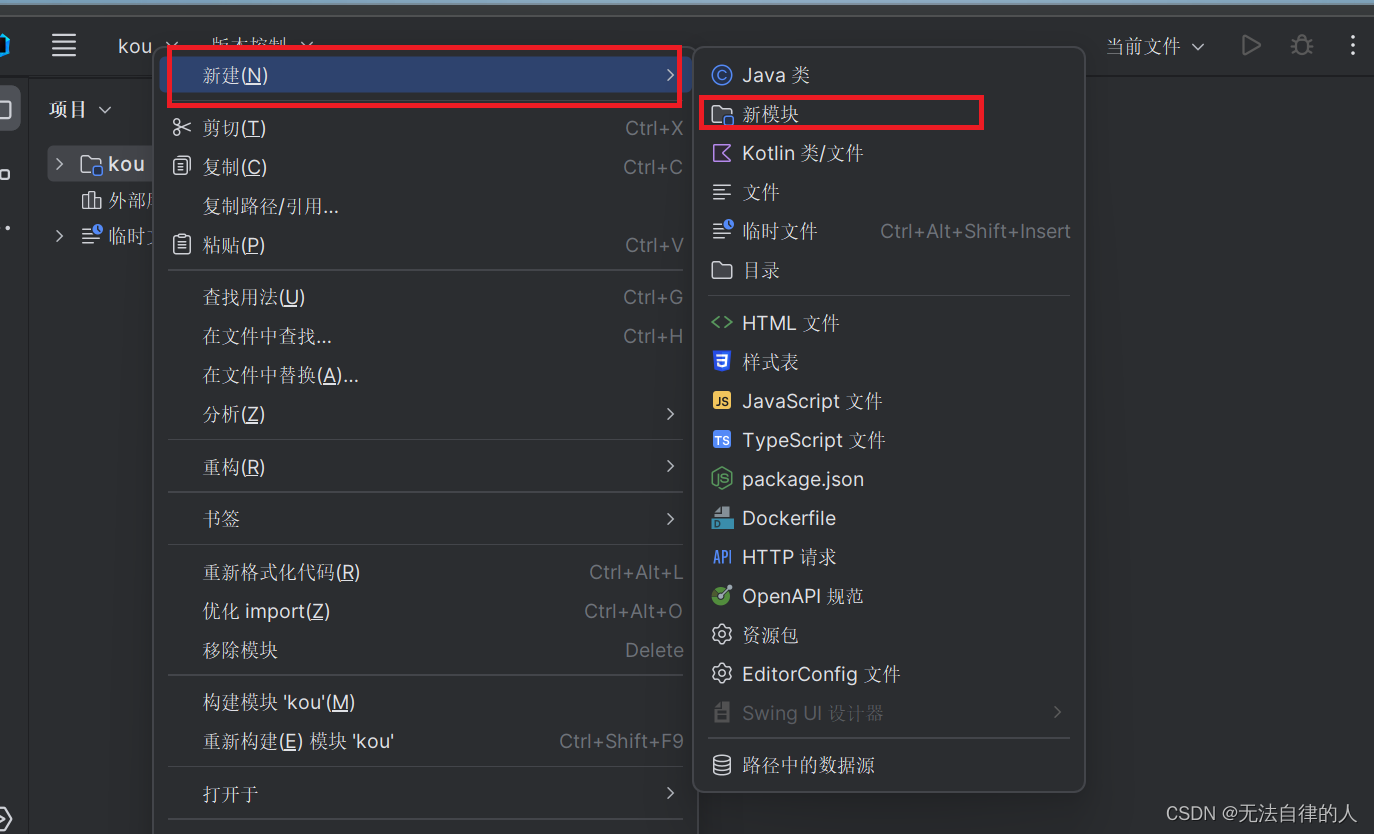
右键我们的项目新建一个新模块

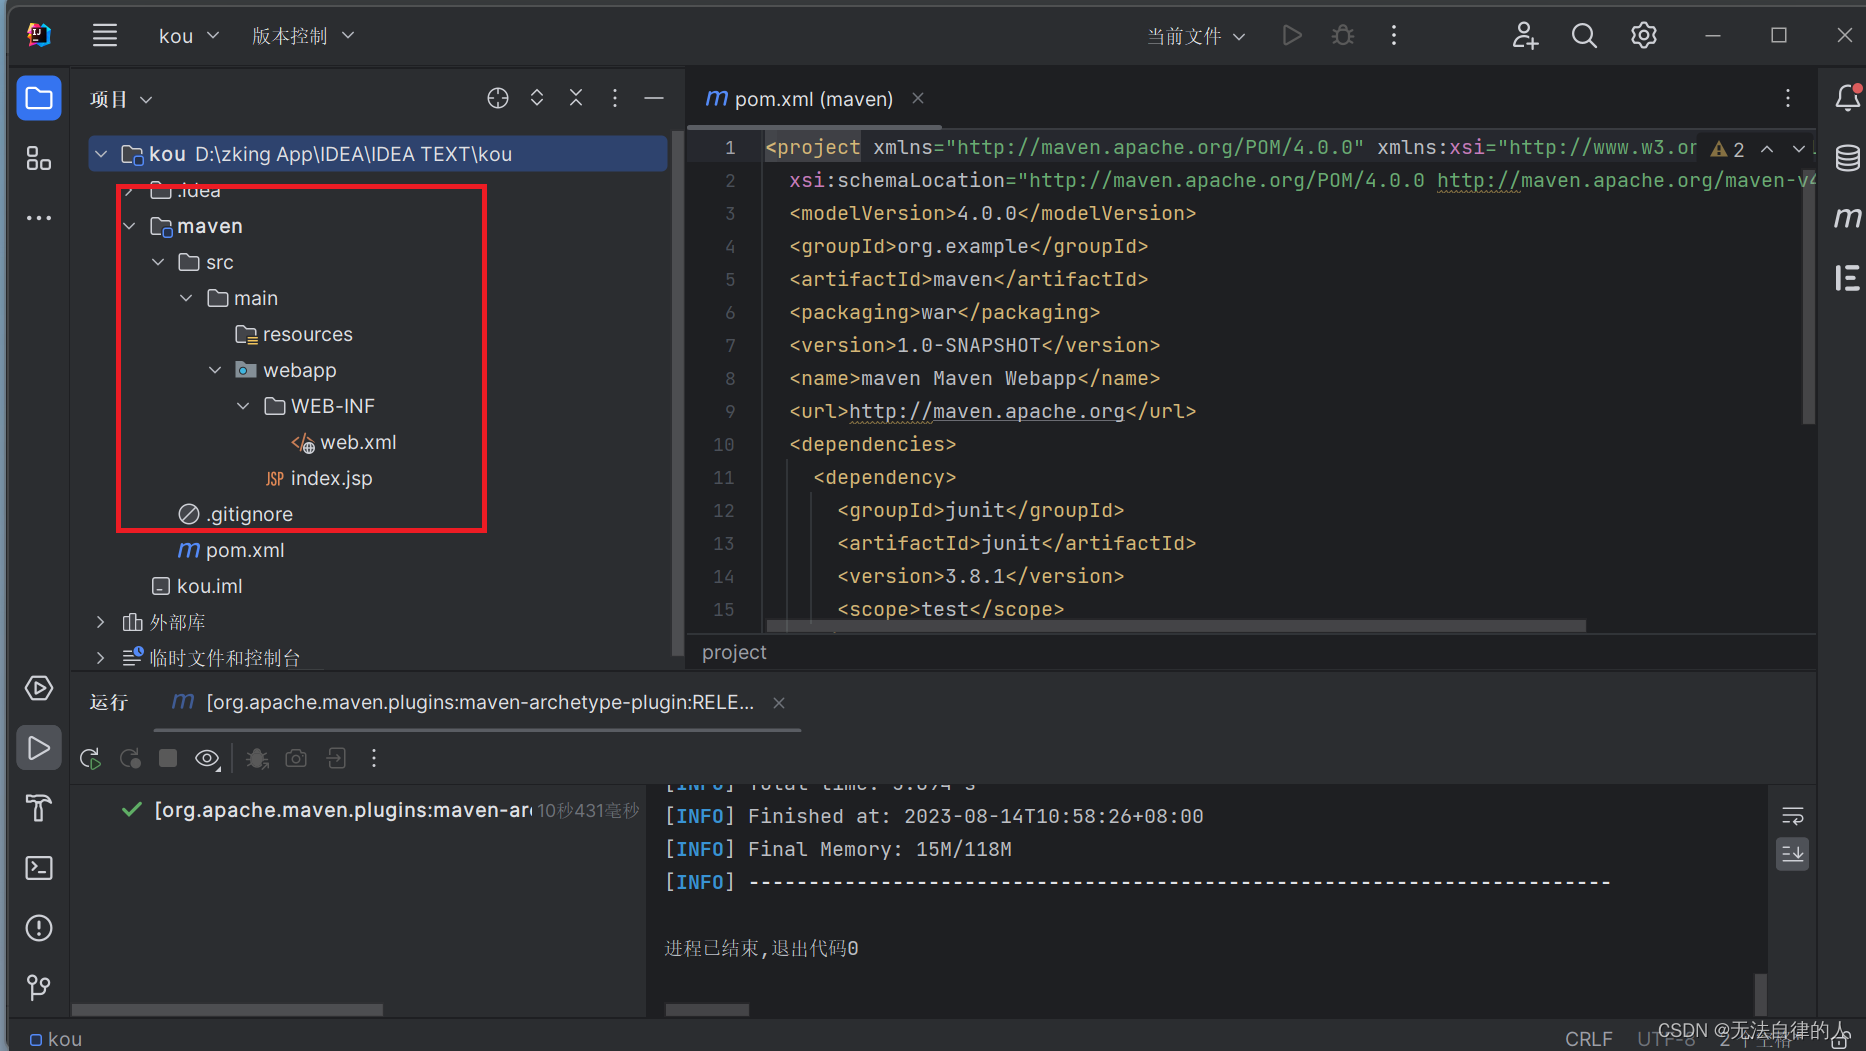
等待加载 ,可以看到项目加载完成了
2、tomcat配置
如图编辑配置
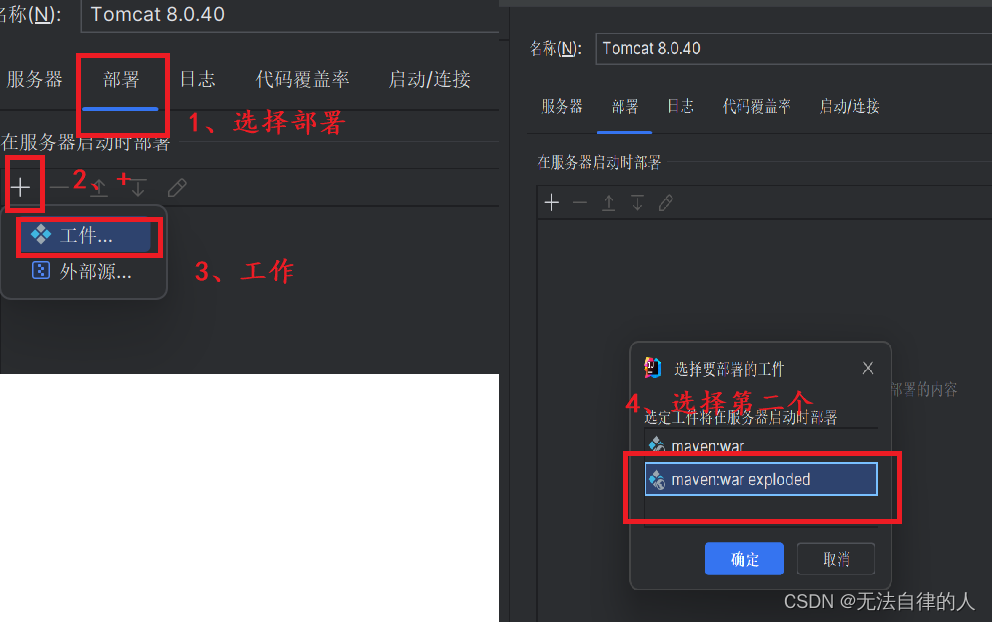

我们就配置成功了
3、测试
运行我们的index.jsp
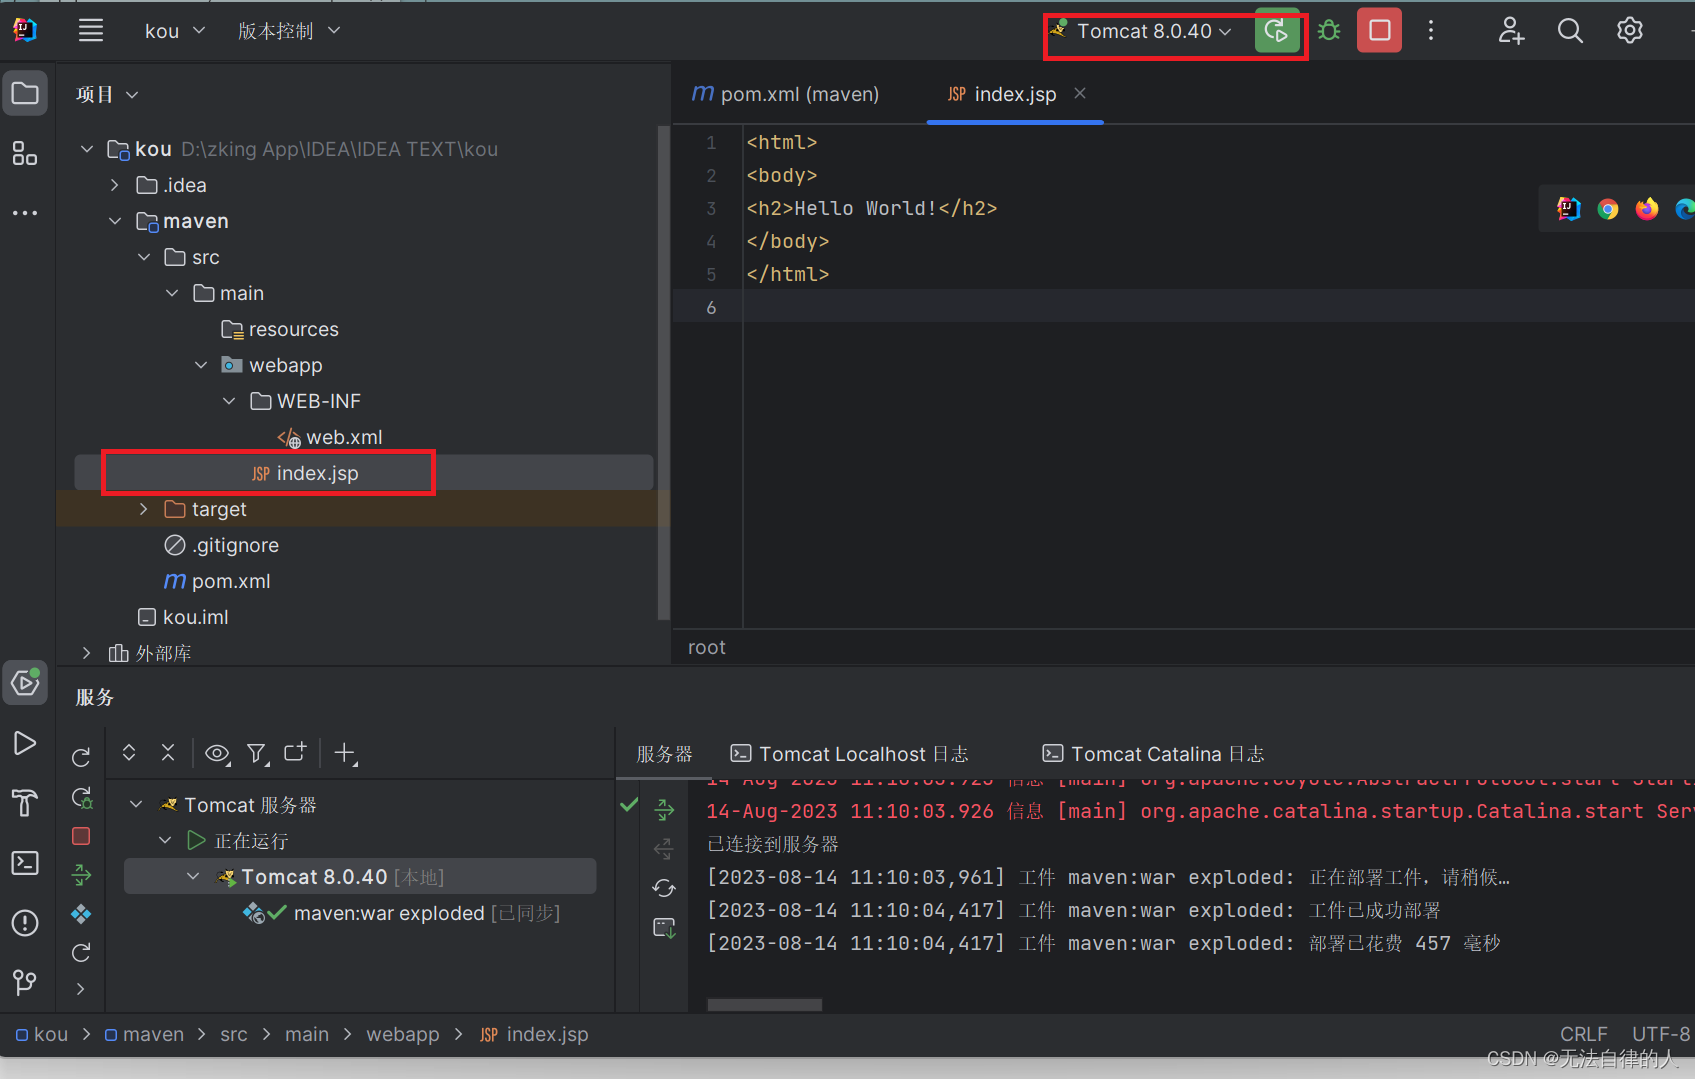
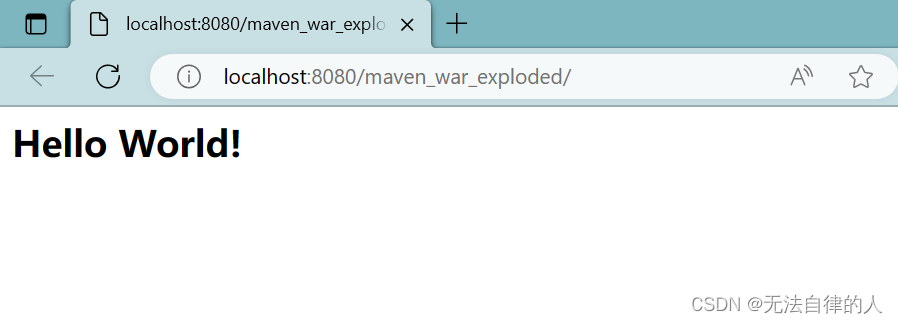
测试成功 !!!


