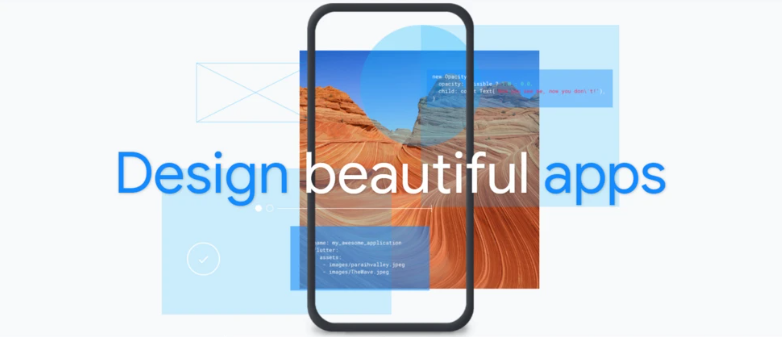
在本篇文章中,我们将深入学习 Flutter UI 的进阶技巧,涵盖了布局原理、动画实现、自定义绘图和效果、以及 Material 和 Cupertino 组件库的使用。通过实例演示,你将更加了解如何创建复杂、令人印象深刻的用户界面。
第一部分:深入理解布局原理
1. 灵活运用 Row 和 Column
Row 和 Column 是常用的布局组件,但灵活地使用它们可以带来不同的布局效果。例如,使用 mainAxisAlignment 和 crossAxisAlignment 可以控制子组件在主轴和交叉轴上的对齐方式。
Row(
  mainAxisAlignment: MainAxisAlignment.spaceBetween,
  children: [
    Container(width: 50, height: 50, color: Colors.red),
    Container(width: 50, height: 50, color: Colors.green),
    Container(width: 50, height: 50, color: Colors.blue),
  ],
)
2. 弹性布局 Flex 和 Expanded
Flex 和 Expanded 可以用于实现弹性布局,让组件占据可用空间的比例。例如,下面的代码将一个蓝色容器占据两倍宽度的空间。
Row(
  children: [
    Container(width: 50, height: 50, color: Colors.red),
    Expanded(
      flex: 2,
      child: Container(height: 50, color: Colors.blue),
    ),
  ],
)
第二部分:动画和动效实现
1. 使用 AnimatedContainer
AnimatedContainer 可以实现在属性变化时自动产生过渡动画效果。例如,以下代码在点击时改变容器的宽度和颜色。
class AnimatedContainerExample extends StatefulWidget {
  @override
  _AnimatedContainerExampleState createState() => _AnimatedContainerExampleState();
}

class _AnimatedContainerExampleState extends State<AnimatedContainerExample> {
  double _width = 100;
  Color _color = Colors.blue;

  void _animateContainer() {
    setState(() {
      _width = _width == 100 ? 200 : 100;
      _color = _color == Colors.blue ? Colors.red : Colors.blue;
    });
  }

  @override
  Widget build(BuildContext context) {
    return GestureDetector(
      onTap: _animateContainer,
      child: AnimatedContainer(
        width: _width,
        height: 100,
        color: _color,
        duration: Duration(seconds: 1),
        curve: Curves.easeInOut,
      ),
    );
  }
}
2. 使用 Hero 动画
Hero 动画可以在页面切换时产生平滑的过渡效果。在不同页面中使用相同的 tag,可以让两个页面之间的共享元素过渡更加自然。
class PageA extends StatelessWidget {
  @override
  Widget build(BuildContext context) {
    return GestureDetector(
      onTap: () {
        Navigator.of(context).push(MaterialPageRoute(
          builder: (context) => PageB(),
        ));
      },
      child: Hero(
        tag: 'avatar',
        child: CircleAvatar(
          radius: 50,
          backgroundImage: AssetImage('assets/avatar.jpg'),
        ),
      ),
    );
  }
}

class PageB extends StatelessWidget {
  @override
  Widget build(BuildContext context) {
    return Scaffold(
      body: Center(
        child: Hero(
          tag: 'avatar',
          child: CircleAvatar(
            radius: 150,
            backgroundImage: AssetImage('assets/avatar.jpg'),
          ),
        ),
      ),
    );
  }
}
第三部分:自定义绘图和效果
1. 使用 CustomPaint 绘制图形
CustomPaint 允许你自定义绘制各种图形和效果。以下是一个简单的例子,绘制一个带边框的矩形。
class CustomPaintExample extends StatelessWidget {
  @override
  Widget build(BuildContext context) {
    return CustomPaint(
      painter: RectanglePainter(),
      child: Container(),
    );
  }
}

class RectanglePainter extends CustomPainter {
  @override
  void paint(Canvas canvas, Size size) {
    final paint = Paint()
      ..color = Colors.blue
      ..style = PaintingStyle.stroke
      ..strokeWidth = 2;

    canvas.drawRect(Rect.fromLTWH(50, 50, 200, 100), paint);
  }

  @override
  bool shouldRepaint(covariant CustomPainter oldDelegate) {
    return false;
  }
}
第四部分:Material 和 Cupertino 组件库
1. 使用 Material 组件
Material 组件库提供了一系列符合 Material Design 规范的 UI 组件。例如,AppBar、Button、Card 等。以下是一个使用 Card 的例子。
Card(
  elevation: 4,
  child: ListTile(
    leading: Icon(Icons.account_circle),
    title: Text('John Doe'),
    subtitle: Text('Software Engineer'),
    trailing: Icon(Icons.more_vert),
  ),
)
2. 使用 Cupertino 组件
Cupertino 组件库提供了 iOS 风格的 UI 组件,适用于 Flutter 应用在 iOS 平台上的开发。例如,CupertinoNavigationBar、CupertinoButton 等。
dart
Copy code
CupertinoNavigationBar(
middle: Text(‘Cupertino Example’),
trailing: CupertinoButton(
child: Text(‘Done’),
onPressed: () {},
),
)
第五部分:综合实例
以下是一个更加综合的例子,涵盖了之前提到的布局、动画、自定义绘图和 Material/Cupertino 组件库的知识点。
import 'package:flutter/material.dart';
import 'package:flutter/cupertino.dart';

void main() {
  runApp(MyApp());
}

class MyApp extends StatelessWidget {
  @override
  Widget build(BuildContext context) {
    return MaterialApp(
      home: ExampleScreen(),
    );
  }
}

class ExampleScreen extends StatelessWidget {
  @override
  Widget build(BuildContext context) {
    return Scaffold(
      appBar: AppBar(
        title: Text('Advanced UI Example'),
      ),
      body: Padding(
        padding: const EdgeInsets.all(16.0),
        child: Column(
          mainAxisAlignment: MainAxisAlignment.center,
          children: [
            AnimatedRotateExample(),
            SizedBox(height: 20),
            CustomPaintExample(),
            SizedBox(height: 20),
            PlatformWidgetsExample(),
          ],
        ),
      ),
    );
  }
}

class AnimatedRotateExample extends StatefulWidget {
  @override
  _AnimatedRotateExampleState createState() => _AnimatedRotateExampleState();
}

class _AnimatedRotateExampleState extends State<AnimatedRotateExample> {
  double _rotation = 0;

  void _startRotation() {
    Future.delayed(Duration(seconds: 1), () {
      setState(() {
        _rotation = 45;
      });
    });
  }

  @override
  Widget build(BuildContext context) {
    return Column(
      children: [
        GestureDetector(
          onTap: () {
            _startRotation();
          },
          child: AnimatedBuilder(
            animation: Tween<double>(begin: 0, end: _rotation).animate(
              CurvedAnimation(
                parent: ModalRoute.of(context)!.animation!,
                curve: Curves.easeInOut,
              ),
            ),
            builder: (context, child) {
              return Transform.rotate(
                angle: _rotation * 3.1416 / 180,
                child: child,
              );
            },
            child: Container(
              width: 100,
              height: 100,
              color: Colors.blue,
              child: Icon(
                Icons.star,
                color: Colors.white,
              ),
            ),
          ),
        ),
        Text('Tap to rotate'),
      ],
    );
  }
}

class CustomPaintExample extends StatelessWidget {
  @override
  Widget build(BuildContext context) {
    return CustomPaint(
      painter: CirclePainter(),
      child: Container(
        width: 200,
        height: 200,
        alignment: Alignment.center,
        child: Text(
          'Custom Paint',
          style: TextStyle(color: Colors.white, fontSize: 18),
        ),
      ),
    );
  }
}

class CirclePainter extends CustomPainter {
  @override
  void paint(Canvas canvas, Size size) {
    final center = Offset(size.width / 2, size.height / 2);
    final radius = size.width / 2;
    final paint = Paint()
      ..color = Colors.orange
      ..style = PaintingStyle.fill;

    canvas.drawCircle(center, radius, paint);
  }

  @override
  bool shouldRepaint(CustomPainter oldDelegate) {
    return false;
  }
}

class PlatformWidgetsExample extends StatelessWidget {
  @override
  Widget build(BuildContext context) {
    return Column(
      children: [
        Material(
          elevation: 4,
          child: ListTile(
            leading: Icon(Icons.account_circle),
            title: Text('John Doe'),
            subtitle: Text('Software Engineer'),
            trailing: Icon(Icons.more_vert),
          ),
        ),
        SizedBox(height: 20),
        CupertinoButton.filled(
          child: Text('Explore'),
          onPressed: () {},
        ),
      ],
    );
  }
}
这个示例演示了一个综合性的界面,包括点击旋转动画、自定义绘图和 Material/Cupertino 组件。你可以在此基础上进一步扩展和修改,以满足更复杂的 UI 设计需求。
总结
在本篇文章中,我们深入学习了 Flutter UI 的进阶技巧。我们了解了布局原理、动画实现、自定义绘图和效果,以及 Material 和 Cupertino 组件库的使用。通过实例演示,你将能够更加自信地构建复杂、令人印象深刻的用户界面。
希望这篇文章能够帮助你在 Flutter UI 进阶方面取得更大的进展。如果你有任何问题或需要进一步的指导,请随时向我询问。祝你在 Flutter 开发的道路上取得成功!

![[小尘送书-第二期]《Power BI数据分析与可视化实战》数据清洗、数据建模、数据可视化设计与高级技法](https://img-blog.csdnimg.cn/8db00f7e59664a5fa80e4db1934c5666.png#pic_center)

