Blob
Blob: 前端专门用于支持文件操作的二进制对象
File: 一种特殊的Blob对象
文件下载
<!DOCTYPE html>
<html lang="en">
<head>
	<meta charset="UTF-8">
	<meta name="viewport" content="width=device-width, initial-scale=1.0">
	<title>Document</title>
</head>
<body>
	<a id="a1">点击下载</a>
	<script>
		// 获取a标签的dom
		const a1 = document.getElementById("a1");
		const content = '<div><h1>JS++</h1><p>Hello</p></div>'
		const blob = new Blob()
		console.log(blob)
	</script>
</body>
</html>

我们可以看到blob对象第一个参数需要一个数组,第二个参数是对blob对象的描述
所以对其进行传参
<!DOCTYPE html>
<html lang="en">

<head>
	<meta charset="UTF-8">
	<meta name="viewport" content="width=device-width, initial-scale=1.0">
	<title>Document</title>
</head>

<body>
	<a id="a1">点击下载</a>
	<script>
		// 获取a标签的dom
		const a1 = document.getElementById("a1");
		const content = '<div><h1>JS++</h1><p>Hello</p></div>'
		const blob = new Blob([content], {
			type: 'text/html'
		})
		URL.createObjectURL()
	</script>
</body>

</html>
我们通过URL.createObjectURL可以生成一个url地址 ,此方法需要一个blob对象

此时我们给a标签设置href连接
<!DOCTYPE html>
<html lang="en">

<head>
	<meta charset="UTF-8">
	<meta name="viewport" content="width=device-width, initial-scale=1.0">
	<title>Document</title>
</head>

<body>
	<a id="a1">点击下载</a>
	<script>
		// 获取a标签的dom
		const a1 = document.getElementById("a1");
		const content = '<div><h1>JS++</h1><p>Hello</p></div>'
		const blob = new Blob([content], {
			type: 'text/html'
		})
		a1.href = URL.createObjectURL(blob)
		a1.setAttribute('download', '下载.html')
	</script>
</body>

</html>
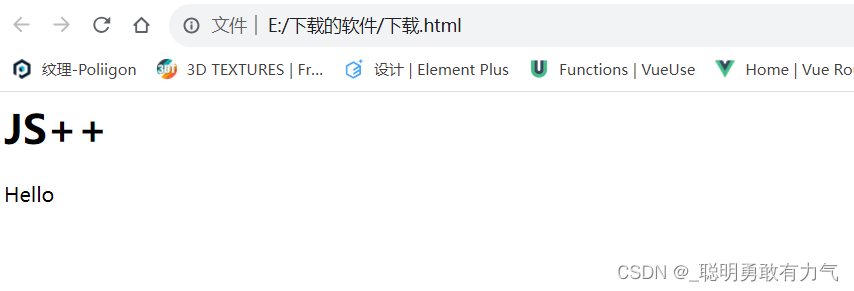
此时点击下载就可以成功下载并预览

文件预览
<!DOCTYPE html>
<html lang="en">

<head>
	<meta charset="UTF-8">
	<meta name="viewport" content="width=device-width, initial-scale=1.0">
	<title>Document</title>
</head>

<body>
	<input type="file" id="fileInput">
	<script>
		const fileInput = document.getElementById("fileInput")
		fileInput.addEventListener('change', (e) => {
			console.log(e.target.files);
		})
	</script>
</body>

</html>
我们可以看到e.target.files表示文件对象
<!DOCTYPE html>
<html lang="en">

<head>
	<meta charset="UTF-8">
	<meta name="viewport" content="width=device-width, initial-scale=1.0">
	<title>Document</title>
</head>

<body>
	<input type="file" id="fileInput">
	<script>
		const fileInput = document.getElementById("fileInput")
		fileInput.addEventListener('change', (e) => {
			const file = e.target.files[0];
			const fileReader = new FileReader();
			// 生成base64图片
			fileReader.readAsDataURL(file)
			fileReader.onload = function () {
				console.log(fileReader.result)
			}
		})
	</script>
</body>

</html>
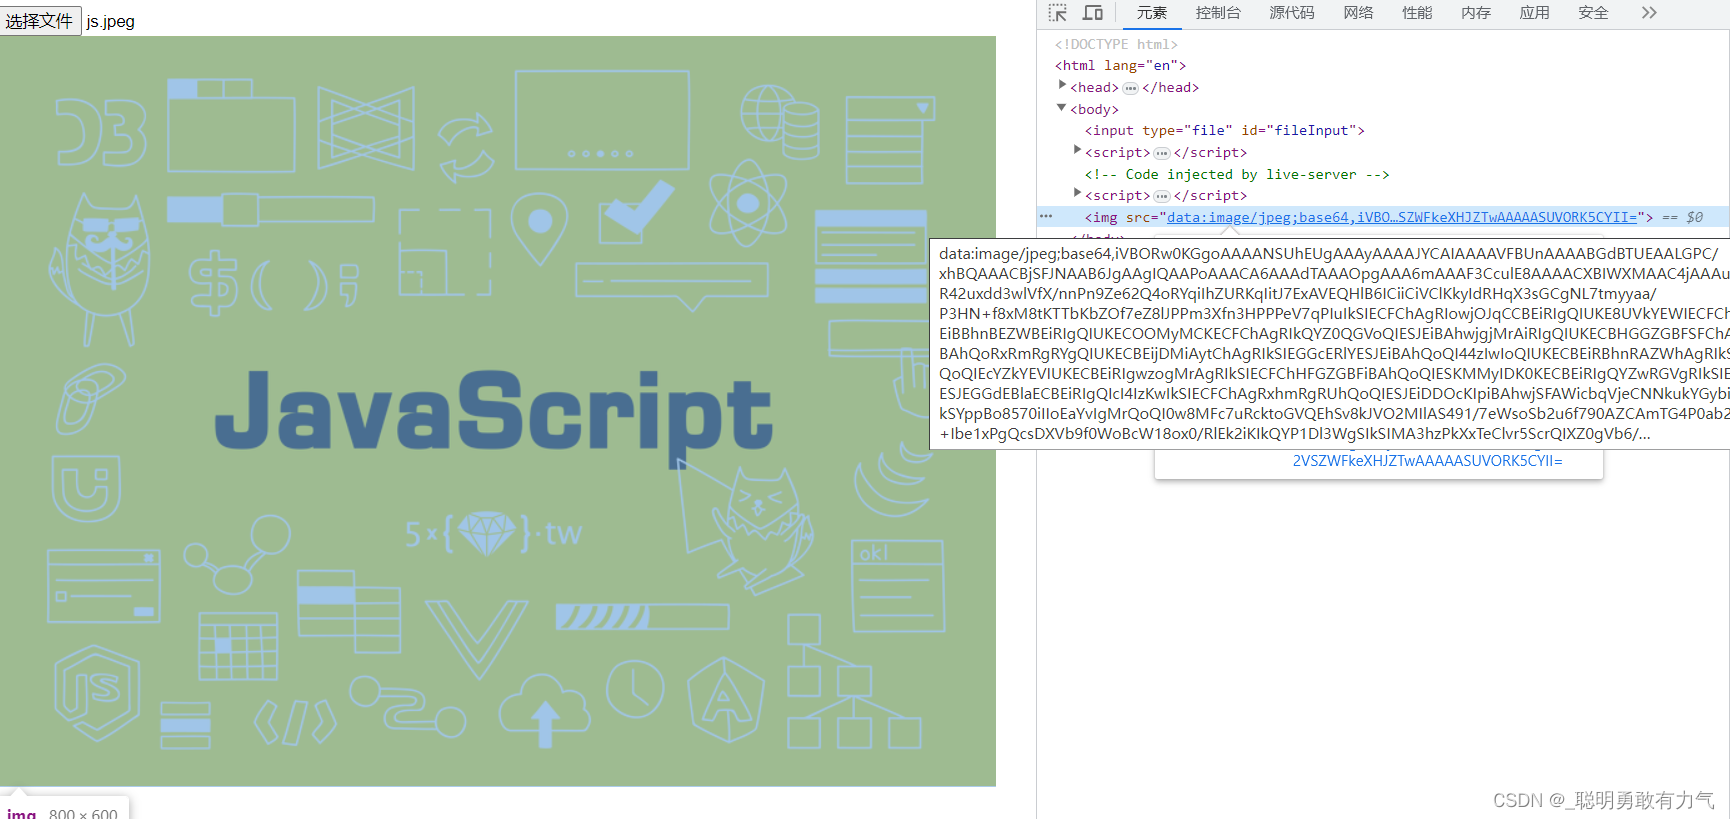
 这里先使用fileReader来实现预览功能

<!DOCTYPE html>
<html lang="en">

<head>
	<meta charset="UTF-8">
	<meta name="viewport" content="width=device-width, initial-scale=1.0">
	<title>Document</title>
</head>

<body>
	<input type="file" id="fileInput">
	<script>
		const fileInput = document.getElementById("fileInput")
		fileInput.addEventListener('change', (e) => {
			const file = e.target.files[0];
			const fileReader = new FileReader();
			// 生成base64图片
			fileReader.readAsDataURL(file)
			fileReader.onload = function () {
				const src = fileReader.result;
				const img = document.createElement("img");
				img.src = src
				document.body.appendChild(img);
			}
		})
	</script>
</body>

</html>
<!DOCTYPE html>
<html lang="en">

<head>
	<meta charset="UTF-8">
	<meta name="viewport" content="width=device-width, initial-scale=1.0">
	<title>Document</title>
</head>

<body>
	<input type="file" id="fileInput">
	<script>
		const fileInput = document.getElementById("fileInput")
		fileInput.addEventListener('change', (e) => {
			const file = e.target.files[0];
			const url = URL.createObjectURL(file)
			const img = document.createElement("img");
			img.src = url
			document.body.appendChild(img);
			// 销毁临时的url
			img.onload = function () {
				URL.revokeObjectURL(url);
			}
		})
	</script>
</body>

</html>
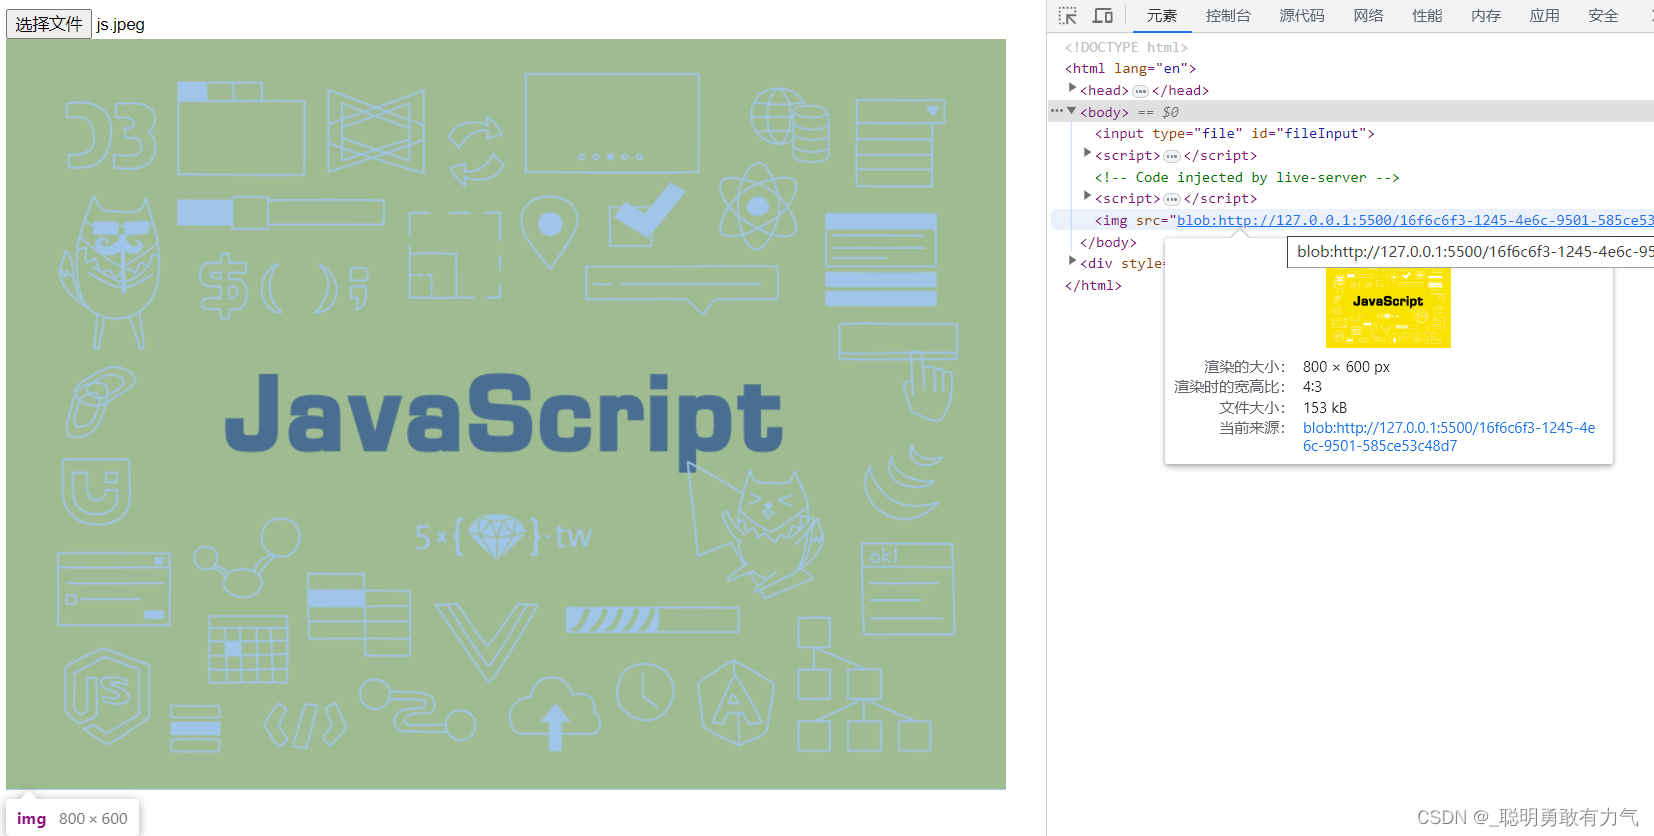
分片上传
我们先使用koa开启一个服务器
npm init -y 初始项目
npm install koa koa-router koa-static koa-bodyparser
const Koa = require('koa')
const Router = require('koa-router')
const static = require('koa-static')
const parser = require('koa-bodyparser')

const app = new Koa()

app.listen(3000, () => {
	console.log('server listen at port 3000')
})
npm install nodemon -g
配置脚本


运行
npm run dev

koa-parser用来处理post请求
koa-static用来创建静态资源
const Koa = require('koa')
const Router = require('koa-router')
const server = require('koa-static')
const Parser = require('koa-bodyparser')

const app = new Koa()

// 注册Parser中间件 就可以解析post过来的body数据
app.use(Parser())

// 使用server中间件 可以将文件夹作为静态文件目录
app.use(server(__dirname + '/public'))


app.listen(3000, () => {
	console.log('server listen at port 3000')
})
multiparty将上传文件保存到临时目录
const Koa = require('koa')
const Router = require('koa-router')
const server = require('koa-static')
const Parser = require('koa-bodyparser')
const multiparty = require('multiparty')

const app = new Koa()
const router = new Router()

// 注册Parser中间件 就可以解析post过来的body数据
app.use(Parser())

// 使用server中间件 可以将文件夹作为静态文件目录
app.use(server(__dirname + '/public'))

router.post('/upload', async (ctx, next) => {
	const form = new multiparty.Form({ uploadDir: 'temp' })
	ctx.body = '上传成功'
})

app.use(router.routes())

app.listen(3000, () => {
	console.log('server listen at port 3000')
})
增加上传功能
<!DOCTYPE html>
<html lang="en">

<head>
	<meta charset="UTF-8">
	<meta name="viewport" content="width=device-width, initial-scale=1.0">
	<title>Document</title>
</head>

<body>
	<input type="file" id="file1" />
	<button id="btn1">上传</button>
	<script src="https://cdn.bootcdn.net/ajax/libs/axios/1.3.6/axios.js"></script>
	<script>
		const btn1 = document.getElementById('btn1');
		btn1.addEventListener('click', () => {
			const file1 = document.getElementById('file1');
			const file = file1.files[0]
			const formData = new FormData()
			formData.append('file', file)

			axios.post('/upload', formData)
		})
	</script>
</body>

</html>
const Koa = require('koa')
const Router = require('koa-router')
const server = require('koa-static')
const Parser = require('koa-bodyparser')
const multiparty = require('multiparty')

const app = new Koa()
const router = new Router()

// 注册Parser中间件 就可以解析post过来的body数据
app.use(Parser())

// 使用server中间件 可以将文件夹作为静态文件目录
app.use(server(__dirname + '/public'))

router.post('/upload', async (ctx, next) => {
	const form = new multiparty.Form({ uploadDir: 'temp' })
	form.parse(ctx.req)
	form.on('file', () => {

	})
	ctx.body = '上传成功'
})

app.use(router.routes())

app.listen(3000, () => {
	console.log('server listen at port 3000')
})


分片上传
<!DOCTYPE html>
<html lang="en">

<head>
	<meta charset="UTF-8">
	<meta name="viewport" content="width=device-width, initial-scale=1.0">
	<title>Document</title>
</head>

<body>
	<input type="file" id="file1" />
	<button id="btn1">上传</button>
	<script src="https://cdn.bootcdn.net/ajax/libs/axios/1.3.6/axios.js"></script>
	<script>
		const btn1 = document.getElementById('btn1');

		//10 kb
		const chunkSize = 1034 * 10
		let index = 0

		btn1.addEventListener('click', upload)

		function upload() {
			const file1 = document.getElementById('file1');
			const file = file1.files[0]
			// 解构出文件名和扩展名
			const [filename, fileext] = file.name.split('.')
			// 获取文件大小
			const fileSize = file.size

			let start = index * chunkSize
			// 如果切片初始值 大于文件大小 就不切片
			if (start > fileSize) {
				return
			}
			const blob = file.slice(start, start + chunkSize)
			const blobName = `${filename}.${index}.${fileext}`
			const blobFile = new File([blob], blobName)

			const formData = new FormData()
			formData.append('file', blobFile)
			axios.post('/upload', formData).then(() => {
				index++
				// 递归发送请求
				upload(index)
			})
		}
	</script>
</body>

</html>
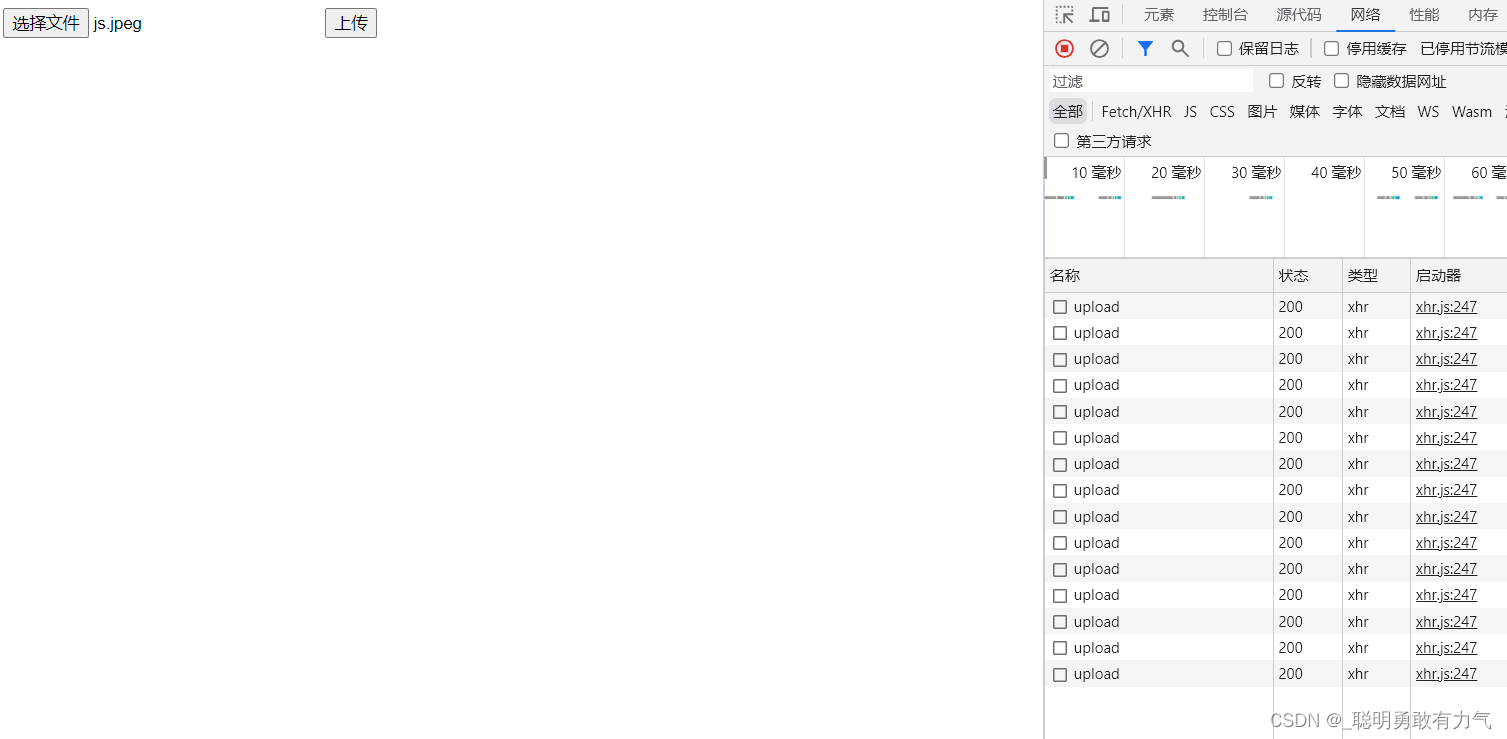
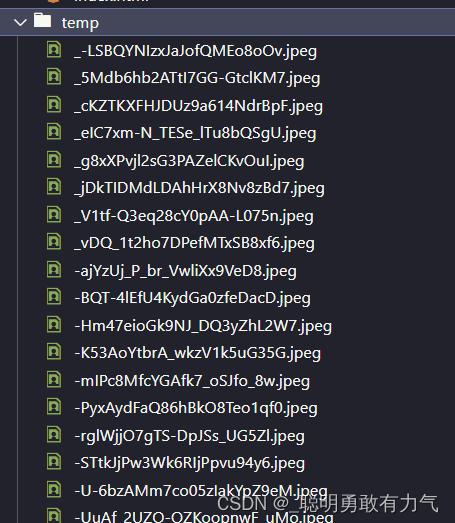
分片上传成功





![[原创]从model-based推导到model-free(到PG+general advantage estimation)](https://img-blog.csdnimg.cn/8a8e2242dc6b4ada9451b51b00015e1e.png)
