Cacti
Cacti(流量和性能监测为主)
Cacti 在英文中的意思是仙人掌的意思,Cacti 是一套基于 PHP、MySQL、SNMP 及 RRDTool 开发的网络流量监测图形分析工具。它通过 snmpget 来获取数据,使用 RRDtool 绘画图形,而且你完全可以不需要了解 RRDtool 复杂的参数。它提供了非常强大的数据和用户管理功能,可以指定每一个用户能查看树状结构、host 以及任何一张图,还可以与 LDAP 结合进行用户验证,同时也能自己增加模板,功能非常强大完善。
LAMP (底层环境)
数据收集:SNMP(j简单网络管理协议)
数据展示:B/S RRDTOOL(图片展示)
服务端配置(主控端)
安装 Cacti 需要 Mysql,PHP,RRDTool,net-snmp 和 支持 PHP 的 Web服务器,如 Apache,Nginx 或 IIS等。
软件版本要求:
Dependency	Cacti 1.2.x	 Cacti 1.3.x
MariaDB		5.5+		10.2.x+
MySQL		5.5+		5.7+
PHP			5.4+		8.0+
RRDtool		1.4+		1.8+
Net-SNMP	5.5+		5.8+
1 安装 net-snmp 简单网络管理协议
# yum install -y net-snmp net-snmp-libs net-snmp-utils net-snmp-devel net-snmp-perl
2 安装 RRDTool 绘图工具
# yum install –y rrdtool rrdtool-devel rrdtool-php rrdtool-perl perl-devel perl-CPAN perl-YAML
3 安装和配置 cacti
# wget https://www.cacti.net/downloads/cacti-1.2.12.tar.gz
cacti-1.2.12.tar.gz
1)安装 cacti
将源码包释放到 Web 服务器的网页目录
[root@server ~]# tar zxf cacti-1.2.12.tar.gz -C /var/www/html
[root@server ~]# cd /var/www/html/
[root@server html]# mv cacti-1.2.12 /var/www/html/cacti
2)创建数据库,并导入默认数据库
MariaDB [(none)]> set collation_server='utf8_general_ci';
Query OK, 0 rows affected (0.00 sec)

MariaDB [(none)]> create database cacti default character set utf8;
Query OK, 1 row affected (0.00 sec)

MariaDB [(none)]> grant all on cacti.* to cactiuser@localhost identified by "cactiuser";
Query OK, 0 rows affected (0.00 sec)

MariaDB [(none)]> GRANT SELECT ON mysql.time_zone_name TO 'cactiuser'@'localhost' IDENTIFIED BY 'cactiuser';
Query OK, 0 rows affected (0.01 sec)

MariaDB [(none)]> flush privileges;
Query OK, 0 rows affected (0.00 sec)

MariaDB [(none)]> use cacti;
Database changed
MariaDB [cacti]> source /var/www/html/cacti/cacti.sql;
3)设置数据库时区
[root@server html]# mysql_tzinfo_to_sql /usr/share/zoneinfo/ | mysql -u root -p mysql
Enter password:
Warning: Unable to load '/usr/share/zoneinfo//leapseconds' as time zone. Skipping it.
Warning: Unable to load '/usr/share/zoneinfo//tzdata.zi' as time zone. Skipping it.
4)编辑 include/config.php
为 Cacti 配置指定数据库类型,名称,主机,用户和密码
[root@server html]# vim /var/www/html/cacti/include/config.php
$database_type     = 'mysql';
$database_default  = 'cacti';
$database_hostname = 'localhost';
$database_username = 'cactiuser';
$database_password = 'cactiuser';
$database_port     = '3306';

$url_path = '/cacti/';
$cacti_session_name = 'Cacti';
5)设置适当的权限以生成图形/日志
创建一个用户账号,调整目录属主,以便正常读取和写入数据
[root@server include]# chown -R apache:apache /var/www/html/cacti/
[root@server include]# useradd -r -M cactiuser
[root@server include]# chown -R cactiuser /var/www/html/cacti/rra
6)设置计划任务,采集数据
[root@server cacti]# crontab -e
[root@server cacti]# crontab -l
*/5 * * * * /usr/bin/php /var/www/html/cacti/poller.php > /dev/null  2>&1
7)重启相关服务
[root@server cacti]# systemctl restart httpd && systemctl restart mariadb.service
[root@server cacti]# systemctl restart crond && systemctl restart snmpd
8)安装spine高速数据采集插件
cacti 默认使用 cmd.php 来轮询数据,速度会很慢,因此我们采用Spine来轮询数据。cacti-spine 是一个由 C 语言开发的,用于替代 cmd.php 的快速获取速度的引擎。(也可以不装)
# wget https://www.cacti.net/downloads/spine/cacti-spine-1.2.12.tar.gz
# yum install -y mysql-devel dos2unix autoconf automake binutils libtool gcc cpp glibc-headers glibc-devel help2man
# tar zxvf cacti-spine-1.2.12.tar.gz
# cp -R cacti-spine-1.2.12 /usr/local/spine
# cd /usr/local/spine
# ln -s /usr/lib64/libmysqlclient.so.1.2.12 /usr/lib64/libmysqlclient.so
# sh bootstrap
# ./configure && make && make install
# chown root:root /usr/local/spine/bin/spine
# chmod +s /usr/local/spine/bin/spine
# cp /usr/local/spine/etc/spine.conf.dist /etc/spine.conf
# vim /etc/spine.conf
		DB_Host localhost
		DB_Database cacti
		DB_User cactiuser
		DB_Pass cactiuser
		DB_Port 3306
# /usr/local/spine/bin/spine    // 初始化
重启httpd服务,在浏览器访问:http://ip/cacti,进入安装界面
4 初始化 Cacti 系统
在浏览器访问 web 服务,除此访问会自动跳转至安装指南界面
第一次登录提示/var/www/html/cacti/log/cacti.log问题,创建该文件,并赋予权限
[root@server ~]# touch /var/www/html/cacti/log/cacti.log
[root@server ~]# chown apache:apache /var/www/html/cacti/log/cacti.log
登录界面,用户 admin ,密码 admin ,以超级用户登录

检查各个模块时,会有报错
修改 /etc/my.cnf 在[mysqld]后添加如下内容:
[root@server ~]# vi /etc/my.cnf
[mysqld]
skip-grant-tables
max_allowed_packet = 16777216
max_heap_table_size = 128M
tmp_table_size = 128M
join_buffer_size = 256M
innodb_buffer_pool_size = 1901M
innodb_read_io_threads = 32
innodb_write_io_threads = 16
innodb_buffer_pool_instances =16
innodb_additional_mem_pool_size = 80
innodb_large_prefix = ON
innodb_flush_log_at_trx_commit = 2
innodb_file_format = Barracuda
innodb_file_per_table = ON
innodb_additional_mem_pool_size = 80M
重启服务
[root@server ~]# systemctl restart mariadb
字符集编码和版本我没有做修改,注释后面有解决办法
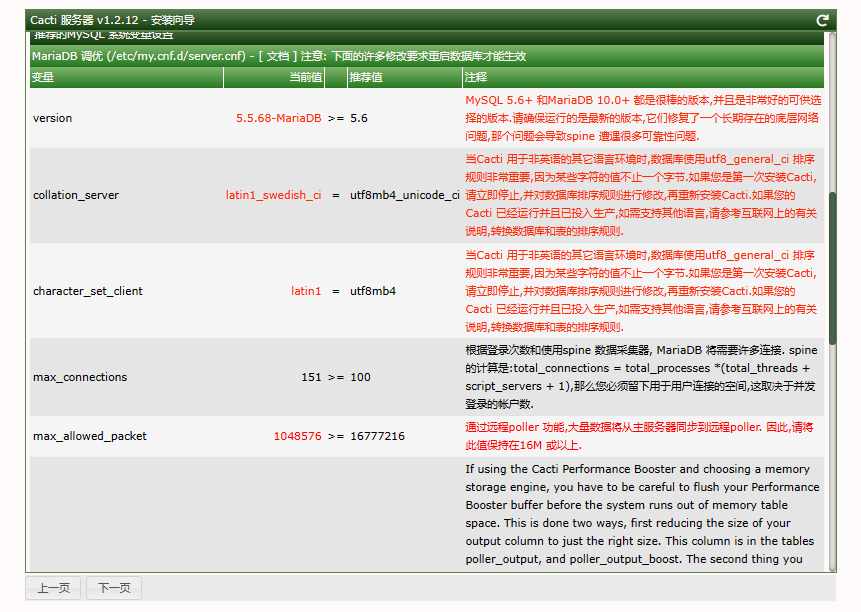
全部点击 “下一页” , 接收默认值
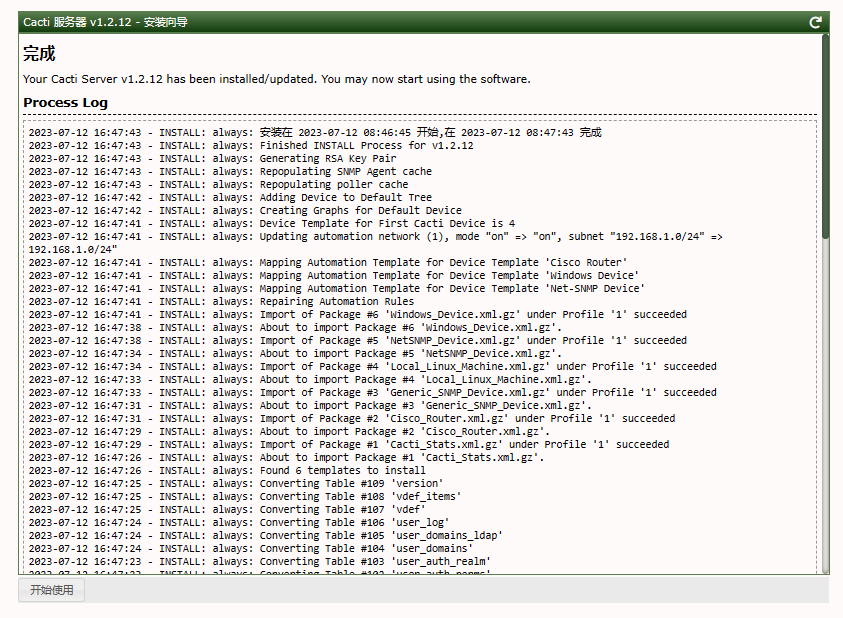
安装完成后的登录界面

5 监控本机
修改本机 snmp 配置文件
[root@server ~]# vim /etc/snmp/snmpd.conf
···
// 修改 default 为本机ip,修改 public 为自己的团体名(可以不改)
42  com2sec notConfigUser  default       public
// 把 systemview 改成 all,供所有 snmp 访问权限
64  access  notConfigGroup ""      any       noauth    exact  all none none
// 去掉此行注释
85  view all    included  .1                               80
重启 snmp 服务
[root@server ~]# systemctl restart snmpd
状态显示 UP ,表示成功
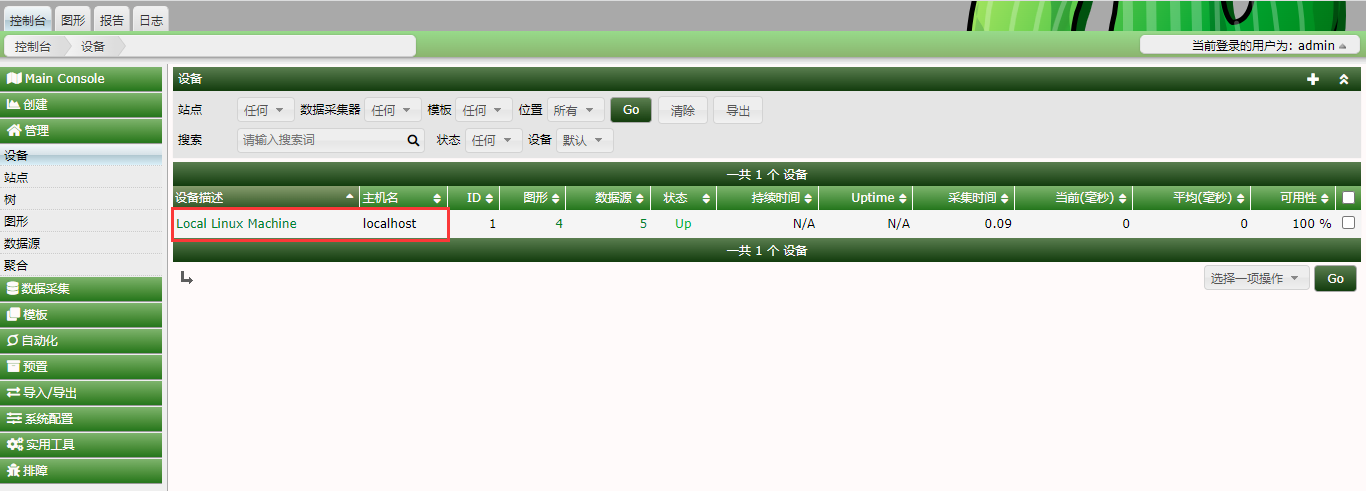
监控其他机器 Linux
安装 SNMP
# yum install -y net-snmp net-snmp-libs net-snmp-utils net-snmp-devel net-snmp-perl
修改 snmp 配置文件
修改方式与之前一样,不同的是 IP 需要指向主控端
[root@localhost ~]# vim /etc/snmp/snmpd.conf
com2sec notConfigUser  192.168.153.132       public        // 指向主控端 IP
access  notConfigGroup ""      any       noauth    exact  all none none
view all    included  .1                               80
重启 SNMP
# systemctl restart snmpd.service && systemctl enable snmpd.service
在 web 配置
主机名填写被控端 IP ;设备模板选择 Linux 模板

页面往下,点击创建,再点击保存
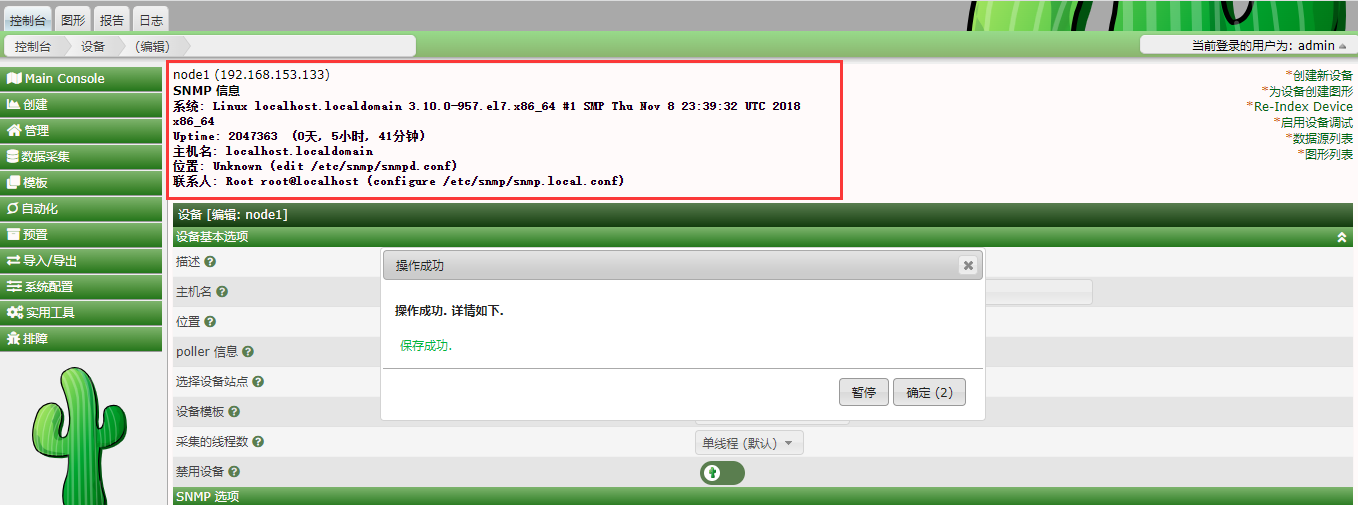
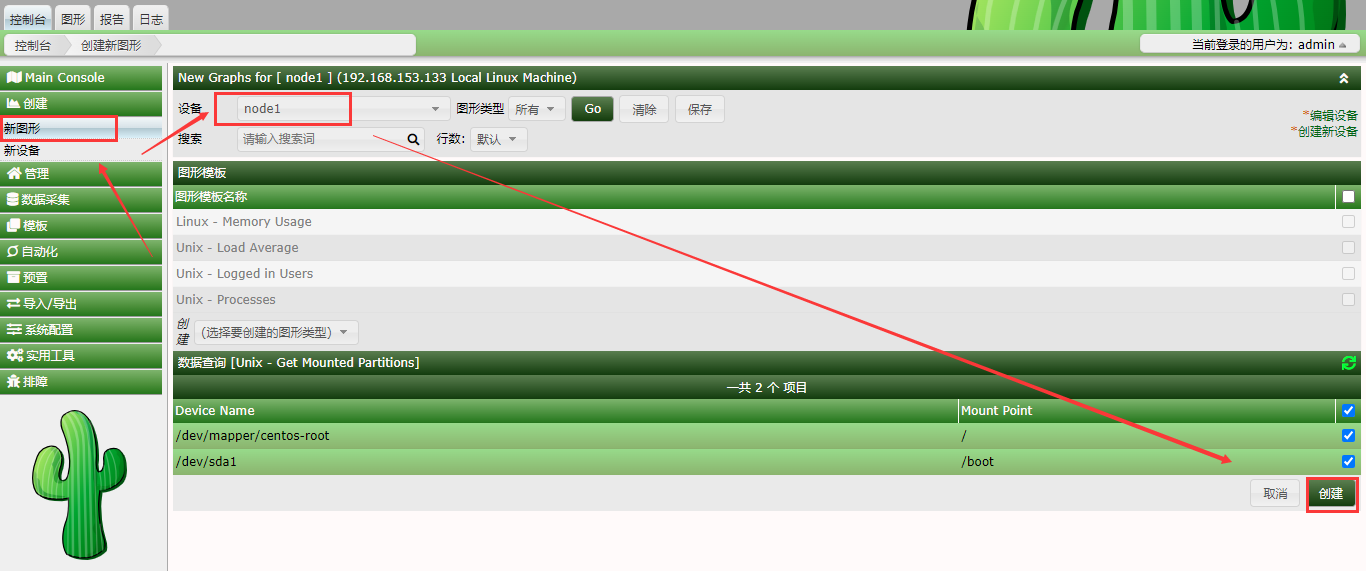
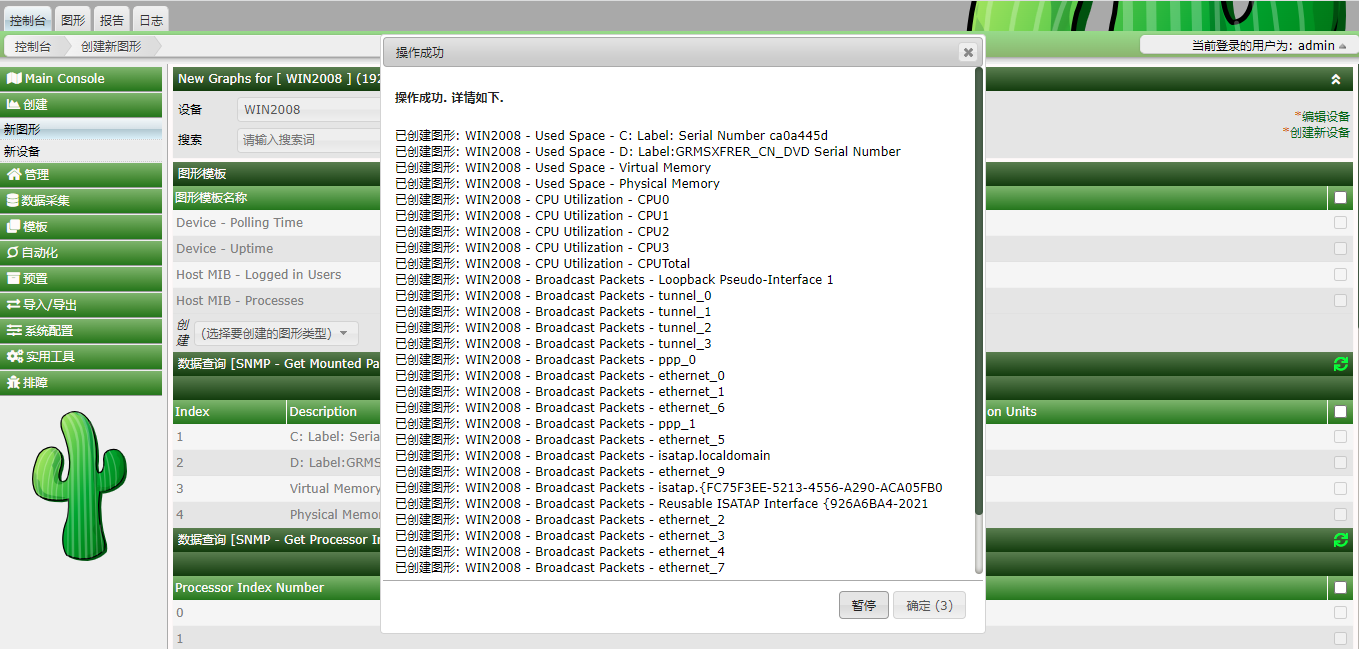
为主机添加图形
创建新图形,选择刚才创建的主机,点击创建
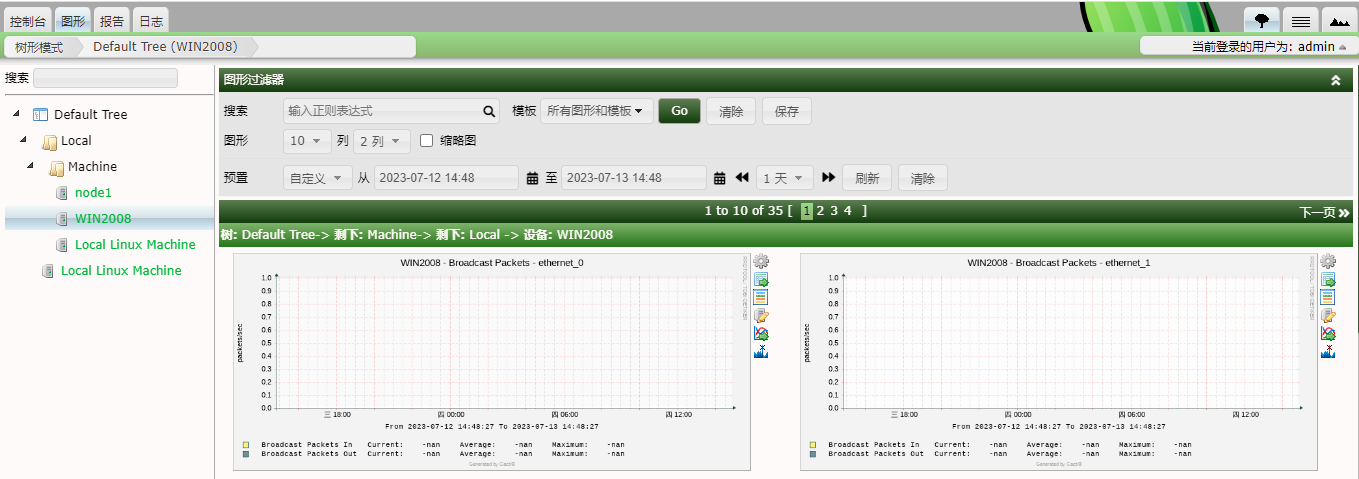
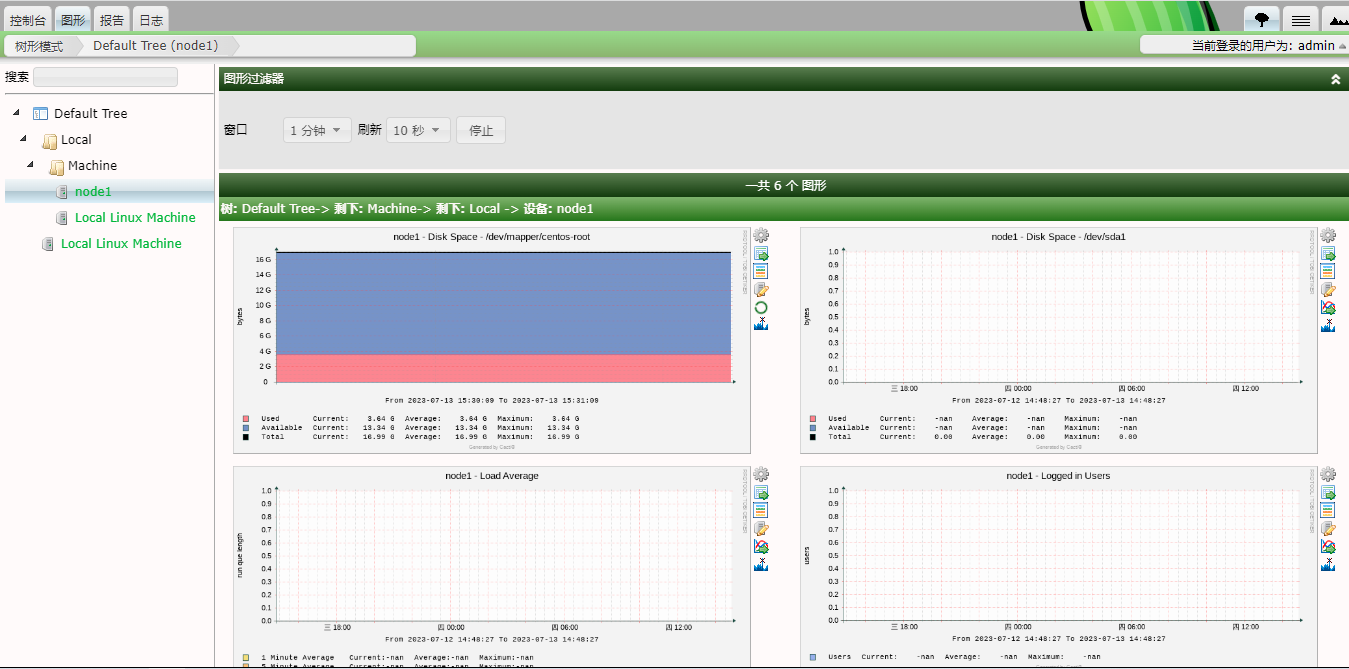
查看图形数据
监控 Windows 主机
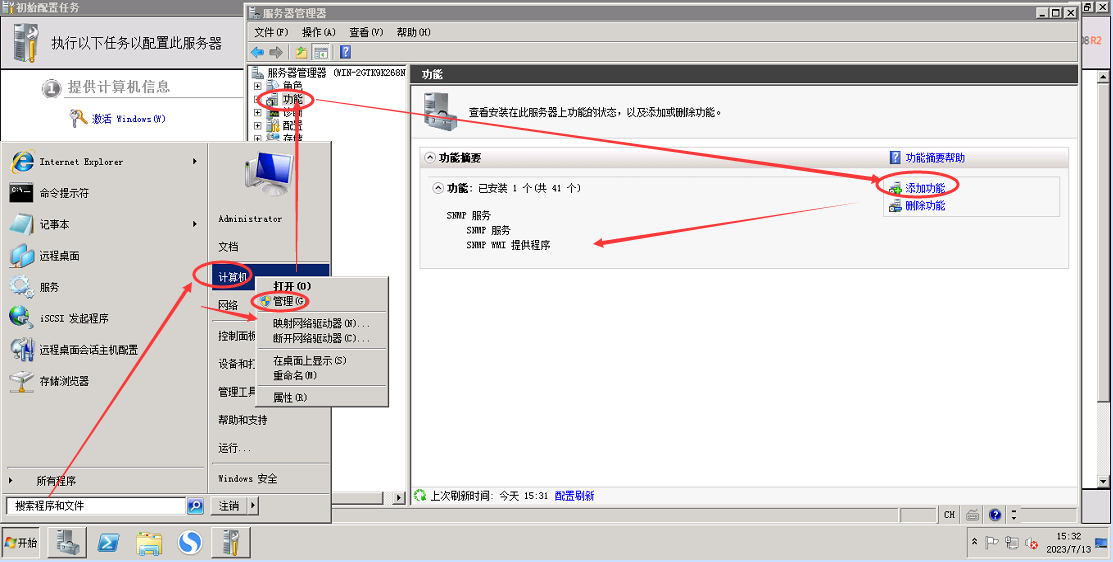
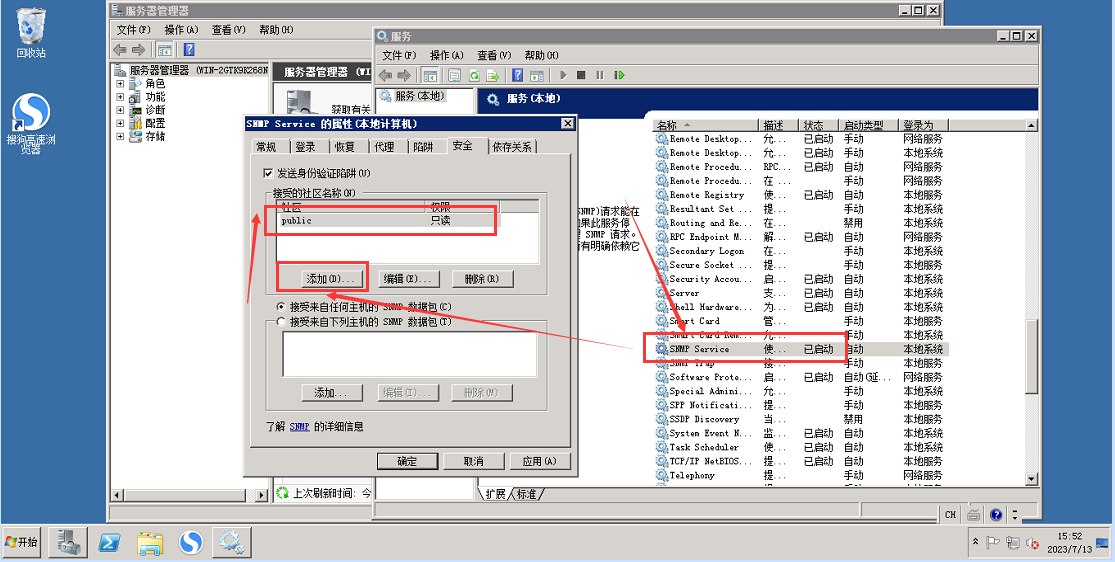
1 添加 SNMP 功能
开始–计算机–右键管理–功能–添加功能–选择 SNMP – 添加安装
打开服务,在服务中去找到 SNMP
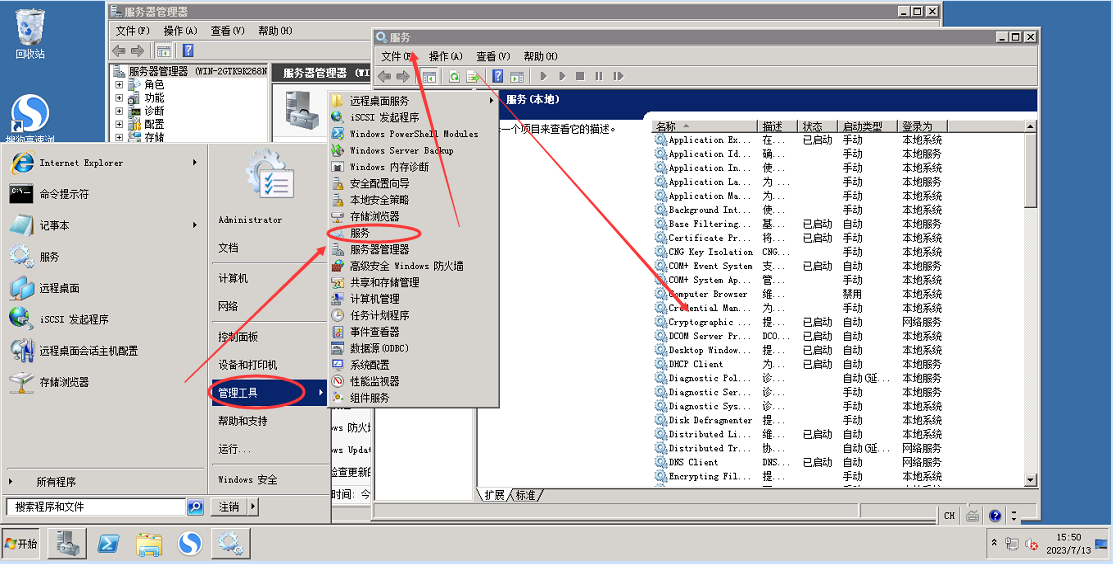
点击服务,选择安全,添加 public ,下面可以选择接收哪个 IP 的连接,这里我选择所以,当然也可以添加主控端的 IP
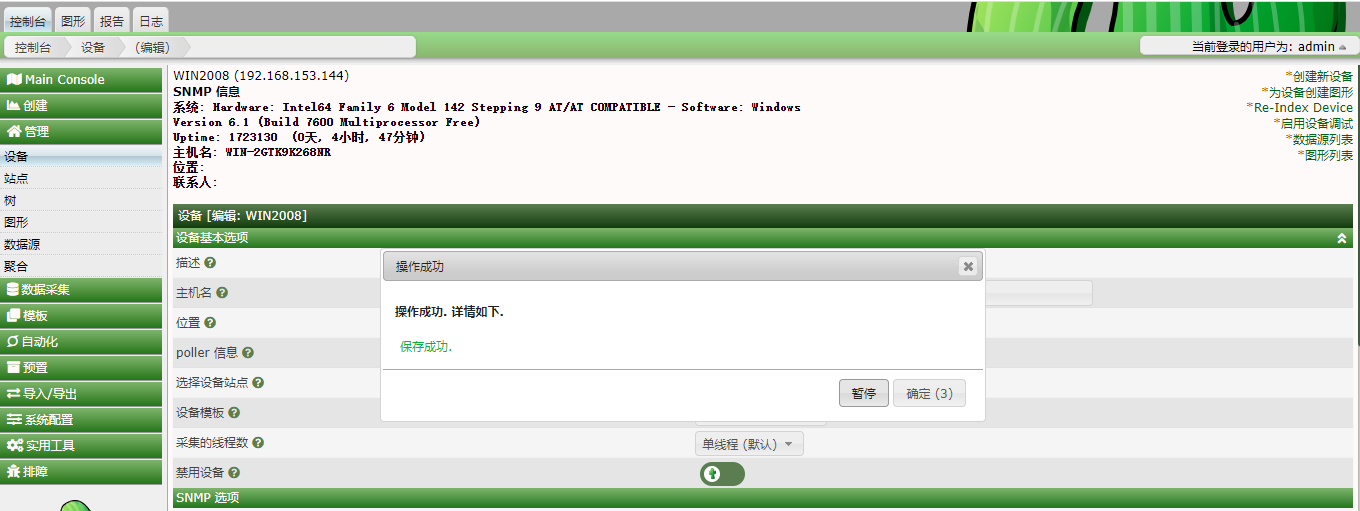
2 在 web 端添加 Windows 主机
模板选择 Windows

点击创建,再保存
添加图形,选择刚才创建的设备,右边勾选几个图形,点击 GO
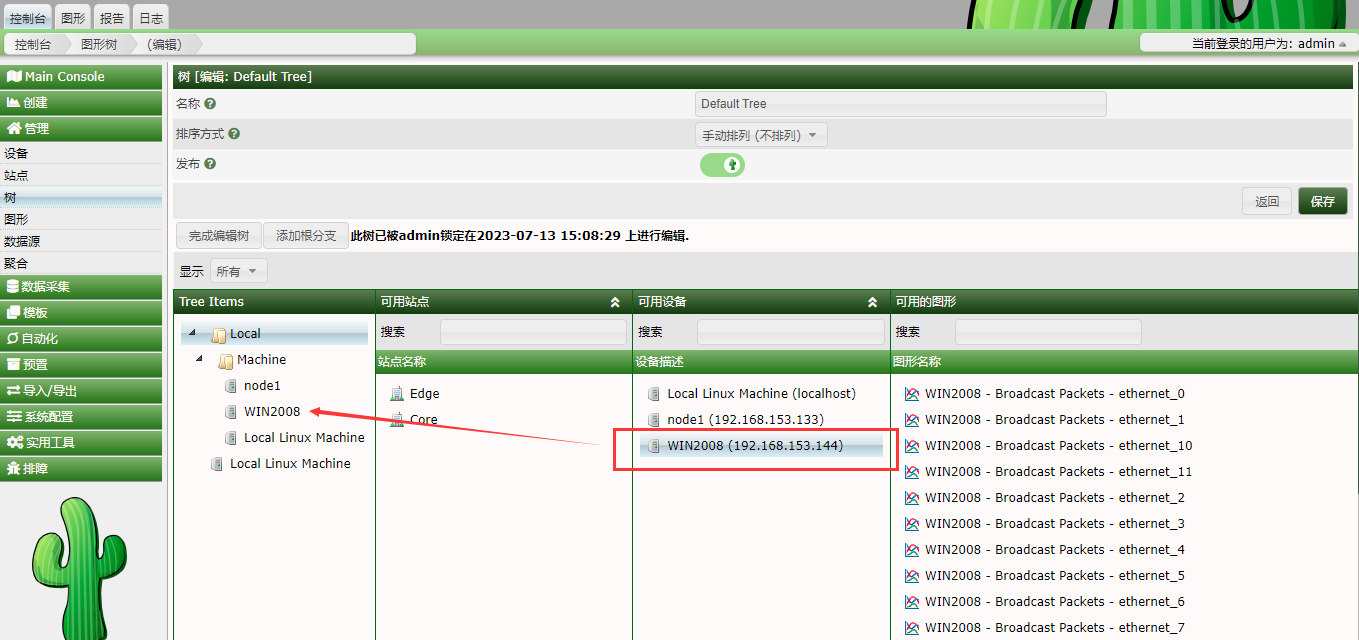
添加树,右键选中,托选到目录下;点击保存,点击完成编辑树
现在可以看到图形了
