需求:用户首次进入的时候肯定不知道一些功能是干什么在哪里,之后给用户一个页面引导,教他怎么做。
点击插件driver.js官方文档
效果:
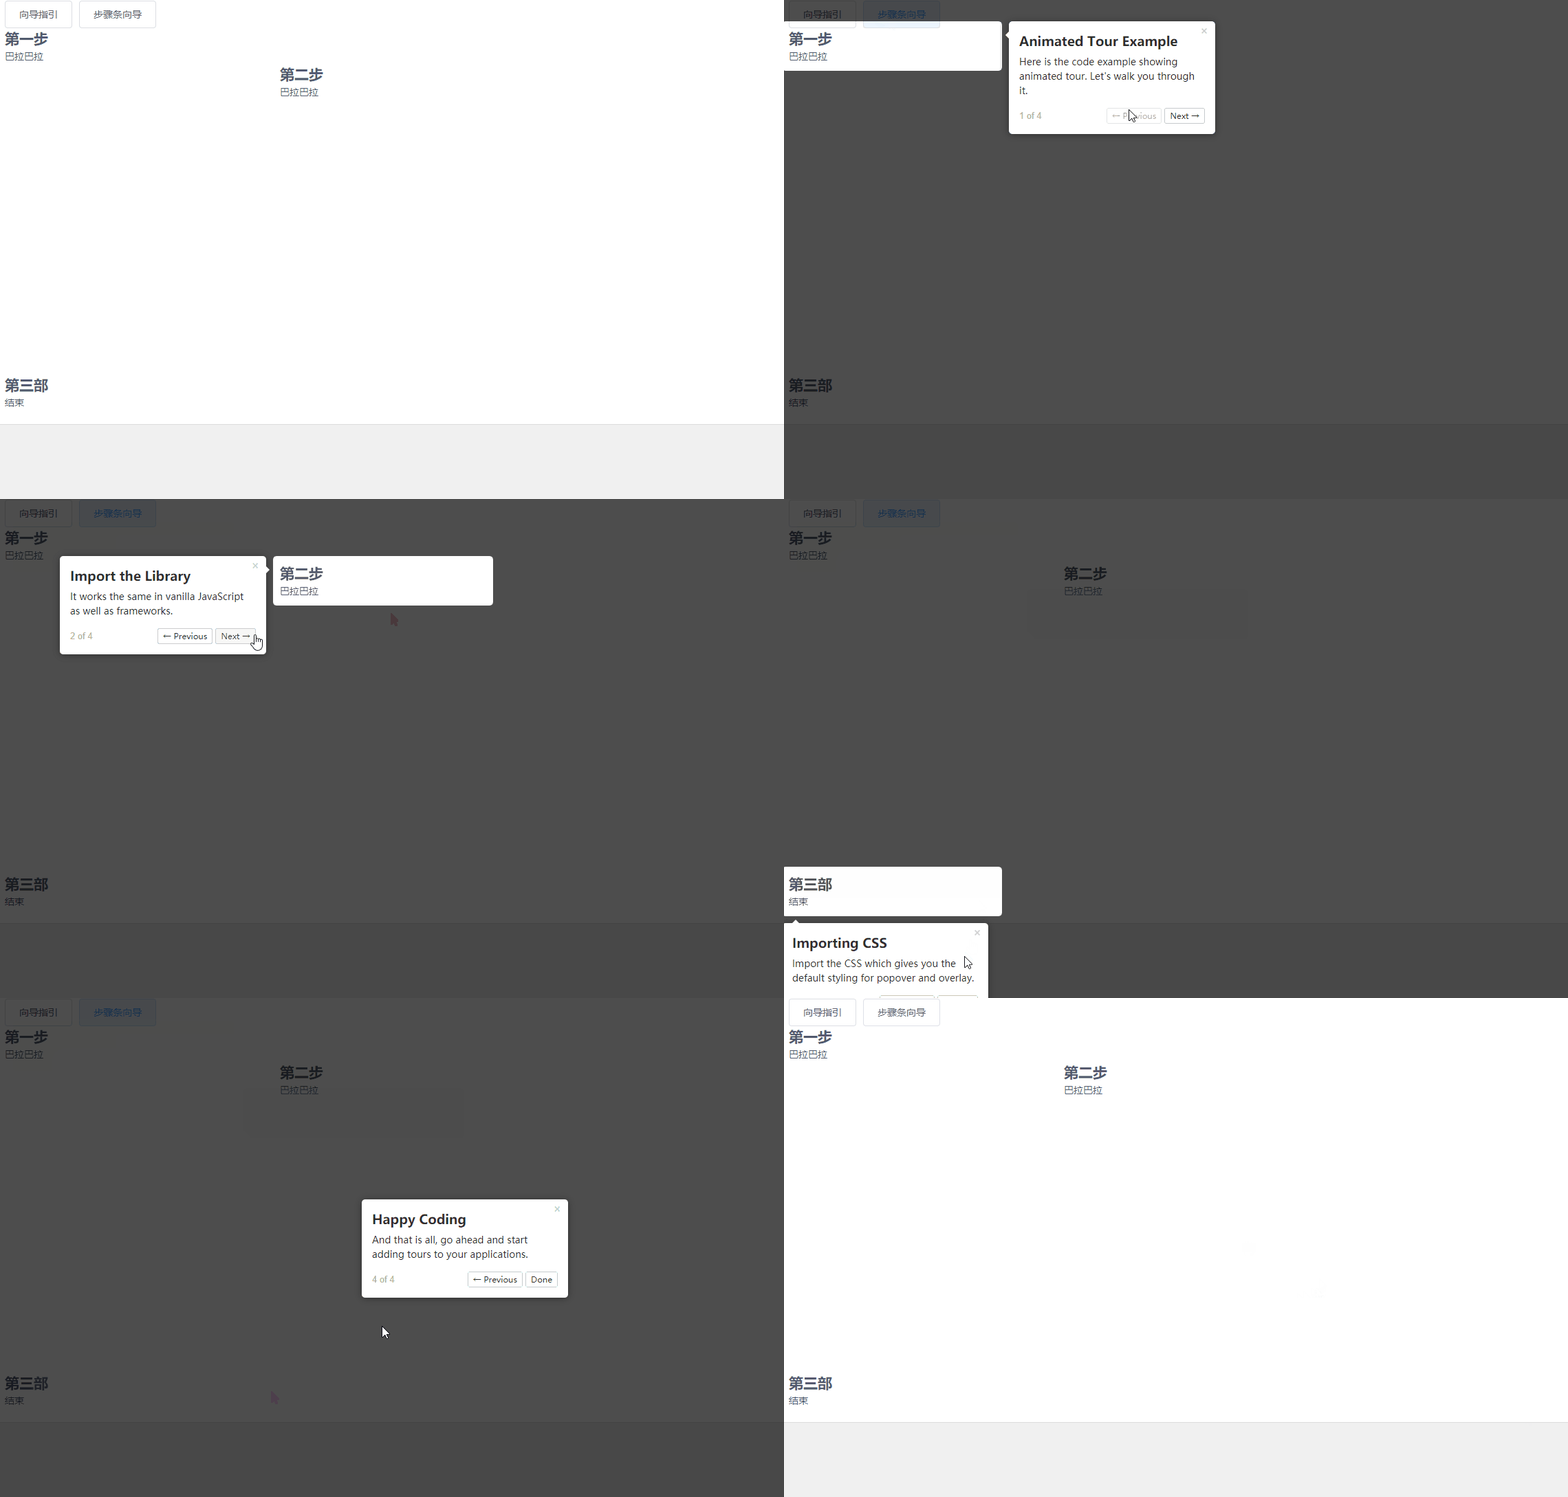
1.下载driverjs
我默认下载的是最新版 "driver.js": "^1.0.5",,其他的低版本可能导入和使用方式不一样哈,别下错了
npm install driver2.导入
这个包比较小,只有18k
import { driver } from 'driver.js';
import 'driver.js/dist/driver.css';
3.写几个需要向导的div内容,并且设置id值,用于锁定
 <div id="some-element" class="top">
                <h2>第一步</h2>
                <section>巴拉巴拉</section>
            </div>
                 <!-- 左 -->
                 <div id="step-item-3" class="left">
                <h2>第二步</h2>
                <section>巴拉巴拉</section>
            </div>
            <div id="step-item-4" class="bottom">
                <h2>第三部</h2>
                <section>结束</section>
            </div>
4.引导的内容和定位
每一个元素代表的是每一步
element:用户绑定需要向导的div中id的值,也可以用.类名,或者div,为了准确性最好还是用id值绑定,优先级高点
steps: [
                {
                    element: '#some-element',
                    popover: {
                        title: 'Animated Tour Example',
                        description: "Here is the code example showing animated tour. Let's walk you through it.",
                        side: 'right',//弹窗在元素的位置
                        align: 'start'
                    }
                },
                {
                    element: '#step-item-3',
                    popover: {
                        title: 'Import the Library',
                        description: 'It works the same in vanilla JavaScript as well as frameworks.',
                        side: 'left',
                        align: 'start'
                    }
                },
                {
                    element: '#step-item-4',
                    popover: {
                        title: 'Importing CSS',
                        description: 'Import the CSS which gives you the default styling for popover and overlay.',
                        side: 'bottom',
                        align: 'start'
                    }
                },
                {
                    popover: {
                        title: 'Happy Coding',
                        description: 'And that is all, go ahead and start adding tours to your applications.'
                    }
                }
            ]
5.点击按钮后开始绑定
   const driverObj = driver({
                showProgress: true,
                steps: this.steps
            });
            driverObj.drive();
        }
6.完整代码
<template>
    <div class="content-box">
        <div class="container">
            <el-button @click="query">向导指引</el-button>
            <el-button @click="driverobj">步骤条向导</el-button>
            <div id="some-element" class="top">
                <h2>第一步</h2>
                <section>巴拉巴拉</section>
            </div>
                 <!-- 左 -->
                 <div id="step-item-3" class="left">
                <h2>第二步</h2>
                <section>巴拉巴拉</section>
            </div>
            <div id="step-item-4" class="bottom">
                <h2>第三部</h2>
                <section>结束</section>
            </div>

        </div>
    </div>
</template>

<script>
import { driver } from 'driver.js';
import 'driver.js/dist/driver.css';
export default {
    data() {
        return {
            steps: [
                {
                    element: '#some-element',
                    popover: {
                        title: 'Animated Tour Example',
                        description: "Here is the code example showing animated tour. Let's walk you through it.",
                        side: 'right',//弹窗在元素的位置
                        align: 'start'
                    }
                },
                {
                    element: '#step-item-3',
                    popover: {
                        title: 'Import the Library',
                        description: 'It works the same in vanilla JavaScript as well as frameworks.',
                        side: 'left',
                        align: 'start'
                    }
                },
                {
                    element: '#step-item-4',
                    popover: {
                        title: 'Importing CSS',
                        description: 'Import the CSS which gives you the default styling for popover and overlay.',
                        side: 'bottom',
                        align: 'start'
                    }
                },
                {
                    popover: {
                        title: 'Happy Coding',
                        description: 'And that is all, go ahead and start adding tours to your applications.'
                    }
                }
            ]
        };
    },
    mounted() {},
    methods: {
        query() {
            const driverObj = driver();
            driverObj.highlight({
                element: '#some-element',
                popover: {
                    title: 'Title',
                    description: 'Description'
                }
            });
        },
        driverobj() {
            const driverObj = driver({
                showProgress: true,
                steps: this.steps
            });
            driverObj.drive();
        }
    }
};
</script>

<style lang="scss" scoped>
.bottom{
    width: 300px;
    margin-top: 400px;

}
.left{
    width: 300px;
    margin-left: 400px;
}
.top{
    width: 300px;
}
</style>
文章到此结束,希望对你有所帮助~

